0%

Book Description

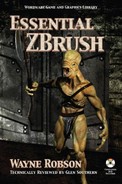
Essential ZBrush offers a detailed overview of the popular digital sculpting tool as well as a guide to mastering digital sculpting. From the basics of ZBrush to the creation of a number of models that demonstrate hard surface sculpting, realisitic organic sculpting, and environmental sculpting, this book provides readers with the tools to produce high-quality digital sculpts. With this text, the reader will explore the various ZBrush palettes, brushes, and settings, and learn how to customize the interface; discover how to create a base mesh using ZSpheres; find out how to use normal and displacement maps in both 3ds Max and Maya; understand the importance of properly posing your models; explore a variety of production-tested pipelines and workflows; learn how to create and apply materials to your models. Includes companion DVD with more than 3 hours of video tutorials showing how to model and texture the image shown on the front cover! It also contains full-color versions of the images in the book.

Table of Contents

  1. Dedication
  2. Contents
  3. Introduction
  4. 1 About ZBrush
    1. Who Should Use ZBrush?
    2. Learning to Be a Digital Sculptor
      1. Self-based Learning
      2. Course-based Learning
      3. Learning Using DVDs, Books, and Online Tutorials
        1. DVDs
        2. Online Tutorials and Magazine Articles
      4. One-on-One Tutoring
      5. The Combination Approach
      6. The Written Word
    3. Form and Replication
    4. Iconography and Why It’s Bad News
    5. Form and Replication Part 2
      1. Sculpting in Planes
      2. The Use of Shapes to Sculpt Anatomical Detail
      3. Words of Caution
    6. Mental Approaches to ZBrush
  5. 2 Finding Your Way Around ZBrush
    1. Explanation of 2D, 2.5D, and 3D
    2. The Difference between the Canvas and 3D Mode
    3. Navigating Around ZBrush
      1. Rotating the Model
    4. Hiding and Showing Geometry
      1. Hiding Geometry on a Single Mesh
      2. Hiding by Polygon Groups
      3. Hiding Using Masks
      4. Showing and Hiding Using Subtools
    5. Hardware Requirements
    6. Graphics Tablet vs. Mouse
      1. Which Tablet Should You Choose?
    7. Digital Sculpting and the Importance of Reference
  6. 3 Main Concepts
    1. What Are UV Maps and Why Do I Need Them?
      1. Making UVs in ZBrush
      2. External Applications and UV Generation
    2. What Are Subtools?
    3. Appending vs. Inserting Tools
    4. Appending an External Model to Your Sculpt
    5. Rolling Your Own Subtools
    6. Mask to Subtool
      1. E Smt
      2. S Smt
      3. Thick
    7. Projecting One Subtool onto Another
    8. Low-Res vs. High-Res Base Meshes
      1. Points for Using a Low-Resolution Base Mesh
      2. Points Against Using a Low-Resolution Base Mesh
      3. Points for Using a High-Resolution Base Mesh
      4. Points Against Using a High-Resolution Base Mesh
      5. Final Thoughts on Base Meshes
    9. High-Definition Geometry in ZBrush
      1. Adding HD Geometry to Your Sculpture
  7. 4 Important Palettes
    1. The Brush Palette
      1. Standard Brush
      2. Displace Brush
      3. Move Brush
      4. Inflate Brush
      5. Magnify Brush
      6. Blob Brush
      7. Pinch Brush
      8. Flatten Brush
      9. Gouge Brush
      10. Mallet Brush
      11. Morph Brush
      12. Nudge Brush
      13. Rake Brush
      14. SnakeHook Brush
      15. ZProject Brush
      16. Smooth Brush
      17. MeshInsert Brushes
    2. The Clay Brush Subset
      1. Clay Brush
      2. Clay Tubes Brush
    3. The Document Palette
    4. The Alpha Palette
    5. The Color Palette
    6. The Layer Palette
    7. 3D Sculpting Layers
      1. What Are 3D Layers?
      2. Creating a Layer
      3. Changing the Layer
      4. Erasing an Area from a Layer
  8. 5 Monster Head from a Sphere Project
    1. About This Project
      1. Some Preparatory Theory
    2. Starting the Sculpting
      1. Medium-Resolution Details
      2. Adding the Eyes
      3. Two Eyes from One
      4. Back to the Sculpting Again
      5. Cleaning Up the Eye and Moving On
      6. Time for Some Changes
      7. The Importance of a “Back Story”
      8. Continuing Onward with the Model
      9. Finer Details
      10. Adding an Ear
      11. Finishing Off
    3. Some Final Thoughts
  9. 6 ZSpheres
    1. What Are ZSpheres?
    2. Basic ZSphere Creation
    3. Making and Adding ZSpheres
    4. Symmetry and ZSpheres
    5. Adaptive Skin
    6. Parents and Children with Minimal Skin
    7. Multiple-Resolution ZSpheres
    8. Spheres of Influence (Attractor Spheres)
    9. Inverted Spheres
    10. ZSphere Project: Guardian Body Base Mesh
      1. The Guardian Biped Base Rig
      2. Making the Base Mesh ZSphere Setup
  10. 7 Displacement and Normal Maps
    1. The Importance of Texture Size
    2. Displacement Maps
      1. What Is a Displacement Map?
      2. The Difference between Displacement, Bump, and Normal Maps
      3. 8-, 16- and 32-bit Map Types
      4. Generating Displacement Maps
    3. Normal Maps
      1. What Are Normal Maps?
      2. Modeling with Normal Maps in Mind
      3. Producing Normal Maps Using ZMapper
        1. Basic Workflow for Single Subtools
        2. Baking a Normal Map from an Arbitrary Mesh
    4. Using Normal Maps and Displacement Maps
      1. Using Normal Maps in 3ds Max
      2. Using Normal Maps in Maya
      3. Using Your Displacement Map in 3ds Max Using Mental Ray
      4. Using Your Displacement Map in Maya
      5. Note for Maya 2008 Users
  11. 8 ZMapper
    1. What Is ZMapper?
    2. What Is a Normal Map?
    3. What Is a Surface Normal?
    4. How Normal Maps Are Used in Game and Render Engines
    5. Reverse Engineering an In-game Normal Map
      1. Starting ZMapper
    6. Quick Start to Normal Mapping
    7. Getting to Know ZMapper
      1. Main Control Block
      2. The Transform Block
      3. The Mesh Block
      4. The Morph Modes Block
      5. The Wires Block
      6. The Screen Block
      7. The Display Block
      8. Configuration and Preview Buttons
      9. The Subtabs
        1. The Normal & Cavity Map Tab
        2. The Projection Tab
        3. The Expert Pass 1 and Expert Pass 2 Tabs
        4. The Misc Tab
      10. Overview
  12. 9 Posing a Digital Sculpt in ZBrush
    1. Why Is a Pose Important?
    2. Where to Get Pose Ideas
      1. Gesture Drawing and Its Relation to ZBrush Posing
      2. Other Inspiration for Poses
      3. Some Tips Before We Move Onward
    3. Posing with Action Lines
      1. Topological Masking
    4. The Transpose Master Plug-in
    5. An Overview of ZSphere Rigs
      1. Posing with a ZSphere Rig
        1. Posing with a ZSphere Rig Workflow
    6. Closing Thoughts
  13. 10 Customizing ZBrush
    1. Overview
    2. The Custom Stuff Built In
    3. Areas of the Interface
    4. Moving Things Around
      1. Important Things to Know
      2. Enabling Customization
      3. The Actual Moving Stuff Around Bit
    5. Custom Hotkeys
      1. What Is a Hotkey?
      2. Setting Custom Hotkeys
      3. The Default Hotkeys
    6. Custom Startup Document
      1. Simple Change of Document Size and Color
    7. Adding to Existing Materials, Alphas, and Textures
    8. Making a Custom Palette
  14. 11 Common Workflow Tips
    1. UV’ing a Finished Sculpt with No UVs
    2. Wayne’s “ZBrush 2” Style Smooth Brush
      1. Small Changes Can Affect Big Things
    3. Need More Polygons But Don’t Want to Use HD?
      1. The Process
    4. Rendering Out from ZBrush in Passes
      1. How It’s Done in the Movies
      2. Types of Passes
        1. Beauty Pass
        2. Ambient Occlusion (or Dirt Pass)
        3. Specular Passes
        4. Shadow/Lighting Passes
        5. Matte Pass
        6. Color Pass (Diffuse Pass)
        7. Depth Pass (ZDepth Pass)
    5. The Practical Application in ZBrush
      1. Passes Used
        1. Beauty Pass
        2. Cavity Shader Pass
        3. Flat Shade Pass
        4. Light Pass
        5. Wide Specular Pass 1
        6. Wide Specular Pass 2
        7. Thin Specular Pass
      2. The Process
  15. 12 Materials and MatCaps
    1. Materials
      1. Families and Types of Materials
        1. The Standard Material Family
        2. The Special Material Family
        3. MatCap Materials
        4. The Fiber Material
    2. Rolling Your Own MatCaps in ZBrush
      1. Making Our First MatCap
      2. Making MatCaps Externally
        1. Opacity
        2. Cavity Detection
        3. Cavity Transition
        4. Intensity A/B
        5. Monochromatic A/B
        6. Depth A/B
        7. Colorize
        8. Base Color Chip
        9. A/B Color Chips
        10. Col Color Chip
        11. Material Texture
      3. Capturing a MatCap Texture
    3. Geometry Projection in ZBrush
      1. Using Subtools
  16. 13 Hard Surface Sculpting: The Door of Secrets
    1. The Door Base Mesh
    2. Sculpting the Door
    3. Adding the Small Details
    4. Creating the Textures and Maps for the Door
      1. The Color/Diffuse Texture
      2. Specular Level Map
      3. Specular Color Map
      4. Normal Map
  17. 14 Hard Surface Sculpting: The Guardian’s Weapon
    1. About the Workflow
    2. Sculpting the Weapon
  18. 15 Environment Modeling: The Stone Surround for the Door of Secrets
    1. About the Workflow
    2. Sculpting the Door Surround
    3. Making the Maps
      1. The Normal Map
      2. The Cavity Map
      3. Making the Other Maps in Photoshop
        1. Making a Better Diffuse Map
        2. Making the Specular Levels Map
  19. 16 The Guardian Project: Sculpting the Head
    1. Introduction
      1. Character Back Story
      2. Behind the Door
    2. Sculpting the Head
      1. Starting Work
  20. 17 Retopologizing the Guardian’s Head
    1. What Is Retopologizing?
    2. Why Do I Need to Retopologize a Model That Isn’t Animated?
    3. Retopologizing in ZBrush
      1. Basic Workflow Guide
    4. Other Uses for Retopologizing
    5. Editing Existing Topology
    6. Guide to Retopologizing the Guardian’s Head
      1. Painting the Reference Lines
      2. Retopologizing
      3. Exporting the Final for UV Mapping
  21. 18 Sculpting the Guardian’s Body
    1. Body Blocking Stage 1
      1. Subdivision Level 1
      2. Subdivision Level 2
      3. Subdivision Level 3
    2. Body Blocking Stage 2
      1. Subdivision Level 4
      2. Subdivision Level 5
      3. Subdivision Level 6
      4. Subdivision Level 7
    3. Body Blocking Stage 3
      1. Starting to Bring the Torso Together
      2. Subdivision Level 8
    4. The Lower Half of the Body
    5. Sorting Out the Polygroups
    6. Bringing It All Together
    7. Posing the Guardian
    8. Final Tweak and Tidy Up
  22. 19 Texturing the Guardian’s Body
    1. A Few Words Before We Start
    2. Texturing the Guardian’s Body
      1. Basic Polypainting
      2. Base Texture Pass 1
      3. Base Texture Pass 2
      4. Base Texture Pass 3
      5. Painting Over the Base Texture
      6. Back in the Red
  23. 20 Texturing the Guardian’s Head
    1. Fitting the Sculpted Details to Your Texture
    2. Texturing Inside the Mouth
    3. Finishing Touches to the Head Texture
    4. Coloring and Sculpting the Veins and Body Details
  24. 21 Sculpting the Accessories
    1. The Guardian’s Belt and Loincloth
      1. Sculpting the Belt
      2. Sculpting the Loincloth
    2. Photoshop: Texturing Both Items
      1. The Cloth
      2. The Belt
  25. 22 Rendering the Guardian Scene
    1. Importing the Models and Setting the Scene
    2. Basic Material Creation
      1. The Mental Ray Subsurface Skin Shader (SSS)
    3. Lights, Camera, Action!
    4. The Materials Used
    5. OBJ Settings
    6. In Conclusion
  26. Index
  27. About the DVD
    1. DVD/Source Code Usage License Agreement
3.147.85.183