
13. Prototyping: Breathing (Some Sort of) Life into Your Designs
Prototyping is an effective way of testing and validating proposed functionality and designs prior to investing in development. Prototyping is also a great way to experiment and ideate with your team and/or your clients, especially when it comes to dealing with page view flows or complex interactions. You can use a number of tools and approaches—from the quick-and-dirty to the interactive and robust—to create prototypes. Your method will largely be determined by three factors: First, the purpose, or intent, of your prototype. What are you trying to accomplish through prototyping? Who is the intended audience? Second, the resources (tools, materials, and skill) that you have at your disposal to dedicate toward prototype development. And finally, your timeline—you’ve gotta get it done when it’s gotta get done.
Jonathan Knoll & Russ Unger
In the context of user experience design, prototyping is the act of (and in many cases, the art of) creating, mimicking, or testing all or part of the functionality of an application or website with users. Prototypes can be created in an analog state (such as with whiteboards or pencil and paper) or in a digital state (with PowerPoint or Keynote, Acrobat, Visio, OmniGraffle, Axure, HTML, or other technology-based tools).
Prototyping should be an iterative process because prototypes are generally created to identify issues with—or to validate—the user experience. Once you gather feedback, you can make modifications to the prototype for additional testing. In other cases, a successful (enough) prototype can keep a project moving forward into other phases of the development lifecycle.
Remember that prototyping is a process—it’s not an artifact. You might end up creating screens and (sometimes mock) functionality that you call a prototype, but these are a part of prototyping; they are not the end result. The outcome of the prototyping process is actionable internal or external feedback on concepts in order to enhance and improve the design.
This chapter, however, focuses on creation of the prototype only, leaving the details of testing to Chapter 14.
How Much Prototype Do I Need?
Any user experience design process should include some degree of prototyping—whether it is formal or informal, interactive or inactive. Prototyping does not have to be performed for an entire website or application. In fact, prototyping can be very effective when using a representative sampling of a system; in other words, you don’t have to create a simulation of the entire system, you only need to simulate key parts and/or interactions. In most cases, you will want to test a handful of concepts and your prototype should include only those concepts.
You can engage in prototyping using any number of methods that are readily available to you: whiteboarding, pencil-and-paper sketching, storyboarding, cardboard cut-outs, and so on. In addition, a growing number of digital tools are available that allow you to create interactive prototypes and engage your test users in a more realistic environment.
The method of prototyping that you choose will largely depend upon the time and materials available to you, as well as your target audience and their sophistication level. The following sections cover some of the more popular methods available to meet many of your prototyping needs.
Paper Prototyping
Few activities can take you back to your early years quite like the hands-on, arts-and-crafts approach of paper prototyping. The only tools needed are pencils and pens, paper, scissors, and anything you can swipe from the art department or buy at a local office supply store.
Paper prototyping is flexible. As long as you have an eraser or more materials, you can create as many scenarios as you need. You can also revise rapidly from test to test—that is, if a potential user calls out a glaring error in something you have created, it is not a complex process to update the design before showing to the next potential user.
It’s also cheap. Beyond the amount of time you invest in paper prototyping, you can generally create any scenario for much less than the cost of a couple of highbrow lattes. Paper, sticky notes, index cards, pencils, and the like should already be at your disposal, and if they aren’t, you won’t break the bank by stocking up.
The process is simple: Sketch the portion of the functionality you want to test. Present the functionality to the user(s). Document the feedback (it’s paper, so flip your prototype over and start writing). Then move on to the next user, or make updates and start over.
Simple. Fun. Effective.
Used early in the process, paper prototyping can help uncover design-related issues before you’ve become heavily invested. Changes at this stage can be made quickly and efficiently, reducing your risk. This allows you to make efficient changes prior to investing too much in the design.
Using three sheets of different colored paper, each tab in Figure 13.1 was sketched as it would display on the website, then they were stacked on top of each other. The Global Now tab is placed on top to display its content as if the user had just visited the home page for the first time. Each tab shows the navigation available to the users and allows them to select a different viewing option.
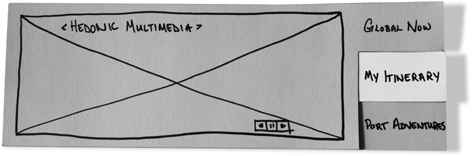
Figure 13.1 Paper prototype of a vertical, tab-based navigation
When a user selects a different tab, that particular tab is moved to the front of the stack to show the newly active tab’s view of the content area, such as the My Itinerary tab displayed in Figure 13.2.
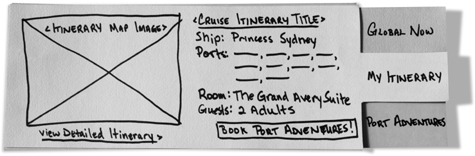
Figure 13.2 Paper prototype of a vertical tab-based navigation with the My Itinerary tab activated
Paper prototyping is about as low-budget as you can get and can be as simple as the exercise above. When you start exploring full systems, the hours you invest can become substantial (though your material costs increase only slightly). If you need to change the primary navigation on a hundred pages of paper prototypes, this method becomes costly. While paper prototyping is essentially low cost, it does not scale well for reuse when pieces need to be updated. At that point you should consider whether moving to digital tools would be more beneficial.
Digital Prototyping
If your prototyping needs are greater than paper can handle, you may find that a technology-based solution works better for you and your audience. These tools can enable you to showcase exactly how interactive portions of the site or application will appear to users.
Digital prototyping pulls from many other aspects of the design process. You’ll be able to refer to your personas when presenting or testing your digital prototype, to your wireframes for blocking and visual treatment of the prototype, and to visual design assets (if they are available at this point in the process) for a realistic fit and finish to your prototype.
Wireframe vs. Realistic Prototypes
Just as with paper prototyping methods, your mileage may vary with digital prototypes. Depending on the tools, resources, and skills you have at your disposal, as well as the requirements you are dealing with, you may find that having your prototype look like wireframes is good enough for your project. In fact, it may be preferable. Wireframes can show the audience that the project is still a work in progress and not the final, production-ready site.
On the other hand, sometimes during design testing with users, you will find that the most important aspect of the prototype is how realistically it represents the final system.
The outcome of your digital prototype rests on three factors:
• Who are you building this prototype for, and why?
It is vital to the success of your prototype to know what you’re doing with it before you get too deep into the project. Are you building a prototype for design testing with users? If so, what is important to focus on for the testing? Does it matter if the prototype is a black-and-white wireframe, or does it need to resemble a live website? Are you testing for discoverability of buttons and links?
Are you building the prototype for a business pitch that needs buy-in from a team of executives, managers, investors, or others who might be signing your paycheck at the end of the day? If so, what are you trying to communicate to them? What needs to be functional and what simply needs to look functional? These questions may help determine the requirements for your digital prototype.
• What types of resources, tools, and skills do you have available?
If you are not an HTML or Flash expert, and don’t have the budget to engage someone who is, you can still build a very functional prototype by using a simple presentation tool like PowerPoint or Keynote or by using a wireframing tool like Visio or OmniGraffle. Even a simple PDF might work.
• What does your timeline look like?
Do you have the time to pull together a team and build an amazing, almost production-ready prototype that will show the users a crystal-clear vision of the production-ready site? Do you have a few hours to export your wireframes as HTML or to build a very simple Flash project to simply show the page flow and basic interactive elements within the project?
Both types of digital prototypes can be very useful. However, just as with any real project with a deadline looming, it’s important to set expectations based on the time and materials available to you.
HTML vs. WYSIWYG Editors
HTML is the digital equivalent of a paper prototype. It is (sometimes) free and (somewhat) easy. If you aren’t an HTML wizard or a front-end code expert, you can still be an HTML prototype wizard with just some basic knowledge of HTML.
There are essentially two ways to build an HTML prototype:
• Hand-coding the HTML
• Using a WYSIWYG editor, such as Adobe Dreamweaver, Realmac’s Rapid-Weaver, or Microsoft Visual Studio. These tools have a code view as well as a layout view that allows you to visualize your code efforts without opening a browser.
In the recent past, those WYSIWYG editors were popular, but more web-based tools have begun to proliferate, such as: Handcraft (formerly Quplo), Justinmind, Balsamiq, IxEdit, Pencil, Mockflow, JustProto, InVision, and Protoshare.
Creating a Prototype with a WYSIWYG Editor
The great thing about using the layout view in a WYSIWYG HTML editor is that you can build a page layout with about the same amount of effort as it would take to lay out a page in Microsoft PowerPoint, Apple’s Keynote, or any other simple graphical layout application (more on these later). And it’s just as easy to add interactivity such as links, mouse events, and so on.
One of the most impressive aspects of Dreamweaver (Figure 13.3) is that it features what Adobe calls the Live View, which is based on the open source WebKit rendering engine. What does this mean? Quite simply, it means that what you see in Live View is exactly what you’ll get in Apple’s Safari and Google’s Chrome browsers—assuming you’ve been meticulous with the details in your prototype. Dreamweaver is a very powerful prototyping tool, especially when used in conjunction with Adobe Fireworks.
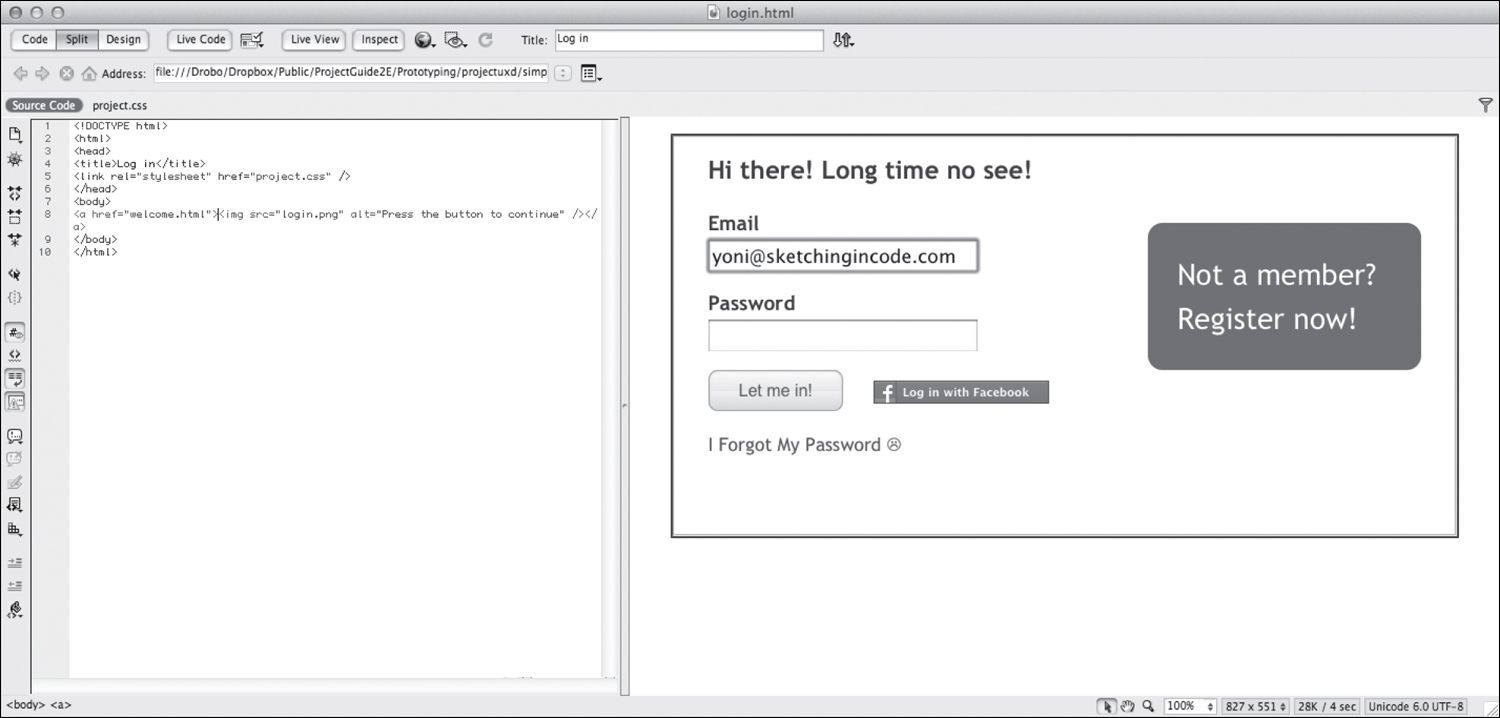
Figure 13.3 A simple example prototype created in Dreamweaver
Creating a Basic HTML Prototype
Possibly the least expensive way to build a simple, quick-and-dirty HTML prototype is to do it “by hand”—to type in the code manually in a text-editing tool.
One of the most common reasons for transitioning a design from wireframe to prototype is the requirement to show or test the proposed flow and navigation of the site. By taking blocks of elements or even full pages from your wireframe (or design mock-up) and setting them up as clickable images in your HTML prototype, you can very quickly and easily build a functioning prototype.
One simple prototyping method is to post clickable screenshots that can be viewed in a browser. A user can click to advance the view to a new screen. Wash, rinse, and then repeat. This is fairly straightforward and does not require a lot of “code knowledge” to pull it off in a fairly short amount of time.
In the following exercise, you must have wireframes or screens that you can export as an image file for a log-in page and destination (welcome) page at your disposal. You will need to have two files: login.png and welcome.png, which are the before and after states of a login process. If you do not currently have those ready, you can download sample images from http://www.projectuxd.com.
This entire exercise will be a lot easier if you create a folder and keep all of your files in its root. You can get a little more organized later in your code life by creating folder structures that can hold your scripts, style sheets, images, and any other artifacts you might need to keep separate from your pages.
Note
Typos are the most common mistakes made in HTML coding, so pay close attention to the accuracy of your typing.
1. In your WYSIWYG HTML editor or a simple text editor, such as Notepad (Windows), TextMate (Mac), or TextWrangler (Mac), create a new document and save it as login.html in the same prototype folder. Make certain you select HTML as the file format in the event another file format has been set as the default.
2. In your new document, insert the following HTML code:
<!DOCTYPE html>
<html>
<head>
<title>Log in</title>
</head>
<body>
<a href="welcome.html"><img src="login.png" alt="Log in" /></a>
</body>
</html>
3. Save the document and then open the file in your web browser. You should see the log-in image you exported or downloaded, and the browser’s title bar should display “Log in” (Figure 13.4).
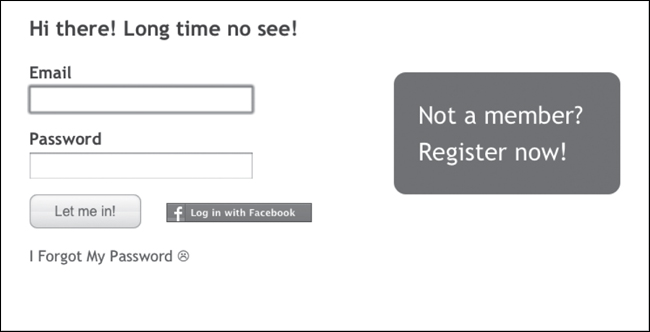
Figure 13.4 The login.html live and in the browser
4. The most important line of code in your document is:
<a href="welcome.html"><img src="login.png" alt="Log in" /></a>
This line adds your image to the page you have created and turns it into a link that loads the welcome.html page (which you’ll create next).
In your text editor, save a copy of the login.html file, but save it as welcome.html.
In welcome.html, replace this line of code:
<a href="welcome.html"><img src="login.png" alt="Log in" /></a>
with:
<a href="login.html"><img src="welcome.png" alt="Start over" /></a>
5. Then save your file and re-open login.html in your browser. You know you want to, so do it: Click anywhere on the image in your browser. DO IT!
6. You now have built a simple prototype demonstrating a log-in process (Figure 13.5).
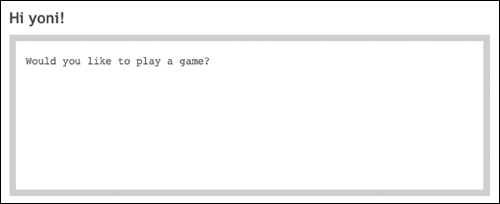
Figure 13.5 welcome.html live and in the browser
Breaking Down the Code
Now that you have created a basic prototype using a very limited amount of HTML, it’s time to briefly walk through the code, or HTML markup, so you can have a better understanding of what you just created.
At the top of your document, the basics of any HTML document are placed: DOCTYPE, HTML, HEAD, TITLE, and BODY tags.
<!DOCTYPE html>
<html>
<head>
<title>About</title>
</head>
<body>
</body>
</html>
These basic tags are required in any HTML document. The DOCTYPE simply tells the browser how it should read the markup (code) on the page. The DOCTYPE shown here indicates that the code below will conform to the HTML5 specification (mostly, though, this will just make developers happy that you care—it’s not integral to most of what is happening under the covers).
The HTML tag is the root element of any HTML document—all other tags will be contained within it. The HEAD tag is a container for other tags that have information for or about the document. These tags tell your browser (as well as search engines!) what’s coming. If your HTML document were a book, the HEAD tag would contain everything from the front cover up until the beginning of Chapter 1. The key player for your purposes, though, is the TITLE element, which lets you tell the browser what the name of the page is.
Finally, there is the BODY element. The BODY tag starts where the HEAD tag left off. In other words, the content of your HTML document—what the user sees—should be placed within the BODY tags.
It should not go without mentioning how important it is to properly close your HTML tags. Take another look at the HTML, HEAD, TITLE, and BODY tags. Most HTML elements have both start and end tags. The start tag (<html> or <title>) indicates the beginning of an element; the end tag (</html> or </title>) signifies the end of the element. Properly closing your elements is crucial to making sure browsers interpret your HTML document correctly. Even a simple document can blow up—not display or function correctly—due to a missing closing tag. As you learn more about HTML markup, you’ll find that a well-structured HTML document is also a way to communicate information architecture to your developers, especially if it takes advantage of all of HTML5’s new semantic tags.
Getting back to the code, the IMG tag is used to add an image element to your document. It is all that you need to make sure that an image is displayed in a browser—assuming you have its src (path or URL) correct. In the following code example, it is assumed that the image file is in the root directory (the same directory as the HTML file referencing it):
<img src="login.png" alt="Press the button to continue" />
The ALT attribute is intended to provide the alternative text to display if the image cannot load. This isn’t particularly important for most prototypes, so you can hijack the attribute and use it to provide simple instructions for your users when they hover their mouse over the image. What about an end tag? Since the contents of an image element are defined by the src and alt attributes, an IMG tag will not—and cannot—contain other tags or text, so it doesn’t need an end tag. Other common tags which do not have an end tag include the INPUT tag (used to add various form elements to a document) and the BR tag (to force a line break).
Anchor elements—represented by an A tag—are used to essentially link to someplace else, which is indicated within the href portion of the tag:
<a href="welcome.html">Link text</a>
For the sake of remaining simple, the A tag in the example uses a relative path—“relative” because the files for this tutorial are all in the same (or root) folder. An absolute path looks like this:
<a href="http://www.sketchingincode.com/projectuxd/index.html">Link
text</a>
Anchor tags can also be used to link to a specific element within an HTML document. When they are used this way, there will be a hash (#) followed by the ID of the target element. The following link refers to an element on the index.html page with “basic” as its ID (the value of the id attribute):
<a href="http://www.sketchingincode.com/projectuxd/index.html#basic">
Link text</a>
Clicking on this link will take the user directly to the targeted element on the page. It might look something like this:
<p id="basic">some text</p>
Using the ID attribute in conjunction with hashed anchor elements also allows quick intra-page navigation, sometimes referred to as bookmarks.
As it happens, the HTML in our example is standards-compliant. As previously mentioned, typos are the most common mistakes when creating code. The ability to check your code using a markup validation service (see http://validator.w3.org) can save you a lot of time in the future.
That said, this is not especially beautiful code. But the purpose of this simple prototype example is to communicate your ideas to your audience—not to impress developers (not yet, at least).
This simple markup example linked multiple HTML pages by any click on the image. This is about as simple as it gets. But what if you want to get more granular with the clickable areas within the layout?
The answer: image maps.
With image maps, you can designate areas of an image to link to and display different pages when clicked. One of the easiest ways to create image maps is to use a WYSIWYG tool (such as Dreamweaver) to assign linkable sections of an image. You can do this without any real knowledge of how to create the HTML code, as most WYSIWYG tools allow you “draw” over the image to define the space that will contain the link.
Note
For more information on how to create image maps, see the “How do I create an image map for my web page” tutorial by Dave Taylor at http://www.askdavetaylor.com/how_do_i_create_an_image_map_for_my_web_page.html.
A Little More Than Basic
Even with image maps defining your clickable areas, a prototype can become unmanageable in a hurry if you’re working with a lot of different states, user flows, or pages.
If you want to expand your basic prototyping skills so that you can display a page with form elements, include the ability to submit it, and then display a response to the form, well, it gets a bit more challenging. You probably would need to read some books or do a lot of online research to find some different examples to help you on your way. Sometimes, it’s more difficult to search and find what you are looking for than it is to find someone else to do it for you. In any case, if you had a little JavaScript at your disposal and knew how it worked, you could probably pull off some impressive stuff—or at least add some interactions to your pages. If you’re comfortable looking at HTML markup and you’re interested in learning more about JavaScript, DOM Scripting: Web Design with JavaScript and the Document Object Model by Jeremy Keith (http://amzn.com/1590595335) is a great book to get started with. For an in-depth look at practical techniques—including some useful examples—try out John Resig’s Pro JavaScript Techniques (http://amzn.com/1590597273).
This will not be a lesson in “all things JavaScript”; instead, we will use a popular JavaScript library that you have probably already heard of: jQuery (http://jquery.com).
If you are interested in a few slightly more advanced examples, Jonathan Knoll, Designer+Architect at InfinityPlusOne, has created them for you to learn from. Visit http://sketchingincode.com/projectuxd. The additional examples include a slightly advanced Log-in that allows you to communicate additional states of view without actually leaving a web page and a registration page that also lets you pass variables (as in a user name or email address) to a new page.
We’ve provided the code on a 5.25′ floppy in the back of this book. Okay, since this is not a 1986 magazine on the Vic-20, we’ve actually supplied it all online for you. Bad jokes aside, you can find the code online at http://sketchingincode.com/projectuxd.
Example 1
This is a prototype that demonstrates a log-in experience. It is identical to the clickable image prototype provided previously, except this is entirely in code (the clickable images were left at home for this example). You will see a Log-in page (Figure 13.6 on the next page).
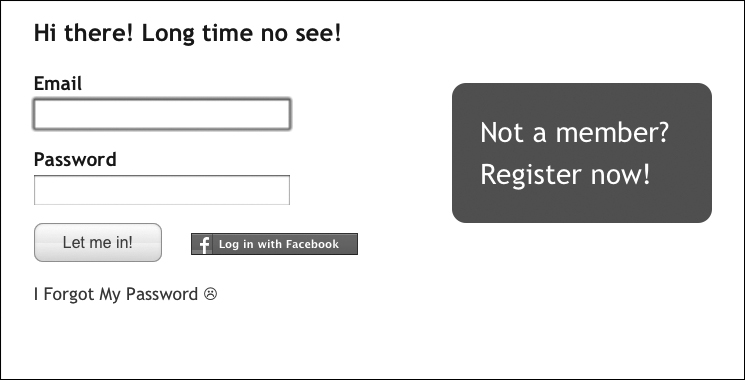
Figure 13.6 The log-in screen
Once you click through, the prototype loads a Welcome page that displays, “Hi yoni!,” indicating that you have successfully signed into the website (Figure 13.7).
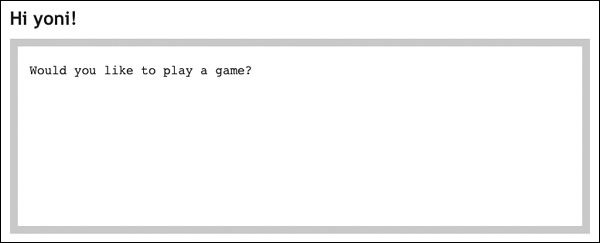
Figure 13.7 The Welcome screen
Example 2
This is a prototype that demonstrates a simple registration experience. This example uses jQuery to load a new image after clicking on the current image displayed on the page. You will see a Register page with nothing filled out (Figure 13.8).
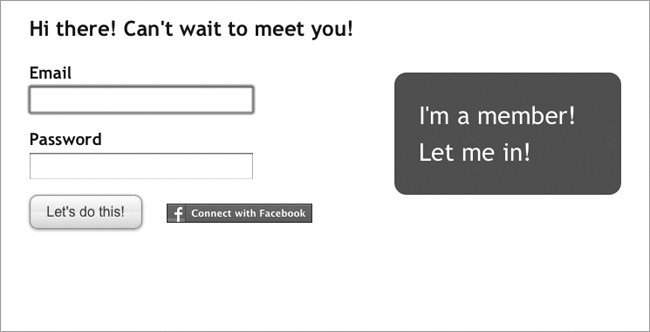
Figure 13.8 The Register screen
Upon clicking, a Register page with the email address entered into the email address field loads (Figure 13.9).
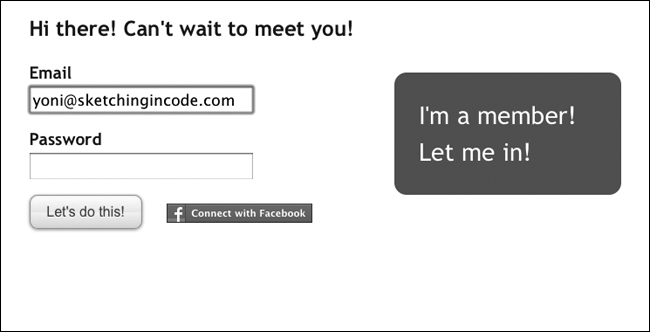
Figure 13.9 The Register screen with Email field populated
Click again to see the second step of the registration process (Figure 13.10).
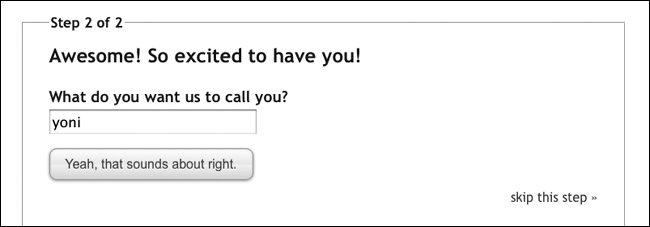
Figure 13.10 The Registration process
Click a final time to load the Welcome page view (Figure 13.11).
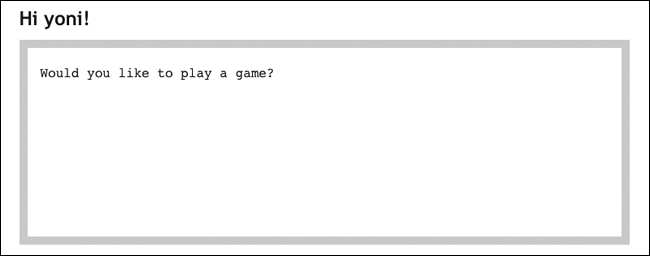
Figure 13.11 The Welcome screen
For your benefit and exploration purposes, live examples of all of these prototypes—as well as all of the files that were used to create them—are available online for you to view and/or download at http://sketchingincode.com/projectuxd.
Sometimes you need more...
Image-based prototypes are great for contextualizing designs, demonstrating user flows and basic interactions, or for eliciting basic feedback. But sometimes you need more. In fact, one could argue that the Log-in example above is precisely the type of thing you should be testing with greater realism.
Users hate form fields, so any time you need to design and test a form, there’s a good chance that your best bet is an HTML prototype with actual HTML form elements. This will allow you to test without providing too much guidance, and will allow you to observe unexpected behaviors.
To see and learn how to turn the previous prototype into a fully interactive prototype, go to http://sketchingincode.com/projectuxd.
HTML prototyping is just one approach to digital prototyping, and there a lot of ways to go about it. Many different frameworks and dynamic coding languages can be used to create very robust prototypes to meet almost any need. If HTML prototyping is an area you want to explore and expand upon, you might want to seek out tutorials and other resources for more of a deep dive in that area. To get started, you might want to research JavaScript, PHP (or other dynamic coding languages), jQuery (http://jquery.com) or the Yahoo! Interface Library (http://developer.yahoo.com/yui).
Note
For a deeper exploration into HTML, see Introducing HTML 5 by Bruce Lawson and Remy Sharp (New Riders, 2011). To learn more about Cascading Style Sheets, see Stunning CSS3: A Project-Based Guide to the Latest in CSS by Zoe Mickley Gillenwater (New Riders, 2011).
Additional Tools for Prototyping
You’ve now explored hands-on options that can help you create prototypes in both analog and digital spaces. In addition to these methods, there are a number of other software tools that you can use to create prototypes that range from the basic “getting the job done” to ones that are more robust and filled with interaction and intelligence. The following list is far from inclusive, but it will provide you with a variety of options for creating the right prototype for your situation:
• PowerPoint & Keynote: Presentation software applications
• Keynote KungFu (http://keynotekungfu.com): Travis Isaacs has a great approach to visual prototyping
• Adobe Acrobat PDFs: Can be used to link pages of content based upon click interactions
• Visio & OmniGraffle: Pretty standard PC and Mac wireframing tools
• Axure RP: Wireframing with built-in methods for documentation and prototyping
• Adobe Fireworks: Fireworks has a standard set of UI elements that make prototyping relatively quick
• There is also a growing list of online tools for creating prototypes, such as InVision (http://invisionapp.com), Handcraft (http://handcraft.com), Justinmind Prototyper (http://justinmind.com/), mockingbird (http://gomockingbird.com) and many, many others
• Balsamiq Mockups: A very inexpensive tool that is designed with the non-designer in mind; rough and unpolished on purpose, with the intent of quickly getting a message across to your audience
• A developer: Someone who knows how to code better and faster than you and who will work with you to get to “something clickable” quickly
Working with a Developer
If you have the resources available to you, you may want to engage a developer to create a prototype for you based on your wireframes or designs. Note that the developer will need to have a firm understanding of what you are trying to accomplish, so this approach may require that you also create development specifications and requirements for the process to be efficient and effective.
If your prototype is being used for iterative testing, make sure that you communicate which parts of the prototype you are focusing on for testing and will therefore require changes to be implemented quickly. It is advisable to spend time with the developer during the development process and identify key areas of the code that should be flagged (with comments in the code) as susceptible to change. Be sure to remain engaged with your developer during the prototype development to keep the lines of communication open and ensure accuracy of the output.
Note
For greater detail on a variety of prototyping approaches, see the book, A Practitioner’s Guide to Prototyping, by Todd Zaki Warfel (Rosenfeld Media: http://www.rosenfeldmedia.com/books/prototyping).
Prototype Examples
The simple, easy-to-execute examples of prototyping in this chapter are far from a complete set of approaches that you should use for every situation. To highlight some real-world uses of prototyping, Keith Tatum and Jon Hadden generously shared from their experiences.
Keith Tatum, Creative Director, Retail Direct Client Team at Resource Interactive, created the paper prototype in Figure 13.12 to explain the left-hand navigation links and identify the navigation hierarchies and categorizations to his collaboration partners at Align Interactive (www.aligninteractive.com). In addition, the paper prototyping process allowed him to bypass the wireframe phase and move into visual design and layout (Figure 13.13).
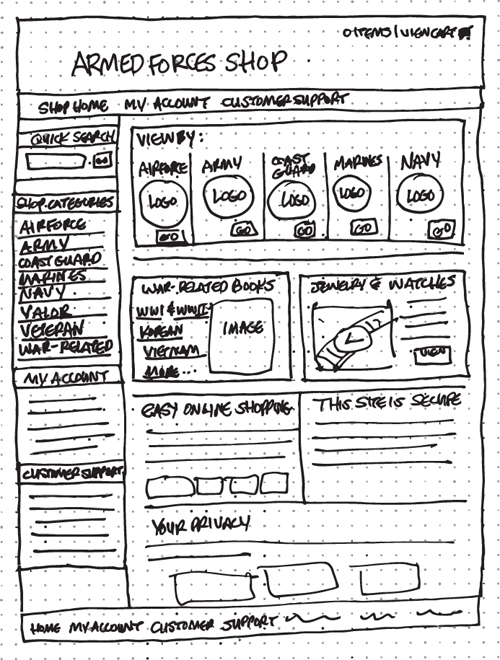
Figure 13.12 Paper prototype used to explain navigation concepts to development team
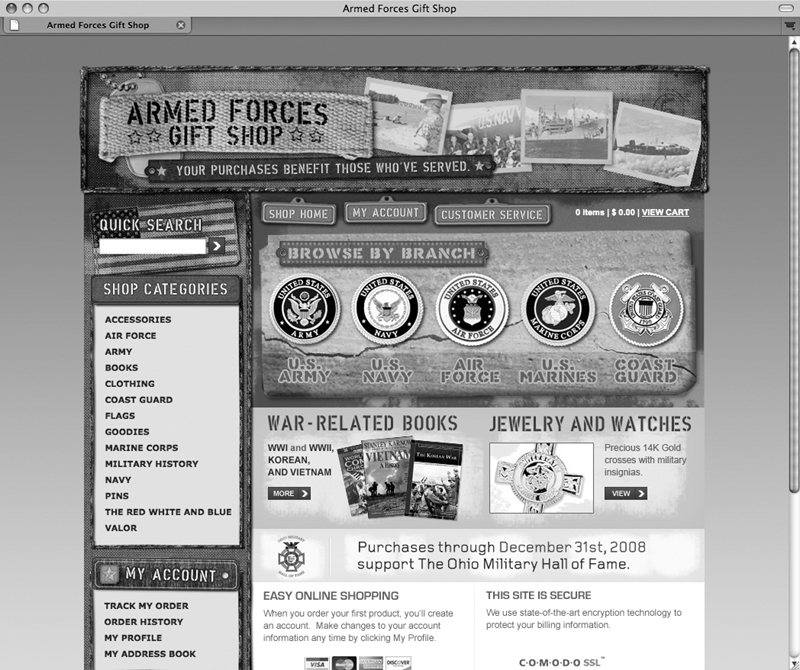
Figure 13.13 Live website design based on paper prototype
Keith took advantage of his team’s common understanding of the design and development tasks to quickly create a design within two workdays. This allowed the team to proceed with development quickly upon approval of the visual design concept (Figure 13.14).
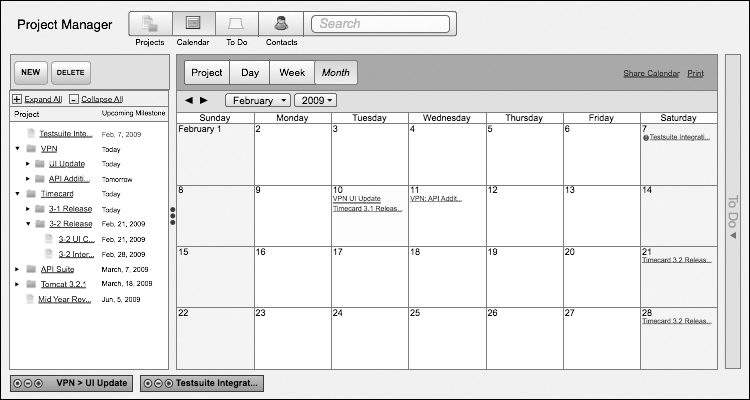
Figure 13.14 Functional prototype of a calendar tool, mocked up using high-fidelity XHTML, CSS, and JavaScript. Courtesy of Jon Hadden.
Jon Hadden (www.jonhadden.com), Senior User Experience Designer at space150, created a prototype of the calendaring functionality for a tool he is building called Project Manager. Project Manager is a collaborative, web-based application for managing projects. It began as OmniGraffle wireframes and was then built as a high-fidelity XHTML prototype to help determine if the functionality was both usable and affordable.
Affordability is an important point: In some cases, portions of an application or project can be put to the prototype test to see if the functionality is cost effective. If the cost of creating functionality becomes a concern and prototype development exceeds time-and-materials expectations, you may need to evaluate the viability of your project.
What Happens After Prototyping?
Once you have completed your prototyping process, you will need to synthesize your results and turn them into something actionable. If you were paper prototyping, you might need to begin creating digital wireframes based on the feedback you received. If you are already in a digital wireframe mode, you may need to update your wireframes and proceed through your project process. Or, you may need to take your feedback and update your prototype for another round of reviews.
Todd Zaki Warfel, president of Messagefirst (www.messagefirst.com), shared the following:
Prototypes are a way to achieve one or more of the following goals:
• Work your way through a design
• Create a common communication platform
• Sell your design ideas internally (e.g., to your boss, other designers, etc.)
• Test technical feasibility
• Test design concepts with end users/customers
Prototyping serves as a feedback mechanism. Through prototyping, you can determine whether to continue with a particular design direction or explore a different one, prior to moving on to the next phases of your project.
Remember: Regardless of where you are in the process, prototyping is just a piece of the process, and as with any other piece, you need to be aware of when you have reached the point of maximum effectiveness and are ready to move on to the next stage of the user experience process.