
Chapter 27. Recipe: creating an autocomplete text box
- Creating an autocomplete text box in ASP.NET MVC
- Using a jQuery autocomplete plug-in
It’s not uncommon for text boxes to automatically suggest items based on what we type. The results are further filtered as we type to give us the option to select an available item with the mouse or keyboard. One of the first examples of this in the wild was Google Suggest, shown in figure 27.1.
Figure 27.1. Google Suggest filters options as we type.

This chapter covers the mechanics of implementing autocomplete functionality using the freely available jQuery library. We’ll first describe how to structure the code necessary to enable the functionality. Then, we’ll show you how to style the UI to fit within your application’s look and feel.
27.1. Creating the basic autocomplete text box
A rudimentary implementation of this automatic suggestion feature would be to monitor keypresses and fire off Ajax requests for each one. Of course, this means that a fast typist would trigger many requests, most of which would be immediately discarded for the next request coming in 5 milliseconds (ms). An effective implementation would take into account a typing delay and also provide keyboard and mouse support for selecting the items.
Luckily, jQuery has an extensive list of plug-ins available. One such plug-in is Dylan Verheul’s autocomplete, which you can download at www.dyve.net/jquery/ along with a few others, including googlemaps and listify. Another, arguably equally popular, autocomplete plug-in is available from Jörn Zaefferer at http://mng.bz/60ct. The plug-ins are similar, so although this chapter uses Dylan Verheul’s autocomplete plug-in, most of what you read here will apply to the other plug-in as well.
The implementation of the autocomplete functionality is that we have a simple text box on our page, and the jQuery plug-in adds the behavior necessary to handle keypress events and fire the appropriate Ajax requests to a URL that will handle the requests. The URL points to a controller action, and by convention the responses are formatted so that the plug-in can handle them.
Assume for our purposes that we want to filter U.S. cities in the text box. The first step is to add a controller, an action, and a view for displaying the UI for this example. Ensure that jQuery (in this case, jquery-1.4.1.js) and jquery.autcomplete.js are referenced at the top of the view (or master page):
<script type="text/javascript"
        src="../../scripts/jquery-1.4.1.js"></script>
<script type="text/javascript" src="../../scripts/jquery.autocomplete.js">
     </script>
Here’s how we’d output the text box for city:
<%= Html.TextBox("city") %>
Package this up with a simple controller, as shown in listing 27.1.
Listing 27.1. Controller and action for displaying our test page
public class HomeController : Controller
{
   public ActionResult Index()
   {
      return View();
   }
}
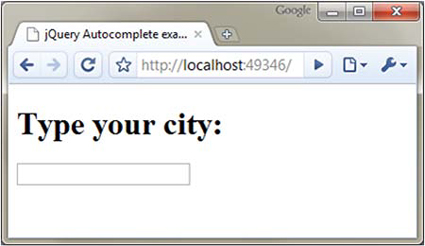
This is a simple action method, and it returns the default view. Figure 27.2 shows what we’d expect.
Figure 27.2. Our simple view with a text box
Now, let’s add a little JavaScript to add the autocomplete behavior:
<script type="text/javascript">
    $(document).ready(function() {
        $("input#city")
           .autocomplete('<%= Url.Action("Find", "Cities") %>'),
    });
</script>
Place the script in the <head> of the page. You can see that the URL for the autocomplete behavior is specified as Url.Action("Find", "Cities"). This will point to a Find() action on the CitiesController. We’ll need to write this controller and action as shown in listing 27.2.
Tip
The autocomplete plug-in can also filter local data structures. This is useful when we have a limited set of data and we want to minimize requests sent to the server. The autocomplete plug-in in local mode is also much faster, because there’s no Ajax request being made behind the scenes. The only downside is that we must render the entire array onto the view as a JavaScript array.
Listing 27.2. Action to find cities from an autocomplete Ajax request

The details of the CityRepository can be found in the code samples provided with the book. For now, we’ll focus on the new Find(string q) action. Because this is a standard action, we can navigate to it in our browser and test it out. Figure 27.3 shows a quick test.
Figure 27.3. A simple HTTP GET for the action with a filter of “hou” yields the expected results.

Now that we’re sure that the action is returning the correct results, we can test the text box. The JavaScript we added earlier hooks up to the keypress events on the text box and should issue queries to the server. Figure 27.4 shows this in action.
Figure 27.4. The results are displayed in a <ul> tag. We can apply CSS to make it look nicer.

Our autocomplete functionality works as intended, but the resulting text looks quite gaudy when exercised in the browser. The next section explains how to style the results so that the resulting data fits in with the UI of the application.
27.2. Styling the results
The drop-down selections are unformatted by default, which makes them a little ugly. CSS magic will make them look nicer. Listing 27.3 shows some sample CSS for this transformation.
Listing 27.3. CSS used to style the autocomplete results
<style type="text/css">
    div.ac_results ul
    {
        margin:0;
        padding:0;
        list-style-type:none;
        border: solid 1px #ccc;
    }

    div.ac_results ul li
    {
        font-family: Arial, Verdana, Sans-Serif;
        font-size: 12px;
        margin: 1px;
        padding: 3px;
        cursor: pointer;
    }

    div.ac_results ul li.ac_over
    {
        background-color: #acf;
    }
</style>
The result of applying this CSS can be seen in Figure 27.5.
Figure 27.5. The styled drop-down results look much nicer. The selected item is highlighted and can be chosen with the keyboard or mouse.

The options of the autocomplete plug-in enable us to configure it to our needs. For the case that we’ve shown here, it’s as simple as this:
$(your_textbox).autocomplete('your/url/here'),
The full list of options can be seen in table 27.1.
Table 27.1. Common options for the autocomplete plug-in
|
Option |
Description |
|---|---|
|
inputClass |
This CSS class will be added to the input box. |
|
resultsClass |
The CSS class to apply to the results’ container. The default value is ac_results. |
|
The CSS class to apply to the input box while results are being fetched from the server. The default is ac_loading. |
|
|
lineSeparator |
The character used to separate the results. The default is . |
|
minChars |
The minimum number of characters before sending a request to the server. The default is 1. |
|
Delay |
The delay after typing when the request will be sent. The default is 400 ms. |
To set these options, include them in a dictionary as the second argument to the autocomplete method, as shown in listing 27.4.
Listing 27.4. Adding options to the jQuery autocomplete plug-in
<script src="../../Scripts/jquery-1.4.1.js"
    type="text/javascript"></script>
<script src="../../Scripts/jquery.autocomplete.js"
    type="text/javascript"></script>
<script type="text/javascript">
  $(document).ready(function() {
    $("input#city").autocomplete(
        '<%= Url.Action("Find", "City") %>', {
minChars : 3,
delay : 300
    });
  });
</script>
This type of functionality is immensely useful for selecting from large lists. It keeps our initial page size down by not loading all these items at once, and it’s user-friendly. Every scenario is unique, so be sure to tune the delay to match the nature of the data. This will ensure that the number of requests back to the server is kept to a manageable level.
27.3. Summary
In this chapter, we learned how to leverage a common jQuery plug-in to add autocomplete behavior to a view. We learned how to respond to Ajax requests and create a formatted response that the plug-in can consume. You should now be able to apply this technique to make your applications more responsive and helpful to your users.
Many other useful helpers for specialized functionality are available from jQuery, as well as third-party component vendors. Armed with your knowledge of creating ASP.NET MVC applications, you’re now well equipped to deliver top-notch web-based software that not only delivers one-of-a-kind features but also incorporates the best components available for ASP.NET MVC. Happy coding!