
Now that we have created the instances that will be serving the content, we need to create the load balancer:
- We'll start off by going to the EC2 Dasboard and selecting Load Balancers from the menu. Next, press the Create Load Balancer button:

- In the next window, we will select the Classic Load Balancer as the type of the load balancer. The service windows shows PREVIOUS GENERATION; that is essentially true, but as mentioned in the The AWS Elastic Load Balancing service section of this chapter, we can still use it whenever a simple load balancing solution is required.
Next, press the Create button:

- In the Define Load Balancer Basic Configuration window, we will need to define a name. The name needs to be unique within the region. By default, the load balancer will be internet-facing, meaning it will respond to the traffic on the internet. To make it internal, we can select the Create an internal load balancer check mark, which means it will only respond on an internal IP. Internal ELBs can be used to decouple parts of your application, such as the web and the backend tier, from communicating directly, with the ability to introduce separate scaling groups for each tier. If we want to select the availability zones and VPC we can select the Enable Advanced VPC Configuration check mark. In our case, this is not necessary, as we have deployed the instances in the default VPC. We will also need to select the IP protocol and port in the Listener Configuration section. In our case, we will use the HTTP listener, as we are exposing our application on port 80. We also need to select the correct two availability zones in the VPC that we used to spin up our EC2 instances. Next, we click on Next: Assign Security Groups:

- In the Assign Security Groups page, we need to configure the security group that will allow traffic to our load balancer. If you have already configured a security group that opens port 80, you can simply reuse the same security group by choosing Select an existing security group and then select the security group or create a new one, as shown in the following screenshot. Next, we click on Next: Configure Security Settings:

- Since we are not creating an HTTPS listener, we will disregard the alert on the next page and choose Next: Configure Health Checks:

- In the Configure Health Check section. A target group in a load balancer is used to group instances to which the traffic from a listener is directed. In our case, the instances are listening on port 80 and the protocol needs to be set as HTTP. If our application is running any other custom layer 4 connection mechanism, we can still load balance it by selecting the protocol as TCP instead. We can also select SSL or HTTPS in this section, and define health checks if we have a health check page that is on a specific path. At the end, we will choose Next: Add EC2 Instances:

- On the Add EC2 instances section, we can select the instances that will be part of our target group. You can also configure cross-zone load balancing and connection draining here. Once done, choose Next: Add Tags:

- In the Add Tags section, we are able to apply key-value pairs that we can use to appropriately identify our load balancer. For instance, we can give it a key-value pair matching the instances, so they can be managed together, or we can add a key-value pair that will identify the load balancer uniquely. Once done, choose Review and Create:

- In the Review step, we will get presented with all the information that we have input in the previous steps. Once done reviewing, click on the Create button:

- There will be a notification presented upon the load balancer creation; we can choose Close to exit from the dialog:

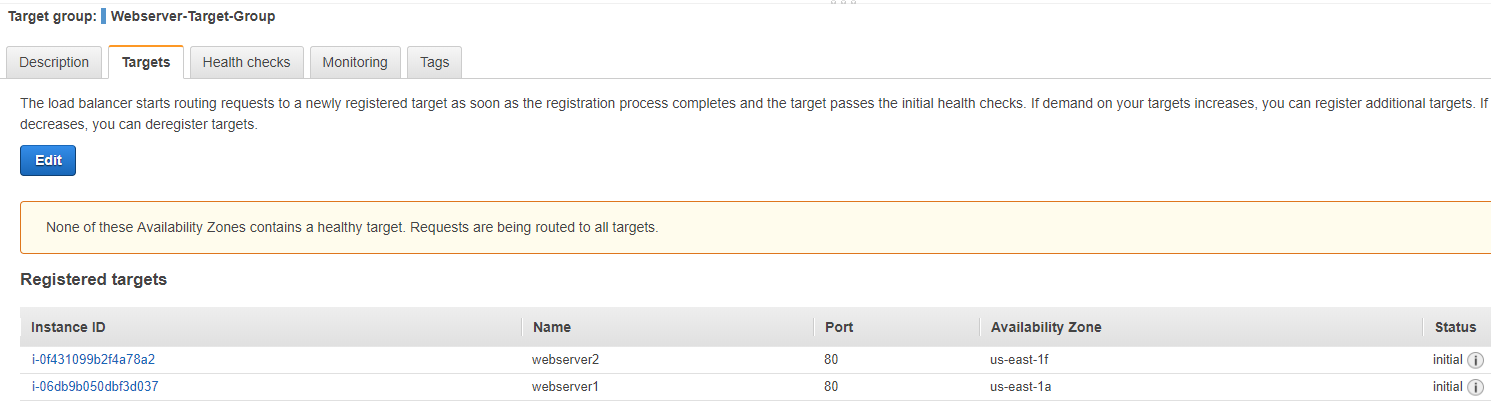
- Now, we can browse back to the load balancing section in the EC2 Management Console and check our target group:

- Before we try to access the application, we need to verify that our instances are ready. We can look at the targets and verify their status. The initial status means it is in the process of being registered, or it has already been added but the number of health checks is still at zero. As soon as we get a healthy response from the instance to the load balancer, the status will be changed to healthy:
- As soon as at least one instance is healthy, we can test our load balancer. The Targets tab is very useful, as it can also be used to identify an instance that has failed, or that has an unhealthy status when operating our application behind a load balancer:

- To test the load balancer, we need to go back to the EC2 Management Console and select the Load Balancers section. Choose the newly created load balancer and search for the DNS name in the Description tab. In our example, the DNS name is Tutorial-AWS-ELB-1353523812.us-east-1.elb.amazonaws.com:

Paste the DNS name into your web browser, which should display the same web page that is served by one of our servers. You should get two different responses, showing that the actual content is coming from webserver1:

Or, you'll see this when the response is coming from webserver2:

We now have a working application being served by the load balancer. As predicted, the response of the servers can identify each server and the application is highly available as it is being served by two instances from two different availability zones. In production, you would naturally serve the same content from both sites and that would enable your application to survive a failure of an availability zone, while maintaining the delivery of the application uninterrupted.