
Let's first create a queue by executing the following steps:
- In the management console, we can simply navigate to the SQS dashboard and, when presented with the initial screen, choose Get Started Now:

- This will immediately be followed by the Create New Queue dialog, where we can enter a queue name and then click Quick-Create Queue or click Configure Queue:

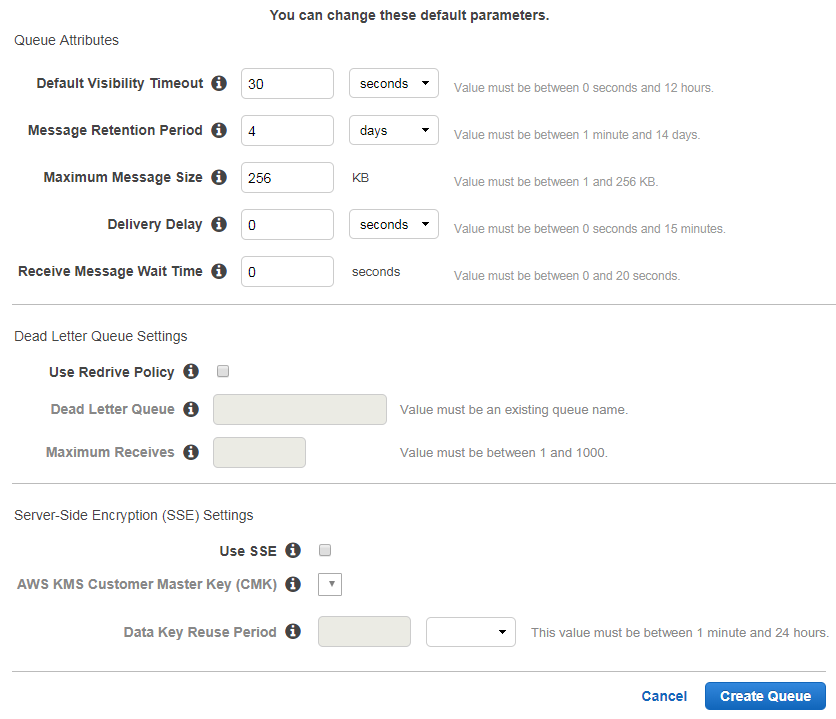
- By clicking Configure Queue, we are able to configure features such as the visibility timeout; how long we want to retain the messages in the queue, the maximum message size; the delivery delay, which makes the message invisible for a certain period before enabling it to be read; and short or long polling by defining the receive message wait time of up to 20 seconds. We can also configure a dead letter queue and server-side encryption here:
- After the queue is created, the management console will show the queue and its properties:

- Creating a queue can be done via the CLI with the use of the aws sqs create-queue command. The only required attribute for this command would be --queue-name, while all the optional advanced options can be used to configure the same properties as the Configure Options operation. Please see the CLI reference in the Further reading section of this chapter for all the possible options for the create-queue operation.
- To list the queues in the AWS CLI, we can run the aws sqs list-queues command, which should give us a response that outputs the QueueUrls key with the value representing the full HTTPS path to the queue that we can address directly:
{
 "QueueUrls": [
 "https://us-east-2.queue.amazonaws.com/866117724370/markocloud"
 ]
}