The Case for Multiple Carousels
Let’s say your first catalog is one in which you put all of your important photos. That one is your baby and you don’t want anyone else to be able to edit or delete those photos. Might there be events or vacations that you share with a mix of friends and family? And, might you want to be able to create a collection of photos from the occasion, and be able to share them and even edit them together? Perhaps.
How about an example? Every summer for the last 13 years my family has ventured off to the green hills of Vermont with the same group of friends for a week of fun and relaxation. Every year we have a deluge of photos taken by everyone over the course of the week. This is usually followed by some of them being passed around via email, others going on Facebook, some are here, and some are there. I’m usually the worst and end up sitting on them until we are back together the following year. How cool would it be if we all had Carousel and if one person created a new carousel just for that year’s photos and gave each of the other families access to that carousel via the sharing mechanism in Carousel? That would change everything for us. Now we could all individually upload our own sets of photos and at the same time be able to view, edit, and download everyone else’s photos all from that same carousel. I can’t wait to try it next summer!
It doesn’t have to be that complicated, though. How about just a way to share your last set of vacation photos with the grandparents? How about a way to share the wedding photos you took with the newlyweds? You can define the reason and the group any way that works for you, but you need to keep in mind that whoever you share a carousel with will have the same level of control for adding new photos, editing existing photos, and even deleting photos as you do. When I spoke to the Carousel team at Adobe about this, they liked to use the phrase “trusted partner” when speaking of who you would share a carousel with, and I hope you can see why.
Within a single Carousel subscription you can create up to five different carousels, and within each carousel you have the choice to keep it to yourself or share it with up to five other people.
Creating Additional Carousels
You can create a new carousel from any of your devices in the same steps:
1. Launch Carousel.
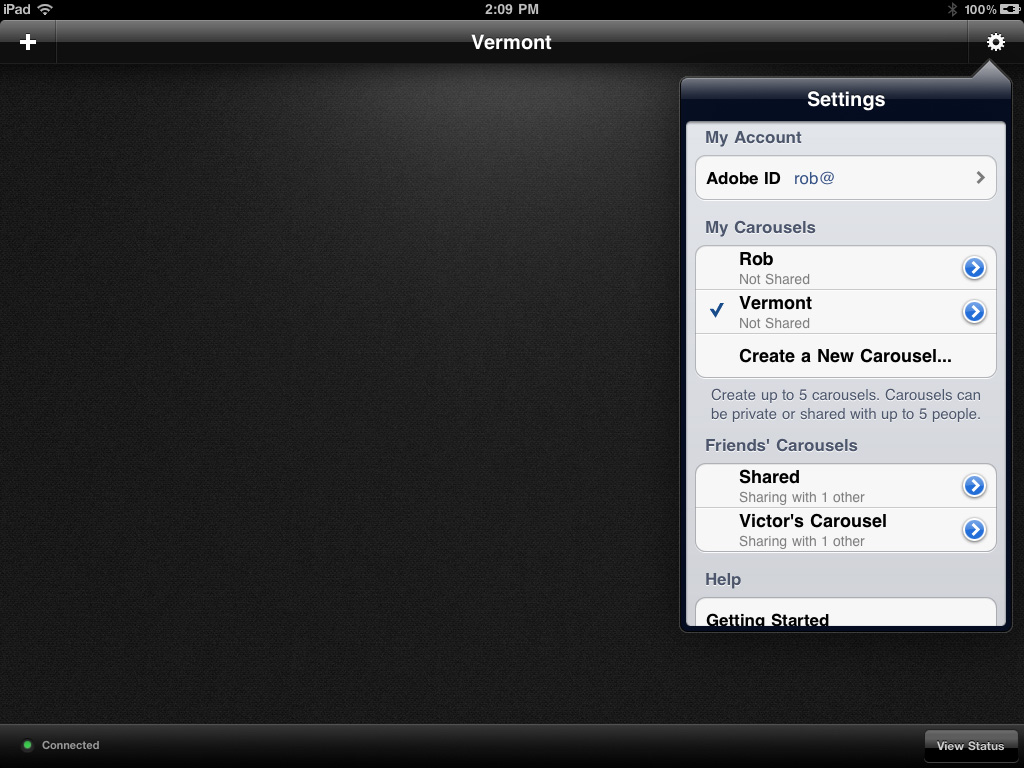
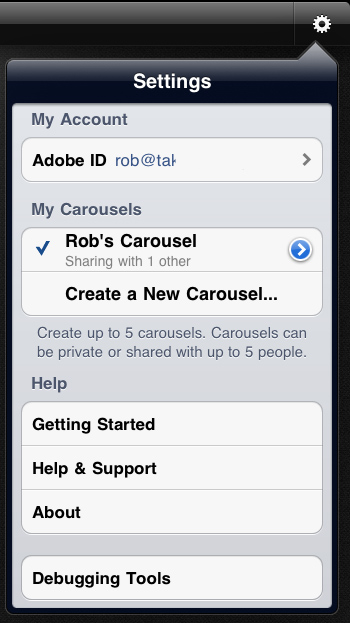
2. Click or tap the Settings icon to open the Settings menu (Figure 4.1).

3. Click or tap the Create a New Carousel menu to open the Add Carousel menu (Figure 4.2).
Figure 4.2 The Add Carousel menu.
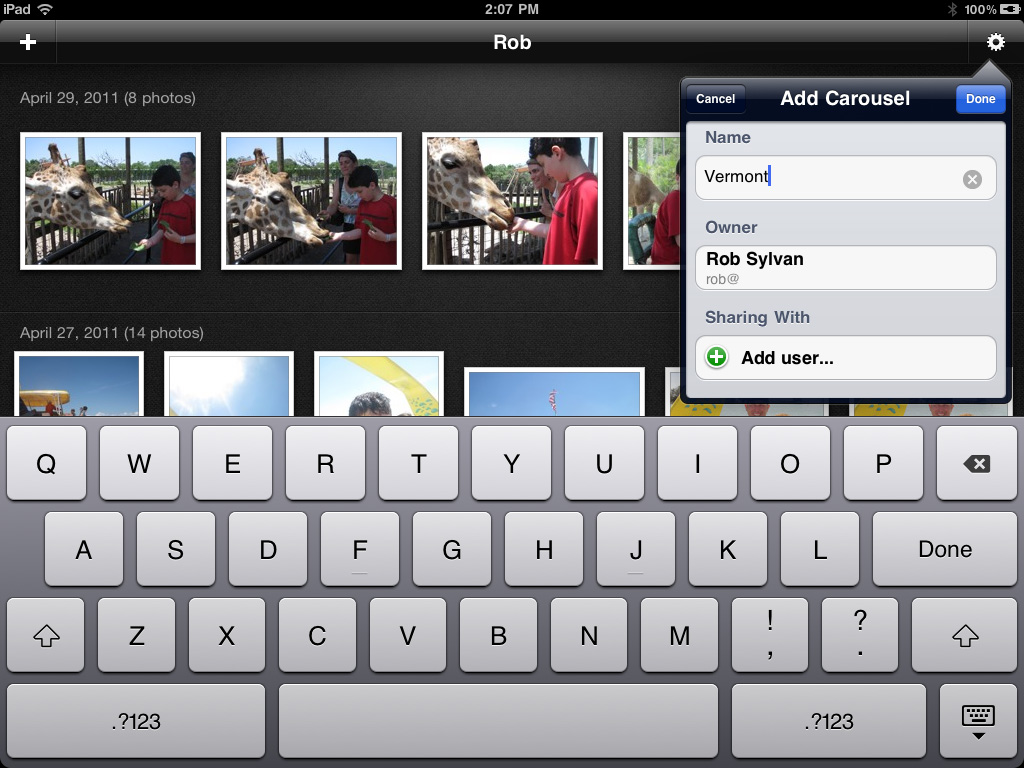
4. Give the new carousel a name.
5. (Optional) You can choose to share this new carousel now, or come back any time and share later. We’ll cover sharing in the next section.
6. Click or tap the Done button to finish the process.
Your view will switch to this new empty carousel, and you’ll see a check mark next to this carousel’s name in the Settings menu (Figure 4.3). Also note that the sharing status will appear under the name of the carousel in the Settings menu.
Figure 4.3 The new carousel has been created.
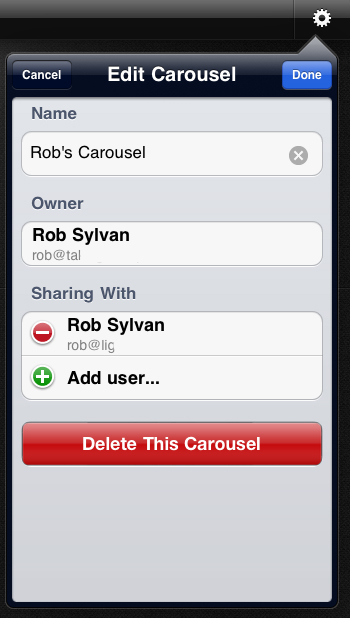
That’s all there is to it. You can start importing photos and sharing at any time. If you should have a change of heart and want to rename that carousel or even delete it outright, just click or tap the arrow next to its name in the Settings menu to go to the Edit Carousel menu (Figure 4.4).
Figure 4.4 You can edit a carousel’s name and status.
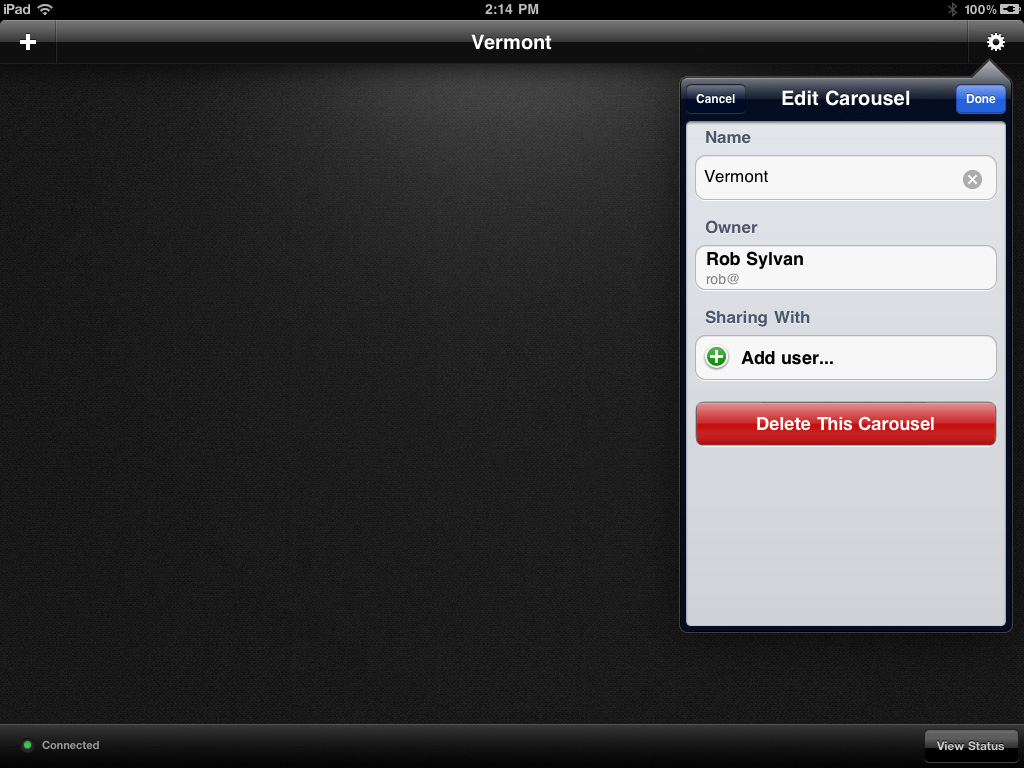
This is also where you will come to add more people to share the carousel. Click or tap the Done button to accept any change you’ve made or Cancel to exit without changing.
Sharing a Carousel
You can share a carousel with anyone who has an email address, has the computer hardware that can run Carousel (see first chapter for all the minimum requirements), and is willing to install Carousel. The person you share with does not have to pay for a Carousel subscription to access your carousel. In other words, if you’ve bought into an annual subscription and want to share one of your carousels with grandma, she just needs to install the app and create a free Adobe ID account to access yours without any cost to her. Grandma would only need to pay for a subscription if she wanted to create a carousel of her own. That’s pretty cool.
To start sharing:
1. Tap the Settings icon to open the Settings menu.
2. Either create a new carousel or choose an existing carousel to edit (see previous section for the steps to edit a carousel).
3. From the Edit Carousel menu (Figure 4.4), click or tap the Add User button.
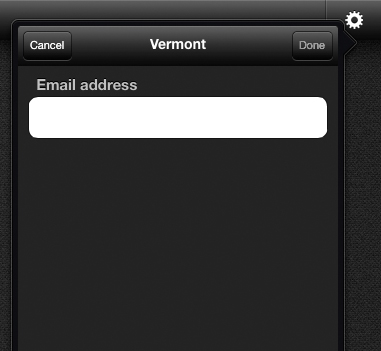
4. Enter the email address of the person you want to invite to share (Figure 4.5).
Figure 4.5 You only need to enter their email address.
5. Click or tap the Done button to go back to the Edit Carousel menu.
6. Click or tap the Done button one last time to send the invitation.
This will send off an email to the address you entered.
Getting an Invite
The person you invited will soon get an email (Figure 4.6) that lets them know you want to share your carousel with them, and then instructs them in how to get involved.
Figure 4.6 You’ve been invited.

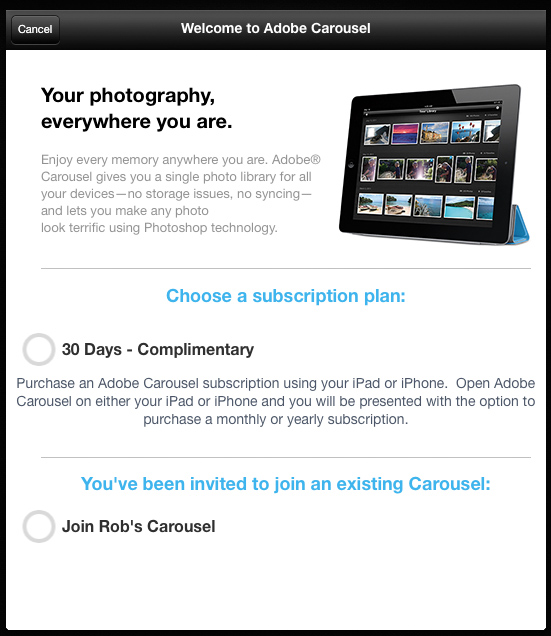
If they already have Carousel installed, and you sent the invitation to the email address they used to create their Adobe ID (it helps to ask them this), then when they log in to their Carousel they will see any other carousels being shared with them in the Settings menu, and can select yours from the list. If they are new to Carousel they will first have to download and install the software, then create an Adobe ID, verify their email, and then when they log in they’ll see an option to join your carousel (Figure 4.7).
Figure 4.7 A subscription is not needed to join a shared carousel.
I suggest having a brief conversation with everyone you choose to share a carousel with before you send the invitation so they know what to expect, and know they don’t need to spend any money to see the carousel you are sharing. Perhaps you could even suggest a book on the subject? ![]()
Removing Someone from a Share
As the creator of the carousel, you are the only person who can invite others to share the carousel. You also have the power to remove someone from a carousel if you wish. Here’s how:
1. Launch Carousel.
2. Click or tap the Settings icon to open the Settings menu.
3. Click or tap the arrow next to the shared carousel you want to edit (Figure 4.8).
Figure 4.8 Editing a carousel’s membership.
4. Click or tap the minus sign (-) next to the person you want to remove (Figure 4.9).
Figure 4.9 Removing a person from a shared carousel.
5. When prompted, click or tap the Remove button to confirm the action.
6. Click or tap the Done button to exit the Edit Carousel menu and complete the process.
The person you removed will no longer be able to log in to that carousel, and will get a curt message (Figure 4.10) if they were in it at the time.
Figure 4.10 Sorry, you’re not allowed in anymore.
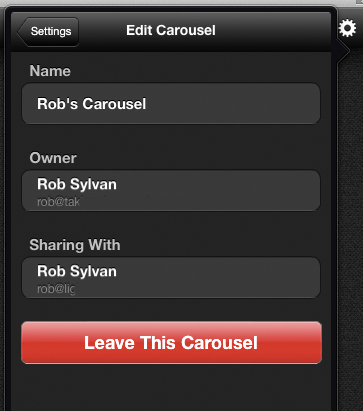
This is another area where I would encourage you to discuss the process with the other person before you remove them. No need to hurt anyone’s feelings over it. You can also let them know that they can remove themselves at any time by going to the Settings menu, choosing the carousel they want to edit, then clicking the Leave This Carousel button (Figure 4.11).
Figure 4.11 You can check out any time you want, and you can leave.