
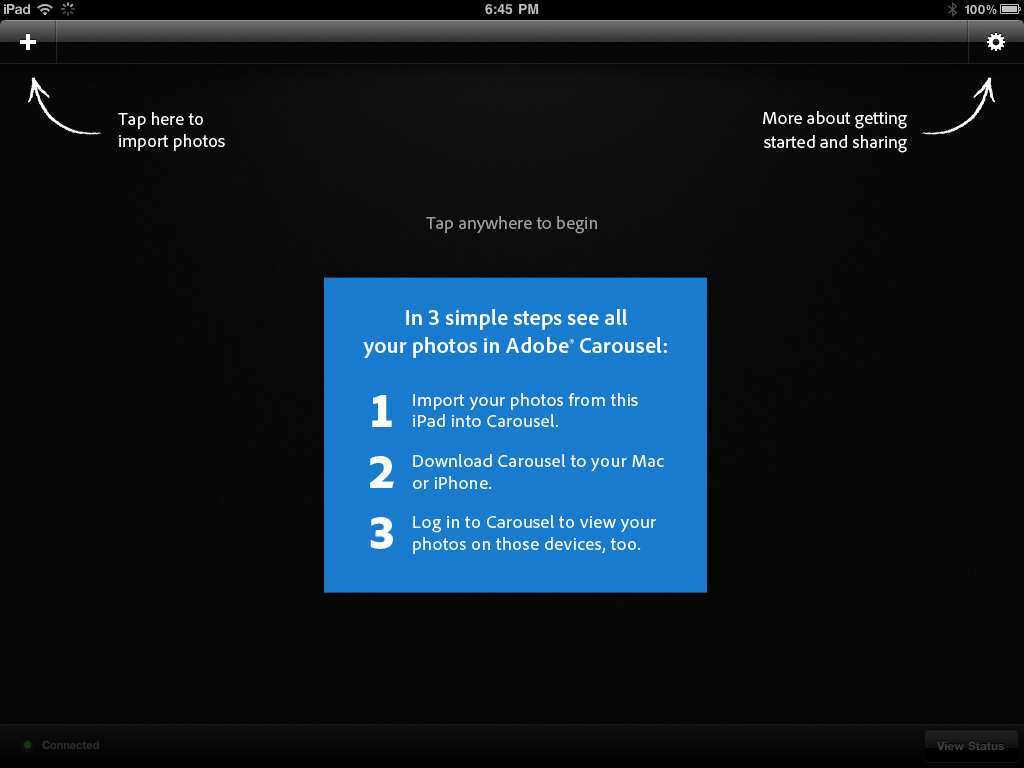
From Your iDevice
Even if most of your photos are on your computer, you may also have photos on your iPhone, iPod touch, or iPad that you’d like to import into Carousel too. Here’s how:
1. Launch Carousel on the device containing the photos you want to import.
2. Tap the plus sign (+) in the upper-left corner of the Carousel interface (Figure 2.6).
Figure 2.6 Tap the plus sign (+) to start.
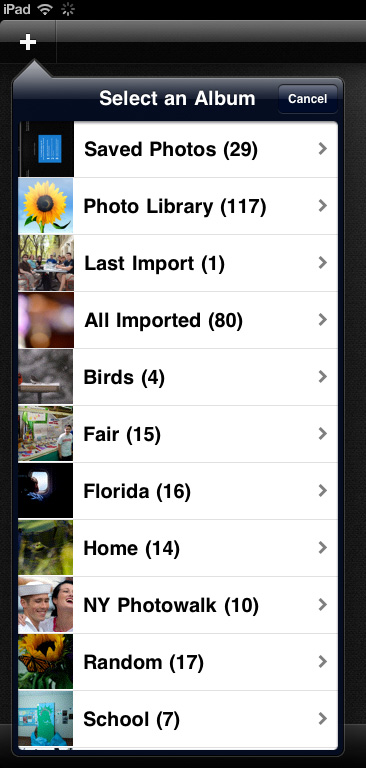
3. Select the Album containing the photos you want to import (Figure 2.7).
Figure 2.7 You can only select one album at a time.
4. Select the individual photos you want to import, or tap the Select All button at the bottom to select all the photos in that Album (Figure 2.8).
Figure 2.8 Selecting individual photos.
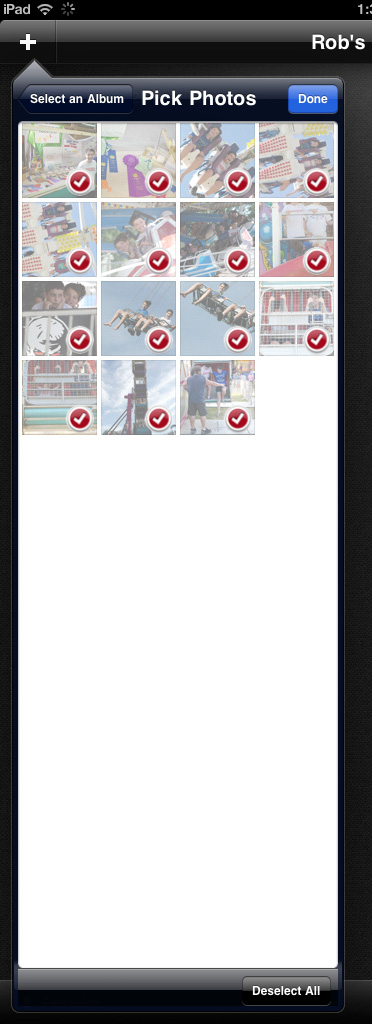
If you want to select most but not all of the photos in a given album, it is quicker to tap the Select All button then deselect a few individual photos.
5. Tap the Done button to start the import.
Just like on your computer, the photos will start showing up in Carousel on your device and begin uploading into the cloud behind the scenes. Repeat the process for any photos in other Albums that you want to import. Once all of these photos have been imported and uploaded into the cloud, they will start showing up on your other devices. This is when Carousel starts getting really fun.
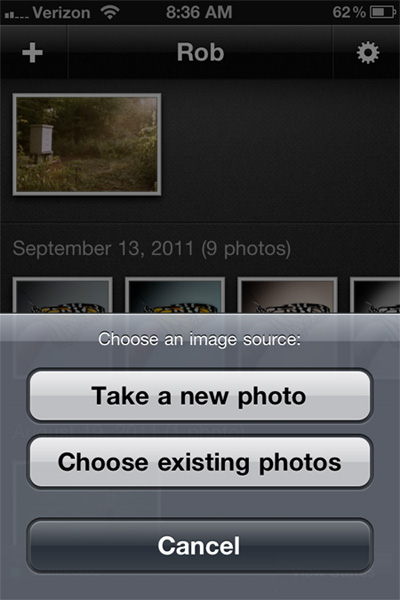
If you have an iPhone or iPad 2, you will also have the ability to import photos taken by the camera directly into Carousel. Here’s how that works:
- Tap the plus sign (+) in the upper-left corner of the Carousel interface, where you will be prompted to choose an image source (Figure 2.9).
Figure 2.9 Choose an image source.
- Tap “Take a new photo” to use the camera.
This will take you right to the default Camera app where you can compose your photo and take the shot.
- After taking the photo, you will see a preview of the photo you just captured (Figure 2.10) and have the choice to retake the photo or use it in Carousel.
Figure 2.10 Tap Retake to redo the shot or tap Use to send it to Carousel.

After you tap Use, the photo is added to your carousel. It’s as easy as that. Once your photos have had time to upload to the cloud, you’ll see them start to appear on your other devices. Keep in mind that the photos you capture using Carousel are not saved to that device’s Camera Roll. They only go into Carousel, so if you want to see them in other apps on your device, you need to export copies out of Carousel, which is covered in the next chapter.