12. Organizing Documents
One underused feature that Acrobat 8 inherited from Acrobat 7 is the Organizer. This astonishingly handy tool provides lists of your PDF files categorized a variety of ways for convenient access:
• You can find files according to when you last looked at them (yesterday, last week, and so on).
• You can find files in any location on your hard disk.
• You can create a list of favorite folders on your hard disk, which can be examined with a single click.
• You can create collections of PDF files pertaining to a particular task or topic. A collection’s files can be scattered throughout your hard disk but are all accessible in the same list.
I find I use this tool all the time, particularly when I’m working on a project that requires repeated reference to a number of PDF-format reference documents.
Examining the Organizer
Opening the Organizer involves a single menu selection: File > Organizer > Open Organizer. As a shortcut, you can press Shift-Command/Control-1. You’re now looking at the Organizer window (Figure 12.1).
Figure 12.1. The Organizer window displays its content in several sections.
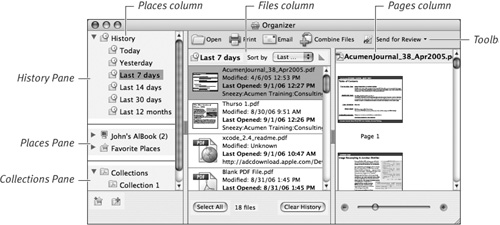
This window has three columns. From left to right, these are as follows:
Places. This column has three panes, presenting collections of PDF files. Some of these collections are created for you, such as the collection of all files viewed yesterday; you can create other collections for convenient access to your files.
Files. When you choose a container in the Categories column, the Files column lists PDF files in that container.
Pages. When you choose a PDF file in the Files column, the Pages column shows you thumbnails of the pages in the document.
 Tip
Tip
• You can zoom the thumbnails displayed in the Pages column. To do so, drag the slider beneath the thumbnail pane or click the + or – button (Figure 12.2).
Figure 12.2. The slider beneath the Pages column zooms the page preview.

Running along the top of the Files and Pages columns is a set of tool buttons that perform various actions on files you select in the Files column (Figure 12.3). These tools are duplicates of tools that exist in the Acrobat toolbars; we’ve discussed them elsewhere in this book. For the record, the tool buttons are as follows:
• Open opens the file selected in the Files column.
• Print prints the file selected in the Files column.
• Email uses your email client to send the selected file as an email attachment.
• Combine Files combines two or more selected files into a single PDF file or package. We described this in Chapter 4.
• Send for Review starts the review process for the select file. We discuss reviewing PDF files in Chapters 5–7.
Figure 12.3. The Organizer window’s toolbar gives you quick access to commonly used features.
![]()
Tips
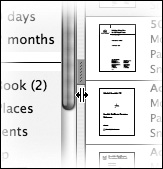
• You can easily change the width of the columns in the Organizer window by dragging the dividers between the columns (Figure 12.4).
Figure 12.4. You can resize any of the columns by dragging the divider separating one column from the next.
• You can open a file by either selecting it in the Files column and then clicking the Open button, or double-clicking it in the Files column. I recommend double-clicking; it’s faster.
Using the History Pane
The purpose of the History pane in the Places column (Figure 12.5) is to allow easy access to files you’ve looked at before.
Figure 12.5. The History pane (top left) lets you view files according to when they were last viewed.
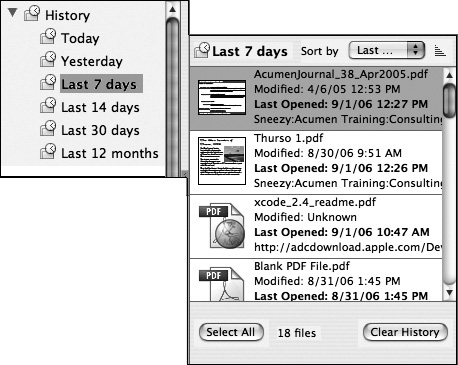
The History pane gives you a useful variety of time periods from which to choose: Today, Yesterday, “Last 7 days,” and so on.
Acrobat keeps track of all the documents you view and adds them to the appropriate time category. This happens without any intervention on your part.
To examine the files from a time period
• Click the desired time period.
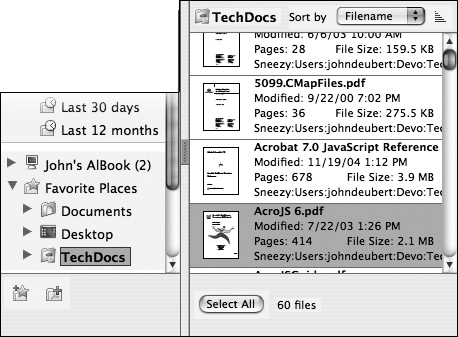
The Files column lists all the files you viewed in that time period. For each file, Acrobat lists the name of the file, the date it was last modified and viewed, and the location of the file on the hard disk.
Tip
• You can sort the files in the Files column a variety of ways, including by filename, file size, and author. Choose the criterion from the “Sort by” pop-up menu.
Sometimes you may want to clear out Acrobat’s internal list of files you’ve viewed. This may be for security purposes or just to simplify the list—the “Last 12 months” list can be so long that it isn’t practical to find a particular file.
When you clear out Acrobat’s history records, all the history categories become empty. Be certain you really want to do this, because it isn’t undoable.
To clear the history
• Click the Clear History button at the bottom of the Files column.
Having cleared the history, Acrobat again starts accumulating files into the history categories.
Using the Places Pane
The Places pane (Figure 12.6) lets you view places on your hard disk and server volumes that hold PDF files. Initially, this pane contains two folders:
• Your computer’s disk, which may be opened to examine folders anywhere on your disk.
Opening this item gives you access to your entire hard disk’s folder hierarchy.
• Favorite Places, where you can put folders that you frequently visit for PDF documents. This initially contains your Documents folder and your computer’s Desktop.
Figure 12.6. The Places pane (left) lets you view files according to where they’re located on your computer.
The Favorite Places category is extremely useful if you have folders that contain libraries of PDF files. Add one of those folders to your favorites, and you can get to any of the files in that folder without having to work your way through your disk’s file hierarchy.
To add a folder to the Favorite Places folder
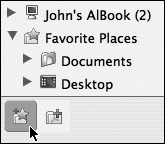
- Click the New Favorites icon, beneath the Categories column, in the lower-left corner of the Organizer dialog box (Figure 12.7).
Figure 12.7. You can add a new folder to the Places pane by clicking the New Favorites icon, located below the Places column.
Your system’s standard pick-a-folder dialog box opens.
- Choose the folder on your disk that you want to add to your favorites.
Acrobat adds that folder to your favorites. From now on, you can access the contents of that folder by clicking the folder in the Favorite Places category (Figure 12.8).
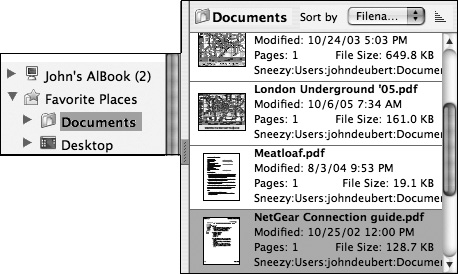
Figure 12.8. Once you’ve added a folder to the Places pane, you can see PDF files in that folder by clicking the folder’s icon.
To remove a folder from the Favorite Places folder
- Right-click the folder in the Favorite Places list to get to the contextual menu (Figure 12.9).
Figure 12.9. To delete a folder from the Favorite Places folder, right-click the folder and choose Remove from the contextual menu.

- Choose the Remove item in the menu.
Acrobat removes the folder from your favorites.
Using the Collections Category
This is my favorite part of the Organizer. The Collections pane (Figure 12.10) lets you create collections of PDF documents that reside anywhere on your hard disk. If you have PDF files scattered here and there that pertain to a particular subject, you can place them all in a collection and access them from this virtual folder.
Figure 12.10. The Collections pane lists virtual folders that contain PDF files pertaining to a particular task.
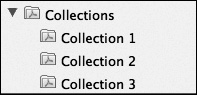
Initially, the Collections category has three “starter” collections, all of them empty, named Collection 1, Collection 2, and Collection 3. You can add files to these collections or create your own collection.
Tip
• You can rename collections, including the three default ones Adobe provides. To do so, click the collection name once to select it and then click it again to put the name into editing mode. Then, type the new name.
To create a new collection
- Click the New Collection icon, located beneath the Categories column (Figure 12.11).
Figure 12.11. You create a new collection by clicking the New Collection icon below the Places column.
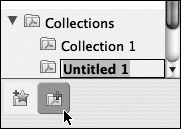
Acrobat inserts a new collection named something like Untitled 1.
- Type a name for your collection.
To add files to a collection
- Right-click the collection in the Categories column to obtain a contextual menu (Figure 12.12).
Figure 12.12. You add files to a collection by right-clicking the collection and selecting Add Files from the contextual menu.

- In the contextual menu, choose Add Files.
Acrobat will present you with the standard pick-a-file dialog box.
- Select the file you want to add to the collection.
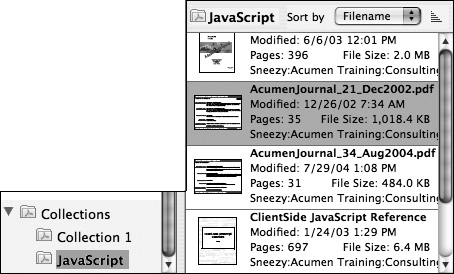
When you click the collection’s name in the Category column, the Files column lists all the files you’ve placed in that collection (Figure 12.13).
Figure 12.13. When you click a collection, the files it contains are displayed in the Files column.
Tips
• Note from Figure 12.12 that you can also rename or delete a collection by right-clicking it in the Categories column and choosing the appropriate option from the contextual menu.
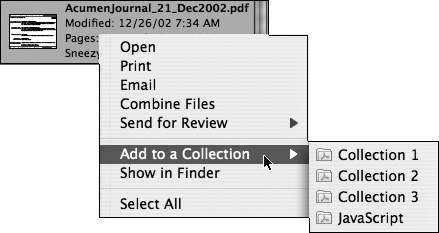
• An alternative way to add a file to a collection is to right-click that file in the Files column and choose Add to a Collection (Figure 12.14). The resulting contextual menu has a submenu that lists all existing collections; choose the collection to which you want to add the file.
Figure 12.14. An alternative way of adding a file to a collection is to right-click the file in the Files pane, choose Add to a Collection, and choose the collection to which you want to add the file.