
Hour 1. Getting Started: Creating a Simple App
What You’ll Learn in This Hour
![]() Setting up your development environment
Setting up your development environment
![]() Running your app on an emulator
Running your app on an emulator
The goal of this hour is to jump into Android development. To do this, you first need to set up a development environment. With the introduction of the Android Developer Tools (ADT) Bundle download, this process has become much easier for new Android developers. With the development environment in place, you will create a simple app and then modify it. This process will introduce you to the tools for creating user interfaces, running test apps, and debugging code.
Setting Up Your Development Environment
To jump into Android development, you have to first set up a working development environment. You do Android development in Java. Significant Android support is built into the Eclipse Integrated Development Environment (IDE). IntelliJ and Android Studio, which is built on IntelliJ, are other good choices. This book focuses on using Eclipse. To install Eclipse and the Eclipse plugin for Android (Android Developer tools), you download a single installation file called the ADT Bundle.
Tip: Attached Code
The source code examples in this book are available for download. You’ll learn more about Eclipse projects in this hour. Generally, the code is included in one or more projects with names like Hour1App.
Installation Using the ADT Bundle
With the single download of the ADT Bundle, you receive all you need to begin Android development. The ADT Bundle includes the Eclipse IDE and all required tools to get started.
Download the ADT Bundle by following the download links provided on http://developer.android.com/sdk/index.html. Installation and environment setup instructions are available for both Windows and Macintosh machines.
The ADT Bundle is a zipped file. After you download and unzip it, you see the folder structure shown in Figure 1.1. Running the Eclipse application starts the development environment.
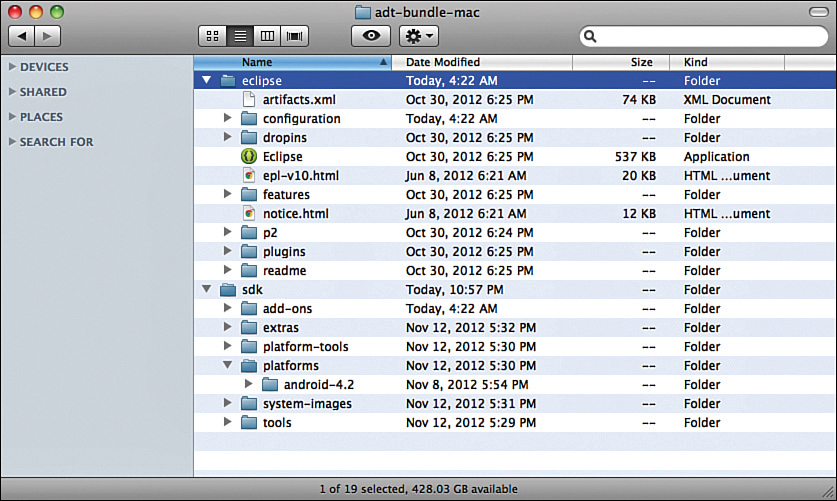
Looking at Figure 1.1, you see that two main folders exist:
![]() Eclipse contains the Eclipse Integrated Development Environment and related tools.
Eclipse contains the Eclipse Integrated Development Environment and related tools.
![]() The sdk folder contains a number of subfolders, including tools, platforms, and platform tools.
The sdk folder contains a number of subfolders, including tools, platforms, and platform tools.
Understanding What Has Been Installed
The Android environment distinguishes between Android SDK tools and platform tools. Tools are the core components of the Software Development Kit (SDK). They are used by all versions of Android. Platform tools are associated with a specific version of Android. In this example, the platform for version 4.2 of Android is installed. There are also folders called extras, add-ons, and system-images. When you use an emulator to test an Android app, you use a virtual device that is set up in the system-images folder. A virtual device or Android Virtual Device is referred to as an AVD. You can create an AVD by using a tool in Eclipse ADT called the Android Virtual Device Manager. You can access it from the Windows menu in Eclipse.
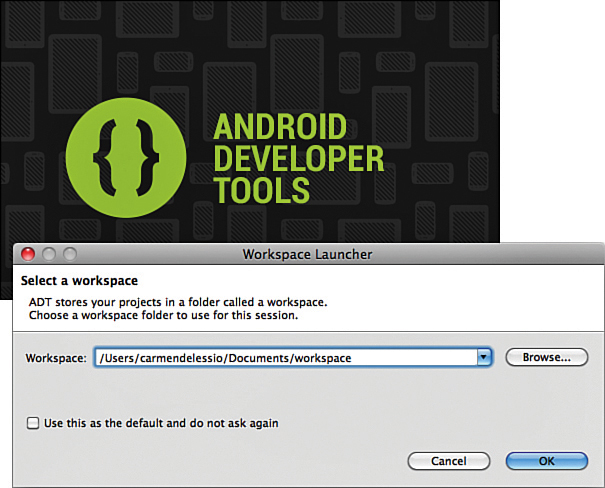
Figure 1.2 shows the app start-up screen for Android developer tools after you’ve installed the bundle. When you use the tools installed by the ADT Bundle, you are using Eclipse. (This book refers to the development environment as Eclipse.)
Instantly Creating a Simple App
In this section, you create and run a simple app. Figure 1.2 shows that when you start Eclipse, you must set a workspace for development. Typically, the default is a good choice. The first time you use Eclipse, you see a welcome screen. After you close it, you see Eclipse, as shown in Figure 1.3.
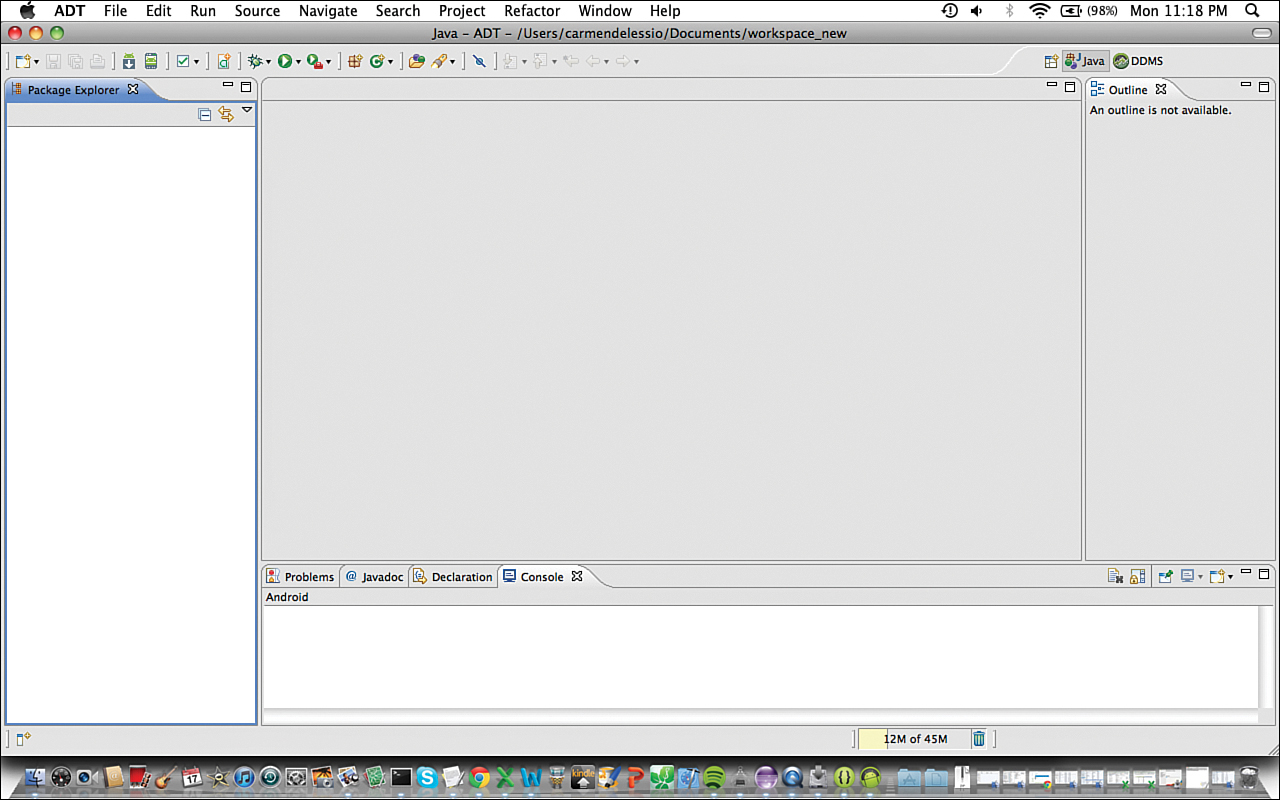
Eclipse is a blank slate to start your app development efforts. You add projects for each app you want to create. The discussion starts with a simple app and looks closely at what can be automatically generated.
Creating a New Project
To create an app, the first step is to create a new project. To do this, follow these steps:
1. In Eclipse, choose File, New, and Android Application Project.
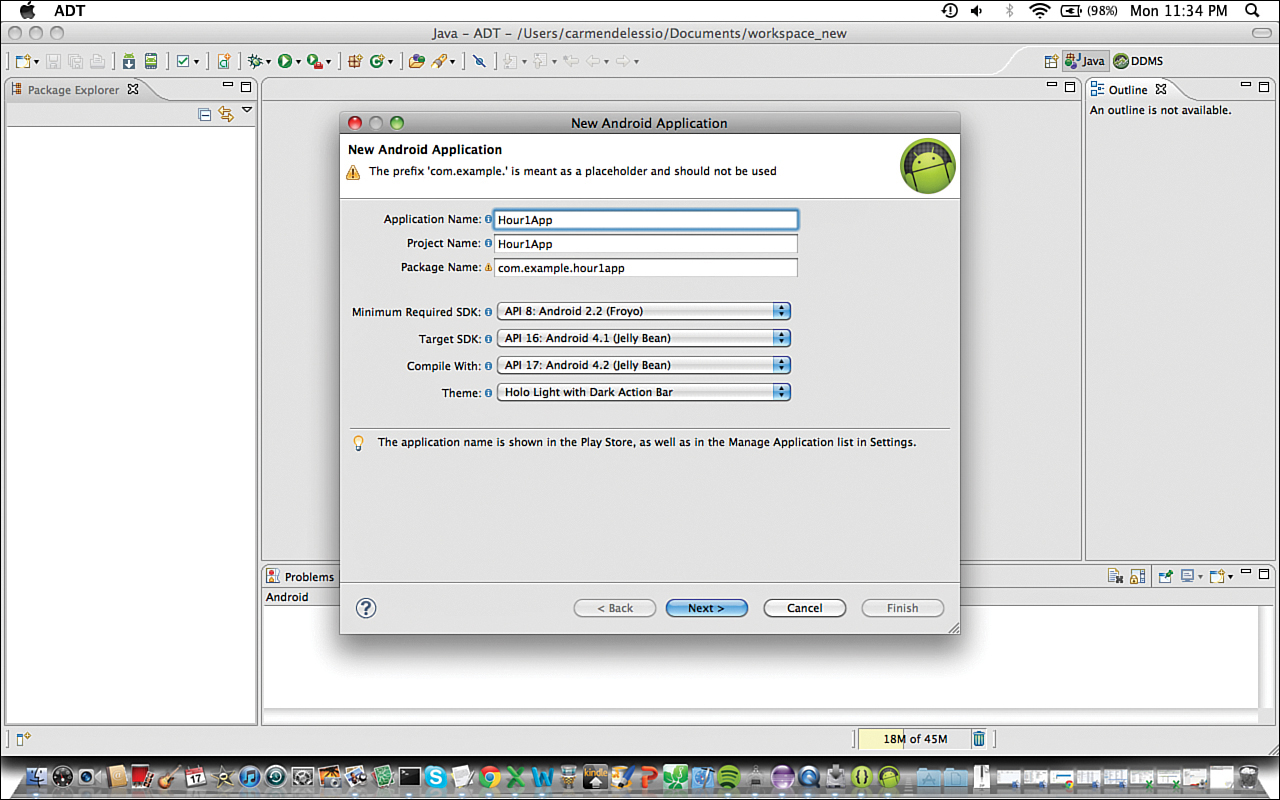
2. Fill in Hour1App for the Application Name. The Project Name and Package Name will be filled in automatically.
Your screen should look like what’s shown in Figure 1.4.
Did You Know?: Package Names
The package name in Figure 1.4 includes com.example, and a note tells you that you should change it. A Java package uniquely identifies an app. Typically, you use a reverse domain name structure. You can change the package name to anything you like. The apps in this book use com.bffmedia as the package name going forward.
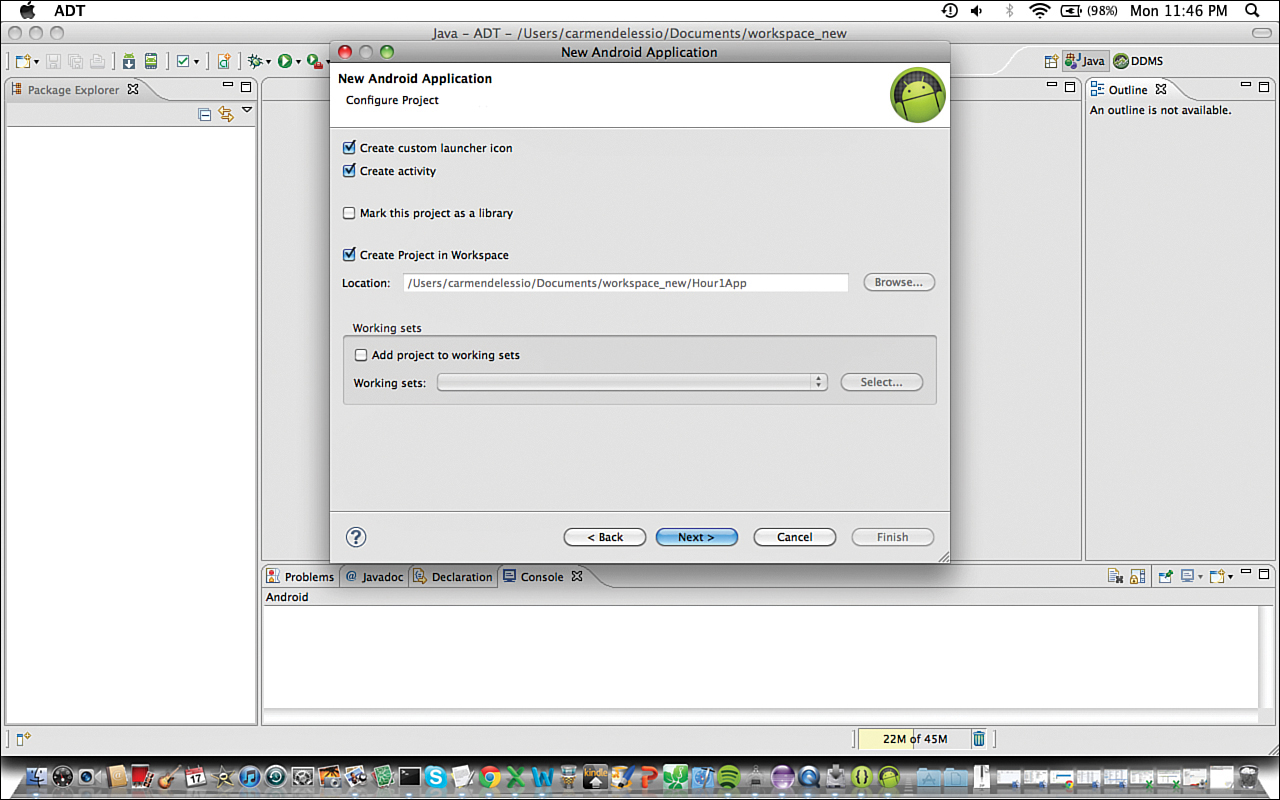
3. Click Next. On the screen that appears, choose the checkbox to create a custom icon and create an activity. Your screen will look like Figure 1.5.
4. Click Next. The icon screen appears. You can accept the default icon and choose an activity type for the app. Choose a Blank Activity and click Next. Your screen should look like Figure 1.6. Click Finish.

The project might take a minute or two to load, but your formally empty Eclipse ADT is starting to look full! Figure 1.7 shows the project in full. On the left, you see the Package Explorer for the Hour1App. Many folders have been created. The highlighted item is called activity_main.xml. The center of the screen shows a graphical representation of this XML file.

Understanding the Java Code and XML Layout
As mentioned, Figure 1.7 shows the graphical layout represented by the XML file activity_main.xml. In Android, this is a standard way to create the user interface. Creating or modifying a user interface on the fly is certainly possible, but for the most part, you will use XML files. You can modify these files through the graphical interface or by changing the XML directly. Both methods can be useful.
You just generated a simple app that shows the screen defined in the XML layout. There are methods in Java code to show that screen. To see the Java code, in the Package Explorer, expand the src folder and select the MainActivity.java file. Your screen should look like Figure 1.8.
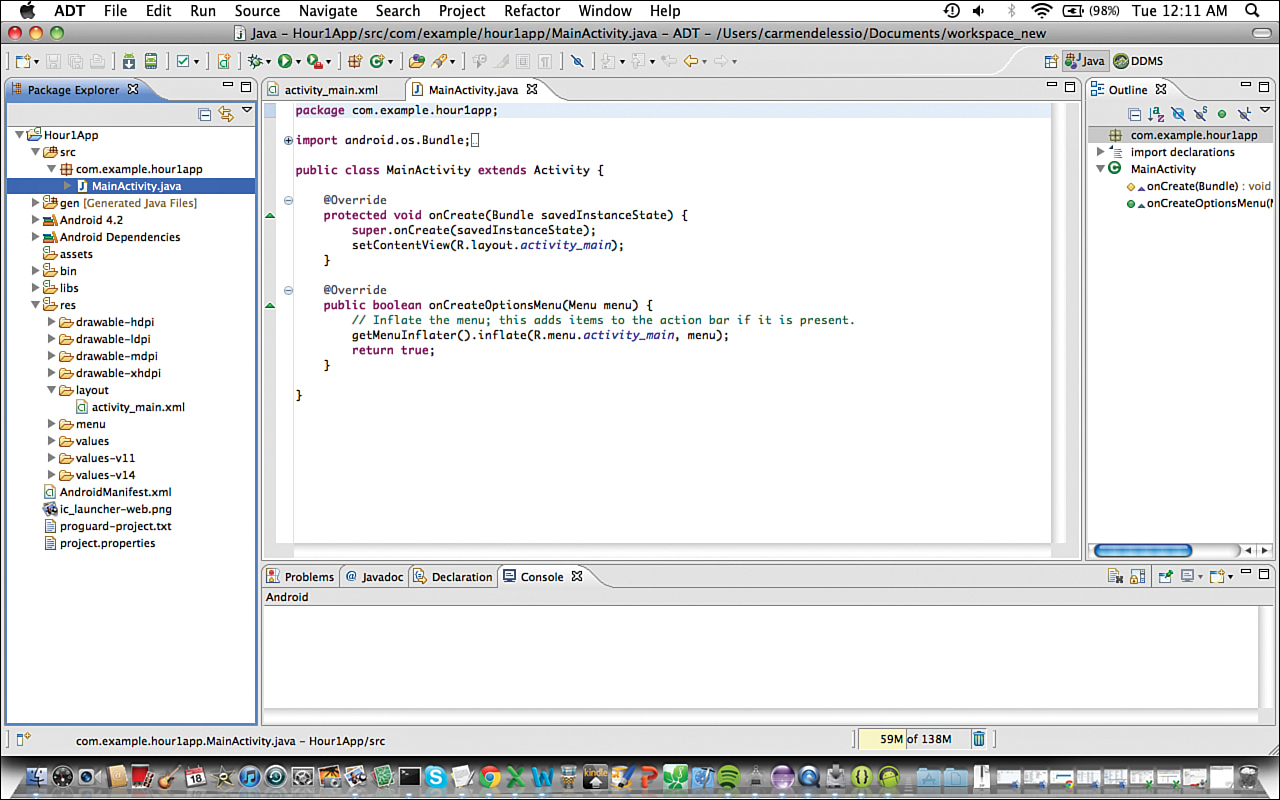
In Figure 1.8, you can see that MainActivity extends a class called Activity. There are two methods: onCreate and onCreateOptionsMenu(). In the onCreate() method, you see the link between your source code and the XML layout file. A call is made to setContentView() with a reference to R.layout.activity_main. That is the XML file that you created.
You use the onCreateOptionsMenu() that is generated for handling menu items. Hour 7, “ActionBar and Menu Navigation,” covers this in more detail.
Android converts files in the res folder to resources that are used within the app. The activity_main.xml file is in the folder res/layout/. When this is referred to as a resource within the app, it is R.layout.activity_main.
GO TO ![]() HOUR 3, “EXPLORING AN ANDROID PROJECT AND RESOURCES,” to learn more about resources.
HOUR 3, “EXPLORING AN ANDROID PROJECT AND RESOURCES,” to learn more about resources.
Running the App
To run the app, follow these steps:
1. Highlight Hour1App and right-click it with a mouse to show a list of options. You can also press the Control key and click a Mac. Choose Run As, and then Android Application (see Figure 1.9).

2. When you receive the error message “Android AVD Error,” you can choose whether to create a new Android Virtual Device. Choose Yes.
An Android Virtual Device (AVD) is required to run the emulator. It defines the specifics of a device for testing in the emulator. Many different devices are available and you can create custom configurations. Creating a new AVD with the defaults provided is easy.
To do this, in the Android Virtual Device Manager screen:
1. Choose New to create a new AVD.
2. Select a device from the drop-down menu and give this AVD a name.
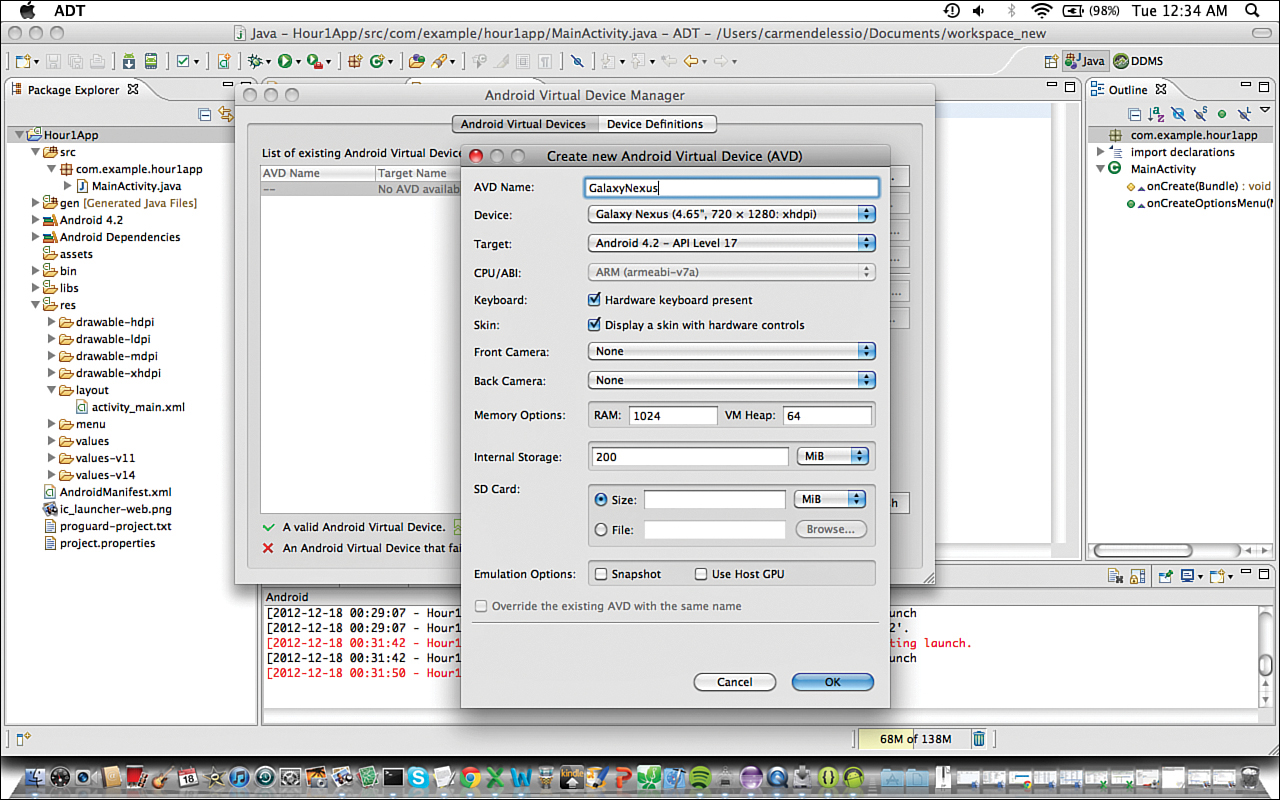
In Figure 1.10, the device selected is a Galaxy Nexus and the AVD Name is “GalaxyNexus.”
Now you can close the AVD Manager and run the app again. It should successfully run in the emulator using the Galaxy Nexus Android Virtual Device.
Did You Know?: Auto Monitor Logcat
When you run the app in the emulator, Eclipse asks whether you want to automatically monitor logcat. Logcat is an Android tool for showing the messages that are logged to the system. Logcat will be the first area you look when debugging, and you can add your own app messages. So, say “Yes” to monitoring logcat.
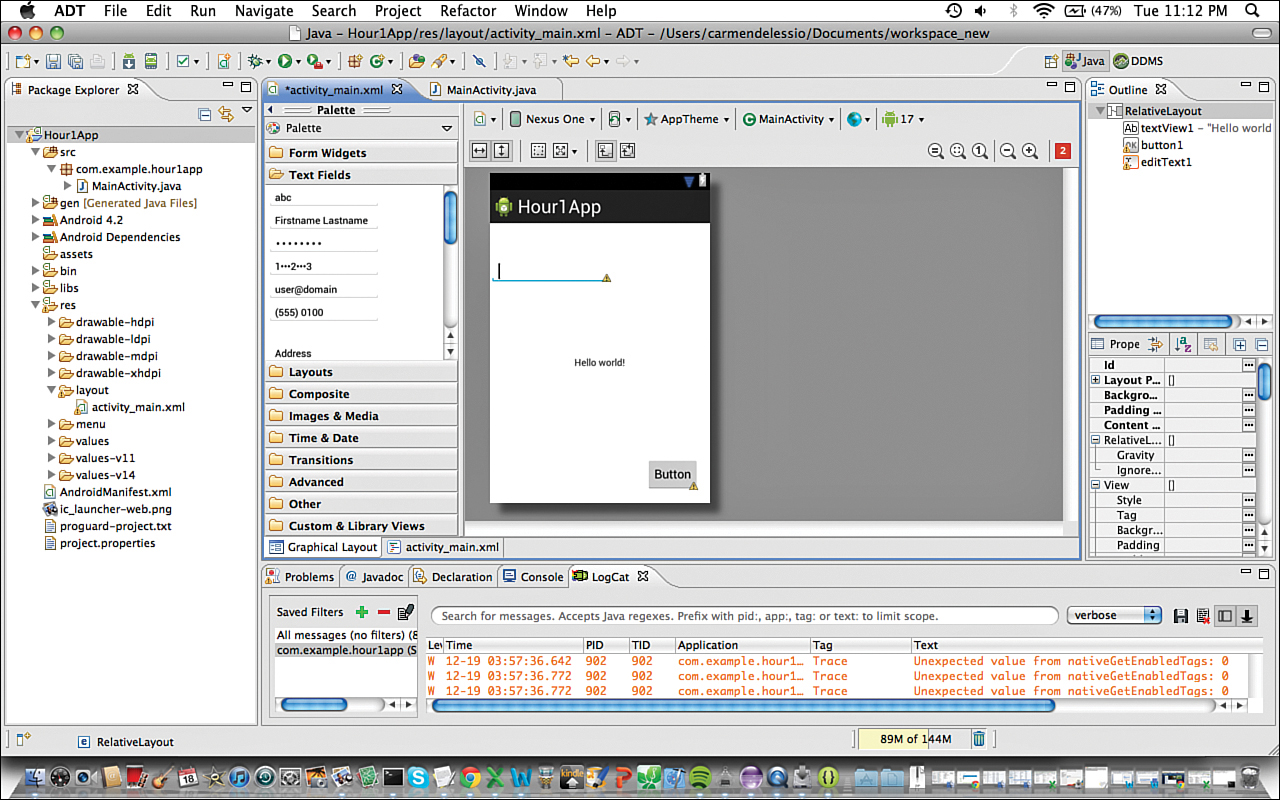
Personalizing the App
The instant app you created shows the words “Hello world!,” as shown in Figure 1.11. You’ll want to make this app your own by adding interactive features. To do this, you update the user interface by adding a field for entering data and a button. When the user clicks the button, the entered text appears in the center of the screen.
Updating the User Interface
The first step in making the app your own is to update the user interface.
Try It Yourself: Updating the User Interface Using the Visual Editor
1. Find the activity_main.xml file in the res/layout folder. That is the file that was displayed when the app was created.
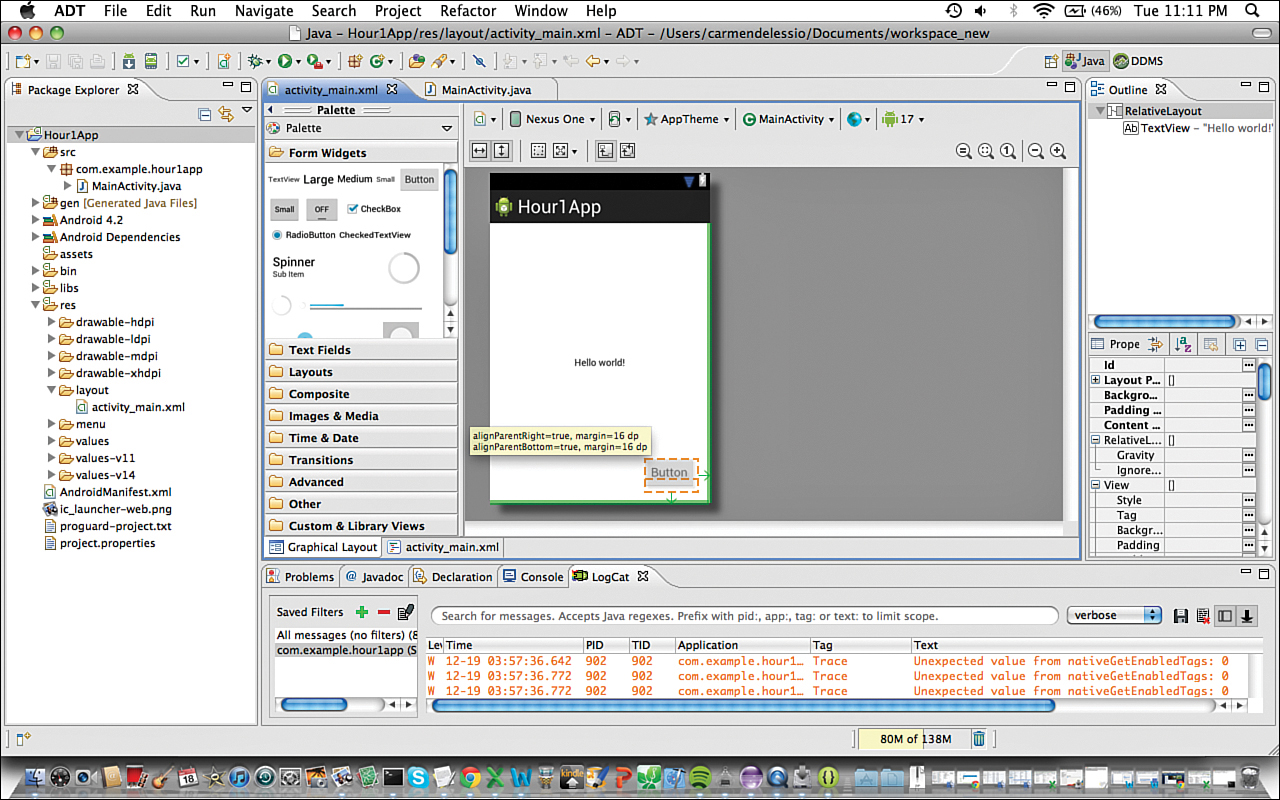
2. Choose a button from the Form Widgets section of the palette and drag it onto the app canvas. See Figure 1.11.
3. Select the Text Fields section of the palette. Choose the first type of EditText field and drag it onto the canvas. As you drag it, you see the words “Plain Text.” Figure 1.12 shows your edits.
4. Save your changes.
Adding Action in Code
Now that you have the simple user interface for your app, add the code to refer to the Button and EditText. The next step is to update the TextView in the center of the screen. Listing 1.1 shows the XML code for Button that was created using the visual tool. The id for the Button is specified in line 2 as button1; the EditText is editText1; and the original TextView has the id textView1. These ids are important because they are used to refer to these user interface items in the code.
LISTING 1.1 Button Defined in XML Layout
1: <Button
2: android:id="@+id/button1"
3: android:layout_width="wrap_content"
4: android:layout_height="wrap_content"
5: android:layout_alignParentBottom="true"
6: android:layout_alignParentRight="true"
7: android:layout_marginBottom="17dp"
8: android:layout_marginRight="15dp"
9: android:text="Button" />
The goal is to accept the information entered into the EditText and plop it into the TextView when the Button is clicked. The first step in doing that is making a connection between the user interface and the code. The second step is to add an action to the Button.
You need to modify the code that was generated. Select the MainActivity.java file in Eclipse. You modify the code in the onCreate() method, but first add the necessary imports for the user interface elements.
The new import statements are the following:
import android.widget.Button;
import android.widget.EditText;
import android.widget.TextView;
The complete list of imports is as follows:
import android.os.Bundle;
import android.app.Activity;
import android.view.Menu;
import android.view.View;
import android.view.View.OnClickListener;
import android.widget.Button;
import android.widget.EditText;
import android.widget.TextView;
These Java classes are included in Android in the widget package.
Add the code to the onCreate() method to associate the resources from the layout file with the code. Listing 1.2 shows the onCreate() method. Lines 5 through 9 define an EditText, TextView, and Button that you can now use in your code. The findViewById() method makes the association Line 4 tie this Activity to the XML layout file named activity_main.xml in the res/layout folder in your project. Lines 5–8 refer to the ids of each of the resources defined in that file.
LISTING 1.2 Referring to UI Widgets in Code
1: @Override
2: protected void onCreate(Bundle savedInstanceState) {
3: super.onCreate(savedInstanceState);
4: setContentView(R.layout.activity_main);
5: EditText e = (EditText)findViewById(R.id.editText1);
6: TextView t = (TextView)findViewById(R.id.textView1);
7: Button b = (Button)findViewById(R.id.button1);
8: }
Listing 1.2 sets you up to read the data from the EditText field and populate the TextView when the Button is clicked. Listing 1.3 shows the code to do this.
LISTING 1.3 Responding to the Button Click
1: @Override
2: protected void onCreate(Bundle savedInstanceState) {
3: super.onCreate(savedInstanceState);
4: setContentView(R.layout.activity_main);
5: final EditText e = (EditText)findViewById(R.id.editText1);
6: final TextView t = (TextView)findViewById(R.id.textView1);
7: Button b = (Button)findViewById(R.id.button1);
8: b.setOnClickListener(new OnClickListener() {
9: public void onClick(View v) {
10: t.setText(e.getText());
11: }
12: });
13: }
You add the final modifier to the declarations on lines 5 and 6. Final variables are not changed after they are assigned. That is true in this case, and it allows you to use these variables in the code for the Button. If the variable e is not declared final, you see this error in Eclipse:
Cannot refer to a non-final variable e inside an inner class defined in a different
method
This error occurs on line 10. In line 10, you use the variable e, but you are in an inner class. Line 8 declares a new instance of the class OnClickListener(). Using a variable that might change in a separate class like this is not allowed. By declaring e as a final variable, you can use it because you are assured it is not changing. You can also make the EditText a field in the class that would have global scope and be visible to all methods.
The code to update the TextView from the EditText field occurs on line 10. The text is read from variable e and set in variable t. Line 10 is in the onClick() method for Button b. Setting the onClickListener() in line 8 tells Button b to listen for clicks. When a click on the Button occurs, the onClick() method of the OnClickListener fires and the code runs to update the TextView.
Make these modifications, and run the app in the emulator to watch the interaction occur.
Summary
In this hour, the goal was to jump into Android development. The first step was to download and install a development environment for Android. Using that environment, you generated a simple application and then updated it. You learned that the user interface for an Android app can be created visually, and that it is actually an XML file. You saw how the Java code for Android development refers to resources in the XML layout. You added a simple action to the app by creating an onClickListener() method for a button.
Q&A
Q. Is it best to use the ADT Bundle to get started?
A. The ADT Bundle is the quickest and easiest way to start Android development, but if you have an existing Eclipse instance or are using an IDE other than Eclipse, you should be able to install the Android SDK, platform, and platform tools as separate pieces and continue to use the development environment that you are familiar with.
Q. Should I use the visual tool for creating user interfaces?
A. Generally, yes, but this chapter just introduces this tool. As you learn more about Android layouts, you might find yourself using both the tool and modifying XML directly.
Workshop
Quiz
1. In an activity, what method associates a resource for a Button to a variable of type Button?
2. How do you add a Button to the screen using the visual tool?
Answers
1. An activity includes a method called findViewById() that associates resources with variables in the code. Specifically, findViewById() is passed a resource id and returns the Button or other view associated with the resource. In this code, you must cast the view to the proper type.
2. Just drag and drop the Button from the palette to the app canvas.
Exercise
Use the visual editing tool to add additional items to the app. Those items should include a CheckBox and an ImageView, but this is a good opportunity to try many different user interface elements.