With that, you are successfully taking pictures. Your image will be saved to a file on the filesystem for you to use.
Your next step is to take this file, load it up, and show it to the user. To do this, you need to load it into a reasonably sized Bitmap object. To get a Bitmap from a file, all you need to do is use the BitmapFactory class:
val bitmap = BitmapFactory.decodeFile(photoFile.getPath())
There has to be a catch, right? Otherwise we would have put that in bold, you would have typed it in, and you would be done.
Here is the catch: When we say “reasonably sized,” we mean it. A Bitmap is a simple object that stores literal pixel data. That means that even if the original file were compressed, there would be no compression in the Bitmap itself. So a 16-megapixel, 24-bit camera image – which might only be a 5 MB JPG – would blow up to 48 MB loaded into a Bitmap object (!).
You can get around this, but it does mean that you will need to scale the bitmap down by hand. You will first scan the file to see how big it is, next figure out how much you need to scale it by to fit it in a given area, and finally reread the file to create a scaled-down Bitmap object.
Create a new file called PictureUtils.kt and add a file-level function to it called getScaledBitmap(String, Int, Int) (Listing 16.13).
Listing 16.13 Creating getScaledBitmap(…) (PictureUtils.kt)
fun getScaledBitmap(path: String, destWidth: Int, destHeight: Int): Bitmap {
    // Read in the dimensions of the image on disk
    var options = BitmapFactory.Options()
    options.inJustDecodeBounds = true
    BitmapFactory.decodeFile(path, options)

    val srcWidth = options.outWidth.toFloat()
    val srcHeight = options.outHeight.toFloat()

    // Figure out how much to scale down by
    var inSampleSize = 1
    if (srcHeight > destHeight || srcWidth > destWidth) {
        val heightScale = srcHeight / destHeight
        val widthScale = srcWidth / destWidth

        val sampleScale = if (heightScale > widthScale) {
            heightScale
        } else {
            widthScale
        }
        inSampleSize = Math.round(sampleScale)
    }

    options = BitmapFactory.Options()
    options.inSampleSize = inSampleSize

    // Read in and create final bitmap
    return BitmapFactory.decodeFile(path, options)
}
The key parameter above is inSampleSize.
This determines how big each “sample” should be for each pixel – a sample size of 1 has one final horizontal pixel for each horizontal pixel in the original file, and a sample size of 2 has one horizontal pixel for every two horizontal pixels in the original file.
So when inSampleSize is 2, the pixel count in the image is one-quarter of the pixel count in the original.
One more bit of bad news: When your fragment initially starts up, you will not know how big PhotoView is. Until a layout pass happens, views do not have dimensions onscreen. The first layout pass happens after onCreate(…), onStart(), and onResume() initially run, which is why PhotoView does not know how big it is.
There are two solutions to this problem: Either you wait until a layout pass happens, or you use a conservative estimate. The conservative estimate approach is less efficient but more straightforward. Write another file-level function called getScaledBitmap(String, Activity) to scale a Bitmap for a particular Activity’s size.
Listing 16.14 Writing a conservative scale function (PictureUtils.kt)
fun getScaledBitmap(path: String, activity: Activity): Bitmap {
    val size = Point()
    activity.windowManager.defaultDisplay.getSize(size)

    return getScaledBitmap(path, size.x, size.y)
}

fun getScaledBitmap(path: String, destWidth: Int, destHeight: Int): Bitmap {
    ...
}
This function checks to see how big the screen is and then scales the image down to that size. The ImageView you load into will always be smaller than this size, so this is a very conservative estimate.
Next, to load this Bitmap into your ImageView, add a function to CrimeFragment to update photoView.
Listing 16.15 Updating photoView (CrimeFragment.kt)
class CrimeFragment : Fragment(), DatePickerFragment.Callbacks {
    ...
    private fun updateUI() {
        ...
    }

    private fun updatePhotoView() {
        if (photoFile.exists()) {
            val bitmap = getScaledBitmap(photoFile.path, requireActivity())
            photoView.setImageBitmap(bitmap)
        } else {
            photoView.setImageDrawable(null)
        }
    }

    override fun onActivityResult(requestCode: Int, resultCode: Int, data: Intent?) {
        ...
    }
    ...
}
Then call that function from inside updateUI() and onActivityResult(…).
Listing 16.16 Calling updatePhotoView() (CrimeFragment.kt)
class CrimeFragment : Fragment(), DatePickerFragment.Callbacks {
    ...
    private fun updateUI() {
        ...
        if (crime.suspect.isNotEmpty()) {
            suspectButton.text = crime.suspect
        }
        updatePhotoView()
    }
    ...
    override fun onActivityResult(requestCode: Int, resultCode: Int, data: Intent?) {
        when {
            resultCode != Activity.RESULT_OK -> return

            requestCode == REQUEST_CONTACT && data != null -> {
                ...
            }

            requestCode == REQUEST_PHOTO -> {
                updatePhotoView()
            }
        }
    }
    ...
}
Now that the camera is done writing to your file, you can revoke the permission, closing off access to your file again. Do this from onActivityResult(…) to revoke it when a valid result is received and also from onDetach() to cover the possibility of an invalid response.
Listing 16.17 Revoking URI permissions (CrimeFragment.kt)
class CrimeFragment : Fragment(), DatePickerFragment.Callbacks {
    ...
    override fun onStop() {
        ...
    }

    override fun onDetach() {
        super.onDetach()
        requireActivity().revokeUriPermission(photoUri,
            Intent.FLAG_GRANT_WRITE_URI_PERMISSION)
    }

    override fun onActivityResult(requestCode: Int, resultCode: Int, data: Intent?) {
        when {
            ...

            requestCode == REQUEST_PHOTO -> {
                requireActivity().revokeUriPermission(photoUri,
                    Intent.FLAG_GRANT_WRITE_URI_PERMISSION)
                updatePhotoView()
            }
        }
    }
    ...
}
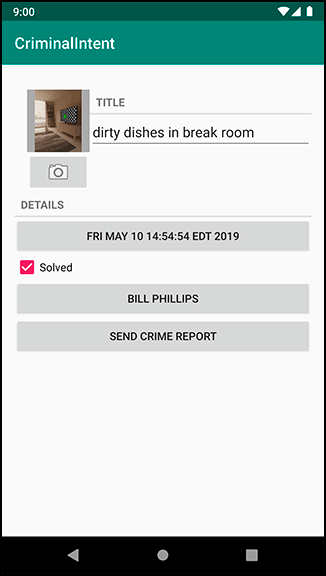
Run CriminalIntent again. Open a crime’s detail screen and use the camera button to take a photo. You should see your image displayed in the thumbnail view (Figure 16.3).