
You have already seen two ways to display web content: You can either launch the user’s web browser or embed the content in your application. There is also a third option that is a hybrid of what you have seen so far.
Chrome Custom Tabs (developer.chrome.com/multidevice/android/customtabs) let you launch the Chrome web browser in a way that feels native to your application. You can configure its appearance to make it look like part of your app and feel like the user has never left your app. Figure 29.4 shows an example of a custom tab. You can see that the result looks like a mix of Google Chrome and your PhotoPageActivity.
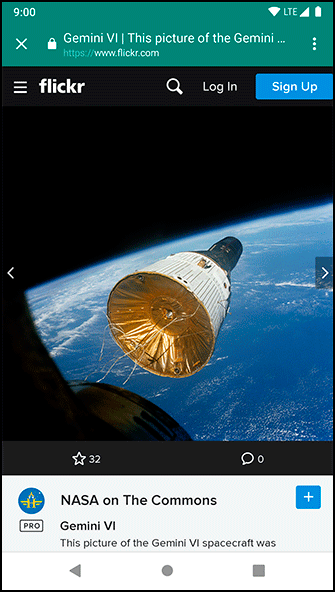
When you use a custom tab, it behaves very similar to launching Chrome. The browser instance even has access to information like the user’s saved passwords, browser cache, and cookies from the full Chrome browser. This means that if the user had logged into Flickr in Chrome, then they would also be logged into Flickr in every custom tab. With WebView, the user would have to log into Flickr in both Chrome and PhotoGallery.
The downside to using a custom tab instead of a WebView is that you do not have as much control over the content you are displaying. For example, you cannot choose to use custom tabs in only the top half of your screen or to add navigation buttons to the bottom of a custom tab.
To start using Chrome Custom Tabs, you add this dependency:
implementation 'androidx.browser:browser:1.0.0'
You can then launch a custom tab. For example, in PhotoGallery you could launch a custom tab instead of PhotoPageActivity:
    class PhotoGalleryFragment : VisibleFragment() {
        ...
        private inner class PhotoHolder(private val itemImageView: ImageView)
            : RecyclerView.ViewHolder(itemImageView),
                View.OnClickListener {
            ...
            override fun onClick(view: View) {
                val intent = PhotoPageActivity
                    .newIntent(requireContext(), galleryItem.photoPageUri)
                startActivity(intent)

                CustomTabsIntent.Builder()
                    .setToolbarColor(ContextCompat.getColor(
                        requireContext(), R.color.colorPrimary))
                    .setShowTitle(true)
                    .build()
                    .launchUrl(requireContext(), galleryItem.photoPageUri)
            }
        }
        ...
    }
With this change, a user who clicks on a photo will see a custom tab like the one shown in Figure 29.4. (If the user did not have Chrome version 45 or higher installed, then PhotoGallery would fall back to using the system browser. The result would be just like when you used an implicit intent at the beginning of this chapter.)