
RecyclerView is a subclass of ViewGroup. It displays a list of child View objects, called item views. Each item view represents a single object from the list of data backing the recycler view (in your case, a single crime from the crime list). Depending on the complexity of what you need to display, these child Views can be complex or very simple.
For your first implementation, each item in the list will display the title and date of a Crime, as shown in Figure 9.5.
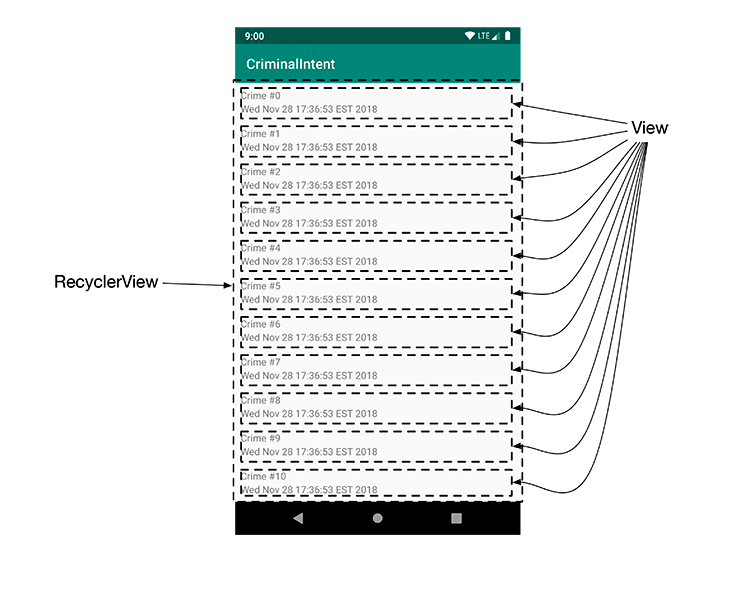
Each item displayed on the RecyclerView will have its own view hierarchy, exactly the way CrimeFragment has a view hierarchy for the entire screen. Specifically, the View object on each row will be a LinearLayout containing two TextViews.
You create a new layout for a list item view the same way you do for the view of an activity or a fragment. In the project tool window, right-click the res/layout directory and choose New → Layout resource file. Name the file list_item_crime, set the root element to LinearLayout, and click OK.
Update your layout file to add padding to the LinearLayout and to add the two TextViews, as shown in Listing 9.8.
Listing 9.8 Updating the list item layout file (layout/list_item_crime.xml)
<LinearLayout xmlns:android="http://schemas.android.com/apk/res/android"
              android:orientation="vertical"
              android:layout_width="match_parent"
              android:layout_height="match_parent">
              android:layout_height="wrap_content"
              android:padding="8dp">

    <TextView
            android:id="@+id/crime_title"
            android:layout_width="match_parent"
            android:layout_height="wrap_content"
            android:text="Crime Title"/>

    <TextView
            android:id="@+id/crime_date"
            android:layout_width="match_parent"
            android:layout_height="wrap_content"
            android:text="Crime Date"/>

</LinearLayout>
Take a look at the design preview, and you will see that you have created exactly one row of the completed product. In a moment, you will see how RecyclerView will create those rows for you.