Now that you have downloaded and parsed JSON from Flickr, your next task is to download and display images. In this chapter, you will learn how to use Looper, Handler, and HandlerThread to dynamically download and display photos in PhotoGallery.
The current PhotoHolder in PhotoGalleryFragment simply provides TextViews for the RecyclerView’s GridLayoutManager to display. Each TextView displays the caption of a GalleryItem.
To display photos, you are going to update PhotoHolder to provide ImageViews instead. Eventually, each ImageView will display a photo downloaded from the mUrl of a GalleryItem.
Start by creating a new layout file for your gallery items called list_item_gallery.xml. This layout will consist of a single ImageView (Figure 26.1).

These ImageViews will be managed by RecyclerView’s GridLayoutManager, which means that their width will vary.
Their height, on the other hand, will remain fixed.
To make the most of the ImageView’s space, you have set its scaleType to centerCrop.
This setting centers the image and then scales it up so that the smaller dimension is equal to the view and the larger one is cropped on both sides.
Next, update PhotoHolder to hold an ImageView instead of a TextView. Replace bindGalleryItem() with a method to set the ImageView’s Drawable.
Listing 26.1 Updating PhotoHolder (PhotoGalleryFragment.java)
private class PhotoHolder extends RecyclerView.ViewHolder {
    private TextView mTitleTextView ImageView mItemImageView;

    public PhotoHolder(View itemView) {
        super(itemView);

        mTitleTextView = (TextView) itemView;
        mItemImageView = (ImageView) itemView.findViewById(R.id.item_image_view);
    }

    public void bindGalleryItem(GalleryItem item) {
        mTitleTextView.setText(item.toString());
    }

    public void bindDrawable(Drawable drawable) {
        mItemImageView.setImageDrawable(drawable);
    }
}
Previously the PhotoHolder constructor assumed it would be passed a TextView directly.
The new version instead expects a view hierarchy that contains an ImageView with the resource ID R.id.item_image_view.
Update PhotoAdapter’s onCreateViewHolder(…) to inflate the gallery_item file you created and pass it to PhotoHolder’s constructor.
Listing 26.2 Updating PhotoAdapter’s onCreateViewHolder(…) (PhotoGalleryFragment.java)
public class PhotoGalleryFragment extends Fragment {
  ...
  private class PhotoAdapter extends RecyclerView.Adapter<PhotoHolder> {
        ...
        @Override
        public PhotoHolder onCreateViewHolder(ViewGroup viewGroup, int viewType) {
            TextView textView = new TextView(getActivity());
            return new PhotoHolder(textView);
            LayoutInflater inflater = LayoutInflater.from(getActivity());
            View view = inflater.inflate(R.layout.gallery_item, viewGroup, false);
            return new PhotoHolder(view);
        }
        ...
    }
  ...
}
Next, you will need a placeholder image for each ImageView to display until you download an image to replace it. Find bill_up_close.png in the solutions file and put it in res/drawable. (See the section called Adding an Icon in Chapter 2 for more on the solutions.)
Update PhotoAdapter’s onBindViewHolder(…) to set the placeholder image as the ImageView’s Drawable.
Listing 26.3 Binding default image (PhotoGalleryFragment.java)
public class PhotoGalleryFragment extends Fragment {
  ...
  private class PhotoAdapter extends RecyclerView.Adapter<PhotoHolder> {
        ...
        @Override
        public void onBindViewHolder(PhotoHolder photoHolder, int position) {
          GalleryItem galleryItem = mGalleryItems.get(position);
          photoHolder.bindGalleryItem(galleryItem);
          Drawable placeholder = getResources().getDrawable(R.drawable.bill_up_close);
          photoHolder.bindDrawable(placeholder);
        }
        ...
    }
  ...
}
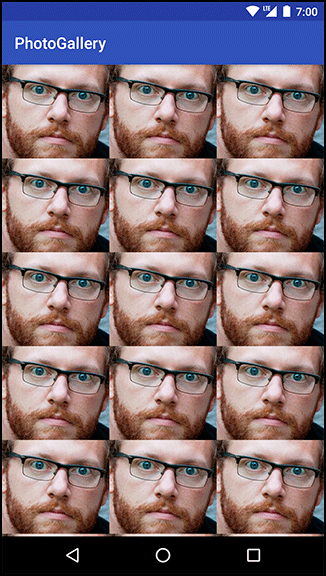
Run PhotoGallery, and you should see an array of close-up Bills, as in Figure 26.2.