
74. An Android TableLayout and TableRow Tutorial
When the work began on the next chapter of this book (“An Android Room Database and Repository Tutorial”) it was originally intended that it would include the steps to design the user interface layout for the Room database example application. It quickly became evident, however, that the best way to implement the user interface was to make use of the Android TableLayout and TableRow views and that this topic area deserved a self-contained chapter. As a result, this chapter will focus solely on the user interface design of the database application to be completed in the next chapter, and in doing so, take some time to introduce the basic concepts of table layouts in Android Studio.
74.1 The TableLayout and TableRow Layout Views
The purpose of the TableLayout container view is to allow user interface elements to be organized on the screen in a table format consisting of rows and columns. Each row within a TableLayout is occupied by a TableRow instance which, in turn, is divided into cells, with each cell containing a single child view (which may itself be a container with multiple view children).
The number of columns in a table is dictated by the row with the most columns and, by default, the width of each column is defined by the widest cell in that column. Columns may be configured to be shrinkable or stretchable (or both) such that they change in size relative to the parent TableLayout. In addition, a single cell may be configured to span multiple columns.
Consider the user interface layout shown in Figure 74-1:

From the visual appearance of the layout, it is difficult to identify the TableLayout structure used to design the interface. The hierarchical tree illustrated in Figure 74-2, however, makes the structure a little easier to understand:

Clearly, the layout consists of a parent LinearLayout view with TableLayout, LinearLayout and RecyclerView children. The TableLayout contains three TableRow children representing three rows in the table. The TableRows contain two child views, with each child representing the contents of a table column cell. The LinearLayout child view contains three Button children.
The layout shown in Figure 74-2 is the exact layout that is required for the database example that will be completed in the next chapter. The remainder of this chapter, therefore, will be used to work step by step through the design of this user interface using the Android Studio Layout Editor tool.
74.2 Creating the Room Database Project
Select the Create New Project quick start option from the welcome screen and, within the resulting new project dialog, choose the Fragment + ViewModel template before clicking on the Next button.
Enter RoomDemo into the Name field and specify com.ebookfrenzy.roomdemo as the package name. Before clicking on the Finish button, change the Minimum API level setting to API 26: Android 8.0 (Oreo) and the Language menu to Kotlin.
74.3 Converting to a LinearLayout
Locate the main_fragment.xml file in the Project tool window (app -> res -> layout) and double-click on it to load it into the Layout Editor tool. By default, Android Studio has used a ConstraintLayout as the root layout element in the user interface. This needs to be converted to a vertically oriented LinearLayout. With the Layout Editor tool in Design mode, locate the main ConstraintLayout component in the Component tree and right-click on it to display the menu shown in Figure 74-3 and select the Convert View... option:
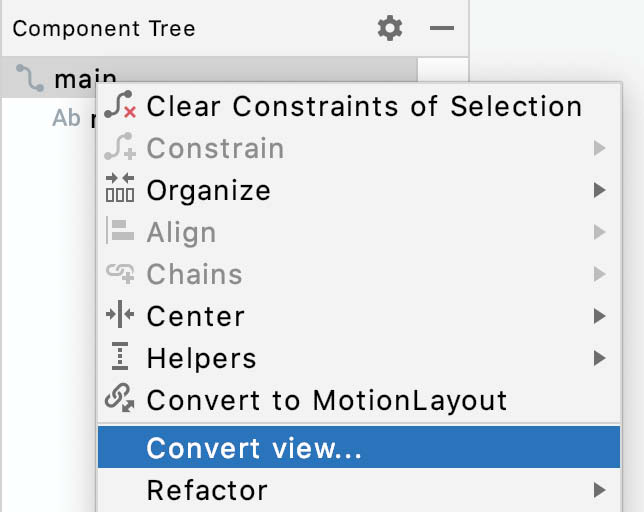
In the resulting dialog (Figure 74-4) select the option to convert to a LinearLayout before clicking on the Apply button:

By default, the layout editor will have converted the ConstraintLayout to a horizontal LinearLayout so select the layout component in the Component Tree window, refer to the Attributes tool window and change the orientation property to vertical:

Figure 74-5
With the conversion complete, select and delete the default TextView widget from the layout.
74.4 Adding the TableLayout to the User Interface
Remaining in the main_fragment.xml file and referring to the Layouts category of the Palette, drag and drop a TableLayout view so that it is positioned at the top of the LinearLayout canvas area.
Once these initial steps are complete, the Component Tree for the layout should resemble that shown in Figure 74-6.

Clearly, Android Studio has automatically added four TableRow instances to the TableLayout. Since only three rows are required for this example, select and delete the fourth TableRow instance. Additional rows may be added to the TableLayout at any time by dragging the TableRow object from the palette and dropping it onto the TableLayout entry in the Component Tree tool window.
With the TableLayout selected, use the Attributes tool window to change the layout_height property to wrap_content and layout_width to match_parent.
74.5 Configuring the TableRows
From within the Text section of the palette, drag and drop two TextView objects onto the uppermost TableRow entry in the Component Tree (Figure 74-7):

Select the left most TextView within the screen layout and, in the Attributes tool window, change the text property to “Product ID”. Repeat this step for the right most TextView, this time changing the text to “Not assigned” and specifying an ID value of productID.
Drag and drop another TextView widget onto the second TableRow entry in the Component Tree and change the text on the view to read “Product Name”. Locate the Plain Text object in the palette and drag and drop it so that it is positioned beneath the Product Name TextView within the Component Tree as outlined in Figure 74-8. With the EditText object selected, change the inputType property from textPersonName to none, delete the “Name” string from the text property and set the ID to productName.

Drag and drop another TextView and a Number (Decimal) Text Field onto the third TableRow so that the TextView is positioned above the EditText in the hierarchy. Change the text on the TextView to Product Quantity and the ID of the EditText object to productQuantity.
Shift-click to select all of the widgets in the layout as shown in Figure 74-9 below, and use the Attributes tool window to set the textSize property on all of the objects to 18sp:

Before proceeding, be sure to extract all of the text properties added in the above steps to string resources.
74.6 Adding the Button Bar to the Layout
The next step is to add a LinearLayout (Horizontal) view to the parent LinearLayout view, positioned immediately below the TableLayout view. Begin by clicking on the small disclosure arrow to the left of the TableLayout entry in the Component Tree so that the TableRows are folded away from view. Drag a LinearLayout (horizontal) instance from the Layouts section of the Layout Editor palette, drop it immediately beneath the TableLayout entry in the Component Tree panel and change the layout_height property to wrap_content:

Figure 74-10
Drag and drop three Button objects onto the new LinearLayout and assign string resources for each button that read “Add”, “Find” and “Delete” respectively. Buttons in this type of button bar arrangement should generally be displayed with a borderless style. For each button, use the Attributes tool window to change the style setting to Widget.AppCompat.Button.Borderless and the textColor attribute to @color/black. Change the IDs for the buttons to addButton, findButton and deleteButton and respectively.

With the new horizontal LinearLayout view selected in the Component Tree change the gravity property to center_horizontal so that the buttons are centered horizontally within the display.
In the Component Tree, click on the disclosure arrow to the right of the newly added horizontal LinearLayout entry to fold all of the children from view.
From the Containers section of the Palette, drag a RecyclerView instance and drop it onto the Component Tree so that it positioned beneath the button bar LinearLayout as shown in Figure 74-12. Take care to ensure the RecyclerView is added as a direct child of the parent vertical LinearLayout view and not as a child of the horizontal button bar LinearLayout.

When the RecyclerView is added to the layout, Android Studio may provide the option to add the corresponding library to the project build configuration as illustrated below. Click on the OK button to add this library before proceeding:
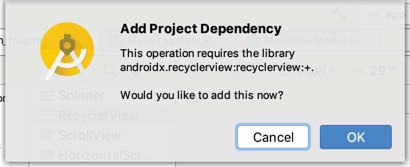
Figure 74-13
With the RecyclerView selected in the layout, change the ID of the view to product_recycler and set the layout_height property to match_parent. Before proceeding, check that the hierarchy of the layout in the Component Tree panel matches that shown in the following figure:

Figure 74-14
74.8 Adjusting the Layout Margins
All that remains is to adjust some of the layout settings. Begin by clicking on the first TableRow entry in the Component Tree panel so that it is selected. Hold down the Cmd/Ctrl-key on the keyboard and click on the second and third TableRows, the horizontal LinearLayout and the RecyclerView so that all five items are selected. In the Attributes panel, locate the layout_margin attributes category and, once located, change the value to 10dp as shown in Figure 74-15:

With margins set, the user interface should appear as illustrated in Figure 74-1.
The Android TableLayout container view provides a way to arrange view components in a row and column configuration. While the TableLayout view provides the overall container, each row and the cells contained therein are implemented via instances of the TableRow view. In this chapter, a user interface has been designed in Android Studio using the TableLayout and TableRow containers. The next chapter will add the functionality behind this user interface to implement the SQLite database capabilities using a repository and the Room persistence library.