
Chapter 8: Mastering Angular Forms
Getting user inputs is an integral part of almost any modern app that we use. Whether it is authenticating users, asking for feedback, or filling out business-critical forms, knowing how to implement and present forms to end users is always an interesting challenge. In this chapter, you'll learn about Angular forms and how you can create great user experiences using them.
Here are the recipes that we're going to cover in this chapter:
- Creating your first template-driven Angular form
- Form validation with template-driven forms
- Testing template-driven forms
- Creating your first Reactive form
- Form validation with Reactive forms
- Creating an asynchronous validator function
- Testing Reactive forms
- Using debounce with Reactive form control
- Writing your own custom form control using ControlValueAccessor
Technical requirements
For the recipes in this chapter, make sure you have Git and NodeJS installed on your machine. You also need to have the @angular/cli package installed, which you can do with npm install -g @angular/cli from your terminal. The code for this chapter can be found at https://github.com/PacktPublishing/Angular-Cookbook/tree/master/chapter08.
Creating your first template-driven Angular form
Let's start getting familiar with Angular forms in this recipe. In this one, you'll learn about the basic concepts of template-driven forms and will create a basic Angular form using the template-driven forms API.
Getting ready
The project for this recipe resides in chapter08/start_here/template-driven-forms:
- Open the project in Visual Studio Code.
- Open the terminal and run npm install to install the dependencies of the project.
- Once done, run ng serve -o.
This should open the app in a new browser tab and you should see the following view:
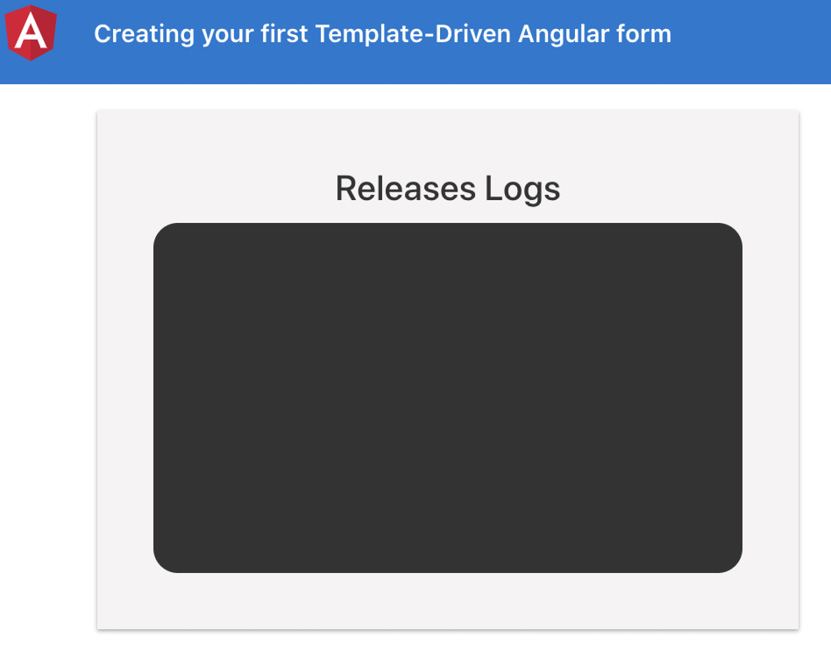
Figure 8.1 – Template-driven forms app running on http://localhost:4200
How to do it…
We have an Angular app that already has a release log component and a bunch of things set up, such as the ReleaseLog class under the src/app/classes folder. So, in this recipe, we'll create a template-driven form to allow the user to pick an app and submit a release version. Let's get started:
- First, open the terminal in the project's root and create a component for the release form as follows:
ng g c components/release-form
The command should create a new component in the src/app/components folder named ReleaseFormComponent.
- Add the newly created component to the template of VersionControlComponent and modify the version-control.component.html file as follows:
<div class="version-control">
<app-release-form></app-release-form>
<app-release-logs [logs]="releaseLogs"></app-release- logs>
</div>
Next, let's adjust some styles for the release form to be used within VersionControlComponent.
- Modify the version-control.component.scss file as follows:
:host {
...
min-width: 400px;
.version-control {
display: flex;
justify-content: center;
}
app-release-logs,
app-release-form {
flex: 1;
}
app-release-form {
margin-right: 20px;
}
}
We'll have two inputs in the ReleaseFormComponent template. One to select the app we want to release, and the second for the version we want to release.
- Let's modify the release-form.component.ts file to add the Apps enum as a local property that we can later use in the template:
import { Component, OnInit } from '@angular/core';
import { IReleaseLog } from 'src/app/classes/release-log';
import { Apps } from 'src/app/constants/apps';
...
export class ReleaseFormComponent implements OnInit {
apps = Object.values(Apps);
newLog: IReleaseLog = {
app: Apps.CALENDAR,
version: '0.0.0'
};
constructor() { }
ngOnInit(): void {
}
}
- Let's now add the template for our form. Modify the release-form.component.html file and add the following code:
<form>
<div class="form-group">
<label for="appName">Select App</label>
<select class="form-control" id="appName" required>
<option value="">--Choose--</option>
<option *ngFor="let app of apps" [value]="app">{{app}}</option>
</select>
</div>
<div class="form-group">
<label for="versionNumber">Version Number</label>
<input type="text" class="form-control" id="versionNumber" aria-describedby="versionHelp" placeholder="Enter version number">
<small id="versionHelp" class="form-text text-muted">Use semantic versioning (x.x.x)</small>
</div>
<button type="submit" class="btn btn-primary"> Submit</button>
</form>
- We now need to integrate the template-driven form. Let's add FormsModule to the app.module.ts file as follows:
...
import { ReleaseFormComponent } from './components/release-form/release-form.component';
import { FormsModule } from '@angular/forms';
@NgModule({
declarations: [...],
imports: [
BrowserModule,
AppRoutingModule,
FormsModule
],
...
})
export class AppModule { }
- We can now make our form work in the template. Let's modify the release-form.component.html file to create a template variable for the form, named #releaseForm. We will also use the [(ngModel)] binding for both the inputs against appropriate values for the newLog property as follows:
<form #releaseForm="ngForm">
<div class="form-group">
<label for="appName">Select App</label>
<select name="app" [(ngModel)]="newLog.app" class="form-control" id="appName" required>
<option value="">--Choose--</option>
<option *ngFor="let app of apps" [value]="app">{{app}}</option>
</select>
</div>
<div class="form-group">
<label for="versionNumber">Version Number</label>
<input name="version" [(ngModel)]="newLog.version" type="text" class="form-control" id="versionNumber" aria-describedby="versionHelp" placeholder="Enter version number">
<small id="versionHelp" class="form-text text- muted">Use semantic versioning (x.x.x)</small>
</div>
<button type="submit" class="btn btn-primary"> Submit</button>
</form>
- Create a method for when the form will be submitted. Modify the release-form.component.ts file to add a new method named formSubmit. When this method is called, we'll emit a new instance of ReleaseLog using an Angular @Output emitter as follows:
import { Component, EventEmitter, OnInit, Output } from '@angular/core';
import { NgForm } from '@angular/forms';
import { IReleaseLog, ReleaseLog } from 'src/app/classes/release-log';
...
export class ReleaseFormComponent implements OnInit {
@Output() newReleaseLog = new EventEmitter<ReleaseLog>();
apps = Object.values(Apps);
...
ngOnInit(): void {
}
formSubmit(form: NgForm): void {
const { app, version } = form.value;
const newLog: ReleaseLog = new ReleaseLog(app, version)
this.newReleaseLog.emit(newLog);
}
}
- Update the template now to use the formSubmit method on the form's submission and modify the release-form.component.html file as follows:
<form #releaseForm="ngForm" (ngSubmit)="formSubmit(releaseForm)">
...
</form>
- We now need to modify VersionControlComponent to be able to act on the new release log emitted. In order to do so, modify the version-control.component.html file to listen to the newReleaseLog output event from ReleaseFormComponent as follows:
<div class="version-control">
<app-release-form (newReleaseLog)="addNewReleaseLog ($event)"></app-release-form>
<app-release-logs [logs]="releaseLogs"></app-release- logs>
</div>
- Cool! Let's create the addNewReleaseLog method in the version-control.component.ts file and add the ReleaseLog received to the releaseLogs array. Your code should look as follows:
...
export class VersionControlComponent implements OnInit {
releaseLogs: ReleaseLog[] = [];
...
addNewReleaseLog(log: ReleaseLog) {
this.releaseLogs.unshift(log);
}
}
Awesome! Within a few minutes, we were able to create our first template-driven form in Angular. If you refresh the app now and try creating some releases, you should see something similar to the following:

Figure 8.2 – Template-driven forms app final output
Now that you know how the template-driven forms are created, let's see the next section to understand how it works.
How it works…
The key to using template-driven forms in Angular resides in FormsModule, the ngForm directive, by creating a template variable using the ngForm directive and using the [(ngModel)] two-way data binding along with the name attributes for inputs in the template. We began by creating a simple form with some inputs. Then, we added the FormsModule, which is necessary for using the ngForm directive and the [(ngModel)] two-way data binding. Once we added the module, we could use both the directive and the data binding with our newly created local property named newLog in the ReleaseFormComponent. Notice that it could be an instance of the ReleaseLog class, but we kept it as an object of the IReleaseLog type instead because we don't want the ReleaseLog class's message property as we don't use it. With the [(ngModel)] usages and the #releaseForm template variable in place, we could submit the form using the ngSubmit emitter of Angular's <form> directive. Notice that we pass the releaseForm variable to the formSubmit method, which makes it easier to test the functionality for us. Upon submitting the form, we use the form's value to create a new ReleaseLog item and we emit it using the newReleaseLog output emitter. Notice that if you provide an invalid version for the new release log, the app will throw an error and will not create a release log. This is because we validate the version in the constructor of the ReleaseLog class. Finally, when this newReleaseLog event is captured by VersionControlComponent, it calls the addNewReleaseLog method, which adds our newly created release log to the releaseLogs array. And since the releaseLogs array is passed as an @Input() to ReleaseLogsComponent, it immediately shows it right away.
See also
- Building a template-driven form in Angular: https://angular.io/guide/forms#building-a-template-driven-form
Form validation with template-driven forms
A great user experience is key to acquiring more users that love to use your applications. And using forms is one of those things that users don't really enjoy. To make sure that users spend the least amount of time filling in forms and are done with them faster, we can implement form validation to make sure that users enter the appropriate data a.s.a.p. In this recipe, we're going to look at how we can implement form validation in template-driven forms.
Getting ready
The project for this recipe resides in chapter08/start_here/tdf-form-validation:
- Open the project in Visual Studio Code.
- Open the terminal and run npm install to install the dependencies of the project.
- Once done, run ng serve -o.
This should open the app in a new browser tab and you should see the app as follows:
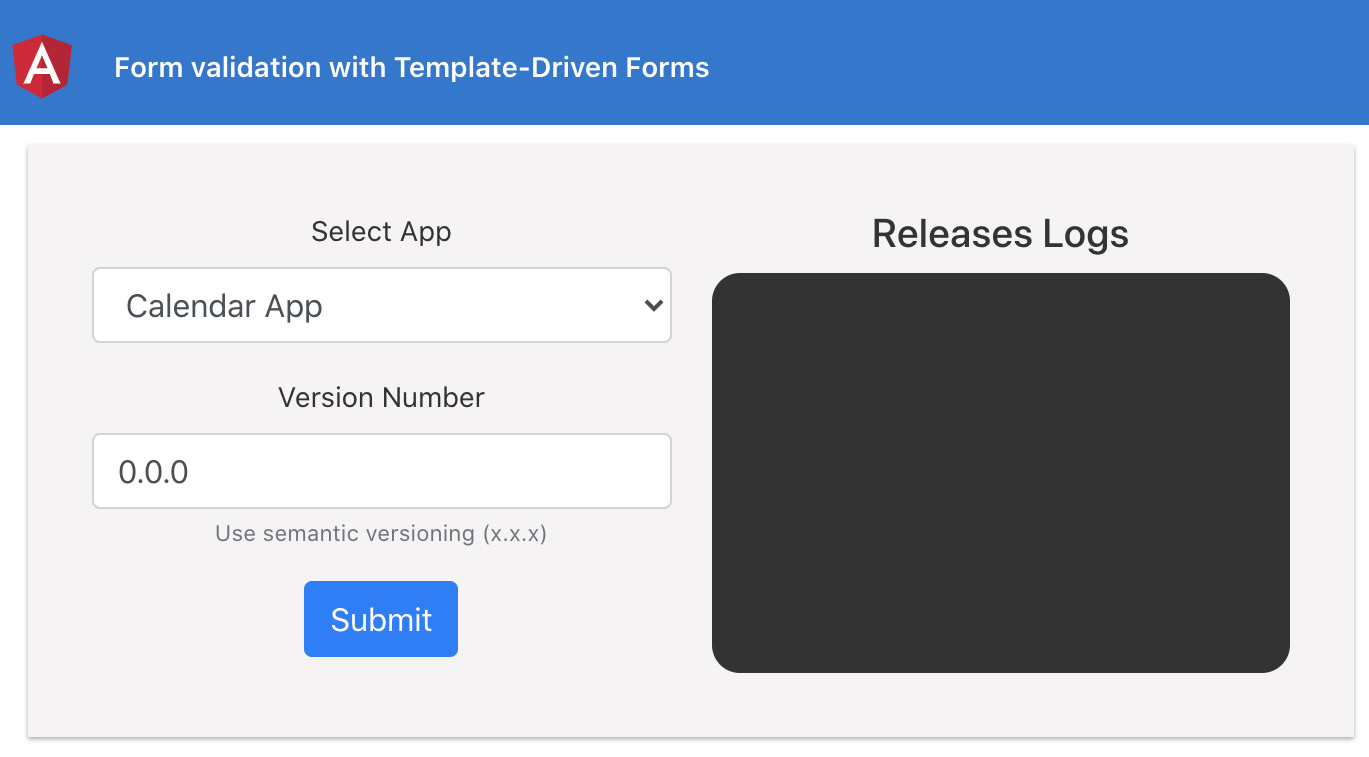
Figure 8.3 – TDF form validation app running on http://localhost:4200
Now that we have the app running locally, let's see the steps involved in this recipe in the next section.
How to do it…
We now have the app from the previous recipe, a simple Angular app with one template-driven form using the ngForm and ngModel directives. The form is used to create release logs. In this recipe, we're going to make this form better in terms of validating the input as the user types the input. Let's get started:
- First of all, we'll add some validators from the @angular/forms package that are part of the Reactive forms API. We'll apply the required validation to both inputs and a regex validation on the version input. We need to create template variables for both our inputs. We will name them nameInput and versionInput, respectively. Modify the code in the release-form.component.html file so that it looks as follows:
<form #releaseForm="ngForm" (ngSubmit)="formSubmit(releaseForm)">
<div class="form-group">
<label for="appName">Select App</label>
<select #nameInput="ngModel" name="app" [(ngModel)]="newLog.app" class="form-control" id="appName" required>
<option value="">--Choose--</option>
<option *ngFor="let app of apps" [value]="app">{{app}}</option>
</select>
</div>
<div class="form-group">
<label for="versionNumber">Version Number</label>
<input #versionInput="ngModel" name="version" [(ngModel)]="newLog.version" type="text" class="form-control" id="versionNumber" aria- describedby="versionHelp" placeholder="Enter version number" required>
<small id="versionHelp" class="form-text text-muted">Use semantic versioning (x.x.x)</small>
</div>
<button type="submit" class="btn btn-primary"> Submit</button>
</form>
- We can now use the template variables to apply validations. Let's start with the name input. In terms of validation, the name input shouldn't be empty and an app should be selected from the select box. Let's show a default Bootstrap alert when the input is invalid. Modify the code in the release-form.component.html file. It should look as follows:
<form #releaseForm="ngForm" (ngSubmit)="formSubmit(releaseForm)">
<div class="form-group">
<label for="appName">Select App</label>
<select #nameInput="ngModel" name="app" [(ngModel)]="newLog.app" class="form-control" id="appName" required>
<option value="">--Choose--</option>
<option *ngFor="let app of apps" [value]="app">{{app}}</option>
</select>
<div [hidden]="nameInput.valid || nameInput.pristine" class="alert alert-danger">
Please choose an app
</div>
</div>
<div class="form-group">
...
</div>
<button type="submit" class="btn btn-primary">Submit </button>
</form>
- To validate the version name input, we need to apply the SEMANTIC_VERSION regex from our src/app/constants/regexes.ts file. Add the constant as a local property in the ReleaseFormComponent class to the release-form.component.ts file as follows:
...
import { Apps } from 'src/app/constants/apps';
import { REGEXES } from 'src/app/constants/regexes';
...
export class ReleaseFormComponent implements OnInit {
@Output() newReleaseLog = new EventEmitter<ReleaseLog>();
apps = Object.values(Apps);
versionInputRegex = REGEXES.SEMANTIC_VERSION;
...
}
- Now, use versionInputRegex in the template to apply the validation and show the related error as well. Modify the release-form.component.html file so that the code looks as follows:
<form #releaseForm="ngForm" (ngSubmit)="formSubmit(releaseForm)">
<div class="form-group">
...
</div>
<div class="form-group">
<label for="versionNumber">Version Number</label>
<input #versionInput="ngModel" [pattern]="versionInputRegex" name="version" [(ngModel)]="newLog.version" type="text" class="form-control" id="versionNumber" aria- describedby="versionHelp" placeholder="Enter version number" required>
<small id="versionHelp" class="form-text text-muted">Use semantic versioning (x.x.x)</small>
<div
[hidden]="versionInput.value && (versionInput.valid || versionInput.pristine)"
class="alert alert-danger"
>
Please write an appropriate version number
</div>
</div>
<button type="submit" class="btn btn-primary"> Submit</button>
</form>
- Refresh the app and try to invalidate both inputs by selecting the first option named --Choose-- from the Select App drop-down menu and by emptying the version input field. You should see the following errors:

Figure 8.4 – Displaying input errors using ngModel and validation
- Next, we're going to add some styles to make our inputs more visual when it comes to validation. Let's add some styles to the release-form.component.scss file as follows:
:host {
/* Error messages */
.alert {
margin-top: 16px;
}
/* Valid form input */
.ng-valid[required], .ng-valid.required {
border-bottom: 3px solid #259f2b;
}
/* Invalid form input */
.ng-invalid:not(form) {
border-bottom: 3px solid #c92421;
}
}
- Finally, let's make the validation around the form submission. We'll disable the Submit button if the inputs do not have valid values. Let's modify the template in release-form.component.html as follows:
<form #releaseForm="ngForm" (ngSubmit)="formSubmit(releaseForm)">
<div class="form-group">
...
</div>
<div class="form-group">
...
</div>
<button type="submit" [disabled]="releaseForm.invalid" class="btn btn-primary">Submit</button>
</form>
If you refresh the app now, you'll see that the submit button is disabled whenever one or more inputs are invalid.
Great! You just learned how to validate template-driven forms and to make the overall user experience with template-driven forms slightly better.
How it works…
The core components of this recipe were the ngForm and ngModel directives. We could easily identify whether the submit button should be clickable (not disabled) or not based on whether the form is valid, that is, if all the inputs in the form have valid values. Note that we used the template variable created using the #releaseForm="ngForm" syntax on the <form> element. This is possible due to the ability of the ngForm directive to be exported into a template variable. Therefore, we were able to use the releaseForm.invalid property in the [disabled] binding of the submit button to conditionally disable it. We also showed the errors on individual inputs based on the condition that the input might be invalid. In this case, we show the Bootstrap alert element ( a <div> with the CSS class alert). We also use Angular's provided classes, ng-valid and ng-invalid, on the form inputs to highlight the input in a certain way depending on the validity of the input's value. What's interesting about this recipe is that we validated the app name's input by making sure it contains a non-falsy value where the first <option> of the <select> box has the value "". And what's even more fun is that we also validated the version name right when the user types it using the [pattern] binding on the input to a regex. Otherwise, we'd have to wait for the user to submit the form, and then it would have been validated. Thus, we're providing a great user experience by providing the errors as the user types the version.
See also
- Show and hide validation error messages (Angular Docs): https://angular.io/guide/forms#show-and-hide-validation-error-messages
- NgForm docs: https://angular.io/api/forms/NgForm
Testing template-driven forms
To make sure we build robust and bug-free forms for end users, it is a really good idea to have tests relating to your forms. It makes the code more resilient and less prone to errors. In this recipe, you'll learn how to test your template-driven forms using unit tests.
Getting ready
The project for this recipe resides in chapter08/start_here/testing-td-forms:
- Open the project in Visual Studio Code.
- Open the terminal and run npm install to install the dependencies of the project.
- Once done, run ng serve -o.
This should open the app in a new browser tab and you should see the app as follows:
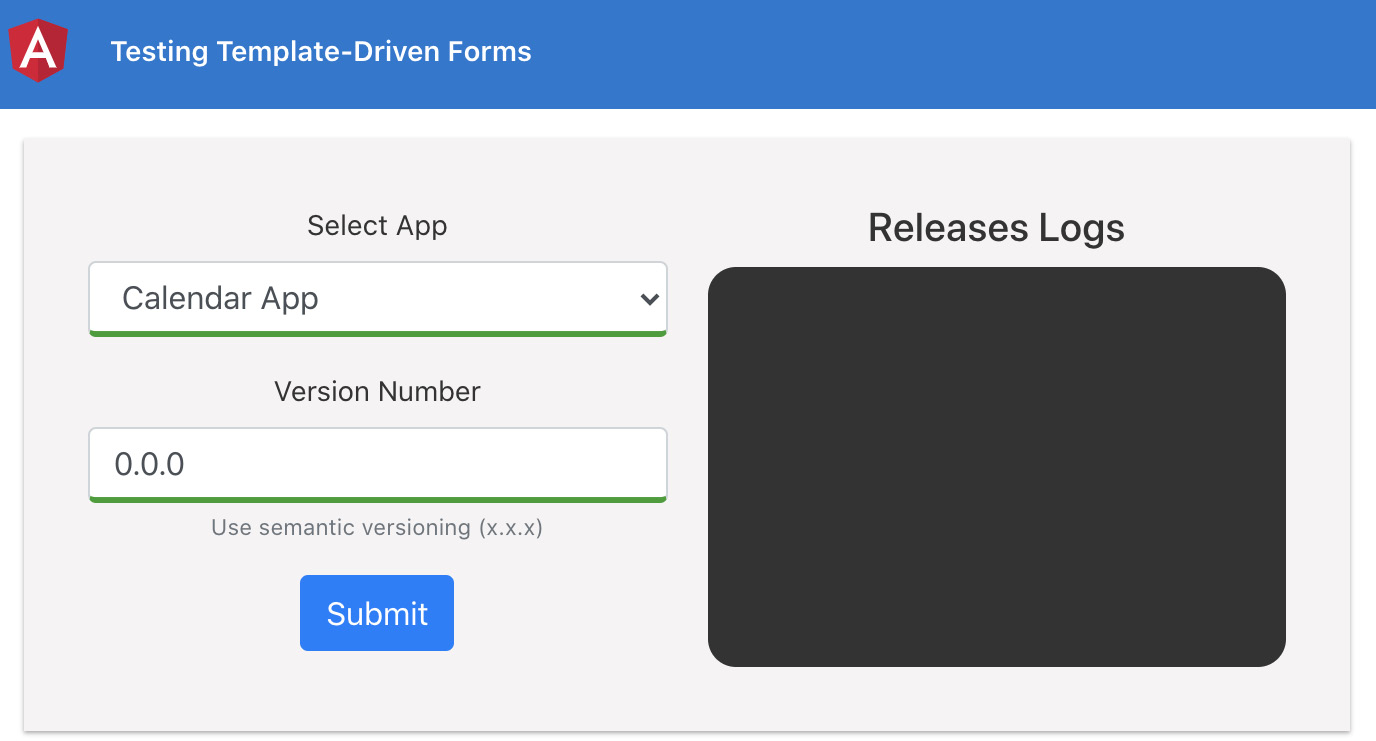
Figure 8.5 – The Testing Template-Driven Forms app running on http://localhost:4200
Now that we have the app running locally, let's see the steps involved in this recipe in the next section.
How to do it…
We have the app from the previous recipe that contains a template-driven form used to create release logs. The form also has validations applied to the inputs. Let's start looking into how we can test this form:
- First of all, run the following command to run the unit tests:
npm run test
Once the command is run, you should see a new instance of the Chrome window being opened that runs the unit tests. One test out of the six we have has failed. You will probably see something like the following in the automated Chrome window:

Figure 8.6 – Unit tests with Karma and Jasmine running in an automated Chrome window
- The ReleaseFormComponent > should create test is failing because we don't have FormsModule added to the tests. Notice the Export of name 'ngForm' not found error. Let's import FormsModule into the testing module's configuration in release-form.component.spec.ts as follows:
import { ComponentFixture, TestBed } from '@angular/core/testing';
import { FormsModule } from '@angular/forms';
import { ReleaseFormComponent } from './release-form.component';
describe('ReleaseFormComponent', () => {
...
beforeEach(async () => {
await TestBed.configureTestingModule({
declarations: [ ReleaseFormComponent ],
imports: [ FormsModule ]
})
.compileComponents();
});
...
it('should create', () => {
expect(component).toBeTruthy();
});
});
If you look at the tests now, you should see all the tests passing as follows:
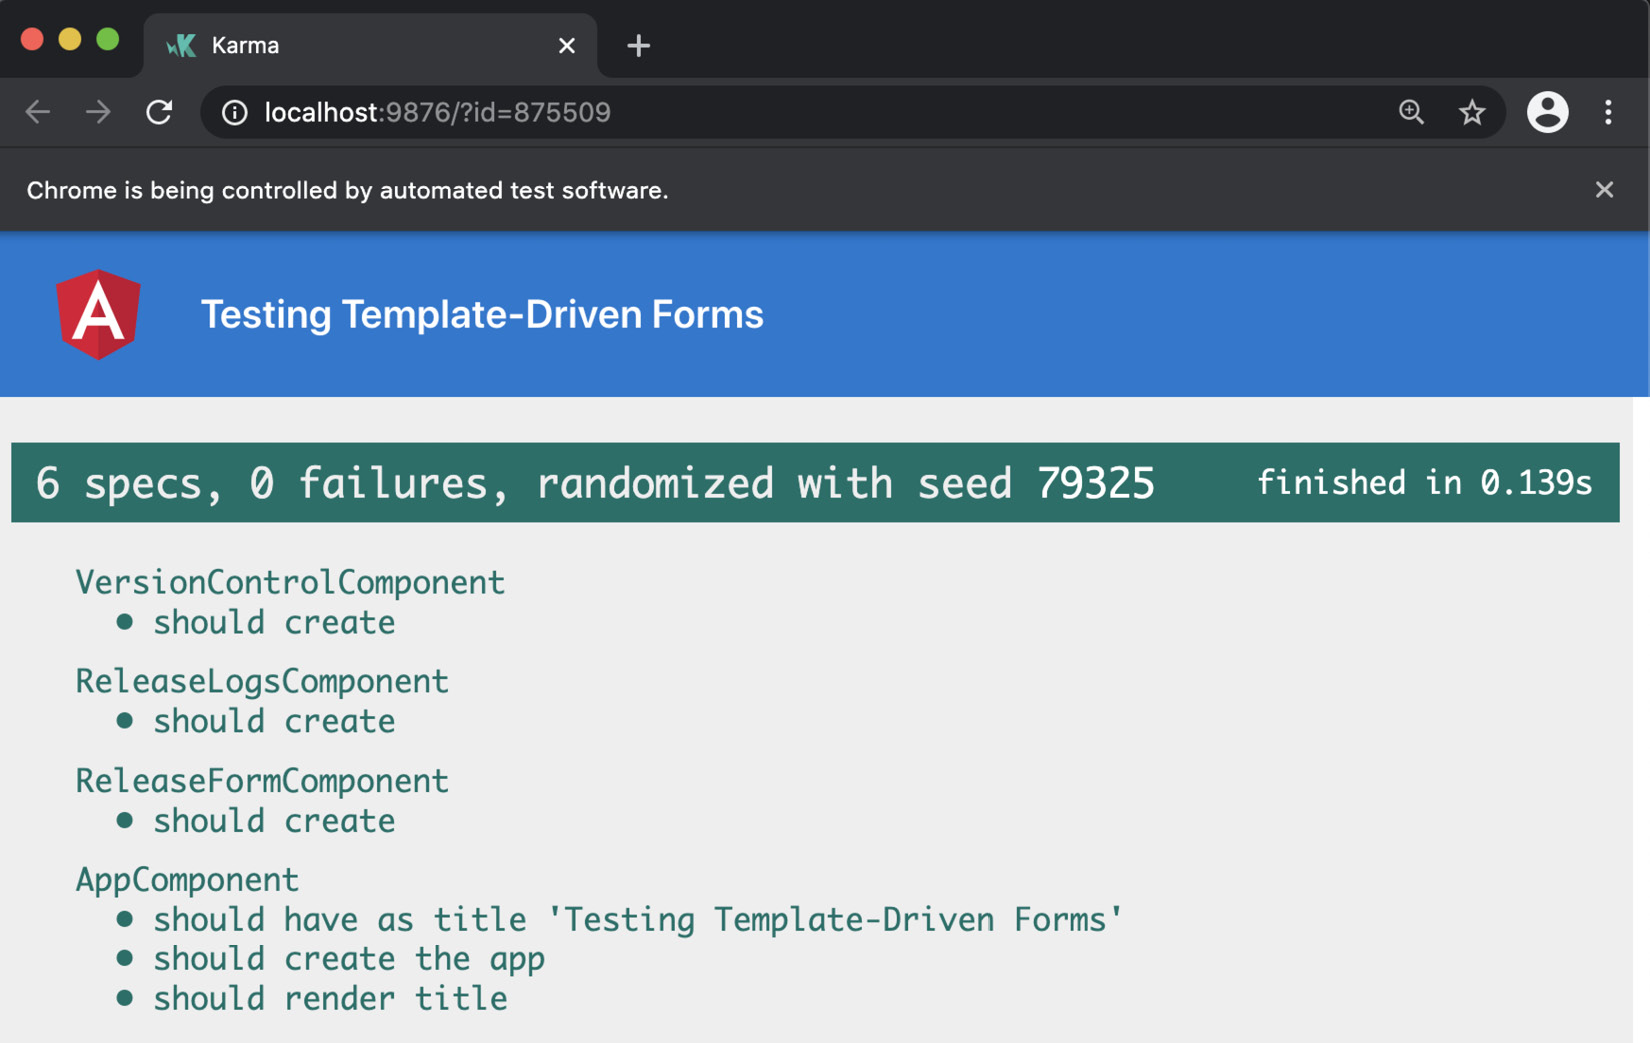
Figure 8.7 – All tests pass after importing FormsModule into the appropriate test
To test the form correctly, we'll add a couple of tests, one for successful input and one for each invalid input. For that, we need to access the form in our component since we're writing unit tests.
- Let's access the #releaseForm in our component class using the @ViewChild() decorator in the release-form.component.ts file as follows:
import { Component, EventEmitter, OnInit, Output, ViewChild } from '@angular/core';
...
@Component({
selector: 'app-release-form',
templateUrl: './release-form.component.html',
styleUrls: ['./release-form.component.scss']
})
export class ReleaseFormComponent implements OnInit {
@Output() newReleaseLog = new EventEmitter<ReleaseLog>();
@ViewChild('releaseForm') releaseForm: NgForm;
apps = Object.values(Apps);
versionInputRegex = REGEXES.SEMANTIC_VERSION;
...
}
- Let's add a new test now. We'll write a test that should validate the case for when both the inputs have valid values. Add the test to the release-form.component.spec.ts file as follows:
import { ComponentFixture, TestBed, fakeAsync } from '@angular/core/testing';
import { ReleaseFormComponent } from './release-form.component';
describe('ReleaseFormComponent', () => {
...
it('should create', () => {
expect(component).toBeTruthy();
});
it('should submit a new release log with the correct input values', fakeAsync( () => {
expect(true).toBeFalsy();
}));
});
- The new test is failing so far. Let's try to fill the values in the form, submit the button, and make sure that our @Output emitter named newReleaseLog emits the correct value from releaseForm. The content of the test should look as follows:
...
import { ReleaseLog } from 'src/app/classes/release-log';
...
it('should submit a new release log with the correct input values', fakeAsync(async () => {
const submitButton = fixture.nativeElement. querySelector('button[type="submit"]');
const CALENDAR_APP = component.apps[2];
spyOn(component.newReleaseLog, 'emit');
await fixture.whenStable(); // wait for Angular to configure the form
component.releaseForm.controls[ 'version'].setValue('2.2.2');
component.releaseForm.controls[ 'app'].setValue(CALENDAR_APP);
submitButton.click();
const expectedReleaseLog = new ReleaseLog(CALENDAR_ APP, '2.2.2');
expect(component.newReleaseLog.emit) .toHaveBeenCalledWith(expectedReleaseLog);
}));
When you save the file, you should see the new test passing with the expected values. It should appear as follows in the Chrome tab:

Figure 8.8 – New test for successful form submission passing
- Let's add a test for the case when we have an incorrect version provided in the form. The submit button should be disabled and we should have an error thrown by the formSubmit method. Add a new test to your release-form.component.spec.ts file as follows:
...
describe('ReleaseFormComponent', () => {
...
it('should submit a new release log with the correct input values', fakeAsync(async () => {
const submitButton = fixture.nativeElement. querySelector('button[type="submit"]');
const CALENDAR_APP = component.apps[2];
spyOn(component.newReleaseLog, 'emit');
await fixture.whenStable(); // wait for Angular to configure the form
const expectedError = 'Invalid version provided. Please provide a valid version as (major.minor.patch)';
component.releaseForm.controls[ 'version'].setValue('x.x.x');
component.releaseForm.controls[ 'app'].setValue(CALENDAR_APP);
expect(() => component.formSubmit(component. releaseForm))
.toThrowError(expectedError);
fixture.detectChanges();
expect(submitButton.hasAttribute( 'disabled')).toBe(true);
expect(component.newReleaseLog.emit) .not.toHaveBeenCalled();
}));
});
- Let's add our final test, which makes sure that the submit button is disabled when we have not selected an app for the release log. Add a new test to the release-form.component.spec.ts file as follows:
...
describe('ReleaseFormComponent', () => {
...
it('should disable the submit button when we don't have an app selected', fakeAsync(async () => {
const submitButton = fixture.nativeElement. querySelector('button[type="submit"]');
spyOn(component.newReleaseLog, 'emit');
await fixture.whenStable(); // wait for Angular to configure the form
component.releaseForm.controls[ 'version'].setValue('2.2.2');
component.releaseForm.controls[ 'app'].setValue(null);
fixture.detectChanges();
expect(submitButton.hasAttribute( 'disabled')).toBe(true);
expect(component.newReleaseLog.emit ).not.toHaveBeenCalled();
}));
});
If you look at the Karma tests window, you should see all the new tests passing as follows:
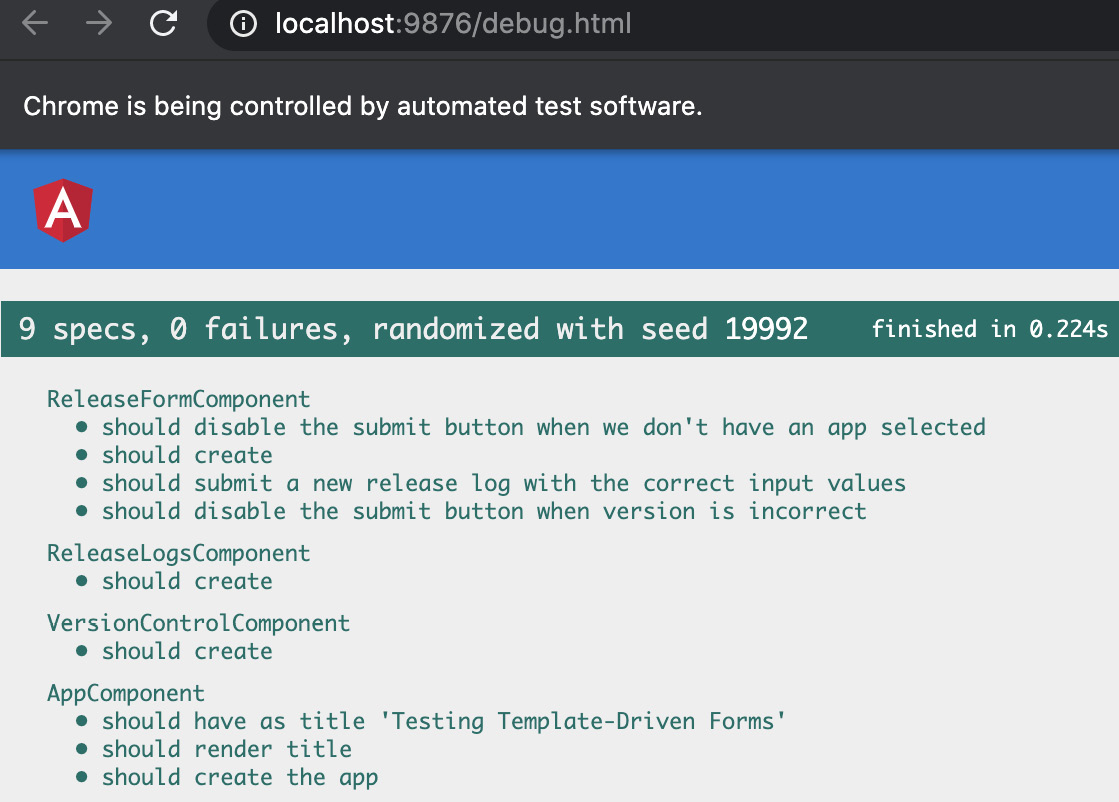
Figure 8.9 – All tests passing for the recipe
Awesome! You now know a bunch of techniques for testing your template-driven forms. Some of these techniques might still require some explanation. See the next section to understand how it all works.
How it works…
Testing template-driven forms can be a bit of a challenge as it depends on how complex the form is, what use cases you want to test, and how complex those use cases are. In our recipe, the first thing we did was to include FormsModule in the imports of the test file for ReleaseFormComponent. This makes sure that the tests know the ngForm directive and do not throw relevant errors. For the test with all the successful inputs, we spied on the newReleaseLog emitter's emit event defined in the ReleaseFormComponent class. This is because we know that when the inputs are correct, the user should be able to click the submit button, and as a result, inside the formSubmit method, the emit method of the newReleaseLog emitter will be called. Note that we're using fixture.whenStable() in each of our tests. This is to make sure that Angular has done the compilation and our ngForm, named #releaseForm, is ready. For the should disable the submit button when version is incorrect test, we rely on formSubmit to throw an error. This is because we know that an invalid version will cause an error in the constructor of the ReleaseLog class when creating a new release log. One interesting thing in this test is that we use the following code:
expect(() => component.formSubmit(component.releaseForm))
.toThrowError(expectedError);
The interesting thing here is that we needed to call the formSubmit method ourselves with releaseForm. We couldn't just do it by writing expect(component.formSubmit(component.releaseForm)).toThrowError(expectedError); because that would rather call the function directly there and would result in the error. So, we need to pass an anonymous function here that Jasmine will call and would expect this anonymous function to throw an error. And finally, we make sure that our submit button is enabled or disabled by first getting the button using a querySelector on fixture.nativeElement. We then check the disabled attribute on the submit button using submitButton.hasAttribute('disabled').
See also
- Testing template-driven forms: https://angular.io/guide/forms-overview#testing-template-driven-forms
Creating your first Reactive form
You've learned about template-driven forms in the previous recipes and are now confident in building Angular apps with them. Now guess what? Reactive forms are even better. Many known engineers and businesses in the Angular community recommend using Reactive forms. The reason is their ease of use when it comes to building complex forms. In this recipe, you'll build your first Reactive form and will learn its basic usage.
Getting ready
The project for this recipe resides in chapter08/start_here/reactive-forms:
- Open the project in Visual Studio Code.
- Open the terminal and run npm install to install the dependencies of the project.
- Once done , run ng serve -o.
- Click on the name of the first user and you should see the following view:

Figure 8.10 – The Reactive Form app running on http://localhost:4200
Now that we have the app running locally, let's see the steps involved in this recipe in the next section.
How to do it…
So far, we have an app that has ReleaseLogsComponent, which shows a bunch of release logs that we create. We also have ReleaseFormComponent, which has a form by means of which the release logs will be created. We now have to make our current form a Reactive form using the Reactive forms API. Let's get started:
- First of all, we need to import ReactiveFormsModule into the imports of our AppModule. Let's do it by modifying the app.module.ts file as follows:
...
import { ReleaseFormComponent } from './components/release-form/release-form.component';
import { ReactiveFormsModule } from '@angular/forms';
@NgModule({
declarations: [...],
imports: [
BrowserModule,
AppRoutingModule,
ReactiveFormsModule
],
providers: [],
bootstrap: [AppComponent]
})
export class AppModule { }
- Let's create the Reactive form now. We'll create a FormGroup in our ReleaseFormComponent class with the required controls. Modify the release-form.component.ts file as follows:
...
import { FormControl, FormGroup, Validators } from '@angular/forms';
import { REGEXES } from 'src/app/constants/regexes';
@Component(...)
export class ReleaseFormComponent implements OnInit {
apps = Object.values(Apps);
versionInputRegex = REGEXES.SEMANTIC_VERSION;
releaseForm = new FormGroup({
app: new FormControl('', [Validators.required]),
version: new FormControl('', [
Validators.required,
Validators.pattern(REGEXES.SEMANTIC_VERSION)
]),
})
...
}
- Now that we have the form named releaseForm in place, let's bind it to the form by using it in the template. Modify the release-form.component.html file as follows:
<form [formGroup]="releaseForm">
...
</form>
- Great! Now that we have the form group bound, we can also bind the individual form controls so that when we finally submit the form, we can get the value out for each individual form control. Modify the release-form.component.html file further as follows:
<form [formGroup]="releaseForm">
<div class="form-group">
...
<select formControlName="app" class="form-control" id="appName" required>
...
</select>
</div>
<div class="form-group">
...
<input formControlName="version" type="text" class="form-control" id="versionNumber" aria- describedby="versionHelp" placeholder="Enter version number">
<small id="versionHelp" class="form-text text-muted">Use semantic versioning (x.x.x)</small>
</div>
...
</form>
- Let's decide what will happen when we submit this form. We'll call a method named formSubmit in the template and pass releaseForm in it when the form is submitted. Modify the release-form.component.html file as follows:
<form [formGroup]="releaseForm" (ngSubmit)="formSubmit(releaseForm)">
...
</form>
- The formSubmit method doesn't yet exist. Let's create it now in the ReleaseFormComponent class. We'll also log the value on the console and emit the value using an @Output emitter. Modify the release-form.component.ts file as follows:
import { Component, OnInit, Output, EventEmitter } from '@angular/core';
...
import { ReleaseLog } from 'src/app/classes/release-log';
...
@Component(...)
export class ReleaseFormComponent implements OnInit {
@Output() newReleaseLog = new EventEmitter<ReleaseLog>();
apps = Object.values(Apps);
...
formSubmit(form: FormGroup): void {
const { app, version } = form.value;
console.log({app, version});
const newLog: ReleaseLog = new ReleaseLog(app, version)
this.newReleaseLog.emit(newLog);
}
}
If you refresh the app now, complete the form, and hit Submit, you should see a log on the console as follows:
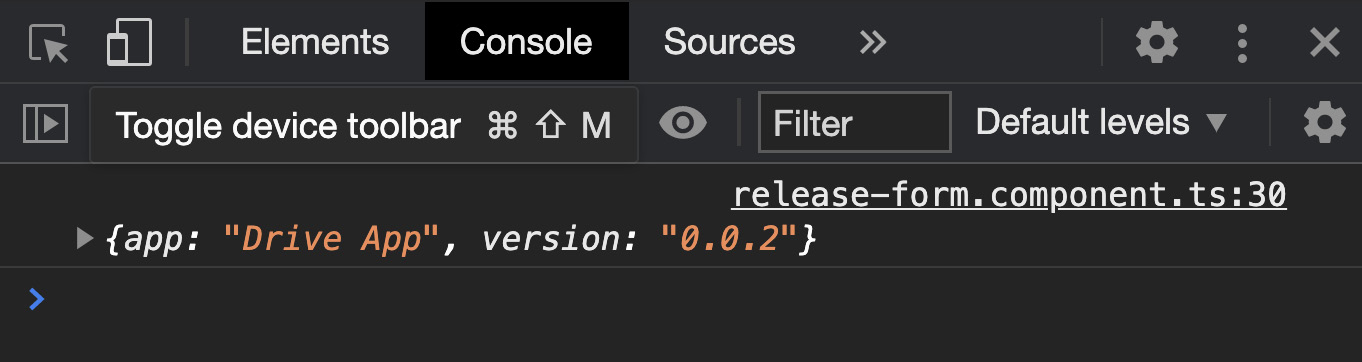
Figure 8.11 – Log displaying the values submitted using the Reactive form
- Since we've emitted the value of the newly created release log via the newReleaseLog output emitter, we can listen to this event in the version-control.component.html file and add the new log accordingly. Let's modify the file as follows:
<div class="version-control">
<app-release-form (newReleaseLog)="addNewReleaseLog ($event)"></app-release-form>
<app-release-logs [logs]="releaseLogs"> </app-release-logs>
</div>
- Refresh the app and you should see the new release log being added to the release logs view. You should see the logs on the console as well, as shown in the following screenshot:

Figure 8.12 – New logs being added to the logs view on form submission
Awesome! So, now you know how to create a basic Reactive form using the Reactive forms API. Refer to the next section to understand how it all works.
How it works…
The recipe begins with having a basic HTML form in our Angular app with no Angular magic bound to it. We first started importing ReactiveFormsModule in the AppModule. If you're using the Angular Language Service with the editor of your choice, you might see an error as you import ReactiveFormsModule into the app and don't bind it with a Reactive form, in other words, with a FormGroup. Well, that's what we did. We created a reactive form using the FormGroup constructor and created the relevant form controls using the FormControl constructor. We then listened to the ngSubmit event on the <form> element to extract the value of releaseForm. Once done, we emitted this value using the @Ouput() named newReleaseLog. Notice that we also defined the type of the value that this emitter will emit as IReleaseLog; it is good practice to define those. This emitter was required because ReleaseLogsComponent is a sibling of ReleaseFormComponent in the component's hierarchy. Therefore, we're communicating through the parent component, VersionControlComponent. Finally, we listen to the newReleaseLog event's emission in the VersionControlComponent template and add a new log to the releaseLogs array via the addNewReleaseLog method. And this releaseLogs array is being passed to ReleaseLogsComponent, which displays all the logs as they're added.
See also
- Angular's guide to Reactive forms: https://angular.io/guide/reactive-forms
Form validation with Reactive forms
In the previous recipe, you learned how to create a Reactive form. Now, we're going to learn how to test them. In this recipe, you'll learn some basic principles of testing Reactive forms. We're going to use the same example from the previous recipe (the release logs app) and will implement a number of test cases.
Getting ready
The project that we are going to work with resides in chapter08/start_here/validating-reactive-forms inside the cloned repository:
- Open the project in Visual Studio Code.
- Open the terminal and run npm install to install the dependencies of the project.
- Once done, run ng serve -o.
This should open the app in a new browser tab and you should see it as follows:
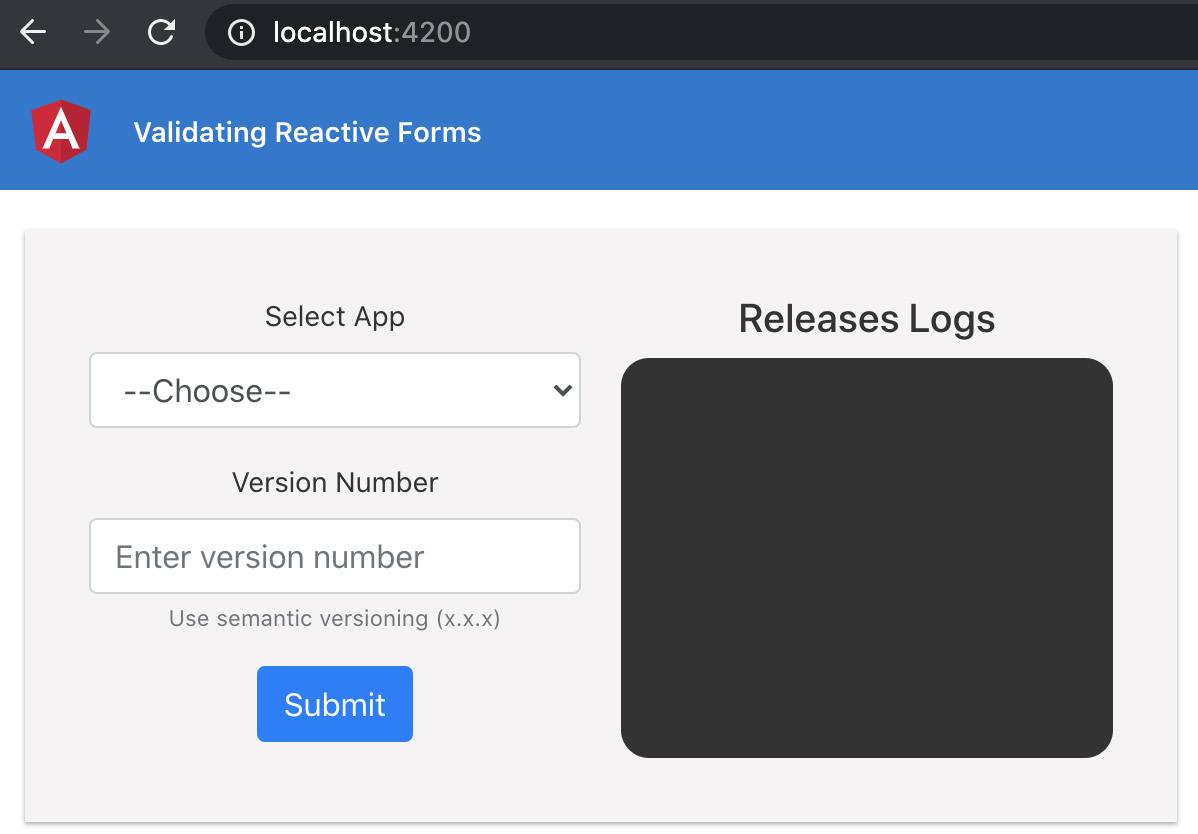
Figure 8.13 – The Validating Reactive Forms app running on http://localhost:4200
Now that we have the app running locally, let's see the steps involved in this recipe in the next section.
How to do it…
For this recipe, we're using the Release Logs application that has the Reactive form implemented already, although we don't have any sort of validation on the inputs so far. If you just select an app and submit the form, you'll see an error on the console as follows:
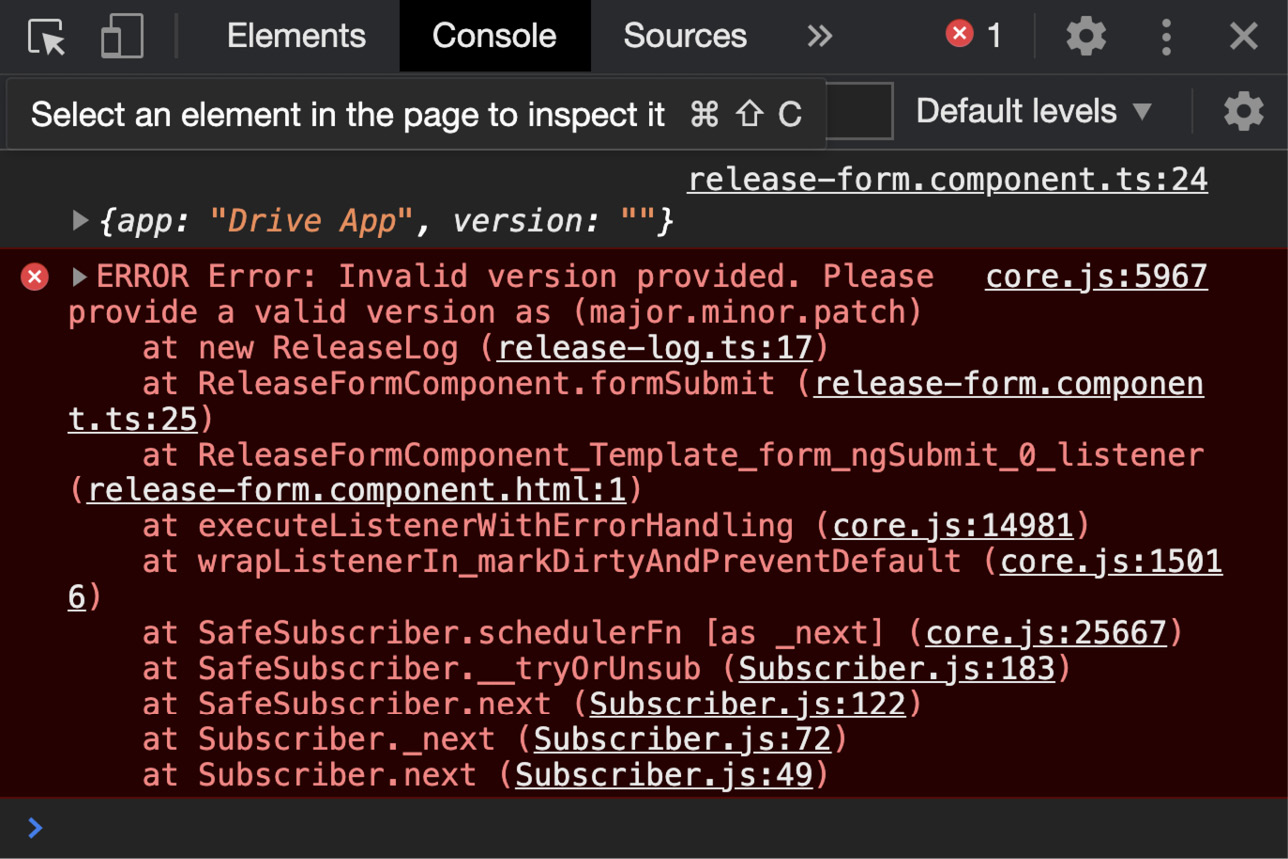
Figure 8.14 – Error when submitting the Reactive form app without form validations
We're going to incorporate some form validations to enhance the user experience and to make sure that the form can't be submitted with invalid input. Let's begin:
- We'll first add some validations from the @angular/forms package, which are part of the Reactive Forms API. We'll apply the required validator on both inputs and the pattern validator on the version form control. Update the release-form.component.ts file as follows:
import { Component, OnInit, Output, EventEmitter } from '@angular/core';
import { FormControl, FormGroup, Validators } from '@angular/forms';
...
import { REGEXES } from 'src/app/constants/regexes';
@Component({...})
export class ReleaseFormComponent implements OnInit {
...
versionInputRegex = REGEXES.SEMANTIC_VERSION;
releaseForm = new FormGroup({
app: new FormControl('', Validators.required),
version: new FormControl('', [
Validators.required,
Validators.pattern(this.versionInputRegex)
]),
})
...
}
- Now we'll add the hints to the view to show the user errors when an invalid input is selected. Modify the release-form.component.html file as follows:
<form [formGroup]="releaseForm" (ngSubmit)="formSubmit(releaseForm)">
<div class="form-group">
<label for="appName">Select App</label>
<select formControlName="app" class="form-control" id="appName">
...
</select>
<div
[hidden]="releaseForm.get('app').valid || releaseForm.get('app').pristine"
class="alert alert-danger">
Please choose an app
</div>
</div>
<div class="form-group">
...
<small id="versionHelp" class="form-text text-muted">Use semantic versioning (x.x.x)</small>
<div [hidden]="releaseForm.get('version').valid || releaseForm.get('version').pristine"
class="alert alert-danger">
Please write an appropriate version number
</div>
</div>
<button type="submit" class="btn btn-primary">Submit </button>
</form>
- We'll also add some styles to show the errors with a better UI. Add the following styles to the release-form.component.scss file:
:host {
/* Error messages */
.alert {
margin-top: 16px;
}
/* Valid form input */
.ng-valid:not(form),
.ng-valid.required {
border-bottom: 3px solid #259f2b;
}
/* Invalid form input */
.ng-invalid:not(form) {
border-bottom: 3px solid #c92421;
}
}
Refresh the app and you should see the inputs with red borders when the input values are wrong. The errors once you enter or select an invalid input will look as follows:

Figure 8.15 – Red borders shown on invalid input values
- Finally, let's make the validation around the form submission. We'll disable the Submit button if the inputs do not have valid values. Let's modify the template in release-form.component.html as follows:
<form [formGroup]="releaseForm" (ngSubmit)="formSubmit(releaseForm)">
<div class="form-group">
...
</div>
<div class="form-group">
...
</div>
<button type="submit" [disabled]="releaseForm.invalid" class="btn btn-primary">Submit</button>
</form>
If you refresh the app now, you'll see that the submit button is disabled whenever one or more inputs are invalid.
And that concludes the recipe. Let's look at the next section to see how it works.
How it works…
We started the recipe by adding the validators, and Angular has got a bunch of validators out of the box, including Validators.email, Validators.pattern, and Validators.required. We used the required validator with the pattern validator in our recipe for the inputs for the app name and the version, respectively. After that, to show the hints/errors for invalid inputs, we added some conditional styles to show a border-bottom on the inputs. We also added some <div> elements with class="alert alert-danger", which are basically Bootstrap alerts to show the errors on invalid values for the form controls. Notice that we're using the following pattern to hide the error elements:
[hidden]="releaseForm.get(CONTROL_NAME).valid || releaseForm.get(CONTROL_NAME).pristine"
We're using the condition with .pristine to make sure that as soon as the user selects the correct input and the input is modified, we hide the error again so that it doesn't show while the user is typing in the input or making another selection. Finally, we made sure that the form cannot even be submitted if the values of the form controls are invalid. We disabled the submit button using [disabled]="releaseForm.invalid".
See also
- Angular docs for validating Reactive forms: https://angular.io/guide/reactive-forms#validating-form-input
Creating an asynchronous validator function
Form validations are pretty straightforward in Angular, the reason being the super-awesome validators that Angular provides out of the box. These validators are synchronous, meaning that as soon as you change the input, the validators kick in and provide you with information about the validity of the values right away. But sometimes, you might rely on some validations from a backend API, for instance. These situations would require something called asynchronous validators. In this recipe, you're going to create your first asynchronous validator.
Getting ready
The project that we are going to work with resides in chapter08/start_here/asynchronous-validator inside the cloned repository:
- Open the project in Visual Studio Code.
- Open the terminal and run npm install to install the dependencies of the project.
- Once done, run ng serve -o.
This should open the app in a new browser tab and you should see something like the following:
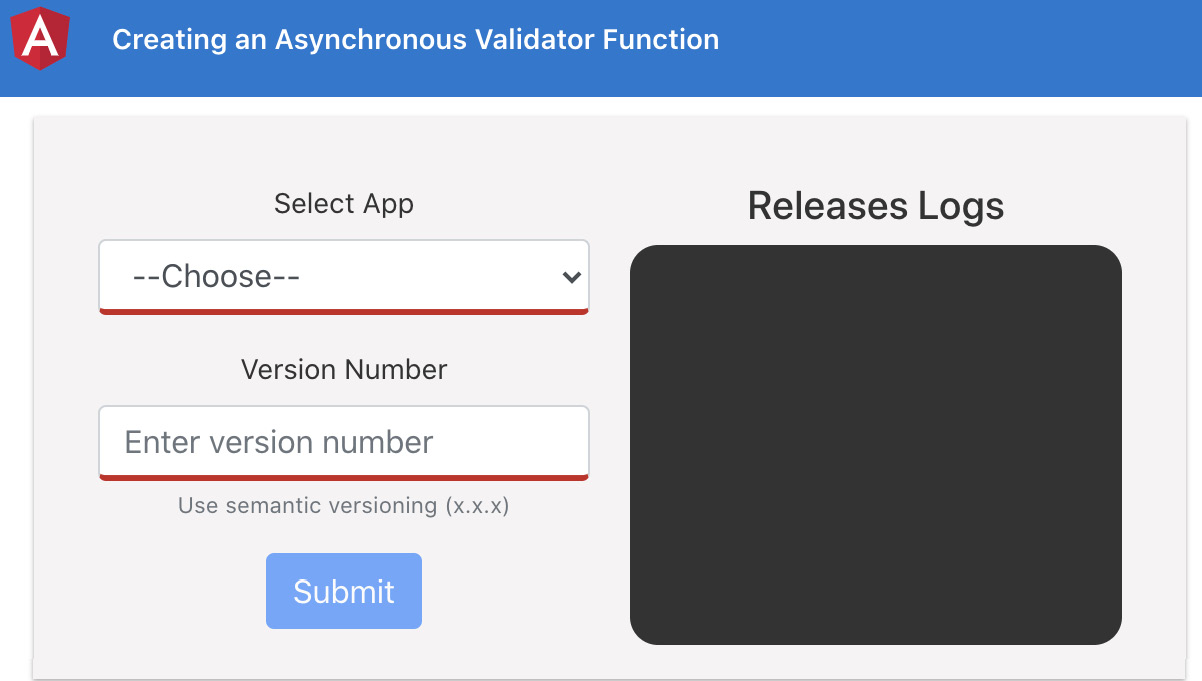
Figure 8.16 – Asynchronous validators app running on http://localhost:4200
Now that we have the app running, let's see the steps involved in this recipe in the next section.
How to do it…
We already have some things set up in the release logs app. We have a data.json file residing in the src/assets folder that holds the versions for each of our target apps for the release logs. We'll create an async validator to make sure that the new releases for each of the applications have a greater version than that specified in the data.json file. Let's begin:
- First, we're going to create the async validator function for the recipe. Let's create a method named versionValidator in the VersionService class in the version.service.ts file as follows:
...
import { compareVersion } from 'src/app/utils';
import { AbstractControl, AsyncValidatorFn, ValidationErrors } from '@angular/forms';
import { Observable, of } from 'rxjs';
@Injectable({...})
export class VersionService {
...
versionValidator(appNameControl: AbstractControl): AsyncValidatorFn {
// code here
}
...
}
- We'll now define the content of the validator function. Let's modify the versionValidator method as follows:
versionValidator(appNameControl: AbstractControl): AsyncValidatorFn {
return (control: AbstractControl): Observable<ValidationErrors> => {
// if we don't have an app selected, do not validate
if (!appNameControl.value) {
return of(null);
}
return this.getVersionLog().pipe(
map(vLog => {
const newVersion = control.value;
const previousVersion = vLog[appNameControl.value];
// check if the new version is greater than previous version
return compareVersion(newVersion, previousVersion) === 1 ? null : {
newVersionRequired: previousVersion
};
}))
}
}
- Now that we have the validator function in place, let's add that to the form control for the version number. Let's modify the release-form.component.ts file as follows:
import { Component, OnInit, Output, EventEmitter } from '@angular/core';
import { FormControl, FormGroup, Validators } from '@angular/forms';
import { IReleaseLog, ReleaseLog } from 'src/app/classes/release-log';
import { Apps } from 'src/app/constants/apps';
import { REGEXES } from 'src/app/constants/regexes';
import { VersionService } from 'src/app/core/services/version.service';
@Component({...})
export class ReleaseFormComponent implements OnInit {
...
constructor(private versionService: VersionService) { }
ngOnInit(): void {
this.releaseForm.get('version') .setAsyncValidators(
this.versionService.versionValidator(
this.releaseForm.get('app')
)
)
}
...
}
- We will now use the validator to enhance the user's experience of the form by modifying the release-form.component.html file. For ease of usage, let's wrap the content inside an <ng-container> element using the *ngIf directive, and create a variable within the template for the version form control as follows:
<form [formGroup]="releaseForm" (ngSubmit)="formSubmit(releaseForm)">
<ng-container *ngIf="releaseForm.get('version') as versionControl">
<div class="form-group">
...
</div>
<div class="form-group">
...
</div>
<button type="submit" [disabled]="releaseForm. invalid" class="btn btn-primary">Submit</button>
</ng-container>
</form>
- Let's now add the error message. We'll use our custom error, newVersionRequired, from the validator function to show the error when the specified version isn't newer than the previous version. Modify the release-form.component.html file as follows:
<form [formGroup]="releaseForm" (ngSubmit)="formSubmit(releaseForm)">
<ng-container *ngIf="releaseForm.get('version') as versionControl">
<div class="form-group">
...
</div>
<div class="form-group">
<label for="versionNumber">Version Number</label>
<input formControlName="version" type="text" class="form-control" id="versionNumber" aria-describedby="versionHelp" placeholder="Enter version number">
...
<div *ngIf="(versionControl. getError('newVersionRequired') && !versionControl.pristine)"
class="alert alert-danger">
The version number should be greater than the last version '{{versionControl. errors['newVersionRequired']}}'
</div>
</div>
<button [disabled]="releaseForm.invalid" class="btn btn-primary">Submit</button>
</ng-container>
</form>
Try to select an app and add a lower version number and you should now see the error as follows:

Figure 8.17 – Error being shown when a lower version number is provided
- One issue right now is that we are able to submit the form while the asynchronous validation is in progress. That's because Angular, by default, marks the error as null until the validation is done. To tackle this, we can show a loading message instead of the submit button in the template. Modify the release-form.component.html file as follows:
<form [formGroup]="releaseForm" (ngSubmit)="formSubmit(releaseForm)">
<ng-container *ngIf="releaseForm.get('version') as versionControl">
<div class="form-group">
...
</div>
<div class="form-group">
...
</div>
<button *ngIf="versionControl.status !== 'PENDING'; else loader" type="submit" [disabled]="releaseForm.invalid" class="btn btn-primary">Submit</button>
</ng-container>
<ng-template #loader>
Please wait...
</ng-template>
</form>
If you refresh the app, select an app, and type a valid version, you should see the Please wait… message as follows:

Figure 8.18 – Loader message while async validation is in progress
- We still have an issue where the user can type and press Enter quickly to submit the form. To prevent this from happening, let's add a check in our formSubmit method in the release-form.component.ts file as follows:
formSubmit(form: FormGroup): void {
if (form.get('version').status === 'PENDING') {
return;
}
const { app, version } = form.value;
...
}
- Finally, we have another issue to handle. If we select a valid version number and change the app, we can still submit the form with the entered version number although it is logically wrong. To handle this, we should update the validation of the 'version' form control whenever the value of the 'app' form control changes. To do that, modify the release-form.component.ts file as follows:
import { Component, OnInit, Output, EventEmitter, OnDestroy } from '@angular/core';
...
import { takeWhile } from 'rxjs/operators';
...
@Component({...})
export class ReleaseFormComponent implements OnInit, OnDestroy {
@Output() newReleaseLog = new EventEmitter<IReleaseLog>();
isComponentAlive = false;
apps = Object.values(Apps);
...
ngOnInit(): void {
this.isComponentAlive = true;
this.releaseForm.get ('version').setAsyncValidators(...)
this.releaseForm.get('app').valueChanges
.pipe(takeWhile(() => this.isComponentAlive))
.subscribe(() => {
this.releaseForm.get ('version').updateValueAndValidity();
})
}
ngOnDestroy() {
this.isComponentAlive = false;
}
...
}
Cool! So, you now know how to create an asynchronous validator function in Angular for form validation within Reactive forms. Since you've finished the recipe, refer to the next section to see how this works.
How it works…
Angular provides a really easy way to create async validator functions, and they're pretty handy too. In this recipe, we started by creating the validator function named versionValidator. Notice that we have an argument named appNameControl for the validator function. This is because we want to get the app name for which we are validating the version number. Also notice that we have the return type set to AsyncValidatorFn, which is required by Angular. The validator function is supposed to return an AsyncValidatorFn, which means it will return a function (let's call it the inner function), which receives an AbstractControl and returns an Observable of ValidatorErrors. Inside the inner function, we use the getVersionLog() method from VersionService to fetch the data.json file using the HttpClient service. Once we get the version from data.json for the specific app selected, we compare the version entered in the form with the value from data.json to validate the input. Notice that instead of just returning a ValidationErrors object with the newVersionRequired property set to true, we actually set it to previousVersion so that we can use it later to show it to the user.
After creating the validator function, we attached it to the form control for the version name by using the FormControl.setAsyncValidators() method in the ReleaseFormComponent class. We then used the validation error named newVersionRequired in the template to show the error message, along with the version from the data.json file.
We also needed to handle the case that while the validation is in progress, the form control is valid until the validation is finished. This allows us to submit the form while the validation for the version name was in progress. We handle it by hiding the submit button during the validation process by checking whether the value of FormControl.status is 'PENDING'. We hide the submit button in that case and show the Please wait… message in the meantime. Note that we also add some logic in the formSubmit method of the ReleaseFormComponent class to check whether FormControl.status is 'PENDING' for the version number, in which case, we just do a return;.
One more interesting thing in the recipe is that if we added a valid version number and changed the app, we could still submit the form. We handle that by adding a subscription to .valueChanges of the 'app' form control, so whenever that happens, we trigger another validation on the 'version' form control using the .updateValueAndValidity() method.
See also
- AsyncValidator Angular docs: https://angular.io/api/forms/AsyncValidator#provide-a-custom-async-validator-directive
Testing Reactive forms
To make sure we build robust and bug-free forms for end users, it is a really good idea to have tests around your forms. It makes the code more resilient and less prone to errors. In this recipe, you'll learn how to test your template-driven forms using unit tests.
Getting ready
The project for this recipe resides in chapter08/start_here/testing-reactive-forms:
- Open the project in Visual Studio Code.
- Open the terminal and run npm install to install the dependencies of the project.
- Once done, run ng serve -o.
This should open the app in a new browser tab, and you should see the app as follows:

Figure 8.19 – The Testing Reactive Forms app running on http://localhost:4200
Now that we have the app running locally, let's see the steps involved in this recipe in the next section.
How to do it…
We have the Release Logs application that has a Reactive form implemented with some validations. In this recipe, we're going to implement some tests for the forms. Let's get started:
- First of all, run the following command to run the unit tests in a separate terminal window:
yarn test
Once the command is run, you should see a new instance of the Chrome window being opened that runs the tests as follows:

Figure 8.20 – Unit tests with Karma and Jasmine running in an automated Chrome window
- Let's add our first test for the case when all the inputs have a valid value. In this case, we should have the form submitted and the form's value emitted through the emitter of the newReleaseLog output. Modify the release-form.component.spec.ts file as follows:
import { ComponentFixture, TestBed } from '@angular/core/testing';
import { ReleaseLog } from 'src/app/classes/release-log';
...
describe('ReleaseFormComponent', () => {
...
it('should submit a new release log with the correct input values', (() => {
const app = component.apps[2];
const version = '2.2.2';
const expectedReleaseLog = new ReleaseLog(app, version);
spyOn(component.newReleaseLog, 'emit');
component.releaseForm.setValue({ app, version });
component.formSubmit(component.releaseForm);
expect(component.newReleaseLog.emit) .toHaveBeenCalledWith(expectedReleaseLog);
}));
});
If you look at the tests now, you should the new test passing as follows:

Figure 8.21 – Test case passing for the successful input
- Let's add a test for the case when we have an incorrect version provided in the form. The submit button should be disabled and we should have an error thrown by the formSubmit method. Add a new test to your release-form.component.spec.ts file as follows:
...
describe('ReleaseFormComponent', () => {
...
it('should throw an error for a new release log with the incorrect version values', (() => {
const submitButton = fixture.nativeElement. querySelector('button[type="submit"]');
const app = component.apps[2];
const version = 'x.x.x';
spyOn(component.newReleaseLog, 'emit');
const expectedError = 'Invalid version provided. Please provide a valid version as (major.minor. patch)';
component.releaseForm.setValue({ app, version });
expect(() => component.formSubmit(component. releaseForm))
.toThrowError(expectedError);
expect(submitButton.hasAttribute( 'disabled')).toBe(true);
expect(component.newReleaseLog.emit ).not.toHaveBeenCalled();
}));
});
- Let's add our final test, which makes sure that the submit button is disabled when we have not selected an app for the release log. Add a new test to the release-form.component.spec.ts file as follows:
...
describe('ReleaseFormComponent', () => {
...
it('should disable the submit button when we don't have an app selected', (() => {
const submitButton = fixture.nativeElement. querySelector('button[type="submit"]');
spyOn(component.newReleaseLog, 'emit');
const app = '';
const version = '2.2.2';
component.releaseForm.setValue({ app, version });
submitButton.click();
fixture.detectChanges();
expect(submitButton.hasAttribute( 'disabled')).toBe(true);
expect(component.newReleaseLog.emit ).not.toHaveBeenCalled();
}));
});
If you look at the Karma tests window, you should see all the new tests passing as follows:

Figure 8.22 – All tests passing for the recipe
Great! You now know how to write some essential tests for Reactive forms. Refer to the next section to understand how it all works.
How it works…
Testing Reactive forms doesn't even require importing ReactiveFormsModule into the test module as of Angular 10. For all the tests in our recipe, we spied on the newReleaseLog emitter's emit event defined in the ReleaseFormComponent class. This is because we know that when the inputs are correct, the user should be able to click the submit button, and as a result, inside the formSubmit method, the emit method of the newReleaseLog emitter will be called. For the test covering the validity of the 'version' form control, we rely on formSubmit to throw an error. This is because we know that an invalid version will cause an error in the constructor of the ReleaseLog class when creating a new release log. One interesting thing in this test is that we use the following code:
expect(() => component.formSubmit(component.releaseForm))
.toThrowError(expectedError);
The interesting thing here is that we needed to call the formSubmit method ourselves with releaseForm. We couldn't just do it by writing expect(component.formSubmit(component.releaseForm)).toThrowError(expectedError); because that would rather call the function directly there and would result in an error. So we need to pass an anonymous function here that Jasmine will call and would expect this anonymous function to throw an error. And finally, we make sure that our submit button is enabled or disabled by first getting the button using querySelector on fixture.nativeElement. And then we check the disabled attribute on the submit button using submitButton.hasAttribute('disabled').
See also
- Testing Reactive forms: https://angular.io/guide/forms-overview#testing-reactive-forms
Using debounce with Reactive form control
If you're building a medium-to large-scale Angular app with Reactive forms, you'll surely encounter a scenario where you might want to use a debounce on a Reactive form. It could be for performance reasons, or for saving HTTP calls. So, in this recipe, you're going to learn how to use debounce on a Reactive form control.
Getting ready
The project that we are going to work with resides in chapter08/start_here/using-debounce-with-rfc inside the cloned repository:
- Open the project in Visual Studio Code.
- Open the terminal and run npm install to install the dependencies of the project.
- Once done, run ng serve -o.
This should open the app in a new browser tab and you should see it as follows:

Figure 8.23 – The Using debounce with Reactive Form Control app running on http://localhost:4200
Right now, you'll notice that for each character we type into the input, we send a new HTTP request to the API shown as follows:

Figure 8.24 – Multiple HTTP calls sent as we type in the input
Now that we have the app running locally, let's see the steps involved in this recipe in the next section.
How to do it…
For this recipe, we're using an application that uses the RandomUser.me API to get users. As you see in Figure 8.24, we send a new HTTP call for every change in the input. Let's begin with the recipe to avoid doing that:
- Adding the debounce to the form is super easy. Let's use the debounceTime operator in the home.component.ts file as follows:
...
import { debounceTime, takeWhile } from 'rxjs/operators';
@Component({...})
export class HomeComponent implements OnInit, OnDestroy {
searchDebounceTime = 300;
...
ngOnInit() {
...
this.searchUsers();
this.searchForm.get('username').valueChanges
.pipe(
debounceTime(this.searchDebounceTime),
takeWhile(() => !!this.componentAlive)
)
.subscribe(() => {
this.searchUsers();
})
}
}
Well, it's funny that this is it for the recipe as far as the task is concerned. But I do want to give you more out of this book. So we're going to write some interesting tests.
- We'll add a test now to make sure that our searchUsers method isn't called before searchDebounceTime has passed. Add the following test to the home.component.spec.ts file:
import { HttpClientModule } from '@angular/common/http';
import { waitForAsync, ComponentFixture, discardPeriodicTasks, fakeAsync, TestBed, tick } from '@angular/core/testing';
import { HomeComponent } from './home.component';
describe('HomeComponent', () => {
...
it('should not send an http request before the debounceTime of 300ms', fakeAsync(async () => {
spyOn(component, 'searchUsers');
component.searchForm.get( 'username').setValue('iri');
tick(component.searchDebounceTime - 10); // less than desired debounce time
expect(component.searchUsers ).not.toHaveBeenCalled();
discardPeriodicTasks();
}));
});
- Now we'll add a test for the case when searchDebounceTime has passed and the searchUsers() method should have been called. Add a new test to the home.component.spec.ts file as follows:
...
describe('HomeComponent', () => {
...
it('should send an http request after the debounceTime of 300ms', fakeAsync(async () => {
spyOn(component, 'searchUsers');
component.searchForm.get( 'username').setValue('iri');
tick(component.searchDebounceTime + 10); // more than desired debounce time
expect(component.searchUsers ).toHaveBeenCalled();
discardPeriodicTasks();
}));
});
If you refresh the Karma test Chrome window, you'll see all the tests passing as follows:

Figure 8.25 – All tests passing for the recipe
- Now, run the npm start command to spin up the app again. Then, monitor the network calls while you type an input into the search box. You'll see that the debounceTime operator causes only 1 call once you stop typing for 300 milliseconds, as shown in the following screenshot:
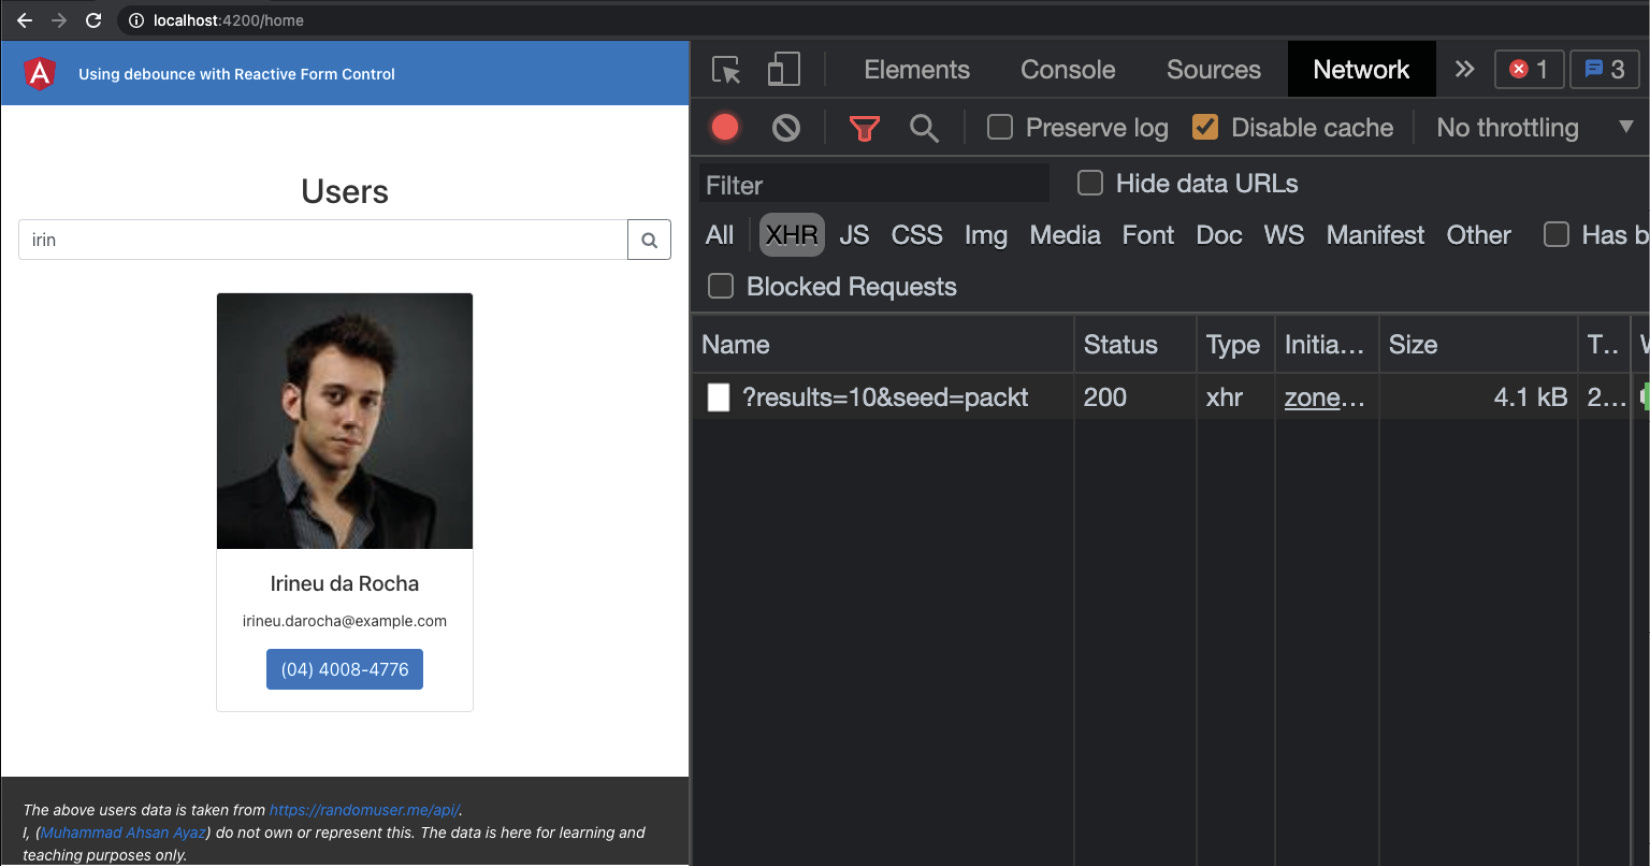
Figure 8.26 – Only one network call sent after a 300ms debounce
Awesome! So, now you know how to use debounce with a Reactive form control and also how to write tests to check whether things work fine with the debounce. And that concludes the recipe. Let's refer to the next section to see how it works.
How it works…
The main task for the recipe was quite easy. We just used the debounceTime operator from the rxjs package and used it with our Reactive form control's .valueChanges Observable. Since we're using it within the .pipe() operator before the .subscribe() method, every time we change the value of the input, either by entering a value or by pressing the backspace key, it waits for 300ms according to the searchDebounceTime property and then calls the searchUsers() method.
We also wrote some tests in this recipe. Notice that we spy on the searchUsers() method since that is what it's supposed to be called whenever we change the value of the 'username' form control. We're wrapping the test functions inside the fakeAsync method so we can control the asynchronous behavior of the use cases in our tests. We then set the value of the form control using the FormControl.setValue() method, which should trigger the method provided as an argument to the .subscribe() method after the time according to searchDebounceTime has passed. We then used the tick() method with the value of searchDebounceTime so it simulates an asynchronous passage of time. Then we write our expect() block to check whether the searchUsers() method should or shouldn't have been called. Finally, at the end of the tests, we use the discardPeriodicTasks() method. We use this method so that we don't face the Error: 1 periodic timer(s) still in the queue. error and our tests work.
See also
- RxJS DebounceTime operator: https://rxjs-dev.firebaseapp.com/api/operators/debounceTime
Writing your own custom form control using ControlValueAccessor
Angular forms are great. While they support the default HTML tags like input, textarea etc., sometimes, you would want to define your own components that take a value from the user. It would be great if the variables of those inputs were a part of the Angular form you're using already.
In this recipe, you'll learn how to create your own custom Form Control using the ControlValueAccessor API, so you can use the Form Control with both Template Driven forms and Reactive Forms.
Getting ready
The project for this recipe resides in chapter08/start_here/custom-form-control:
- Open the project in Visual Studio Code.
- Open the terminal and run npm install to install the dependencies of the project.
- Once done, run ng serve -o.
This should open the app in a new browser tab and you should see the following view:

Figure 8.27 – Custom form control app running on http://localhost:4200
Now that we have the app running locally, let's see the steps involved in this recipe in the next section.
How to do it…
We have a simple Angular app. It has two inputs and a Submit button. The inputs are for a review and they ask the user to provide a value for the rating of this imaginary item and any comments the user wants to provide. We'll convert the Rating input into a custom Form Control using the ControlValueAccessor API. Let's get started:
- Let's create a component for our custom form control. Open the terminal in the project root and run the following command:
ng g c components/rating
- We'll now create the stars UI for the rating component. Modify the rating.component.html file as follows:
<div class="rating">
<div
class="rating__star"
[ngClass]="{'rating__star--active': (
(!isMouseOver && value >= star) ||
(isMouseOver && hoveredRating >= star)
)}"
(mouseenter)="onRatingMouseEnter(star)"
(mouseleave)="onRatingMouseLeave()"
(click)="selectRating(star)"
*ngFor="let star of [1, 2, 3, 4, 5]; let i = index;">
<i class="fa fa-star"></i>
</div>
</div>
- Add the styles for the rating component to the rating.component.scss file as follows:
.rating {
display: flex;
margin-bottom: 10px;
&__star {
cursor: pointer;
color: grey;
padding: 0 6px;
&:first-child {
padding-left: 0;
}
&:last-child {
padding-right: 0;
}
&--active {
color: orange;
}
}
}
- We also need to modify the RatingComponent class to introduce the necessary methods and properties. Let's modify the rating.component.ts file as follows:
...
export class RatingComponent implements OnInit {
value = 2;
hoveredRating = 2;
isMouseOver = false;
...
onRatingMouseEnter(rating: number) {
this.hoveredRating = rating;
this.isMouseOver = true;
}
onRatingMouseLeave() {
this.hoveredRating = null;
this.isMouseOver = false;
}
selectRating(rating: number) {
this.value = rating;
}
}
- Now we need to use this rating component instead of the input that we already have in the home.component.html file. Modify the file as follows:
<div class="home">
<div class="review-container">
...
<form class="input-container" [formGroup]= "reviewForm" (ngSubmit)="submitReview(reviewForm)">
<div class="mb-3">
<label for="ratingInput" class="form- label">Rating</label>
<app-rating formControlName="rating"> </app-rating>
</div>
<div class="mb-3">
...
</div>
<button id="submitBtn" [disabled]="reviewForm. invalid" class="btn btn-dark" type="submit"> Submit</button>
</form>
</div>
</div>
If you refresh the app now and hover on the stars, you can see the color changing as you hover over the stars. The selected rating is also highlighted as follows:

Figure 8.28 – Rating component with hovered stars
- Let's now implement the ControlValueAccessor interface for our rating component. It requires a couple of methods to be implemented and we'll start with the onChange() and onTouched() methods. Modify the rating.component.ts file as follows:
import { Component, OnInit } from '@angular/core';
import { ControlValueAccessor } from '@angular/forms';
@Component({...})
export class RatingComponent implements OnInit, ControlValueAccessor {
...
constructor() { }
onChange: any = () => { };
onTouched: any = () => { };
ngOnInit(): void {
}
...
registerOnChange(fn: any){
this.onChange = fn;
}
registerOnTouched(fn: any) {
this.onTouched = fn;
}
}
- We'll now add the required methods to disable the input when required and to set the value of the form control, in other words, the setDisabledState() and writeValue() methods. We'll also add the disabled and value properties to our RatingComponent class as follows:
import { Component, Input, OnInit } from '@angular/core';
import { ControlValueAccessor } from '@angular/forms';
@Component({...})
export class RatingComponent implements OnInit, ControlValueAccessor {
...
isMouseOver = false;
@Input() disabled = false;
constructor() { }
...
setDisabledState(isDisabled: boolean): void {
this.disabled = isDisabled;
}
writeValue(value: number) {
this.value = value;
}
}
- We need to use the disabled property to prevent any UI changes when it is true. The value of the value variable shouldn't be updated either. Modify the rating.component.ts file to do so as follows:
...
@Component({...})
export class RatingComponent implements OnInit, ControlValueAccessor {
...
isMouseOver = false;
@Input() disabled = true;
...
onRatingMouseEnter(rating: number) {
if (this.disabled) return;
this.hoveredRating = rating;
this.isMouseOver = true;
}
...
selectRating(rating: number) {
if (this.disabled) return;
this.value = rating;
}
...
}
- Let's make sure that we send the value of the value variable to ControlValueAccessor because that's what we want to access later. Also, let's set the disabled property back to false. Update the selectRating method in the RatingComponent class as follows:
...
@Component({...})
export class RatingComponent implements OnInit, ControlValueAccessor {
...
@Input() disabled = false;
constructor() { }
...
selectRating(rating: number) {
if (this.disabled) return;
this.value = rating;
this.onChange(rating);
}
...
}
- We need to tell Angular that our RatingComponent class has a value accessor, otherwise using the formControlName attribute on the <app-rating> element will throw errors. Let's add an NG_VALUE_ACCESSOR provider to the RatingComponent class's decorator as follows:
import { Component, forwardRef, Input, OnInit } from '@angular/core';
import { ControlValueAccessor, NG_VALUE_ACCESSOR } from '@angular/forms';
@Component({
selector: 'app-rating',
templateUrl: './rating.component.html',
styleUrls: ['./rating.component.scss'],
providers: [{
provide: NG_VALUE_ACCESSOR,
useExisting: forwardRef(() => RatingComponent),
multi: true
}]
})
export class RatingComponent implements OnInit, ControlValueAccessor {
...
}
If you refresh the app now, select a rating, and hit the Submit button, you should see the values being logged as follows:
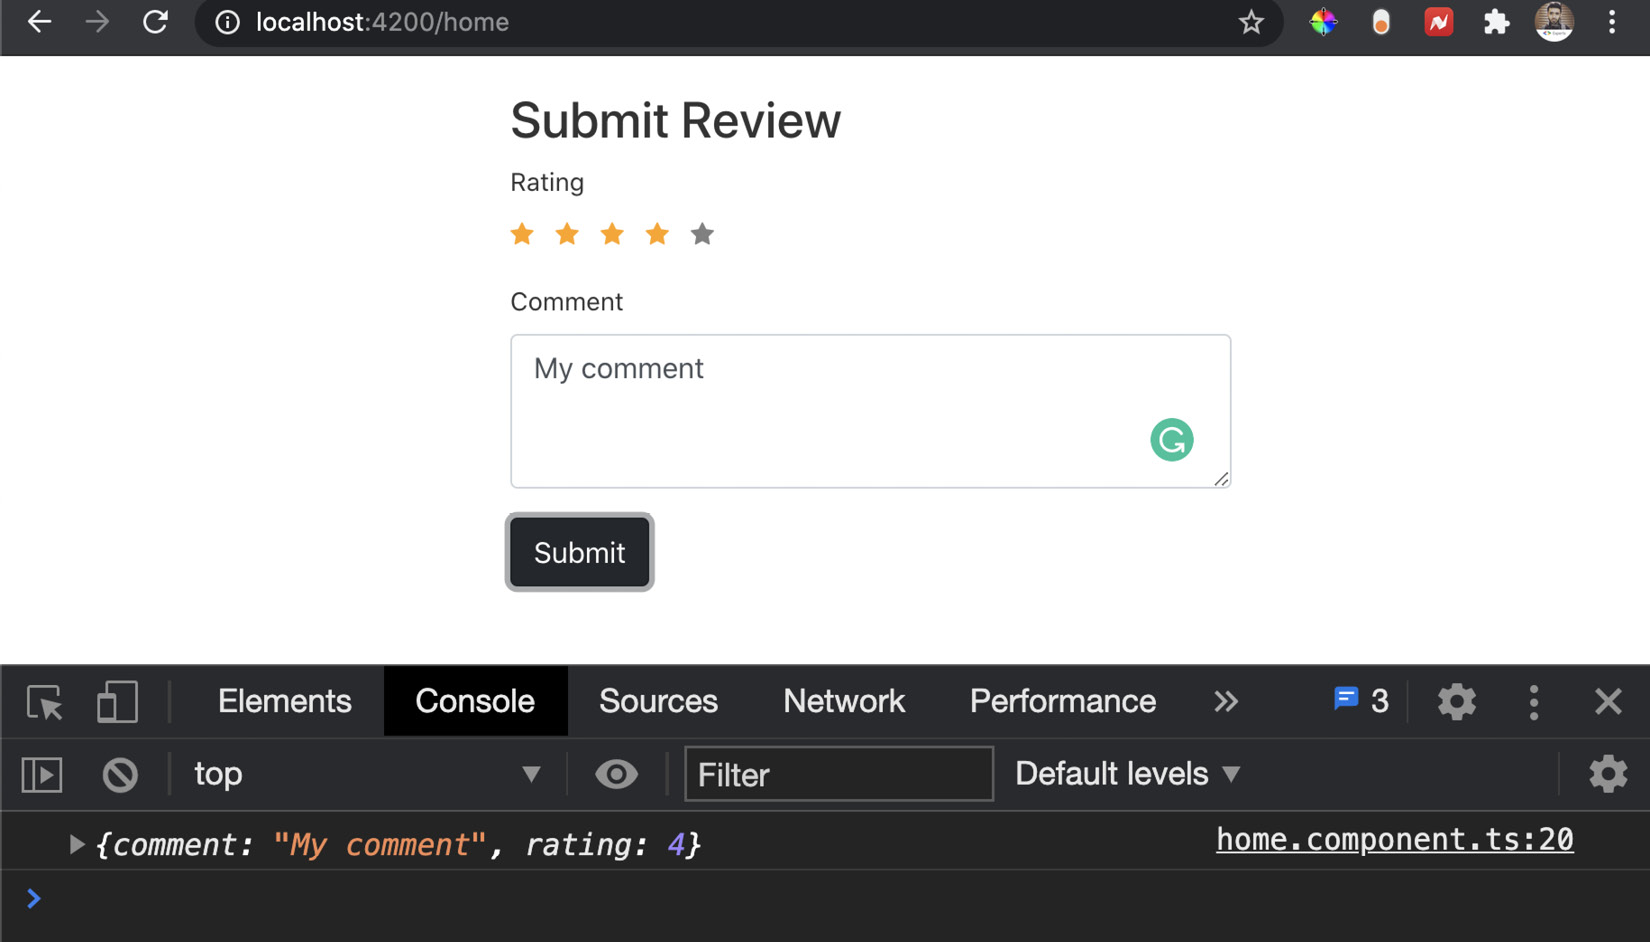
Figure 8.29 – Form value logged using the custom form control
Voilà! You just learned how to create a custom form control using ControlValueAccessor. Refer to the next section to understand how it works.
How it works…
We started the recipe by creating a component that we can use to provide a rating for the review we have to submit. We started off by adding the template and the styles for the rating component. Notice that we are using an [ngClass] directive on each of the star elements to add the rating__star--active class conditionally. Let's discuss each condition now:
- (isMouseOver && hoveredRating >= star): This condition relies on the isMouseOver and hoveredRating variables. The isMouseOver variable becomes true as soon as we mouse over any star and is turned back to false when we move away from the star. This means that it is only true when we're hovering over a star. hoveredRating tells us which star we're hovering over at the moment and is assigned the star's value, in other words, a value from 1 to 5. So, this condition is only true when we're doing a mouseover, and the hovered star's rating is greater than the value of the current star. So, if we're hovering over the fourth star, all the stars from value 1 to 4 will be highlighted as they'll have the rating__star--active class conditionally assigned to them.
- (!isMouseOver && value >= star): This condition relies on the isMouseOver variable that we discussed previously and the value variable. The value variable holds the value of the selected rating, which is updated when we click on a star. So, this condition is applied when we're not doing a mouseover and we have the value of the value variable greater than the current star. This is especially beneficial when you have a greater value assigned to the value variable and try to hover over a star with a lesser value, in which case, all the stars with values greater than the hovered star will not be highlighted.
Then we used three events on each star: mouseenter, mouseleave, and click, and then used our onRatingMouseEnter, onRatingMouseLeave, and selectRating methods, respectively, for these events. All of this was designed to ensure that the entire UI is fluent and has a good user experience. We then implemented the ControlValueAccessor interface for our rating component. When we do that, we need to define the onChange and onTouched methods as empty methods, which we did as follows:
onChange: any = () => { };
onTouched: any = () => { };
Then we used the registerOnChange and registerOnTouched methods from ControlValueAccessor to assign our methods as follows:
registerOnChange(fn: any){
this.onChange = fn;
}
registerOnTouched(fn: any) {
this.onTouched = fn;
}
We registered these functions because whenever we do a change in our component and want to let ControlValueAccessor know that the value has changed, we need to call the onChange method ourselves. We do that in the selectRating method as follows, which makes sure that when we select a rating, we set the form control's value to the value of the selected rating:
selectRating(rating: number) {
if (this.disabled) return;
this.value = rating;
this.onChange(rating);
}
The other way around is when we need to know when the form control's value is changed from outside the component. In this case, we need to assign the updated value to the value variable. We do that in the writeValue method from the ControlValueAccessor interface as follows:
writeValue(value: number) {
this.value = value;
}
What if we don't want the user to provide a value for the rating? In other words, we want the rating form control to be disabled. For this, we did two things. First, we used the disabled property as an @Input(), so we can pass and control it from the parent component when needed. Secondly, we used the setDisabledState method from the ControlValueAccessor interface, so whenever the form control's disabled state is changed, apart from @Input(), we set the disabled property ourselves.
Finally, we wanted Angular to know that this RatingComponent class has a value accessor. This is so that we can use the Reactive forms API, specifically, the formControlName attribute with the <app-rating> selector, and use it as a form control. To do that, we provide our RatingComponent class as a provider to its @Component definition decorator using the NG_VALUE_ACCESSOR injection token as follows:
@Component({
selector: 'app-rating',
templateUrl: './rating.component.html',
styleUrls: ['./rating.component.scss'],
providers: [{
provide: NG_VALUE_ACCESSOR,
useExisting: forwardRef(() => RatingComponent),
multi: true
}]
})
export class RatingComponent implements OnInit, ControlValueAccessor {}
Note that we're using the useExisting property with the forwardRef() method providing our RatingComponent class in it. We need to provide multi: true because Angular itself registers some value accessors using the NG_VALUE_ACCESSOR injection token, and there may also be third-party form controls.
Once we've set everything up, we use formControlName on our rating component in the home.component.html file as follows:
<app-rating formControlName="rating"></app-rating>
See also
- Custom form control in Angular by Thoughtram: https://blog.thoughtram.io/angular/2016/07/27/custom-form-controls-in-angular-2.html
- ControlValueAccessor docs: https://angular.io/api/forms/ControlValueAccessor