
Following the same logic that was used in the previous chapters, I will assume you have Eclipse installed. If that is not the case, that is, if you followed the examples using some other IDE (for example, IntelliJ), a few steps could be a bit different.
In order to be able to modify, build, and run Solr from the source code, you need the following:
- An IDE such as Eclipse or IntelliJ
- A Subversion client, which can be a standalone client (such as the svn command-line tool or TortoiseSVN) or a plugin in your IDE (for example, Subclipse or Subversive)
- Apache ANT (http://ant.apache.org/bindownload.cgi)
Subversion is an open source version control system that is used to maintain the source code of the Apache projects, including Solr.
As a first step, you need to check out the Solr source code from the SVN repository. Depending on your role, you should point to one of the following addresses:
http://svn.apache.org/repos/asf/lucene/dev/<branch>https://svn.apache.org/repos/asf/lucene/dev/<branch>
As you can see, the only difference in the preceding links is in the protocol. The first link, which uses http, is for anonymous checkout, and the other, which uses https, is for committers. Committers are those people who have commit rights, that is, active members of the development community with write permissions on the repository. I assume you don't fall within this last category, so the correct link is the first.
The link also contains a <branch> placeholder. This must be replaced with the correct target version you will work on. That strictly depends on the task you would like to do. If you want to fix a bug in a past version (for example, 4.7.2), you should point to the corresponding branch. If you want to pick up an existing enhancement or bug that has been scheduled for the next major release, you should point to the "trunk" leg. The following table describes how the repository tree is organized (http://svn.apache.org/repos/asf/lucene/dev/):
|
Folder |
Description |
|---|---|
|
|
Development branches. |
|
|
The development branch for the next version, 5.x. |
|
|
The development branches for versions that have been released. Apart from some tasks that have been scheduled for a given release, most of the development activities done in these branches are bug fixes. |
|
|
When a new version is released, the corresponding source code is copied here, in a dedicated folder (for example, |
|
|
This is the main center of development. |
The target branch depends on what you would like to do. If you pick up an existing JIRA among its attributes, you will also find the affected version. Besides, you may want to fix an issue in an older version (for example, 3.6.1) because your customer is using that specific version.
Keep in mind that most development tasks are done in the trunk and then reported to the corresponding active development branch (under the
branches folder). Anyway, before starting, it is always recommended to ping the dev list explaining what you want to do.
One of the common problems in a distributed development is the agreement about source code formalisms: comments, naming conventions, and so on.
That's the reason the Solr development team provided two useful configuration files—one for Eclipse and another for IntelliJ. These files can be imported to those IDEs to automate a lot of things such as indentation, braces positions, line wrapping, comments, and so on.
Pick up that file from one of the following addresses, depending on your favorite IDE:
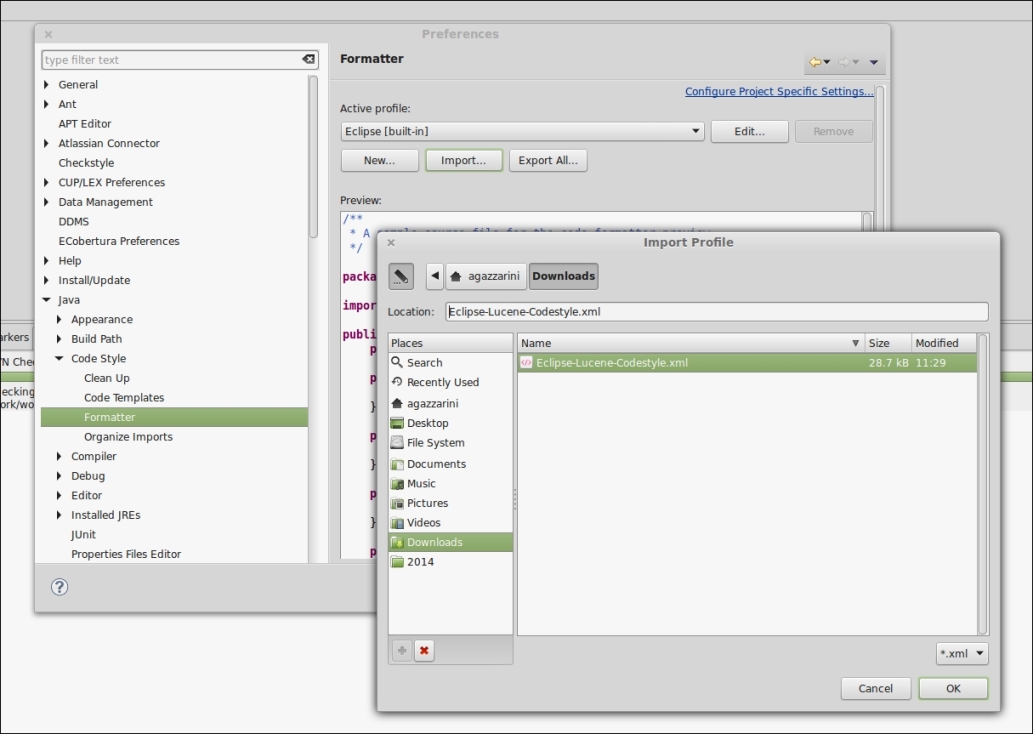
In Eclipse, the configuration file can be imported by going to Window | Preferences | Java | Code Style | Formatter and then clicking on the Import button, as shown in the following screenshot:
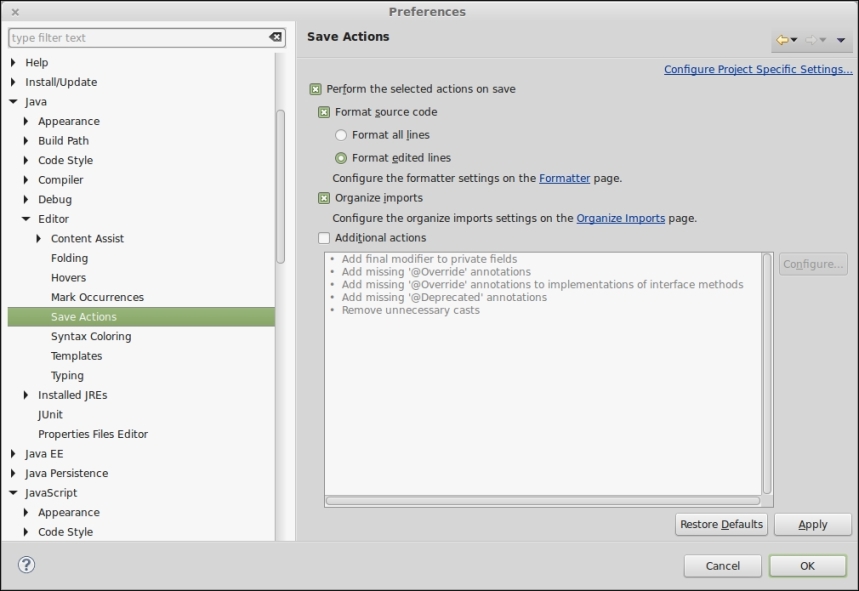
After that, navigate to Java | Editor | Save Actions. Select the Perform the selected actions on save checkbox and the Format edited lines radio button, as shown in this screenshot:
Once you have identified the target branch to work on, check out the source code using the svn command-line tool or your favorite tool (for example, TortoiseSVN).
SOLR-3191 was considered a new feature at that time, so I checked out the trunk. The current trunk requires Java 8 in order to build so, to execute the steps needed in this chapter, let's point to a different branch (5_x). Open a shell and type the following command:
# cd /work/solrdev
# svn checkout http://svn.apache.org/repos/asf/lucene/dev/branches/branch_5x solr_5
Bear in mind the following:
- I'm not a committer, so I pointed to the read-only (
http) address. - The name of the local folder that will contain the downloaded source is
solr_5. If it doesn't exist, it will be automatically created. - The
/work/solrdev/solr_5folder is a local working folder on my machine. You can choose whatever name you like.
When you execute that command, a lot of files will be downloaded. In the end, you should see something like this:
…
A    solr_5/solr/test-framework/src/java/overview.html
A    solr_5/.hgignore
U   solr_5
Checked out revision 1651057.
Getting the source code is not enough, unless you want to develop your patch using Vim. You will have to create a project in your IDE. Assuming you are in the /work/solrdev/solr_5 folder you created in the previous step, type the following:
# ant clean test
The ant command will immediately fail because the build requires Ivy (a dependency management tool), and you don't have that on your machine. No problem! There's a dedicated task that can install Ivy for you. Type this command:
# ant ivy-bootstrap
You should see something like this:
…
ivy-bootstrap2:
ivy-checksum:
ivy-bootstrap:

BUILD SUCCESSFUL
Total time: 3 seconds
Now we can retry the first command:
# ant clean test
This will execute the whole test suite, which is very huge, so take a long coffee break!
Once the test suite has been executed, type this command if you are using Eclipse:
# ant eclipse
If you are using IntelliJ, type the following command:
# ant idea
This will generate the IDE project files within the current directory (solr_5). From here on, I will assume you're using Eclipse, but the steps are basically the same for IntelliJ.
Open Eclipse and create a new workspace (you can also use the workspace where you loaded the sample projects of this book).
Open the File menu and choose Import. From the dialog that appears, go to General | Existing Projects into Workspace. Using the Browse button, select the /work/solrdev/solr_5 folder. Press Ok and then Confirm. The dialog will close and the project will be imported, as shown in this screenshot:
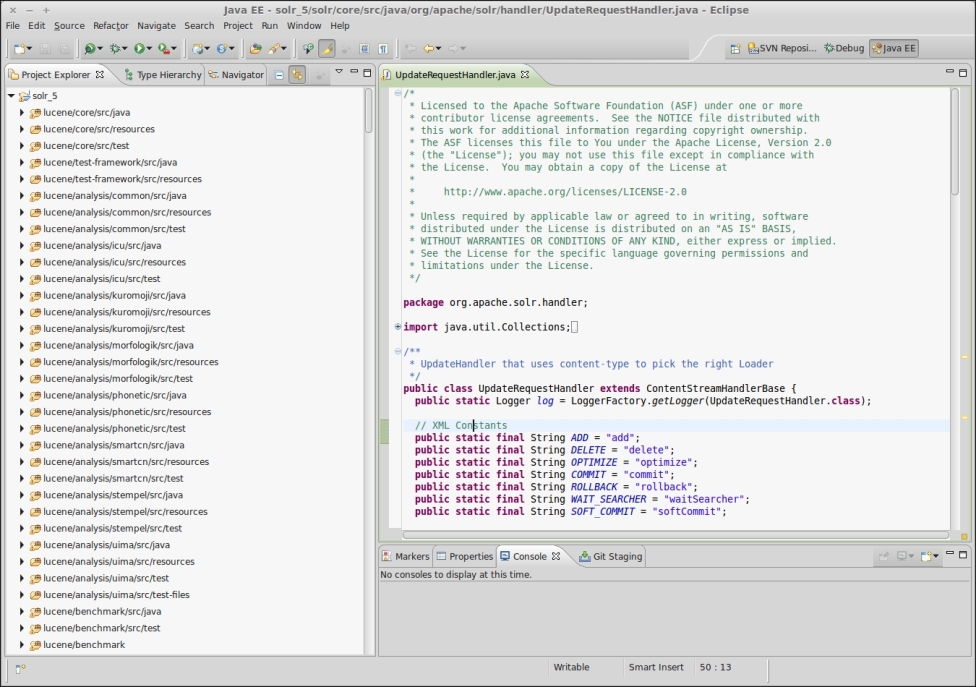
Once the project has been built, you shouldn't have any errors. Everything is ready, and you can proceed with your change.