
In the previous chapter, we covered the Struts 2 form tags. We started to see how the framework, including its interceptors, themes, and templates, provide a lot of out of the box power. In this chapter, we'll continue our exploration of form topics, looking at form validation and its spooky cousin, type conversion.
Validation helps to ensure that only appropriate data is passed to our actions. Type conversion converts form data (which is always sent from the browser as a string) to various Java types such as Integers, Dates, or our own custom conversions.
In this chapter, we'll take a more detailed look at:
How to configure form validation in various ways
The validations supplied by the framework
The basics of type conversion
How to customize type conversion and validations for our specific application needs
Validation is a topic that could fill up a book in itself. There's client-side validation, server-side validation through either XML or annotations (or both) available on both actions and models, Ajax validation, custom validation, interceptor stack interaction, issues relating to type conversion, manual validation, and so on.
We'll whittle this down somewhat and provide a basic validation overview, highlighting how using even a small amount of configuration or annotations, we can create complex and robust validations.
As we saw during our discussion regarding ActionSupport's Validateable and ValidationAware interfaces, the validate() method will be run during the default workflow, returning to the "input" result if there are any validation errors.
In Chapter 3, we implemented some simple validation on some recipe fields by manually calling Commons Lang StringUtil.isBlank() on our action properties, adding field errors for each blank field.
We can, of course, run any code in the validate() method. This means that validation can run the entire gamut, from the simple presence of a value to arbitrarily complex business-side validation, using services or in the validation method (not recommended in general).
However, for simple form validation it can be quicker and easier to use either XML-based validation or annotation-based validation.
Struts 1 users will be familiar with XML-based validation. Struts 2 provides similar XML-based validation with an added bonus, which is similar to the message resource file lookup. Validation configuration files are located hierarchically, named after an action, its parent classes, or its interfaces.
To get started, we'll rework our simplistic recipe validation to use XML-based validation. Previously, we were validating manually in our new recipe action's validate() method.
public void validate() {
if (StringUtils.isBlank(recipe.getName())) {
addFieldError("recipe.name",
getText("recipe.name.required"));
}
if (StringUtils.isBlank(recipe.getIngredients())) {
addFieldError("recipe.ingredients",
getText("recipe.ingredients.required"));
}
}
We'll delete that method. Our XML-based form validation will mirror our original manual validation criteria—the name and the ingredients must not be blank. We'll create an XML validation file in the same package as our action, and name it NewRecipeAction-validation.xml. The naming convention is simple; it's our action's class name with an appended-validation.xml. There are a few additional naming conventions detailed on the Struts 2 documentation wiki.
<!DOCTYPE validators PUBLIC
"-//OpenSymphony Group//XWork Validator 1.0.2//EN"
"http://www.opensymphony.com/xwork/xwork-validator-1.0.2.dtd">
<validators>
<validator type="requiredstring">
<param name="fieldName">recipe.name</param>
<message>Recipe name is required.</message>
</validator>
<field name="recipe.ingredients">
<field-validator type="requiredstring">
<message>Recipe ingredients are required.</message>
</field-validator>
</field>
</validators>
The first thing we notice from the above code is that there are two different ways to specify validation for a specific field. We can either use a<validator> element and provide the field name in a<param> element, or use a<field> element.
When we have a single validation for a field, it really doesn't matter which convention we use. As validation becomes more complex, the<field> convention becomes more readable because it groups validations more logically.
If we submit our form with one of the required fields missing, we are taken back to the form, our field label is red, and the appropriate messages from our validation file for the missing fields are displayed.
Let's add an additional validation. We'll now require that the recipe name must be at least three characters long. We add the following to our validation XML file:
<validators>
...
<validator type="stringlength">
<param name="fieldName">recipe.name</param>
<param name="minLength">3</param>
<message>
Directions must be at least ${minLength} characters long.
</message>
</validator>
Perhaps we can now see one reason why the<field> element makes more sense for field-specific validations. Using<validator> elements and supplying the field name parameters gives a disjointed view of what's actually intended, even though it works. It makes more sense to group validations by field, rather than by validation type:
<field name="recipe.name">
<field-validator type="requiredstring">
<message>Recipe name is required.</message>
</field-validator>
<field-validator type="stringlength">
<param name="minLength">3</param>
<message>
Directions must be at least %{minLength} characters long.
</message>
</field-validator>
</field>
We're able to include the minLength parameter in our error message. Validation messages can include OGNL expressions and refer to anything available on the OGNL value stack. (Yes, that includes action properties—another big win.)
Note again that as of Struts 2.1, we can use the same %{} OGNL notation in our property and validation files (as we do here) as we use in our JSP pages. Previously, only the ${} notation was supported, which led to some confusion.
There are several ways to customize and improve our validation messages, which have so far been specified explicitly. The first thing we notice is that our validation messages repeat, more or less, the field names defined in our package.properties file.
Because we can use OGNL to access the value stack, even in our validation files, we can use our action's getText() method to include the field name defined in the property file. (This may not always be possible due to grammar, capitalization, or other requirements, but we'll get to that.) Here's a fragment showing this technique with the recipe name field.
<field name="name">
<field-validator type="requiredstring">
<message>%{getText(fieldName)} is required.</message>
</field-validator>
<field-validator type="stringlength">
<param name="minLength">3</param>
<message>
%{getText(fieldName)} must be at least %{minLength}
characters long.
</message>
</field-validator>
</field>
The fieldName value is set with the<field> element's name attribute by Struts 2. This allows us to remove a common point of duplication and eliminate field label and validation message field name mismatches.
Our next observation is that the entire message can be localized. We can move our messages into our package.properties file (or another file in the file lookup hierarchy), while maintaining our OGNL method calls and parameters. The<message> elements now use a key attribute to define the messages, for example:
<field name="name">
<field-validator type="requiredstring">
<message key="requiredstring"/>
</field-validator>
<!-- etc. -->
Our property file now has an entry containing our original message verbatim.
requiredstring=%{getText(fieldName)} is required.
Eventually, we might move global validation messages like this into either a global resource file or a root package.properties file.
Also note that we've already run into a potential grammar problem due to our "ingredients" validation with our requiredstring message. The message "Ingredients is required" sounds awkward to many English speakers. Instead, it is better expressed as "Ingredients are required"—the perils of obsessive-compulsive web application development!
The default validations are defined in the XWork 2 library and include a basic set of validators. It is likely that most projects will either need to define their own custom validators, or use a combination of pre-built and manual validation. Manual validation is particularly useful when there are complex business-side validations that cannot be expressed in XML, or are too awkward to be expressed. It also allows the re-use of existing business logic.
We've already seen the requiredstring validator, but there is a parameter available we didn't cover. The trim parameter defines whether or not the string will be trimmed using the java.lang.String.trim() method prior to performing the validation. The parameter has true as its default value. Hence, if we want the user to be able to enter only spaces, we must set the trim parameter to false using the<param> element.
<field-validator type="requiredstring">
<param name="trim">false</param>
<message key="requiredstring"/>
</field-validator>
In general, this is rarely what we want, which is why it defaults to true.
Note
The trim parameter only trims the string for the length check. It does not trim the field value itself—don't expect a trimmed string in the action. We'll see a few ways around this as we move through the book.
Note that the requiredstring validator is not the same as the required validator, and has a different behavior. The required validator (covered shortly) checks for nullness. Browsers send an empty string (""), not null, when a text element isn't filled in. This means a text input field element's action property will never be null, it will always be the empty string. Therefore, the required validator's check won't work for a text input field.
We've also seen the stringlength validator, but not its maxLength or trim parameters. The trim parameter works the same way as it does with the requiredstring validator.
The maxLength parameter does what we'd expectsetting an upper bound on the length of the field value. To demonstrate maxLength, we'll change our recipe name validation to require a name between three and eight characters and create a validation message including the upper and lower bounds.
<field-validator type="stringlength">
<param name="minLength">3</param>
<param name="maxLength">8</param>
<message key="stringlength"/>
</field-validator>
Creating a parameterized stringlength message is similarly easy.
stringlength=%{getText(fieldName)} must be between %{minLength} and %{maxLength} characters.
However, this isn't a generic string length validation message. Some length requirements apply only to a minimum number of characters, with no limit set for maximum number of characters (or the opposite). Fixing this leads us to a side trip into the world of validation messages.
There are many games we can play to create robust, human-readable error messages under very complex circumstances. The easiest solution to fix our stringlength validation message is to provide separate messages depending on whether or not we've specified the minLength and/or maxLength parameters.
stringminlength=%{getText(fieldName)} must be at least %{minLength} characters.
stringmaxlength=%{getText(fieldName)} must be under %{maxLength} characters.
stringminmaxlength=%{getText(fieldName)} must be between %{minLength} and ${maxLength} characters.
We then use the appropriate message key in our field validator configuration, and rely on the developer to use the correct message. We'll come back to this, as developers rarely do the right thing.
Next, we'll create a new requirement, which states that we must echo the data entered back to the user along with the number of characters actually entered, focusing on the recipe name field.
Note
At the time of writing this book, there appears to be no trivial way to access the actual value being validated from an external message file. Hence, we will be going back to using messages in our validation file.
Once again, we'll rely on OGNL's ability to call arbitrary methods.
<field-validator type="stringlength">
<param name="minLength">3</param>
<param name="maxLength">8</param>
<message>
Name must be between %{minLength} and %{maxLength}
characters; '%{recipe.name.trim()}' is
%{recipe.name.trim().length()} characters.
</message>
Our next requirement change is that we must use the stringMinLength or stringMaxLength messages (currently defined in our properties file) depending on whether or not the value we entered is too long or too short. This provides a more specific error message. Again, OGNL allows us to do this relatively easily.
<message>
<![CDATA[%{name.trim().length() < minLength ?
getText('stringMinLength') :
getText('stringMaxLength') }
]]>
</message>
The CDATA allows us to use the< comparison operator. OGNL's ternary operator allows us to check the length of the trimmed data and retrieve the appropriate message. The last requirement we'll give ourselves is to put our message in a property file (for I18N), but retain the use of our minimum length and maximum length messages. This is harder.
As noted, the current crop of XWork validators don't provide trivial access to the value being validated, but they're still accessible using OGNL and some knowledge of the value stack during validation. During validation, the top-most stack item is the validator itself (meaning it would be trivial to expose the value being validated). The next item down the stack is our action, meaning our action properties are also available.
By using OGNL's map-style access to action properties, we can construct an ugly, but requirement-achieving OGNL statement allowing us to move our message into a property file, giving us a stringminmaxlength message that looks like this (formatted nicely):
stringminmaxlength=
%{[1][fieldName].trim().length() < minLength
? getText('stringminlength')
: getText('stringmaxlength') }
We already know that fieldName refers to the name of the field being validated. The weird bit is the [1], which looks like an array reference without the array. This is OGNL-speak. An [n] by itself references the stack minus the first n elements. This means that when our expression is evaluated against the value stack, we'll start searching from the nth element and move down. The [fieldName] portion uses map-style notation to access the action property named inside the brackets (here, whatever value fieldName contains).
With clever use of OGNL, we can put all sorts of functionality in our validation messages (and any other message, for that matter), including I18N-ed pluralization rules. Sometimes it looks a little scary, but we laugh in the face of danger to meet our client's many and perverse requirements.
Note
I have been a bit deceptive (here, by "a bit", I mean "a lot") because the above capability just discussed is very cool and handy. Now, let's talk about our big but... Our current recipe action is using a Recipe class instance in the form. Our OGNL treachery will work only if the field name isn't nested.
In other words, we're validating recipe.name. This means we're trying to use the OGNL expression ${[1]['recipe.name']}, which we'll discover doesn't work. This breaks some of the convenience of the message tricks we have just discussed.
As we'd expect, there's a workaround, though bulkier. Recall that ActionSupport's getText() method comes in many flavors, including one that takes a list of message parameters. This sounds promising, and it turns out that it fixes all our problems (at least those surrounding this particular validation message requirement).
In our validation file, where we have easy access to our recipe.name property, we can define our message as follows:
<message>
<![CDATA[
${recipe.name.trim().length() < minLength
? getText('stringminlength', {recipe.name,
recipe.name.length()})
: getText('stringmaxlength', {recipe.name,
recipe.name.length()}) }
]]>
</message>
We also update our stringminlength and stringmaxlength messages and use the standard Java positional parameter notation (not OGNL, there's no "$" or "%") to access the parameters passed in with the getText() call (we'll only show stringminlength).
stringminlength=${getText(fieldName)} must be at least
${minLength} characters; ''{0}'' has a measly {1}.
Of course, we went a bit crazy in this example, choosing the minimum or maximum message when we could have used a single message. This was more to show off some of the capabilities provided to us by OGNL at several levels of the validation message process.
The required validator checks for the nullness of a form field. This is a little bit misleading. However, as even empty form fields are sent to the server, they won't be null, the HTTP parameters are empty strings. The notable exceptions are unchecked checkboxes. Even that is not entirely true with the use of the Struts 2<s:checkbox> tag (recall its use of hidden fields), so even checkbox properties won't be null.
To explain a bit further, we'll show a first attempt at validating two numbers (example form just has text fields for both):
<s:form action="reqint">
<s:textfield key="reqint"/>
<s:textfield key="reqInteger"/>
<s:submit/>
</s:form>
Our action has reqint and reqInteger properties—the first a primitive, the second an object. The reason for having one of each will become clear shortly (getters and setters elided):
public int reqint;
public Integer reqInteger;
Our first attempt at a validation file defines an int validator for each field, expected to be in the range of 10 to 20 (both inclusive).
<field name="reqint">
<field-validator type="int">
<param name="min">10</param>
<param name="max">20</param>
<message>
'int' must be between ${min} and ${max} (inclusive).
</message>
</field-validator>
</field>
<field name="reqInteger">
<field-validator type="int">
<param name="min">10</param>
<param name="max">20</param>
<message>
'Integer' must be between ${min} and ${max} (inclusive).
</message>
</field-validator>
</field>
When we visit the form URL, we notice that the input element for the int field reqint is already filled in with a "0", whereas the Integer field reqInteger is empty. This is because the default value of a primitive int is 0, while the default value of an Integer is null (this alone may determine whether we use primitives or objects as properties).
If we submit the form as is, we'll get the message saying that reqint must be between 10 and 20. However, there is no message for the reqInteger field even though it's empty, and clearly not between 10 and 20.
Why? The int validator (more precisely, its parent class) does not do the range comparison if the value is null. This is where the required validator makes an appearance. It must be used for non-primitive properties that should have a value.
We just add the required validator to the reqInteger <field>:
<field-validator type="required">
<message>Missing the 'Integer' value.</message>
</field-validator>
When we submit a fresh form, we'll now get an appropriate error message when the reqInteger field is empty.
Everything looks good until we enter a non-numeric value. If we enter "adf" in both fields, we get back two different messages for each field. The int field gives us the int error, the Integer field gives us the required error, and both claim that there's an "Invalid field value". Something has happened behind the scenes, producing a message we didn't define.
This error message appears due to a type conversion error ("adf" is not a valid numeric value, at least in base 10) and is added to our field-specific by the conversionError interceptor. We can disable this by removing the interceptor from our action's interceptor stack if it meets our application's needs.
We can override the type conversion error message in our property file. We can either override the global I18N key xwork.default.invalid.fieldvalue or create individual error messages for each field by creating messages named invalid.fieldvalue.xxx, where xxx is the name of the field.
The double validator works like an int validator, but validates doubles. However, the double validator has parameters for both inclusive and exclusive range comparisons (the int validator is always inclusive). Because floating point numbers are inherently inaccurate, we might occasionally need both inclusive and exclusive comparisons.
The parameters are named minInclusive, maxInclusive, minExclusive, and maxExclusive, each being what we'd expect. Any parameter that is set will be checked, and any combination is legal. For example, we would specify both inclusive parameters and only one exclusive parameter, and so on.
Using a Double property requires the use of the required parameter, as with the int validator. Primitive double parameters will be filled beforehand in the form with their default value "0.0" (unless of course our action initializes it in some way).
The email validator ensures that a field is a valid email address. Technically, it only validates most email addresses, but covers the majority of common addresses. The regular expression for validating an RFC-compliant email address is about one page long, and is not to be trifled with. (To paraphrase an old joke: I had a problem validating email addresses. I decided to use regular expressions, and then I had two problems.)
The email validator is a subclass of the regex validator discussed next. One potential gotcha is that if we're using a string property for the address, we must use the requiredstring validator to make sure there's an email address to validate.
The url validator, unlike the email validator, is not a regex validator subclass. It uses an XWork utility class to check for valid URLs using the default java.net.URL constructor (with a trivial hack so HTTPS URLs are properly validated).
As with the email validator, if we use a string property for the URL, we'd need to use the requiredstring validator if a URL is required.
As the name suggests, the date validator validates dates, with optional min and/or max parameters for validating date ranges. Our action property is usually a java.util.Date.
Recall again that the server receives a string parameter from the form—everything comes from the browser as a string. We'll cover how this type conversion works in a bit. For now, the short explanation is that XWork has a default set of type converters, one of which knows how to convert strings into dates. By default, XWork will use the Date.SHORT format for the appropriate locale. Failing to do this, it will use the default system locale.
The regex validator accepts arbitrary regular expressions (Java syntax) and validates the input field against that expression. If the field being validated with the regex validator is required, we need to use the requiredstring validator, as we've already seen.
The regex validator also accepts the trim parameter and an additional caseSensitive parameter if the regular expression is case sensitive. The default value is true.
A complete discussion of regular expressions is outside the scope of this book. However, they're very useful as a general tool. Having a reasonable grasp of regular expressions is among the most valuable tools in our toolbox.
Both the expression and fieldexpression validators take arbitrary OGNL expressions in their expression parameters, which are evaluated and used to determine a validation's success or failure. Almost any validation can be performed using one of these two validators, although the supplied convenience validators should be used when possible.
In general, anything more complex than the convenience validators should probably be encapsulated in business logic and used in a validate() method rather than encoded in our validation configuration. However, in some instances, these validators are handy. This is particularly true for simple expressions, such as comparing email and email confirmation fields.
That being said, as OGNL lets us call arbitrary methods (static or not), almost any validation can be captured using these validators. If we have exposed business logic, it may be easier to use those services using OGNL. Different people prefer different techniques.
As a quick example, we'll validate an email address against a confirmation email address. We will stipulate that it must not start with the string "dave" (as people named Dave are generally a little shifty). We'll use the fieldexpression validator (to keep out those nasty Daves), and will use the expression validator for the confirmation address validation.
Our validation for our two email addresses looks like this:
<field name="email">
<field-validator type="email">
<message key="email.required"/>
</field-validator>
<field-validator type="requiredstring">
<message key="required"/>
</field-validator>
<field-validator type="fieldexpression">
<param name="expression">!email.startsWith('dave')</param>
<message key="keep.daves.out"/>
</field-validator>
</field>
<field name="cemail">
<field-validator type="email">
<message key="email.required"/>
</field-validator>
<field-validator type="requiredstring">
<message key="required"/>
</field-validator>
</field>
Our expression validator is not tied to a specific field, unlike the other validations we've seen so far.
<validator type="expression">
<param name="expression">email.equals(cemail)</param>
<message key="confirm"/>
</validator>
Submitting this form with non-matching emails, along with the condition stated above (name shouldn't start with the string "dave"), doesn't display our confirmation error message. Only field-specific error messages are displayed by the standard Struts 2 form tags. We must use the<s:actionerror> tag to display the nonfield errors:
<s:actionerror/>
This displays a bulleted list of all non-field-specific error messages. There are corresponding<s:actionmessage> and<s:fielderror> tags, each displaying what we'd expect. The<s:fielderror> tag accepts either a value attribute or<s:param> elements that name the field whose errors will be displayed.
Note that our check for strings not starting with "dave" could also call a utility method (for example, a service object injected into our action). Business-oriented rules such as this one, whenever possible, should exist in re-usable objects, so that can be used throughout the application.
Assuming such an object exists, our fieldexpression validation might look like this:
<field-validator type="fieldexpression">
<param name="expression">
!emailService.excluded(email)
</param>
<message key="email.excluded"/>
</field-validator>
We can also combine manual and XML validation by implementing validate() in our action, calling super.validate() to run the XML validation. We can then perform any additional validation. For example, we could remove the email exclusion check from our XML validation and put it in our action's validate() method, as shown here:
public void validate() {
super.validate();
if (emailService.excluded(email)) {
addFieldError("email",
getText("email.excluded",
new String[] { getText("email.label") }));
}
}
Moving the field validation into our action means we need to manually pass the name of the field (retrieved from our property file) to our validation error message. The field name will no longer refer to the fieldName value, but would instead be a standard Java resource positional parameter.
The conversion validator checks to see if there was a conversion error on the field in question. This can be used if the conversion interceptor is not in our interceptor stack (which we'll discuss later), and we want a specific conversion error message. We've already seen how other validator's error messages are enough to catch conversion errors, rendering the conversion validator unnecessary in many circumstances.
The visitor validator is used primarily when we're implementing the ModelDriven interface or validating domain objects directly, which we haven't discussed yet. In short, using the visitor validator allows us to validate a form field using a model-specific validation file. This can make more sense than action-specific validation, depending on our application.
All of the validations we've seen so far can be configured using annotations rather than XML. Validation annotations can be applied at the action method level using the @Validations annotation, or the property level by annotating property setters.
Annotation validators require a message parameter, even if a key element is specified. It's used as a default message if the message specified by the key can't be found in a resource file. It can be a blank string, a message from a getText() call, a warning message saying the key is missing, an actual error message, and so on.
OGNL expressions are available to our annotations, just like our XML.
Classes that will be validated using annotations may use the @Validation annotation at the type (class or interface) level. It is a marker annotation taking no parameters. It used to be required, but isn't anymore.
On a side note, making the @Validation annotation optional may be marginally less work for us, but makes it marginally more difficult for tools to determine if a class has validation annotations. It's not a major issue from a technical standpoint, but is an example of the typical tradeoffs developers often make.
As mentioned, there are two ways annotations can be used for form validation. They can be applied at the property level by annotating setter methods, or at the action method level by grouping them with the @Validations annotation.
The @Validations annotation accepts several parameters that group similar validations together. This allows all required validations to be grouped together, all email validations to be grouped together, and so on. There is a group element for each included validation type (except for double, as we'll discuss soon).
The following groupings are available:
requiredFieldsrequiredStringsintRangeFieldsstringLengthFieldsregexFieldsemailsurlsdateRangeFieldsexpressionsfieldExpressionscustomValidatorsvisitorFields
As a brief example, we'll look at a @Validations example for an email address and some required fields. We might validate the action class as follows:
@Validations(
emails = { @EmailValidator(fieldName="email",
message = "Invalid email address.",
key="valEmail") },
requiredStrings = {
@RequiredStringValidator(fieldName="email",
message="Email is required.", key="required") },
requiredFields = {
@RequiredFieldValidator(fieldName="aRequiredInteger",
message="Integer is required.", key="required"),
@RequiredFieldValidator(fieldName="aRequiredDouble",
message="Double is required.", key="required")
}
)
When specifying field-level validations with the @Validations annotation, the fieldName element must be provided to tie validations to fields.
There are a couple of issues we must take into consideration while deciding if we'll use the action-method-specific validations using the @Validations annotation, or if we'll annotate each property setter method.
The first is that if we have an action class with multiple methods, which we want to execute and validate separately, we'll have an issue. The @Validations annotation is not method-specific. Regardless of which method is annotated and which one is executed, all validations found within the @Validations annotation will be executed for all methods.
Another less serious issue is that specifying a @DoubleRangeFieldValidator using the @Validations annotation is more trouble than it's worth, as the @Validations annotation (for now) does not have a double validations grouping. We can still validate doubles by using a customValidators block. For fun, we'll see what that would look like.
customValidators = {
@CustomValidator(type="double", fieldName="reqDouble",
message="dblMinMax", key="dblMinMax",
parameters={@ValidationParameter(name="minInclusive",
value="-10.0"),
@ValidationParameter(name="maxInclusive",
value="10.0")})
}
That wasn't as much fun as we'd hoped for. It does show how custom validations can be specified through annotations, even if the parameter passing is a bit unwieldy.
@SkipValidation marks methods that should be excluded from validation. Depending on our requirements, we can use this annotation to work around the limitation of the @Validations annotation. It's particularly helpful if we have validations handled using setter validation annotations, but want to skip them for certain action methods.
This is the annotation analogous to the required validator and there is nothing much interesting to add to the discussion. However, remember that the message element is required, even if you provide a key element with a resource key.
The annotation version of the int validator accepts the min and max elements, and operates in the same way as its XML counterpart. If we're validating an Integer (a non-primitive integer), we must also specify the @RequiredFieldValidator, just as we would with XML-based validation.
Specifying multiple validation annotations on a property setter is a simple matter of listing each appropriate annotation and no grouping is necessary as with action methods. A required Integer property can then be annotated as follows.
@RequiredFieldValidator(key="required",
message="!!! MISSING required MESSAGE !!!")
@IntRangeFieldValidator(key="intMinMax", min="-10", max="10",
message="!!! MISSING intMinMax MESSAGE !!!")
public void setReqInteger(Integer reqInteger) {
this.reqInteger = reqInteger;
}
Again, our message element could include an actual error message, complete with arbitrary OGNL expressions. Here, we're warning that the error message wasn't found.
This is analogous to the double validator and accepts all the configuration elements as its XML counterpart. As mentioned, the only caveat regarding the @DoubleRangeFieldValidator is that if used at the action method level inside a @Validations annotation, we need to pretend it's a custom validator. This works, but it adds a fair amount of syntactic overhead to define its parameters.
Each of the remaining validation annotations are similar to the annotations already discussed and are analogous to their XML counterparts. Their documentation is available both on the Struts 2 documentation wiki and in the Struts 2/XWork 2 API documentation.
For the sake of completeness, we'll list them here:
@EmailValidator@UrlValidator@DateRangeFieldValidator@StringRegexValidator@ExpressionValidator@FieldExpressionValidator@ConversionErrorFieldValidator@VisitorFieldValidator
(You didn't really want me to rewrite the existing documentation, did you?)
In addition to server-side validation available using both XML and annotations, we can also use client-side validation. This is handled using JavaScript injected by the Struts 2 form tags. Client-side validation is turned on by setting the<s:form> tag's validate attribute to true.
The client-side validation mechanism depends on the theme being used. When using the "xhtml" or css_xhtml themes, it's pure JavaScript client-side validation, whereas using the ajax theme uses Ajax-based validation.
Note
Client-side validation requires the presence of XML or annotation validation. The server-side configuration is used to create the appropriate JavaScript.
When using the @Validations annotation on an action method, we must remember to provide the fieldName element for our field validations. Failure to provide the fieldname element will result in the failure of our client-side validation with a FreeMarker exception. We must use the fieldName element anyway, but forgetting it sometimes leads to a difficult-to-diagnose error.
Client-side validation supports a smaller number of validators, which are listed here:
requiredrequiredstringstringlengthregexemailurlintdouble
There are a couple of things to remember when using client-side validation.
The client-side required validator works differently than the server-side. The client-side version checks and flags empty strings. The server-side version checks for a null value, which doesn't work for string fields (empty fields are empty strings, not null).
Lastly, the Struts 2 form element tags have a required attribute. The required attribute is not tied to any validation process. It just controls whether or not there is a required indicator (by default, an asterisk "*") rendered in the form field's label.
In other words, if we need a form field to be required, we must still use the required or requiredstring validators. Adding the required attribute to a form input element tag alone is not enough.
The built-in validators are great for simple validations. The regex and expression family can handle more complicated validations. We will, however, need a custom validator sometimes.
The bulk of string-related validations can be handled by the regex validator, or by combining it with one or more expression validators—particularly if we're well versed in regular expressions. (If you haven't already noticed, I think regex fluency is very important.)
When our system has existing business-side validation rules, however, using a custom validator makes sense. In our newest contrived example, we'll say our system has a classification field, and we have existing business logic that validates the format of this field.
As there's already code, duplicating the functionality using the regex validator is unnecessary. And worse, it introduces another potential failure point in our system. In addition, if the validation ever changes (for example, the number of digits can either be three or four, but four-digit classifications must begin with "1" or "2"), we'd have to change our code in two places and not just one. This is generally a recipe for disaster.
Instead of using the regex validator, we can create and register a validator that uses the existing classification validation code rather than run the risk inherent in repeating ourselves. The existing validation logic exists in a ClassificationService class containing a static validation method with the signature boolean isValidClassification(String).
We're implementing a field validator, so we'll extend Xwork's FieldValidatorSupport. We need to implement only the validate method—void validate(Object). Validation errors are signaled by the presence of field errors in our action's field errors collection (which ActionSupport provides, or we can implement manually).
The following is the majority of our classification validator (imports elided):
package com.packt.s2wad.ch07.examples.classification;
public class ClassificationValidator extends FieldValidatorSupport {
public void validate(Object o) throws ValidationException {
String val = (String) getFieldValue(getFieldName(), o);
if (!ClassificationService.isValidClassification(val)) {
addFieldError(getFieldName(), o);
}
}
}
During normal operation, the validate() method gets an instance of the action we've submitted to. Here, we're getting the value of the field from the action, and adding field errors to our action.
We must register our validator, so Struts 2 knows what we're referring to in our validation configuration. We create a validators.xml and place it in the root of our classpath. (Earlier versions of Struts 2 required us to include the default validators, which is no longer a requirement.)
<?xml version="1.0" encoding="UTF-8"?>
<!DOCTYPE validators PUBLIC
"-//OpenSymphony Group//XWork Validator Config 1.0//EN"
"http://www.opensymphony.com/xwork/xwork-validator-config-1.0.dtd">
<validators>
<validator name="classification"
class="com.packt.s2wad.ch07.examples.classification.ClassificationValidator"/>
</validators>
We can now use our classification validator in our action using annotations. (We could just as easily use it in our validation XML, but we're bored of that. It's too easy in the XML, we just use the classification type.)
In this example, our action has a single classification property. We annotate its setter with the @CustomValidator annotation. We have no parameters, so we can keep things clean.
@CustomValidator(type="classification",
message="Invalid classification")
public void setClassification(String classification) {
this.classification = classification;
}
We could even assume a static property in the classification service that defines an invalid classification message:
@CustomValidator(type="classification",
message="${@com.packt.s2wad.ch07.examples.classification.ClassificationService@INVALID_CLASSIFICATION}")
Okay, so OGNL's static method is a thing of both beauty and horror.
We could also do this validation in an action's validate() method. If our classification service is injected, it might be cleaner. (We'll discuss injection when we cover testing. It's not as scary as it sounds, and no needles are involved.)
Deciding where to put this type of logic might include considering the implementation of the validation logic, how often the "classification" validation is used, organization coding standards, and so on. Having declarative (or annotation-driven) validation can also ease the creation of various documentation (as opposed to Java-only validation).
It's quite easy to use our custom validator in either @Validations annotations using the @CustomValidator annotation or on a property setter. Unfortunately, at the time of writing this book, the ability to create a custom validation annotation (instead of using @CustomValidator) was difficult to integrate into the default XWork annotation validation configuration.
We've already seen some type conversions, often without even being aware of it. Remember our int and Integer form validations? Our action simply declared values as the int and the Integer, and we didn't give it any more thought, even when we mysteriously ended up with a new Recipe object.
As has been mentioned already, web browsers only and always send back strings. In times not-so-long past, we could see a lot of code fragments similar to the following (assuming an anInt property):
String s = request.getParameter("anInt");
int anInt = NumberUtils.toInt(s, 0);
doSomething(anInt);
Okay, that's not much extra code because we're making use of Apache Commons Lang and its NumberUtils class to hide the potential NumberFormatException. We are also making use of Java 1.5's auto-boxing for the int to Integer conversion.
However, in Struts 2 the code is simply:
doSomething(anInt);
Busting out our trusty command line tool wc (for "word count"—it's pretty handy for low-resolution size comparisons), we confirm that it's one-third the line count and one-fifth the character count. There's more to this than simply less typing. There is a significant reduction in cognitive overhead, as our code is more focused on what we're actually doing. The conversion code was ancillary to our actual task, doing something to our Integer.
Type conversion! Well, the above old school code was type conversion too, but it happened "in the foreground" and we were doing it manually. Ideally, the type conversion should happen behind-the-scenes, letting us focus on what we're really trying to accomplish. Our goal, after all, isn't converting integers—it's doing something with them.
Struts 2 has built-in type conversion that is usually intuitive. We didn't really think about it when we did our integer validation. The validators depend on type conversion to convert the form values into something they can use. It's entirely possible to never need to understand most of how type conversion works (except, perhaps, collections).
Obviously, there's out of the box support for integers, both primitive and objects. Numeric support includes bytes, shorts, longs, doubles, BigIntegers, and BigDecimals. Date and Calendar types are also supported. There is also support for Maps and Lists. We'll take a look at that next, after looking at how to create our own converters.
Nested conversions are also possible. In other words, if we have a domain object, such as a recipe, its properties can be converted. Our recipe had only string properties, so we don't need it yet. We'll look at an example later when we cover collections.
We can also create our own type converters to supply functionality not included by default. For example, the included BigDecimal type conversion breaks if our input string has extra spaces at the end (an oversight, I'm sure). We'd like to fix that. (Note that we'll learn a better way to implement this in Chapter 8.)
The default Java BigDecimal parsing doesn't really like extra spaces. (We already know that we should be using the BigDecimal class for accurate calculations involving money, among other things, right?)
We could work around this in several ways. We could use a string property, trim it ourselves, and do the BigDecimal conversion in our action. However, this completely defeats the purpose of the type conversion process. Let's create a custom type converter (which seems like the best solution, given the section of the book we're in).
Custom type conversions generally implement the ognl.TypeConverter interface or, a bit more cleanly, extend the StrutsTypeConvertor class. It defines two methods, convertFromString(Map, String[], Class) and convertToString(Map, Object), which do as we'd expect (although the parameters look odd at first).
Note
We've left the error handling and logging in place not only to show how simple error handling and logging is (perhaps a bit over-done here), but also to highlight how little application code has to do with the actual problem being solved. There's also a potential subtle exception message issue, just to see if you're paying attention!
Often, there's a lot of boilerplate code dedicated to two goals: making sure our code doesn't break, and if it does, ensuring that it's easy to figure out why it broke, and how to fix it. We'll discuss error handling and logging soon.
Our conversion implementation is reasonably straightforward.
public class BigDecimalConverter extends StrutsTypeConverter {
public Object convertFromString(Map context,
String[] values,
Class toClass) {
if (values == null) {
return null;
}
if (values.length != 1) {
String msg = String.format("Array too big: [%s]",
StringUtils.join(values, ", "));
throw new TypeConversionException(msg);
}
return values[0] == null ? null
: new BigDecimal(values[0].trim());
}
public String convertToString(Map context, Object o) {
if (!(o instanceof BigDecimal)) {
String msg =
String.format("No BigDecimal supplied; object was %s",
o.getClass().getCanonicalName());
throw new TypeConversionException(msg);
}
BigDecimal val = (BigDecimal) o;
if (val == null) {
return null;
}
return val.toString();
}
}
The last step is to inform Struts 2 that we'd like to use this type converter for a specific property on our form. If we assume an action TestBigDecimal with an exposed BigDecimal property myBigOne, we can create a file in the same package as TestBigDecimal named TestBigDecimal-conversion.properties, which will look like this:
myBigOne=com.packt.s2wad.ch07.examples.conversion.BigDecimalConverter
We name the property that will use our type converter and provide the class of the type converter to use. Pretty straightforward, but very XML-ish! We can also use an annotation and eliminate another external file.
To use our BigDecimalConverter with annotations, we annotate our action class with the @Conversion marker annotation, so that it's scanned for @TypeConversion annotations. The @TypeConversion annotation is applied on property setters and is straightforward as shown here:
@TypeConversion(converter =
"com.packt.s2wad.ch07.examples.conversion.BigDecimalConverter")
public void setBig(BigDecimal big) {
this.big = big;
}
The only issue left is that we have to configure all BigDecimal properties using either XML or annotations. This is not a big deal for occasional needs, but hardly convenient if they're scattered across an entire application. To configure type conversions across an entire application, we create a file named xwork-conversion.properties on the root of our classpath and fill it with type and converter pairs:
java.math.BigDecimal=
com.packt.s2wad.ch07.examples.conversion.BigDecimalConverter
Using whatever parsing mechanism necessary, it is similarly straightforward to create arbitrarily complex type converters such as coordinates (for example, convert a string "5, 10" into a Point object), URLs (there's a url validator, but the result is stored in a stringit could just as easily be a URL object, and probably should be), and so on. Ultimately, we're still turning a string (repeat after me: the browser always sends strings!) into a domain objectwe're just doing it in an unobtrusive way.
Hiding this functionality and keeping type conversion out of our mainline code is really handy. It reduces the amount of code contained in our actions and the cognitive load needed to understand that code. We still need to remember that type conversion is taking place—it's another place to look if things go wrong.
Struts 2 also provides automatic type conversion for collections, including maps. By using OGNL's array (or map) syntax in our forms, Struts 2 will not only automatically convert specific data types, but will also put that data into a collection. Our actions receive a collection of domain objects, with no intervention from us.
To demonstrate this capability, we'll return to our client's application. As it stands, the ingredients are a simple text area. One of the requirements is to have a list of individual ingredients, with each ingredient having a quantity and a name.
Recall that we have already created a ShoppingListItem class with the name and quantity properties. We'll modify our Recipe class and change its ingredients property to use the existing ShoppingListItem (getter and setter not shown).
private List<ShoppingListItem> ingredients;
We will also update our recipe view page and iterate over the ingredients:
<s:iterator value="recipe.ingredients">
<tr>
<td><s:property value="quantity"/></td>
<td><s:property value="name"/></td>
</tr>
</s:iterator>
We will also change our FakeRecipeService to use the new data type. Notice that the Recipe class has been graced with an addIngredient() method. This might seem like an unnecessary addition, but we'll consider two things after looking at how we create sample data.
Recipe recipe2 = new Recipe(2, "Java");
recipe2.setRecipeTypes(new ArrayList<String>() {{
add(FakeRecipeTypeService.RECIPE_TYPE2.getName());
add(FakeRecipeTypeService.RECIPE_TYPE4.getName());
}});
recipe2.addIngredient(new ShoppingListItem("1",
"Large lack of abstractions"));
recipe2.addIngredient(new ShoppingListItem("Lots", "typing"));
The most obvious benefit is also the least interesting—there's a little less typing. We might skip the convenience method, so that adding an ingredient looks more like this:
recipe2.getIngredients().
add(new ShoppingListItem("Lots", "typing"));
That's longer, but not ridiculously so. The actual big win is that we're exposing that much less of our Recipe class's implementation. Remember how object-oriented programming was supposed to hide implementation details? There's nothing hidden about a getIngredients() call. No big deal, we say.
In this case, that's probably true. However, consider the very simple case of changing how we store our collection of ingredients. Let's say we now need to store our ingredients in a map, indexed by the ingredient ID. Suddenly, our decision to expose our list doesn't seem so good, and we must change all of our code that uses the getIngredients() method, as it's tied to using a list (well, collection).
By using an addIngredient() method, we've provided a layer of isolation from the underlying implementation. Assuming that we don't need to pass in any additional information when adding an ingredient, the only code that has to change is isolated within the Recipe class's implementation.
Sometimes, a small amount of effort up front can reduce potential development hassles down the road, even when it seems trivial and unimportant.
Our new requirement states that a recipe form will have fields for ten ingredients (ShoppingListItems). (We'll see how to add rows dynamically when we cover JavaScript, one of the world's most misunderstood languages.) There are several changes to be made in order to meet our new requirements.
First, we need to generate appropriate form tags for each of the ten ingredients. In order to make use of the built-in collection conversions, our form tags need to end up looking like typical array notation, one for each ingredient.
<input type="text" name="recipe.ingredients[0].name"/>
<input type="text" name="recipe.ingredients[1].name"/>
<!-- ... and so on ... -->
We could do this manually, but that seems like a poor solution. A quick solution is to build the text tags inside an iterator.
<s:iterator value="{1, 2, 3, 4, 5, 6, 7, 8, 9, 10}"
var="idx" status="stat">
<s:textfield name="recipe.ingredients[%{#stat.index}].quantity"/>
<s:textfield name="recipe.ingredients[%{#stat.index}].name"/>
</s:iterator>
Struts 2.1.7+'s iterator tag includes "begin", "end", and "step" attributes, to support looping similar to JSTL's "forEach" tag.
The name attribute includes an OGNL expression inside the field name, and is similar to the OGNL we've already seen. It simply uses the index of the iterator as the array index of the recipe's ingredients list.
Note
Simply, you say? What's simple about [%{#stat.index}]?! The #stat.index, which we've already seen, just refers to the iterator tag's status. The %{} forces OGNL evaluation, so we get the index value inside the square brackets. The rest is simple array notation. Piece of cake! The coolest part hasn't even happened yet, though.
Note that we don't really need the array index notation here. Struts 2 will notice that there are multiple values for the same form parameter, and will do the right thing. However, if we need to guarantee an order, it's best to leave them in. Recipe ingredients are usually listed in the order of use. Hence, order is significant here.
If we visit our new recipe form at /recipes/new, we see something like this (truncated after a couple of our new ingredient fields):
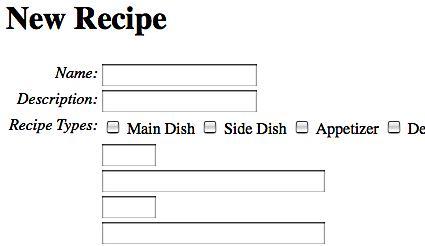
We're definitely on the right track, but there are a few glaring deficiencies. We need a label for our ingredient fields, and it'd be a lot nicer if the ingredient's quantity and name fields were lined up on the same row.
We can create labels in a resource file, as we've done in the past. Our default label will be Ingredient #n where n will be the list element from our iterator, the numbers 1 through 10. There are actually two ways in which we could do this. As we define a var attribute in our<s:iterator> tag, we know there's a variable named idx available on the value stack, and we remember that the value stack is available in our message resources. We could then create a message resource such as this:
recipe.ingredientn=Ingredient #${idx}
(Here, the # symbol has nothing to do with OGNLit just means a number!)
We could add the label to one of the text fields using the getText() call as shown here:
<s:textfield label="%{getText('recipe.ingredientn')}" size="5"
name="recipe.ingredients[%{#stat.index}].quantity"/>
This is acceptable, but it creates a dependency between our JSP page and our resource file. If a developer changes the name of the iterator (the iterator tag's var attribute), the message will be broken. We're lazy, and we're certain to break this later.
Instead, we'll use the same getText() trick we've used before, and pass in an argument to the message resource. Our message will look like this:
recipe.ingredient=Ingredient #{0}
To use this message, our text tag will contain the following label attribute:
label="%{getText('recipe.ingredient', { #idx })}"
Slightly tricky OGNL, but it's still relatively straightforward. Our array of arguments to getText() is an OGNL immediate list. It consists of a single element, the named var of our iterator, with the # notation as usual. We could also just use the status variable, and pass in #status.count.
In Java, this call would look like this:
getText("recipe.ingredient", new String[] { idx });
The other issue was that our ingredient's quantity and name text fields are putting themselves in separate table rows because we're using the default "xhtml" theme. We'd like them on a single line, and will associate a label with each line.
We're not up to themes and templates yet, but here's a simple trick. We can set the theme for a single element by using the theme attribute. The simple theme renders only the input element no table rows, no table cells, and no labels. Also, there are no error messages. Hence, there's still a hole in our solution, but we have to stop somewhere.
Our solution (for this chapter) will build the table row and table cells, normally built by the Struts 2 tags and the "xhtml" theme, on our own. In the first cell, where Struts 2 puts its labels, we'll put our label, using the Struts 2 property tag. The second cell gets the text inputs. We'll force them to render themselves using the simple theme, which renders no extraneous stuff.
<s:iterator value="{1, 2, 3, 4, 5, 6, 7, 8, 9, 10}" status="stat">
<tr>
<td>
<s:property value="getText('recipe.ingredientn',
{ #stat.count })"/>
</td>
<td>
<s:textfield theme="simple" size="5"
name="recipe.ingredients[%{#stat.index}].quantity"/>
<s:textfield theme="simple" size="30"
name="recipe.ingredients[%{#stat.index}].name" />
</td>
</tr>
</s:iterator>
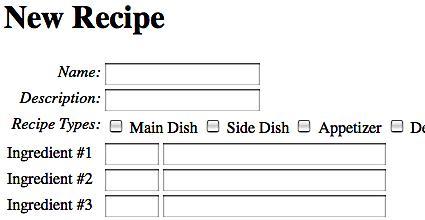
Visiting our page now shows a more reasonable form, as shown in the following figure:
We'll skip ingredient validation. However, recall that an action's validate() method can easily call super.validate(), which will call any XML- or annotation-based validation. It will then add other validation logic such as iterating over recipe ingredients and checking for values, and so on. But we still need to get the recipe ingredients into our Recipe instance, right?
Before we cover submission of this form, we'll take a quick look at our Recipe class again, looking at its toString() method. Here, it's creating a verbose, human-readable dump of the important bits, useful in console output.
public String toString() {
return String.format("%s [id=%d, name=%s, type(s)=[%s],
ingredients=[%s]]",
super.toString(), id, name,
StringUtils.join(recipeTypes, ", "),
StringUtils.join(ingredients, ", "));
}
It just returns a string that combines all the data we need together (using Apache Commons Lang's StringUtils.join() method because we've spent a lot of time poring over the Apache Commons Javadocs, right?). We looked at Recipe.toString(), so we'd understand what's in our NewRecipe action's execute() method.
public String execute() throws Exception {
System.out.println(recipe.toString());
return SUCCESS;
}
Not much, but we know that after we submit the form, we can check our console and, in theory, we should see a nice readable dump of our new recipe, complete with its ingredient list. However, we're worried because we haven't really written any code.
Sure, we wrote a Recipe class and a ShoppingListItem. We also wrote a JSP that pretended like our form was returning instances of ShoppingListItem in our recipe's ingredients list. Our form had already assumed that we could blithely use recipe.name, and it would be put into a Recipe object.
Note
For the Struts 1 coders out there, remember copying ActionForm properties into a domain object with BeanUtils.copyProperties()?. Also, make ActionForm and BeanUtils.copyProperties() Or worse yet, copying the properties over by hand? Wasn't it fun?
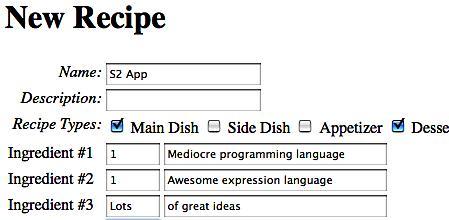
The above figure shows the form we're submitting. After we hit the submit button, the Struts 2 type conversion process takes hold. For example, it knows that when we specify a text field named recipe.name on our form, we don't just have a string, but rather a Recipe class with a name property. Better yet, on seeing recipe.ingredients[0].quantity, it assumes that the Recipe class has a list of ShoppingListItems, each having a quantity property. And we didn't have to tell it anything.
When we check our console, we see the following (formatted for some amount of legibility):
com.packt.s2wad.ch07.models.Recipe@7c6dff [
id=null,
name=S2 App,
type(s)=[Main Dish, Dessert],
ingredients=[
ShoppingListItem@ed5f47 [quantity=1,
item=Mediocre programming language],
ShoppingListItem@a4662 [quantity=1,
item=Awesome expression language],
ShoppingListItem@92fe37 [quantity=Lots,
item=of great ideas], ...
Something really helpful has happened. We're not dealing with strings, but with domain objects, without writing any of the code ourselves! This is a thing of beauty. Our mainline code is about as simple as anything can be.
Maps are handled similarly, using the map key in OGNL's [] syntax instead of an array index. (OGNL's () (parentheses) syntax is used only for indexed collection access, discussed on the Struts 2 documentation wiki.) For our current requirements, we will just use a list. However, putting values into maps is a very common need when dealing with collections of data relating to a specific instance (such as a checkbox list of recipe IDs, and so on).
This chapter covers the basics of Struts 2 form validation, configurable through both XML and annotations. We also see that it's easy to combine manual and automatic validation by calling super.validate() to run the automatic validation, and implementing additional validation manually
The chapter also explains how to create custom validators that can be used as easily as built-in validators when configured using XML, and nearly as easily using annotations.
Struts 2 also provides a basic set of type converters and can automagically marshal form values into our domain objects, saving a tremendous amount of boilerplate code.
In the next chapter, we will finally take the framework functionality that we've put off for the first seven chapters. This is primarily to reinforce the idea that it's possible to accomplish quite a bit without having an in-depth knowledge of one of the fundamental components of Struts 2—interceptors.
Are you excited yet?
References
A reader can refer to the following:
Struts 2 validation:
Struts 2 Type Conversion (covers more complex use cases than we had room for):