
Lesson Files | FCP4 Book Files > Lessons > Lesson 2 Project |
Media | Sahara folder; Music folder |
Time | This lesson takes approximately 75 minutes to complete. |
Goals | Open source clips in the Viewer Play clips in the Viewer Mark edit points in the Viewer Remove edit points View edit points Create a new sequence Make Overwrite edits Make Insert edits Build a sequence Back up a sequence |
In the simplest terms, editing consists of screening clips, deciding exactly what portion of a clip you will use, and placing it in a sequence in a specific order. In this lesson, you will screen your clips in the Viewer window. You will then mark the portion of the clip you want to use. Finally, you will edit the marked selections to the Timeline using two types of edits, Overwrites and Inserts. In addition, you will open, close, and duplicate sequences.
You will begin by clicking the Final Cut Pro icon in the Dock and then opening the Lesson 2 Project file.
Single-click the Final Cut Pro icon in the Dock.
Choose File > Open and navigate to the Lessons folder, as you did in Lesson 1.
Select the Lesson 2 Project file and click Choose.
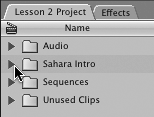
In the Browser, the same project elements appear just as they did in the completed Lesson 1 Project file. These elements link back to the same set of source media on your hard drive as you used in Lesson 1. Only the links back to the media have been duplicated; not the media itself.
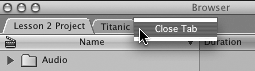
If you have another project open (as shown in the following figure), Ctrl-click its tab in the Browser and select Close Tab from the contextual menu.
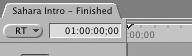
In the Timeline, play the current sequence titled Sahara Intro – Finished.
In this lesson, you will create your own version of this sequence.
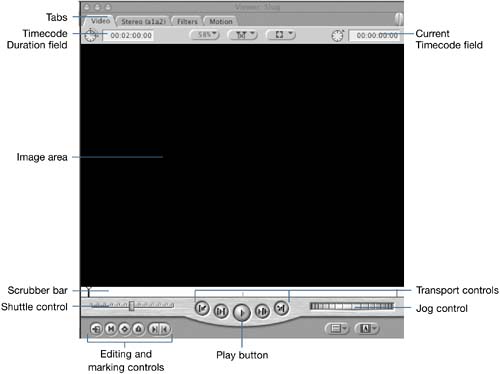
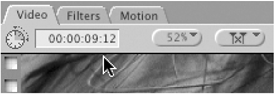
The Viewer window is where you play and mark your source clips in preparation for editing. The Viewer has four tabs. The default is the first tab, Video, where you can see, hear, and mark your clips. There can be a separate audio tab for working more closely with the audio of a clip. If no audio is present in the clip, no audio tab will appear. The Filters and Motion tabs will be used when you start to create effects. These three tabs will be covered in more detail in later lessons. In this lesson, you will practice different ways to open and view clips in the Viewer.
There are three ways you can open a clip in the Viewer to screen it:
Double-click a clip in the Browser
Drag a clip from the Browser into the Viewer
Select a clip in the Browser and press Return
In the Browser window, click the small triangle next to the Sahara Intro bin to display the clips in this bin. Double-click the blue nose hawk clip to open it in the Viewer.
The clip is opened in the Viewer. Like the Canvas, the Viewer has an image area and a scrubber bar beneath it with a small playhead. It also has transport, shuttle, and jog controls.
To play this clip, click the Viewer Play button in the transport controls.
As the clip plays, the playhead moves forward through the scrubber bar, as it did in the Canvas.
Double-click the scorpion clip to open it in the Viewer. Play this clip by pressing the spacebar to start and stop it.
The Viewer also has a Timecode Duration field. But unlike the Canvas, where the length of the sequence is displayed, here the length or duration of the current clip is displayed.
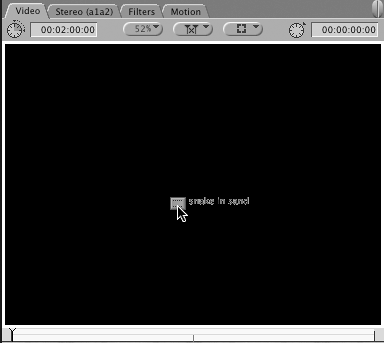
Now drag the snake in sand clip from the Browser into the Viewer image area and release the mouse.
Press the L key to play this clip. Press it again to double the play speed. Press K to stop. Press J to go backward. Press J again to play at 2x reverse speed.
Drag the digging mouse clip into the Viewer. Press End to go to the end, or tail, of the clip, and Home to go to the beginning, or head, of the clip.
NOTE
In the Viewer, pressing the up arrow takes you to the head and pressing the down arrow takes you to the tail of the clip.
First frame of clip
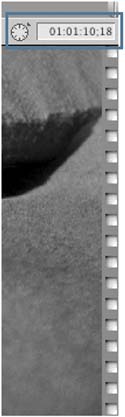
Last frame of clip
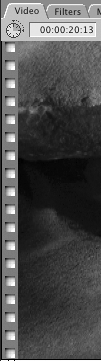
The film strips that appear at the head and tail of the clip are another set of overlays. They represent the first frame and last frame of the clip.
Another way to open a clip is to select it and press Return.
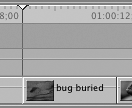
Single-click the bug buried clip in the Browser to select it, and then press Return to open it in the Viewer. Use the shuttle and jog controls to move through this clip.
In the Browser, select the lizard eye move clip and press Return to open it. Press the right arrow key to move the playhead forward one frame.
The Viewer also has a Current Timecode field that indicates where you are located within that clip.
To access a clip that has recently been opened in the Viewer, click the Recent Clips pop-up menu button in the lower-right corner of the Viewer window. In the pop-up menu, select the digging mouse clip.
NOTE
The Recent Clips window stores a finite number of recent clips, but you can change the number in the User Preferences window (Option-Q).
In the Browser is a bin containing extra clips you can use for your own practice throughout the lesson. You can practice opening and viewing clips in the Viewer or continue on with learning to mark clips.
Click the triangle to display the contents of the Unused Clips bin. Open each of the four clips in the Viewer a different way and then play each clip using a different approach.
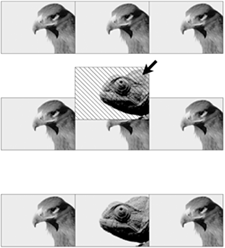
Now that you've screened your clips, you're ready to identify the portion you want to edit into the sequence. Is it the head turn of the blue nose hawk? The ear twitch of the feathered ear creature? Or the blink of the reptile eye? Once you determine what portion of a clip to use, you mark the starting and stopping points of the desired action. These marks define the edit points of the clip.
Later in this lesson, you will edit the marked clips into a sequence. But for now, you will practice different ways to mark a clip. As with many Final Cut Pro operations, there are several ways to mark a clip before editing it to the Timeline.
One way to mark edit points in a clip is to use the Viewer marking controls, also referred to as buttons. These controls are located beneath the shuttle control in the Viewer.

The Mark In button places a starting point, or In point, in the clip. The Mark Out button places a stopping point, or Out point, in the clip.
Clicking either button will place an edit point in the scrubber bar wherever the playhead is located.
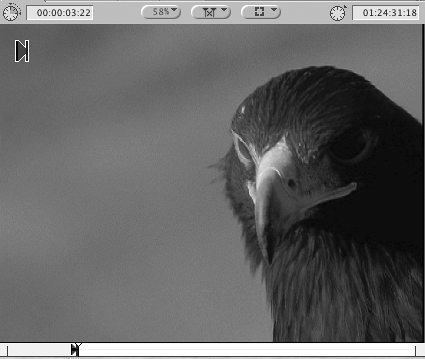
From the Browser menu, open the blue nose hawk clip into the Viewer and play the clip.
NOTE
The Timecode Duration field reflects the full length of the clip when there are no edit points. When you mark this clip, this duration will change to reflect the marked portion only.
You are going to place an edit point just before the hawk opens its beak.
Play the clip again and stop just after you see the hawk begin to open its beak the first time. Either drag the playhead back in the scrubber bar or play backward and stop before the hawk opens its beak.
Click the Mark In button in the Viewer to mark an In point at this location.
A new In point appears in the scrubber bar where the playhead is located. Notice the In point overlay in the upper-left corner of the image area.
Play the clip until the hawk closes its beak and stop the clip.
If necessary, drag the playhead or use the arrow keys or jog control to adjust the exact location.
Click the Mark Out button to mark an Out point at this location.
A new Out point appears in the scrubber bar where the playhead is located and in the upper-right corner of the image area. The Timecode Duration field reflects the length of the marked portion of the clip, and the scrubber bar becomes gray outside of the marked area.

Click the Play In to Out button to see just the marked portion of your clip.
At this point, you might normally edit the marked clip to the sequence. But you can also screen and mark several clips at one time and then edit them to the sequence in a later step. Let's continue practicing different ways to mark clips.
For some, working with keyboard shortcuts is a preferred way to edit, whereas others prefer clicking buttons on the interface. In Final Cut Pro, shortcuts are often created from the first letter of the functions. This is true for the Mark In and Mark Out shortcuts. All the keyboard shortcuts that relate to the In point use the letter I with or without a modifier key. All the shortcuts that relate to the Out point use the letter O.
Open the snake in sand clip in the Viewer, and play it until the snake's body is completely in frame. Refine your location with the left and right arrow keys.
Press the I key to mark an In point at this location.
An In point is placed in the scrubber bar at this location, as well as over the image area, just as it did when you pressed the Mark In button.
Play the clip and, without stopping, press O to mark an Out point after the snake reverses position and moves to the other side. If you're not satisfied, mark a different Out point.
To adjust the Out point directly, drag the point itself left or right in the scrubber bar.
TIP
Be sure to drag from the black triangle of the Out point, otherwise you will move the playhead instead.

As you drag the Out point in the scrubber, you see the new Out point change in the Viewer image area. Also, the Timecode Duration field updates to reflect the new duration between the In and Out points. However, when you stop dragging, the image in the Viewer reverts to the playhead location.
Click the Play In to Out button to play the marked portion of the clip.
Click the Recent Clips pop-up menu and select blue nose hawk.
Once you mark edit points on a clip, those edit points stay with the clip until you remove them.
Choose File > Save Project, or press Cmd-S, to save the edit points you've created.
When editing a clip to the sequence, you can use just one edit point or sometimes no edit points at all. Final Cut Pro will default to using the first frame of the clip as an In point if no In point has been marked. It will use the last frame of the clip as an Out point if no Out point has been marked. If no In and Out points have been marked, the entire length of the clip will be used in the edit.
Open the landscape clip and play it. Move the playhead to the head of the clip.
Press Shift-right arrow two times to move the playhead 2 seconds forward in the clip, and mark an In point. Press the Play In to Out button to view the marked portion of the clip.
With no Out point, the clip plays from the In point to the end of the clip.

Open the digging mouse clip and play it.
You will use this clip from the beginning, so you will not need to mark an In point.
With the playhead in the Home position, press Shift-right arrow three times to move the playhead forward 3 seconds. Mark an Out point at this location.

Without an In point, this clip automatically starts at the beginning and plays to the Out point.
Open the orange lizard clip and play it. To use this clip in its entirety, you can do one of three things:
Don't mark the clip at all.

When edited, this clip will play from first to last frame.
Click the Mark Clip button in the Marking controls.

In one step, and regardless of where the playhead is located, this button marks an In at the first frame and an Out at the last frame of the clip.
To try the third option, clear these marks by choosing Mark > Clear In and Out.
Press X to use the shortcut to mark the entire clip.

Each of these three options will yield the same result: using a clip in its entirety. However, the easiest option is to just use the clip unmarked.
Sometimes, rather than marking a specific action point, you may choose to set a duration or an amount of time you want to use a clip. For example, if you have a locked-down, wide shot of some ongoing activity, the actual start or stop action point may not be as critical as the amount of time you want to use the shot.
Open the bug buried clip and play it. Press Home to move the playhead to the beginning of the clip.
Press Shift-right arrow seven times to move the playhead forward seven seconds from the head, and mark an In point at this location.
To create a 3-second duration from this In point, click the Timecode Duration field and type 3:00. Press Return to enter this duration.
An Out point is automatically created in the scrubber bar 3 seconds from the In point.
Let's change the duration to 4 seconds. Enter 4. (number four followed by a period) in the Timecode Duration field and press Return.
The Out point adjusts automatically to create a 4-second duration.
Open the scorpion clip and move the playhead 3 seconds in from the head of the clip.
Mark an In and give this clip a 2-second duration using the method shown in the preceding steps.
You can apply a similar approach to create a duration from the end of a clip or Mark Out point. But unlike the previous example, where the Out point is automatically calculated from the In point, here you move the location of the playhead by a specific amount by typing an offset number in the Current Timecode field. Then you mark an In point at that location.
Open the small cat clip and press End to move the playhead to the end of the clip.
This will be the Out point, but you don't need to mark an Out here because it is the last frame of the clip.
Click in the Current Timecode field on the right (not the Timecode Duration field on the left) and type –300 (minus 300) or –3. (minus 3 followed by a period), and press Return.
The Current Timecode location number is offset by that amount and the playhead is backed up 3 seconds before its current placement at the end of the clip.
Press I, or click the Mark In button, to set an In point at this location.
Click the Play In to Out button, or press Shift- (backslash), to play the marked portion of this clip.
The clip plays from the new In point to the end of the clip.
Sometimes, you may have screened clips and logged timecode numbers to use as In and Out points in editing. If edit points have been selected through a separate screening or logging process, you can go directly to those timecode locations and mark them as edit points.
Open the feathered ears clip and play it.
Click in the Current Timecode field, type 1:03:29:09, and press Return.
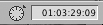
In the scrubber bar, the playhead jumps to the timecode location labeled 1 hour, 3 minutes, 29 seconds, and 9 frames.
Mark an In point at this location.
This time, with the Viewer window active and your pointer anywhere in the window, type 1:03:34:17.
As you type, the numbers are automatically entered in the Current Timecode field.
Press Return to enter the number. The playhead jumps to this location.
Mark an Out point here and play the marked portion of the clip.
Open the lizard eye move clip and play it.
Following steps 2 through 6, mark an In point at 1:03:39:00 and an Out point at 1:03:41:16 on the lizard eye move clip.
Once you have marked a clip, you can view the material at, around, or between those marks by clicking one of the Viewer transport buttons or using a keyboard shortcut. Let's work with one clip and view its marks in different ways.
Open the scorpion clip from the Browser.
This clip has already been marked with an In and Out point.
You can move the playhead to either the In or Out point three different ways: using Shift plus I or O, the transport controls, or the up and down arrows.
Follow these steps to go to either the In point or Out point of this clip:
Press Shift-I to go to the In point; press Shift-O to go to the Out point.
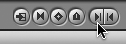
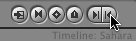
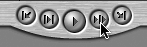
Click the Previous Edit button to go back to the In point; click the Next Edit button to go back to the Out point; click it again to go to the end of the clip; click the Previous button to go back through both edit points to the beginning of the clip.

Press the up arrow to jump the playhead backward to each of the edit points toward the head of the clip; press the down arrow to jump the playhead forward to each of the edit points toward the tail of the clip.
The up and down arrows work the same way as the Previous and Next Edit buttons do.
When you use the Play In to Out button to view the marked portion of your clips, the playhead stops when it gets to the end of the clip. You can change how you view a clip or sequence by turning on Loop Playback. With Loop Playback active, the clip plays repeatedly so you can see it over and over again.
Click the Play In to Out button, or press Shift-, to see only the marked portion of the small cat clip.
The clip plays from the In point to the Out point and stops.
To see the marked area play repeatedly, choose View > Loop Playback, and click the Play In to Out button again.
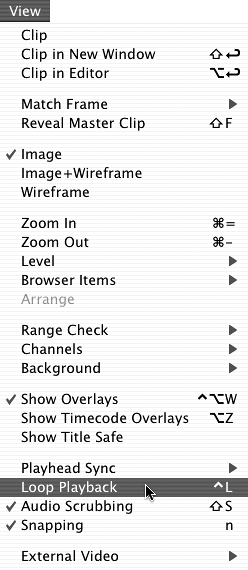
Choose View > Loop Playback again, or press Ctrl-L, to deselect this option. (It is deselected if it doesn't have a checkmark next to it in the View menu.)
Sometimes you want to see the area around the playhead. The playhead always marks the current location. Again, there are buttons and keyboard shortcuts that do this.
Press Shift-I to move the playhead to the In point of this clip.
Click the Play Around Current button to play a little before the mark point and a little after.
The Play Around Current function is not tied to a mark. It will play around the current location of the playhead, wherever that is in the clip or sequence.
To use this button's shortcut, press the (backslash) to play a little before and after the current playhead position.
Once you mark In and Out points on a clip, they stay with the clip until you remove them. To remove edit points, you'll utilize the same keys that you did for marking and viewing edit points—I, O, and X.
Click the Recent Clips pop-up menu and select the orange lizard clip.
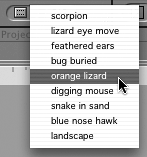
The full length of this clip was marked in an earlier exercise.
Press Option-I to clear the In mark.
Press Option-O to clear the Out mark.
Press X to mark the full length of the clip again.
Press Option-X to clear both the In and Out marks at the same time.
Press Cmd-S to save your new edit points.
Before you edit marked clips into a new sequence in the Timeline, you need to do a little preparation. First, you need to create the new, empty sequence in the Browser, name it, and open it in the Timeline. Then you have to position the playhead where you want to make the edits and make sure the the clip will go to the correct track.
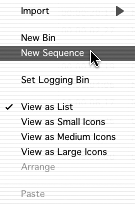
In the Browser, click the triangle to display the contents of the Sequences bin.
Ctrl-click in the empty gray area of the Browser to bring up the contextual menu and select New Sequence.
NOTE
You can also create a new sequence by choosing File > New > Sequence, or pressing Cmd-N in the Browser.

In the Browser, a new sequence icon appears with Sequence 2 (or other sequential number) in the name area.
In the sequence name area, type My Sahara Intro, and press Return.
To keep the elements in your Browser organized, drag the new sequence into the Sequences bin.

Double-click this sequence to open it in the Timeline.

The Timeline now contains two sequence tabs identifying the two open sequences. The same two sequence tabs appear in the Canvas as well.
To prepare for the first edit, make sure the playhead is parked at the head of the sequence.
The playhead position determines the placement of the edit in the sequence, and the clip's marked duration determines how much of the clip is used.
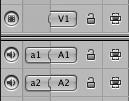
On the far left of the Timeline is a track control area. Each track you use in a sequence is given a different number, such as V1 and V2 for video tracks, and A1 and A2 for audio tracks. You can control certain aspects of each track using the track controls. For now, look at the v1 Source control.
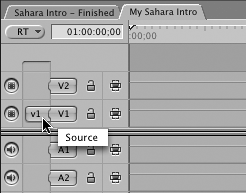
When you open a clip into the Viewer, Source controls appear in the Timeline track area for that clip. The clips you have been marking are all video only clips. Therefore, you will see just a v1 Source control. When a Source control is connected or patched to the upper case V1 Destination control, the source video will be edited to the V1 track in the Timeline.
Make sure the v1 source track is connected, or patched, to the V1 destination track.
You can make different types of edits in Final Cut Pro, and each type places a clip in a sequence a little differently. In this lesson, you will work with two types of edits: Overwrites and Inserts. An Overwrite edit places a clip over whatever is on a Timeline track, and an Insert edit positions a clip between other clips currently on a track However, the method of making edits is similar for all edit types.
Overwrite editing places a clip in the Timeline over whatever is currently at the playhead position. The Timeline may be empty at that point, or another clip may be present. Either way, the new clip simply overwrites whatever is there.
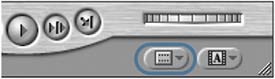
Like most functions within Final Cut Pro, there are several ways to make an edit. In this exercise, you will use the Edit Overlay in the Canvas to place the edits into the My Sahara Intro sequence in the Timeline.
From the Clips bin in the Browser, open the landscape clip in the Viewer. Press Play In to Out to view the marked portion of the clip.
Click and hold your pointer in the image area.
A thumbnail of your edit attaches to the pointer.
Drag the thumbnail image into the Canvas window, but don't release the mouse.
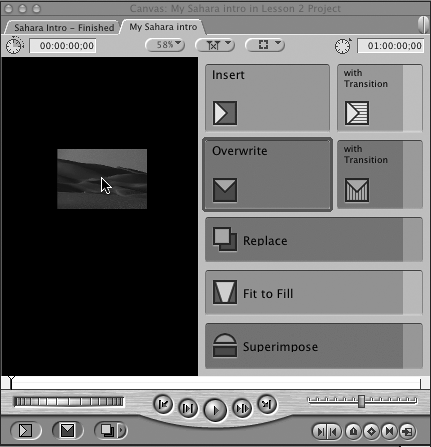
The Edit Overlay appears in the Canvas window with a palette of seven sections representing seven different types of edits. The red Overwrite section has a brighter border around it, indicating that it is the default edit option.
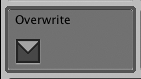
The icon on the Overwrite section has a downward-facing triangle or arrow. This is a visual clue that you will be covering or overwriting anything in its place in the Timeline.
Drag the landscape thumbnail image onto the Overwrite section in the Edit Overlay and release the mouse.

The marked clip is placed in the Timeline at the playhead position. The playhead jumps to the end of the clip, or more specifically, the first frame of the space following the clip, awaiting the next Overwrite edit.
From the Browser, open the blue nose hawk clip in the Viewer.
This clip has already been marked, and the playhead is positioned where you want this edit to be placed, after the first clip in the sequence. So you are ready to proceed to make another Overwrite edit.
In the Viewer, drag the thumbnail image to the Edit Overlay in the Canvas, and drop the image onto the Overwrite section.
Repeat the process with the orange lizard clip. Open the clip, and drop its thumbnail image onto the Overwrite section in the Canvas Edit Overlay.
Make the Timeline active. Press Home and play the clips you've edited. If Looping is still active, click Ctrl-L to turn it off.
When the playhead gets to the end of the last clip in the sequence, it stops. This is the correct position to place the next Overwrite edit.
To make an Overwrite edit, you can also click the Overwrite edit button in the Canvas or press a keyboard shortcut. These methods will produce the same result as dragging to the Edit Overlay. You will continue editing clips to the end of the sequence. As always, be aware of playhead placement as well as the Source to Destination track controls.
Open the bug buried clip in the Viewer and play the marked portion.
To edit this clip, click the red Overwrite edit button in the Canvas.
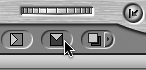
The clip is automatically placed at the end of the sequence, at the playhead position, just as the other edits were.
This time, move the playhead in the Timeline back 1 second by pressing Shift-left arrow.
The next Overwrite edit will begin here and overwrite the remainder of this clip, erasing it from the sequence.
Open the lizard eye move clip and click the Overwrite button.
The bug buried clip appears shorter in the Timeline than it did before.
Open the small cat clip and click the Overwrite button again.
Hover the pointer over the red Overwrite edit button.
When you move over the Overwrite edit button, a tooltip appears displaying the overwrite shortcut, F10.
Open the feathered ears clip and this time press F10 to edit this clip into the sequence.
In the Timeline, press Home and play the sequence.
In the next exercises, you will add a narration track and make Insert edits to this sequence.
Throughout this book, you will learn numerous ways to work with audio in Final Cut Pro. In this lesson, you will simply open an audio-only narration clip and add it to the sequence. You will use the full length of the clip, so marking the clip will not be necessary.
In the Browser, click the small triangle next to the Audio bin.
Double-click the intro narration sound clip to open it in the Viewer and click the Play button or press the spacebar to play it.
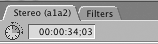
In the Viewer, the clip appears with a single Stereo (a1a2) audio tab displaying two tracks of stereo audio. (This tab also has additional audio controls, which will be covered in a later lesson.)
In the Timeline track controls area, only a1 and a2 Source controls appear and are patched to the A1 and A2 destination tracks.
Click the Timeline to make it active, and press Home to move the playhead to the beginning of the sequence, where you will edit the narration track.
Click the Overwrite button to edit the audio clip at this location.
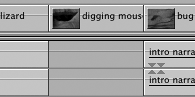
The narration track is laid in the Timeline on A1 and A2 from the beginning of the sequence.
Click the Timeline to make it active and press Shift-Z to bring the entire track into full view.

Press the Home key and play the sequence with the narration.
The narration track is a little longer than the current V1 track. You will add more video edits in the next Insert exercise.
In the next exercise, you will insert clips throughout your sequence. Before making major changes to a sequence, it's a good idea to back up the sequence by duplicating it. This way, if you don't like the new changes, you can go back to the previous version and start again. Duplicating a sequence makes an exact copy of the edit information. It does not duplicate the source media.
In the Browser, Ctrl-click the My Sahara Intro sequence icon.
A contextual menu appears with different options.
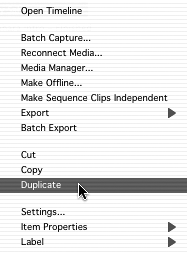
Select Duplicate.
A duplicate sequence is created and placed under the original sequence in the Browser. The word Copy is added to the sequence name.
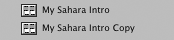
To rename this sequence, click in the name area of the copy and type Overwrites Only. Press Tab or Return to accept it.
Double-click the Overwrites Only sequence to open it in the Timeline.
Click alternately the Overwrites Only and My Sahara Intro sequence tabs.
At this point, the two sequences should be identical.
To close the Overwrites Only sequence, Ctrl-click its tab in the Timeline or Canvas, and select Close Tab.
Take a moment to save the work you've done in your project by pressing Cmd-S.
In order to make the video track of this sequence longer to match the music length, you will add more clips. But rather than add them to the end of the sequence, as you've been doing, you will insert the clips between existing clips by using the Insert edit.
When you insert a clip into the sequence, all clips in all tracks following the new clip are pushed down the duration of the clip. Since you now have a continuous music track you don't want to disturb, you will lock it so that inserting the video clips will not affect it.
As in Overwrite editing, you will use the same three methods of making an edit and will use the location of the playhead to determine where a clip will be inserted.
From the Browser, open the digging mouse clip and play it. You will use the clip as marked.
In the Timeline, use the up or down arrow to move the playhead to the first frame of the bug buried clip.
The L-shaped mark in the lower-left corner of the Canvas image area appears, indicating that the playhead is positioned on the first frame of the clip.
You will insert the digging mouse clip in front of this clip.
As you did with the first Overwrite edit, click and drag the Viewer image to the Canvas Edit Overlay, but don't release the mouse.
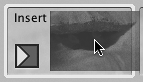
The Insert section is yellow, and its icon is an arrow pointing to the right. This indicates that all the following clips in the sequence will be moved forward to allow room for the new clip you are editing.
Place the clip on top of the yellow Insert section, and when the section is highlighted, release the mouse.
In the Timeline, the clip is inserted between the orange lizard and bug buried clips. But the narration was affected as well, which you don't want in this situation.
Press Cmd-Z to undo the last action—in this case, the Insert edit.
Another track control in the Timeline is the Lock control. Locking a track keeps it from being affected by an editing function, such as inserting the clip in step 4.
In the Timeline, click the Track Lock controls for the A1 and A2 tracks.
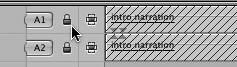
Diagonal lines appear on the music tracks, indicating that these tracks are locked and cannot be changed.
Now repeat step 4 and play this area of the sequence.
In the Timeline, press the down arrow to move the playhead to the first frame of the lizard eye move clip.
You will insert the snake in sand clip in front of the lizard eye move clip by using a different editing method.
Open the snake in sand clip and click the yellow Insert Edit button in the Canvas.
The clip is inserted before the lizard eye move clip.
Press the down arrow again to move the playhead to the first frame of the small cat clip.
Open the scorpion clip and insert it into the sequence by using the F9 shortcut.
Press Home to go to the head of the sequence and play it.
In later lessons, you will learn to refine your sequence by trimming and adjusting edit points.
As a review, create a different version of the Sahara animals sequence. Remember, refining is covered in a later lesson. For now, just practice opening, marking, and making edits in different ways.
Create a new sequence and name it Practice Edits. Drag it into the Sequences bin.
Edit the Sahara 25.aif music track to the A1 and A2 destination tracks in the sequence.
Open four different clips and mark a specific action or enter a duration (about 4 seconds per clip). Edit them into the sequence as Overwrite edits.
Open three additional clips, mark them (about 3 seconds per clip), and insert each one between the existing clips.
Save frequently throughout your editing process, and again at the end of your session, whether the sequence is complete or not. You may have made only minor organizational changes or marked a few clips. Saving your project ensures these decisions are included the next time you open that project.
Press Cmd-S to save the current project.
Choose File > Close Project if you want to close this project.
NOTE
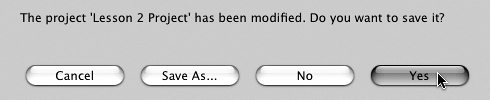
When you close a project or quit Final Cut Pro, a prompt to save appears if you have made any changes since the last time you saved the project. If this window appears, click Yes to ensure that you are saving the most recent changes.
If you want to keep working on this project the next time you open Final Cut Pro, you don't have to close the project prior to quitting the program. If you quit with that project open, it will open along with the program the next time you launch Final Cut Pro.
Press Cmd-Q to quit Final Cut Pro, or continue to the next lesson.
How to open and view clips in the Viewer
How to mark In and Out points on clips
How to set durations
How to adjust edit points
How to go to and view edit points
How to open and close sequences
How to make Overwrite edits
How to back up a sequence
How to make Insert edits
How to play and review edits
How to add music to a sequence
How to lock tracks
Table . Keyboard Shortcuts
Marking | |
|---|---|
I | Marks an In point |
O | Marks an Out point |
X | Marks the entire clip length |
Option-I | Removes an In point |
Option-O | Removes an Out point |
Option-X | Removes both In and Out points together |
Shift-I | Moves the playhead to the In mark |
Shift-O | Moves the playhead to the Out mark |
Shift- | Plays from the In to the Out mark |
Plays around the current playhead location | |
Cmd-Z | Undoes the last action |
Playing and Viewing | |
|---|---|
Shift-Z | Shows the entire sequence in the Timeline |
Ctrl-L | Enables Loop Playback |
Cmd-O | Opens a project |
Ctrl-click | Brings up a contextual menu |
Cmd-S | Saves the current status of a project |
Editing | |
|---|---|
F10 | Makes an Overwrite edit |
F9 | Makes an Insert edit |