
Lesson Files | FCP4 Book Files > Lessons > Lesson 3 Project |
Media | Sahara folder; Music folder |
Time | This lesson takes approximately 60 minutes to complete. |
Goals | Select and move clips in the Timeline |
Copy and paste clips | |
Select multiple clips in the Timeline | |
Work with the Snapping control | |
Overwrite clips directly to the Timeline | |
Insert clips directly to the Timeline |
Final Cut Pro's flexibility allows an editor to work with different styles of editing. You can click edit buttons on the interface, or you can use keyboard shortcuts such as F9 and F10 to make Insert and Overwrite edits. Or you can drag a clip to the Edit Overlay in the Canvas. But there's another editing style that's easy yet powerful at the same time: dragging a clip directly into the Timeline to make an edit. Once a clip is in the Timeline, you can select it, move it, or copy and paste it. You can do just about anything you need to do to manipulate the clip or sequence using the Timeline editing approach.
To get started in Lesson 3, launch Final Cut Pro by clicking on the program icon in the Dock and then open the project for this lesson. You will also create a new sequence to begin editing.
Launch Final Cut Pro by single-clicking the program icon in the Dock.
Close all open projects by Ctrl-clicking their tabs and selecting Close Tab.
The Canvas and Timeline windows close when there are no sequences to display, and the Effects tab is the only tab in the Browser.
Choose File > Open, or press Cmd-O, and choose the Lesson 3 Project file from the FCP4 Book Files > Lessons folder on your hard drive.
This project has three bins: Audio for music and sound effects, Sahara Rain for the video clips used in this project, and Sequences.
In the Lesson 3 Project tab, click the disclosure triangle next to the Sequences bin and double-click the Sahara Rain - Finished sequence to open it.
The Canvas and Timeline windows open to display the open sequence.
Play this sequence to see what you will create in this lesson.
This sequence has four audio tracks. On A1 and A2 is a stereo music track that was created in the program Soundtrack, which comes bundled with Final Cut Pro 4. You will learn to create a sound track in Lesson 14.
On track A3 and A4 is a stereo sound effect of rain. One clip has been duplicated several times to continue the sound effect under the entire video track.
In the previous lesson, you created a new sequence in the Browser and then dragged the icon into the Sequences bin to keep your project organized. But you can also create a new sequence that appears in the Sequences bin in one step.
To create a new sequence directly in the Sequences bin, move the pointer to the Sequences bin and hold down the Control key. Don't click just yet.

A tiny icon appears representing a contextual menu. Clicking the pointer at this location brings up the contextual menu for just that item.
Ctrl-click the Sequences bin and select New Sequence from the contextual menu.
The new sequence appears already in the Sequences bin.
Name the new sequence Timeline Editing and double-click it to open it in the Timeline.
Timeline editing can include moving one clip's position in the sequence or moving all the clips on one or more tracks. It also includes copying and pasting a clip or a group of clips to another point in the sequence or to a different sequence altogether. You can even trim a clip directly in the Timeline, but that will be covered in a later lesson. Before you work with multiple clips in the Timeline, let's start by working with a single clip to learn how to select, move, copy, paste, and delete it.
NOTE
The more facility you have manipulating clips in the Timeline, the easier it will be to edit clips to the Timeline.
Selecting clips in the Timeline follows Apple selection principles in general. Clicking once on a clip selects it. Clicking off the clip deselects it. But with Final Cut Pro, where you click on the clip itself is very important. For now, you will edit some clips into the Timeline using the methods from the previous lesson as a review.
In the Browser, click the triangle next to the Sahara Rain bin and double-click the raining on trees clip to open it in the Viewer. Play the clip.
This is a video-only clip. You will use the full length of this clip in the sequence and add the sound of rain in another step.
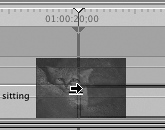
In the Timeline, move the playhead to the middle of the empty sequence.
To edit the raining on trees clip into the sequence at this location, click the red Overwrite edit button in the Canvas.
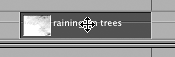
To select the raining on trees clip in the Timeline, click once in the middle of the clip.
The clip turns brown to indicate that it is the selected or highlighted clip.
To deselect this clip, click in the blank Timeline area above the clip.
Move the mouse pointer to the head of the clip. Note that the pointer changes to a vertical resize arrow. Click once to select the In point of this clip.

Move the pointer across the clip to the Out point. When you see the resize arrow, click once to select the Out point.
To select the clip itself and not just an edit point, click again in the middle of the clip with the pointer.

To deselect the clip, you can also use the keyboard shortcut, Shift-Cmd-A.
Clips can be dragged left or right and up or down in the Timeline. Dragging clips left or right repositions them in the sequence. Dragging clips up or down repositions them vertically onto another track in the sequence. A clip can also be moved by typing an offset amount directly in the Timeline.
In the Timeline, click the raining on trees clip again to select it. Once selected, move the mouse pointer through the clip without dragging it.
The pointer changes to a move cursor.
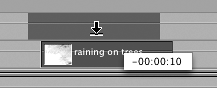
Click and drag the raining on trees clip to the right, but don't release it.

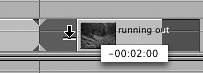
Several things happen. A small box appears that displays a + sign and a number. This is how far in time you have moved the clip forward from its original position. Also, the pointer changes to a downward arrow. The two small viewing frames in the Canvas are covered in the next exercise.
Release the clip.
Now drag the clip to the left and then right past its stationary position.
A minus or plus sign appears to indicate how far the clip is being moved from its current position. If you move the clip again, the distance is measured from the new location.
Drag the clip up to the V2 track above it and release it. Drag it back down to the V1 track.
Dragging up and down repositions the clip to another track. You can also reposition it horizontally in the Timeline at the same time.
With the clip selected, type 300, for 3 seconds, in the Timeline track area.
NOTE
It may seem strange to just start typing a number without typing it somewhere specific, but Final Cut Pro anticipates what you want to do.
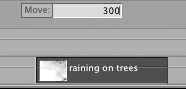
In the center of the Timeline, a Move box appears with the number you typed.
Press Return to enter the amount and move the clip.
To move a clip to the left, enter a minus sign in front of the move amount.
Type –4. (minus 4 followed by a period) and press Return.
Move the playhead to about an inch before the clip and drag the clip toward the playhead. When you get close, let the clip snap to the playhead.

Snapping is a function that you can toggle off or on throughout the editing process. You will use it again later when you edit to the Timeline.
Now drag the clip to the beginning of the Timeline as the first edit in this sequence.
You can use several methods to select a group of clips. Some follow the normal selection process used when you selected clips and put them in bins in Lesson 1. Some use Final Cut Pro tools from the Tool palette. In this exercise, you will practice different methods of selecting and moving a group of clips.
First, edit the running in, just sitting, and running out clips into the sequence as Overwrite edits following the raining on trees clip. They do not need to be marked; you will use the full length of each clip. When you've edited the clips, click the Timeline to make it active, press Shift-Z to show the sequence in full view, and play the sequence.

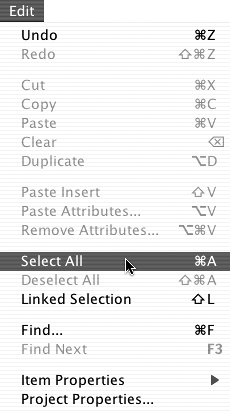
With the Timeline active, select all the clips by choosing Edit > Select All from the main menu (or by using the shortcut, Cmd-A).
With all the clips selected, click any one of the selected clips and drag right. Release the clips when you've moved them about 10 seconds forward, or to the right, in the Timeline.

As you drag, you see the distance you moved the clips in the Move box.
With clips still selected, type –5. (minus 5 followed by a period) in the Timeline and press Return.
This moves the group of clips 5 seconds back to the left.
Deselect these clips in one of three ways:
Choose Edit > Deselect All.
Press Shift-Cmd-A.
Click in the empty Timeline area.
There are several ways to select a group of clips. After trying each method, deselect the clips using one of the options in step 5.
Click the first clip in the sequence and Shift-click the last clip.
All clips in between become selected.
Click the first clip and Cmd-click the last clip.
Just those two clips become selected.
Drag a marquee around the first three clips.
As you start to drag, the pointer changes to a crosshair icon. Every clip the crosshair icon touches becomes selected. Do not deselect.

To move the raining on trees, running in, and just sitting clips two seconds earlier in the Timeline, type –2. (minus 2 followed by a period) and press Return.
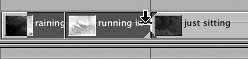
Drag the fourth clip left until it snaps to the third clip, but don't release the mouse.
Snapping triangles appear around the edge of the clip.
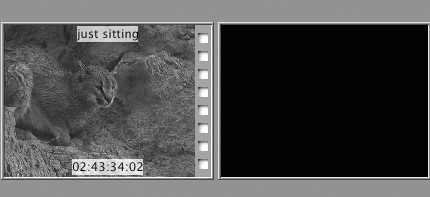
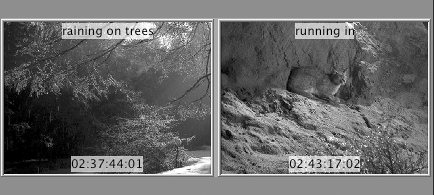
In the Canvas window, two edit frames appear. The left frame displays the clip frame before the clip you're dragging. The overlay identifies the clip name and source timecode number. The right frame displays the clip frame that follows the clip you're dragging. In this case, no clips follow this one in the sequence, so the right frame is black.
Now continue to drag the fourth clip left, into the other clips, but don't release the mouse.
As you drag a clip over other clips in the Timeline, the Canvas edit frames update to display the frame before and frame after the clip that's being dragged or repositioned. This is a good way to match action when making changes.
Now move the clip you've been dragging to snap to the end of the last clip, the just sitting clip, and release it. This should place the clips back in their original order once again.
Select all the clips using any of the selection methods and drag them to the left to the beginning of the sequence, then release the mouse. Deselect the clips.
Copying and pasting in the Final Cut Pro Timeline is similar to copying and pasting in a word-processing program. First you select a clip. Next you copy it. Then you move the playhead to where you want to paste the clip, and you paste it. You use the same Apple shortcut commands for cut, copy and paste: Cmd-X, Cmd-C, and Cmd-V.
Click the triangle to display the contents of the Audio bin, then double-click the rain sound clip to open it in the Viewer. Play the clip.

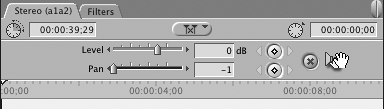
This is a sound-only clip. Notice the Stereo tab in the Viewer. Stereo tracks appear together in one tab, but they take two tracks in the Timeline.
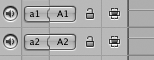
Also notice in the Timeline track control area that the a1 and a2 Source controls are targeting the A1 and A2 Destination controls. This is where you want to place this audio.
In the Timeline, move the playhead to the head of the sequence and click the red Overwrite edit button. Play the clip in the sequence.
This clip adds the sound of rain under the video clips. But the clip itself is not long enough to sustain the entire sequence. Let's copy the clip and paste it several times to continue the sound of the rain.
Select the rain sound clip and choose Edit > Copy, or press Cmd-C.
Use the up or down arrow to position the playhead at the end of the first rain sound clip.
From the main menu, choose Edit > Paste, or press Cmd-V.

A copy of the rain sound clip is placed at the playhead position in the Timeline, and the playhead moves to the end of that new clip.
With the playhead at its current position at the end of the second rain sound clip, press Cmd-V again, and then two more times, for a total of five rain sound clips. Play the sequence.

NOTE
You can keep pasting the clip again and again because it remains on the computer Clipboard until something else replaces it.
The five rain clips provide a base of sound for the current video clips. But the last rain sound clip goes beyond the end of the sequence. You can use the drag approach to shorten or trim the last sound clip so it stops where the video clips on the V1 track stop. Trimming will be covered in depth in Lesson 5.
Click on the Out point of the last rain sound clip to select it. Drag the Out point to the left until it snaps in line with the Out point of the running out clip. When it snaps in place, release the mouse.
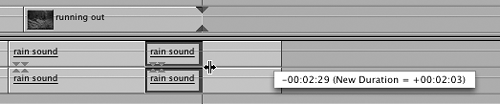
The offset information in the yellow box indicates the trim amount and the new clip length.
You have just completed the first step in learning how to edit in the Timeline by manipulating clips already there. Now it's time to learn to edit clips by dragging them to the Timeline. This method goes hand in hand with the drag-and-drop approach you've been using to manipulate the current clips.
But before you start making edits directly to the Timeline, let's focus on some of the automatic functions in the Timeline editing process.
When you edit to the Timeline, the position of your pointer in a track will determine the type of edit you make, either Overwrite or Insert. Properly positioning your pointer is the key to editing in the Timeline.
Use any one of the selection methods described in the preceding exercise to select all the clips in the sequence.
Press the Delete key to delete these clips.
Each audio and video track in the Timeline has a thin line running across the upper-third area of the track. This is the line you focus on when making edits directly to the Timeline.
Move the tip of your pointer up and down over the one-third line in the V1 track.
Nothing happens now, but this is the point where edit options will change when you have a clip in hand.
Open the raining on trees clip into the Viewer. You will use the full length of this clip.
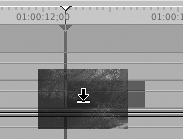
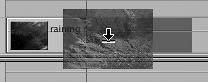
Click in the Viewer image area and drag the raining on trees clip thumbnail to the middle of the Timeline, but don't release the mouse.
With clip thumbnail in hand, focus on the tip of your pointer and drag it up and down over the one-third line in the V1 track just as you did before.
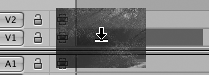
When the tip of the pointer is positioned below the one-third line, an Overwrite edit is indicated with a downward arrow and solid box representing clip length.
When the tip of the pointer is positioned above the one-third line, an Insert edit is indicated with a forward arrow and hollow box representing clip length.
While still holding the mouse button down, drag the clip back to the Viewer and release the mouse.
When you made Overwrite and Insert edits in the previous lesson, you moved the playhead in the Timeline to where you wanted to place the new clip. This is not required when you drag a clip into the Timeline. You can place a new clip wherever you choose to drop it, regardless of the playhead position.
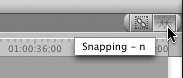
However, a clip will snap to the playhead when you move past it as long as the Snapping control is active. Using the snapping function to snap a clip to the playhead will ensure that you are positioning your clip exactly where you want it to go. The Snapping control is located in the upper-right corner of the Timeline button bar and can be toggled off or on during the editing process.
NOTE
Every window has its own button bar that can be customized with a unique set of functions, tools, or commands. The two default functions that appear in the Timeline window are the Snapping control and the Linked Selection control. You will learn to customize these button bars in a later lesson.
Click the Snapping control in the Timeline several times.
When snapping is on or active, the icon design turns green and looks concave. When the function is toggled off, the design is gray and appears flatter.
Make sure snapping is toggled on.
Drag the playhead to the center of the Timeline.
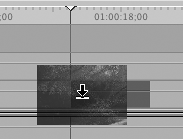
Drag the raining on trees clip from the Viewer to the Timeline again and position it on the V1 track to be an Overwrite edit—but don't release the clip.
Drag the clip across the playhead—but don't release it.
The dark, square portion of the clip beneath the thumbnail snaps to the playhead. In the Timeline ruler area, brown snapping triangles appear just beneath the yellow playhead, and the playhead stem in the track area is thicker.
Return the clip to the Viewer and release the mouse.
Turn snapping off by clicking the Snapping control in the Timeline button bar.
Now drag the raining on trees clip from the Viewer to the Timeline and drag it over the playhead.
The clip passes over the playhead without snapping to it. With snapping off, it is difficult to tell whether the clip is lined up at the playhead position or not.
As you drag, press N to toggle snapping back on again.
You can toggle snapping on and off even while you're moving a clip.
Drag the clip to the head of the Timeline. Make sure the downward, Overwrite edit arrow is showing, and drop the clip in the Timeline as the first Overwrite edit of the sequence.
The playhead jumps to the end of the newly placed clip, just as it did when you made Overwrite edits in the previous lesson.
Let's add to this sequence by making some additional Overwrite edits. You will edit three clips that tell a simple story. The feathered ear animal comes in to hide from the rain, sits a while, then leaves. You will edit these three clips using the drag to Timeline overwrite method.
Open the running in clip from the Browser. You will use the full length of the clip for now.
Drag the clip from the Viewer to the Timeline as an Overwrite edit and snap it to the end of the first edit.
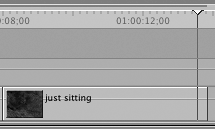
Open the just sitting clip, and drop it in as the third Overwrite edit at the end of the previous clip. Play the sequence.
Drag the playhead through the last clip and find the point toward the end of the clip where the animal blinks for a second time. Try to park the playhead after the second blink.
In this situation, the blink is so close to the Out point of this clip that the playhead may snap to the Out point. This is a good time to toggle off snapping by pressing N to finesse your playhead location. Once you've positioned the playhead where you want it, you can press N again to turn snapping back on.
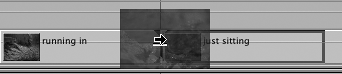
Open the running out clip and drag the clip from the Viewer to the Timeline. This time, snap it to the playhead in the previous clip and release it as an Overwrite edit.
Dropping the clip here overwrites the last portion of the just sitting clip.
Drag the last clip to the right.
The portion of the clip that came after the playhead is no longer part of the sequence. It has been overwritten by the last clip.
Drag the last clip back into place at the end of the sequence.
For an Insert edit to the Timeline, you want to place the tip of the mouse pointer just above the one-third line in the track. The visual clue is the sideways arrow and the hollow clip icon under the pointer.
For this exercise, make sure snapping is active in the Timeline.
Open the horned lizard clip in the Viewer, and mark an In point just before the lizard comes into frame. You will use the clip to the end, so you don't need an Out point.
Drag this clip into the Timeline and place it on V1 between the running in and just sitting clips, but don't release the mouse. Position the pointer above the one-third line in the V1 track. Make sure you see the visual clues of the forward pointing arrow and the hollow clip and then release the mouse.
The clips past this insertion point are pushed down the duration of the horned lizard clip.
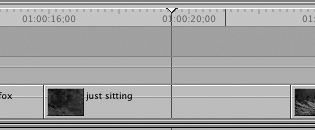
Open the little fox clip and play it. Then drag it to the V1 track and insert it after the horned lizard clip.
You can also insert a clip right in the middle of another clip. For example, you might decide to break up the action of a long clip by inserting a different image for a few seconds in the middle. The long clip will be split into two parts, and the second part will be pushed down the length of the newly inserted clip.
Position the playhead somewhere in the middle of the just sitting clip.
This is where you will insert the new clip.
Open the cat watching clip and mark an In point when it turns its face to look at the camera.
Drag and drop this clip as an Insert edit at the playhead position. Play this area of the sequence.
There are now two clips named just sitting in the Timeline and the cat watching clip sits between them.
Open the frog lizard clip into the Viewer and play the clip. You will use the entire length of the clip in this edit.
Drag the clip into the Timeline and insert it between the second just sitting clip and the running out clip.
Play the sequence and press Cmd-S to save these edits.
When you edit directly to the Timeline, you drag from the image area of a clip in the Viewer. But when you open a music clip, there is no video display. Instead, you drag from a Drag Hand icon as though that were the clip's image. Once in the Timeline, an audio clip can be manipulated the same way as video clips.
From the Browser, open the rain mix.aif clip.
The suffix in the name, .aif, represents a common sound file format.
In the Viewer, move your pointer over the Drag Hand icon (which looks like a hand on a speaker).
When the pointer is over the Drag Hand icon, it becomes a hand you use to drag the clip.
Drag the Drag Hand icon directly to the Timeline to the A1 and A2 audio tracks. Drop it at the head of the sequence as an Overwrite edit and play the sequence.
Let's say you want the music to begin on the second clip, not the first.
Drag the rain mix.aif clip to the right until the head of the clip snaps in place with the head of the second V1 clip, the running in clip. Then drag it to the head of the Timeline.

Open the rain sound clip and play it.
This is the sound of the rain you used earlier and copied several times to build an effects track.
Since there is a music track on the A1 and A2 tracks, this clip must be placed on the A3 and A4 tracks beneath the music. If you were using the edit button, Edit Overlay, or keyboard shortcut to edit this clip, you would have to change the destination for this sound effect to the A3 and A4 tracks. But when you drag edits to the Timeline, you can simply drag them to the specific track on which you want to place them.
Drag the Drag Hand icon from the Viewer Audio tab to the A3 and A4 tracks. Release this clip as an Overwrite edit at the head of the sequence.

Let's edit a second rain sound clip to the sequence another way. In the Timeline track control area, click the A4 Destination control to target the a2 source to this track in the Timeline. Then click the A3 Destination control to target the a1 source track.
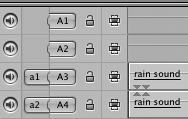
With the playhead at the end of the first rain sound clip, click the Overwrite edit button in the Canvas window.
The source clip is placed on the A3 and A4 tracks.
As you experienced earlier in the lesson, the one clip of the rain sound effect does not cover the entire sequence.
Copy the raining on trees clip in the V1 track and paste it at the end of the V1 clips. This creates a visual bookend for the sequence.
Copy the rain sound clip from the A3 and A4 tracks and paste it at the end of the second rain sound clip.
The playhead repositions to the end of the clip you just pasted.
Paste the sound effect as many times as is necessary to provide a continuous track of rain under the video.
Always save your project frequently throughout your editing session and again before you close the project or quit Final Cut Pro.
How to select and deselect clips in the Timeline
How to move a clip in the Timeline
How to copy and paste clips
How to view edit points in the Canvas window
How to use the snapping function
How to make Overwrite and Insert edits directly to the Timeline