
Lesson 1. Speeding Up Your Workflow
Spending a little time up-front in preparation saves considerable production time when you are knee deep in a project. The quicker you can get your ideas into Logic, the more time you can spend creating and producing music and audio!
This lesson covers techniques to make your Logic sessions more efficient, going beyond the basics to speed up your workflow. Throughout, you will learn how to quickly access common functions and tools, as well as how to customize Logic to suit your individual needs.
Using Project Templates
Logic is a versatile application that can be configured in many ways. Usually you will want to display data, tracks, and windows according to the type of project you are working on. For example, songwriting calls for a vastly different work process than, say, stereo-mastering a CD.
To aid in this, Logic enables you to create and use multiple templates as the basis for a project. Having a catalog of blank project templates, tailored to a specific workflow, will let you get to work more quickly and easily.
You can start by opening up one of the many premade templates that come with Logic Pro 8.
- Choose File > New.
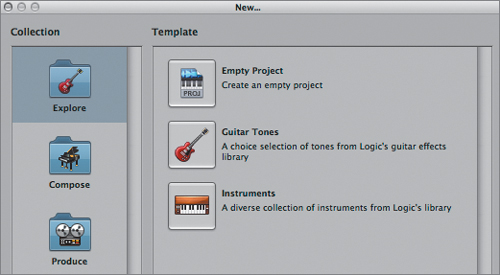
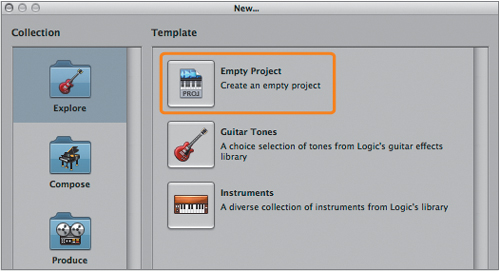
The Templates dialog opens, labeled “New.”
Logic Pro organizes its templates in four collections—Explore, Compose, Produce, and My Templates—each represented by a folder in the left pane. These collections contain individual templates suited to different workflows. Let’s explore a few examples:
- In the Collection pane, click the Compose folder.
- In the Template pane, click the Songwriter button.
The Songwriter template opens and a Save As dialog appears. When loading templates, Logic automatically prompts you to name and save a project file so as not to overwrite the original template. Since you are simply exploring a few templates in this lesson, you do not need to save a new project file.
- Click the Cancel button.
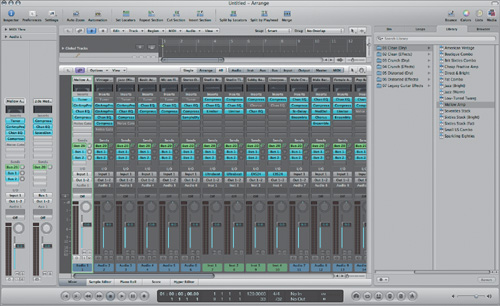
An untitled template file opens. The Arrange window displays multiple audio and software instrument tracks in the Arrange area, and the Inspector and the Library are open.
- Select the tracks, one by one, by clicking in the track list.
As you can see in the Inspector’s Arrange channel strip, each track is preconfigured for specific instruments (electric guitar, acoustic guitar, drums, bass, vocals, etc.), and has channel strips of effect and instrument plug-ins already instantiated.
- At the bottom of the Arrange window, click the Mixer button.
The Mixer opens, displaying all the channels used in the track list.
- In the Mixer, try scrolling to the right to view all the channel strips.
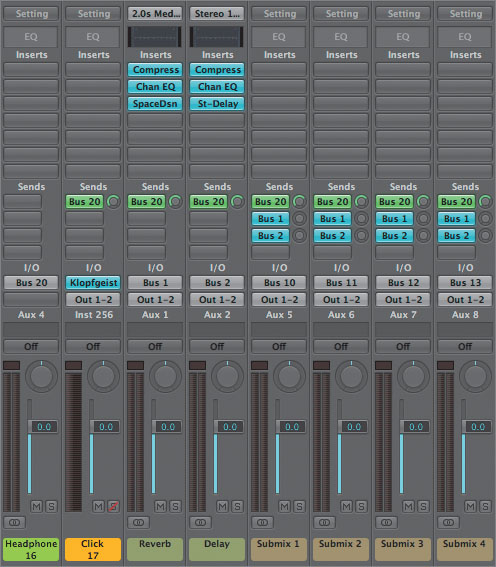
In addition to the audio and instrument channels from the Arrange track list, a variety of preconfigured aux channels are also present, already set up for send effects, headphone mix, and submixes.
Note
The green Send slots on each channel represent pre-fader (before the volume fader) sends to the Headphone channel (Aux 4). A pre-fader send enables you to have independence between the control room and headphone mix. This way, you can adjust the control mix normally (by adjusting the faders) and adjust the headphone mix via the send levels. All that’s needed is to set the Headphone channel’s output to any available stereo output on your audio interface.
- In the Media area on the right, click a few of the channel strip presets listed in the far right column of the Library.
The channel strip setting changes for the selected track, reflecting different instrument settings and effects configurations in the Arrange channel strip. Having the Library accessible from the beginning makes it easy to create new channel configurations to suit your individual needs.
As you can see, this template’s sole purpose is to help you start creating immediately, so you don’t have to first create tracks and routings, instantiate instruments and effects, and open the Library.
- Choose File > Close Project.
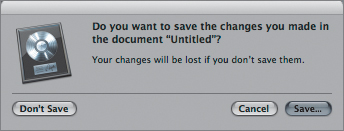
A message appears asking if you wish to save changes to the file.
- Click Don’t Save.
The untitled file based on the Songwriter template closes.

Creating Your Own Template
Although an extensive collection of premade templates comes with Logic Pro, eventually you will want to create custom templates to suit your individual workflow. You can do this by modifying one of the premade templates or making an entirely new one. In the following exercises, you will create a custom template from scratch, then configure the interface for maximum workflow efficiency.
- Choose File > New.
The Template dialog opens. You may have noticed that the Template pane always contains an Empty Project at the top, no matter which collection you select.
By clicking this button, you can create a project without any preconfigured tracks, routings, or display settings.
- In the Templates pane, click the Empty Project button.
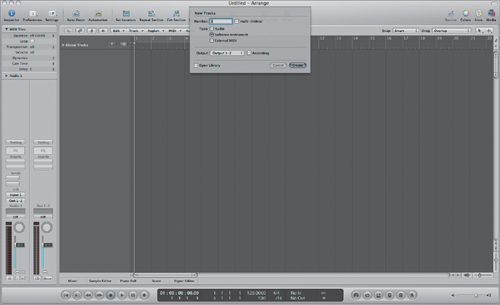
An empty project is created, and the New Tracks dialog opens awaiting input.
Creating New Tracks
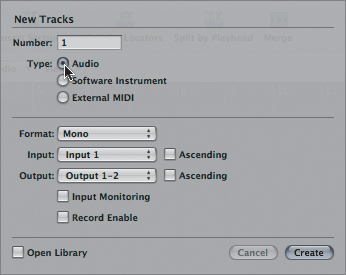
The New Tracks dialog allows the quick creation and configuration of all types of tracks.
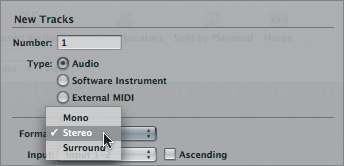
- In the New Tracks dialog, click to select the Audio button, if necessary.
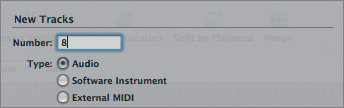
- In the Number field, enter 8.
- In the Format menu, choose Stereo.
- Click Create.
Note
In the New Tracks dialog, you can assign inputs and outputs automatically (even assigning multiple tracks in ascending order), as well as set them to open with input monitoring turned on and recording enabled. This gets you ready for laying down new tracks immediately.
Eight new stereo audio tracks are created and appear in the Arrange area’s track list.
You can create additional groups of tracks at any time by opening the New Tracks dialog.
- In the Arrange area’s local menu bar, choose Track > New.
Tip
You can also open the New Tracks dialog by clicking the Create Track (+) button at the top of the track list.
The New Tracks dialog opens.
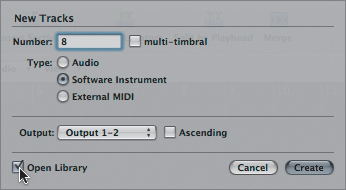
- In the Number field, enter 8.
- Click to select the Software Instruments button.
- Select the Open Library checkbox.
By selecting the Open Library option, you can automatically create new tracks and display the Library in the Media area.
- Click Create.
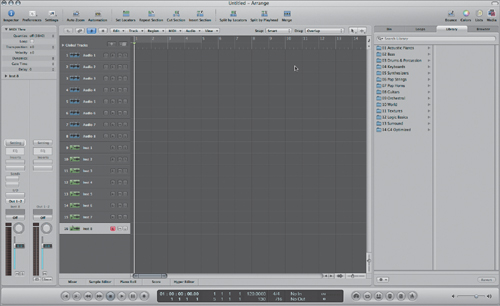
The Library opens, and eight software instrument tracks are created and displayed in the Arrange area’s track list.

Customizing the Interface
Logic has the reputation of being a highly customizable software application for good reason. Not only can you conform the viewing area to a specific workflow, but you can also customize access to the functions you use the most, keeping them at your fingertips.
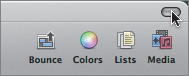
The Toolbar, new to Logic Pro 8, provides access to common editing functions and often-used areas. The Toolbar can also be customized.
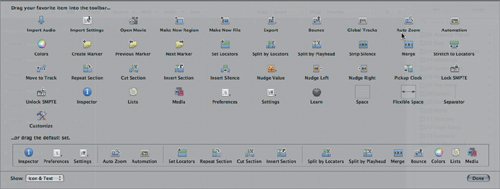
- Control-click the Toolbar area and choose Customize Toolbar from the shortcut menu.
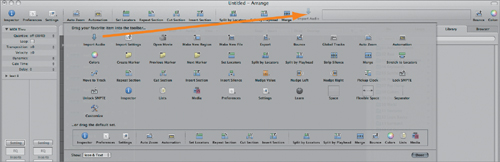
The Customize Toolbar dialog appears.
Functions in the Customize Toolbar dialog can be added to the Toolbar by dragging their icons to the Toolbar.
- Drag the Import Audio icon to the Toolbar, just to the right of the Merge button.
- Click Done.
The Import Audio button is added to the Toolbar.
In addition to customizing the Toolbar, you can also customize the Transport bar.
- Control-click the Transport bar, and choose Customize Transport Bar from the shortcut menu.
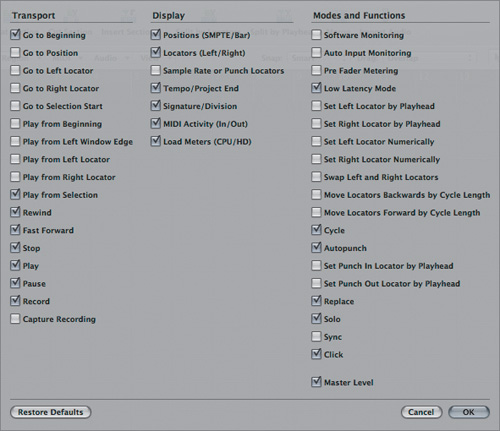
The Customize Transport Bar dialog appears.
To customize the Transport bar, select the checkbox of each function you want to add.
- In the Transport column of the dialog, select the Go to Position checkbox.
- Click OK.
The button is added to the Transport section on the left side of the Transport bar.
Creating Screensets
Logic Pro 8 has been redesigned to allow direct access to all editing and mixing functions from the Arrange area. This single window interface significantly speeds up workflow, but it can also get a little crowded when displaying many items at once.
Screensets enable you to assign area and window combinations (including all zoom settings and view options) to a number key on the computer’s keyboard. In the following exercises, you will create a custom screenset for your template.
- Click the various editor buttons at the bottom of the Arrange window.
It is especially apparent in the Mixer and Media area (Library) that screen real estate only goes so far! Even with a streamlined interface, a separate screenset dedicated to the Mixer could be advantageous.
- Click the button of the active editor to close the editing area.
By default, new project files have only one screenset. You can create a new screenset customized for mixing that still contains a small Arrange area to provide an overview of the project tracks.
- Press the 2 key.
A new screenset is created, indicated by Screenset 2 in Logic’s menu bar.
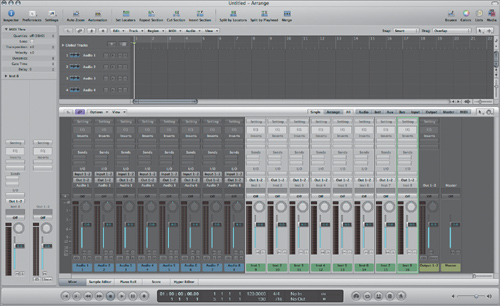
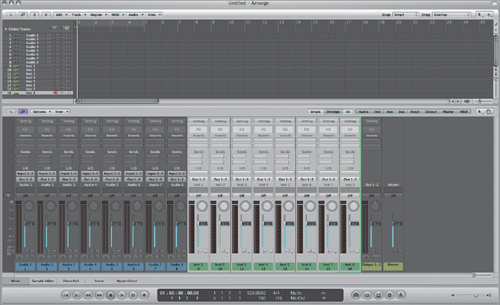
- Click the Mixer button.
The Mixer appears at the bottom of the Arrange window.
You now have a screenset consisting of the Mixer area and a small Arrange area.

Maximizing Workspace
When you work with larger productions, it is helpful to have as much space as possible to view the musical data. You should set up Screenset 2 for maximum viewable space in both the Arrange area and the Mixer, while making sure that you’re still able to access important project information.
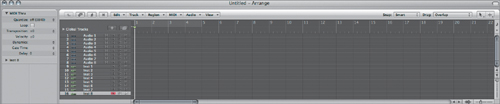
Currently, the Arrange area may display only four tracks without your having to scroll. If this small Arrange area is to serve as an overview of the project’s tracks, you must adjust the view to display as much of the arrangement as possible, both vertically and horizontally.
- At the far right of the Arrange area, drag the vertical zoom control all the way up.
Note
If you are using a smaller screen resolution than 1140 × 900, it is possible that the vertical zoom control will be hidden from view. If this is the case, use the Zoom Vertical Out key command (Control–Up Arrow) instead.
The Arrange area view shrinks vertically, but it still may not display all 16 tracks that you created earlier. To see all of the tracks, you need to gain screen space by closing infrequently accessed and redundant areas. Since you are devoting this screenset to mixing, access to the Toolbar’s editing and viewing functions is not essential.
- At the upper-right corner of the Arrange window, click the Toolbar button.
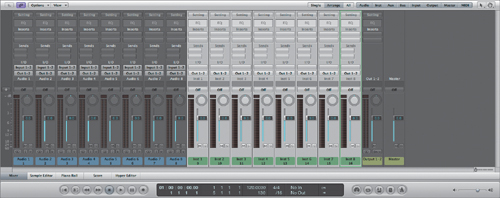
The window expands slightly, allowing a full display of all 16 tracks in the Arrange area.
Although the Inspector’s channel strips and Parameter boxes are vital when you’re working in the Arrange area, they are not needed when you’re mixing a project.
- In the Arrange area’s local menu bar, choose View > Inspector to hide the Inspector.
The Inspector is hidden, allowing more channels to appear in the Mixer and more measures in the Arrange area.
In Logic (as in any other application), windows and areas must be in key focus for you to make any changes in them. That is, windows need to be active before you can interact with them. For your customized mixing screenset, it makes sense to have the Mixer area receive key focus.
- Press the Tab key to shift key focus to the Mixer.
The Mixer’s top bar will be highlighted to indicate that it has key focus.
Locking Screensets
At present, your screenset is open to any additional changes, and it will always reflect the last state in which you left it. In Logic terms, the screenset is unlocked and can be continuously altered.
Considering that you just spent a fair amount of time configuring the screenset for mixing purposes, it makes sense to lock the screenset so you can always return to this state.
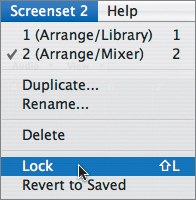
- In the Screenset 2 menu, choose Lock.
A small bullet appears between Screenset and the number 2 in the menu bar, signifying that the screenset is locked.
- Press the 1 and 2 keys to switch screensets between the Arrange/Library screenset, and the Arrange/Mixer screenset you just locked.
Screenset 2 opens, configured as it was when locked.
Comparing Unlocked and Locked Screensets
When you are new to Logic, your tendency is to lock all screensets. However, the unlocked state has distinct advantages, because you can spontaneously tweak a screenset to suit each stage of your production (increasing or decreasing zoom levels, for example). An unlocked screenset is especially valuable during editing. Often you are bouncing between different editors and adjusting specific parts of the project. It is helpful, then, to return to a screenset that’s in the same state that you left it when you continue work on a specific project area.
However, this takes some getting used to, and unintentional alterations can occur. If you are satisfied with the given configuration of a screenset, it is a good idea to lock it, protecting it from further changes until you unlock it again.
The next exercise will help you get a feel for using unlocked and locked screensets.
- Press 1 to open the Arrange/Library screenset.
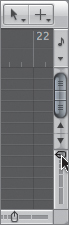
- In the Tool menu, choose the Pencil tool.
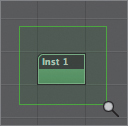
- On the Inst 1 track, click the grid line at bar 9 to create a blank region.
- Hold down Control-Option while drawing a selection rectangle around the Inst 1 region that you just created.
The region will zoom in to a high degree.
- Press 2 to open Screenset 2, then open Screenset 1 again.
Notice how recalling Screenset 1 restores the zoomed state in which you left it. Now repeat the same steps with Screenset 1 locked.
- Control-Option-click the background of the Arrange area to return to the previous zoom state.
The Arrange area appears as it did when you started this exercise.
- Choose Screenset 1 > Lock.
- Hold down the Control-Option while dragging a selection rectangle around the Inst 1 region as you did previously.
- Open Screenset 2, then open Screenset 1.
This time when you return to Screenset 1, the region is displayed exactly as it was when you locked the screenset. No matter what edits are performed within the screenset (zooming, in this case), it will return to a normalized state, almost like a template.
- Delete the region you created by selecting it and pressing Delete.
Using Key Commands
As you become familiar with Logic’s feature set, you’ll notice that you perform some tasks more often than others. By assigning a command to a specific key on the computer’s keyboard, you can execute common functions without reaching for the mouse and navigating a hierarchical menu system. Key command assignments are written to a location within the ~/Library/Application Support/Logic folder and are accessible to all Logic projects. This differs from the screensets that you created in the last exercise, which are saved within each project file.
Logic’s Key Commands window is a powerful mapping tool that lets you assign a key (or key combination) to nearly every menu item within Logic, and also to some special functions that can be accessed only by using a key command.
If you’ve been working with Logic for some time, you are probably using default key commands and have assigned some custom commands of your own. Let’s start by reviewing the basic procedure for key assignments and follow up with additional techniques to maximize the potential of this powerful feature.
Viewing Key Assignments
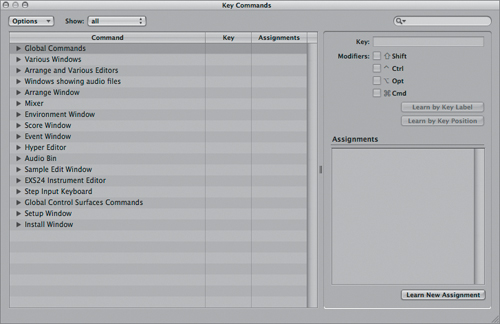
- Open Logic’s Key Commands window by choosing Logic Pro > Preferences > Key Commands.
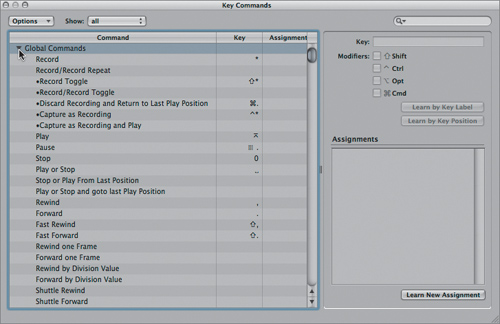
The Key Commands window opens.
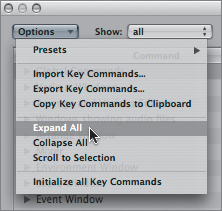
- In the Key Commands window, from the Options menu, choose Expand All.
The list expands to show all possible key commands. Scroll down using the scroller to the right of the pane to get an idea of the breadth of the assignable functions within Logic. There are a vast number of choices, to be sure!
Tip
It can be easy to get carried away and start assigning keys indiscriminately, but chances are that most of these assignments will be forgotten. Instead, assign key commands only to actions that you perform often. This way you will always have your most-used actions at your fingertips but avoid being overwhelmed.
- In the Key Commands window, from the Options menu, choose Collapse All.
The Commands column now shows only those categories that represent the main application areas, instead of listing every available command. You can view key commands more methodically in this manner.
Topping the list is the Global Commands category, which contains actions that function regardless of the window or editor you are working in at a given time.
- Click the disclosure triangle to the left of Global Commands.
Clicking the disclosure triangle for a given window or category enables you to quickly view all the commands associated with it.
Assigning Keys to Commands
Let’s assign a useful key command that doesn’t already have a default assignment.
- Click the Shuttle Rewind command, located near the bottom of the currently visible part of the list (use the scroller, if necessary).
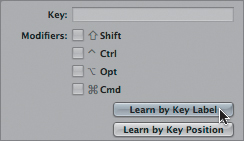
- Click the Learn by Key Label button, located at the right side of the window.
Note
A key label is what is actually imprinted on the individual key. Since Logic has been localized for many languages, this becomes important, as computers sold internationally have different keyboard layouts. In this way, a function assigned to, say, the Y key will be activated regardless of where the key is on a given keyboard.
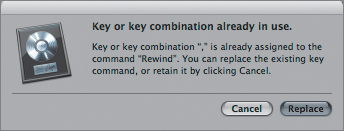
- Press the comma key.
An alert message appears.
This message is Logic’s fail-safe to keep you from assigning the same key to multiple commands. It also provides an option for quickly reassigning the key to a new command.
The Key column in the Key Commands window shows the key assignments in use. In the current example, you can clearly see that the comma key is assigned to the Rewind command. However, as you remember from scanning the list, not all functions are easily determined, which is why this alert message is beneficial.
- Click Cancel.
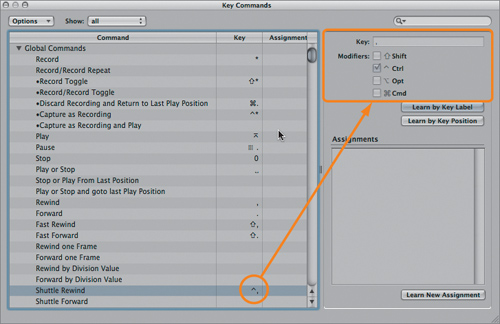
- With the Learn by Key Label button still active, press Control-comma.
The key combination you entered is displayed in the Key column next to the Shuttle Rewind command.
Note
This combination of key (comma) plus modifier key (Control) is also represented in the area above the Learn by Key Label button.
- Click the Shuttle Forward command (located below Shuttle Rewind).
- Press Control-period to assign that key combination.
- Close the Key Commands window.
You have assigned two very useful key commands for getting around in the Arrange area. Try pressing these keys, observing their effect on the playhead. Note how you can increase the winding speed by repeatedly pressing the period or comma while holding down the Control key. Try initiating movement in a single direction, then “braking” by pressing the key in the opposite direction. This behavior is modeled after analog tape transports or video decks, where each press of the rewind or fast-forward button increases the direction speed.
Tip
For key commands to be useful, you must remember the key assignment. Therefore, choose assignments that provide a clue to their functions. The first letter of a function, or a graphic representation of it, represents a good place to start. (For example, the comma and period keys also have the less-than and greater-than symbols.) Also try to think about commands as parts of families of similar functionality, then assign related commands to keys with different modifiers. (For example, since comma is the command for Rewind, Control-comma is a logical choice for Shuttle Rewind.)
Using Key-Command-Only Functions
Some functions are accessible only via key commands and not available as menu items. These commands should not be overlooked, however, as they can be quite useful.
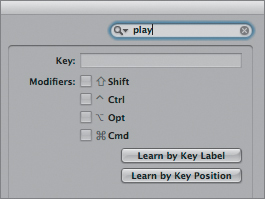
In the upper-right corner of the Key Commands window is a search field. This functions like the search in many other Apple software applications. If you are familiar with any of those, you will feel right at home. You can, for example, use it to search for Logic’s many playback functions.
- Open the Key Commands window, this time using its own key command, Option-K.
- Click once in the search field and enter play.
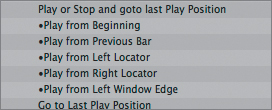
The left pane of the Key Commands window now lists every command that has the word play in it, regardless of the category. You’ll notice that some of the commands have a bullet (•) in front of them.
The bullet indicates that this function is accessible only via key command, and it is not available as a menu choice.
- Scroll down (if necessary), and click “•Set Rounded Locators and Cycle Play.”
- Assign “Set Rounded Locators and Cycle Play” to Shift-Spacebar.
- Close the Key Commands window.
Note
This useful key command packs multiple functions into a single keystroke. Used in the Arrange area or in any editor, it creates a cycle area (setting the locators first) around a selected region or event and then initiates playback. Use this command when you want to quickly audition the section around a given region or event.
Accessing the Tool Menu
Logic’s Tool menus offer essential manipulation of data within a variety of windows. These tools are indispensable, changing the Pointer tool to act in a variety of helpful ways. It is therefore extremely important that you have easy access to these often-used objects. Let’s take a moment to explore the ways you can gain quick access to the Tool menus.
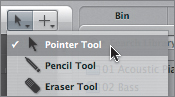
There are many Tool menus in Logic. The available tools change depending on the functions of a window or editor.
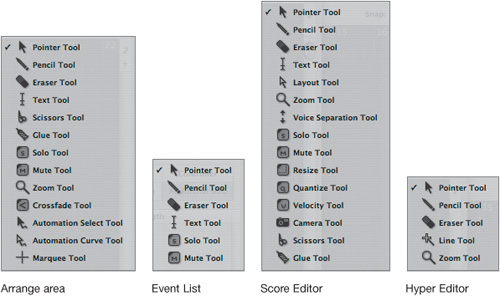
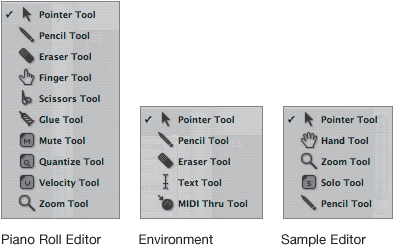
As you can see in the previous figures, the Tool menus vary in number as well as types of tools. Even so, there is a great deal of overlap in frequently used tools (the Pointer tool, for instance).
In all cases, the Tool menus are located on the upper-right side of the screen, usually a distance away from where you wish to use the tool. This distance may seem small the first few times you move your mouse across the screen, but if you find yourself switching tools often while editing (and most of us do), then this movement can become tedious and ergonomically harmful. In the following exercises, you will use Logic’s shortcuts to gain quick access to a Tool menu, enabling you to work in a more efficient manner.
Using the Alternate Tool
When working with objects in any window, you have two tools always available at the mouse position, represented by the two Tool menus. The left menu option is your default tool, and the right menu option is your alternate tool, made available by pressing the Command key. The ability to switch between these two tools at the place you are actually working (your current pointer position) enables you to more quickly toggle between often-used tools, which speeds workflow.
- In the Arrange area, choose the Pointer tool within the left (default) Tool menu, if it is not already chosen.
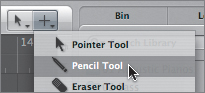
- In the right (alternate) Tool menu, choose the Pencil tool.
- Move your pointer over the main part of the Arrange area and press the Command key while watching the pointer.
The pointer changes to the Pencil tool.
The Pencil tool in this case is referred to as the Command-click, or alternate, tool. You can think of the action as a momentary toggle to a tool that you’ve preset.
Tool assignments can be different for each area or window that has a Tool menu. These assignments are saved with the screenset, so let’s add your Command-click assignment to the screenset that you created earlier in this chapter.
- Unlock Screenset 1 by pressing Shift-L.
- Lock Screenset 1 by pressing Shift-L again.
The Command-click tool designation is saved to the screenset.
Quickly Accessing the Tool Menu
- Move your pointer to the middle of the Arrange area.
- Press the Esc key.
A floating Tool menu should appear at the pointer position.
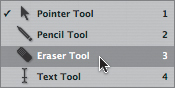
- Click the Eraser tool.
The Tool menu disappears, and the Pointer tool is now an Eraser tool.
This technique can save many a trip across the screen to select a new tool, because it opens the Tool menu when and where you need it for editing.
- Press the Esc key again.
Instead of choosing the desired tool using the mouse, try an even quicker key command.
- Press the 5 key on your computer keyboard.
The Tool menu disappears, and the Eraser tool changes to the Scissors tool.
- Press the Escape key twice to return to the Pointer tool.
Working with Hard-Wired Tool Menu Commands
Just as holding down the Command key lets you momentarily toggle to an alternate tool, so Logic can carry out common functions by using tools in conjunction with a modifier key. These “hard-wired” commands aren’t listed within menus, so a list of the most useful ones is provided here:

Controlling the Tool Menu with a Two-Button Mouse
When using a two-button mouse with Logic, you gain another way to access the Tool menu. To do this, you must first designate the function of the right mouse button, choosing between two modes of operation.
These options are set within Logic’s preferences.
- Choose Logic Pro > Preferences > Global to view the Preferences window.
From here you can select different preference categories (Global, Audio, and so on) by clicking the buttons at the top. Once you select a category, you can access different aspects of preferences by clicking a tab.
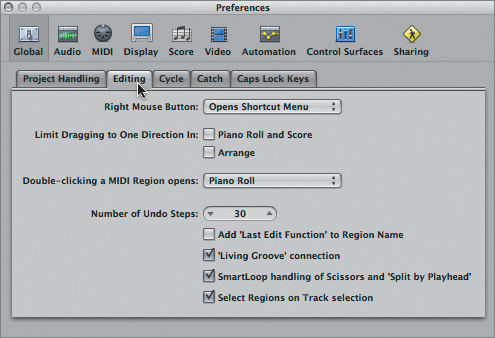
- Click the Editing tab.
The screen shot shows Logic’s Editing preferences, which include assignment of the second mouse button.
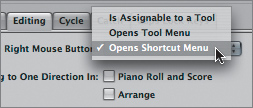
- Click the pop-up menu next to the Right Mouse Button menu to view the options.
The first option, “Is Assignable to a Tool,” enables you to assign a tool of your choice to the right mouse button. Once this option is chosen, a third Tool menu appears next to the default and alternate Tool menus, representing the right-click tool. Essentially, this assignment works similarly to the Command-click, or alternate, tool you looked at earlier. However, it functions independently of the Command-click tool, in effect providing three tool choices at your disposal at any given time.
The second option, Opens Tool Menu, works similarly to pressing the Esc key (see “Quickly Accessing the Tool Menu,” earlier in this lesson), displaying a Tool menu at your current mouse position.
The third option, Opens Shortcut Menu, works similarly to pressing the Control key (see “Working with Hard-Wired Tool Menu Commands” in this lesson), displaying a shortcut menu with associated functions at the current mouse position.
- Choose Opens Shortcut Menu, if it is not already chosen.
- Close the Preferences window.
Saving a Project Template
You have spent quite a bit of time customizing this project. Now you’ll need to save it as a template because you will be using this template in the upcoming lesson.
- Choose File > Save as Template.
The “Save Template as” window opens, automatically pointing to a save location in the Project Templates folder that was created when you initially installed Logic Pro.
- Enter the filename: Advanced Logic.
- Click the Save button.
The template is now saved to your hard disk and will appear the next time you create a new project, in the My Templates collection.
Opening and Creating Projects Automatically
Having a selection of templates at your fingertips can be useful in any given situation. However, most of the time you’ll want to start your sessions with the same basic configuration. You can configure Logic Pro to automatically launch a given template or empty project by setting a startup action preference.
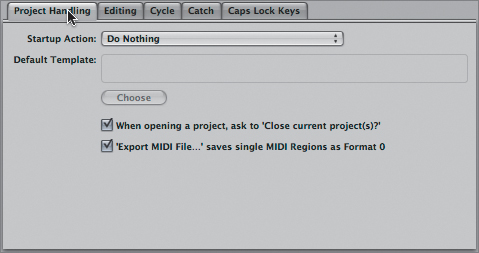
- Choose Logic Pro > Preferences > Global.
- Click the Project Handling tab.
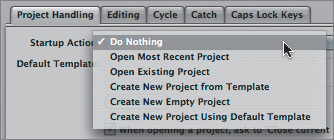
- Click the Startup Action pop-up menu to view the menu items.
These commands dictate Logic’s action on startup, ranging from Do Nothing (no project file is loaded) to Create New Project Using Default Template. Once you have created a general-purpose, or default, template (as you have been doing in this chapter), it is convenient to have Logic automatically base a new project file on it at startup. This will let you get to work as soon as Logic opens.
- Choose Startup Action > Create New Project Using Default Template.
Now all that’s needed is to specify which template Logic will use as the default.
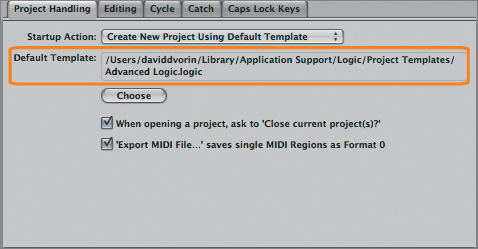
- Click the Choose button.
The Template dialog opens.
- In the Collection pane, click My Templates.
- In the Template pane, click Advanced Logic.
The file path pointing toward the Advanced Logic template is displayed in the Default Template field.
The next time you open Logic, it will automatically create a new project based on the template you created in this lesson.
- Close the Preferences window.
Backing Up and Transporting Your Setup
After you’ve spent considerable time customizing your Logic setup, it is a good idea to back up your key commands and project templates for retrieval in the future.
If you work in multiple locations, it is advisable to take these with you when you work on another Logic setup in a different facility. USB flash drives are great for carting around your personal Logic settings. Use the table below to copy files from your main system.

To benefit from the portability of your Logic settings, you must load them into the host system. The contents of both your Key Commands and Project Templates folders must be copied to the location listed above in the new system to make them available.
Note
You can also export and import key commands from within the Key Commands window by choosing the item in the Options menu.
Importing Screensets
Sometimes when you’re working on Logic song files from other people, you may wish to import your own screensets so that you can more comfortably navigate through their songs. You can do this as a settings import from one project file to another, and it only requires that you have a copy of one of your project files available.
- Choose File > Project Settings > Import Settings.
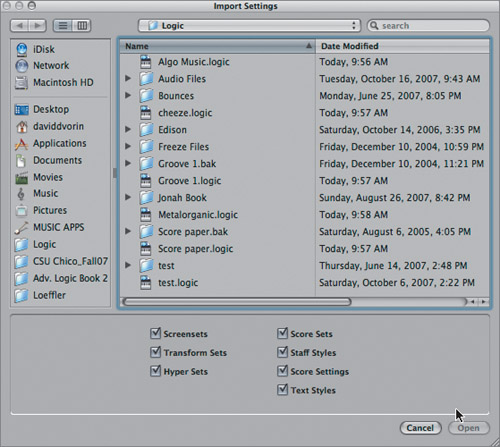
The Import Settings file selector box opens.
- Select the Screensets checkbox if it isn’t already selected.
- In the file selector box, go to Music > Logic 8_BTB_Files > Lessons and select 03_The Only Light_Start.logic.
- Click Open.
Logic copies the screensets to the current project.
- Press the numbers 1–4 on your keyboard to view the imported screensets.
Accessing Your Settings over a Network
New to Logic Pro 8 is the ability to back up and share user-created plug-in settings, channel strip settings, and key commands over a network. This makes it convenient to transport your custom settings from machine to machine in a networked facility, or anywhere you have an Internet connection.
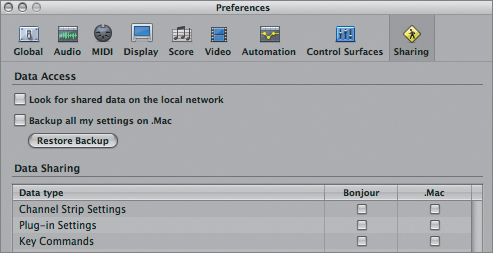
- Choose Logic Pro > Preferences > Sharing.
The Preferences window opens, displaying Sharing preferences.
Data can be exchanged over a local network using Apple’s Bonjour technology or over the Internet using a .Mac account.
Note
Logic uses settings defined in your System Preferences to access your .Mac account, so make sure that these are configured prior to transfer.
To share your data over a network, first select the data type you are sharing (Channel Strip Settings, Plug-in Settings, or Key Commands), and how you would like to share it (Bonjour or .Mac).
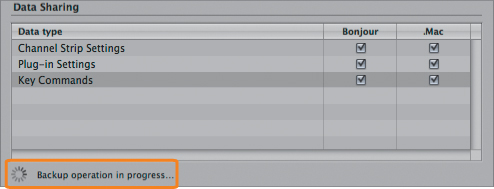
- Select the appropriate Channel Strip Settings, Plug-in Settings, and Key Commands checkboxes in the Bonjour and .Mac columns.
Backing Up Your Settings Using a .Mac Account
If you have access to a .Mac account, you are able to back up and restore Channel Strip settings, Plug-in Settings, and Key Commands to your iDisk. This enables you to efficiently back up precious custom settings without using external hard drives or optical media. It also provides a convenient way to retrieve your settings; all you need is Internet access.
To send data to a .Mac account, you need to select the “Backup all my settings on .Mac” checkbox within the Data Access area in the Sharing preferences.
- In the Preferences window, select “Backup all my settings on .Mac.”
The backup operation starts immediately, indicated by a status message at the bottom of the window.
Tip
You can find out the date and time of your last .Mac backup by placing your pointer over the “Backup all my settings on .Mac” checkbox.
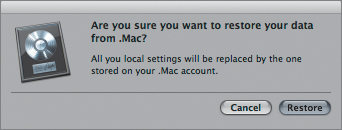
After you’ve saved the settings to your .Mac account, you can retrieve them by clicking the Restore Backup button.
- Click the Restore Backup button.
A message appears asking if you want to overwrite your local settings with the ones uploaded to the .Mac account.
- Click the Restore button.
The data is restored to your computer.
Note
You can access the settings backed up to a given .Mac account with any computer connected to the Internet by logging on to the iDisk Public folder for the .Mac account. The files are written to the Public/MusicAudioData directory. You can even access them via a web browser by using the following URL: http://idisk.mac.com/dotmacaccountname/Public/MusicAudioData.
Sharing Settings on a Network
In addition to backing up and restoring your own settings, Logic can use an active network connection to gain access to the settings of others. This can be done by connecting to another’s .Mac account (via the Internet) or using Bonjour (in a local network).
- In the Sharing Preferences window, select “Look for shared data on the local network.”
As long as a network connection is detected, you should be able to access any Mac running Logic with data sharing enabled. (See “Accessing Your Settings over a Network” in this lesson.)
When connected, you can access shared key commands via the Options menu in the Key Commands window.
- Close the Preferences window.
- Open the Key Commands window by choosing Logic Pro > Preferences > Key Commands.
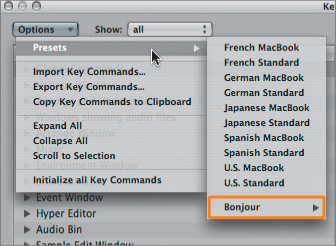
- Click the Options menu and choose Presets.
The Presets menu displays a Bonjour menu containing the key command sets available from other machines on the local network.
- Close the Key Commands window.
In addition to key commands, Bonjour also allows access to shared plug-in and channel strip settings wherever you normally use them (the Library, channel strips, and plug-in windows).
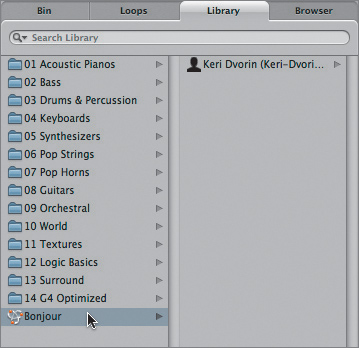
- In the Library, click the Bonjour menu at the bottom of the list.
All available accounts are shown.
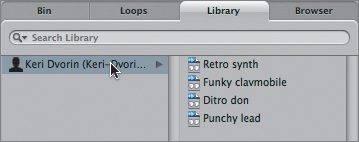
- In the Bonjour menu, click an account to access the channel strip settings.
You can also use a .Mac account to share settings. To do this, you must have an active Internet connection and the appropriate account information to access the .Mac account.
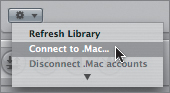
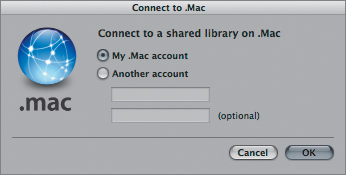
- At the bottom of the Library, click the Action pop-up menu at the bottom and choose “Connect to .Mac.”
The Connect to .Mac dialog appears.
Here you can choose whether you want to connect to your own .Mac account or the public folder on another’s (by entering the account name).
- Click OK.
Once a connection is established, you can now access the .Mac account’s settings by selecting within the Library.
Note
The .Mac folder will list all user-created channel strip settings within account folders. If you haven’t created any channel strip settings, the user account folder will be grayed out (unable to be selected). When new user channel strip settings are created, you need to disconnect then reconnect to the .Mac account before these display within the Library.
- Close the project.
Lesson Review
1. What are project templates?
2. What are some of the ways you can customize a project file?
3. What is the advantage to an unlocked screenset?
4. Identify two strategies for creating key commands that help you remember them.
5. Are all key commands accessible via menus?
Answers
1. Project templates are premade project files containing various configurations specific to certain session tasks, such as composing and mixing.
2. Project files can be customized by adding buttons to the Toolbar and Transport bar and by maximizing various areas of the workspace.
3. An unlocked screenset can be advantageous during the editing stage because it allows a dynamic view of the current data.
4. Assign a key command only if you find yourself performing a menu command often. Assign keys that provide a clue to the function of a command, such as a key with a graphic representation or the first letter of the function.
5. No. Some useful functions are accessible only via key command, indicated by a bullet preceding the name in the Key Commands window.
6. You can access the Tool menus quickly by using alternate tools, using the Esc key to display the Tool menu at the pointer location, and using a two-button mouse.
7. Custom key commands, plug-in settings, and channel strip settings can be backed up to traditional storage media as well as to a Bonjour account on a local network or a .Mac account accessed via an Internet connection.