
Appendix A. Tools and Accessories
For many Arduino projects you don’t need any tools, just some jumper wires, shield and sensor PCBs, and of course an Arduino. But after graduating to more advanced projects you will find that a selection of basic tools and accessories becomes essential. A set of hand tools, a soldering iron, and a few other items are usually sufficient for all but the most complex projects. If I may be so bold, I would recommend my book Practical Electronics: Components and Techniques (O’Reilly) as a reference for things like screw and bolt sizes, electronic components, and PCB fabrication.
In this chapter I will describe the basic tools you might want to consider having on hand for your own projects. Everything presented here can easily fit into a medium-sized toolbox when it’s not needed.
Hand Tools
A good selection of hand tools is essential. With patience and some effort you can accomplish just about any task with good hand tools. Before the introduction of electricity, hand tools were really the only way for most people to build anything, and they built a lot of amazing things. So can you, as long as you are willing to take the time to do it correctly. We won’t look at techniques here, as there are other books that cover that, but I will describe some tools you might want to consider, and where to find them.
Screwdrivers
For most projects involving an Arduino all you need in the way of screwdrivers is a good set of the miniature types or a combination kit, such as the one shown in Figure A-1, and a set of larger screwdrivers. You can find various sets of miniature screwdrivers at most well-stocked hardware stores, some big-box home improvement stores, and just about any electronics store that specializes in components and tools.
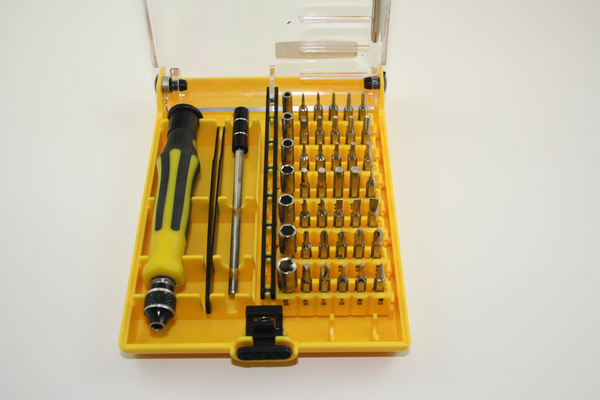
Figure A-1. A set of miniature screwdrivers
Full-size screwdrivers, like those shown in Figure A-2, can be found in numerous places, including the home repair aisle of a large grocery store. Avoid the very large tools, and look for a kit that has smaller tip sizes. You will need those, but the large tools not so much (unless you also need to do residential power wiring or work on an automobile).
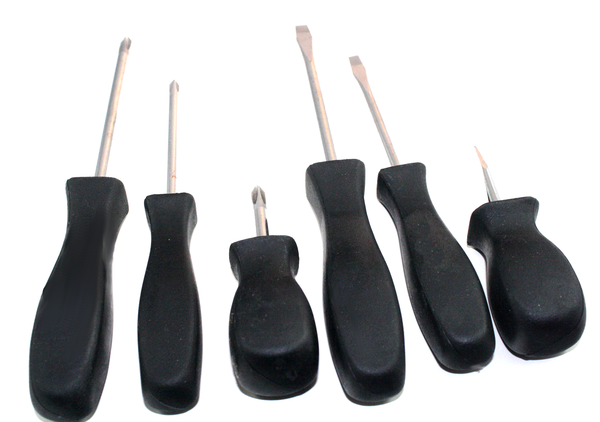
Figure A-2. A set of standard full-size screwdrivers
Pliers and Cutters
Needle-nosed pliers, diagonal cutters, and a pair of good flush cutters are essential. You might also want to consider a pair of standard pliers and perhaps even lineman’s pliers, but these aren’t absolutely necessary. Figure A-3 shows a selection of basic pliers and cutters that can be purchased as a set. You can also pick and choose from individual tools to suit your needs.
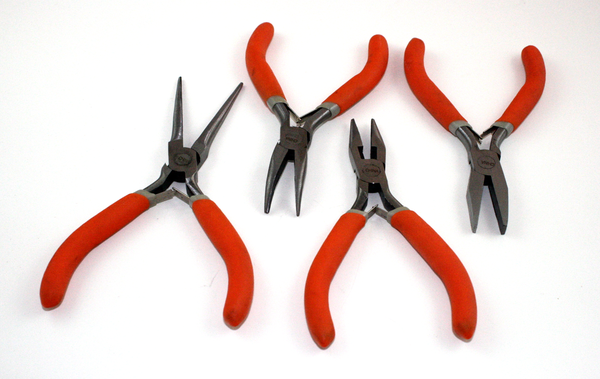
Figure A-3. A set of basic pliers and cutters
Resist the temptation to try to use the wire cutters that come with the bundled selections from some hardware and home improvement stores for doing PCB-level electronics work. Flush cutters are made specifically for trimming component leads and cutting small-gauge wire, and they do a fine job of it. Figure A-4 shows a typical flush cutter tool.
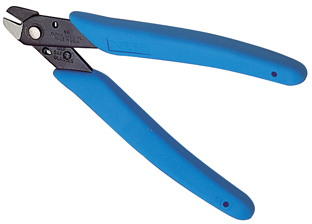
Figure A-4. Typical flush cutters for electronics work
Wire Strippers
Another essential tool is a wire stripper. Although you may be tempted to use a pair of cutters to do this, it’s generally not a good idea. It’s very easy to cut one or more of the fine wires that make up a strand, and a nick on a solid conductor is where it will usually break if it is flexed. I keep two types on hand, and which one I pick up depends largely on how many wires I need to strip and which tool happens to be the easiest to reach.
The simplest wire stripper consists of a pair of blades with an adjustable stop, like the tool shown in Figure A-5. The downside to this tool is that you have to adjust the stop each time you use a different gauge of wire. But if you always use the same wire, then it’s really not a problem (I use #24 gauge insulated twisted strand wire for almost everything, so I seldom need to adjust my tool).

Figure A-5. Basic wire strippers
My favorite wire strippers are sold by Klein, and they not only handle different wire gauges but also pull off the cut insulation, all in one motion. Figure A-6 shows an example of this type of tool. These are surprisingly affordable, and you can purchase an additional cutter blade for even more wire gauges. The downside is that they are big and somewhat bulky, so they won’t fit into tight spaces.
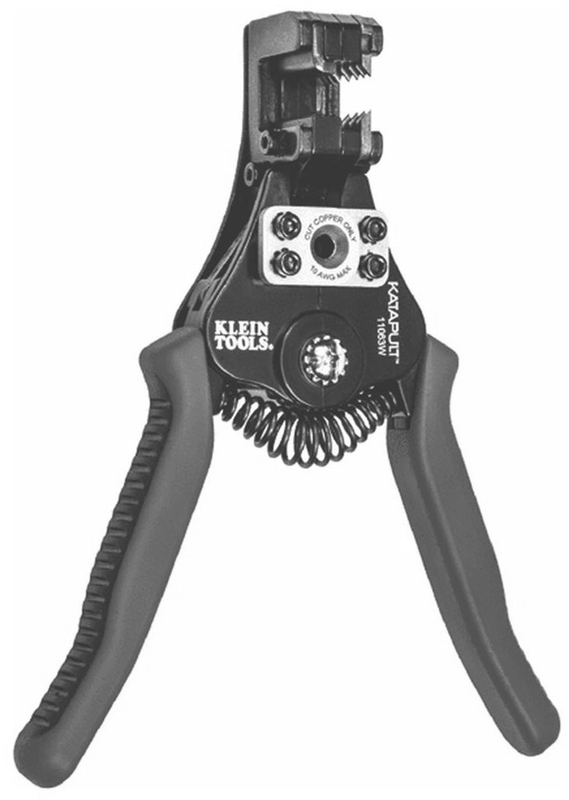
Figure A-6. Fancy wire strippers
Connector Crimping Tools
One of the main annoyances encountered when working with Arduino boards, shields, and the various available modules is connecting everything. Jumper wires with pins and sockets are fine for assembling something on the bench (or kitchen table) to see how it works, but this can present some long-term reliability issues. A better approach is to use an I/O extension shield (like those described in Chapter 9) that provides multiconductor connectors. Figure A-7 shows such a shield with cables attached.

Figure A-7. I/O extension shield with connectors attached
The metallic connectors attach to wires by crimping, and that means you will need a special tool (and the correct connector bodies and inserts). Fortunately the price of these tools has dropped dramatically over the past few years. You can now buy a tool for about $30 that does the same basic job as a tool that used to cost $200. Figure A-8 shows a selection of crimping tools.
Once the contacts (either pins or sockets) have been crimped onto the wires, the next step is to insert them into a connector housing, also called a shell or a body. These are available in 0.1 inch (2.54 mm) pitch (spacing), which is a de facto industry standard and is what is commonly found on Arduino components. Figure A-9 shows 1-, 2-, 3-, and 4-position connector housings. The pin or socket connectors lock into the plastic housings and can be easily removed by gently lifting a small locking tab using a miniature screwdriver.
Some Arduino shields and modules use connectors similar to those found on the ends of telephone or network cables. These can be assembled with tools available at most big-box home improvement stores, electronics distributors, and of course from online suppliers. Figure A-10 shows a shield that uses these types of connectors.
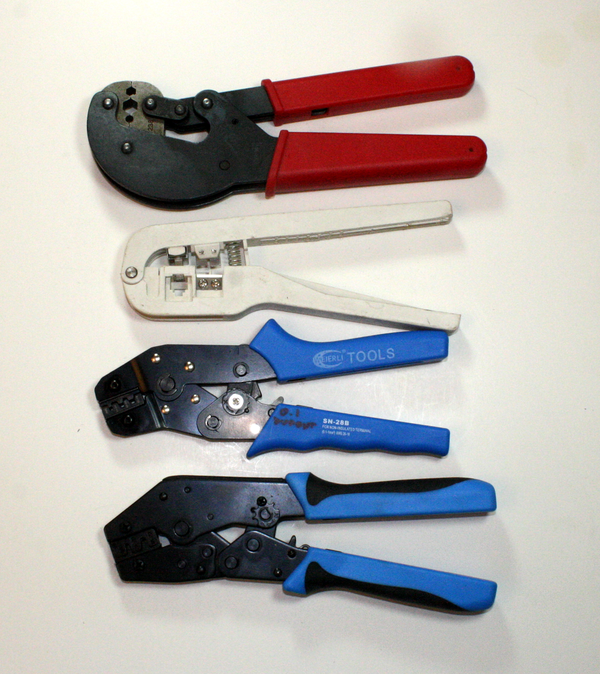
Figure A-8. Various types of low-cost crimping tools
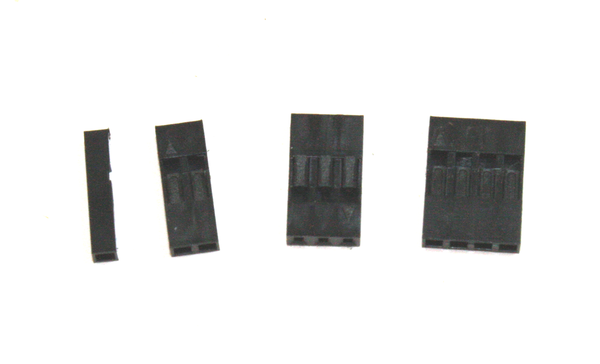
Figure A-9. 0.1 inch (2.54 mm) connector housings
Lastly, there are the so-called lug connectors used in electrical systems and vehicles, like the part shown in Figure A-11. These are readily available, but not very commonly used with Arduino projects (although they are used in the signal generator in Chapter 11). The connectors come in a variety of styles and types, and the crimping tools are available from many different sources.
Figure A-12 shows one type of tool used with lug connectors. Do not attempt to use this type of crimping tool with the small connectors used for the pins and sockets on a PCB like an Arduino—the end result will just be a smashed and useless connector.
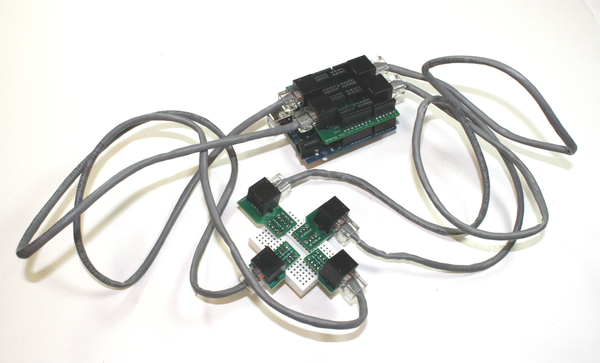
Figure A-10. I/O extension shield with RJ45 (8P8C) connectors
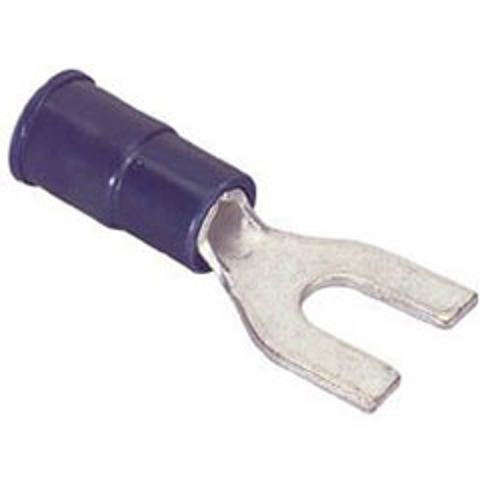
Figure A-11. A spade lug-type connector
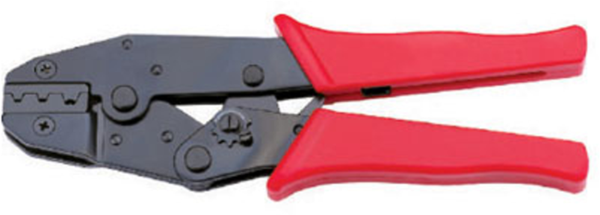
Figure A-12. A common spade lug crimping tool
Crimped connectors are easy to install, reliable (if done correctly—it can take some practice), and cheap. The downside is the initial investment in the tools. If you are willing to make that investment, then your soldering iron will spend most of its time in your toolbox and your projects will have a polished and professional look.
Saws
A couple of types of small saws are handy to have on hand when you need to trim a circuit board, cut out a small section of a plastic enclosure, or cut a section of plastic tubing. Nothing else can do those things as quickly and easily as a saw.
A jeweler’s saw like the one shown in Figure A-13 is useful for doing very fine precision cuts, but it’s not very good at cutting large items. The trick to using a jeweler’s saw is to let the saw do the work without forcing it into the cut (this can generally be said of any saw, by the way). The thin blades won’t take much in the way of stress, but they will cut through almost anything with enough care and patience.
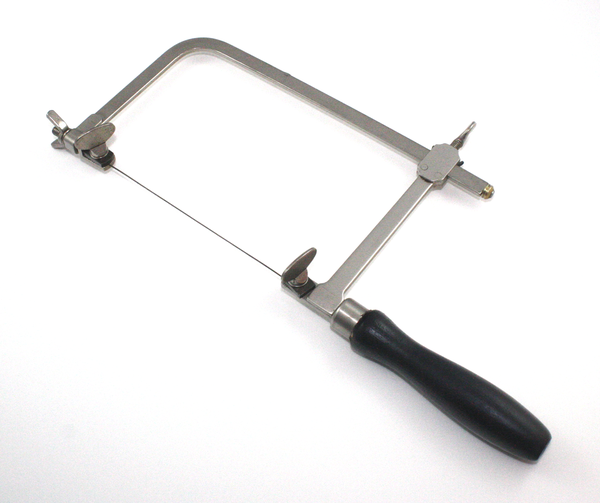
Figure A-13. Jeweler’s saw
For larger jobs, particularly those involving metal, a hacksaw is the way to go. A typical generic hacksaw is shown in Figure A-14. Newer models may have a more streamlined look, but the basic idea is the same. You can also buy hacksaws that are little more than a blade with a handle at one end.
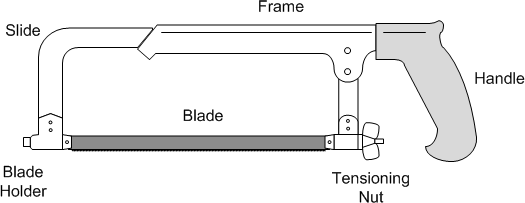
Figure A-14. Common hacksaw design
When using a hacksaw remember that the saw will only cut in one direction, either push or pull. It depends on how the blade is installed. I prefer to mount the blade so that the saw cuts when pulled, but some people like to do it the other way.
Power Tools
For many tasks some good hand tools will get the job done and, if used correctly, do it nicely as well. But other tasks might need more power than a hand tool can deliver without causing muscle cramps. Drilling and grinding are two examples.
Drills
An electric hand drill is great for many things. Drilling precise holes is generally not one of those things, but when you need just one 1/8 inch hole in a panel, and it doesn’t have to be super-precise, then a hand drill is very useful. I recommend a cordless drill, like the one shown in Figure A-15, if for no other reason than that it is less of a hassle without a power cord. Although a battery-operated cordless drill might not have the same amount of torque as a drill that plugs into a wall outlet, most small projects involve plastic, thin wood or wood-like materials, and thin metal, and a cordless drill will work just fine.
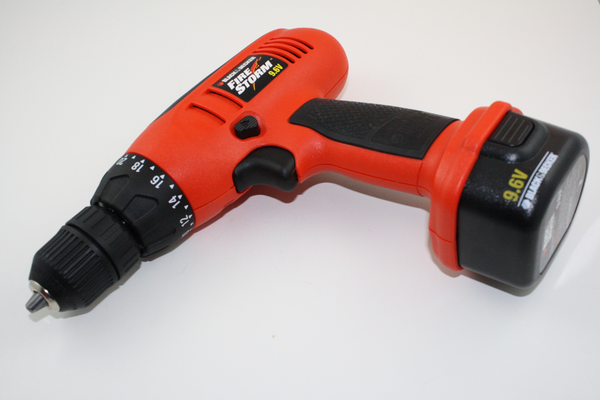
Figure A-15. Cordless drill with interchangeable battery pack
Miniature Grinder
Although a grinder isn’t actually an essential tool, it is a very useful and handy tool to have around. A miniature grinder, like the one shown in Figure A-16, can be used to sharpen screwdrivers, take the rough edges and burrs off of the end of a metal rod after it is cut, clean up the edges of plastic pieces, and even trim up a PCB.
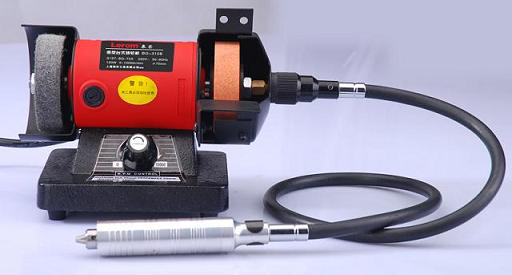
Figure A-16. Miniature grinder
This particular grinder is from Harbor Freight, and it includes a rotary tool attachment. It might not do everything a standalone rotary tool will do, but it does come in handy for lightweight jobs.
Miniature Drill Press
If you need some precisely sized holes, in precise locations, then you really need a drill press. Although a full-sized drill press can be used for jobs like this, they tend to be large things that don’t easily tuck away into a closet when you don’t need them. The solution is a miniature drill press like the one shown in Figure A-17.
In addition to drilling holes for switches and LEDs in a small plastic enclosure, you can also drill holes in a PCB. Accessories such as a miniature vise are available to hold the work steady while drilling.
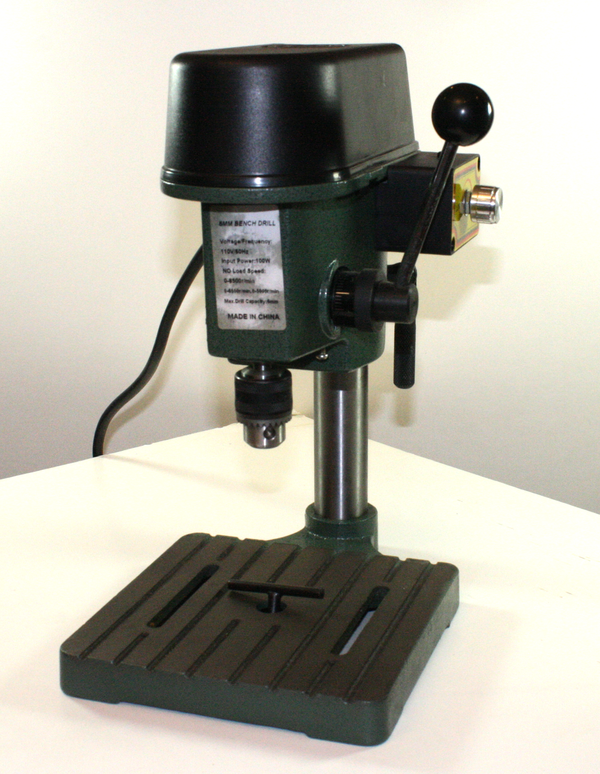
Figure A-17. Miniature drill press
Soldering
If any one activity could be said to characterize electronics, it would have to be soldering. Soldering is not really necessary if you are using ready-made PCBs and modules with an Arduino, but if you want to integrate an Arduino into a larger system, then soldering may be required. And if you happen to purchase a shield with a packet of pin and socket connectors and empty holes on the PCB, then soldering is no longer optional.
Soldering Irons
Soldering irons come in a range of prices, from ultra-low-cost tools with no temperature control and tips of dubious quality, to soldering stations with interchangeable tips and integrated temperature control costing hundreds of dollars. Avoid the cheap tools, as they can do some serious damage to a circuit board and the components soldered onto it. Spend as much as you can afford, but at least consider something like the iron shown in Figure A-18, which sells for about $15.
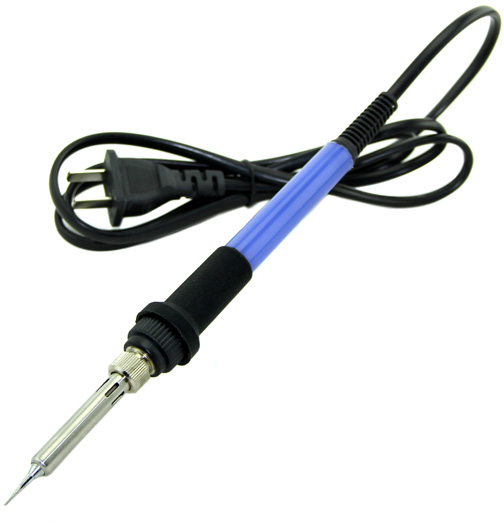
Figure A-18. Inexpensive soldering iron
If you can afford it, consider a soldering station like the one shown in Figure A-19. These tools range in price from about $50 to somewhere around $300. A good soldering station is a good investment, but you really need to have some serious soldering work to do in order to justify a pricey model.
Soldering Accessories
A soldering iron or soldering station is nice to have, but without some basic accessories it won’t be very useful. At a minimum you’ll need some solder. Don’t buy solder for electronics at the local hardware store unless it specifically states that it is for electronics work. A good electronics-grade solder will have a flux core (usually rosin), and most are on the thin side. I like to purchase solder in one-pound (454 g) spools, like the one shown in Figure A-20.
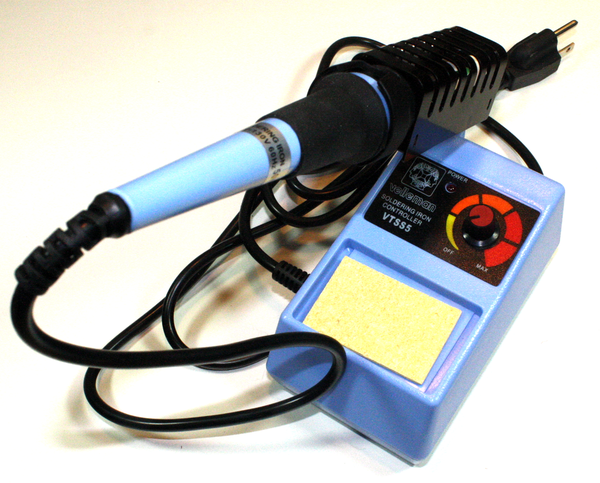
Figure A-19. Soldering station
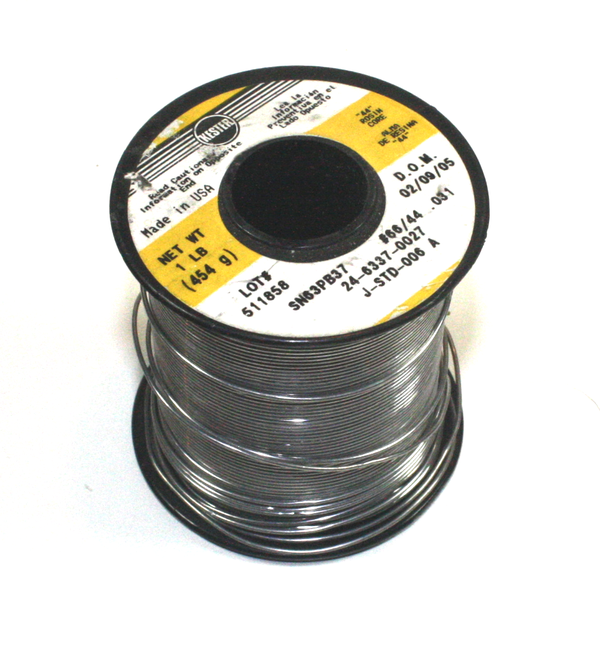
Figure A-20. Spool of rosin-core solder
Other useful accessories include solder wick (copper braid for removing solder), liquid or paste flux, and solder paste. You can learn more about the tools and accessories, and find soldering tutorials, in numerous texts and in online videos.
Tool Sources
Table A-1 lists some sources for the tools covered in this appendix. This is a very short list, as there are a large number of suppliers selling tools of all kinds.
| Distributor/vendor | URL | Distributor/vendor | URL |
|---|---|---|---|
Adafruit |
Maker Shed |
||
Apex Tool Group |
MCM Electronics |
||
CKB Products |
SainSmart |
||
Circuit Specialists |
SparkFun |
||
Electronic Goldmine |
Stanley |
||
Harbor Freight Tools |
Velleman |
Don’t overlook your local used tool shop. Many cities have one or more shops that specialize in used tools, with selections that include everything from buckets full of used screwdrivers to used machine shop tools like vertical mills. Other places to look include organizations that accept donations, such as Goodwill (here in the US). They may not have much of a selection when it comes to tools, but if you have a moment to spare they can sometimes yield up some amazingly good deals.