
WHAT YOU WILL LEARN IN THIS CHAPTER
How to support the four different types of screen orientations
The various events that are fired when a device rotates
How to reposition the views on a View when the orientation of a device changes
How to change the screen rotation dynamically during runtime
How to set the orientation of your application before it is loaded
With the Hello World! application in Chapter 2, you saw how your iPhone application can be written so that it supports viewing in either the portrait or landscape mode. This chapter dives deeper into the topic of screen orientation. In particular, you will learn how to manage the orientation of your application when the device is rotated. You will also learn how to reposition your views when the device is rotated so that your application can take advantage of the change in screen dimensions.
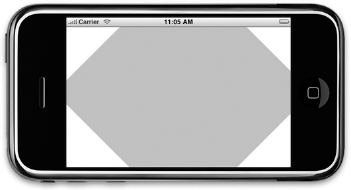
One of the features that modern mobile devices support is the ability to detect the current orientation — portrait or landscape — of the device. An application can take advantage of this ability to readjust the device's screen to maximize the use of the new orientation. A good example is Safari on the iPhone. When you rotate the device to landscape orientation, Safari automatically rotates its view so that you have a wider screen to view the content of the page (see Figure 6-1).

In the iPhone SDK, there are several events that you can handle to ensure that your application is aware of changes in orientation. You can check it out in the following Try it Out.
TRY IT OUT: Supporting Different Screen Orientations
Codefile [ScreenRotations.zip] available for download at Wrox.comUsing Xcode, create a new View-Based Application project and name it
ScreenRotations.Press Command-R to test the application on the iPhone Simulator.
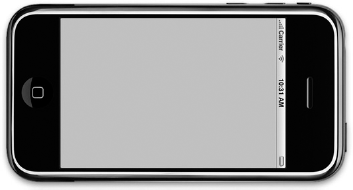
Change the iPhone Simulator orientation by pressing either the Command-→ (rotate it to the right) or Command-← (rotate it to the left) key combination. Notice that the screen orientation of your application does not change with the change in device orientation (see Figure 6-2); the status bar is now vertical.
By default, the iPhone application project you created using Xcode supports a single orientation — portrait mode. If you want to support screen orientations other than the default portrait mode, you can do so by overriding the shouldAutorotateToInterfaceOrientation: method in a view controller. This event is commented out by default in the ScreenRotationsViewController.m file:
/*// Override to allow orientations other than the default portrait orientation.- (BOOL)shouldAutorotateToInterfaceOrientation:(UIInterfaceOrientation)interfaceOrientation {// Return YES for supported orientationsreturn (interfaceOrientation == UIInterfaceOrientationPortrait);}*/
Note
On the iPhone, screen rotation is automatically handled by the OS. When the OS detects a change in screen orientation, it fires the shouldAutorotateToInterfaceOrientation: event; it is up to the developer to decide how the application should display in the target orientation.
The shouldAutorotateToInterfaceOrientation: method is called when the View is loaded and when orientation of the device changes. This event passes in a single parameter — the orientation that the device has been changed to. The returning value of this event determines whether the current orientation is supported.
If you want to support all screen orientations, simply return a YES:
- (BOOL)shouldAutorotateToInterfaceOrientation:
(UIInterfaceOrientation)interfaceOrientation {

   return YES;

}
This means that your application will rotate to all orientations (the status bar will always appear at the top) when the device is rotated.
To support specific orientations, simply perform an equality check to specify the orientation supported. For example, the following code snippet shows that only the left landscape orientation is supported.
- (BOOL)shouldAutorotateToInterfaceOrientation:
(UIInterfaceOrientation)interfaceOrientation {
return (interfaceOrientation == UIInterfaceOrientationLandscapeLeft);
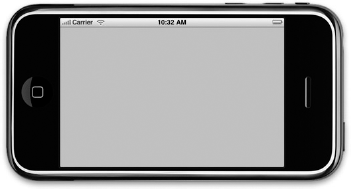
}This means that your application will display only in landscape mode (see Figure 6-3) with the Home button on its left (hence the constant name UIInterfaceOrientationLandscapeLeft).
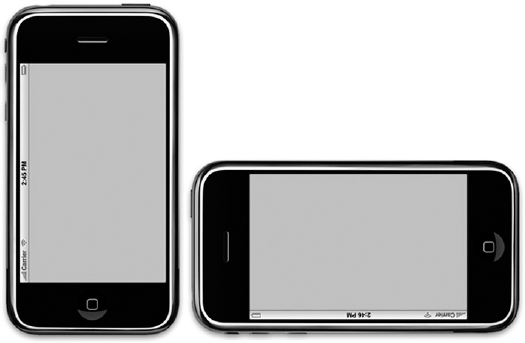
If the user rotates the device to portrait mode or landscape mode with the Home button on the right (UIInterfaceOrientationLandscapeRight), the application will not change its orientation (see Figure 6-4).
Note
Here is one easy way to differentiate between UIInterfaceOrientationLandscapeLeft and UIInterfaceOrientationLandscapeRight. Just remember that UIInterfaceOrientationLandscapeLeft refers to the Home button positioned on the left and UIInterfaceOrientationLandscapeRight refers to the Home button positioned on the right.
So far, you have seen a few constants related to screen orientations: UIInterfaceOrientationPortrait, UIInterfaceOrientationLandscapeLeft, and UIInterfaceOrientationLandscapeRight. You have a total of four constants to use for specifying screen orientations:
UIInterfaceOrientationPortrait— displays the screen in portrait modeUIInterfaceOrientationPortraitUpsideDown— displays the screen in portrait mode but with the Home button at the top of the screenUIInterfaceOrientationLandscapeLeft— displays the screen in landscape mode with the Home button on the leftUIInterfaceOrientationLandscapeRight— displays the screen in landscape mode with the Home button on the right
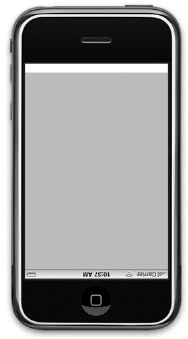
Of the four modes, it is usually not recommended to use the UIInterfaceOrientationPortraitUpsideDown mode because it could easily disorient your users (see Figure 6-5).
If your application supports multiple screen orientations, you should override the shouldAutorotateToInterfaceOrientation: method and then use the || (logical OR) operator to specify all the orientations it supports, like this:
- (BOOL)shouldAutorotateToInterfaceOrientation:
    (UIInterfaceOrientation)interfaceOrientation {

  return (interfaceOrientation == UIInterfaceOrientationPortrait ||
          interfaceOrientation == UIInterfaceOrientationLandscapeRight);

}
The preceding code snippet enables your application to support both the portrait and landscape-right modes.
The iPhone SDK view controller exposes several events that you can handle during the rotation of the screen. The ability to handle events fired during rotation is important because it allows you to reposition the views on the View, or you can stop media playback while the screen is rotating. The events that you can handle are:
The following sections take a more detailed look at each of these events.
First, the willAnimateFirstHalfOfRotationToInterfaceOrientation: event is fired just before the rotation of the View starts. The method looks like this:
- (void)willAnimateFirstHalfOfRotationToInterfaceOrientation:
    (UIInterfaceOrientation) toInterfaceOrientation
    duration: (NSTimeInterval) duration {

}
The toInterfaceOrientation parameter indicates the orientation that the View is changing to, and the duration parameter indicates the duration of the first half of the rotation, in seconds.
In this event, you can insert your code to perform tasks that you want to perform before the rotation starts, such as pausing media playback, pausing animations, and so on.
The willAnimateSecondHalfOfRotationFromInterfaceOrientation: event is fired when the rotation is halfway through (see Figure 6-6). The method looks like this:
- (void)willAnimateSecondHalfOfRotationFromInterfaceOrientation:
    (UIInterfaceOrientation) fromInterfaceOrientation
    duration: (NSTimeInterval) duration {

}
The fromInterfaceOrientation parameter indicates the orientation that it is changing from, whereas the duration parameter indicates the duration of the second half of the rotation, in seconds.
In this event, you typically perform tasks when the rotation is halfway done, such as repositioning the views on the View, resuming media playback, and so on.
The previous two events are fired consecutively — first the willAnimateFirstHalfOfRotationToInterfaceOrientation: is fired, followed by the willAnimateSecondHalfOfRotationFromInterfaceOrientation event. If you do not need two separate events for handling rotation, you can use the simpler willRotateToInterfaceOrientation: event.
The willRotateToInterfaceOrientation: event is fired before the orientation starts. In contrast to the previous two events, this is a one-step process. Note that if you handle this event, the willAnimateFirstHalfOfRotationToInterfaceOrientation: and willAnimateSecondHalfOfRotationFromInterfaceOrientation: events will not be fired anymore.
The method looks like this:
- (void)willRotateToInterfaceOrientation:
    (UIInterfaceOrientation) toInterfaceOrientation
    duration: (NSTimeInterval) duration {

}
The toInterfaceOrientation parameter indicates the orientation that it is changing to, and the duration parameter indicates the duration of the rotation, in seconds.
Besides the willRotateToInterfaceOrientation: event, there is yet another event that you can handle before the rotation starts — the willAnimateRotationToInterfaceOrientation: event. The willAnimateRotationToInterfaceOrientation: event is fired before the animation of the rotation starts.
Note
If you handle both the willRotateToInterfaceOrientation: and willAnimateRotationToInterfaceOrientation: events, the former will fire first, followed by the latter.
The method looks like this:
- (void)willAnimateRotationToInterfaceOrientation:
    (UIInterfaceOrientation) interfaceOrientation
    duration: (NSTimeInterval) duration {

}
The interfaceOrientation parameter specifies the target orientation to which it is rotating.
Note
If you handle this event, the willAnimateFirstHalfOfRotationToInterfaceOrientation: and willAnimateSecondHalfOfRotationFromInterfaceOrientation: events will not fire anymore.
In the following Try It Out, you will see how you can reposition the views on your UI when the device changes orientation.
TRY IT OUT: Repositioning Views during Orientation Change
Using the same project created earlier, double-click the
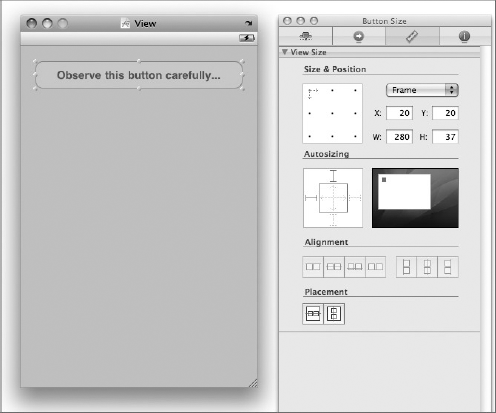
ScreenRotationsViewController.xibfile and add a Round Rect Button view to the View (see Figure 6-7).Observe its size and positioning by viewing the Size Inspector window. Here, its position is (20,20) and its size is 280 by 37 pixels.
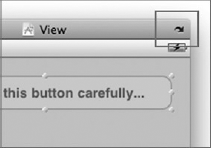
Rotate the orientation of the View by clicking the arrow icon on the upper-right corner of the window (see Figure 6-8).
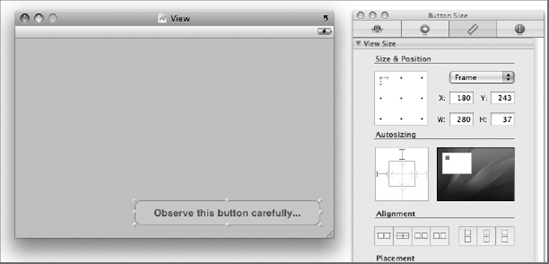
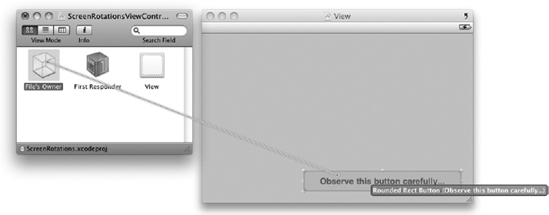
Reposition the Round Rect Button view by relocating it to the bottom-right corner of the View window (see Figure 6-9). Also observe and record its position.
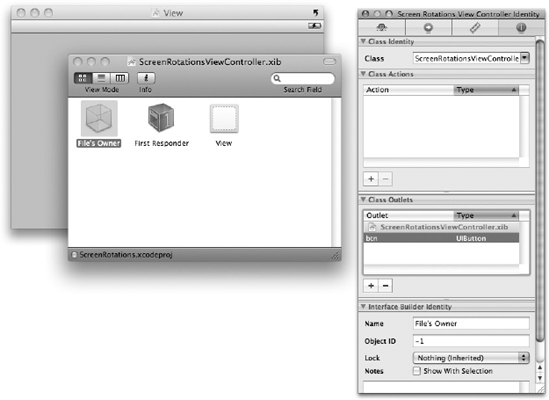
In the
ScreenRotationsViewController.xibwindow, select the File's Owner item and create an outlet namedbtn(of typeUIButton) in the Identity Inspector window (see Figure 6-10).Connect the outlet you have created by control-clicking the File's Owner item and dragging over to the Round Rect Button view (see Figure 6-11). Select
btn.Save the project in Interface Builder.
Back in Xcode, insert the following code into the
ScreenRotationsViewController.hfile:#import <UIKit/UIKit.h> @interface ScreenRotationsViewController : UIViewController {IBOutlet UIButton *btn;}@property (nonatomic, retain) UIButton *btn;@endIn the
ScreenRotationsViewController.mfile, add the following code:@implementation ScreenRotationsViewController
@synthesize btn;... ... - (void)willAnimateSecondHalfOfRotationFromInterfaceOrientation: (UIInterfaceOrientation) fromInterfaceOrientation duration: (NSTimeInterval) duration {UIInterfaceOrientation destOrientation = self.interfaceOrientation;if (destOrientation == UIInterfaceOrientationPortrait){//---if rotating to portrait mode---btn.frame = CGRectMake(20,20,280,37);}else{//---if rotating to landscape mode---btn.frame = CGRectMake(180,243,280,37);}} - (void)dealloc {[btn release];[super dealloc]; }Save the project and press Command-R in Xcode to deploy the application onto the iPhone Simulator.
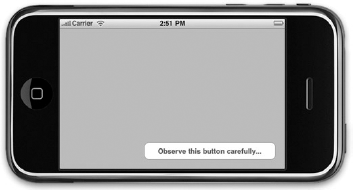
Observe that when the iPhone Simulator is in portrait mode, the Round Rect Button view is displayed in the top-left corner. But when you change the orientation to landscape mode, it is repositioned to the bottom-right corner (see Figure 6-12).
How It Works
This project illustrates how you can reposition the views on your application when the device changes orientation. You first create an outlet and connect it to the Round Rect Button view on the View window.
When the device is being rotated, you handle the willAnimateSecondHalfOfRotationFromInterfaceOrientation: event because doing so allows you to know the destination orientations that the device is changing to. In this method, you can either obtain the destination orientation using the fromInterfaceOrientation parameter, or you can obtain it via the interfaceOrientation property of the current View (self), like this:
UIInterfaceOrientation destOrientation = self.interfaceOrientation;
Using this information, you position the view according to the destination orientation by altering its frame property:
if (destOrientation == UIInterfaceOrientationPortrait)
    {
        btn.frame = CGRectMake(20,20,280,37);
    }
    else
    {
        btn.frame = CGRectMake(180,243,280,37);
}In the previous section, you saw how your application can handle the changes in device orientation when the user rotates the device. There are times (such as when you are developing a game), however, when you want to force the application to display in certain rotations independently of how the orientation the device is held.
There are two scenarios to consider:
During runtime, you can programmatically rotate the screen by using the setOrientation: method on an instance of the UIDevice class. Using the project created earlier, suppose you want the user to change the screen orientation when the user presses the Round Rect Button view. You can code it as follows:
-(IBAction) btnClicked: (id) sender{
   [[UIDevice currentDevice] setOrientation:UIInterfaceOrientationLandscapeLeft];
}
The setOrientation: method takes in a single parameter specifying the orientation you want to change to.
Note
After you have programmatically switched the orientation of your application, your application's rotation can still be changed when you physically rotate the device. The orientation that it can be changed to is dependent of what you set in the shouldAutorotateToInterfaceOrientation: method.
When a View is loaded, by default it is always displayed in portrait mode. If your application requires that you display the View in a particular orientation when it is loaded, you can do so by setting the orientation of the status bar, like this:
- (void)viewDidLoad {
   [UIApplication sharedApplication].statusBarOrientation =UIInterfaceOrientationLandscapeRight;
    [super viewDidLoad];
}
It's interesting to note that the setOrientation: method described in the previous section cannot be used to change the orientation of the View during loading time:
//---does not work during View loading time---
[[UIDevice currentDevice] setOrientation:UIInterfaceOrientationLandscapeLeft];
Likewise, setting the orientation of the status bar does not work during runtime (after the View has loaded):
//---does not work during run time---
[UIApplication sharedApplication].statusBarOrientation =
    UIInterfaceOrientationLandscapeLeft;
Note
The orientation to which you are changing must first of all be specified in the shouldAutorotateToInterfaceOrientation: event. This can also be specified in the info.plist file for the application by setting the InitialInterfaceOrientation key to the desired orientation.
In this chapter, you have seen how changes in screen orientations are handled by the various events in the view controller class. Proper handling of screen orientations will make your application more useable and improve the user experience.
EXERCISES
Suppose you want your application to only support the landscape right and landscape left orientation. How should you modify your code?
What is the difference between the
frameandcenterproperty of a view?
WHAT YOU HAVE LEARNED IN THIS CHAPTER
TOPIC | KEY CONCEPTS |
|---|---|
Handling device rotations | Implement the |
Four orientations supported |
|
Events fired when device is rotated |
|
Properties for changing the position of a view | Use the Use the |