
Now, let's explore the options to work with SparkR including shell, scripts, RStudio, and Zeppelin.
The following steps will explain how to install and configure R, and the latest version of Spark:
- As a first step, we need to install R on all machines in the cluster. The following exercises are tested on CDH 5.7 Quick start VM, which has the CentOS 6.5 operating system. We need to add the latest Extra Packages for Enterprise Linux (EPEL) repository to the VM, which enables you to install R. EPEL is a community-based repository project from the Fedora team, which provides add-on packages for Red Hat and CentOS. Use the following command to install R on the VM:
wget http://download.fedoraproject.org/pub/epel/6/x86_64/epel-release-6-8.noarch.rpm
sudo rpm -ivh epel-release-6-8.noarch.rpm
sudo yum -y install R
- You can test the installation by starting the R shell. Just type R on the command line to get into the R shell. CDH 5.7 uses Spark version 1.6. But, we want to use the latest version of Spark (2.0) to work with all the new features of R. So, follow the following procedure to install Spark 2.0. If you have already installed Spark 2.0, skip the following installation steps:
wget http://apache.mirrors.tds.net/spark/spark-2.0.0/spark-2.0.0-bin-hadoop2.7.tgz
tar xzvf spark-2.0.0-bin-hadoop2.7.tgz
cd spark-2.0.0-bin-hadoop2.7
- Add the
SPARK_HOMEandPATHvariables to the profile script so that these environment variables will be set every time a new session is started:[cloudera@quickstart ~]$ cat /etc/profile.d/spark20.sh export SPARK_HOME=/home/cloudera/spark-2.0.0-bin-hadoop2.7 export PATH=$PATH:/home/cloudera/spark-2.0.0-bin-hadoop2.7/bin
- Let Spark know about the Hadoop configuration directory and Java home by adding environment variables to
spark-env.sh. Copy the template files to theconfdirectory, as follows:cp conf/spark-env.sh.template conf/spark-env.sh cp conf/spark-defaults.conf.template conf/spark-defaults.conf cp /etc/hive/conf/hive-site.xml conf/ vi conf/spark-env.sh export HADOOP_CONF_DIR=/etc/hadoop/conf export JAVA_HOME=/usr/java/jdk1.7.0_67-cloudera
- Change the log level to
ERRORin theconf/log4j.propertiesfile after copying the template file.
Let's learn how to use the SparkR shell in local, standalone, and yarn mode.
Now, enter the SparkR shell in local mode with the following command. By default, it will get into local mode with all the cores (local[*]) allocated. You can change the number of cores using master[n], as follows:
[cloudera@quickstart spark-2.0.0-bin-hadoop2.7]$ bin/sparkR
[cloudera@quickstart spark-2.0.0-bin-hadoop2.7]$ bin/sparkR --master local[2]
You will get the following output. Notice that SparkContext is not available, and the only SparkSession is available as 'spark':

Figure 10.5: SparkR shell in local mode
Use the q() command to quit from the shell.
Start the standalone master and worker with the following commands, and then start SparkR by passing the standalone master URL:
[cloudera@quickstart spark-2.0.0-bin-hadoop2.7]$ cd sbin/
[cloudera@quickstart sbin]$ sudo ./start-all.sh
[cloudera@quickstart spark-2.0.0-bin-hadoop2.7]$ bin/sparkR --master spark://quickstart.cloudera:7077
The output will be as follows:

Figure 10.6: SparkR shell with the Standalone Resource Manager
If you are still in the Spark standalone shell, exit from it using the q() command. If you don't exit, Yarn will not be able to allocate resources. Make sure Yarn is up and running on the cluster and then pass the yarn-client to the master when starting up the SparkR shell. Also, make sure that the yarn configuration file yarn-site.xml is in /etc/hadoop/conf:
[cloudera@quickstart spark-2.0.0-bin-hadoop2.7]$ bin/sparkR --master yarn
The output is as follows:
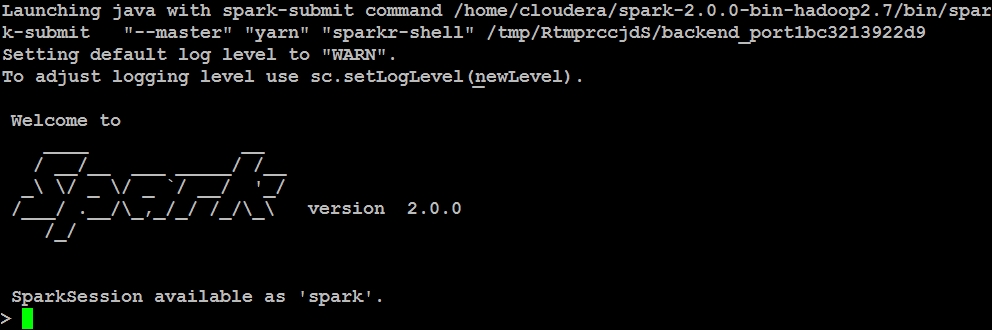
Figure 10.7: SparkR shell with the YARN Resource Manager
The SparkR --help command will show you all the available options such as driver memory, executor memory, and number of cores.
While you are in the SparkR shell, if you are looking for help, type help() or help(lapply) as an example. Use help.start() for an HTML browser interface to help.data() for all available datasets shipped with R installation.
Use the following commands to create a local DataFrame in R and convert it to SparkR DataFrame:
> localDF <- data.frame(name=c("Jacob", "Jessica", "Andrew"), age=c(48, 45, 25))
> df1 <- as.DataFrame(localDF)
> df2 <- createDataFrame(localDF)
> collect(df1)
Otherwise use the following command:
> head(df1)
Or use the following command:
> head(df2)
     name age
1   Jacob  48
2 Jessica  45
3  Andrew  25
To create a DataFrame from a JSON file stored on a local filesystem, use the following command:
> people_json <- read.df("file:///home/cloudera/spark-2.0.0-bin-hadoop2.7/examples/src/main/resources/people.json", "json")

> people_json
DataFrame[age:bigint, name:string]
> head(people_json)
  age    name
1  NA Michael
2  30    Andy
3  19  Justin
To write the people DataFrame as a Parquet file, use the following command. This will create the people-parq directory on HDFS, and will create a Parquet file with snappy compression:
> write.df(people_json, path = "people-parq", source = "parquet", mode = "overwrite")
Copy the hive-site.xml to the conf directory to let SparkR know about the Hive configuration:
cp /etc/hive/conf/hive-site.xml /home/cloudera/spark-2.0.0-bin-hadoop2.7/conf/
If not done already, go to Hue's UI, from quick start menu, click on Step2: Examples and then click on on Hive to install example tables in Hive quickly.
In Spark 1.6 and below, create the hiveContext and use it to fire Hive query language (HiveQL), as follows:
> hiveContext <- sparkRHive.init(sc)
> results <- sql(hiveContext, "SELECT * from sample_07 limit 10")
In Spark 2.0 and above, create a SparkSession, which is the entry point for R to a Spark cluster. In the SparkR shell, you get a pre-configured SparkSession called 'spark'. If the sample_07 table does not exist in Hive, install the Hive examples in Hue's Quick Start Wizard:
> results <- sql("SELECT * from sample_07 limit 10")
> results
DataFrame[code:string, description:string, total_emp:int, salary:int]
> head(results)

     code                         description total_emp salary
1 00-0000                     All Occupations 134354250  40690
2 11-0000              Management occupations   6003930  96150
3 11-1011                    Chief executives    299160 151370
4 11-1021     General and operations managers   1655410 103780
5 11-1031                         Legislators     61110  33880
6 11-2011 Advertising and promotions managers     36300  91100

> avg <- sql("select avg(salary) as avg_salary from sample_07")
> collect(avg)
  avg_salary
1   47963.63
Note that the RDD API is made private in SparkR release 1.4 as it is undergoing major changes. Some of the methods can be accessed using an internal API (via :::), as shown in the following snippet. But this is not a recommended method as of this version. For more details, take a look at https://issues.apache.org/jira/browse/SPARK-7230:
> myRDD <- SparkR:::textFile(sc, "file:///home/cloudera/spark-2.0.0-bin-hadoop2.7/README.md")
> fileCounts <- SparkR:::map(myRDD, nchar)
> SparkR:::take(fileCounts, 10)
When you start the SparkR shell, SparkContext and SqlContext are automatically created. We need to create them explicitly when using scripts. Create a script as shown in the following snippet, and submit it using spark-submit:
[cloudera@quickstart ~]$ cat sparkrScript.R
library(SparkR)

# Initialize SparkSession
sparkR.session(appName = "SparkR Script")

# Create a local DataFrame in R
localDataFrameinR <- data.frame(name=c("Jacob", "Jessica", "Andrew"), age=c(48, 45, 25))

# Convert R's local DataFrame to a SparkR's distributed DataFrame
DataFrameSparkR <- createDataFrame(localDataFrameinR)

# Print the SparkR DataFrame schema
printSchema(DataFrameSparkR)

# Print the rows
head(DataFrameSparkR)

# Register the DataFrame as a table
createOrReplaceTempView(DataFrameSparkR, "sparkrtemptable")

# SQL statements on registered table, convert to a local dataframe, and print
age25above <- sql("SELECT name FROM sparkrtemptable WHERE age > 25")
age25abovelocaldf <- collect(age25above)
print(age25abovelocaldf)

# Write the data out in json format on HDFS:
write.df(DataFrameSparkR, path="SparkR.json", source="json", mode="overwrite")

# Stop the script:
sparkR.stop()
Now, submit the script using the spark-submit command and check the result on HDFS:
[cloudera@quickstart ~]$ cd spark-2.0.0-bin-hadoop2.7
[cloudera@quickstart spark-2.0.0-bin-hadoop2.7]$ bin/spark-submit ~/sparkrScript.R

root
 |-- name: string (nullable = true)
 |-- age: double (nullable = true)

     name age
1   Jacob  48
2 Jessica  45
3  Andrew  25

     name
1   Jacob
2 Jessica

[cloudera@quickstart spark-2.0.0-bin-hadoop2.7]$ hadoop fs -cat SparkR.json/part*
{"name":"Jacob","age":48.0}
{"name":"Jessica","age":45.0}
{"name":"Andrew","age":25.0}
Use the following command to submit the job using yarn as the master and also increase the number of threads used by RBackend to handle RPC calls from the SparkR package from the default number of 2 to 3:
[cloudera@quickstart spark-2.0.0-bin-hadoop2.7]$ bin/spark-submit --master yarn --conf spark.r.numRBackendThreads=3 ~/sparkrScript.R