
When the animator is posing a character's arm (specially when using FK), it's often required to have two opposite features for their shoulder: with or without rotation inheritance from the torso. This is also called a "hinged" shoulder, when it doesn't inherit the rotation.
The "hinged" shoulder technique is very useful for enabling the animator to rotate the character's torso and have its arms still on the same direction. This affords similar independence to the arms from the torso as found in IK setups, while still allowing the animator to work in FK mode to have a finer control over the animation arcs.
- Open the file
005-Shoulders.blend. It has our character model with an FK setup for his arms, ready for our work. We have custom shapes applied to the bones and a ready to use UI, with two bones (one to drive each shoulder) and an unselectable mesh in wire display mode to help us view the controller.As the shoulder bones are parented to the Rib controller in the default FK mode, if you rotate any of the torso bones they will follow the transformation, as you can see in the next screenshot:
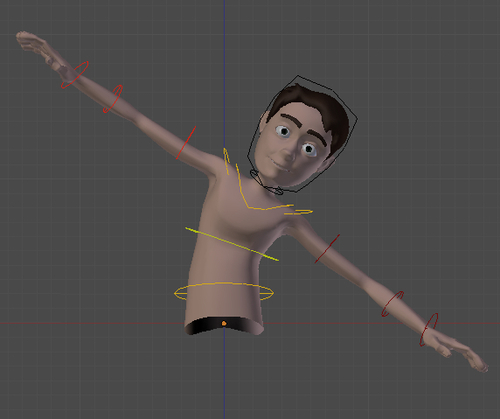
That's fine for some situations when animating your character, but we need to give the animator the control over whether or not the shoulders should follow the body rotation.
In Blender, all bones have the properties Inherit Rotation and Inherit Scale, which are located on the Bone tab, under the Properties window, as we can see in the next screenshot for the Shoulder.L bone:
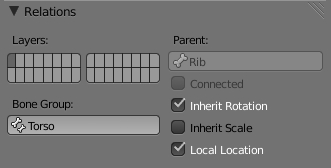
You can see that the Inherit Scale property is already disabled, so you can scale the character's spine without affecting the arms' size. The Inherit Rotation is checked but, different from the previous recipes, we don't have a slider value to drive. Is there a way to drive the on or off state of a box? Yes!
- Select the
Shoulder.Lbone, right-click on the Inherit Rotation box in the Properties window and choose Add Driver, like you would do for a slider. The field will acquire a purple hue, which indicates that it has a driver attached to it. - Open a Graph Editor, selecting the Drivers mode in the window header. Click on the name of the driver that you've just created in the left panel: Inherit Rotation (Shoulder.L).
- In the Properties tab (N), under the Driver section, set the Ob/Bone field values as
Otto_ArmatureandHinge-Arm.L; leave the X Location channel and check the Local Space box. In the Expr field, above the Add Variable button, type justvar. The next screenshot shows the panel setup: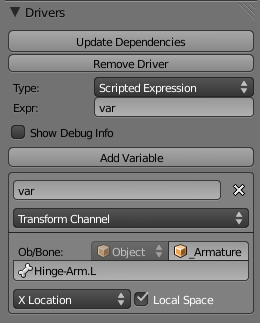
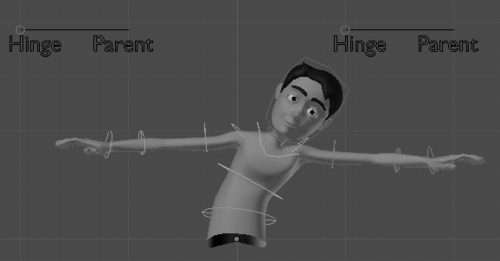
- Now, moving the
Hinge-Arm.Lbone on its X axis will drive the value, similar to a regular slider. That happens because Blender will read any driven value lower than 1 as False (thus, the disabled state), assigning True when the value is equal to 1.Since there are only two possible (Boolean) values, the slider in our UI doesn't offer any intermediate situations: the shoulder is either "hinged" when the controller has its X position from 0 to .999, or it follows the torso rotation when the controller's X location is equal to or more than 1. The next screenshot shows our character with both shoulders in "hinged" mode:
The file 005-Shoulders-complete.blend has this finished recipe for your reference in case of any doubts.
By assigning a regular driver to a Boolean (True or False) field, we can control its state by having values lower than 1 interpreted as "False" and equal or higher ones as "True".
With this principle in mind, you can control a number of features that were impossible to animate in previous versions of Blender: from the X-Ray property of an armature to options inside constraint panels, you can drive everything!
Chapter 2: Controlling the neck and head