Whether we built the Gidiosaurus deforming rig part by hands from scratch or by the Human Meta-rig, we must now add the necessary constraints and controls to allow the animators to easily manipulate the character.
Note
Note that once the mesh is skinned, the rig, as it is at this point, can actually already work by directly selecting the interested bones and rotating them in Forward Kinematics; however, to simplify the animator's work (and complicate our life a little bit more), it's good practice to add the Inverse Kinematic constraints and the control bones.
Let's start by opening the Gidiosaurus_rig_from_scratch_02.blend file; as usual, enter Edit Mode to ensure that the X-Axis Mirror item in the Armature Options subpanel under the Tool Shelf is enabled.
We now need to create the control bones; we can do it by extruding from the bones they will drive:
- Press the 3 key on the numpad to go in the Side view and, if not already, select the Armature; if necessary, in the Display subpanel, change the visualization of the bones from B-Bone to Octahedral.
- While still in Edit Mode, use Shift to select the joints of the hand with the forearm and the calf with the foot (it's enough only on one side) and extrude them going backwards (0.400 along global y axis).
- Rename the new extruded bones as ctrl_hand.L, ctrl_hand.R, ctrl_foot.L, and ctrl_foot.R respectively. Deselect the Deform item and unparent them all.
- Select the Head of the hips bone and repeat: rename the extruded bone as MAIN.
- Select the hips bone and in the Relations subpanel, parent it as a child of the MAIN bone:

Extruding the control bones part 1
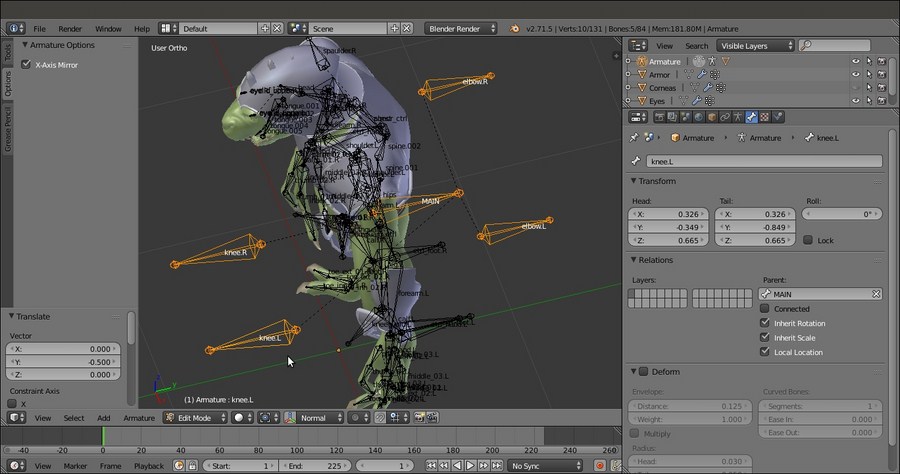
- Select the elbow joint (between the forearm and arm) and extrude a new bone backwards; rename the extruded bone and the mirrored one as elbow.L and elbow.R. Disable the Deform item and parent them (Keep Offset) to the MAIN bone. Move them backwards by 0.500 along the global y axis.
- Select the knee joint (between the thigh and calf) and extrude forward; rename the new bones as knee.L and knee.R. Disable the Deform item and parent them (Keep Offset) to the MAIN bone as well. Move them forward by -0.500 along the global y axis;

Extruding the control bones part 2
- Go into Pose Mode and select the forearm.L bone; go to the Bone Constraints window and assign an Inverse Kinematics constraint. Set Target = Armature, Bone = ctrl_hand.L, Pole Target = Armature, Bone = elbow.L, Pole Angle = -90°, and Chain Length = 2, and deselect Stretch. Repeat the process for the forearm.R bone:

Assigning the IK constraint to the forearm.L bone
- Do the same for the calf.L and calf.R bones, using the ctrl_foot.L and ctrl_foot.R bones as targets and the knee.L and knee.R bones as poles, but set the Pole Angle to 90° for both.
- Now, go back into Edit Mode, select the hand and foot bones, and use Shift + D to duplicate them. Click on the Pivot Point button on the 3D view toolbar, select the Individual Origins item, and then scale the duplicated bones smaller to 0.600:

Scaling the bones smaller on their individual origin
- Deselect the Deform item for all of them, and then rename them as: handrot.L, handrot.R, footrot.L, and footrot.R.
- In the Relations subpanel (or by the Ctrl + P | Keep Offset shortcut), parent handrot.L to ctrl_hand.L, handrot.R to ctrl_hand.R, footrot.L to ctrl_foot.L, and footrot.R to ctrl_foot.R:

Using the Parent slot under the Relations subpanel
- Use Shift to select the ctrl_foot.L bone and the foot.L bone and press Ctrl + Alt + A to align the first one with the active one; then, select only the ctrl_foot.L bone, and by the toolbar widget manipulator set to Normal orientation, rotate it 245° on the x axis:

Rotating the bone on the Normal orientation by the widget
- Go into Pose Mode and select the hand.L bone; assign a Copy Rotation bone constraint with Target = Armature and Bone = handrot.L, and set Space = Pose Space to Pose Space.
- Repeat for the other hand bone and feet.
- Select the Tails of the eyelid_upper.L, eyelid_bottom.L, and eye.L bones and extrude forward by 0.0600 along the y axis; rename them as eyelid_ctrl_upper.L, eyelid_ctrl_bottom.L, and eye_ctrl.L and the same names with the .R suffix for the mirrored ones.
- Add a new bone in the middle front of the eyes, rename it eyes_ctrl, and parent it with offset to the head bone; then, select the eye_ctrl.L and eye_ctrl.R bones and parent them with offset to the eyes_ctrl bone.
- Select the eyelid_upper.L, eyelid_upper.R, eyelid_bottom.L, and eyelid_bottom.R bones and parent them with offset to the head bone:

The eyes control rig
- Select the Tails of the mand and tongue.005 bones and extrude; rename the extruded bones as ctrl_mouth and ctrl_tongue. Parent with offset the ctrl_tongue bone to the ctrl_mouth bone and this latter bone to the head bone:

Extruding the control bones for the tongue and jaw
- Go into Pose Mode and assign Locked Track constraints to the eyelid_upper and bottom with target to the respective extruded ctrl bones; set Lock to X:

Assigning the Locked Track constraints for the eyelid's controls
- Assign Damped Track constraints to the eye.L and eye.R bones, again with target to the respective extruded ctrl bones:

Assigning Damped Track constraints for the eye's controls
- Assign a Track To constraint to the mand bone with target to the ctrl_mouth bone; check the Target Z item box and set Space = Pose Space to Pose Space:

Assigning a Track To constraint to the mand bone
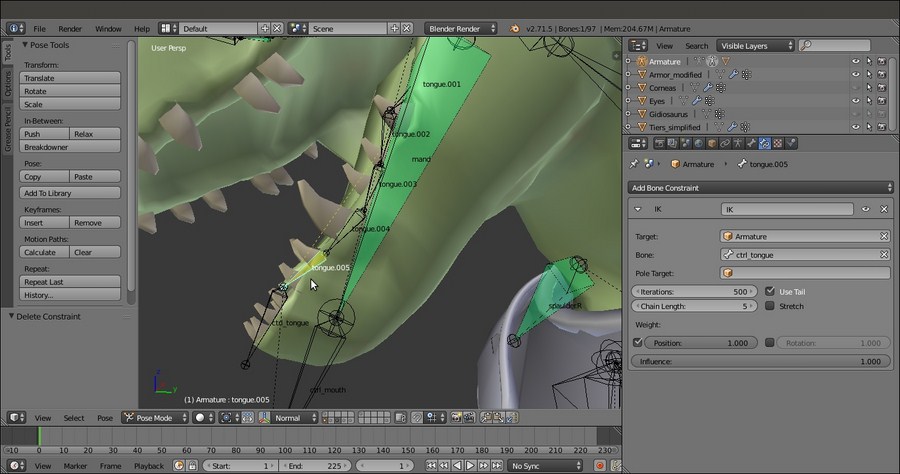
- Assign an Inverse Kinematics constraint to the tongue.005 bone with target to the ctrl_tongue bone; set Chain Length to 5, deselect the Stretch item, and then enable also the Rotation item;

The IK constraint for the bone's chain of the tongue
At this point, the main controls for the Gidiosaurus rig are made; still something is missing, for example, the controls to drive fingers or/and toes bones as a whole, and also a muscle system layer of bones with the Stretch To constraints that can be added to improve the realism of the model. However, this latter option is quite a complex matter and, for the moment, we will stop here (maybe in another book).
The very last thing to do is to assign Custom Shapes (usually, simple meshes located on the last scene layer) to the control and animatable bones widget, and move the rest of the bones to the third Armature layer to be out of view.
To see the completed rig with the Custom Shapes assigned to the control bones, load the Gidiosaurus_rig_from_scratch_03.blend file;

The rig with and without Custom Shapes and with the deformation bones hidden on the third (disabled) Armature layer
