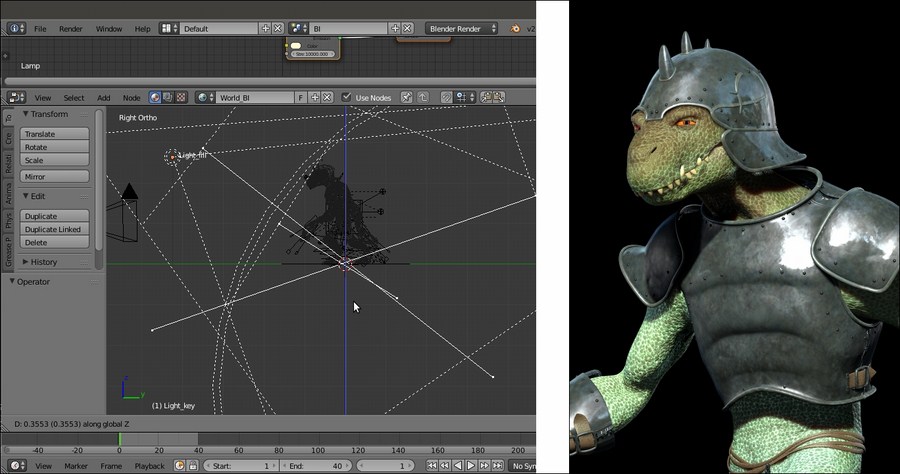
Thanks to the global illumination, a path-tracer like Cycles doesn't necessarily need big lighting setups; in fact, in the recipes we made, we only used one single Spot lamp in addition to the IBL and the results have been quite good anyway.
In Blender Internal, instead, a minimum arrangement of lamps must be done to obtain satisfying results, even with the aid of the World settings we have previously seen.
In this recipe, we are therefore going to see a classic movie three-point lighting rig, an industry standard. The effect of the main key light is enhanced by the other two lamps: the fill light, to brighten (and color) the shadow areas on the subject, and the backlight, to create a light rim on the subject edges thus making it stand out against the background.
Start Blender and load the previously saved Gidiosaurus_IBL.blend file; if necessary, switch to the Blender Render engine by the Engine to use for rendering button in the top main header.
- Put the mouse pointer inside the Camera view and press the numpad 7 key to go in Top view, then press numpad 5 to switch from Perspective to Ortho view.
- Press Shift + C to put the 3D Cursor at the center of the scene and then go to the Outliner to select the Gidiosaurus item: press the numpad period (.) key to center and zoom the view on the selected object:

Centering the top view on the character
- Press Ctrl + Spacebar to disable the widget and scroll the mouse wheel to zoom backward and show the Spot lamp, then press the dot (.) key to switch the Pivot Point from Median Point (or whatever else) to 3D Cursor.
- Select the Lamp, then go to the Object Data window.
- Remember to go to the Scene window and disable the Simplify subpanel!
- Save the file as
Gidiosaurus_lighting.blend.
Don't take into consideration the Node Editor window at the top showing the Lamp nodes under Cycles; the settings to look for are those inside the main Properties panel to the right:

These are the settings you are looking for...
Let's go with the settings of the lights:
- In the Outliner, rename the Lamp item as Light_key.
- Press Shift + D to duplicate the Key_light lamp, press R and, while still in Top view, rotate the duplicated lamp approximately -145 degrees, then go in Side view (numpad 3 key) and rotate it around 15 degrees: in the Outliner, rename it as Light_back.
- In the Object Data window, set the color to a light blue = R 0.700, G 0.900, B 1.000 and the Energy to 5.000:

Positioning the Light_back lamp
- Go back in Top view (numpad 7 key) and re-select the Light_key lamp, press Shift + D and rotate the duplicate by 100 degrees; in the Outliner, rename it as Light_fill. Go in Front view (numpad 1 key) and rotate it around -25 degrees.
- In the Object Data window, set the color to a lighter blue = R 0.500, G 0.800, B 1.000 and the Energy to 2.000:

Positioning the Light_fill lamp
- Go to the Object window and in the Display subpanel enable the Name item for the three lamps; then, back to the Object Data window and in the Spot Shape subpanel, enable the Show Cone item for each one:

The three spot lamps showing their cones of influence
- In the Outliner, disable the 3D viewport visibility of the Light_back and Light_fill lamps by clicking on the respective eye icon, then go in Side Ortho view and select the Light_key lamp.
- Go to the Spot Shape subpanel again and lower the Size value from the default 75° to 30° (or the smallest possible value that still comprehends the whole character):

Lowering the spot lamp size value
- Repeat steps 7 and 8 for the other two lamps as well, then Shift-select all the three lamps and move them upward (on the z axis) a bit, just to better center the light cones' centers on the position of the feet of the character.
- Save the file.

The final result of the three-point lighting rig
A classic three-point lighting rig can in some way compensate for the lack of real global illumination in Blender Internal, although to obtain really good results, three lamps are usually not enough; in any case, the lighting rig of this recipe can be used as a base for even more complex setups.
When using more than one lamp in Blender Internal, we should always be sure that the shadows are enabled for all of them, unless we want particular effects; in fact, a back lamp with disabled shadows can easily shine through the model and also illuminate parts that shouldn't be in light, giving unrealistic results.
To calculate the buffered shadows, Spot lamps take into consideration everything inside their cone from the Clip Start to the Clip End values; this is why we lowered the Size values of the cones as much as possible.
One other crucial factor that can slow the calculation and the rendering times is, obviously, the size of these buffers, which we set to 4000 for each one of the three lamps; quite big, but because we set the cones that large enough to just comprehend the shape of their target object. This means we could use big shadow buffers, to obtain more details in the shadows if needed.
We do all of this, even though the Gidiosaurus was the only object to be rendered in the scene.
