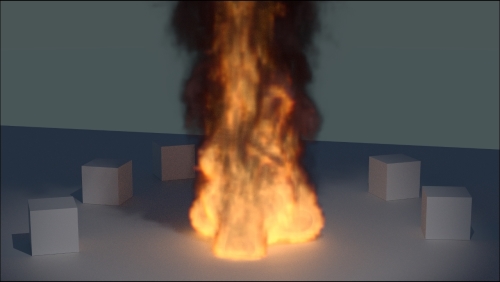
In this recipe, we are going to see one of the most exciting effects we can obtain in Cycles—a fire and smoke simulation effect:

The fire and smoke shader as it appears in the final rendering when assigned to the Suzanne mesh
Start Blender and open the 9931OS_09_fire_smoke_start.blend file, where there is the Suzanne_unwrapped object leaning on a Plane and surrounded by five small Cubes, a Spot lamp, the Camera, and a medium-intensity World with a Sky Texture.
- Go to the Render window, and under the Sampling subpanel, set the Preview samples to
50and the Render samples to100. Then go to the Dimensions subpanel and set the End Frame to80. Under the Light Paths subpanel, enable the Reflective and Refractive Caustics items.
Let's start by creating the smoke simulation by a shortcut:
- Select the Suzanne_unwrapped object, click on the Object item in the 3D viewport toolbar to go to Quick effects, and select the Quick Smoke item. Alternatively, press the spacebar, and in the search window, start typing
Quick. Then select the Quick Smoke item from the menu as shown in the following screenshot:
The Quick Effects menu
- A Smoke Domain (the selected wire box around the Suzanne object) with a prepared fire/smoke material (
Smoke Domain Material) is automatically set up on the selected object, and when you press the Play button in the Player Control on the Timeline toolbar, the smoke simulation starts. Have a look at the following screenshot:
The smoke simulation: in the upper Node Editor window, the material being automatically created by the Quick Effects tool
- Go back to frame 1 and scale the Smoke Domain to a larger size on the global z axis such that its top goes out of the Camera frame boundary. Scale it by
3.000(press S, enter digit3.000, then press Enter). Then move it 5 units upwards. - Go to the Physics window, and under the Smoke subpanel, set the Divisions value to
64. Then go to the Smoke Flames subpanel and set the Speed value to2.00000, Smoke to0.50000, and Vorticity to1.00000. Restart the Play button to recalculate the cache. Have a look at the following screenshot:
The smoke simulation inside a bigger domain box
- As all the 80 frames have been cached, go to the Physics window, and under the Smoke Cache subpanel, click on the Current Cache to Bake button.
- Enable the Smoke Adaptive Domain and the Smoke High Resolution subpanels. Leave the default settings as they are.
- With the mouse arrow in the Camera view, press Shift + Z to switch to the Rendered viewport shading mode. Have a look at the following screenshot:

The smoke simulation seen in the Rendered preview
In the Rendered preview (be careful that the smoke is not supported by GPU yet), we can see the dark grey smoke, but what about the fire?
- In the Physics window, under the Smoke Cache subpanel, click on the Free All Bakes button.
- Go to the Outliner to select the Suzanne_unwrapped item. Then go to the Physics window again. Under the Smoke subpanel, click on the Flow Type slot and switch from Smoke to Fire + Smoke. Then click on the Smoke Color slot and change the color values for R to
0.700, G to0.317, and B to0.335. Have a look at the following screenshot:
- Reselect the Smoke Domain object and click on the Play button to cache the smoke simulation again, this time with reddish smoke and also the fire. Then click on the Current Cache to Bake button again.

The new smoke (and fire) simulation
But this is a Cookbook about materials, so let's put aside the smoke simulation settings and concentrate on the material. To better understand how this works, let's delete the ready-made material and create a new material from scratch.
- In the Node Editor toolbar, press Shift and click on the X button to unlink the
Smoke Domain Material. Set the users to zero.Now, setting the Camera view shading mode to Rendered shows only the Smoke Domain box as a solid object because no material is assigned to the simulation.
- Click on the New button in the Node Editor window toolbar. Delete the Diffuse BSDF shader node and add a Volume Scatter node (press Shift + A and navigate to Shader | Volume Scatter). Connect it to the Volume input socket of the Material Output node.
- Add an Attribute node (press Shift + A and navigate to Input | Attribute) and connect its Fac output to the Density input socket of the Volume Scatter node. In the Name field of the Attribute node, write
density. - Add a Math node (Shift + A | Converter | Math), set the Operation to Multiply, and paste it between the Attribute and the Volume Scatter nodes. Set the second Value to
5.000.
Building the smoke density after deleting the default Quick Effects material
- Press Shift + D to duplicate the Attribute node, connect the duplicated node's output to the Color input socket of the Volume Scatter node. In the Name field, write
color.
The smoke color
As you can see in the rendered preview, the smoke gets a bluish coloration, with the complementary color (orange) getting scattered.
- Add a Volume Absorption node (Shift + A | Shader | Volume Absorption) and an Add Shader node (Shift + A | Shader | Add Shader). Paste the Add Shader node between the Volume Scatter and the Material Output nodes. Then connect the Volume Absorption output to the second Shader input socket of the Add Shader node.
- Connect the Color output of the Color-Attribute node to the Color input socket of the Volume Absorption node, and the output of the Multiply node to the Density input socket of the Volume Absorption node as shown in the following screenshot:

The complete smoke network
- Parent all of these nodes, except the Material Output node, to a Frame. Label it as
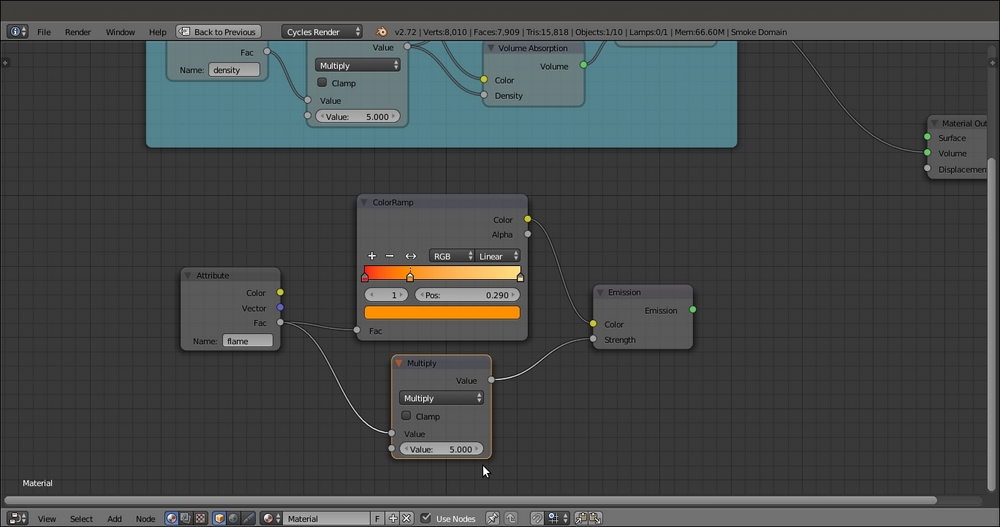
SMOKE. - Duplicate or add a new Attribute node, and in the Name field, write flame. Add an Emission shader (press Shift + A and navigate to Shader | Emission) and connect the Fac output to both the Strength and the Color input sockets of the Emission shader node.
- Add a ColorRamp (Shift + A | Converter | ColorRamp) and paste it between the Attribute output and the Color input socket of the Emission node. Set the black color stop values for R to
1.000, G to0.000, and B to0.010. Then set the white color stop values for R to1.000, G to0.724, and B to0.224. Add a new color stop and move it to the0.290position. Set the color values for R to1.000, G to0.280, and B to0.000. - Add a Math node and paste it between the Attribute output and the Strength input socket of the Emission node. Set the Operation to Multiply and the second Value to
5.000.
Starting to build the fire shader
- Parent these four nodes to a new Frame labeled as
FLAME. - Add an Add Shader node (press Shift + A and navigate to Shader | Add Shader) and paste it between the output of the Add Shader inside the SMOKE frame and the Material Output. Connect the output of the Emission shader inside the FLAME frame to the second Shader input socket of the last Add Shader node.

Smoke and fire shaders added
- Rename the material as
fire_smokeand save the file as9931OS_09_fire_smoke_final.blend.
Considering that we basically used the default settings for the fire and smoke simulation, the result was pretty good. To find out more about the different settings and types of smoke, take a look at the links provided in the See also section of this chapter.
We used the Quick Effects menu to let Blender automatically set up the smoke simulation for us. The steps usually involved are as follows:
- For the simulation domain, set an object that defines the bounds of the simulation volume. In our case, it was the Smoke Domain box in the wireframe viewport shading mode. It could be scaled, moved, or rotated if necessary.
- For the flow, set an object that determines where the smoke will be produced from, that is, the Suzanne_unwrapped object.
- Assign a material to the smoke. In our case, it was the automatically created
Smoke Domain Material, which we then remade as thefire_smokematerial. - Bake the simulation by computing the cache for the required frames and then clicking on the Current Cache to Bake button.
- Save the blend file.
The fire_smoke material we set in the Node Editor is made exactly as shown in the previous volume recipes of this chapter. It consists of all the three shader nodes that can be used for a Volume: the Volume Scatter, the Volume Absorption and the Emission shaders, driven by the flame, density and color attributes we wrote in the Name field of the Attribute nodes and coming from the smoke simulation.
