Whatever the method you are going to use, it's now time to start with the effective sculpting process.
However, first, a disclaimer: in this recipe, I'm not going to teach you how to sculpt, nor is this an anatomy lesson of any kind. For these things, a book itself wouldn't be enough. I'm just going to demonstrate the use of the Blender sculpting tools, showing what brush I used for the different tasks, the sculpting workflow following the reference templates, and some of the more frequently used shortcut keys.
In this recipe, we'll use the Dynamic topology method. If you haven't followed the instructions of the previous recipe, just follow the steps from 12 to 17; otherwise, just open the Gidiosaurus_Dynatopo.blend file that is provided.
As usual, it's a good habit to save the file with the proper name as the first thing; in this case, save it as Gidiosaurus_Dynatopo_Sculpt.blend.
If you are going to use a graphic tablet to sculpt, remember to enable the tablet pressure sensitivity for both size and strength; in any case, it is better to set the respective sliders to values lower than 100 percent; I usually set the size slider around 30/35 and the strength slider to 0.500, but this is subjective:

The tablet pressure sensitivity buttons for the size and the strength
- If you haven't already, go into Sculpt Mode and enable the Dynamic topology feature by clicking on the Enable Dyntopo button in the subpanel with the same name under the Tool Shelf panel or by directly pressing Ctrl + D.
- Set the Detail Size value to 15, either by using the slider under the Enable Dyntopo button or by pressing Shift + D and then moving the mouse to scale it bigger or smaller:

Starting to sculpt
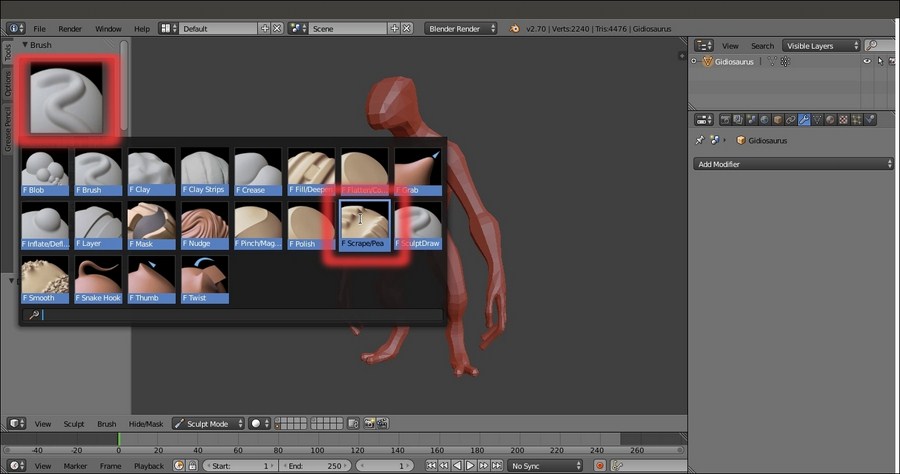
- Click on the Brush selection image (Brush datablock for storing brush settings for painting and sculpting) at the top of the Tools tab under the Tool Shelf panel, and, from the pop-up menu, select the Scrape/Peaks brush (otherwise press the Shift + 3 key shortcut):

Selecting the Scrape/Peaks brush in the sculpt brushes menu
- Start to scrape all the edges and soften the corners to obtain a smooth rounded surface:

Softening the edges of the mesh
- Change the brush; select the Grab brush (G key) and press 3 in the numpad to go into Side view; press the F key and move the mouse cursor to scale the brush, in this case, to scale it much bigger, around 120 pixels (Shift + F is to change the strength of a brush, instead).
- Using the Background Image showing in the orthographic view (the 5 key in the numpad), grab the spine and chest areas of the mesh and move them to fit the shape of the template:

Using the Grab brush to modify the mesh
- Do the same for the other parts of the mesh that don't fit yet, and do it also in Front view (1 key in the numpad) and Back view (Shift + 1 in the numpad).
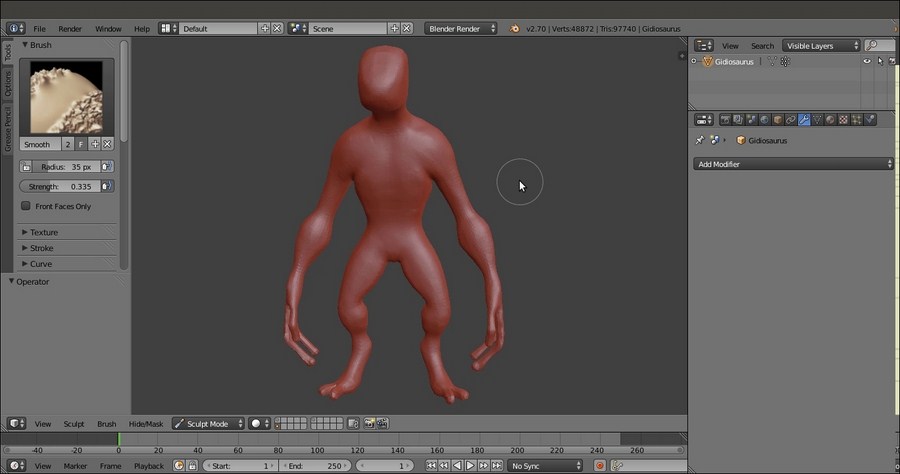
- Select the Scrape/Peaks brush again (Shift + 3 keys) and keep on softening the mesh until almost every part gets rounded and more organic-looking; you can also use the Smooth (S key) brush to further soften the mesh:

The character is starting to take a shape
- Open a new window, switch Editor Type to UV/Image Editor and click on the Open button in the toolbar; browse to the
templatesfolder and select thegidiosaurus_trequarters.pngimage. Then, click on the little pin icon on the right-hand side of the image name on the window toolbar (Display current image regardless of object selection). - Select the Crease brush (4 key); using it as a chisel and following the loaded image as a reference, start to outline the character's more important features on the mesh, drawing the character's anatomy:

Using the Crease brush as a chisel
- By pressing Ctrl while sculpting, we can temporarily reverse the effect of the brush; so, for example, the Crease brush, which usually carves lines in the mesh, can sculpt ridges and spike protrusions. We can use this to add details to the elbow bones and knees on the fly.
- By pressing the Shift key while sculpting instead, we can temporarily switch whatever brush we are using with the Smooth brush, in order to instantly soften any newly added detail or feature.

Outlining the major body features
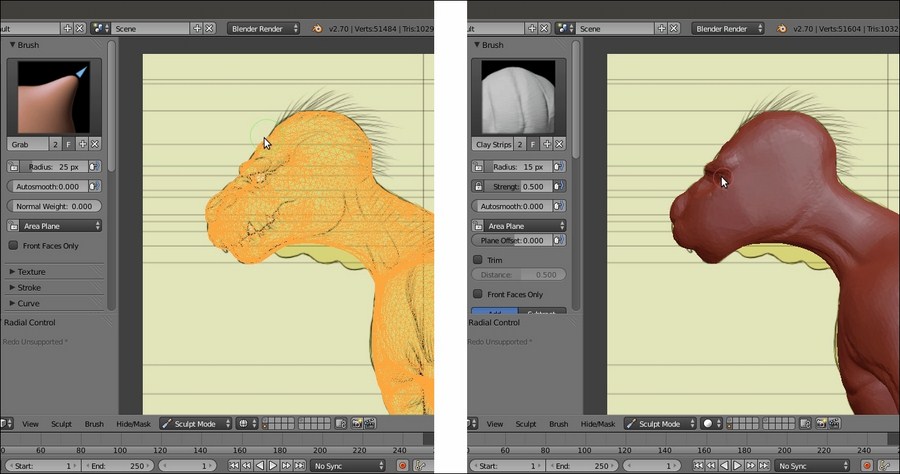
- When finished with the body, exchange the brush for the Clay Strips brush (3 key), start to add stuff (the nose, eyebrows, and so on), and outline the features of the head. Again, press Ctrl to subtract clay (for the eye sockets, for instance) and Shift to soften.

Using the Clay Strips brush to add details and/or carve stuff
- Always use the templates to check for the proportions and positions of the character's features. Also, use Wireframe mode if necessary, by going into Ortho view and comparing the sculpted mesh outline with the background template image; use the Grab brush to quickly move and shape proportionate features in the right places:

Temporarily switching to the Wireframe viewport shading mode to check the proportions in Side view
- Using the Clay Strips (3 key), Smooth (S key), SculptDraw (Shift + 4 key), Crease (4 key), and Pinch (Shift + 2 key) brushes, build the head of the creature and define as many details as possible such as the eyebrows, mouth rim, nostrils, and eye sockets; experiment with all the different brushes:

Detailing the head
- Go out of Sculpt Mode and press N to make the Properties 3D window sidepanel appear; uncheck the Only Render item under the Display subpanel.
- Press Shift + A and add a UV Sphere to the scene. Go into Edit Mode, if you haven't done so already, select all the vertices and rotate them 90 degrees on the x axis; then, scale them to 0.1000. Finally, scale them again to 0.3600.
- Exit Edit Mode and move the UV Sphere to fit inside the left eye socket location.
- Select the character's mesh and press Shift + S; then, in the Snap pop-up menu, choose Cursor to Selected. Select the UV Sphere and go to the Tools tab under the Tool Shelf; click on the Set Origin button and choose Origin to 3D Cursor. This way we have set the origin of the UV Sphere object at the same place as the character's mesh, while the UV Sphere mesh itself is located inside the left eye socket.
- Go to the Object Modifiers window under the main Properties panel and assign a Mirror modifier to it.
- Go to the Outliner, press Ctrl + left-click on the UV Sphere item, and rename it Eyes:

Positioning the eye spheres
- Press Shift + A and add a Cube primitive. Go into Edit Mode and scale it a lot smaller; use the side template as a reference to modify by scaling, extruding, and tweaking the scaled Cube's vertices in order to build a low resolution fang. Go out of Edit Mode and go to the Object Modifiers window to assign a Subdivision Surface modifier.
- Duplicate the fang and, as always, following the side and front templates as a guide, build all the necessary teeth for the Gidiosaurus.
- Select all of them and press Ctrl + J to join them into one single object; press Ctrl + A to apply Rotation & Scale; then, do the same as in steps 19 and 20.
- Go to the Outliner and rename the new object Fangs.

Making the teeth
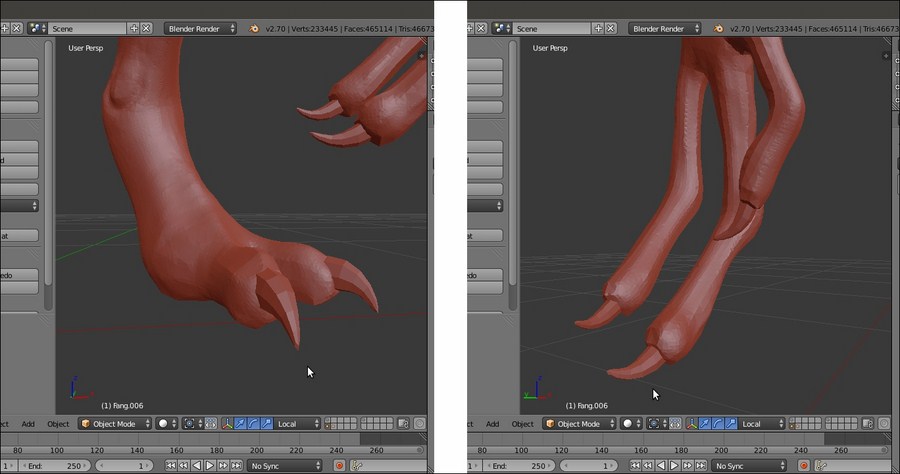
- Add a new Cube and repeat the process to model the talons of the hands and feet:

Making the talons
Note that the Eyes, Fangs, and Talons objects are not going to be sculpted, and therefore they are kept as separate objects. Later, we'll start to retopologize the sculpted body of the creature, while the eyes will be modeled and detailed in the traditional polygonal way; fangs and talons are good enough as they are.
- Reselect the Gidiosaurus object and go back into Sculpt Mode to keep on refining the creature's shape more and more; don't be afraid to exaggerate the features, we can always smooth them later.

The almost completed sculpted mesh
- Adjust the shape of the eyebrows to perfectly fit the Eyes object; then, work more on the mouth rim to accommodate the fangs.

Refining the eyebrows and the mouth rim
- When you think you have arrived at a good enough point, just go out of Sculpt Mode and remember to save the file!
Just a quick note: we don't actually need to go out of Sculpt Mode to save the file, it's possible to save it periodically (press Ctrl + S or Ctrl + W to save the file over itself, and Ctrl + Shift + S to save as) without needing to exit the sculpting session each time.

The completed sculpted mesh compared with the reference templates
So, here we are; the character's sculpting is basically done. We can work on it a lot more, tweaking the shapes further and adding details such as scales, wrinkles, and veins, but for this exercise's sake (and for this recipe), this is enough.
A nice aspect of the Dynamic topology feature is the possibility to actually join different objects into a single mesh; for example, with our Gidiosaurus, we can join the teeth and the talons to the sculpted base mesh and then keep on sculpting the resulting object as a whole.
Actually, there are two ways to do this: simply by joining the objects and by the Boolean modifier.
To join the objects in the usual way, we can do the following:
- Go out of Sculpt Mode.
- Select the first object (that is, the teeth), press Shift + select the second object (the talons), and lastly press Shift + select the sculpted base mesh so that it's the active object (the final composited object will retain the active object's characteristics).
- Press Ctrl + J and it is done!
This is the way you join objects in Blender in general, and it can actually work quite well. There is only one problem: there will always be a visible seam between the different objects, and although in the case of teeth or talons this will not be a problem, in other cases it should be avoided. Let's say you are working on a separated head and later you want to join it to a body; in this case, you don't want a visible seam between the head and neck, obviously!
So, the option is to use the Boolean modifier:
- Go out of Sculpt Mode.
- Select the character's base mesh and go to the Object Modifiers window under the main Properties panel; assign a Boolean modifier.
- Click on the Object field of the modifier to select the object you want to join (let's say, the Talons object) and then click on the Operation button to the left to select Union.
- Click on the Apply button to apply the modifier.
- Hide, move onto a different layer, or delete the original object you joined (the talons).
Unlike the previous method, with Booleans, it will be possible to sculpt and smooth the joining of the different objects without leaving visible seams.
