8. Level Your Horizon
When you’re taking images with a DSLR, it can be pretty difficult to make sure that your horizon is straight and level for each shot. Enter the 6D’s electronic level. Using your camera’s internal gyroscope, the electronic level displays a graphic that tells you whether your horizon is straight. You can enable the electronic level either on the rear LCD or inside the viewfinder.
Enabling the Electronic Level on the Rear LCD
1. Turn on the camera.
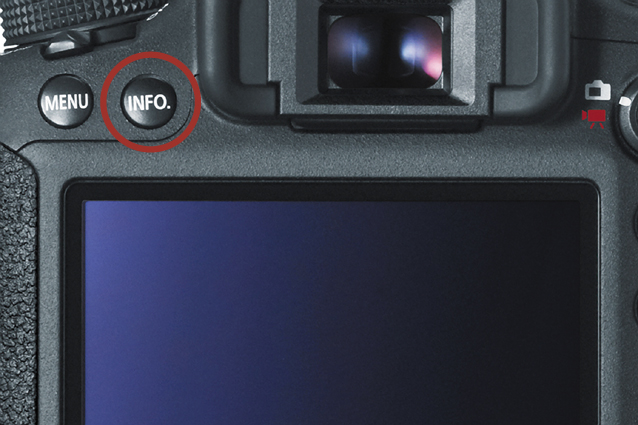
2. Press the Info button (Figure 1.5) on the back of your camera until you see the electronic viewfinder (A). This also works when you are using Live View.
Enabling the Electronic Level in the Viewfinder
1. Turn the camera on.
2. Press the Menu button on the back of your camera.
3. Use the Multi-Controller to move to the Camera Functions tab (A).

4. Scroll down to the C.FnIII: Operation/Others option, and hit the Set button.
5. Use the Multi-Controller to rotate to the Custom Controls section (B), and press the Set button.

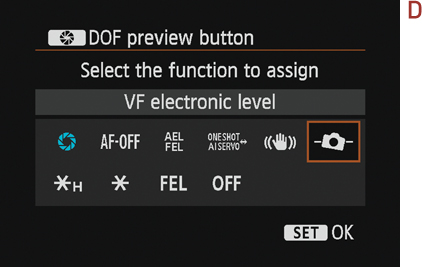
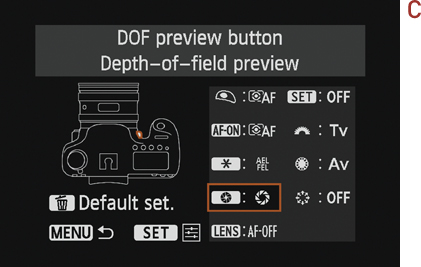
6. Use the Multi-Controller to move to Depth-of-field preview, and press the Set button (C).
7. Move to the VF electronic level option, and press the Set button.
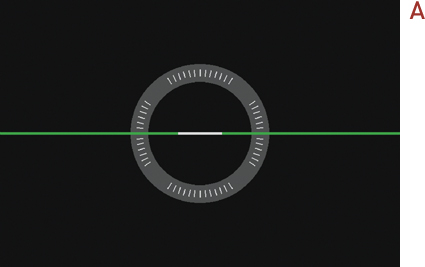
Now every time you press the Depth of Field Preview button on the front of your camera (Figure 1.6), a small electronic level will appear at the bottom of your view-finder, letting you know if you are tilted too far to the left or right (D).
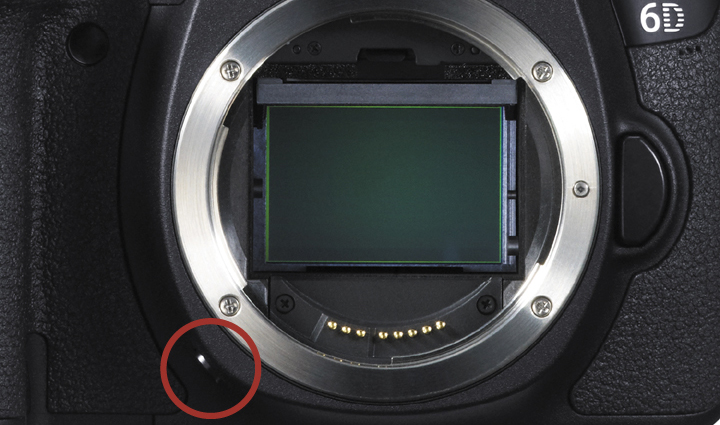
Figure 1.6. The Depth of Field Preview button is on the front of your camera, just below where a lens attaches.