
The Creative Zone
The Creative zone is a group of shooting modes that give you much more control over your camera settings. You will need to have a basic understanding of how exposure is calculated through ISO, shutter speed, and aperture to make the most of these shooting modes (see Chapter 2 for a recap if necessary).

First up on the dial is Program mode (P). If you are just starting to move out of the Basic zone, you will feel most comfortable here. This mode is similar to the modes in the Basic zone in that it gives the camera control over some of the settings but leaves the rest up to you.
In Program mode, the camera maintains control over shutter speed and aperture, while you get to choose the ISO, white balance, focus point, and so on. This gives you a good amount of control over your images, while not forcing you to take over every setting.
When to use Program (P) Mode Instead of the Basic Zone Modes
• When shooting in a casual environment where quick adjustments are needed
• When you want control over the ISO
• When you want to make corrections to the white balance
It is important to note that while the camera chooses the aperture and shutter speed for you, you still have the ability to further adjust those settings if they don’t suit your needs. You can rotate the Main dial to adjust the aperture and shutter speed while maintaining the same exposure for your image. Do you remember the Reciprocal Exposures charts in Chapter 2? The same principles are applied here. For example, if you point your camera at a scene while in Program mode and it gives you a shutter speed of 1/100 of a second and an aperture of f/2.8, you can rotate the Main dial two stops to the right and your camera will give you 1/50 of a second and f/4.0, having adjusted both the aperture and shutter speed for you. Both of these exposures will allow the same amount of light to hit the sensor, but you were able to exert some control over the shutter speed and aperture. Turn the dial to the left, and you make your shutter speed slower while making the aperture smaller (higher f-stop number). Turn the dial to the right, and you increase your shutter speed while making the aperture wider (lower f-stop number).
The key to adjusting your exposure in Program mode is understanding how you want your image to look. If you are taking a portrait of a woman, you will want your aperture to be wide open so she stands out from the background. If you are photographing a bird flying through the air, you will need to choose a faster shutter speed to freeze it in flight. While Program mode will not give you the fine control you might need to capture some of these situations properly, it is a step in the right direction as you move from the Basic zone.
Let’s get your camera set up for shooting in Program mode.
Setting Up and Shooting in Program Mode
1. Turn on your camera, and then turn the Mode dial to align the P with the indicator line.
2. Set your ISO, white balance, and focus points as needed.
3. Point your camera at your subject and press the shutter release button halfway to activate the in-camera light meter.
4. Review the exposure information that the camera gives you.
5. Make any necessary changes to the shutter speed and aperture settings by rotating the Main dial to the right or left with your index finger.
6. Once you are content with the exposure, begin shooting. (If you aren’t sure what the right exposure is, don’t worry. We will begin working on this in the next chapter.)

Shutter Priority mode is known as Tv, or Time Value, mode on Canon cameras. This mode works just as its name sounds, by putting a stronger emphasis on shutter speed than on aperture. When you are in Tv mode, you have full control over the shutter speed, and the camera will choose the correct corresponding aperture for you (see the Reciprocal Exposure charts in Chapter 2). While Tv mode does not give you full control over all aspects of exposure, it is a great start and a handy mode for a variety of photographic situations.
When to use Shutter Priority (Tv) Mode
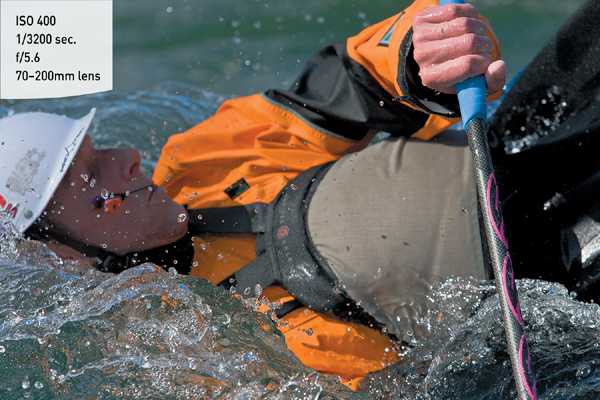
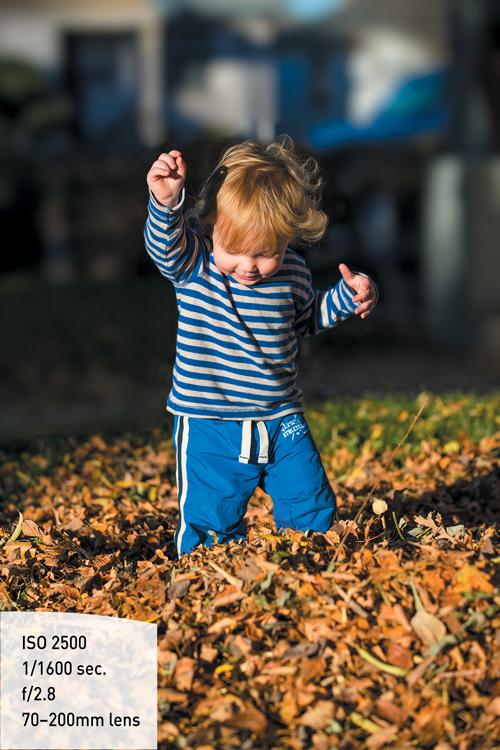
• When attempting to freeze the action of a subject (Figure 3.3); much more on this in Chapter 4
• When you want to create motion blur (Figure 3.4)
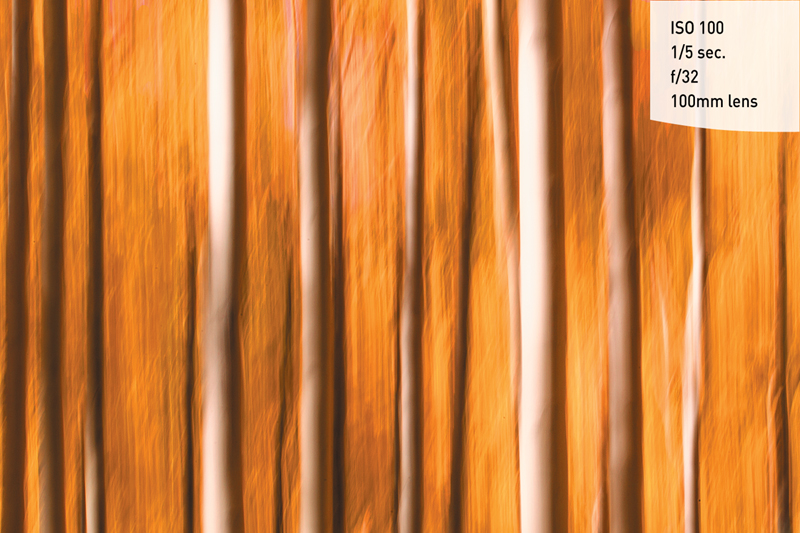
Figure 3.4. A long exposure allowed me to apply motion blur to this image of a grove of aspen trees in the fall.
• When you want to create silky, dreamlike water (Figure 3.5)
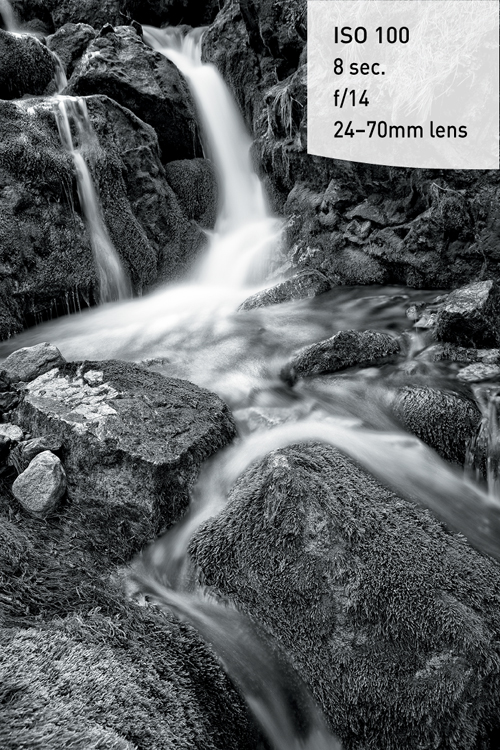
Figure 3.5. By slowing down the shutter speed, you can make an element such as water appear dreamlike.
• When you want a long exposure at night (Figure 3.6); more on this in Chapter 7
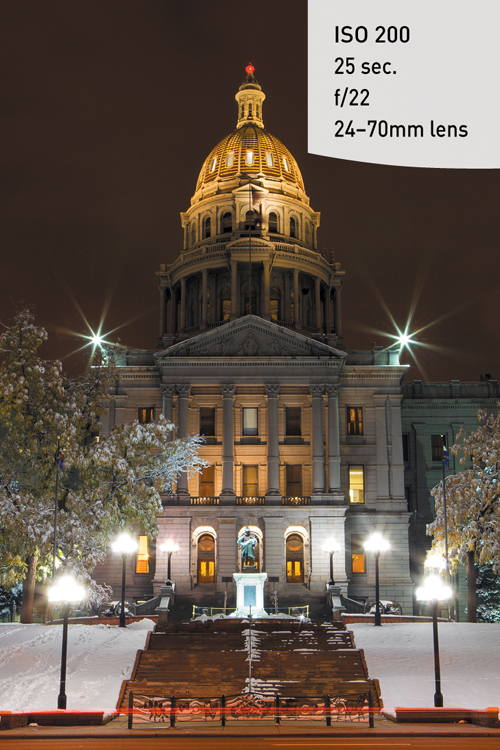
Figure 3.6. When shooting at night, you need to use a longer shutter speed to allow enough light into your camera for a good exposure.
As you can see, the type of image you want to shoot will determine whether you should use Tv mode. Having the ability to envision the way you want your photograph to turn out is vital, and the first step is making sure you have a solid understanding of exposure and its effects on an image. The great thing about DSLRs is the ability to review your images on the LCD screen, giving you the opportunity to reshoot if you didn’t get it right the first time. But what if you only have one shot to get it right, such as at a sporting event? You can’t ask a football player to run for another touchdown because you missed the mark the first time around. This is why it is important to know what the various shutter speeds represent in terms of their ability to freeze action or capture a motion-blurred image.
Let’s examine just how much control you have over shutter speed. The 6D has a shutter speed range from 1/4000 of a second all the way down to 30 seconds. With that much variety, you should have enough control to capture nearly any subject. Think of Tv as a semiautomatic mode—this means that while you have control over the shutter speed, the aperture is still being handled by the camera. This is important to know because there will be times when you want to use a particular shutter speed but your lens won’t be able to accommodate your request.
For example, you might encounter this problem when shooting in low-light situations: If you are shooting a fast-moving subject that will blur at a shutter speed slower than 1/125 of a second but your lens’s largest aperture is f/3.5, you might see your aperture display in the viewfinder and the top LCD begin to blink. This is your warning that there won’t be enough light available for the shot—due to the limitations of the lens—so your picture will be underexposed.
Another case where you might run into this situation is when you are shooting moving water. To get that look of silky, flowing water, it’s usually necessary to use a shutter speed of at least 1/15 of a second. If your waterfall is in full sunlight, you may get that blinking aperture display once again because the lens you are using only stops down to f/22 at its smallest opening. In this instance, your camera is warning you that you will be overexposing your image. There are workarounds for these problems, which we will discuss later (see Chapter 6), but it is important to know that there can be limitations when using Tv mode.
Setting Up and Shooting in Shutter Priority Mode
1. Turn your camera on, and then turn the Mode dial to align the Tv with the indicator line.
2. Select your ISO by pressing the ISO button on the top of your camera or the Quick Control button on the back of your camera.
3. Point the camera at your subject, and then press the shutter release button halfway to activate the light meter.
4. Observe the exposure information at the bottom of your viewfinder, in the top LCD panel, or, if using Live View, in the rear LCD screen.
5. While the meter is active, use your index finger to roll the Main dial to the right or left to raise or lower the shutter speed, respectively. This will force the camera to adjust the aperture in order to maintain a balanced exposure.
Av: Aperture Priority Mode
Aperture Priority, or Av, mode works in a similar fashion to Tv mode except that you control the aperture and the camera controls the shutter speed. This is an incredibly popular setting because it gives you creative control over depth of field (how much of your image is in focus). This is my go-to setting when I am not in Manual mode, and I am sure many of you will find it just as useful.
As we discussed in Chapter 2, a large aperture (small number) means that more light can come through the lens, while a small aperture (large number) means that less light can come through the lens. Av mode lets your camera control the shutter speed, so when you choose a large aperture, you will end up with a faster shutter speed to counterbalance the large amount of light you are allowing to hit the sensor; it works in the opposite manner when you choose a small aperture. When you photograph something with a large aperture, you are decreasing the depth of field (so the background will be blurred); a small aperture increases the depth of field so that more of the image is in focus (Figures 3.7 and 3.8).

Figure 3.7. An aperture of f/5.6 offered a shallow depth of field while still allowing some of the background to be in focus.
When you develop a firm understanding of how aperture and shutter speed are related, you take a giant leap forward toward complete control over your photography.
When to use Aperture Priority (Av) Mode
• When shooting portraits (Figure 3.9)
• When shooting landscapes (Figure 3.10)
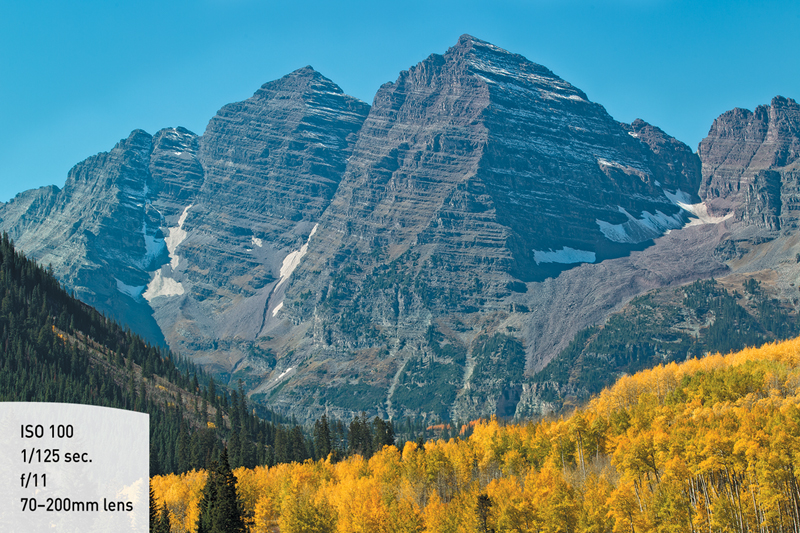
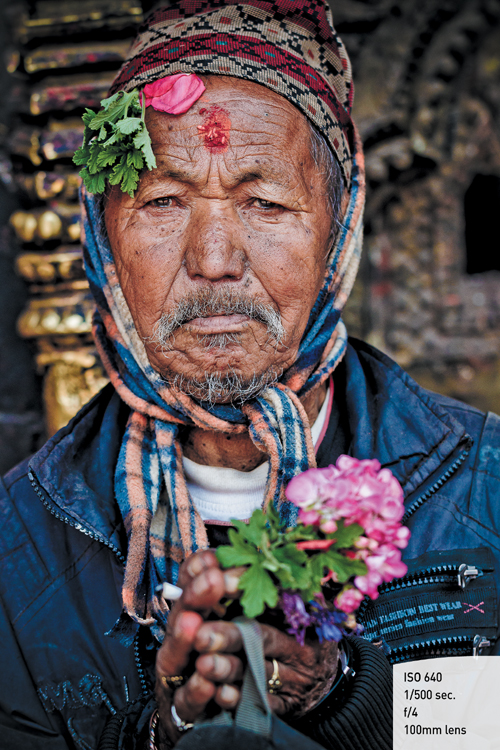
• When shooting macro (close-up) photography (Figure 3.11)
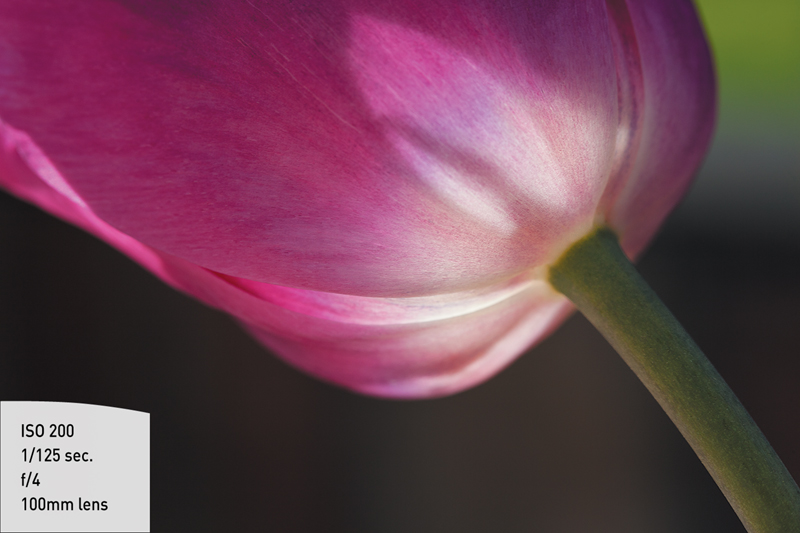
Figure 3.11. A large aperture provides a shallow depth of field so the flower stands out from the background.
Setting Up and Shooting in Aperture Priority Mode
1. Turn on your camera, and then turn the Mode dial to align the Av with the indicator line.
2. Select your ISO by pressing the ISO button on the top of your camera or the Quick Control button on the back of your camera.
3. Point the camera at your subject, and then press the shutter release button halfway to activate the light meter.
4. Observe the exposure information at the bottom of your viewfinder, in the top LCD panel, or, if using Live View, in the rear LCD screen.
5. While the meter is active, use your index finger to roll the Main dial to the right or left to increase or decrease the aperture, respectively. This will force the camera to adjust the shutter speed in order to maintain a balanced exposure.
Setting Exposure Compensation
1. Turn your camera on, and select Av, Tv, or P mode.
2. Press the shutter release button halfway.
3. Rotate the Quick Control dial to the left or right while watching the top LCD panel (A). Moving the dial to the left will underexpose the image; moving it to the right will overexpose the image. You can also access the Exposure Compensation setting via the Quick Control menu on the rear LCD (B).
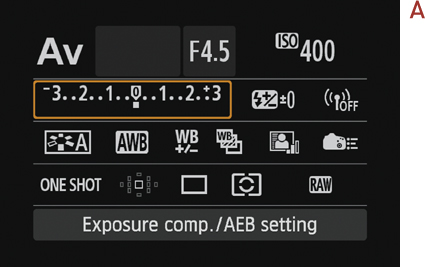
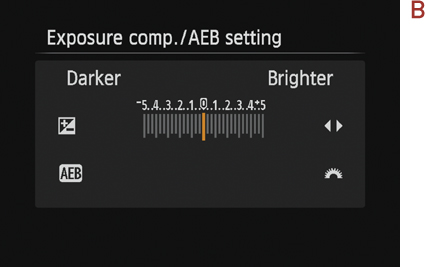
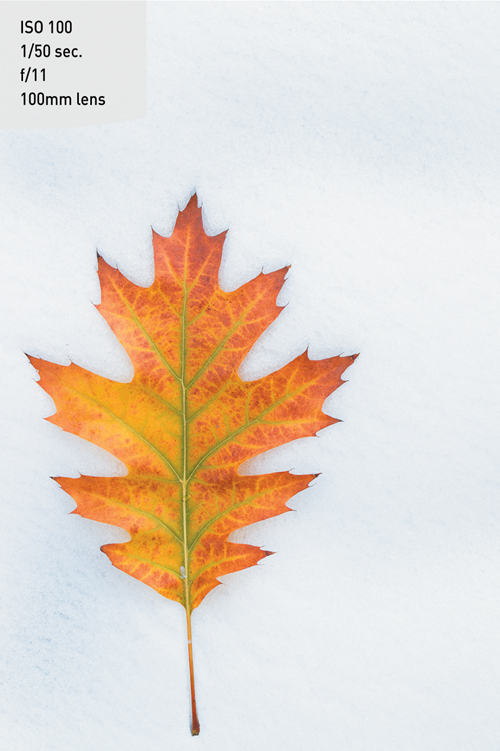
Figure 3.12. When I first took this image in Av mode, the camera tried to give me an exposure that was balanced for both the leaf and the snow. By using Exposure Compensation, I was able to more accurately expose for the beautiful colors of the leaf.
Once upon a time, long before digital cameras and programmed modes, there was manual mode. In those days it wasn’t called “manual mode,” because there were no other modes. It was just photography. Let’s face it—if you want to learn the effects of aperture and shutter speed on your photography, there is no better way to learn than by setting these adjustments yourself. But today, with the advancement of camera technology, many new photographers never give this mode a second thought. That’s truly a shame, as not only is it an excellent way to learn your photography basics, it’s also an essential tool to have in your photographic bag of tricks.
Unlike the shooting modes we have discussed so far, Manual mode allows you full access to every feature on your camera. You control the ISO, shutter speed, aperture, white balance, focus points, and so on. This also means that it is up to you to determine the level of exposure you want in your images. While this may sound daunting, you do have help. There are three places you can see the built-in light meter to help you judge the exposure you are about to take:
• The bottom of the viewfinder
• The top LCD panel
• The rear LCD (when using Live View)
The light meter consists of a straight line segmented by numbers. On the far left is -3, which represents three stops of underexposure (too dark). On the far right is +3, which represents three stops of overexposure (too light). In the middle is a solid dot, representing 0, or a balanced exposure. When you adjust your ISO, shutter speed, and aperture, you will notice the flashing dot under the light meter begin to move. Now you can continue adjusting your settings until you have an exposure that you like, using the 0 mark as a baseline.
When to use Manual (M) Mode
• When experimenting with ISO, shutter speed, and aperture so you can better understand how they are connected
• When you can’t capture a shot with any of the other shooting modes (Figure 3.13)
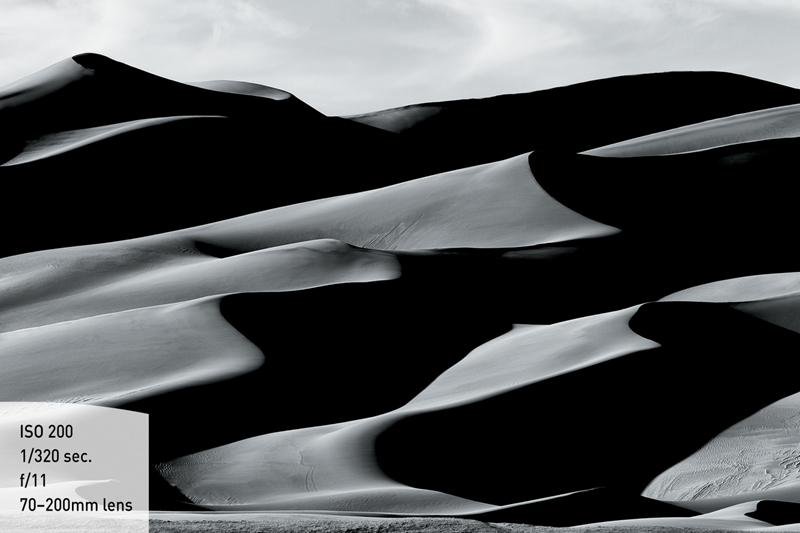
Figure 3.13. There was no way to capture only the areas lit by the sun without shooting in Manual mode.
• When shooting silhouetted subjects (Figure 3.14)
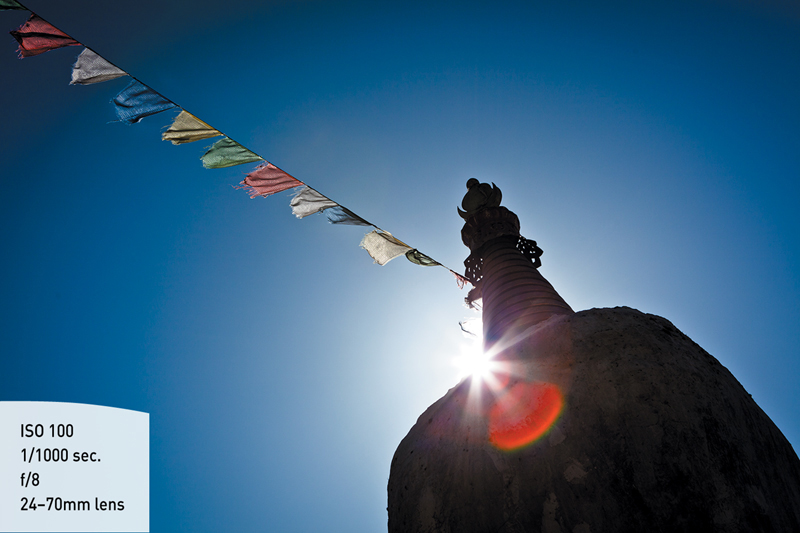
Figure 3.14. A silhouette is very difficult to capture unless you have fine control over all elements of exposure.
• When you want full control over your camera
Setting Up and Shooting in Manual Mode
1. Turn on your camera, and then turn the Mode dial to align the M with the indicator line.
2. Before you adjust your exposure settings, ask yourself what kind of image you want to capture. Are you trying to freeze motion? Do you want a large depth of field? Figure out what kind of image you want to take.
3. Select your ISO by pressing the ISO button on the top of your camera or the Quick Control button on the back of your camera.
4. Point the camera at your subject, and then press the shutter release button halfway to activate the light meter.
5. Observe the exposure information at the bottom of your viewfinder, in the top LCD panel, or, if using Live View, in the rear LCD screen.
6. With the light meter activated, use your index finger to roll the Main dial left and right to change the shutter speed. Then with your thumb, move the Quick Control dial to adjust your aperture. Follow along with the light meter while making these adjustments so you have an idea of how your exposure will turn out.
7. Once you are happy with the exposure, press the shutter release button to take the photo.
B: Bulb Mode
Bulb mode gives you further control over shutter speed. In the P, Av, Tv, and M modes, the longest shutter speed is 30 seconds. In Bulb mode, you have no such restrictions—the camera’s shutter stays open as long as the shutter release button is pressed. This could be 1 second, 10 seconds, or 1000 seconds. As long as the shutter button is held down, the shutter stays open.
But can you really hold the shutter button down for an hour to take a photo of a mountain under the stars? Probably not, but the solution comes in the form of a cable release remote that plugs into your camera (Figure 3.15). Some allow you to set the time; others just have a shutter lock—you lock the shutter release button with the remote and then release it whenever you choose.
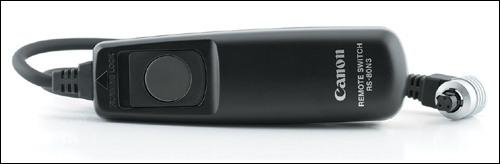
Figure 3.15. The Canon RS-80N3 remote switch will allow you to take advantage of the Bulb shooting mode.
When to use Bulb (B) Mode
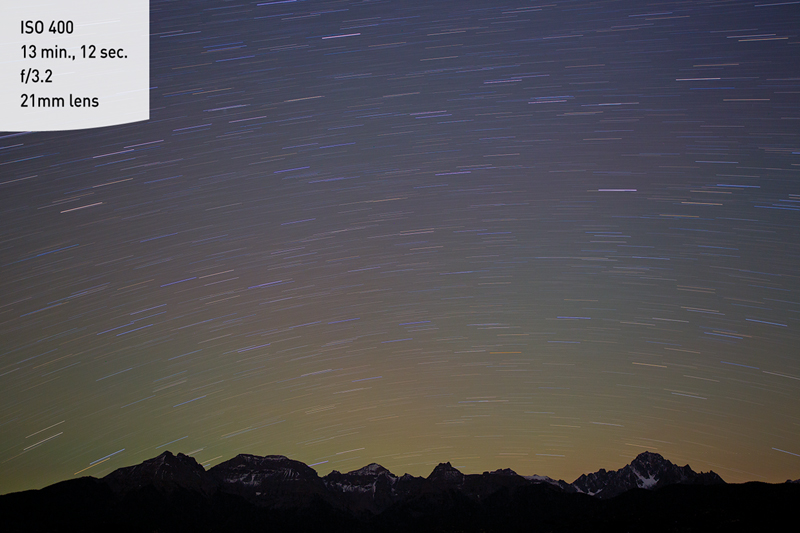
• When shooting star trails (Figure 3.16)
• When you want to capture cars moving down a street (Figure 3.17)
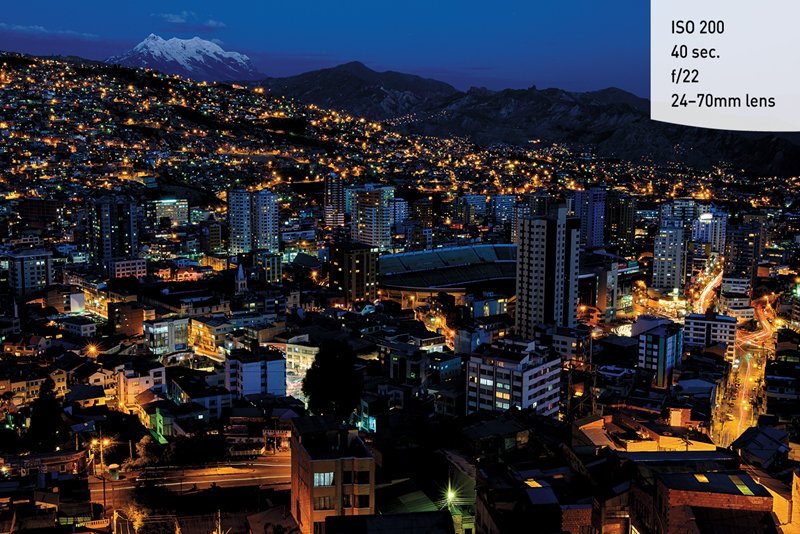
Figure 3.17. To capture the cars’ headlights as streaks as well as light up the rest of the image, I used a shutter speed of 40 seconds in Bulb mode.
• When you want to capture a very dark environment and 30 seconds isn’t long enough
Using Bulb mode certainly takes practice, but once you understand how it opens up new levels of creativity, you might learn to love it. Most people don’t realize that our eyes can only see so much light. By experimenting with Bulb mode on your 6D, you are opening up a whole new world of beauty to capture.
Setting Up and Shooting in Bulb Mode
1. Set your camera on a sturdy tripod, and attach a cable release to the remote control terminal on the side of your camera.
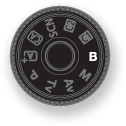
2. Turn the Mode dial to align the B with the indicator line.
3. Select your ISO by pressing the ISO button on the top of your camera or the Quick Control button on the back of your camera.
4. Select your aperture by turning the Main dial.
5. Adjust the camera so that it is facing your subject, and press the button on the cable release. Hold the button down (or lock it) until you are satisfied with your exposure, and then release the shutter. (For very long shutter speeds, lock the cable release button by sliding the button up. To release the shutter, simply slide the button back to its original position.)
C: Camera User Setting Mode
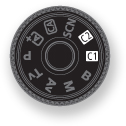
The 6D allows you to customize a shooting mode to your specifications and store this information in two Camera User Setting modes (C1 and C2). These modes are useful if you frequently find yourself shooting similar subject matter or shooting in a similar environment. With access to two completely customized shooting modes, you can quickly switch from shooting wildlife to portraits with a turn of the dial.
You could also store a custom setting for shooting movies with your 6D. You can set the format, ISO, aperture, and shutter speed so you can jump quickly from taking stills to movies. We will talk more about this in Chapter 9.
Manual Callout
For a complete list of all the camera settings that can be registered, please turn to page 328 of your user’s manual.
Setting Up Custom Shooting Modes
1. Make the adjustments to the camera that you want to save in your custom shooting mode.
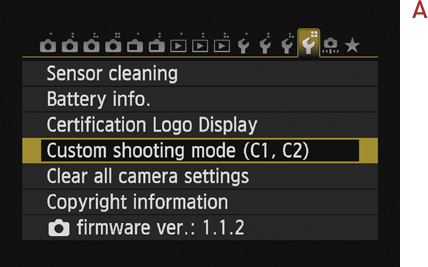
2. Press the Menu button, and use the Multi-Controller to move to the fourth setup tab.
3. Use the Multi-Controller to select Custom shooting mode (C1, C2), and press the Set button (A).
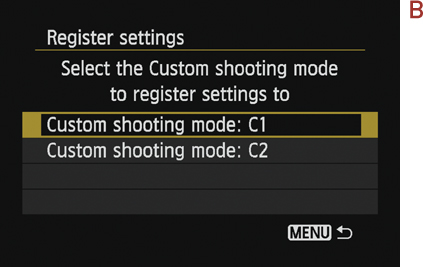
4. Press the Set button on Register Settings.
5. Select C1 or C2 to register your current settings, and press the Set button again (B).
To have your settings auto-update over your stored settings when you select one of the custom settings, change the Auto Update Set setting (found in the Custom shooting mode menu) from Disable to Enable.
How I Shoot: A Closer Look at the Camera Settings I Use
My journey as a photographer began not as a film photographer who studied the craft in school, but as a guy with a passion for traveling and digital technology. I feel that my lack of formal training has had the single biggest impact on me as an artist. I have never felt like I had to tie myself to any of the so-called rules of photography. I have also felt free to creatively express myself through photography in any way I could. It was nice not to have to break the mold that can develop in a more structured learning environment.
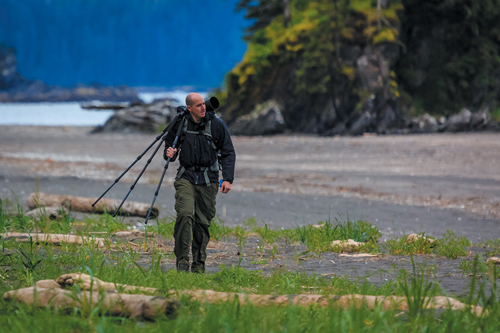
If you catch me out in the field or on location somewhere (Figure 3.18), nine times out of ten you will find me shooting in Manual mode. There is something about having full control over my images that gives me peace of mind. As an artist, I could never get used to the idea that the computer inside my camera would make these key choices for me.
What I love about Canon cameras is the intuitive button placement, the user-friendly menu system, and the spectacular Live View mode. For landscape photographers like me, Live View mode is one of the best technological advances in DSLRs in a long time. Having the ability to manually focus in Live View has changed the way I shoot. We will discuss this more in Chapter 6.
As you work your way through the coming chapters, you will see other tips and tricks I use in my daily photography. But you need to make sure you understand the lessons we have covered in these first three chapters in order to fully take advantage of the rest of this book and, ultimately, become a better photographer.