Sharp and In Focus: Using Tripods
A tripod is vital for your landscape work for a couple of reasons. The first relates to the time of day you will be shooting. To capture the best light with the most beautiful colors, you will need to be shooting at sunrise and sunset, when there is not much available light. When shooting in a dark environment, you need to increase the exposure time, which will result in a slow shutter speed—too slow for handheld photography.
The second reason is that when you are shooting landscapes, you usually want the entire field of view to be in focus (greater depth of field). In order to achieve this, you will need to use very small apertures, which will then require you to compensate with a longer, slower shutter speed.
Slow shutter speeds + handholding the camera = out-of-focus photos.
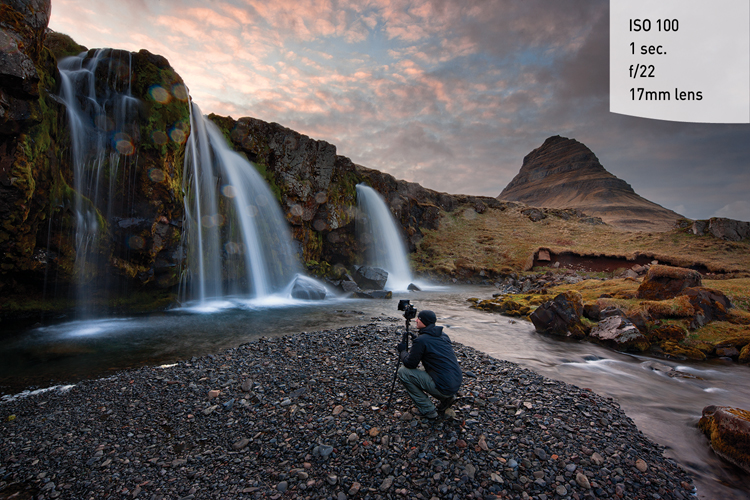
A tripod is the one tool in your arsenal that can help you defeat the camera shake that results from handholding photos during long exposure times (Figure 6.1).
So what should you look for in a tripod? There are four important variables:
• Stability. Make sure the tripod is sturdy enough to handle the weight of your camera and the heaviest lens you own. Every tripod will list the recommended minimum and maximum weight requirements.
• Height. When you are six foot three, like I am, the last thing you want is a tripod that is built for someone who is five foot four. Your day will end much better if you are not bent over while shooting.
• Weight. If you are planning to carry the tripod in your backpack or camera bag, you should pay close attention to how heavy it is.
• Tripod head. In order to attach the camera to the tripod, you need a tripod head. There are a number of options available, but the type of head I recommend is called a ball head. They give you the most flexibility when it comes to angling your camera in a hurry.
A common mistake for photographers is to spend an exorbitant amount of money on a DSLR and a few lenses while purchasing the cheapest tripod they can find. While an expensive tripod does not guarantee quality, you should make sure that your tripod suits your needs (Figure 6.2). Using the variables above is a good start.
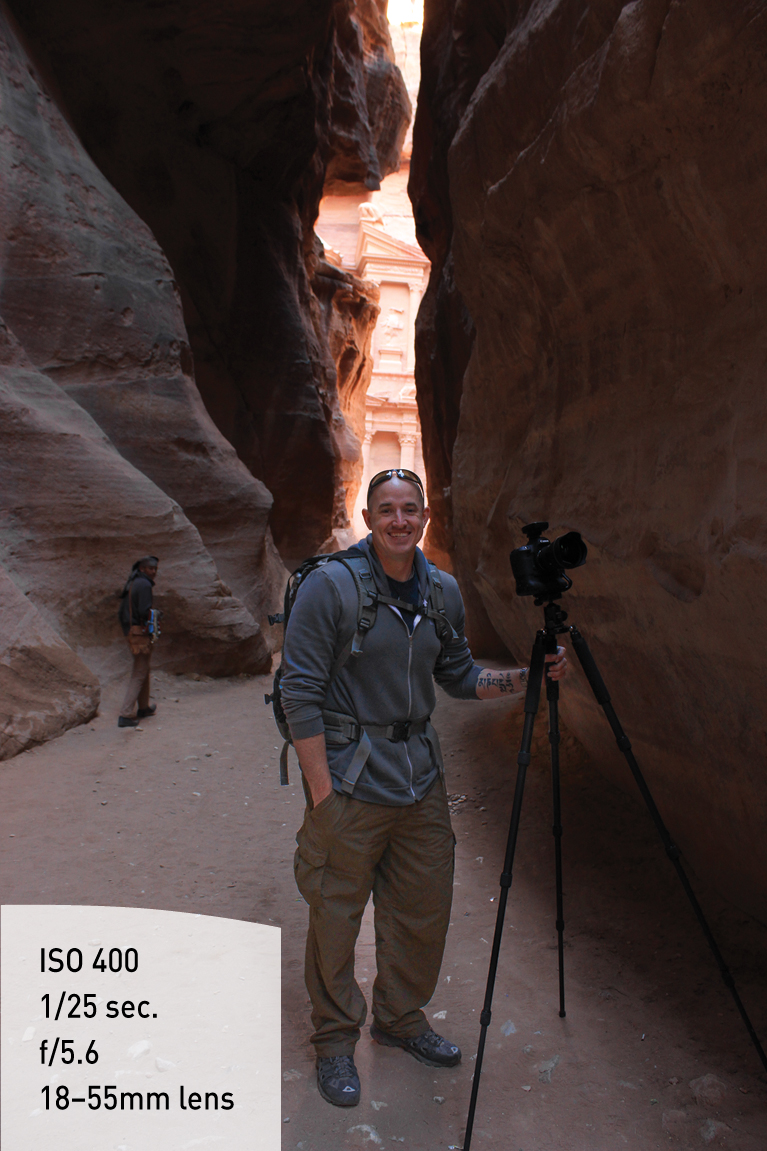
Figure 6.2. This tripod has a maximum height similar to my own, is light enough for travel, and is sturdy enough to handle my heaviest gear. (Photo by Kristal Olson)
Is Lenses and Tripod Don’t Mix