
Advanced Techniques to Explore
The following two sections, which cover shooting panoramas and high dynamic range (HDR) images, require you to use image-processing software.
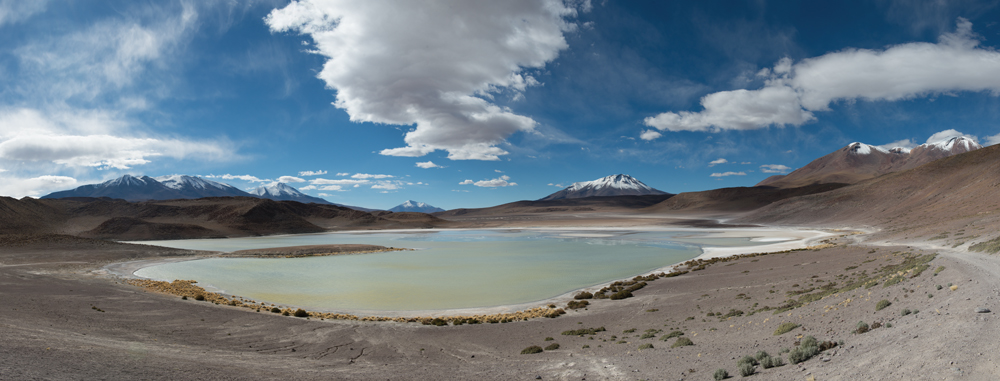
Shooting Panoramas
Occasionally you might find that a scene is just too big to cover in a single photograph. In those cases, you might want to consider a panorama. While you could create a “fake” panorama by cropping the top and bottom of an image with image-processing software, that won’t solve your problem. The purpose of a panorama is to get an extended view of a scene that can’t be captured in a single shot.
To shoot a true panorama, you need to use either a special panorama camera that shoots a very wide frame, or the following method, which requires the combining of multiple frames (Figures 6.20 and 6.21 on the following page). By photographing a series of side-by-side images and stitching them together using editing software, you can produce one elongated panoramic shot.

Figure 6.20. By shooting vertical images that overlap by 30 percent, you mitigate the effects of distortion.
While I won’t go into the details of how to edit these images, a program such as Adobe Photoshop will allow you to easily merge multiple images into a panorama. It is vital that you learn how to photograph the images correctly, which will make stitching them together easy.
Shooting for a Multiple-Image Panorama
1. Mount your camera on your tripod, and make sure it is level.
2. Choose a focal length from 35mm to 50mm.
3. In Av mode, use a very small aperture for the greatest depth of field. Take a meter reading of a bright part of the scene, and make note of it.
4. Now change your camera to Manual (M) mode, and dial in the aperture and shutter speed you obtained in the previous step.
5. Set your lens to manual focus, and then set your focus by finding a point one-third of the way into the scene. (If you use autofocus, you risk getting different points of focus from image to image, which will make the image-stitching more difficult for the software.)
6. While carefully panning your camera, shoot your images to cover the entire area of the scene from one end to the other, making sure to overlap by 30 percent from one frame to the next.
Shooting High Dynamic Range (HDR) Images
In recent years, the use of high dynamic range (HDR) in digital photography has grown dramatically. So what is HDR? When you photograph a scene that has a wide range of tones from shadows to highlights, you have to make a decision regarding which tonal values you are going to emphasize, and then adjust your exposure accordingly. This is because your camera has a limited dynamic range, at least as compared to the human eye. HDR photography allows you to capture multiple exposures for the highlights, shadows, and midtones, and then combine them into a single image using software (Figures 6.22 through 6.25). I recommend using Adobe Photoshop, Nik Software’s HDR Efex Pro 2, or a small application for Adobe Photoshop Lightroom called LR/Enfuse. While I am not going to get into the details of how to edit the images, I will walk you through the steps to set up your camera for HDR.
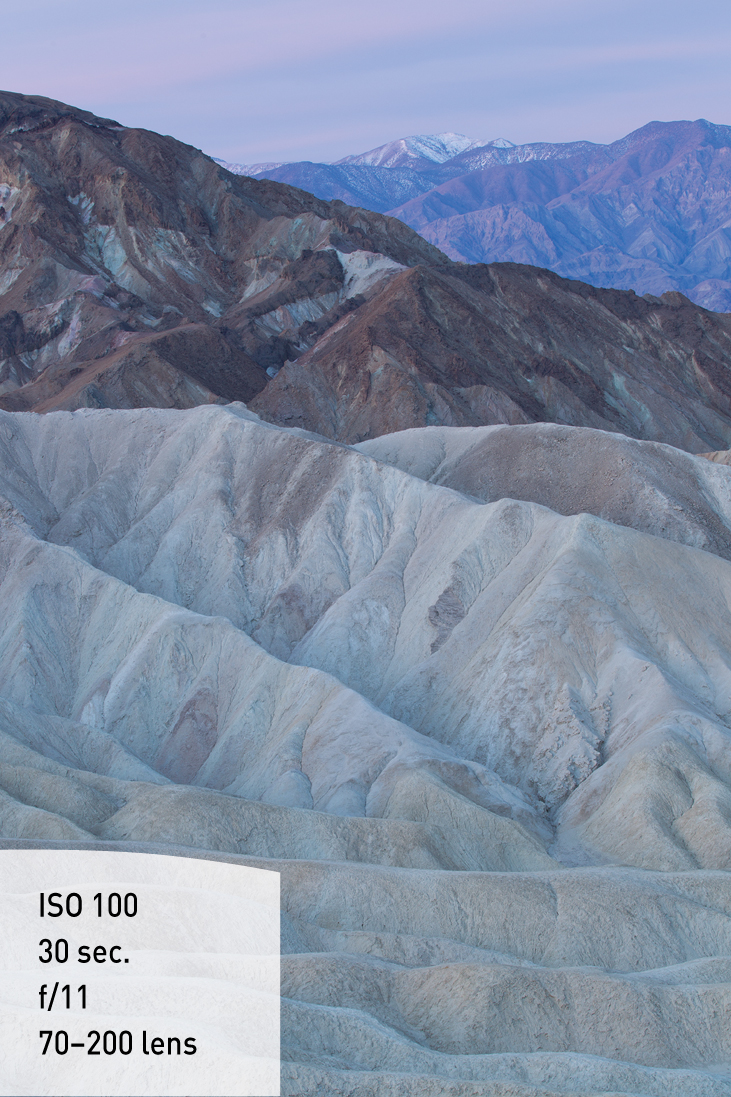
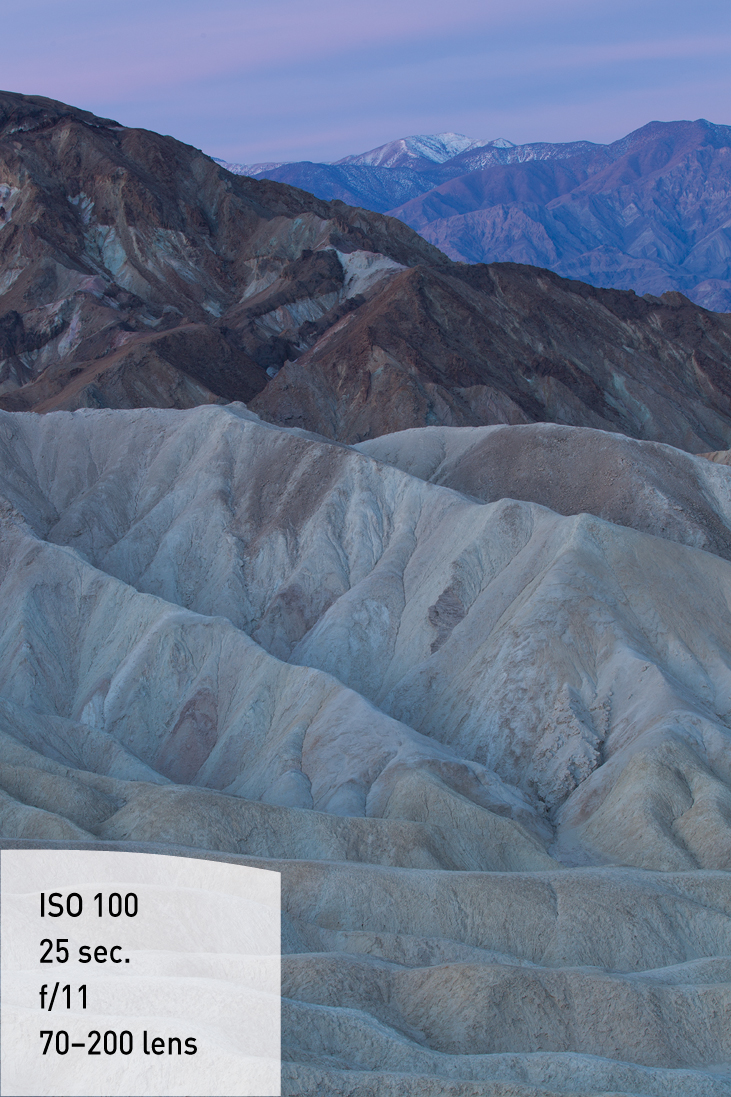

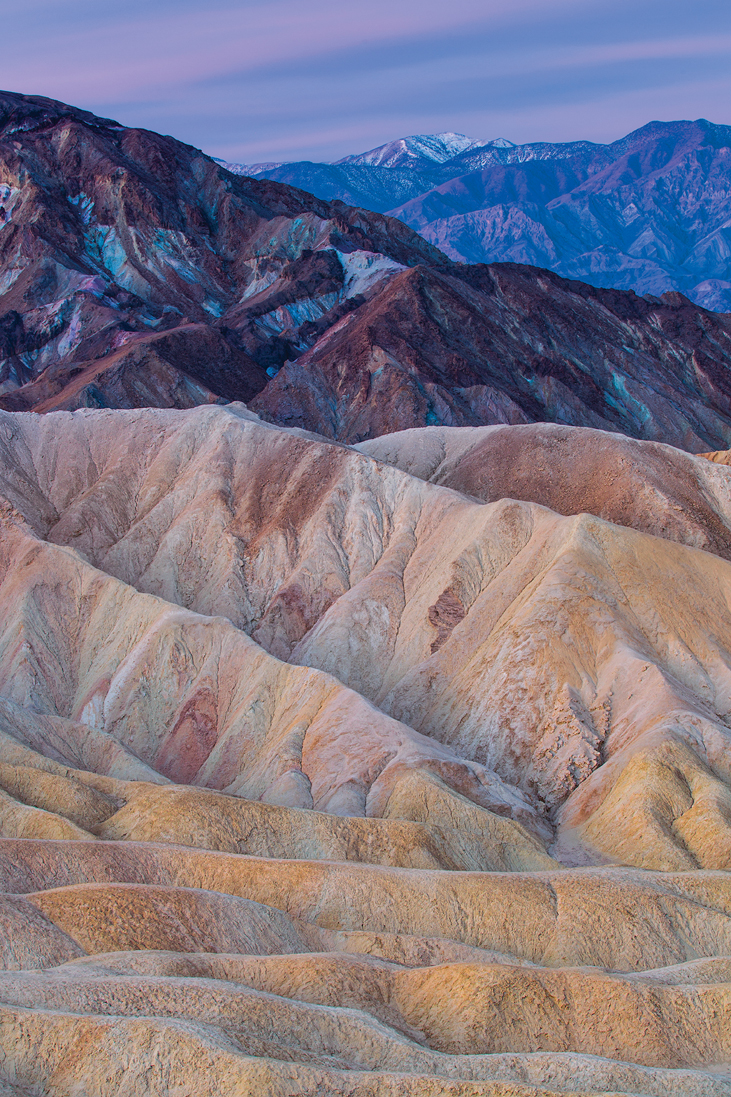
Figure 6.25. Using a Lightroom plug-in called LR/Enfuse, I merged the three exposures to create the final HDR photo.
It is absolutely necessary to use a tripod when shooting HDR, because the images must be perfectly aligned in order to merge them successfully.
The first step is to set up your camera to automatically bracket your exposures. Generally, you will want one image that is underexposed, one that is overexposed, and one that is right in the middle.
Setting Up Auto Exposure Bracketing (AEB) Mode for HDR
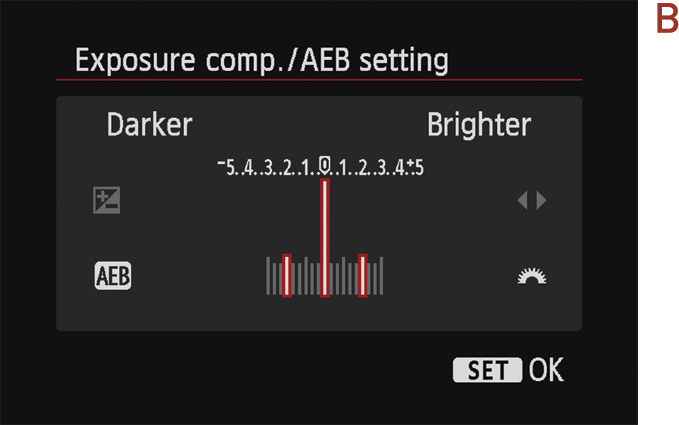
1. Press the Menu button, and use the Multi-Controller to move to the third camera menu from the left (A). Make sure that the Expo. comp./AED item is selected, and press the Set button.

2. Rotate the Main Dial to the right until the exposures are set to two stops between each shot (-2, 0, +2) (B). Then press the Set button. (Note that this setting will remain in place until you change it or turn off your camera.)
3. Press the DRIVE button on top of your camera. Use the Quick Control dial to select 2-second delay mode. (This will allow you to photograph the three images back to back to back, with an initial 2-second delay to help combat camera shake.)
Now that Auto Exposure Bracketing is set up, let’s go through the steps to create the photographs for an HDR image.
Capturing More than Three Images
The 6D gives you the ability to capture more than the standard three-image series with Auto Exposure Bracketing—you can capture four, five, or even seven shots in a bracketed series. To adjust the number of shots in an AEB series, follow these steps:
1. Press the Menu button, and use the Multi-Controller to move to the Custom Function menu tab (A).
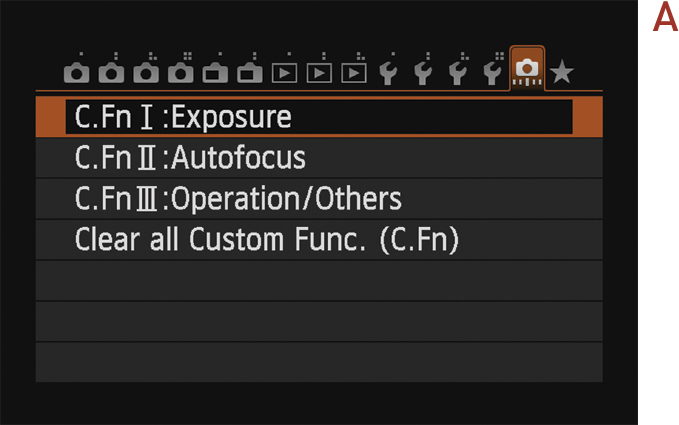
2. Select the C.Fn I: Exposure option, and press the Set button.
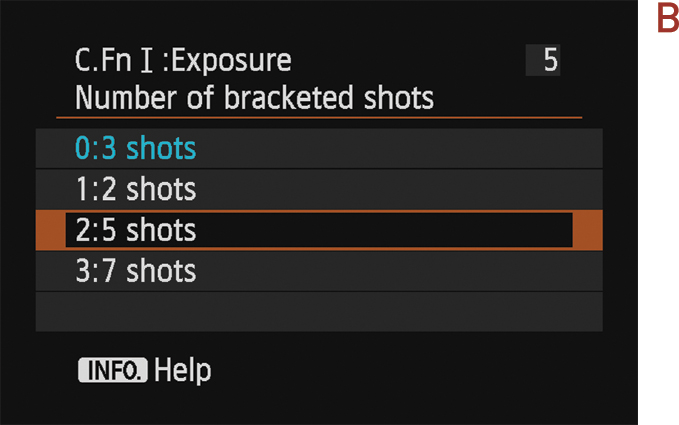
3. Using the Multi-Controller, move to C.Fn 5 within the Exposure section.
Select the number of images you wish to capture (B), and press the Set button to confirm your choice.
Setting Up for Shooting an HDR Image
1. Mount your camera on a tripod, and then set your ISO to a low setting, such as 100, to ensure clean, noise-free images.
2. Set your program mode to Av. During the shooting process, you will be taking three shots of the same scene, creating an overexposed image, an underexposed image, and a normal exposure. Since the camera is going to be adjusting the exposure, you want it to make changes to the shutter speed, not the aperture, so that your depth of field is consistent.
3. Set your camera file format to RAW. This is extremely important because the RAW format contains a much larger range of exposure values than a JPEG file, and the HDR software will need this information.
4. Focus the camera manually, compose your shot, secure the tripod, and press the shutter button. After an initial 2-second delay, your series of images should fire.
5. Download the images to your computer, and create the HDR image using specialized editing software.