Using Flash
The 6D does not come with a built-in flash, but you may find yourself in a situation where you’ll want to use an external flash unit. Any Canon flash will provide enough light to capture an average scene.
Higher-end flashes will provide you such features as wireless triggering, high-speed sync, and coverage for ultra-wide-angle lenses. Although the 6D is an advanced camera, you don’t have to invest in a top-of-the-line flash, especially if you don’t use flash frequently. You might find that a moderate-range flash, such as the 580EX II or 480EX II, is more than adequate for your needs (Figure 7.12).
Flash Sync Speeds
The standard flash synchronization speed for your camera is from 1/60 to 1/180 of a second. The 6D will not let you use the flash with a shutter speed faster than 1/180 of a second because it would be too fast for the light from the flash to reach your sensor.
The key to flash photography is controlling the shutter speed. The longer your shutter is open, the more ambient light you can let into your image. If you are photographing people at sunset and use a slow enough shutter speed, you will be able to capture the light in the background while the flash illuminates your subjects (Figure 7.13).
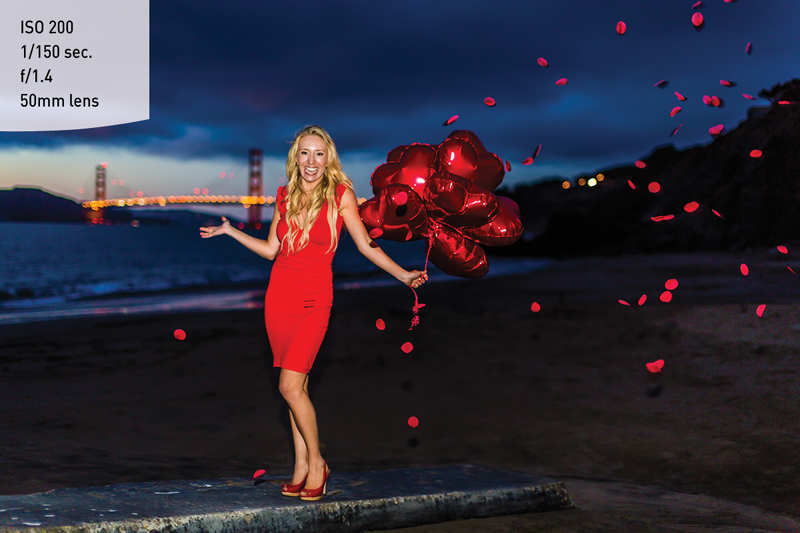
Figure 7.13. The flash illuminated the subject, but the camera still picked up the light from the sunset. (Photo by Michael Bonocore)
Program (P): The shutter speed is automatically set to from 1/60 to 1/180 of a second. The only adjustment you can make in this mode is to your exposure compensation (use the Quick Control dial to change the f-stop).
Shutter Priority (Tv): You can adjust the shutter speed from as fast as 1/180 of a second all the way down to 30 seconds. The lens aperture will adjust accordingly, but at long exposures the lens will typically be set to its largest aperture.
Aperture Priority (Av): This mode has three custom settings for adjusting the shutter speed when using the flash, depending on your needs. The default setting is Auto, which sets the shutter speed for you.
Let’s take a look at the shutter speeds for the modes in the Creative zone:
Setting the Flash Sync Speed in AV Mode
1. Press the Menu button and use the Main dial to select the second camera menu from the left.
2. Use the Multi-Controller to select the External Speedlite control listing, and hit the Set button (A).

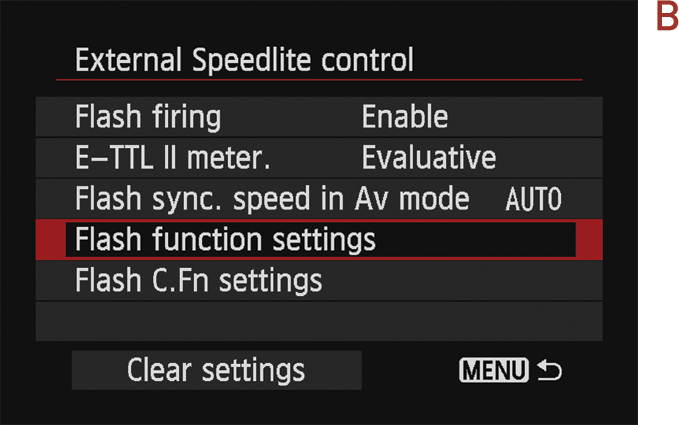
3. Scroll down to the Flash sync. speed in Av mode option, and hit the Set button (B).
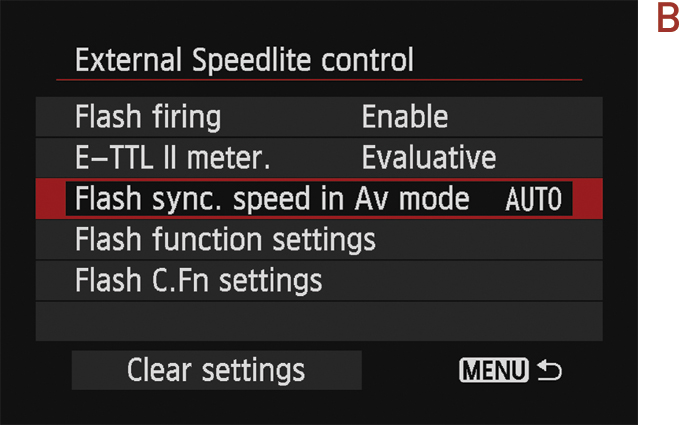
4. Select one of the three choices: Auto, 1/180–1/60 sec. auto, or 1/180 sec. (fixed).
Canon flashes use a technology called E-TTL II (evaluative through the lens) metering to determine the appropriate amount of flash power to output for a proper exposure. When you press the shutter button halfway, the camera quickly adjusts focus while gathering information from the entire scene to measure the amount of ambient light. As you press down the shutter button completely, a pre-flash occurs to meter the light off the subject from the flash, and a determination is made as to how much power is needed to balance the subject with the ambient light.
It is important to note that this applies only to the Program, Shutter Priority, and Aperture Priority modes. When you are using Manual mode, this issue is left up to the photographer.
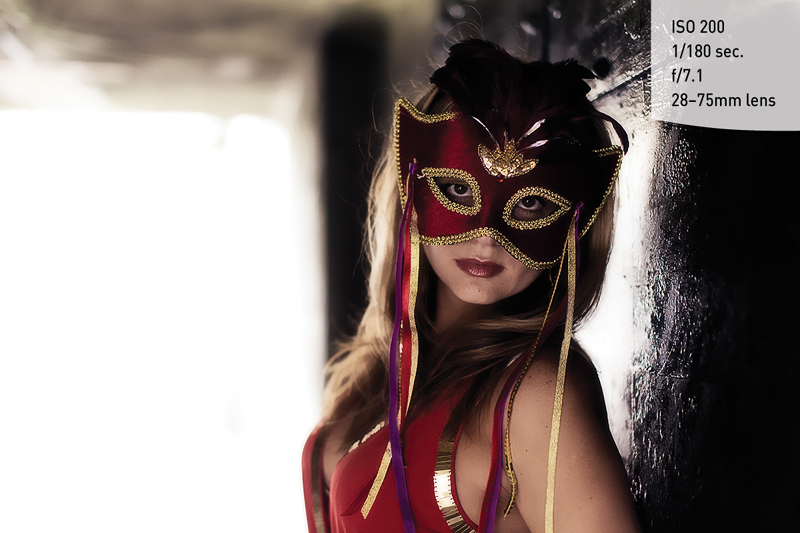
Sometimes the output of the flash will render your subject too light or too dark. Although the E-TTL II system normally results in a good exposure, you may prefer to adjust the output of the flash to suit your own taste. Adjusting the flash output may help if the meter is having difficulty getting a correct exposure (Figure 7.14). This is where flash exposure compensation plays an important role, because it allows you to either increase or decrease the output of the flash in increments as small as 1/3 of a stop. It is more commonly used to reduce the flash output rather than increase it.
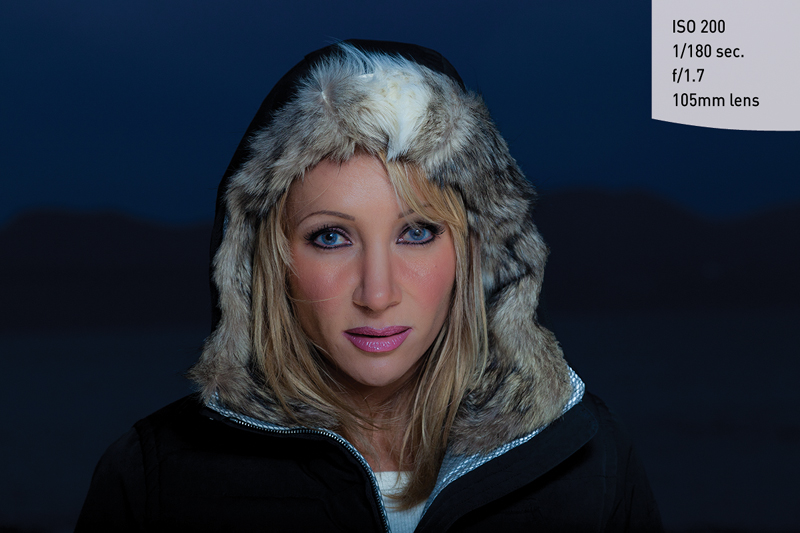
Figure 7.14. Because of the proximity of the subject, the flash output was reduced by 2/3 to ensure a good exposure. (Photo by Michael Bonocore)
Adjusting Flash Exposure Compensation
1. Press the Q button on the back of the camera to activate the Quick Control screen on the LCD monitor.
2. Use the Multi-Controller to select the Flash exposure comp. setting (A), and press the Set button.
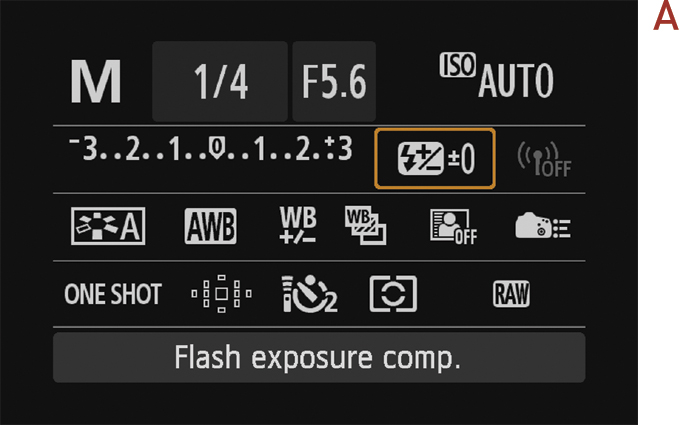
3. Rotate the Main dial left or right to decrease or increase, respectively, the flash exposure compensation (B).

Note that flash compensation affects only the flash output, while exposure compensation affects both the ambient light and the flash exposure. So if you want to underexpose the ambient light while maintaining the same flash output, you need to make an adjustment on your flash to balance the impact of exposure compensation. For example, if you apply a –1 exposure compensation, you would increase the flash compensation by +1 to keep the flash output the same.
Flash Sync Modes
The 6D has three flash synchronization modes: First-curtain, Second-curtain, and High-speed synchronization. The term curtain relates to the opening and closing of the shutter. When your camera fires, there are two curtains that open and close to make up the shutter. The first curtain moves out of the way, exposing the camera sensor to the light. At the end of the exposure, the second curtain moves in front of the sensor, ending that picture cycle.
Your external flash can be synchronized to fire during the first curtain or the second curtain. This applies only to shutter speeds of 1/30 a second or slower, because faster shutter speeds are so quick that the mode doesn’t really matter. For longer exposures, I find that Second-curtain sync is usually a good option.
For example, imagine you’re photographing a person running in a race. It’s somewhat dark outside, so you might get away with a slower shutter speed of 1/15 second, but you also want to use your flash to freeze the subject in place. If you take your photo in First-curtain sync mode, the flash will fire just as the shutter opens. The blurred subject will be exposed after this point until the shutter closes. In such an image, the flash will freeze the subject, but the streaking blur will appear in front of them. If you change your flash setting to Second-curtain sync and take the same photograph, the flash will fire at the end of the exposure. So the flash will freeze the subject at the end of the shutter duration, and the blurred streak will be behind them for a more natural look.
High-speed sync is useful when you are shooting portraits and just want to apply a touch of fill flash to your subject.
Changing Your Flash Sync Mode
1. Press the Menu button, and use the Multi-Controller to select the second Camera menu from the left (A).
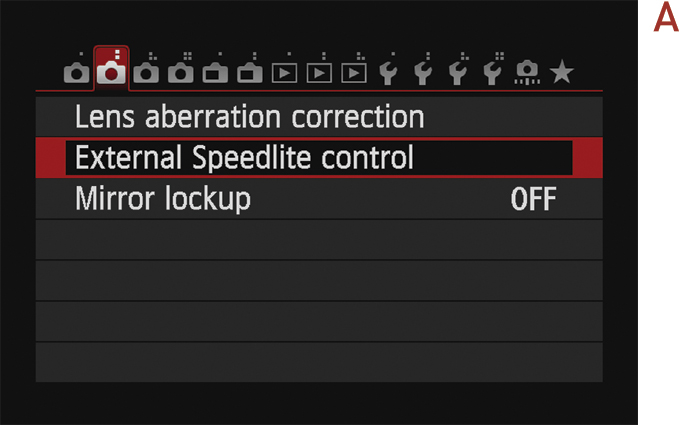
2. Select External Speedlite control, and press the Set button.
3. Scroll down to Flash function settings, and press the Set button (B).
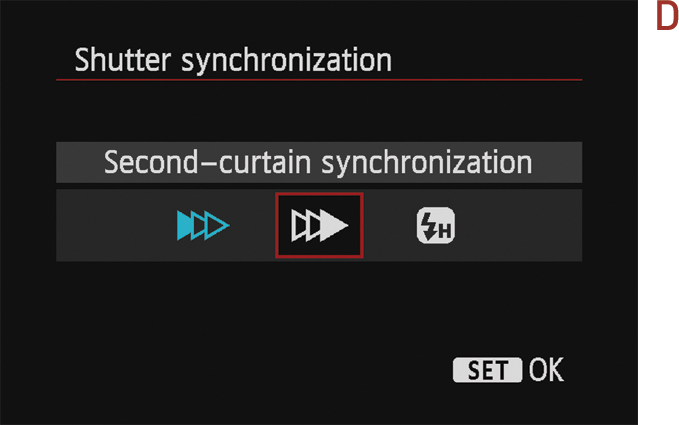
4. Select the flash sync mode icon (C).
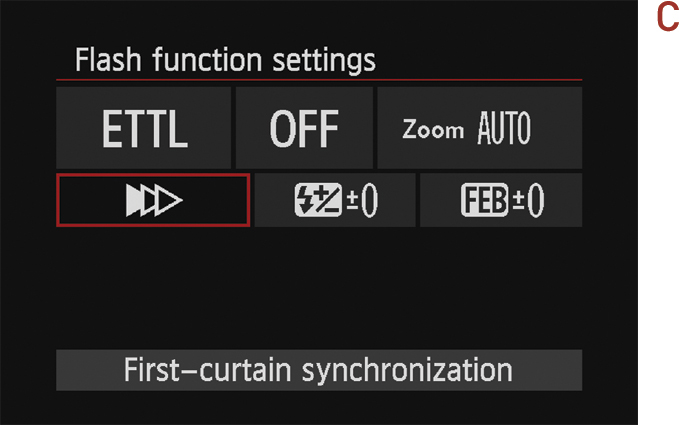
5. Select First-curtain, Second-curtain, or High-speed sync, and press the Set button (D).