
The Ceph RGW can be deployed in a federated configuration with multiple regions, and with multiple zones for a region. As shown in the following diagram, multiple Ceph radosgw instances can be deployed in a geographically separated fashion. Configuring the Ceph object gateway regions and metadata synchronization agents helps to maintain a single namespace, even though Ceph radosgw instances run in a different geographic locale or on a different Ceph storage cluster.

Another approach is to deploy one or more ceph radosgw instances that are geographically separated yet are within a region in separated logical containers known as zones. In this case, a data synchronization agent also enables the service to maintain one or more copies of the master zone's data within a region on the same Ceph cluster. These extra copies of data are important for backup or disaster recovery use cases.

In this recipe, we will learn to deploy the latter method of the Ceph radosgw federation. Under this, we will create a master region, US, which will host two zones: master zone: us-east, containing the RGW instance us-east-1, and secondary zone: us-west, containing the RGW instance us-west-1. The following are parameters and their values that will be used:
- Master Region → United States:
us - Master Zone → United States region-East zone:
us-east - Secondary Zone → United States region-West zone:
us-west - Radosgw Instance-1 → United States region-East zone - Instance1:
us-east-1 - Radosgw Instance-2 → United States region-West zone - Instance1:
us-west-1
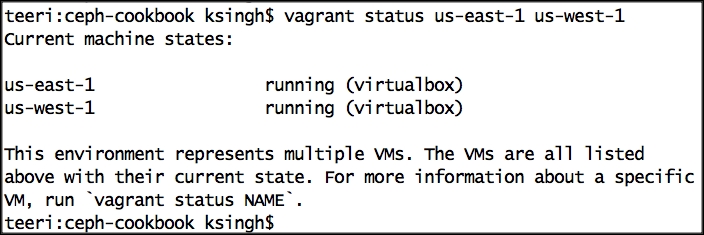
- From your host machine, bring up the virtual machines
us-east-1andus-west-1using Vagrant:$ cd ceph-cookbook $ vagrant status us-east-1 us-west-1 $ vagrant up us-east-1 us-west-1 $ vagrant status us-east-1 us-west-1
From now on, we will execute all the commands from any of the Ceph monitor machines until otherwise specified. In our case, we will use
ceph-node1. Next, we will create Ceph pools that will be used to store a bunch of critical information about object storage data, such as buckets, a bucket index, a global catalog, logs, an S3 user ID, Swift user accounts, e-mails, and so on. - Create Ceph pools for the
us-eastzone:# ceph osd pool create .us-east.rgw.root 32 32 # ceph osd pool create .us-east.rgw.control 32 32 # ceph osd pool create .us-east.rgw.gc 32 32 # ceph osd pool create .us-east.rgw.buckets 32 32 # ceph osd pool create .us-east.rgw.buckets.index 32 32 # ceph osd pool create .us-east.rgw.buckets.extra 32 32 # ceph osd pool create .us-east.log 32 32 # ceph osd pool create .us-east.intent-log 32 32 # ceph osd pool create .us-east.usage 32 32 # ceph osd pool create .us-east.users 32 32 # ceph osd pool create .us-east.users.email 32 32 # ceph osd pool create .us-east.users.swift 32 32 # ceph osd pool create .us-east.users.uid 32 32
- Create Ceph pools for the
us-westzone:# ceph osd pool create .us-west.rgw.root 32 32 # ceph osd pool create .us-west.rgw.control 32 32 # ceph osd pool create .us-west.rgw.gc 32 32 # ceph osd pool create .us-west.rgw.buckets 32 32 # ceph osd pool create .us-west.rgw.buckets.index 32 32 # ceph osd pool create .us-west.rgw.buckets.extra 32 32 # ceph osd pool create .us-west.log 32 32 # ceph osd pool create .us-west.intent-log 32 32 # ceph osd pool create .us-west.usage 32 32 # ceph osd pool create .us-west.users 32 32 # ceph osd pool create .us-west.users.email 32 32 # ceph osd pool create .us-west.users.swift 32 32 # ceph osd pool create .us-west.users.uid 32 32
- Verify the newly created Ceph pools:
# ceph osd lspools
- The RGW instance requires a user and keys to talk to the Ceph storage cluster:
- Create a keyring using the following command:
# ceph-authtool --create-keyring /etc/ceph/ceph.client.radosgw.keyring
# chmod +r /etc/ceph/ceph.client.radosgw.keyring
- Generate a gateway username and key for each instance:
# ceph-authtool /etc/ceph/ceph.client.radosgw.keyring -n    client.radosgw.us-east-1 --gen-key
# ceph-authtool /etc/ceph/ceph.client.radosgw.keyring -n client.radosgw.us-west-1 --gen-key
- Add capabilities to keys:
# ceph-authtool -n client.radosgw.us-east-1 --cap osd 'allow rwx' --cap mon 'allow rwx' /etc/ceph/ceph.client.radosgw.keyring
# ceph-authtool -n client.radosgw.us-west-1 --cap osd 'allow rwx' --cap mon 'allow rwx' /etc/ceph/ceph.client.radosgw.keyring
- Add keys to the Ceph storage cluster:
# ceph -k /etc/ceph/ceph.client.admin.keyring auth add client.radosgw.us-east-1 -i /etc/ceph/ceph.client.radosgw.keyring
# ceph -k /etc/ceph/ceph.client.admin.keyring auth add client.radosgw.us-west-1 -i /etc/ceph/ceph.client.radosgw.keyring

- Create a keyring using the following command:
- Add RGW instances to the Ceph configuration file, that is,
/etc/ceph/ceph.conf:[client.radosgw.us-east-1] host = us-east-1 rgw region = us rgw region root pool = .us.rgw.root rgw zone = us-east rgw zone root pool = .us-east.rgw.root keyring = /etc/ceph/ceph.client.radosgw.keyring rgw dns name = rgw-node1 rgw socket path = /var/run/ceph/client.radosgw.us-east-1.sock log file = /var/log/ceph/client.radosgw.us-east-1.log [client.radosgw.us-west-1] host = us-west-1 rgw region = us rgw region root pool = .us.rgw.root rgw zone = us-west rgw zone root pool = .us-west.rgw.root keyring = /etc/ceph/ceph.client.radosgw.keyring rgw dns name = rgw-ndoe1 rgw socket path = /var/run/ceph/client.radosgw.us-west-1.sock log file = /var/log/ceph/client.radosgw.us-west-1.log

- Next, we will install Ceph packages on the
us-east-1andus-west-1nodes usingceph-deployfrom theceph-node1machine. Finally, we will add configuration files to these nodes:- Allow
cep-node1to perform a password-less SSH login to the RGW nodes. The root password is default, that is,vagrant:# ssh-copy-id us-east-1 # ssh-copy-id us-west-1
- Install Ceph packages on the RGW instances:
# ceph-deploy install us-east-1 us-west-1 - Once Ceph packages are installed on the RGW instance, push the Ceph configuration files:
# ceph-deploy --overwrite-conf config push us-east-1 us-west-1 - Copy the RGW keyrings from
ceph-nodeto gateway instance:# scp ceph.client.radosgw.keyring us-east-1:/etc/ceph # scp ceph.client.radosgw.keyring us-west-1:/etc/ceph
- Next, install the
ceph-radosgwandradosgw-agentpackages on theus-east-1andus-west-1radosgw instances:# ssh us-east-1 yum install -y ceph-radosgw radosgw-agent # ssh us-west-1 yum install -y ceph-radosgw radosgw-agent
- For simplicity, we will disable firewall on the nodes:
# ssh us-east-1 systemctl disable firewalld
# ssh us-east-1 systemctl stop firewalld
# ssh us-west-1 systemctl disable firewalld
# ssh us-west-1 systemctl stop firewalld
- Allow
- Create the
usregion. Log in tous-east-1and execute the following commands:- Create a region infile called
us.jsonunder the/etc/cephdirectory with the following content. You can refer to the author's version of theus.jsonfile provided with the code bundle of this chapter:{ "name": "us", "api_name": "us", "is_master": "true", "endpoints": [ "http://us-east-1.cephcookbook.com:7480/"], "master_zone": "us-east", "zones": [ { "name": "us-east", "endpoints": [ "http://us-east-1.cephcookbook.com:7480/"], "log_meta": "true", "log_data": "true"}, { "name": "us-west", "endpoints": [ "http://us-west-1.cephcookbook.com:7480/"], "log_meta": "true", "log_data": "true"}], "placement_targets": [ { "name": "default-placement", "tags": [] } ], "default_placement": "default-placement"}

- Create the
usregion with theus.jsoninfile that you just created:# cd /etc/ceph # radosgw-admin region set --infile us.json --name client.radosgw.us-east-1
- Delete the default region if it exists:
# rados -p .us.rgw.root rm region_info.default --name client.radosgw.us-east-1 - Set the
usregion as the default region:# radosgw-admin region default --rgw-region=us --name client.radosgw.us-east-1 - Finally, update the region map:
# radosgw-admin regionmap update --name client.radosgw.us-east-1
- Create a region infile called
- Generate
access_keysandsecret_keysforus-eastandus-westzones:- Generate an
access_keyfor theus-eastzone:# < /dev/urandom tr -dc A-Z-0-9 | head -c${1:-20};echo; - Generate a
secret_keyfor theus-eastzone:# < /dev/urandom tr -dc A-Z-0-9-a-z | head -c${1:-40};echo;
- Generate
access_keyfor theus-westzone:# < /dev/urandom tr -dc A-Z-0-9 | head -c${1:-20};echo; - Generate
secret_keyfor theus-westzone:# < /dev/urandom tr -dc A-Z-0-9-a-z | head -c${1:-40};echo;

- Generate an
- Create a zone infile called
us-east.jsonfor theus-east zone. You can refer to the author's version of theus-east.jsonfile provided with the code bundle of this chapter:{ "domain_root": ".us-east.domain.rgw", "control_pool": ".us-east.rgw.control", "gc_pool": ".us-east.rgw.gc", "log_pool": ".us-east.log", "intent_log_pool": ".us-east.intent-log", "usage_log_pool": ".us-east.usage", "user_keys_pool": ".us-east.users", "user_email_pool": ".us-east.users.email", "user_swift_pool": ".us-east.users.swift", "user_uid_pool": ".us-east.users.uid", "system_key": { "access_key": " XNK0ST8WXTMWZGN29NF9", "secret_key": "7VJm8uAp71xKQZkjoPZmHu4sACA1SY8jTjay9dP5"}, "placement_pools": [ { "key": "default-placement", "val": { "index_pool": ".us-east.rgw.buckets.index", "data_pool": ".us-east.rgw.buckets"} } ] }

- Add the
us-eastzone using an infile in both the east and west pools:# radosgw-admin zone set --rgw-zone=us-east --infile us-east.json --name client.radosgw.us-east-1
Now, run the following command:
# radosgw-admin zone set --rgw-zone=us-east --infile us-east.json --name client.radosgw.us-west-1
- Similarly, for the
us-eastzone, create theus-west.jsoninfile with the following contents. You can refer to the author's version of theus-west.jsonfile provided with the code bundle of this chapter:{ "domain_root": ".us-west.domain.rgw", "control_pool": ".us-west.rgw.control", "gc_pool": ".us-west.rgw.gc", "log_pool": ".us-west.log", "intent_log_pool": ".us-west.intent-log", "usage_log_pool": ".us-west.usage", "user_keys_pool": ".us-west.users", "user_email_pool": ".us-west.users.email", "user_swift_pool": ".us-west.users.swift", "user_uid_pool": ".us-west.users.uid", "system_key": { "access_key": " AAK0ST8WXTMWZGN29NF9", "secret_key": " AAJm8uAp71xKQZkjoPZmHu4sACA1SY8jTjay9dP5"}, "placement_pools": [ { "key": "default-placement", "val": { "index_pool": ".us-west.rgw.buckets.index", "data_pool": ".us-west.rgw.buckets"} } ] }

- Add the
us-westzone using an infile in both the east and west pools:# radosgw-admin zone set --rgw-zone=us-west --infile us-west.json --name client.radosgw.us-east-1
# radosgw-admin zone set --rgw-zone=us-west --infile us-west.json --name client.radosgw.us-west-1
- Delete the default zone if it exists:
# rados -p .rgw.root rm zone_info.default --name client.radosgw.us-east-1 - Update the region map:
# radosgw-admin regionmap update --name client.radosgw.us-east-1 - After configuring zones, create zone users:
- Create the
us-eastzone user for theus-east-1gateway instance. Use the sameaccess_keyandsecret_keythat we generated earlier for theus-eastzone:# radosgw-admin user create --uid="us-east" --display-name="Region-US Zone-East" --name client.radosgw.us-east-1 --access_key="XNK0ST8WXTMWZGN29NF9" --secret="7VJm8uAp71xKQZkjoPZmHu4sACA1SY8jTjay9dP5" --system
- Create the
us-westzone user for theus-west-1gateway instance. Use the sameaccess_keyandsecret_keythat we generated earlier for theus-westzone:# radosgw-admin user create --uid="us-west" --display-name="Region-US Zone-West" --name client.radosgw.us-west-1 --access_key="AAK0ST8WXTMWZGN29NF9" --secret="AAJm8uAp71xKQZkjoPZmHu4sACA1SY8jTjay9dP5" --system
- Create the
us-eastzone user for theus-west-1gateway instance. Use the sameaccess_keyandsecret_keythat we generated earlier for theus-eastzone:# radosgw-admin user create --uid="us-east" --display-name="Region-US Zone-East" --name client.radosgw.us-west-1 --access_key="XNK0ST8WXTMWZGN29NF9" --secret="7VJm8uAp71xKQZkjoPZmHu4sACA1SY8jTjay9dP5" --system
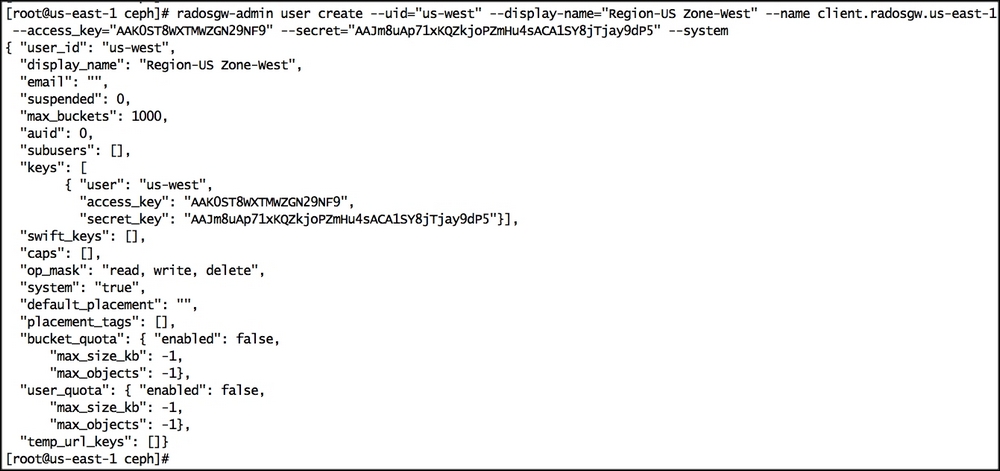
- Create the
us-westzone user for theus-east-1gateway instance. Use the sameaccess_keyandsecret_keythat we generated earlier for theus-westzone:# radosgw-admin user create --uid="us-west" --display-name="Region-US Zone-West" --name client.radosgw.us-east-1 --access_key="AAK0ST8WXTMWZGN29NF9" --secret="AAJm8uAp71xKQZkjoPZmHu4sACA1SY8jTjay9dP5" --system
- Create the
- Update the
ceph-radosgwinit script and set the default user asroot. By default,ceph-radosgwruns using the Apache user, and you might encounter errors if the Apache user is not present:# sed -i s"/DEFAULT_USER.*=.*'apache'/DEFAULT_USER='root'"/g /etc/rc.d/init.d/ceph-radosgw
- Log in to the
us-east-1andus-west-1nodes and restart theceph-radosgwservice:# systemctl restart ceph-radosgw - To verify if the region, zone, and
radosgwconfigurations are correct, execute the following commands from theus-east-1node:# radosgw-admin regions list --name client.radosgw.us-east-1 # radosgw-admin regions list --name client.radosgw.us-west-1 # radosgw-admin zone list --name client.radosgw.us-east-1 # radosgw-admin zone list --name client.radosgw.us-west-1 # curl http://us-east-1.cephcookbook.com:7480 # curl http://us-west-1.cephcookbook.com:7480

- Set up multisite data replication by creating the
cluster-data-sync.conffile with the following contents:src_zone: us-east source: http://us-east-1.cephcookbook.com:7480 src_access_key: XNK0ST8WXTMWZGN29NF9 src_secret_key: 7VJm8uAp71xKQZkjoPZmHu4sACA1SY8jTjay9dP5 dest_zone: us-west destination: http://us-west-1.cephcookbook.com:7480 dest_access_key: AAK0ST8WXTMWZGN29NF9 dest_secret_key: AAJm8uAp71xKQZkjoPZmHu4sACA1SY8jTjay9dP5 log_file: /var/log/radosgw/radosgw-sync-us-east-west.log

- Activate the data synchronization agent. Once the data sync has started, you should see an output similar to the one shown as follows:
# radosgw-agent -c cluster-data-sync.conf