
We use a number of technologies in this chapter, mainly revolving around the Ruby programming language and its various libraries. In addition to Ruby and its libraries we also use a few mashups, which are described below. We have described Sinatra, DataMapper, and Haml in the previous chapters so we will not repeat this here. Please refer to Chapter 1, Cloning Internet Applications for the details if you need to refresh your memory.
JSON (JavaScript Object Notation) is a lightweight data-interchange format, often used within a web context. It is meant to be easy for humans to read as well as for machines to parse or create. As the name suggests, it was derived from Javascript for representing simple data structures and hashes. However, JSON itself is not programming language-specific and has many implementations in various languages. It is increasingly becoming the popular alternative to sending and receiving XML.
In this application we will be using the JSON gem, which is one of the most popular JSON Ruby libraries. Installing the JSON library is simple:
% sudo gem install json
To use the library you need to require it first:
require 'json'
There are primarily two uses of any JSON library—you either use it to parse JSON data or to create JSON formatted data from another format. Parsing is very easy with the JSON Ruby library:
obj = JSON.parse(json_data)
Creating is relatively easy as well:
JSON.generate(obj)
In this chapter and in many chapters, we often use generate JSON from the object itself using the to_json method.
As with previous chapters, while the main features in the applications are all implemented within the chapters itself, sometimes we still depend on other services provided by generally well-known providers. In this chapter we use four services—RPX/Google for user web authentication, Google ClientLogin for API authentication, Gravatar for avatar services, and TinyURL for URL shortening.
RPX is an authentication provisioning service provided by JanRain, a technology startup with deep roots in the OpenID community. It doesn't do the actual authentication itself but acts as a proxy to a multitude of third party authentication providers such as Google, Yahoo!, MySpace, Windows Live ID, Facebook, Twitter, and a number of OpenID providers such as LiveJournal and Blogger. By wrapping around these third party providers it exposes a uniform interface that enables websites and applications to easily use any of the third party authentication providers. This is how it works:
- The user chooses their identity provider from a sign-in interface provided by RPX. This sends some POST parameters to the RPX server, including a token URL, which is a URL that RPX will send to the user once they've been authenticated.
- RPX initiates the authentication process with the chosen provider on behalf of the web application, including sending the user to the chosen provider.
- The provider displays an authentication form to the user for him to authenticate himself (to the provider) and informs the user that he will be signing in to the web application.
- Once the user is authenticated, the provider sends the user back to RPX, which in turn sends the user to the token URL specified earlier, along with a token parameter.
- Armed with the token parameter and an API key that was given by RPX during registration, the web application sends a request to RPX for more information.
- RPX returns the data accordingly if the token is valid. At this point in time, the user is authenticated and can be considered logged in.
To use RPX, we need to firstly register ourselves with RPX. RPX uses its own services for authentication so you can log in with any of the shown third party providers. Once you have registered, you need to create an application within RPX.
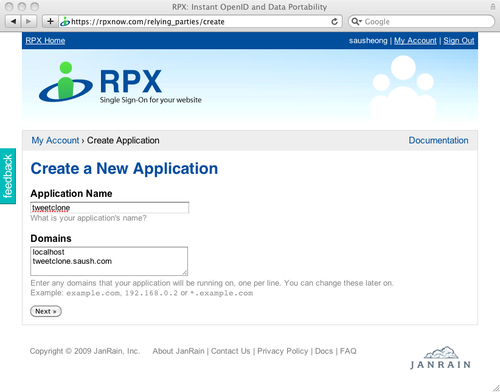
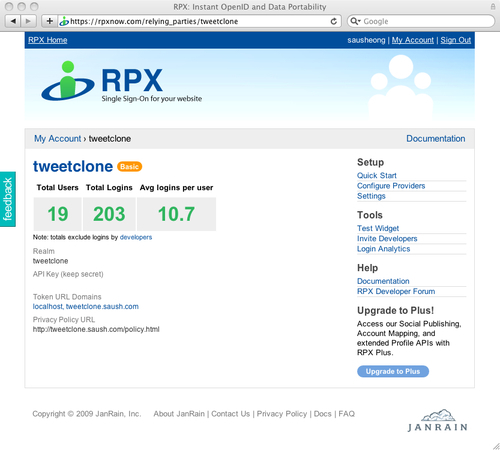
Once you have created the application you will be provided with an API key. This API key is what we will be using to interact with RPX at step 5 above.
Once you have the application you can also set up which providers you want to allow. For Tweetclone, because of the reasons given above, we will only use Google.
As explained above, Google has a couple of authentication mechanism. Google's ClientLogin mechanism is for installed applications, following Google's terminology. However, any application can use it, even web applications. For Tweetclone we use ClientLogin to authenticate for the APIs.
If you read the ClientLogin documentation in Google's ClientLogin for Installed Application page, you might see a complicated diagram that includes token exchange and CAPTCHA challenges.
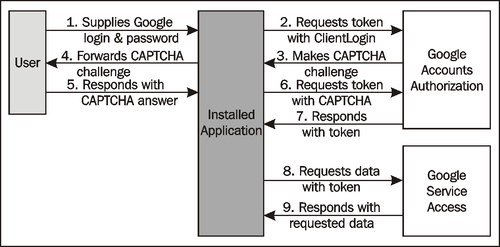
In actual usage this is not strictly necessary and even a bit misleading. If you use the generic service code in the service parameter, xapi (for GData services), you will not be challenged for a CAPTCHA. Naturally this is less secure but for our needs (for usage in an API) we will not be able to demand a CAPTCHA answer anyway so the flexibility suits us.
The generic URL for ClientLogin is:
https://www.google.com/accounts/ClientLogin
We need to send a POST request to the preceding URL, with the following minimal parameters:
|
Parameter |
Description |
|---|---|
|
|
Type of account to request authorization for. Possible values are GOOGLE (get authorization for a Google account only), HOSTED (get authorization for a hosted account only) and HOSTED_OR_GOOGLE (get authorization first for a hosted account; if attempt fails, get authorization for a Google account). For Tweetclone we will use GOOGLE. |
|
|
User's full e-mail address. It must include the domain. |
|
|
User's password. |
|
|
This is the name of the service we are requesting. For the case of Tweetclone we are not requesting any service at all, so we stick with the generic 'xapi' service code. |
|
|
This is a short string identifying your application, for logging purposes. |
Gravatar is short for Globally Recognized Avatar, and is a free Internet application that allows you to map avatars (which are mid-to-small-sized thumbnail pictures representing yourself) to e-mails. The service itself is quite simple—it allows the user to add any number of avatar pictures and also any number of e-mail addresses that belong to you. You can map any of the pictures to any of the e-mail addresses.
We use Gravatar in Tweetclone because we need an avatar and because we don't have an authentication service and only keep a simple profile. We also use Gravatar centrally because not all third-party authentication providers will provide avatars.
Gravatar is very easily usable in web applications. An avatar in Gravatar is identified through its e-mail address, converted into lowercase, with whitespaces trimmed and then hashed with MD5. A typical avatar URL looks like the following:
http://www.gravatar.com/avatar/ee191858f0d96ad93098694537f71998
Note that the file extension is optional, and if it is required by some application, you can append any extension to it (Gravatar doesn't mind or care about the extension at all).
TinyURL is a URL shortening service that we cloned in Chapter 2, URL Shorteners Cloning TinyURL. However, in Chapter 2 we did not implement an API, which is what we require in this chapter. We use TinyURL in Tweetclone to shorten and replace the URLs we encounter while parsing the status. TinyURL has a very simple API. Just execute the following in the web application:
http://tinyurl.com/api-create.php?url=<long url>
And you will be returned the shortened URL.
Heroku is a Ruby-specific, cloud-computing platform that provides specialized Ruby hosting services for developers. It allows Ruby developers to easily and almost instantly deploy web applications to the Internet. Heroku supports Rack-based web applications so deploying our Sinatra applications to Heroku is a breeze. While Heroku charges for hosting, it also provides a free basic tier account. More information on how Heroku is used at the end of this chapter when we talk about deployment.