Chapter 11. Functional Testing: Correctness and Acceptance
Testing is vitally important to confirm that the delivery of software provides value to the business, is easy to maintain, and performs within specified constraints. In this chapter, you will learn about functional testing, which is focused on asserting that the system provides the specified functionality, both from the business perspective and the technical perspective.
Why Test Software?
Why should you test software? The answer that first jumps to mind is to ensure that you are delivering the functionality required, but the complete answer is more complex. You obviously need to ensure that software that you are creating is functionality capable of doing what was intended—delivering business value—but you also need to test for the presence of bugs, to ensure that the system is reliable and scalable, and in some cases cost-effective.
Traditionally, validating the quality of a software system has been divided into testing functional requirements and testing nonfunctional requirements—also referred to as cross-functional or system quality attributes. Before exploring the process of testing functional requirements within a CD pipeline, you first need to understand the various types and perspectives of testing.
What to Test? Introducing Agile Testing Quadrants
It is important that you are clear about the types of testing that must be performed on a system that you are building, and you also need to understand how much of this can be automated. A useful introduction to the types and goals of testing can be found in Agile Testing: A Practical Guide for Testers and Agile Teams (Addison-Wesley) by Lisa Crispin and Janet Gregory.
The entire book is well worth reading, but the most important concept for us in this chapter is the Agile Testing Quadrants, based on original work by Brian Marick. The Agile Testing Quadrants, depicted in Figure 11-1, is a 2 × 2 box diagram with the x-axis representing the purpose of the tests (from supporting the team to critiquing the product) and the y-axis representing whom the test is targeting (from technology facing to business facing). The resulting quadrants within the diagram are labeled Q1 to Q4, and no ordering is implied with this numbering system; this is purely for reference.
Quadrant 1 is located in the position that is strongly supporting the team and technology facing, so the tests falling within this quadrant are unit and component tests. These types of tests can act as scaffolding around which the development team creates the software. They can also shape the design and the architecture. For example, by using TDD, you can ensure that there are also two consumers of functionality: the original consumer component within the application and a test.

Figure 11-1. Agile Testing Quadrants from Agile Testing (Addison-Wesley) by Lisa Crispin and Janet Gregory
Tests falling in Quadrant 1 are highly automatable. You should be running these tests not only within a build pipeline, but also as part of minute-by-minute local builds and, ideally, through an automated process that watches for code changes and runs appropriate tests. Infinitest is one such example of a continuous testing tool that operates as a plugin for Eclipse and IntelliJ.
Quadrant 2 is also strongly supporting the team, but is oriented toward being business- or customer-facing. Tests that fall into this category include functional tests, examples, and story tests. Tests within this quadrant are often referred to as acceptance tests, and are a focus of Specification by Example or BDD.
Quadrant 3, at the top right-corner, is also business facing, but switches the purpose toward critiquing the product. In this quadrant, you try to explore how the end user will feel when using the product. Is it appealing? Is it intuitive? Is it accessible by all types of users and devices? This kind of test cannot be easily automated, since the expected right answer is not always known before the test. However, this does not mean that the tests aren’t important, since failing to address these questions can lead to the product’s failure.
Finally, Quadrant 4 deals with critiquing the product from a technical point of view. These tests are usually difficult to write and tend to require special tools. Also, although their execution can be automated, their evaluation is a little more subjective. For instance, let’s say you write a performance test that ensures that a particular transaction can be executed within 3 seconds. If after a change you see the transaction time jumping from 1 second to 2 seconds, should you worry about it? 2 seconds still falls within the 3-second allowance, but you have suddenly doubled the transaction time.
Quadrants 1 and 2 cover functional requirements, and they will be thoroughly explored within this chapter. Quadrant 4 covers nonfunctional requirements (also referred to as operational requirements), which will be dealt with in Chapter 12. Quadrant 3 goes beyond what can be achieved in a continuous delivery pipeline and is therefore out of scope for this book. However, you can take a look at resources like Explore It! (Pragmatic Bookshelf) by Elisabeth Hendrickson to learn more about this concept.
Continuous Testing
To be able to create new functionality and deliver value at a sustainable pace, you need to have a high level of confidence in your pipeline and practices. Every team makes mistakes, but it is a well-accepted maxim within software delivery that the earlier an issue is found, the less it costs to fix. No amount of testing (outside mathematical formal verification) can guarantee the absence of issues, but your testing approach must be able to highlight problems as early as possible in your development practice.
To achieve this, you need to establish a culture of testing your software thoroughly and continuously, from the moment the first line of code is written to when the associated feature is deployed. In his blog post, “End-to-End Testing Considered Harmful”, Steve Smith explores these ideas in depth and talks about the practice of continuous testing. The idea behind this is that software needs to be tested at all times. This can be a challenge, with things such as the choice of test tooling and the skills available across the team impacting how you implement this.
The entire article by Smith is well worth reading. The core ideas to remember are that although a unit test or acceptance test may appear to offer a low degree of coverage (compared with, say, an end-to-end test), a unit test will validate intent against implementation, and an acceptance test will check the implementation against the requirements. This means that both the code’s behavior and its interaction with other parts of the system can be verified, and this can also be done in a small amount of time and with a minimum of coordination. For example, trying to verify a series of input edge cases within a part of an application by using only end-to-end tests can be ineffective, as a lot of orchestration has to be undertaken with the associated data stores, and each run of a test takes a long time to stand up the system, run the test, and tear everything down.
Building the Right Feedback Loop
Tests create a feedback loop that informs the developer whether the product is working. The ideal feedback loop has several properties:
- It’s fast
-
No developer wants to wait hours or days to find out whether their change works. Sometimes the change does not work—nobody is perfect—and the feedback loop needs to run multiple times. A faster feedback loop leads to faster fixes. If the loop is fast enough, developers may even run tests before checking in a change.
- It’s reliable
-
No developer wants to spend hours debugging a test, only to find out it was a flaky test. Flaky tests reduce the developer’s trust in the test, and as a result, flaky tests are often ignored, even when they find real product issues. Flaky tests also add unnecessary delays: when a developer suspects a test failure might be spurious, their first reaction will be to simply run it again instead of investigating.
- It isolates failures
-
To fix a bug, developers need to find the specific lines of code causing the bug. When a product contains millions of lines of code, and the bug could be anywhere, it’s like trying to find a needle in a haystack.
Turtles All the Way Down
There is an old expression—“turtles all the way down”—that refers to the mythological idea that a giant World Turtle supports Earth on its back. This World Turtle is supported by an even bigger turtle, and that bigger turtle is, in turn, supported by a yet bigger one. There is meant to be an infinite succession of increasingly bigger turtles, each supporting the previous one, therefore concluding that Earth is ultimately supported by “turtles all the way down.”
This expression comes in handy when you think of how tests support your microservices. At the smallest level, you have unit tests, which can assert that all the individual smaller pieces of code are working as intended. This level of testing is obviously not enough, for you need to verify that those pieces can work with each other, which means unit tests need to be supported by a bigger level of tests: component tests. Component tests can check that all subparts of the service can work together to form a cohesive whole, but this is not enough; you also need to verify that your service can work with the rest of your owned components, like databases. This gives rise to acceptance tests. And then, to support this level of testing, you need to verify that your owned components can work as expected with the unowned ones, building end-to-end tests. This way, you can see that your test strategy includes “turtles all the way down.”
The analogy isn’t perfect, though. There are other types of tests that are useful but don’t fit into this idea of scope progression. We are referring to contract tests, which verify that the interaction with an external component works as expected (without the need to include the full service on it), and integration tests, which test all the different communication patterns against components like databases (again, without including the full service).
This idea was effectively put into a graph by Toby Clemson in his presentation “Testing Strategies in a Microservice Architecture,” an extract of which appears in Figure 11-2.
However, all the testing in the world cannot guarantee that your application will work in production for one simple reason: your tests didn’t run in production. Needless to say, we’re not trying to imply that you should run your tests in production. We’re just highlighting the fact that there is a score of reasons for which your application could fail in production even though it passed all the tests prior to deployment: production configuration might be wrong, networking setup might prevent services from talking to each other, database keys may not have the right permissions, etc.
In the end, the only way of truly knowing that your application works in production is exercising it in production. This leads to the highest level of testing: synthetic transactions, or actions that you execute in the production environment as if you were a real user using the application.

Figure 11-2. A microservice, adjacent components, external services, and the boundaries that all the different types of testing will cover. Image taken from Toby Clemson’s online deck on Testing Strategies in a Microservice Architecture.
In the rest of the chapter, we will explore all these types of tests, understand when to use them, and indicate examples of how to build them effectively. We will start with the outermost ones, the ones closer to “the real thing” (synthetic transactions), and we will progressively make our way in to the innermost ones, unit tests.
Synthetic Transactions
Synthetic transactions are real transactions exercised against a production system, but by fake users. This activity can be seen as the highest form of testing, since it is performed on the actual production environment with all the real components, and not just a test environment that is meant to represent production.
Synthetic transactions can also supplement typical monitoring techniques to provide more insight into production health, since you can monitor exactly what the user will experience. This way, they can detect when key business metrics fall outside acceptable norms and assist in identifying production issues fast. Some teams decide to have a bunch of key synthetic transactions scheduled to run on a daily basis, as a way to make sure that everything is working OK.
Remove Fingerprints from Synthetic Transactions
Although we are referring to these transactions in a way that somehow makes them look not real, they are very much so. Bear in mind that this is still your production environment, and any transactions that you execute will form the corpus of reports that might be generated by or presented to the business. Wherever possible, remove the effects of synthetic transactions after running them; you don’t want the CEO to congratulate the company on the steady increase of new users when your synthetic transactions are responsible for a large number of them.
End-to-End Testing
The next level down from Synthetic Transactions is end-to-end testing. End-to-end tests only differ from synthetic transactions in the target environment: like synthetic transactions, end-to-end tests exercise the entire system, including unowned components; however, unlike synthetic transactions, end-to-end tests are run against a purpose-built test environment, as opposed to the real, user-facing production environment. Given that end-to-end tests don’t impact real users, you can be more aggressive with them, performing more operations and manipulating the environment at any point to suit your testing needs.
As a microservice architecture includes more moving parts for the same behavior (compared to a monolithic architecture), end-to-end tests provide value by adding coverage of the gaps between the services. This gives additional confidence in the correctness of messages passing between the services, but it also ensures that any extra network infrastructure such as firewalls, proxies, or load-balancers is correctly configured (especially if the deployment and set-up of these have been automated). End-to-end tests also allow a microservice architecture to evolve over time: as more is learned about the problem domain, services are likely to split or merge, and end-to-end tests give confidence that the business functions provided by the system remain intact during such large scale architectural refactorings.
Writing and maintaining end-to-end tests can be difficult, though. Since end-to-end tests involve many more moving parts than the other strategies discussed in this chapter, they have more reasons to fail. End-to-end tests may also have to account for asynchrony in the system, whether in the GUI or due to asynchronous backend processes between the services. But, most importantly, since end-to-end tests include coverage of unowned components, the team won’t be fully in control of the environment, limiting their capacity to adapt and react to circumstances. These factors can result in flakiness, excessive test runtime, and additional cost of maintenance of the test suite. Mastering the art of end-to-end tests takes time and practice.
Given all these caveats, and given that a high level of confidence can be achieved through lower levels of testing, the role of end-to-end tests must be just making sure everything ties together and that there are no high-level disagreements between the microservices. As such, comprehensively testing business requirements at this level is wasteful, especially given the expense of end-to-end tests in time and maintenance.
Once you take into account all the many drawbacks, it is fair to question whether you need end-to-end tests at all. The right answer is, it depends. The key thing to note at this point is that it is dangerous to over-rely on end-to-end tests, but that doesn’t mean you cannot benefit from them. One of the things to bear in mind is that the difference between end-to-end and acceptance tests is that the former include external services and components, while the latter don’t. The tools, the stakeholders, and the strategies are all the same. If your system doesn’t interact with external entities, or if you trust that interaction, or if you think that automating the test of that interaction isn’t worth the effort, you might be OK with just acceptance tests.
If you do decide to write end-to-end tests, one strategy that works well in keeping an end-to-end test suite small is to apply a time budget, an amount of time the team is happy to wait for the test suite to run. As the suite grows, if the runtime begins to exceed the time budget, the least valuable tests are deleted (or re-written as lower-level tests) to keep the build within the allotted time. The time budget should be in the order of minutes, not hours.
Also, to ensure that all tests in an end-to-end suite are valuable, you should model them around personas of users of the system and the journeys those users make through the system (e.g., “A customer that buys a product for the first time” or “An accountant that needs to review the tax balance for the last quarter”). This provides confidence in the parts of the system that users value the most and leaves coverage of anything else to other types of testing. Tools, such as Gauge and Concordion, exist to help in expressing journeys via business-readable DSLs.
You may have noticed that we have talked about the philosophy and recommended approaches of end-to-end tests, but we haven’t delved into any tools or practices to do this. This is because the tools and practices are the same for end-to-end and acceptance tests; since you are likely to spend more time writing acceptance than end-to-end tests, we will cover the details of tools and practices in the next section.
End-to-End Testing May Be Considered Harmful!
As noted by Steve Smith in “End-to-End Testing Considered Harmful”, end-to-end testing often seems attractive because of its perceived benefits: an end-to-end test maximizes its system under test, suggesting a high degree of test coverage; and an end-to-end test uses the system itself as a test client, suggesting a low investment in test infrastructure. However, the end-to-end testing value proposition is fatally flawed, as both assumptions are incorrect:
The idea that testing a whole system will simultaneously test its constituent parts is a decomposition fallacy. Checking implementation against requirements is not the same as checking intent against implementation, which means an end-to-end test will check the interactions between code pathways but not the behaviors within those pathways.
The idea that testing a whole system will be cheaper than testing its constituent parts is a cheap investment fallacy. Test execution time and nondeterminism are directly proportional to system under test scope, which means an end-to-end test will be slow and prone to nondeterminism.
End-to-end testing is an uncomprehensive, high-cost testing strategy. An end-to-end test will not check behaviors, will take time to execute, and will intermittently fail, so a test suite largely composed of end-to-end tests will result in poor test coverage, slow execution times, and nondeterministic results.
Acceptance Testing
As previously mentioned, acceptance tests and end-to-end tests vary solely in scope: acceptance tests exclude unowned dependent services. If, for instance, you are responsible for a Company Accounts system that uses an external Payments service, and you want to write acceptance tests for it, your system under test would comprise the latest Company Accounts code and a Payments Stub.
Acceptance tests can be written just like any other tests: as a set of automated actions with some prior setup and a number of assertions at the end. However, their position gives you an opportunity to treat them slightly differently. Acceptance testing is the highest form of automated testing in which everything is fully under your control: you can create and delete data, take services up and down, inspect internal status, etc. This means that acceptance tests can be designed as a form of rewriting the business requirements, up to the point that tests and test results can be easily inspected by nontechnical people.
This idea is encapsulated in the term behavior-driven development which has become almost a synonym of acceptance testing. In the rest of this section, we will assume that you have chosen to use BDD to implement acceptance tests, and we will go over both the practice and the main tools that facilitate it.
Behavior-Driven Development
Behavior-driven development (BDD) is a technique to develop systems that appeared as a generalization of TDD. The idea is that, for each use case or scenario, you list the behavior that should be perceived when a user is exercising the system, express that behavior as a set of steps, and then turn those steps into executable actions. Those executable actions can then be run against the system, and if all of them succeed, the scenario can be considered to be successfully implemented. The art of BDD is a wide topic that would require a book on its own, and indeed there are some great resources (for example, BDD in Action [Manning] by John Ferguson Smart), so we’ll only cover the surface here.
Now, whether the BDD tests need to be written before or after the feature is implemented is a matter of debate (see “Testing Outside-In Versus Testing Inside-Out”), but that’s not the main point of BDD. The key advantage of BDD compared to other forms of tests is that BDD is expressed in a high-level language that business people can understand, and the test execution and reports are formatted in a way that nontechnical people can consume. In some teams, the business people write the steps, and then the developers implement them and make them pass.
There isn’t a single tool that makes BDD possible. It could be said that in few areas has the combination of different tools designed to address different problems created such a powerful combined effect as in the realm of acceptance testing. There are essentially three problems that need to be addressed when designing acceptance tests in a BDD manner:
-
The definition, execution, and reporting of scenarios and steps, using tools like SerenityBDD.
-
The interaction with the system mimicking user interaction and experience, using tools like Selenium WebDriver.
-
The enablement of such interaction in environments that are radically different from users’ devices, using tools like HtmlUnit.
Let’s go through them one by one.
Defining steps
Multiple tools can be used to define steps in a BDD interaction, all of which are similar. Some of the most popular ones that are available for Java are Cucumber, JBehave, and SerenityBDD.
The pattern in all of them is simple. You start by indicating a particular feature or story. (The terminology might be different, depending on the tool.) For each feature or story, you indicate various scenarios, or use cases, that describe how the feature is supposed to work. Each scenario is described by multiple steps, each of them tagged with one of these keywords:
- Given
-
Steps that start with “Given” are supposed to indicate the state of the system at the time of initiating the action; for instance, “Given that the user has an account...”.
- When
-
Steps that start with “When” indicate the actions that the user runs against the system; it’s a prelude of the conclusion that will happen next. For instance, “When the user enters her username and password and hits Enter...”.
- Then
-
Steps that start with “Then” indicate the consequence of the previous steps, and they are essentially BDD’s version of assertions. For instance, “Then the user is logged in.”
It’s important to note that these keywords are just syntactic sugar for the reader: they don’t mean anything from the execution point of view. You could write all the steps with “Given,” or with “Then,” and the tests would run the same. Some tools even forgo the idea of Given/When/Then and simply call everything just a “Step.”
One of these tools is SerenityBDD, which is also the one we have chosen to demonstrate acceptance tests in the Extended Java Shop. SerenityBDD integrates with JUnit and other tests’ frameworks seamlessly, meaning you have to worry only about the definition of steps. Although full details can be found at the documentation page, the basic working of SerenityBDD is as follows.
First, you need to create one or more classes that will hold your steps. Each step will be a different method, and will be tagged with the annotation @Step:
@Steppublicvoiduser_obtains_the_list_of_products(){productNames=page.getProductNames();}@Steppublicvoidshopfront_service_is_ready(){page.load();}// ... //
These steps can then be used in normal tests:
@TestpublicvoidnumberOfProductsAsExpected(){// GIVENshopfrontSteps.shopfront_service_is_ready();// WHENshopfrontSteps.user_obtains_the_list_of_products();// ... //}
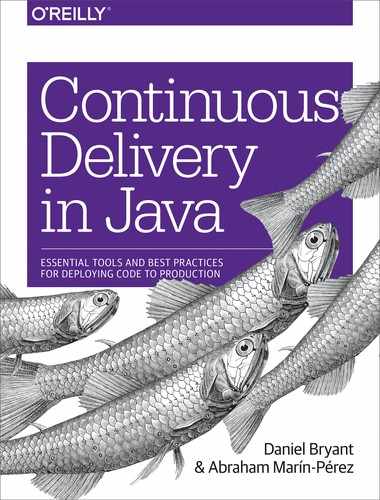
You may think that annotating the methods with @Step seems redundant, since those methods can be called anyway from the test, but then you would be missing one of the most important features of this kind of tools: the reports. By tagging these methods as steps, SerenityBDD can then create appropriate, high-level reports that show which steps worked and which ones didn’t, like the one in Figure 11-3.
Figure 11-3. SerenityBDD’s error report, showing steps that failed and steps that didn’t run
Mimicking user action
Because you are testing at the highest possible level, you want your actions to be as close as possible to those of a real user. Despite all the microservices that may be present in your system, chances are that, eventually, your users are going to interact with you via a website. Therefore, what you want is a way to mimic the way in which a user interacts with your website. This is achieved with tools like Selenium WebDriver (or just Selenium).
Selenium can bring up a browser and allows you to interact with it in an automated manner. Through Selenium, you can tell the browser to visit a page, fill in text boxes, click buttons, etc. Selenium also allows you to programmatically inspect the page, querying whether a particular object is present or whether it has certain text. What’s more, since the action is driven through a real browser, any JavaScript code will also be executed, bringing it closer to a user’s experience. Selenium lets you focus on what the user does, feels, and sees.
It’s important to note that, even though Selenium can help in writing tests, it is not a test tool in itself. It’s just a tool to interact with a web browser programmatically.
Making build instances work like a user device
The first time that you use Selenium, you will probably stumble upon one major hurdle: you can use Selenium in your developer machine with no problem, because your browser of choice is locally installed and Selenium can bring it up, but the browser is not available in the machine running your tests as part of the automated build pipeline, and it will fail. You may think that you just need to install the browser in the build nodes, but chances are that will fail, too: even if the browser is available, your nodes are most likely machines designed for running tests, and won’t have a graphical environment. If you try to start up a browser, it will fail, because it won’t have a graphical subsystem where it can open a window.
To be able to run Selenium in your automated build pipeline, you either need build nodes that include a graphical interface (which would consume significant resources), or a browser without the need for one. And that’s exactly what HtmlUnit is.
HtmlUnit can communicate with a server and obtain websites like a user. It can process HTML and run JavaScript. It can even mimic the input of data and actions like clicking or selecting. And it can do all this without the need to create a graphical window, making it perfectly suitable for running Selenium actions in a windowless environment.
Stubbing or Virtualizing Third-Party Services
Although some systems are small enough that a single team has ownership of all the composite components, in many cases, systems grow to have dependencies on one or more externally managed services. As previously stated, you are not supposed to include these external services in your acceptance tests, but your application will still have to contact something that looks like them. The best thing to do at this point is to either stub or create a fake service that behaves like the external service, and include that in the mix when you are running your acceptance tests.
You could write a web service from scratch, or you could use tools like WireMock or Hoverfly (as you saw in “Virtualizing Services with Hoverfly”). WireMock is a stubbing framework for web applications that can create a service that listens on a specified port, and that can respond to requests in any way you configure it. This then becomes the third-party service that your application communicates with during acceptance tests. More on WireMock in“Component Testing”.
Bringing It All Together
The Extended Java Shop includes a fully working example of acceptance tests that includes all the items mentioned in this section, and then some more. It can be found in the folder /acceptance-tests of the Extended Java Shop repository, and is mainly characterized by the following items:
-
A docker-compose.yml file that will bring all the owned services up so they can be tested together.
-
To substitute the Adaptive Pricing service (which in our setup is meant to be a third-party system), we have decided to opt for a virtualized service called
fake-adaptive-pricing. This is brought up also usingdocker-compose(in practice, you’ll notice that the Fake Adaptive Pricing is simply a wrapper for the real one, but that’s just to make the sample application simpler; the key thing is that, from the acceptance tests’ point of view, we’re not using the real one). -
Maven has been complemented with a docker-compose plugin to be able to start up and bring down all the necessary Docker containers for testing. See pom.xml for details.
-
SerenityBDD is in use in the main test class,
ShoppingAT, and in the steps classes in thestepspackage. -
Selenium WebDriver is in use in the
ShopfrontHomePageclass, where high-level ways to interact with the Shopfront home page are recorded. -
HtmlUnit is specified when we instantiate the Selenium WebDriver object in
ShoppingAT(near the top of the class).
Consumer-Driven Contracts
Whenever a consumer couples to the interface of a component to make use of its behavior, an implicit contract is formed between them. This contract consists of expectations of input and output data structures, side effects and performance, and concurrency characteristics. The idea of consumer-driven contracts (sometimes called simply contract tests) is to make that contract explicit in the form of executable tests that will verify whenever either side is deviating from the agreement.
Tests based on consumer-driven contracts can be used in two different scenarios:
-
Both parts, consumer and provider, agree on the need to have a contract that ties down the interaction. This could either be because your team owns both consumer and provider, and you just want to make sure the interaction is correct, or because even though consumer and provider are owned by different teams, they have agreed on having close communication to ensure that the interaction is fluid and flawless.
-
Only the consumer is willing to create contract tests, maybe because the provider doesn’t want to go through that trouble, or because the provider has so many consumers that they can’t afford to share contract tests with all of them. The second case is more common that it would seem. For instance, if one writes a client to consume the Twitter API, it is very unlikely that they’ll be able to share the burden of contract tests, even if they are willing—imagine if they had to do that with all consumers!
Being confronted with one case or the other will affect not just the type of tests that you write, but also the technologies that you use to write those tests, and even the frequency at which you run them. Let’s begin with the latter case. If the provider is not willing or able to participate in the interface verification, you’re just writing one-sided contract tests. This means you’re essentially treating the external service as a black box and you’re writing tests to verify that behavior doesn’t change unexpectedly, which is no different from what you would do to test your own service (see “Component Testing”). Given this, you don’t need any special tool to write these contract tests; normal testing libraries will do, but you do need to be careful about scheduling.
Is This Really a Contract?
You might be wondering whether a contract that exists for only one side of the interaction is really a contract. The technical response would be that what you are writing isn’t the contract, but the test that verifies the contract. The contract is the implicit understanding that an API wouldn’t change without notice. However, if the name troubles you, just call it something else.
Ideally, you would run your contract tests whenever the client component in the consumer or the interface component in the provider are modified. However, if the provider is not participating in the contract verification, you aren’t likely to know when the provider has changed. You’ll have to configure your pipeline to execute the contract tests whenever your client component changes, and then, depending on how often you do change your client component, you’ll have to consider also scheduling a regular test execution (e.g., daily or weekly) to try to detect any changes that may have happened on the provider side.
Test What You Need, but No Further
If you remember from “Backward Compatibility and Versions in APIs”, one of the ways to handle changes in an API is to allow responses to be modified in a backward-compatible manner. This means that the provider might add new fields at any point without that being considered a violation of the contract. Given this, avoid testing that the entire response from the provider is as you expect. Instead, simply test that you can obtain whatever fields you need. That will save you a lot of time handling false-positives.
The story changes when both provider and consumer are willing to participate in the verification of the interaction. Here we can talk about proper contract-based testing, and use technologies aimed specifically at the specification and verification of contracts. Let’s see them in detail.
RESTful API Contracts
Once provider and consumer have agreed to share the burden of contract testing, several things need to happen. On one side, the provider has to write tests that verify that the API doesn’t change (at least, not inadvertently). On the other side, each consumer has to write tests that verify that their application works with the responses provided by the consumer. There are several issues with this approach. On one hand, there is a significant communication overhead whenever the provider changes the API. On the other hand, there is a non-negligible amount of duplicated effort by all the different consumers to test the same thing from the provider.
It is for this reason that contract tests shouldn’t be written using typical testing tools, but specialized ones. The contract itself should be represented by an independent physical entity that both providers and consumers subscribe to: the provider verifies that the contract is a fair representation of what they produce, while the consumers verify that they can cope with responses from the provider as specified by the contract. Whenever a change in the API is needed, the contract is updated, and everybody reruns their tests against the updated version.
There are different tools to specify contracts, each following different approaches that try to align with different team dynamics and social interactions. We can roughly categorize these tools into two groups, depending on what is considered to be the source of truth. This way, you have contract-first tools, where an independent entity (the contract) is the source of truth, and interaction-first tools, where the consumer is the source of truth. As you will see in detail, in contract-first tools, either consumer or provider may be seen as aligning with or deviating from the contract, while for interaction-first tools, only the provider can be seen as abiding by or violating the contract.
Contract first, interaction second
Contract-first tools work by beginning with the definition of a contract in the form of a set of interactions. Each interaction will specify an example of a request followed by an example of a response. The tools usually provide options to include random values within the requests and/or responses to avoid falling into hardcoded value traps. This, together with many other variants, allows the configuration of the contracts to be as realistic as possible. The tool can then generate two types of artifacts for consumers and providers:
- For providers
-
The tool turns each interaction into a test; the sample request is sent to the service, and then it checks that the response from the service matches the sample response.
- For consumers
-
The tool creates a preconfigured, stubbed service that you can use when testing the consumer application. For each request that the consumer application makes to the stub, the stub will check whether it matches one of the sample requests and, if so, it will respond with the corresponding sample response.
The asymmetry in the artifacts created for consumers and providers reflects the difference in responsibilities: while the provider needs to abide by all the use cases specified in the contract, a given consumer may need to use only some of them. This is why the contract becomes a set of enforced rules for the provider, but a set of available rules for the consumer.
In the Extended Java Shop, we have chosen to demonstrate contract-first tools with the use of Spring Cloud Contract. In this example, we are using Spring Cloud Contract to verify the interaction between the Stock Manager service and the Shopfront service. The contracts themselves live in the Stock Manager project as a set of Groovy files in the package contracts.stockmanager (in the folder /stockmanager/src/test/resources/contracts/stockmanager); they should be easy to interpret, although full details about the syntax can be found at the Spring Cloud Contract documentation. These contracts are then used by both the Stock Manager service build, and the Shopfront service build.
The Stock Manager service build uses the contracts rather transparently, thanks to the inclusion of a specific Spring Cloud Contract Maven plugin. The only code that is needed is the creation of a base class for the generated tests to extend and where any setup will be performed; in our example, this will be StockManagerCDCBase.
The Shopfront service needs some extra setup, though. The job definition in Jenkins needs to be modified to make sure it is triggered whenever the contract is modified, and a step needs to be added to generate the artifact that contains the stubbed service. Check the job definition for the Shopfront service in either of the three prebuilt Jenkins instances in the Extended Java Shop repository. (You can do this by looking at the file /jenkins-base/jobs/shopfront/config.xml, or by running any of the prebuilt Jenkins instances locally as specified in the relevant README.md files and looking at the job definition.) After this, a specific test that uses the generated stubbed service can be written; see StockManagerCDC in Shopfront service for details.
Interaction first, contract second
Interaction-first is a different breed of contract testing tools that take the idea of consumer-driven contracts to the extreme. In this kind of tool, the consumer starts by writing a set of tests that indicate how it expects to interact with the provider. By running these tests against a stub, the tool can make a record of the requests sent by the consumer and the responses that it expects, and call such record the contract. This contract is then sent to the provider, where it will be run against it as a form of component tests that the provider is expected to comply with. Interaction-first tools are therefore a way to run TDD against the definition of an API.
Despite being more faithful to the concept of CDC, interaction-first tools have shortcomings when compared to contract-first tools, at least under some scenarios. If the same team owns both the consumer and the provider, interaction-first tools are ideal, because they ensure that the provider is doing exactly what the consumer needs it to do and nothing else. However, if consumer(s) and provider belong to different teams, these tools can be a source of significant friction.
A provider’s build might be broken because a consumer might have misunderstood the way the API is supposed to work and have written their tests wrong. (Remember, it is the contract that is written from the test, not the other way around.) A rogue consumer might “bully” the provider into developing new features by simply writing some tests for the interaction that they desire, breaking the provider’s build until these are done. And a provider who wants to develop a new version of the API will have no contract tests to validate it until a consumer starts to use it, unless the provider’s team writes a consumer themselves. These, of course, aren’t faults attributable to the tool, but to a flawed organizational culture and misguided social interaction, but one needs to be aware that interaction-first tools enable this sort of behavior.
But remember: there aren’t right or wrong tools, just tools that are more or less adequate for a particular scenario. Despite the aforementioned disadvantages, an interaction-first tool might be exactly what your team needs.
The Extended Java Shop doesn’t include any examples of interaction-first tools, but we encourage you to check out Pact and Pact Broker.
Message Contracts
When it comes to RESTful interfaces, services communicate with each other by using HTTP (barring some odd exceptions). Therefore, regardless of the technology used for the client and/or server side (Dropwizard, Play, Jetty, etc.), when it comes to contract testing, you can use anything that communicates via HTTP to mimic the client and/or server and verify your contracts. Unfortunately, the situation isn’t quite as standardized for the case of messaging platforms, and we won’t be able to provide a single solution for testing message contracts.
It is important to highlight that the objective of this section isn’t to help you choose a messaging technology, but rather to assist in how to test it. For this reason, we will go through the most popular options when it comes to messaging platforms, and indicate how each of them can be tested most effectively. Because of the array of options, we won’t cover each of them in detail, but we’ll include references so you can explore further if needed.
Contract testing at the protocol layer
Testing at the protocol level is useful when the different services that send messages to each other do so using different technologies, but abiding by the same protocol. This is an analogous situation to RESTful services, where different services may use different web technologies, but they all communicate using HTTP. Among the different message queue protocols available, the most popular one is AMQP, with implementations including RabbitMQ, Apache Qpid, and Apache ActiveMQ, among others.
If you are using AMQP as your communication protocol, you can easily execute contract tests by using Pact and Pact Broker. The way the tests are executed is no different from the case of web services described previously. The only difference is that, instead of mimicking the HTTP interaction of server/client, you mimic the AMQP interaction of producer/consumer. Specifics can be found in the documentation, but to give a sense of how similar both approaches are with Pact, suffice it to say that the test setup will differ only in that it uses an AmqpTarget object instead of an HttpTarget object for the mimicked service.
Contract testing at the serialization layer
In some cases, you won’t want to or be able to run your contract tests at the protocol layer. For instance, you might be using a message queue protocol for which there is no easy testing framework. Or you might be using exactly the same technology in all your services, meaning you can afford to move the actual protocol out of the equation. Regardless of the reason, you can assume that messages are going to be correctly delivered to the right recipient, and focus only on the messages themselves. In other words, you can focus on the production and interpretation of the messages.
The best strategy in this scenario is to define schemas for all your messages, including different versions of the same message. This is particularly easy to do if you use Apache Avro to serialize your messages, because then you can leverage the Confluent Schema Registry to store and retrieve your schemas during testing. Gwen Shapira’s excellent talk, “Streaming Microservices: Contracts & Compatibility”, shows in detail how this can be achieved.
Even if you don’t use Avro or the Confluent Schema Registry, you can still use Gwen’s ideas to hone your serialization-based contract tests, especially if you need to support several versions of the same message schema:
-
You can contract-test your producers to ensure that they generate messages using all versions of a schema, placing each copy in a different queue. You can then contract-test your consumers to ensure that they interpret messages of at least one version of a schema, taking it from the relevant queue.
-
Similarly, you can contract-test your producers to ensure that they generate messages matching at least one version of a schema. You can then contract-test your consumers to ensure that they can interpret messages matching any version of the schema, again ensuring producer/consumer communication.
-
Finally, you can contract-test both producers and consumers to ensure that they can produce/consume messages matching at least one version of schema, and then create a number of message transformers that you can contract-test to ensure that they can convert from any given version to any other version of a schema.
In some ways, serialization-based contract testing is a more natural form of contracts, because it takes the schema of the message as the contract to abide by. This way, you can leave aside the actual exchange mechanism and focus on the message itself.
Component Testing
A component is any well-encapsulated, coherent, and independently replaceable part of a larger system. Testing such components in isolation provides multiple benefits. By limiting the scope to a single component, it is possible to thoroughly test the behavior encapsulated by that component while maintaining tests that execute more quickly than broad stack equivalents. In the context of microservices, you can identify a component as one microservice.
Now, there are challenges and questions that need to be addressed when considering component tests. To begin with, your microservice is likely to have external dependencies that you want to exclude when testing your component, so you need an effective and efficient way to replace those. On the other hand, you may need to check some internal behaviors when testing your component, but you need to do this while still treating your service as a black box. Finally, you need to be careful with the very mechanism through which you run the component tests, since this may affect how much of your component you are actually testing. Let’s go through all of this.
Embedded Data Stores
If your service uses a database, you will want to exclude that from your component tests. First, because the database is not really part of the service, it’s a different component that your service communicates with (even if database and service are tightly coupled). Second, and maybe more important, including the database in your component tests would add complexity and slow it down. Besides, you are already including a real database in your acceptance tests, so you can part with it at this level.
What you need, therefore, is something that can look like a database to your service, but without all the added complexity. You need an embedded data store, which is typically implemented by an in-memory database. An in-memory database will offer the same interface as a normal database, but will run entirely in memory, removing the delays of network and disk access. There are multiple options for this, but the most common ones are H2 for standard SQL databases and Fongo for MongoDB.
The Extended Java Shop includes an example of component tests supported by an H2 in-memory database in the Feature Flags service, although this may not be entirely obvious at first. The component tests of the Feature Flags service (folder /featureflags), located in the FeatureFlagsApplicationCT class, make some heavy usage of “Spring Boot magic,” so if you’re looking to understand how H2 is used, you should look at the following:
-
The test/resources folder includes an application.properties file that will override any matching files in main/resources. This file is empty, effectively removing all the configuration items provided in main/resources. In a situation like this, Spring Boot will try to guess the parameters from whatever it can find in the classpath.
-
The pom.xml file has added an H2 dependency for testing.
-
When running the tests, Spring Boot will notice the H2 driver in the classpath and, without any other parameters related to database, assume this is what it needs to use. Because H2 works in memory, no connection details such as URL or username are needed, and our application will be autowired to use H2.
For applications based on frameworks other than Spring Boot, you may need to explicitly indicate that H2 is to be used; this is usually accomplished by configuring the connection URL to something like jdbc:h2:mem:. For other H2 connection options, you can check the H2 documentation.
In-Memory Message Queues
The same arguments apply when running component tests for services that communicate to a message queue: for control and speed, you will want to run the message queue server in-memory. However, as we discussed when we talked about “Consumer-Driven Contracts”, the world of message queues is not as standardized as other disciplines, and while you can use an in-memory database that understands SQL to mimic any other database solution, there isn’t a single tool that can help with message queue technologies. But you still have options.
First, many message queue brokers have the option to run without persistence, effectively turning them into in-memory technologies. If your message queue of choice does support this option, you can just start an instance locally before your component tests start and then stop it when you’re done.
Sometimes you won’t be able to do this for a variety of reasons: maybe the message broker doesn’t support running without persistence, or maybe you can’t run an instance locally because of license or resource constraints. In these cases, you can try the following:
- AMQP-based queues
-
All message queue brokers that implement AMQP are interchangeable at the functional level, meaning you can just pick a different technology for testing. ActiveMQ can easily be set up to run in-memory as part of your tests, with the drawback that it supports only AMQP 1.0; for earlier versions, you can use Qpid.
- Kafka
-
Apache Kafka is so popular that we consider it worth its own mention. Kafka runs on top of ZooKeeper, meaning you can effectively have an in-memory Kafka instance if you run it using the in-process
TestingServerfor ZooKeeper. Alternatively, if you’re using Spring Boot, you can just useEmbeddedKafka, which essentially runs the in-memory Kafka and ZooKeeper instances for you.
If none of the previous options apply to your case, you can still try some ad hoc options. You can consider creating a Docker image that will start up an instance of your message queue broker, and spin up a container for that image before your component tests; this won’t be exactly in-memory, but at least it will keep things locally. Alternatively, if the protocol is simple enough, you can consider creating your own in-memory message queue implementation.
Finally, if no option fits you, maybe you need to take a step back and remove the message queue from the equation: instead of using an in-memory version of the message queue broker, you can use an in-memory version of the code that communicates with the message queue—your message queue client. It’s true that this will avoid testing the connection to the message queue, but you can try to bridge that gap through acceptance and integration tests.
Test Doubles
In the same way that your service may make use of a database that you want to exclude in your component tests, it may communicate with other services that you also want to exclude. You can replace these dependencies with test doubles, owned entities that mimic the external behavior of your dependencies, but without the real internal logic.
The development community has a longstanding debate about the different types of test doubles and the names that each type should have, with terms like stubs, mocks, fakes, dummies, spies, and some others being constantly thrown in and out. In recent times, it has also added virtualized services to the mix. This is still a slightly contentious topic, and some readers might disagree with what we are going to expose next, but in our case, we have decided to adopt the view of Wojciech Bulaty and define the following:
- Stub
-
The simplest of test doubles, a static resource that has fixed values configured for each possible call. It doesn’t keep a state, and it’s not configurable.
- Mock
-
An evolution of the previous; it can be configured to return different values according to different patterns, or it can be reconfigured before each test. It keeps a state, and it can be queried after the test has run to verify whether specific functions have been invoked and how.
- Virtualized service
-
Similar to a mock, but long-lived and hosted at a remote server. Virtualized services can typically be shared between developers and testers.
Any of these types can be useful when replacing real dependencies in component tests, but because of their characteristics, mocks tend to be the most common option. Stubs are sometimes too simplistic to cover some of the cases of a component test, while virtualized services add the delay and uncertainty of a remote network connection.
Stubs can usually be implemented manually, but mocks and virtual services benefit from some tooling. In the realm of component testing, the most common of these tools is WireMock. WireMock can be used as a mock or as a virtualized service in the following ways:
- WireMock as a mock
-
You can start and configure a WireMock instance at any point during your tests; a good example of this can be found in
ShopfrontApplicationCT, where we have used WireMock to replace the service dependencies of the Shopfront service. - WireMock as virtualized service
-
Once configured, WireMock can be started up as a standalone service and deployed into a server, making it permanently available for anyone who needs it. Alternatively, there is also the option of MockLab, a service built on top of WireMock that allows the creation of virtualized services in the cloud.
Regardless of your choice, the important thing to take into account when writing component tests is that you make them independent from the real services your component has to communicate with. This will reduce the probability of false-positives and will allow you to run your tests with confidence.
Creating Internal Resources/Interfaces
As previously mentioned, there are situations in which you want to verify certain internal behaviors as part of your component tests, but you can’t test them directly because that would break the encapsulation that component tests are meant to provide. The best option in this situation is to create internal resources or interfaces—endpoints in your web service that are not meant to be available to the general public. These internal resources can expose the details that you need to verify in your test, and you can use them to check whether the service is behaving as expected.
Perhaps the easiest way to expose this is with an example, which you can find in the Extended Java Shop—more precisely, in the Shopfront service (folder /shopfront). As we have mentioned before, the Shopfront service can talk to an external Adaptive Pricing service to try to override the price of our products to obtain a higher revenue. Let’s say that this Adaptive Pricing service is still rather experimental and not reliable, and it’s frequently down. To minimize the impact of this to our Shopfront service, we want to add a circuit breaker to the connection to the Adaptive Pricing service, for which we will use Netflix’s Hystrix library; details of this can be seen in the AdaptivePricingRepo class.
Now, as part of our component tests, we want to verify that when the Adaptive Pricing service is down, the circuit breaker trips and we stop making calls to it, providing a default value instead. We also want to test that after the Adaptive Pricing service is restored, the circuit breaker closes and we continue to make calls to the external service. We could test this by keeping a count of the number of requests we are making to the Shopfront service and comparing it to the number of requests that our Adaptive Pricing service mock is receiving, but this would be a rather cumbersome test. What we have decided to do instead is create a new internal endpoint, called /internal/circuit-breakers, and then use the InternalResource class to obtain information about all the circuit breakers within the Shopfront service and their status. This way, tests can easily query the status of the circuit breakers and verify that behavior is as expected. What’s more, if you ever change the way circuit breakers are implemented, the component tests will be unaffected.
Internal resources can be restricted to tests (for instance, via feature flags), or they can be packaged with the application and deployed to production. The latter can be useful, because a quick way to assess the internal status of your service can assist in the investigation of production issues.
Control Access to Internal Resources in Production
Internal resources provide useful information for investigations, but may contain sensitive details that shouldn’t be leaked to outsiders. If you do release your internal resources to production, make sure that access is restricted to authorized parties. You can do this by configuring your services so that a specific token is needed to access the resource, or by placing all your internal resources under a common path like /internal and then adding a traffic rule so requests to that path can be performed only from within the organization’s network.
In-Process Versus Out-Of-Process
The last concern to take into account when designing your component tests is perhaps one of the easiest to miss. The thing is, we have been talking about testing your entire service in isolation, but where does the service really end? Is it just the set of classes that you have written? Or does it also include whatever web framework that you have based your application on and that will be ultimately responsible for listening to requests and dispatching responses?
Depending on your answers to these questions, you will be implicitly choosing from two options: in-process testing or out-of-process testing. The names derive from the mechanics used to run the tests. With in-process testing, the service and the tests are running under the same OS process, and the communication between the two is largely done in-memory. However, with out-of-process testing, the service and the tests are running under different OS processes, and the communication between the two is performed over a communication protocol like TCP/IP (even though this will still be contained within the running machine). Let’s analyze the pros and cons of each approach.
Assume that your answer to the previous questions was that you consider your service to comprise only the code that your team has written, and that the underlying web framework has already been thoroughly tested by its creators and by other parties. In this case, you probably don’t want to include the web framework in your component test, because that will only slow it down unnecessarily. Most frameworks will include test utilities that allow you to bypass all the scaffolding and hook into the service at the point where your code starts. This will obviously need the tests and your service to run under the same process, because the machinery for over-the-wire communication might not even be available. You can find an example of this kind of test in the Product Catalogue service (folder /productcatalogue)—more precisely, in the ProductServiceApplicationCT class. The Product Catalogue service is a Dropwizard-based application, and the test uses DropwizardAppRule to instantiate the server automatically before the test starts, and then brings it down after the test is finished.
Similarly, assume now that your answers to the preceding questions were the opposite: you consider that the web framework is, like any other dependency, part of your service, and therefore needs to be tested when you treat your application as a black box. In this case, you want to start up your application independently from your tests to keep them entirely separate, and then use a normal HTTP client (or whatever communication technology that you are using) to exercise your service from the tests. An example of this can be found in the Stock Manager service (folder /stockmanager)—more precisely, in StockManagerApplicationCT. The Stock Manager service is a Spring Boot–based application. However, you won’t see any references to Spring Boot in these tests; compare this with ShopfrontApplicationCT in the Shopfront service (folder /shopfront), where we are using Spring Boot testing facilities. In the Stock Manager service, the component tests are contacting the application by using RestAssured, a library to execute actions over HTTP with a BDD-style syntax. The application itself is being started by Maven through the Spring Boot Maven plugin before tests are executed, and stopped also by this plugin after the tests are done; check the pom.xml file for details.
As usual, neither approach is intrinsically better than the other, and your choice will be based on the needs and values of your team. To assist in this decision, we have included a summary in Table 11-1 with the main pros and cons of each approach.
| In-process | Out-of-process | |
|---|---|---|
| Service execution | Startup and shutdown are automatically managed during test execution and performed transparently; tests can be run within an IDE without any manual steps. | Startup and shutdown of the application need to be managed independently from tests; the developer will have to start the service manually to be able to run component tests within an IDE. |
| Communication pattern | Depending on the framework, communication will be performed in-memory or via the chosen protocol (e.g., TCP/IP). | Communication needs to be done using whatever protocol the application will use in production; e.g., TCP/IP. |
| Scope | Framework may not be included in tests. | Framework will be included in tests. |
| Test coupling | Tests will depend on the framework used to develop the application; if the framework is changed, tests will have to be amended. | Tests are independent from the framework used to develop the application; if the framework is changed, tests remain unaffected. |
| Speed | Potentially faster, as parts of the stack are being bypassed. | Slower, because everything is being executed. |
| Running tests independently (e.g., manually and one by one from the IDE) | Slow, because the application will be started and stopped after each test. | Fast, because the application will remain active across test runs. |
| Bringing changes in | Automatic; because the application is autostarted at each test, any changes will be detected. | Manual; you’ll have to restart the application yourself if you have changed the code. |
Remember: Out-of-Process Testing Implies Manual Reload!
One of the most frustrating, baffling, and disheartening experiences comes when you’re trying to fix a failing test: you keep changing the code of your application and, when you run it again, the test is still failing. You try ever more esoteric and drastic measures, but still no, the test is broken. And then it hits you: you have changed the code, but you haven’t restarted the service! You can get so used to all the automatic actions by IDEs and tools that sometimes you forget that you need to press that pesky button. You’ve been warned!
Integration Testing
Integration testing is another of those terms that mean different things to different people. Some people consider that a system is “integrated” when all the components are fit together, and therefore understand that “integration testing” should involve all the existing components. That’s what we have called end-to-end testing in this book. Here, when we use the term integration testing, we are referring to the test of a particular integration point; for instance, when your service talks to a database, the hard drive, or another service. James Shore and Shane Warden tried to solve this dilemma in their book The Art of Agile Development (O’Reilly) by calling this focused integration testing, emphasising that that you’re focusing on a particular integration point. Although the name is certainly apt, we have chosen to avoid references to the word “integration” anywhere else in this chapter so as to make clear that, when we talk about integration testing, we mean individual points of integration and not the entire system.
At this point, it may seem difficult to ascertain what there could be about the connection between your service and other elements that hasn’t been tested already by either end-to-end, acceptance, or contract tests. However, end-to-end and acceptance tests don’t go into the details of the integration points; they just check that the pieces roughly fall in place. Contract tests verify that the logic of the interaction is correct, but they don’t test the interaction itself.
There are several things that you may need to consider when you test interactions in detail, and we will go through them in the next couple of subsections. The most important thing is this: in order to test the integration with an external component, you don’t need to test your entire application, only the bit that connects with the external component. This will not only give you greater control over the test, but will also result in smaller, faster tests.
Verifying External Interactions
Verifying in detail the interactions with an external component is one of the main reasons to do this kind of test. Moreover, because you’re not bringing up your entire application, but only the bit that contacts the external component, you can afford to run your test against a real external component (or at least something that looks very much like that). Let’s take the example of a database.
When you’re running your component tests, you’ll probably use an in-memory database to speed things up. When you run your acceptance tests or your end-to-end tests, you’ll use the real components, but your tests will cover only a handful of the possible operations against the database. You need to make sure that all the operations against the database are going to work, so you can get the specific class that encapsulates database access, connect it to a real database, and try out all the operations that you may ever need to execute in production. This will give you the confidence that the integration between your service and the database is correct, and will remove the deep tests at acceptance or end-to-end levels.
The mechanism to do this will depend on the technology that you are using and on the type of component that you are connecting to. The Feature Flags service includes an example of this in the FlagRepositoryIT class. In the Feature Flags service (folder /featureflags), all the communication with the database is encapsulated in the FlagRepository class, which provides a high-level interface for the persistance layer. By instantiating this class on its own and connecting it to a real database, we can verify all the operations. Bringing up a real database is also easier than it sounds: thanks to Docker, most database vendors now provide a container with a readily installed database. This, in combination with the Docker Maven plugin, allows you to create and start up a real database before running integration tests, and then dispose of it when you’re done; check the pom.xml file in Feature Flags service for details.
Testing Fault Tolerance
The other reason to run integration tests is to verify that your application is going to respond correctly to multiple error scenarios. This might be impossible to do at the end-to-end test level, because you don’t have control over the external components. You might be able to try this at the component- or acceptance-test level, because here you’re operating with test doubles that you can control. However, given the many moving parts present in these kinds of tests, you may have trouble assessing whether the system did what you expected.
If you, however, isolate the class in the code that is in contact with the external component, and you expose it to different kinds of failures, you can assert exactly what that class is going to do, and then reason from there about how the rest of the service will behave.
Testing fault tolerance is different from verifying external interactions: to test the external interactions, you want to use a real component (or something as real as possible), in order to legitimate the transaction being tested, while to test fault tolerance, you will want to use a fake component, so you can generate all the different error scenarios. The technologies needed for this have been mentioned already. Typical mocking frameworks will provide options to respond with errors; it’s only the approach that is different in this kind of test.
The Extended Java Shop includes an example of fault-tolerance testing in the Shopfront service. The Shopfront service verifies the integration with the Feature Flags service in FeatureFlagsRepoIT, and does this by mocking the Feature Flags service with WireMock and then forcing it to respond with multiple error conditions, among them empty responses, an HTTP status of 500 INTERNAL SERVER ERROR, and a scenario in which the service takes too long to reply. These tests will make the class in contact with Feature Flags, FeatureFlagsRepo, experience exceptions that represent the different error scenarios, which we can now catch and handle appropriately. As you can see in the sample application, from where the code in Example 11-1 has been extracted, in this case we have opted to log the situation and simply indicate to the rest of the application that there is no flag available.
Example 11-1. Handling several error conditions when retrieving a feature flag
public Optional<FlagDTO> getFlag(long flagId) {
    try {
        final String flagUrl = featureFlagsUri + "/flags/" + flagId;
        LOGGER.info("Fetching flag from {}", flagUrl);
        final FlagDTO flag = restTemplate.getForObject(flagUrl, FlagDTO.class);
        return Optional.ofNullable(flag);
            } catch (HttpClientErrorException | HttpServerErrorException |
                ResourceAccessException | HttpMessageNotReadableException e) {
        final String msg = "Failed to retrieve flag %s; falling back to no flag";
        LOGGER.info(format(msg, flagId), e);
        return Optional.empty();
    }
}
Unit Testing
Unit testing is rather ubiquitous these days, and you probably don’t need a primer on it. Countless resources out there explain unit testing and TDD and the main tools for it: frameworks like JUnit, TestNG, or Spock for text execution, and libraries like Mockito, JMock, or PowerMock for mocking dependencies. Also worth mentioning are libraries that help writing more expressive assertions, like Hamcrest or Fest-Assert. But none of this is news.
There is something, however, that we have only recently begun to understand. Over the years, a lot of debate has ensued about what is the “correct” way to write unit tests—more particularly, about how much a unit test should cover. Traditionally, a unit test should cover only the target class being tested, and any dependencies of the class should be abstracted away using test doubles of some sort. However, in some cases, pragmatism leads you to include some of the dependencies of the target class, effectively treating a set of classes as a single “unit.”
Instead of debating about which way is more correct, what the industry is now leaning toward is admitting that both approaches can be correct, depending on the case. In fact, Toby Clemson has gone to the point of giving a name to each of these approaches so we can discuss them in detail: these are sociable unit testing and solitary unit testing. As you will see, some cases obviously call for either approach, and in others the decision won’t be that clear.
Sociable Unit Testing
Sociable unit testing considers a group of two or more classes a society that performs a discernible function when brought together, but that doesn’t have a clear goal when considered separately. In these cases, you can consider the whole group a unit, and you will test them together when writing unit tests.
We can see an example of this in the Product Catalogue service (folder /productcatalogue)—more precisely, in PriceTest, which tests the Price class. As you can see in the code, a Price object accepts two parameters: a UnitPrice, indicating the price of a single unit, and a BulkPrice, indicating the price of the item when bought in bulk (together with the minimum number of items that need to be bought together for the purchase to be considered “bulk”). One of the rules that needs to be verified in PriceTest is that the price of an element bought in bulk must be lower than the price of the element bought individually.
If you were strict about your unit testing, when testing Price in PriceTest, you wouldn’t pass in real implementations of UnitPrice and BulkPrice. Instead, you would pass in test doubles for them. You would create these test doubles so that when Price invokes their methods to check the single and bulk prices (so as to verify the previous rule), the appropriate values are returned by the test doubles. However, you probably agree that this would be overkill here: Price is not entirely independent of UnitPrice and BulkPrice. It’s not like the latter offer some kind of interface to the former. We don’t need to keep the implementations of these classes separate. The concepts of UnitPrice or BulkPrice don’t have that much value beyond the scope of the concept of Price. We have created different classes for these just to avoid duplication of code and to manage tests more easily, but that’s not enough to fully decouple them.
That should convince you that sociable unit testing is the right approach for testing the Price class. If you still need further arguments, try to rewrite those tests by using test doubles instead of real objects, and then compare. You might think that PriceTest looks better with test doubles (and if so, that’s OK), but we honestly doubt it.
Solitary Unit Testing
Solitary unit testing is closer to the traditional idea of unit testing. A class is identified as a unit, and all of its dependencies need to be abstracted away when unit testing, among other things because using real objects for dependencies would make unit testing harder. Although any test doubles might be used for solitary testing, mocks are usually the best suited ones.
Perhaps one of the best examples within the Extended Java App can be found in the Shopfront service (folder /shopfront)—more particularly, in the tests for FeatureFlagsService. The objective of this class is, given a particular flag ID (which may or may not exist in the Feature Flags service), decide whether the user should be allowed to access the feature. The class therefore has a few responsibilities: obtain the flag, read its portion-in value, and decide whether this particular request will fall within the value. As can be seen in the code, this class accepts two parameters: a FeatureFlagsRepo object to communicate with the Feature Flags service, and a Random object to generate random numbers.
Passing in a real FeatureFlagsRepo object would make FeatureFlagsServiceTest unnecessarily complex. For instance, FeatureFlagsRepo could fail to deliver a flag for multiple reasons: it could be because the flag doesn’t exist, or simply because the Feature Flags service is currently unavailable and data couldn’t be retrieved. But, from the point of view of FeatureFlagsService, all this is irrelevant. The only thing that matters is whether a flag is provided, not the reason. This is already pointing us toward the usage of mocks.
However, the case becomes even more obvious if you consider passing in a real Random object. This would imply you don’t have any control over the execution of your tests, because you wouldn’t be able to tell which number is being provided to the FeatureFlagsService object. In this case, the use of mocks is not just convenient; it’s necessary.
Dealing with Flaky Tests
As the number of moving parts increases, the number of things that could go wrong also increases. This sometimes makes tests of larger scope flaky, failing for no apparent reason and then recovering without remediation. And the larger the scope, the higher the likelihood of flakiness. This is a more dangerous thing than it would seem, because it will slowly lead developers toward not taking failing tests very seriously; soon you will develop the habit of rerunning a failing test a couple of times before you start investigating it, delaying necessary action.
The truth is, most brittleness can be addressed with the right measures, although the “right measures” will be different depending on the technology and the problem at hand. A comprehensive compendium of these would require a book of its own, but we can discuss some generic approaches.
Most brittleness comes from some form of indeterminism that hasn’t been accounted for, some implicit assumption or expectation that the test execution didn’t meet. So the general approach will be to identify these assumptions and address them. Let’s look at some examples.
Data
Bad data is one of the most common causes of flaky tests. Data, especially in test/staging environments, tends to be quite volatile: people may delete, add, or modify underlying data without prior warning. Entire databases may be erased and reprovisioned. Live refreshes from production (hopefully, with the right anonymization) might be coming in at any point. If your tests rely on a particular piece of data being there, it is asking for trouble.
The best thing to do regarding data is to have your tests create it as part of the test setup. That way, you know you have exactly what you need. (Ideally, you’ll also delete the data after you’re done, but that is not strictly necessary.) If your test cannot create the data it needs for whatever reason, at the very least it should include a precheck to verify that necessary data is indeed there in the expected form, failing with a meaningful error message otherwise. The former is the best option, since all failures would be proper red flags, but the latter case can still be a time-saver: when you know that your data isn’t there, you can take the necessary measures to add it, but at least you don’t have to do all the prior investigation.
Resource That Is Not Available Yet
This issue can take many forms, from a UI test (for instance, based in Selenium) that is trying to assert on a particular section of the page that hasn’t loaded yet, to a service that is trying to contact a test database that is still in the process of being provisioned. The most common solution is to add delays in the assertion execution so as to try to wait for the relevant resource to be available. Others keep retrying the assertion for a period of time. The problem with this approach is that genuine failures will take very long to fail, because the configured delay will have to pass fully before considering the test a failure, which slows the tests down:
// Both test success and failure will always take 1 minuteThread.sleep(60*1000);/* assertion */// Test success will be as fast as possible,// test failures will always take 1 minuteawait().atMost(1,MINUTES).until(/* assertion */);
A better approach is detecting when your resource has become available, and only then performing the relevant assertions. For instance, in the case of a Selenium test, you can add a hidden element that is present in all the pages served by your website, and that becomes available only after the page has fully loaded. Your test can then wait on this element being available, and then you perform your assertion: this way, if your assertion finds that an expected element is not there, you know it’s a genuine error, and not just a premature assertion. Similarly, for checking that external components are up and running, you can use simple utilities like wait-for-it.
Nondeterministic Events
Sometimes unexpected events will affect the execution of your test, yielding a different result than the one you expected, and therefore causing your test to fail. Now, the important thing to realize here is that the fact that the obtained result is different from expected does not necessarily mean that it’s wrong: if an event has affected execution, maybe the test expectation is no longer valid. An example of this is an acceptance test that expects a particular response from a service, but whose result is affected by an unexpected communication failure between the tested service and a dependency. If the server has been configured to react to the communication failure, it will produce a correct response (given the circumstances), but different from the expected.
The general solution to this kind of problem is to detect that an anomaly has happened and adjust the test expectation accordingly. For instance, the service under test could indicate that its result is impacted by a communication failure, and the test assertion could be simply skipped. It is important to signal this to the test execution framework, though, and categorize the test as “skipped” or “ignored,” because categorizing it as either “success” or “failure” would be misleading. Knowing that a test hasn’t run, developers can then decide what to do in this situation, whether repeating the test or simply accepting the risk that this particular run had a slightly slower test coverage.
If Nothing Else Works
In some rarer scenarios, there will be nothing you can do to address the brittleness of a test, for a variety of reasons. Maybe you have a dependency from a system or component that is managed by a different team, or even a different organization. Maybe the system under test is inherently indeterministic, and you can’t adapt to unexpected events without reimplementing the business logic in the test. Whatever the reason, when a fix is not possible, it’s time to consider mitigation.
If a fix is possible, just not on your hand, and someone else is going to work on it, consider temporarily ignoring the tests. You can simply flag it as ignored and then remember to unignore it at some point in the future (a reminder in a team-shared calendar can work). Or if you want something more automated, you can configure it so it will run only from a particular date onward, effectively ignoring it for the time being and unignoring it automatically at some point in the future.
If a fix is not possible, neither by you nor by someone else, you can try to reduce the scope of the test. Maybe what you are trying to achieve at acceptance-test level can be done by a combination of component and integration tests, which might prove more reliable. Moreover, this might even have the advantage of being faster (and it’s the reason so many teams end up with builds that take up to one hour to run).
Finally, if and when you conclude that no possible fix exists, you must consider deleting the test. This might seem a drastic measure, but you need to remember that tests are there to give you valuable information as part of a tight feedback loop: if the information that they are giving you is misleading and wasteful, you need to reassess what the value of that test really is. Deleting the test might be, overall, better than having to deal with it.
Testing Outside-In Versus Testing Inside-Out
Now that you know all the levels of testing that you will need in your application, a different question pops up: where should you start? Should you begin by defining the overall end-to-end tests and then work your way in? Or should you begin with unit tests for the smallest elements and then build up from there? At the risk of sounding repetitive, the answer is, once again, that it depends.
Your technology, build pipeline, skillset, and even personal preference will determine whether you should favor an outside-in or an inside-out approach. We can only enumerate the characteristics of each case to help you make a decision.
“Outside-In Versus Inside-Out” Is a Different Question from “In-Process Versus Out-of-Process”
Admittedly, the title of this section is awfully similar to that of “In-Process Versus Out-Of-Process”, but they refer to very different things. In this section, we discuss the order in which tests at different levels are written. In an outside-in approach, you start by the outermost tests (acceptance tests, for instance) and make your way through by specifying newer tests at lower levels. In an inside-out approach, you start at the lower scale (unit tests) and progressively build up bigger and longer tests.
On the other hand, the question of in-process versus out-of-process refers to the mechanics used to design and run component tests. In-process will have the service and the tests running under the same OS process. In an out-of-process approach, service and tests run in different OS processes.
Fortunately, these decisions tend to be made once at the beginning of the project, and you won’t have to talk about them (falling prey to the risk of confusion) very often.
Outside-In
Testing outside-in forces you to think of the user experience up front. You will need to determine end-to-end and acceptance tests first; you will have to analyze the needs and limitations in the interactions with other systems; and you will check firsthand whether the environment allows you to do what you intend to do. Also, it allows you to define the feature in a more iterative way: as you make your way in, and you start defining more and more detailed tests, when you go through component, contract, integration, and unit tests, you and your team can decide how to handle edge cases as they approach. Developing outside-in ensures than you don’t build any more code than you strictly need, because everything you do is just the consequence of a higher-level need.
Not everything is rosy, though. To begin with, practitioners agree that building and testing software outside-in requires stronger development skills. When programmers are testing at a particular level, they need to identify the right moment to refactor and switch to a lower level; failing to do this could result in an unbalanced test suite that is too heavy on big, overarching tests. Also, there is the question of when end-to-end and acceptance tests need to go green. If you consider that these tests should be red until the feature is fully implemented, but you have to write these tests first thing, they are going to be failing for a while. If your build is configured to stop the pipeline upon failing tests, your pipeline will be blocked until your feature is fully implemented, which is the opposite of continuous delivery. If your failing end-to-end or acceptance tests don’t block the pipeline, you may be delivering bugs to production—not a great idea either. And, if you decide to write the tests at the beginning but hold off committing them until the end, your uncommitted code could grow stale, also going against the idea of continuous delivery.
Some teams overcome these issues by deciding that end-to-end and acceptance tests may go green before the feature is fully implemented. The idea is that, because these tests are meant to be rather superficial, they could be made to pass by means of a simplistic, incomplete implementation of the feature. The feature can then be fully fledged out as lower-level tests are written and implemented. This certainly addresses the aforementioned issues, but it also creates another one: people need to be aware of the fact that a green end-to-end test doesn’t imply that the feature is available to the public. The useful reports created by tools like SerenityBDD cannot be taken like gospel, and close communication between business and developers is needed to avoid misunderstandings.
Inside-Out
Inside-out testing is, in a way, easier to execute. You may not be able to visualize the big picture, or have an idea of how all the components are going to fit together, but you can grab what you do know and start from there. Maybe you feel pretty confident about a particular class needing extra responsibilities to implement this feature, so you can start there.
Achieving the right balance between types of tests is easier when you work inside-out. If you start with unit tests, you can keep on writing tests until you realize that you have exhausted all the possible scenarios. Once you realize you cannot test anymore at the unit-test level, you go up one level and continue from there. Once you get to the end-to-end or acceptance-test level, you’ll realize that there is little left to test, if anything, and you may focus on writing just enough tests so as to produce the right BDD reports.
One of the downsides of inside-out testing is that you might end up writing at the lower levels more functionalities and checks than you need, maybe because some of the edge cases that you considered at the lower level are just not possible when you put them in the context of the higher level. If you’re having troubling visualizing this, you can find a small example in the Extended Java Shop application—more precisely, in the Feature Flags service (folder /featureflags). We added the ability to update flags by using an inside-out approach, meaning we added an updateFlag(Flag) method in the FlagService class before we added the relevant PUT operation in FlagResource.
When we were writing FlagService and FlagServiceTest, we considered the scenario where we pass to the updateFag(Flag) method a Flag without a flag ID. We considered that an error condition, and created FlagWithoutIdException to signal it. Faithful to the idea of working in small increments, we implemented these changes, tested them, and committed them. When we then added a PUT method to FlagResource, we associated this to the path pattern /flags/{flagId}, and we realized that we would never have a case of updating a flag without a flag ID. If a client tries to update a flag without indicating a flag ID, the request would have the form PUT /flags/, but this would be interpreted by the framework as performing the wrong operation upon the /flags resource, which would be automatically rejected as 405 METHOD NOT ALLOWED. In the end, this was just an unnecessary precaution.
Different People Have Different Brains, and Different Brains Work Differently
It is not uncommon for a person to have a preference over outside-in or inside-out testing, and then change preferences to the other one at some point in their career. This is often perceived as “maturing” or “learning,” and people assume that the latter choice must be better than the former. The reality is much more complex. Different people may be more comfortable with different thought processes; some will have a skill for managing abstractions and thinking about the big picture, and some will need to focus on the details to establish a foundation. Don’t make assumptions about the skill level of a person just because they favor one approach or the other.
Putting It All Together Within the Pipeline
The right balance of tests at all the levels gives a comprehensive and reliable test coverage. Now it’s time to tie it all together in an automated build pipeline. The mechanism used to achieve this will depend on the technology used for your build (Maven, Gradle, Ant, etc.) and the technology used for build automation (Jenkins, TeamCity, GoCD, etc.). However, a few general recommendations can be made:
-
Ensure that each deliverable (i.e., each service or library) has its own job in the build software. This job should trigger whenever a code change is detected that affects the deliverable either directly or indirectly.
-
Tests that refer to a single deliverable (unit, contract, integration, and component tests) should all run within the job that is specific to that deliverable. What’s more, ideally they should run with a single command of the build technology of choice (e.g., Maven), which would take care of any necessary setup or teardown.
-
After a successful build, the specific deliverable should be packaged and made available in some form of repository for later consumption (e.g., DockerHub, Artifactory, etc.).
-
Tests that refer to a set of deliverables (like acceptance or end-to-end tests) should have their own job in the pipeline, and should be triggered after any given service is successfully rebuilt.
-
After a successful run of the acceptance and end-to-end tests, the deliverable whose change triggered the run should be deployed to production (optionally, going through one or more test environments first).
A full example of this can be found in the Extended Java Shop. The three prebuilt Jenkins servers contain a preconfigured pipeline that works exactly as described here. You can follow the instructions in the README.md file to run Jenkins locally and observe the behavior.
Identifying Your Test Types
Most build tools have a set of default suffixes that denote classes that contain tests, like *Test or *Spec. However, most build tools allow you to define your own, which can be helpful to identify at a glance at what level you have encountered a test failure. In the case of the Extended Java Shop, we have used *AT for acceptance tests, *CDC for contract tests, *CT for component tests, *IT for integration tests, and *Test for unit tests. You don’t need to use exactly the same suffixes, but it is highly encouraged that you identify your different test types somehow.
How Much Testing Is Enough?
If a testing strategy is to be compatible with continuous delivery, it must have an appropriate ratio of unit tests, acceptance tests, and end-to-end tests that balances the need for information discovery against the need for fast, deterministic feedback. If testing does not yield new information, defects will go undetected. If testing takes too long, delivery will be slow, and opportunity costs will be incurred.
Continuous delivery advocates continuous testing—a testing strategy in which a large number of automated unit and acceptance tests are complemented by a small number of automated end-to-end tests and focused exploratory testing. The continuous testing test ratio can be visualized as a test pyramid, illustrated in Figure 11-4.

Figure 11-4. The test pyramid indicates that faster, localized tests should be the foundation for slower, broader ones
Finding this balance isn’t easy, and nothing can tell you whether you have achieved it. There are, however, some heuristics that you can consider. Keep in mind that the real objective of your test suite is not to guarantee that your software is free of flaws; that is impossible. When you are constantly changing something, mistakes will happen and bugs will appear. The objective of the test suite is therefore to detect whenever these mistakes happen so as to limit the impact. When you start thinking about tests this way, you develop a sense to know whether you have too few or too many. If you can see parts of the code that, if broken, wouldn’t cause a test to fail, you have too few. If you can identify tests that cannot be made to fail in isolation (i.e., make a change that will make that test and only that test fail), some of those tests are probably redundant.
Close inspection and awareness of your codebase are vital to achieve a test balance, but some tools can help. For instance, test coverage tools like JCov or JaCoCo can flag sections of code that are not covered by any test. Be careful, though, when interpreting the results of these tools: the fact that a line has been covered by a test doesn’t necessarily mean that the right assertions about that line have been executed. Test coverage can warn you when something is not covered, but it cannot be used as a way to state that something is covered.
More advanced tools can flag when a particular section of code is not covered by a test, but they are slow and expensive to run. One of these tools is Jester. Jester will make a random change in your code and then run the tests, assuming something will fail; if it doesn’t, then it flags this change as a test gap. After completing a cycle, it will revert the previous change, make another one somewhere else, and repeat the tests. It will continue until it considers it has tried all the possible combinations. You can easily see how Jester can take literally hours to complete a run, but that’s the price that you pay for complete confidence.
In the end, the important thing is that you remain vigilant. The number of tests that you have will never be “just right.” It will always be either too much or too little. But if you keep an eye on your system, and maybe get the help of some of the tools mentioned here, you’ll be able to detect when you’re deviating from the sweet spot and correct.
Summary
Tests are essential to building trust in your software; they give you the confidence to deliver a product. However, in a world of continuous delivery, you cannot rely on manual tests, for the pace of change is too fast, so you need an appropriate strategy for automated testing:
Building a comprehensive test suite will ensure not just that the new features of the application work as expected, but also that you haven’t broken any of the existing ones.
Synthetic transactions are the ultimate test, for they replicate exactly what your users will do, but the fact that they run in the production environment adds a number of risks.
Broad end-to-end tests are slow to run and often brittle, but they are the only ones that bring all the components together, and therefore the ones closer to the real user experience.
Acceptance tests are also slow, but they verify that all the components that you own work well together, indicating whether you have done your job correctly.
Consumer-driven contracts verify that the expectations between two services are appropriately met by both sides, without the overhead of loading entire applications.
Component tests treat an entire service as a black box, ensuring that all the internal subsections fit in together.
Integration tests look at the seams between components, verifying all the possible variants of the interaction.
Unit tests are fast to run, so you can use them as your foundation to test as much of the logic of your software as possible.
Tying all the tests together into an automated build pipeline will ensure that, upon any code change, your software is thoroughly tested and, if appropriate, released to production.
After this chapter, you have everything that you need to verify that the work you have done when building your software is correct, which is half of the user experience. The other half will be dependent on the nonfunctional requirements, and will be the objective of the next chapter: regardless of how “correct” your application is, users won’t be pleased if the application is slow or unreliable.