One of the great advantages of Web pages over printed pages is their ability to respond to viewers’ actions. When used with restraint, this interactivity can entice your visitors to explore your site more thoroughly. Whether it’s building a menu that responds to cursor movements or simply creating a form for collecting information from visitors, Dreamweaver’s tools make it easy.
Dreamweaver CS4 includes a set of tools called Spry widgets. Combining JavaScript and CSS, most of these widgets fall well beyond the scope of this beginner book. But one, the Spry Menu Bar, helps you create fly-out menus even if you’re not a big-league code jockey.
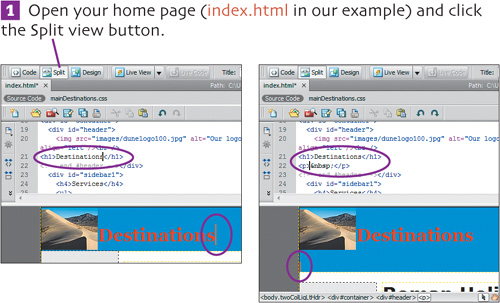
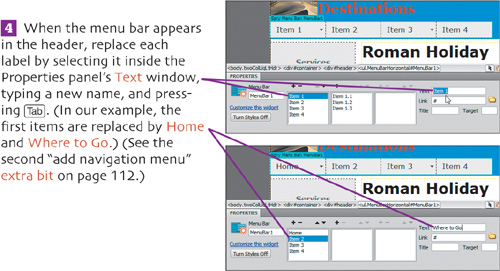
![]() Looking at the header in the Code window, click after the heading (Destinations in our example) and press
Looking at the header in the Code window, click after the heading (Destinations in our example) and press ![]() (Windows) or
(Windows) or ![]() (Mac) to give yourself some space to insert the navigation menu. Click the Design view button to switch out of the Split view.
(Mac) to give yourself some space to insert the navigation menu. Click the Design view button to switch out of the Split view.
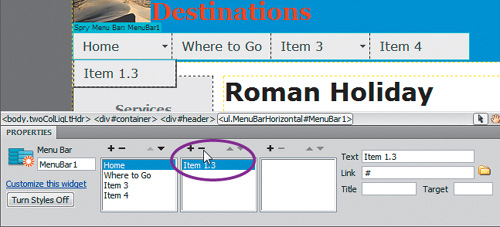
![]() Use the Properties panel’s plus and minus buttons to add or delete items at each level of the list. (In our example, all Home subitems are being removed, while subitems are being added to Where to Go.)
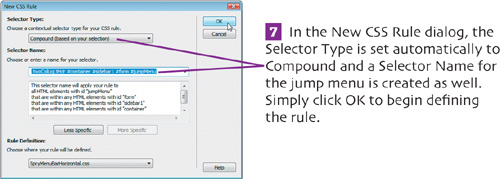
Use the Properties panel’s plus and minus buttons to add or delete items at each level of the list. (In our example, all Home subitems are being removed, while subitems are being added to Where to Go.)

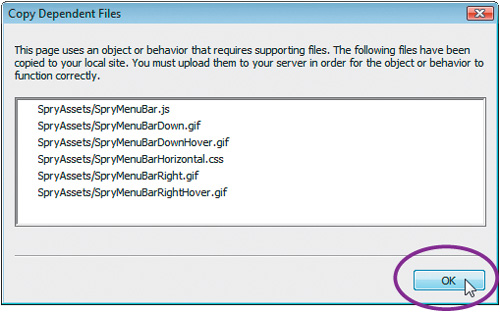
![]() Choose File > Save All and click OK when Dreamweaver asks to copy a series of script and image files to your site.
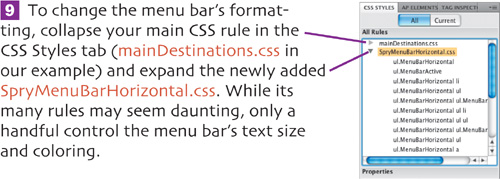
Choose File > Save All and click OK when Dreamweaver asks to copy a series of script and image files to your site.
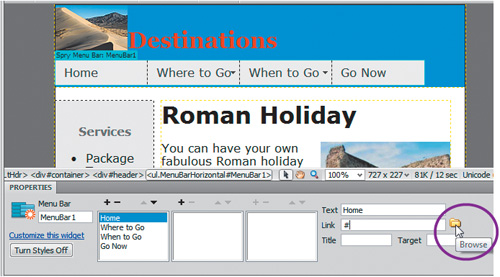
![]() To link a label to its target page, select it in the menu and use the Properties panel’s Link/Browse button to navigate to the page you want. Repeat to link all your navigation bar labels to their respective pages (or do this later after you create those pages).
To link a label to its target page, select it in the menu and use the Properties panel’s Link/Browse button to navigate to the page you want. Repeat to link all your navigation bar labels to their respective pages (or do this later after you create those pages).
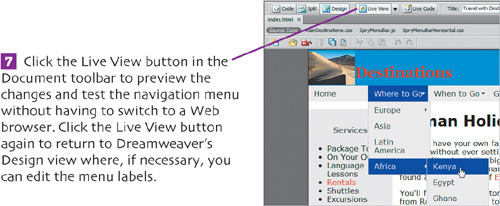
![]() Choose File > Save All. Click the Live View button in the Document toolbar to preview the changes without having to switch to your Web browser. Click the button again to return to Dreamweaver’s Design view.
Choose File > Save All. Click the Live View button in the Document toolbar to preview the changes without having to switch to your Web browser. Click the button again to return to Dreamweaver’s Design view.

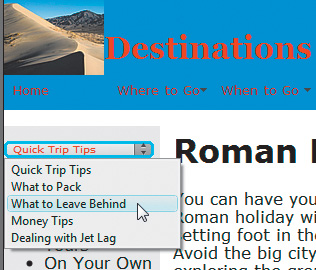
A jump menu is one of the most useful of the many behaviors you can add to a page because it gives your users lots of navigation information in a small space. By clicking the menu, users can choose among a variety of links to which they can jump directly.

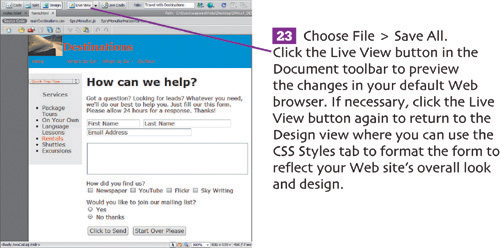
![]() Choose File > Save All. Click the Live View button in the Document toolbar to preview the changes in your default Web browser.
Choose File > Save All. Click the Live View button in the Document toolbar to preview the changes in your default Web browser.
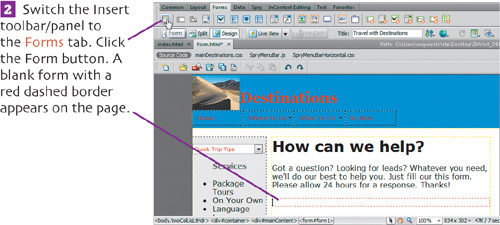
Forms enable you to collect information from your visitors using simple text areas and buttons. As mentioned on page 63, they also offer you a way to receive messages from visitors without posting an email address on the Web site that gets grabbed by Web-crawling spammers. Before starting, check with the administrator for your Internet Service Provider or Web site to find out which System CGI (Get or Post) to use in step 5.
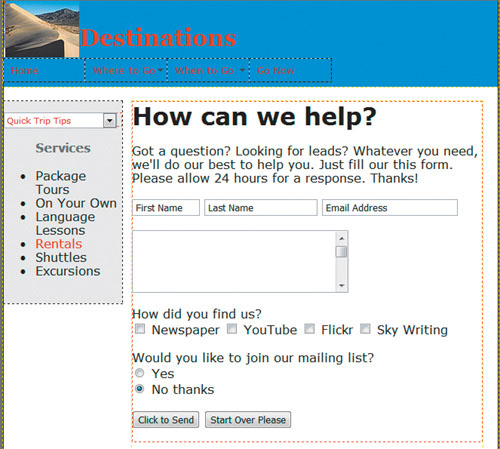
![]() Create a new page for your site by duplicating the one you’ve been using and renaming it (form.html in our example). Replace the main content area with heading and text explaining the form.
Create a new page for your site by duplicating the one you’ve been using and renaming it (form.html in our example). Replace the main content area with heading and text explaining the form.


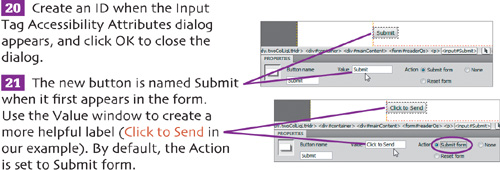
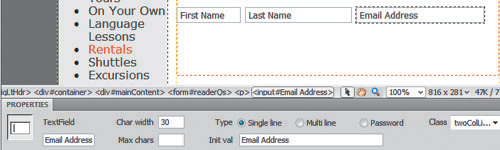
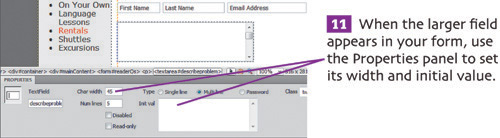
![]() Repeat steps 6–8 for each text field you want added to the form.
Repeat steps 6–8 for each text field you want added to the form.

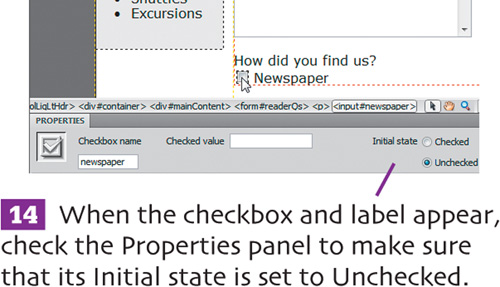
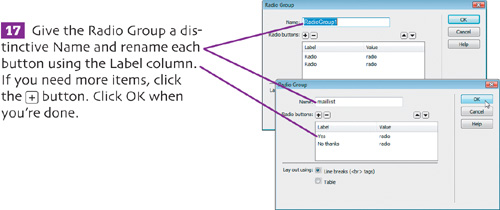
![]() Repeat steps 12–14 until you create all the choices for the question.
Repeat steps 12–14 until you create all the choices for the question.