
CHAPTER 18
MAKING CURRICULUM PHYSICAL: Delivering a Long-Range, Integrated, Design-Based Learning Curriculum
LONG-RANGE PLANNING BOARDS IN DEPTH
Long-Range Planning Boards matter. The time it takes to fabricate them is worth it, because this highly visual and tactile process invariably leads teachers to an invaluable “aha” recognition that developing a monthly integrated curriculum with Design-Based Learning is doable: “Look, I can teach spelling here,” “I can have students calculate measurements here,” or “I can connect a Design Challenge about Movement to a study of the human circulatory system here.”
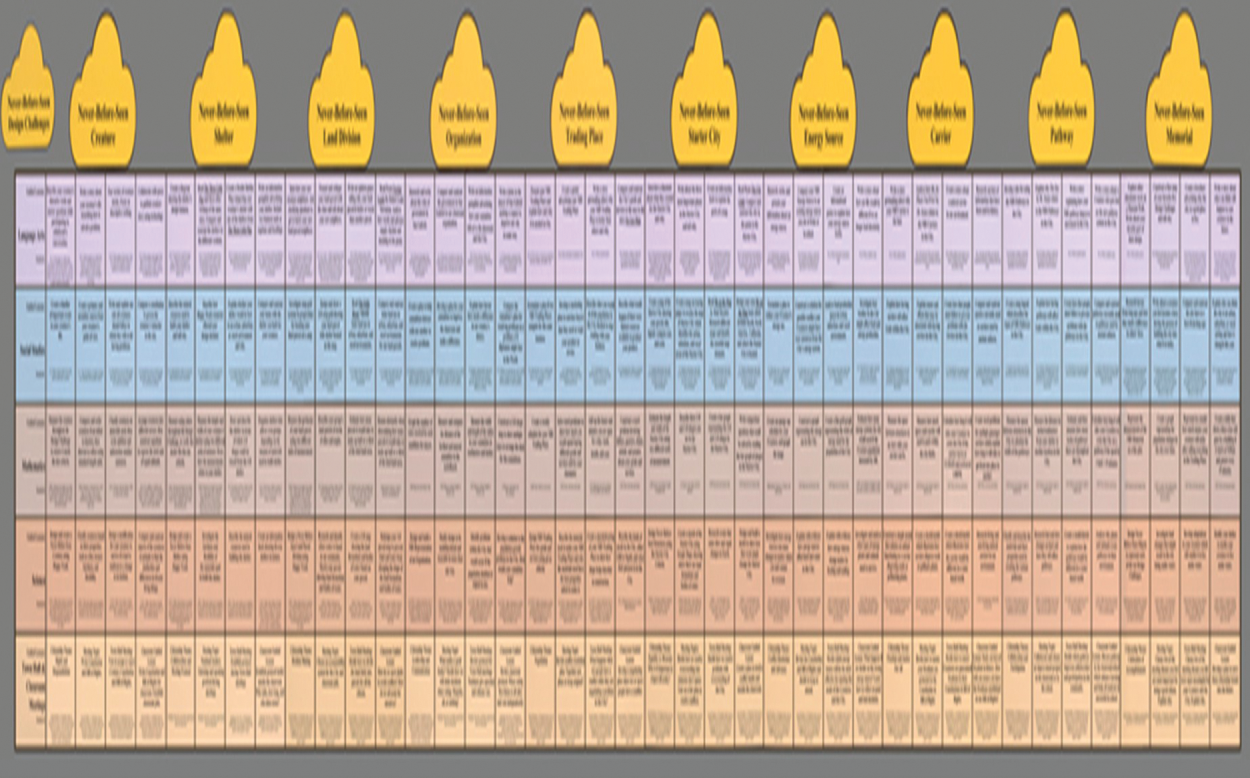
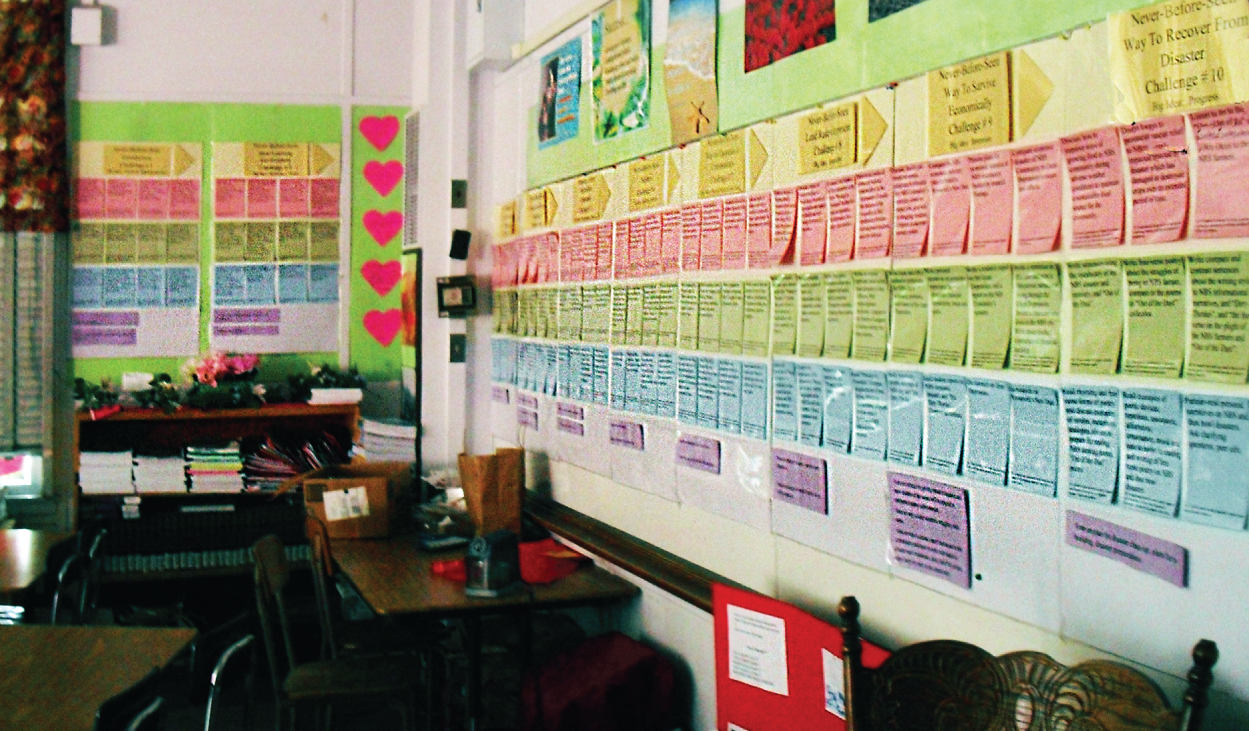
Long-Range Planning Boards are large (approximately 30 × 20 inches each) to dramatize that a sequence of Design Challenges with cross-subject Guided Lessons, represents an integrated curriculum. They are meant to be visible to everyone, a colorful and tactile roadmap of what has been accomplished and what is coming next, piquing the curiosity of students, from kindergartners to high schoolers. Students can see where their teacher's BIG TOPIC Design Challenges and related Guided Lessons (small topics) will take them as the semester or school year progresses, and where they are in the “story” that the teacher expands as students identify dilemmas in their Starter City and go on to solve through a sequence of Design Challenges with Guided Lessons. These portable Boards can be presented to parents and other teachers, and can be carried to district and school meetings, staff development trainings, and conferences. If teachers change grade levels or if the curriculum changes, the Boards are easily reconfigured.
(“When I was a teacher in the Los Angeles Unified School District,” said Jessica Heim, UCLA's Center X Director of the Design-Based Learning Project, “I lost my 1st-grade spot. I got placed in the 5th grade, which I never would have chosen. I was panicked over what to teach, but when I looked at the Long-Range Planning Boards that I had made for the 1st grade, I discovered that all I had to do was to change my Guided Lessons to meet the 5th-grade standards and reorder my Design Challenges. My principal was impressed and my students thrived.”)
When I teach teachers how to make Long-Range Planning Boards, I do it the way I teach everything else: backwards. I have them focus on the visual aspects of the Long-Range Planning Boards and spend what may seem to be an inordinate amount of time teaching about how to make an easily readable display of color-coded, standards-based subject matter. The discussion of color and the aesthetics of the Boards is my way of engaging teachers in making a visual display that shows all of the inter-curricular connections that each Design Challenge generates. (Many teachers I work with have not had to consider the readability of materials or the power of color as a tool to organize, display, and present information.)
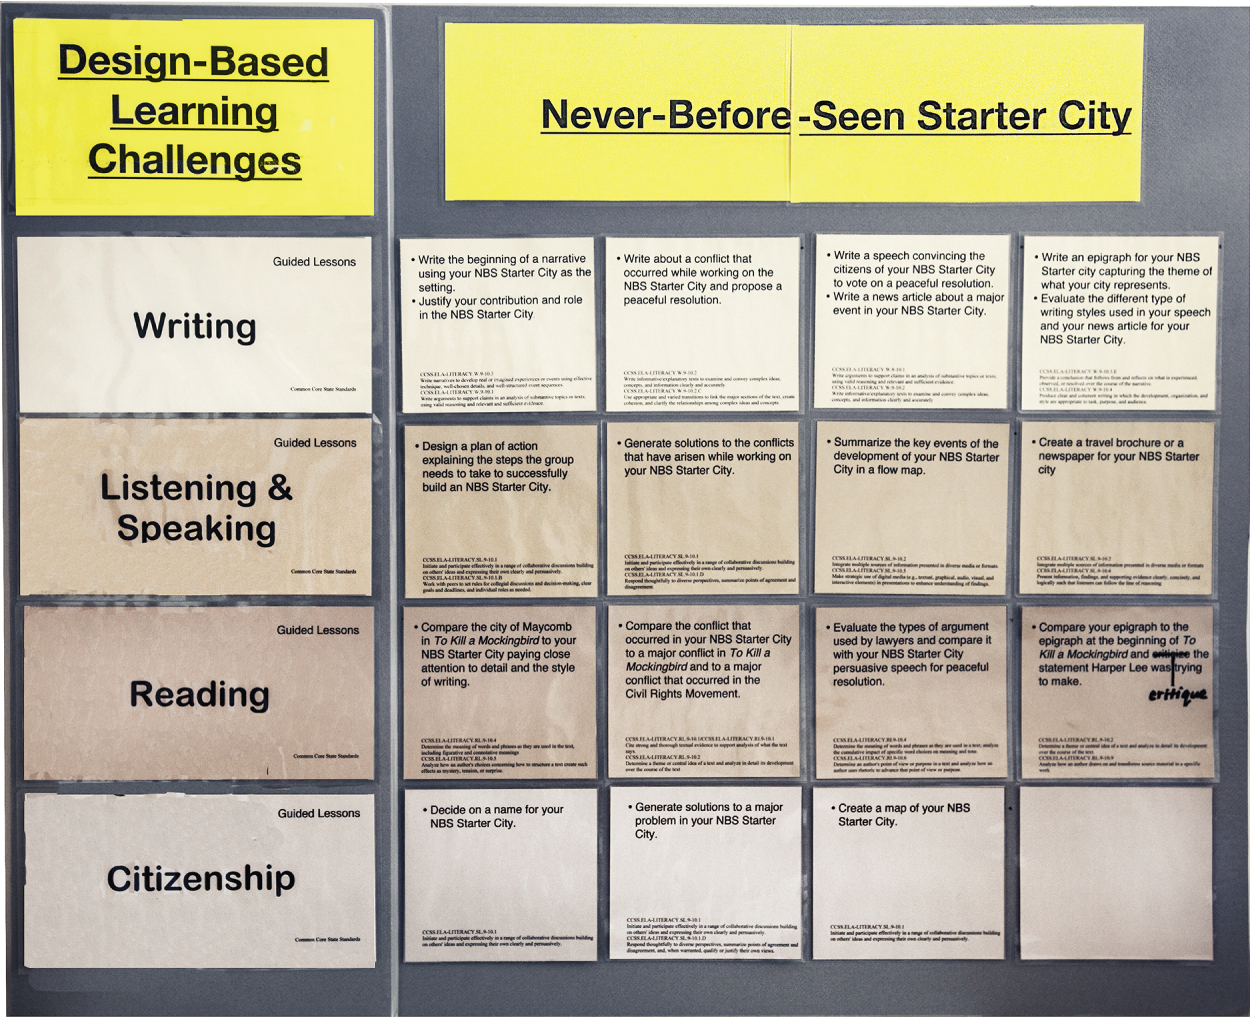
Before teachers begin making their first Board, they identify a BIG TOPIC that they are required to teach at their grade level or in their subject area. They select sheets of cardstock in the colors they have chosen to represent different aspects of their curriculum. They choose one color to represent all of their BIG TOPIC Design Challenges. They select different colors to represent each subject area and its required Guided Lessons and the specific standard to be taught. They choose another color to represent both governance and management of the student-built City and the classroom.
Elementary school teachers display all their subjects on their Boards; middle and high school teachers display a concentration of core curriculum related to the subject being taught.
I ask teachers to consider the size and clarity of the font they choose to print on their selected colors. Will their Long-Range Planning Boards be readable to students, parents, and others? They cut each colored sheet, printed with their Guided Lessons in separate subject areas, into 4- × 4-inch cards. They make a color-coded, multichanneled, detachable legend on a 30-inch strip of poster board that can be easily moved monthly from Board to Board and is the template for 5 to 10 Boards (depending on the length of each teacher's school term). They insert each of their cards into plastic pockets attached to the appropriate color-coded channel on their Boards.
Now, I get to the meat of my Backwards Thinking™ process: teachers refine and personalize their Long-Range Planning Boards. They add required Guided Lessons that best relate to each Design Challenge by using words that adhere to the higher-level thinking skills as described in Bloom's Taxonomy. For example, “compare” and “contrast” versus such lower-level words as “recall” or “name.” Teachers refer to the State Curriculum Framework for their grade level to find the mandated higher-level thinking words that describe their Guided Lessons. (Teachers often express relief that the State Curriculum Framework, the source of their district requirements, brings clarity to what they are expected to teach.) On a computer, they make a new grid of squares. In each square, they write out their additional Guided Lessons above the name, number, and short description of the corresponding standard written in a smaller font. For each month's Design Challenge, teachers print out their grid of Guided Lessons and standards on the cardstock that matches the color they've chosen for each subject area, according to their moveable legend.
Once refined and organized, Long-Range Planning Boards do not have to be remade. They can be shuffled and reconfigured as subject matter changes, and parts can be replaced when new grade levels are assigned.
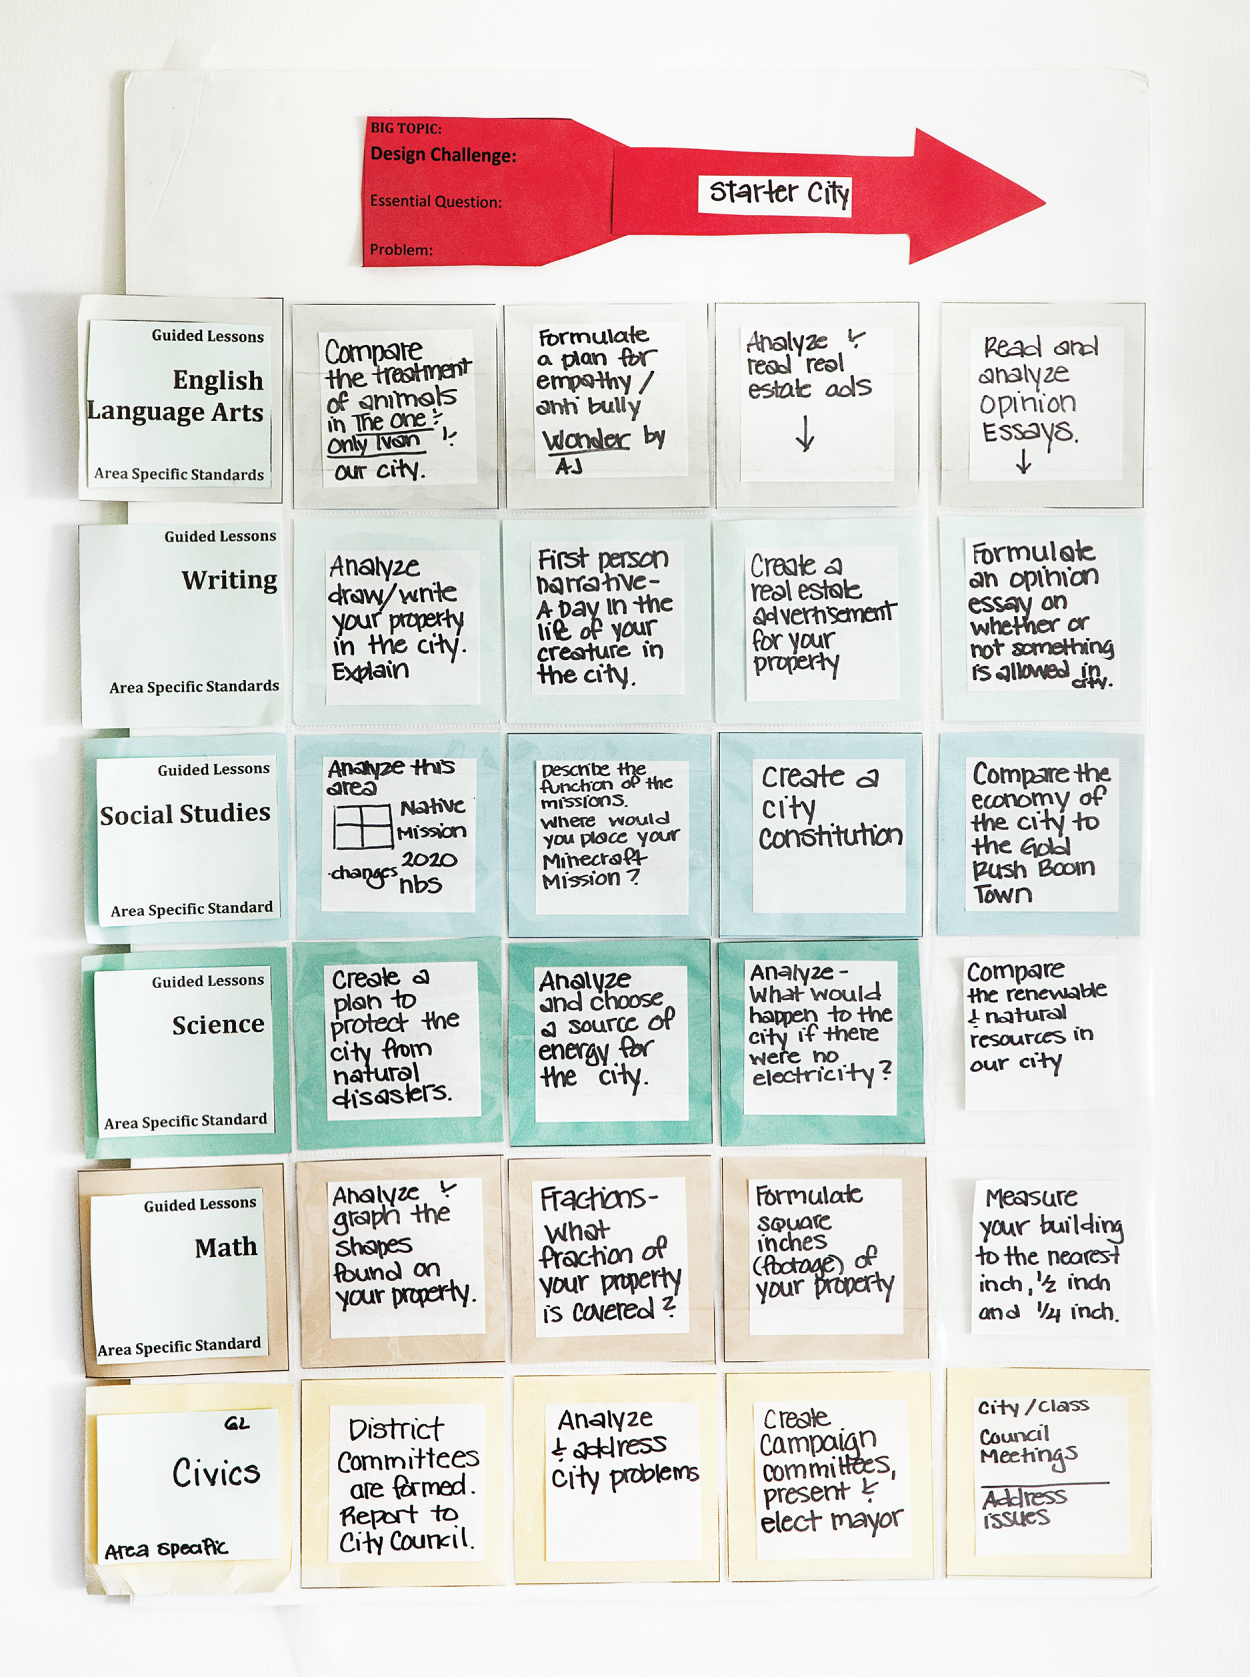
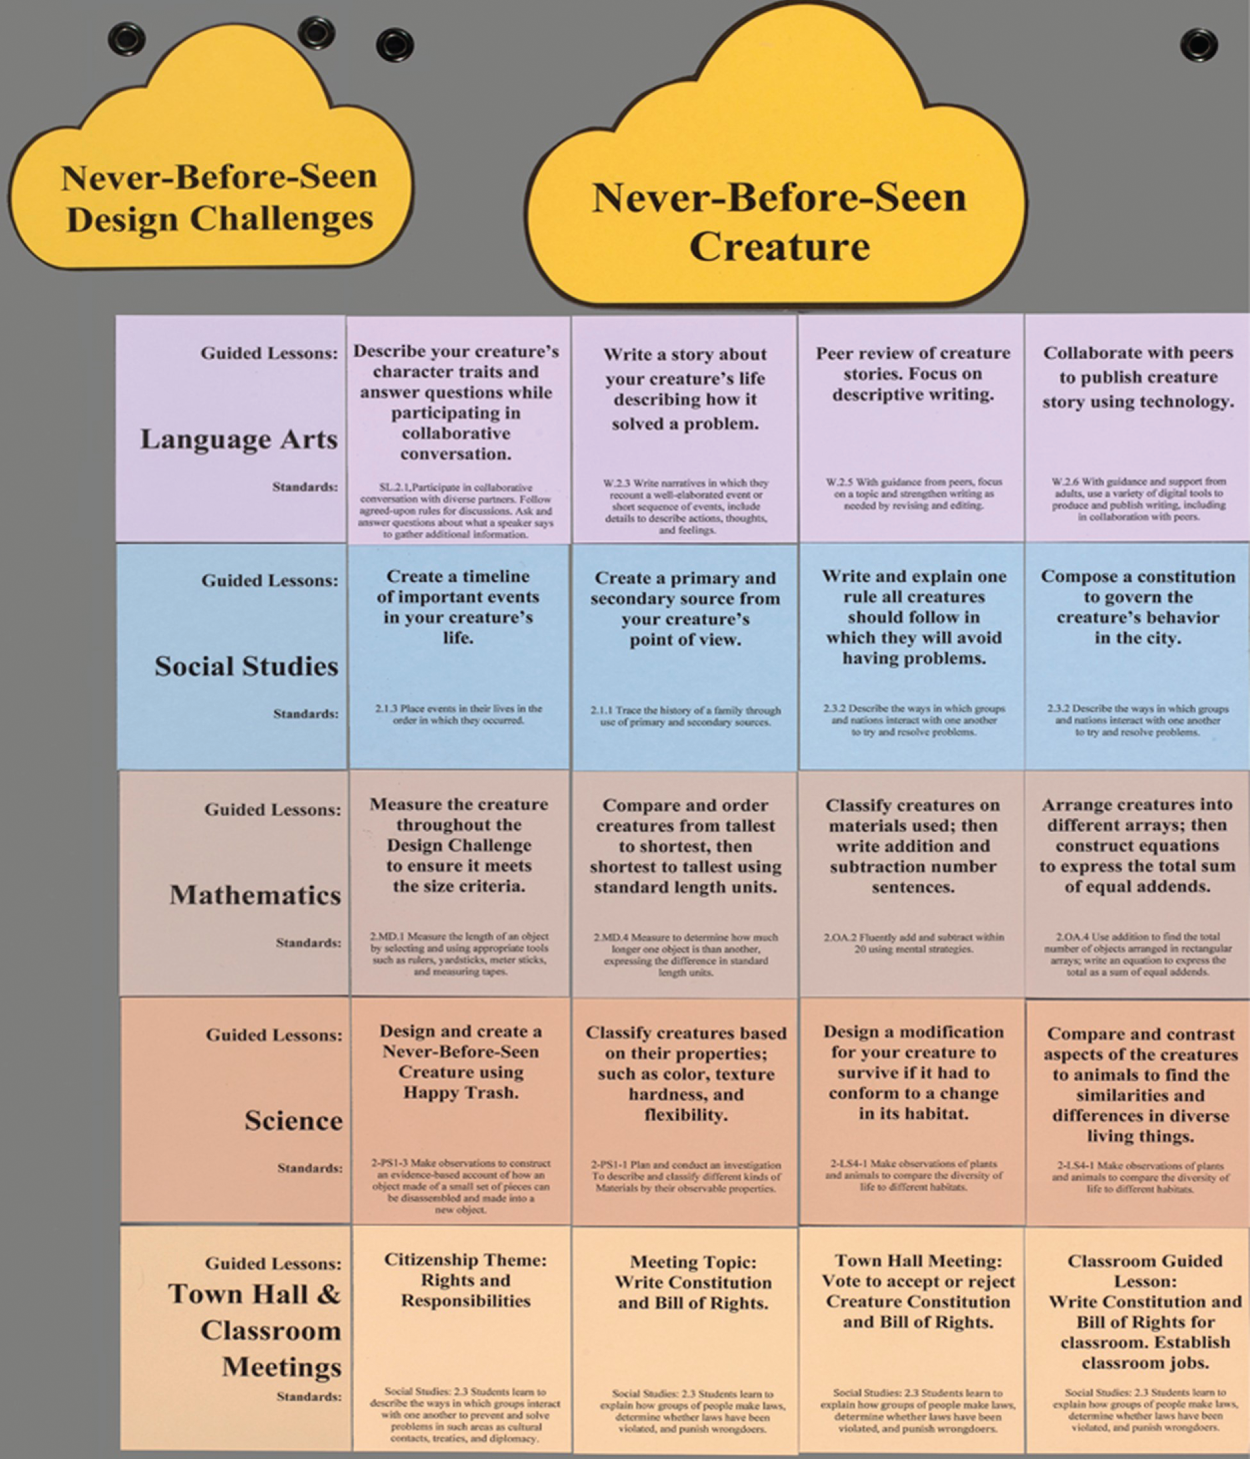
At the elementary level, each of the 10 sections of a teacher's Long-Range Planning Boards would have six channels of color representing high-level Guided Lessons and standards from six subject areas, printed on cardstock in a family of related, pale colors for readability. Each BIG TOPIC Design Challenge is named on brightly colored cardstock, so it is the first thing a viewer notices. Anyone looking at the Long-Range Planning Boards can see at a glance what Design Challenges and Guided Lessons students are working on.
By making Long-Range Planning Boards to display a sequential, integrated curriculum, teachers applying the Design-Based Learning methodology refine all aspects of their teaching practice, and become fluent in seeking out a wider array of curricular connections.
Examples of Long-Range Planning Boards
Through the prominent display of her Long-Range Planning Boards, Annette Dellemonico taught her middle school ESL students the vocabulary of her planning for the school year and had them check off what they completed as a review of the relationship between the Design Challenges and Guided Lessons.
THE EVOLUTION OF THE PLANNING PROCESS
Early on, teachers studying my methodology were having trouble developing their integrated, yearlong curriculum. The usual paper-pencil-computer process was confusing them and took too long. I was preaching the importance of the spatial domain in having students make sense of information, but I wasn't giving teachers that experience. After all, the spatial domain, where my methodology lives, is the most powerful way to teach and learn.
I struggled to find a tactile, time-efficient way to teach the making of Long-Range Planning Boards as a three-dimensional alternative to two-dimensional long-range planning. I remembered using a wooden orange crate as a container for developing a sequential, integrated curriculum during the last course I took at UCLA before achieving my degree and teaching credential. Unofficially called “The Seeds Box,” this course was developed by Corinne Seeds, a John Dewey disciple, for whom the Seeds University Elementary School at UCLA was named, and it was taught by her disciple, Charlotte Crabtree. The requirement for the final exam, based on Dewey's philosophical pedagogy of learning by doing, was to develop a comprehensive course of study around such K–6 units as Community, Early California, the Pilgrims, the Westward Movement, the United Nations, or Japan. The point was to learn how major topics in the social sciences were the nuclei for hands-on activities and lessons to connect subject matter with basic skills across the curriculum.
The orange crates housed our step-by-step, yearlong, cross-curricular teaching sequences. Each step in a sequence specified the actual Reading, Math, Science, Language Arts, Music, and Art lessons related to a topic and described both the physical artifacts that students would build and their subsequent research and textbook studies. Adhering to the details required to make a “Seeds Box” taught me to study state and district requirements and to use textbooks and other resources to amplify subject matter. The end result was a course of study that made sense to me and readied me for teaching.
With the “Seeds Box” in mind, I devised an activity called “The Red Cups,” using plastic, flat-bottomed red cups as containers and a three-dimensional representation of the red triangle on the Curriculum Integration Chart. Having teachers fill their Red Cups with written Guided Lessons related to each Design Challenge, I thought, would clarify their thinking about how to integrate their Design-Based Learning curriculum. I eventually replaced the Red Cups with 3D Red Triangles because the flat-bottomed Red Cups gave teachers the wrong visual cue.
The 3D Red Triangles speed up learning for teachers like crazy. The 3D Red Triangles, the Curriculum Integration Chart, and the Long-Range Planning Boards (see Chapter 4), facilitate the development of a comprehensive, sequential, integrated curriculum. Teachers become expertly familiar with the mandatory state standards, and as part of their long-range planning process, they identify ways to teach higher-level thinking skills as well as the speaking and writing skills required across subjects and grade levels.
ACTIVATING A YEARLONG, STORY-DRIVEN CURRICULUM
The following examples describe the application of long-range plans developed and activated by graduates of the Design-Based Learning master's degree program, which began in 1995 at Cal Poly Pomona, providing a sequential context for up to 10 Design Challenges, each followed by a series of related daily Guided Lessons.
The Newlandia Story (High School, Special Needs)
Don Huey was a seasoned teacher who taught U.S. History, World History, Government, and Life Science to underserved students with special needs at Ganesha High School in the Pomona Unified School District when he received the first Design-Based Learning master's degree. During his course work, Don complained bitterly about the requirement to have his students build a tabletop City. I told him that he could do anything he wanted to do as long as it was three-dimensional, and was based on a real location as the setting for a sequential story that evolved as students identified and solved problems. I didn't have a clue how to apply these constraints to all of the subjects Don taught, but I knew that building a City in the classroom worked.
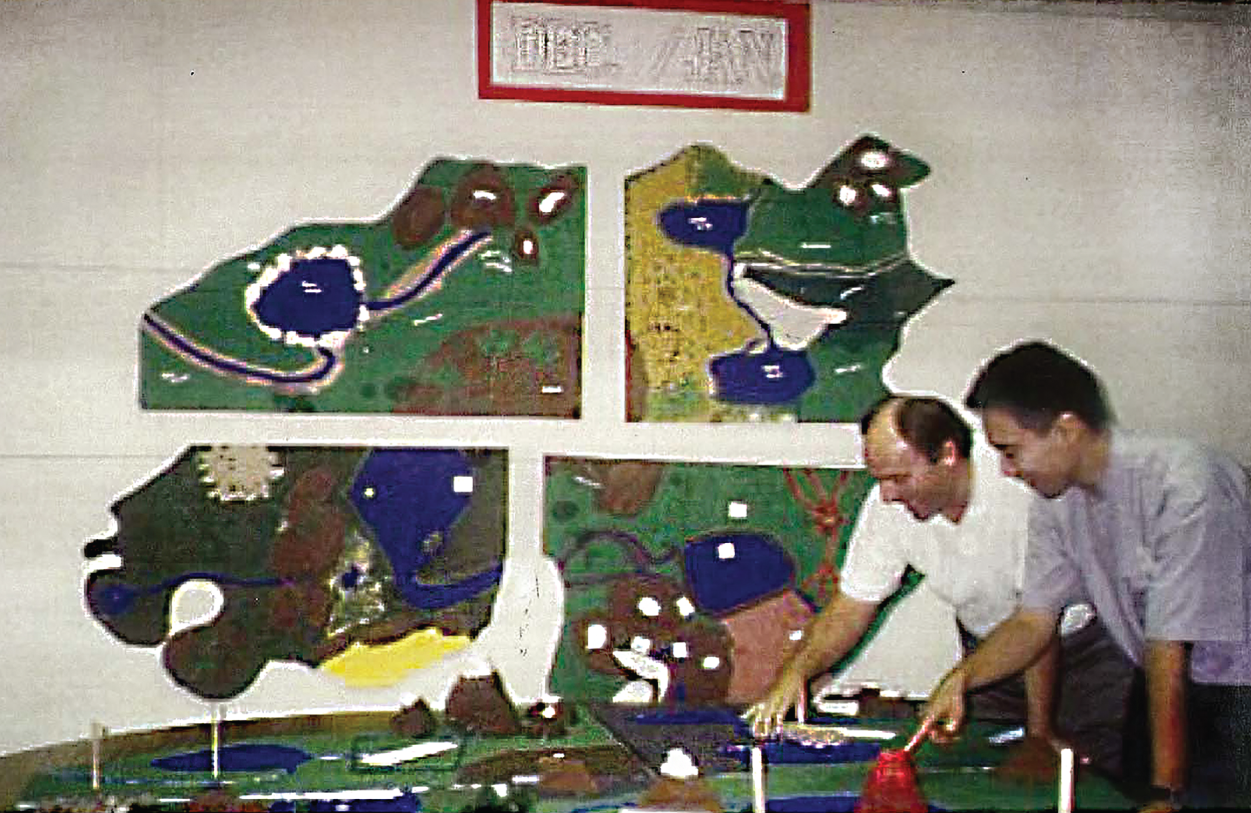
Don developed his story sequence around what he called “Newlandia,” which had four Colonies to simulate the development of the United States. He invented an island in a real-world location in the Pacific Ocean to impose geographic constraints and made a 3D landscape representing that location. Don even figured out where to put the model in his crowded classroom, by raising it on pulleys to the ceiling when it was not in use.
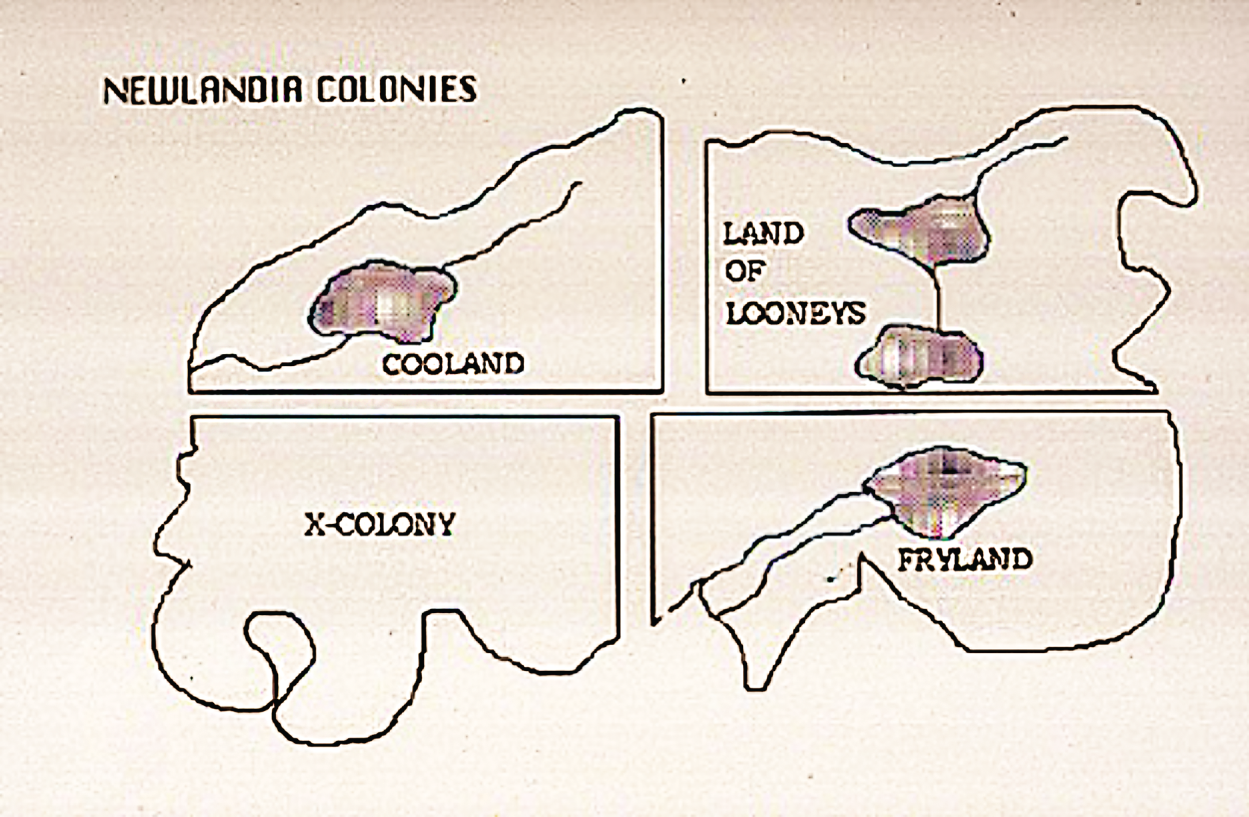
Don's high school students, who had had little to no creative hands-on activity since early grade school, couldn't wait to “play” in Newlandia. His World History students role-played a scenario that they learned afterward in Guided Lessons that were based on events that occurred during World War I. Don specified varied biomes for his Science class. He put his Government class in charge of developing and communicating the rules and regulations governing Newlandia that were adhered to by all of his classes.
One mildly autistic student was so motivated by his experience in building creative solutions to Design Challenges that he entered a contest sponsored by the Toyota Corporation to design a futuristic car. The student insisted that he could do this because a carrier that he had designed for the movement system in Newlandia had been approved by all four classes. He submitted photos of his carrier along with his completion of all the paperwork required for the contest. With Don's guidance, the student met the deadline and although he didn't win, he was thrilled to receive a letter from Toyota praising his efforts.
In that first Design-Based Learning master's degree program, Don's cohort group was very small. Although he joined the others in asking lots of questions, he did not communicate his frustrations or concerns easily in class. At the end of each of our four-hour weekly meetings, I was always unnerved when Don would slam the classroom door as he left. I met with him, suggesting that because he seemed so upset, perhaps this was not the program for him. “No!” he responded. “Every week when I leave class, I'm so mad that I never learned this before, and that all the kids I taught during my 20 years in the classroom never benefited from this kind of teaching.”
The Spanishtopia Story (Middle School, Spanish)
The story of Spanishtopia was developed by Martha Jimenez-Corsi over two years, teaching three different groups of students at three different locations: Wilson Middle School, Eliot Middle School, and Washington Middle School in the Pasadena Unified School District. Through a sequence of Design Challenges for their tabletop City called Spanishtopia, students learned and used Spanish vocabulary, verb conjugation, and sentence structure to identify and describe the artifacts they built and revised and to govern their City.
When Martha's students identified that the creations they built for their Starter City—their first version of Spanishtopia—were indistinguishable from one another, they decided to rebuild Spanishtopia in an organized manner. They designed a Never-Before-Seen Way to Know Your Surroundings. In Guided Lessons, they learned the value of interpreting city signs, especially when visiting foreign countries. Learning the names of common city signs in Spanish, they analyzed ways that information is displayed in a city.
Martha's sequence of Design Challenges continued with students creating signage for Spanishtopia. They built Never-Before-Seen Inhabitants (Avatars) for their City and learned the Spanish names of body parts, titles of respect, and vocabulary to describe physical and personality traits. They practiced speaking Spanish by introducing their Inhabitants to others. When Martha suggested that their Inhabitants were too much alike, the students designed Never-Before-Seen Personal Adornment and learned the Spanish vocabulary related to clothing, accessories, and how weather conditions affect clothing choices. Through class discussion, students analyzed how clothing and personal adornment are part of self-identity, cultural values, and geographic location.
The students met their Inhabitants' everyday needs by designing Never-Before-Seen Places to Exchange Goods and learning the names of common businesses and merchandise in Spanish. To enable their Inhabitants to get around in Spanishtopia, they designed a Never-Before-Seen Way to Move and had Guided Lessons on how to request transportation services and schedules in Spanish. They filled empty spaces in their small City with Never-Before-Seen Ways to Entertain, learning to use basic vocabulary related to leisure activities, and comparing how those activities were the same or different in other cultures.
At the end of Martha's comprehensive sequence of Design Challenges, a community had been established. Students designed a Never-Before-Seen Course Keepsake as a memory holder to review and evaluate what they had learned.
“Spanishtopia was a revelation,” Martha said. “It not only improved my teaching practices, but it so thoroughly captured the interest of my students, that it was clear that Spanish class became truly relevant to them.”
The Atomic City Story (High School Chemistry)
Temy Taylor taught Chemistry at Ganesha High School. Her students built a tabletop City to learn about molecules and atoms. Temy activated her Atomic City story by having students build and revise their City as a molecular world.
All it took to get students started was to have them draw a single dot on a piece of paper to represent an atom. The students observed that no two dots looked alike. Temy had them close their eyes and imagine being the same size as their Dots. They dressed up as Dots (in sandwich boards made of butcher paper) to make the characteristics of their Dots visible to everyone. They discussed how their Dots looked and felt and what it might be like to go inside them. The students then built paper replicas of their Dots, making them small enough to move around in Atomic City. Over the months, students revised their City, responding to a progression of more complex Design Challenges followed by related Guided Lessons about the Periodic Table, bonding, compounds, nuclear chemistry, energy, matter, intra-molecular forces, art, and history.
For one Design Challenge, Temy had her students group their Dots into families in Atomic City. Preparing students for Guided Lessons on how atoms bond, Temy's Criteria List included the requirement that the Dots had to share at least one similarity. (In chemistry, atoms with similar characteristics are called a family or group and are represented by each column of the Periodic Table.) Once the students' families of Dots congregated in Atomic City, like many atoms bonding together, they became bigger compounds called macromolecules.
The Atomic City story continued as students' Dots came under attack when Temy pretended to be an unknown force randomly redistributing the Dots around the City. As the students designed ways to scatter their Dots to escape the attack, they learned about nuclear fusion and energy of reactions. After the attack, the new groups of Dots rebuilt Atomic City in their new locations. Temy used the new groupings to teach Guided Lessons about different types of compounds, and based on how the Dots arranged themselves in their rebuilt City, students learned about the forces that make up solids and liquids.
Through other Design Challenges with Guided Lessons related to the Dots in Atomic City, students learned about chemical equations, balancing equations, chemical equilibrium, and how chemistry is used for art in making pigments, dyes, and acid-base reactions. As the year ended, the students designed a Never-Before-Seen Way to Celebrate the Atomic City story and their achievements.
The Anomop City Story (High School, Language Arts)
Janet Perez had been in the business world for years before becoming a teacher. As a new high school English teacher in a difficult, underserved setting in the Pomona Unified School District, she came into the Design-Based Learning master's program to hone her skills. Even with her limited classroom experience, Janet was convinced that it was not enough for students to read a book about the Holocaust unless they could understand the value that society places on human life. She wanted them to not only become better readers, but to learn to be more empathic humans.
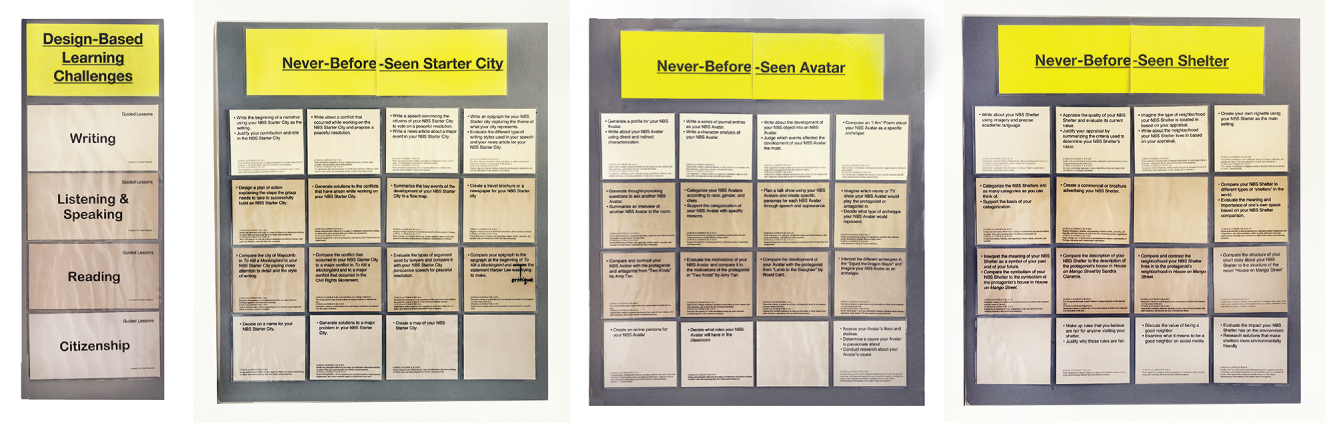
Janet had her students build a tabletop City and structured a sequential curriculum—her Anomop (Pomona spelled backwards) City Story—around a logical sequence of Design Challenges as they developed the City over the course of the school year. Janet's sequence of Design Challenges began with a Never-Before-Seen Place to Learn (to get to know their classroom), Never-Before-Seen-Avatars to live in their City, and Never-Before-Seen Shelters for students' Avatars. Her students' ability to perform on standardized tests greatly improved, Janet observed, because they developed higher-level thinking skills. The hands-on Design Challenges targeted all students, including those with diverse learning styles. Janet described the willingness of her English Language Learners (ELLs) to practice speaking skills, resulting in their advanced reading and vocabulary development. According to Janet, over the course of the school year, her students became more motivated to participate in Design Challenges and grasped that learning can be derived from failure as well as success.
By placing herself outside of her comfort zone and exploring new ways to innovate in her classroom, Janet matured as an educator and was energized by her students' academic and creative growth.
The Special Kids City Story (Elementary School, Special Needs)
The yearlong Special Kids City Story was developed by Deborah Kostich, a teacher for students with moderate to severe disabilities in an elementary school in the Pasadena Unified School District. Her goal was to promote students' self-expression and socialization, develop their communication skills, expand their vocabulary, exercise their fine motor skills, and have them learn to apply subject matter information to the building of a tabletop City in the classroom.
Deborah engaged her students in 10 simple hands-on Design Challenges that told a rudimentary story about a City, the Special Kids who lived there, how they got around, and where they went. The Design Challenges were derived from all required subjects to provide an integrated, standards-based curriculum. Deborah's Special Kids Story encompassed her goals for each of her students and enabled her to assess their progress, check items completed on a daily basis, and modify Guided Lessons according to each student's weaknesses and needs.
Deborah's Long-Range Planning Boards created a flow for her entire Special Kids curriculum and gave her a visual tool that she showed to her students, their parents, and her administrators so that everyone knew what she was teaching—and she did, too.
Deborah's students made progress in meeting the Individualized Education Program (IEP) goals and objectives. They constructed their versions of Never-Before-Seen, three-dimensional artifacts for each Design Challenge as Deborah taught them to cut, glue, stack, and connect parts and related everything they did to subject matter. Her students' fine motor and exploration skills improved and as they described the artifacts they created, her students demonstrated that they could learn to think critically.
In her master's project, Deborah said that her way of teaching changed dramatically. Before applying the Design-Based Learning methodology, she had emphasized single objectives and integrated a minimal amount of physical projects in her planning. She had focused her lesson plans on teaching the objectives and observed that she had underestimated the importance of allowing time for her students to do creative, hands-on activities.
The Math City Story (Middle School Math)
Sharon Soto, a 6th-grade Math teacher in the Walnut Valley Unified School District (where the District built a middle school building dedicated to Design-Based Learning), said she had been a very traditional teacher and that, at first, Design-Based Learning was a stretch for her. The purpose of Sharon's integrated, standards-based, Math City curriculum was to promote higher-level thinking, creative problem solving, reasoning, and proficiency in Math, and to teach students to use and reuse what they learned in a variety of computational settings. To achieve her goals, Sharon taught her students to work collaboratively as they built a tabletop Math City of the Future in the classroom.
Sharon applied the Design-Based Learning methodology through a progression of Design Challenges in three of her courses: Math 6 (regular Math students, including limited English speakers, special education students, and gifted students), Basic Math (students, including some with special needs and non-English speakers, identified as struggling in Math by their 5th-grade teachers), and Advanced Math (students identified as advanced in Math by their 5th-grade teachers, including special education and gifted students). At first, Sharon was concerned about taking time away from teaching Math by having her students build a City. She felt that dealing with the logistics—acquiring building materials, dispersing the materials during the building process, and finding space to store or display the artifacts made for Design Challenges—would eat up too much of her preparation time for Math lessons.
Sharon noted that what kept her going was that even students who learned at a different pace from her Advanced Math students, looked forward to building and doing group work as they followed the Math City Story she gave them for context. Sharon taught these students to analyze their progress in learning mathematical concepts by using the Criteria List. They did not excel in the pencil and paper work or doing computations, but by referring to the Criteria List, they identified and solved mathematical problems during the building process that even some of her “good Math test takers” could not solve. Sharon found that when students were successful in one area, they put much more effort into their weaker areas.
Sharon observed that by devoting 15 to 45 minutes of her 50-minute class once a week to Design Challenges, she was able to engage her students in Guided Lessons and easily taught them about measurement, area, and geometry. Energized by her students' new enthusiasm for Math, Sharon comfortably justified the time spent building Math City, and developed an array of Guided Lessons connected to other related Math standards.
The Microdena Story (International Baccalaureate School, 3rd Grade)
After Leakana Nhem received her master's degree in Design-Based Learning, she deepened her focus on the methodology in an Education Leadership Doctoral program at Cal Poly Pomona.
Leakana's Microdena Story for her 3rd-grade students at Willard International Baccalaureate and Technology Magnet Elementary School in the Pasadena Unified School District took the form of a three-dimensional, student-built, small Community, reflecting the school's goal to promote citizenship and responsibility.
She developed her Microdena curriculum by identifying problems in the Community they built and linking one problem to another in a natural way. She taught her students to make connections between what happened in the Microdena Story and what happened in their larger community and in the world.
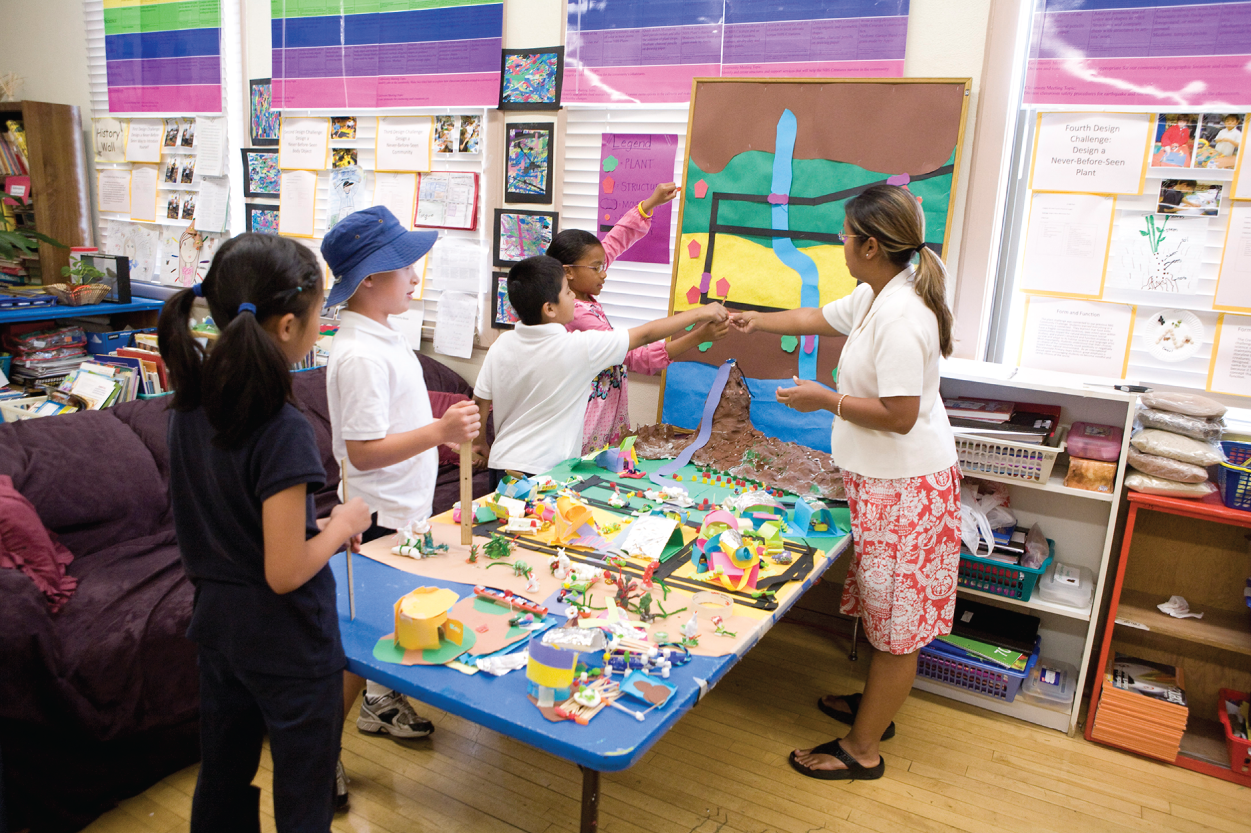
Prior to applying the Design-Based Learning methodology, Leakana said that she struggled to cope with disjointed curricula, with unrealistic pacing guides, teacher manuals, and student workbooks. Her Microdena Story was a yearlong plan for distributing learning among several subject areas. Her sequence of Never-Before-Seen Plant, Creature, and Structure Design Challenges emphasized how every natural and artificial form has a corresponding function. She connected Science, Math, Language Arts, Social Studies, and Art with each of her Design Challenges. Leakana's Long-Range Planning Boards incorporated subject areas that she said due to time constraints she had previously often left out of the school day.
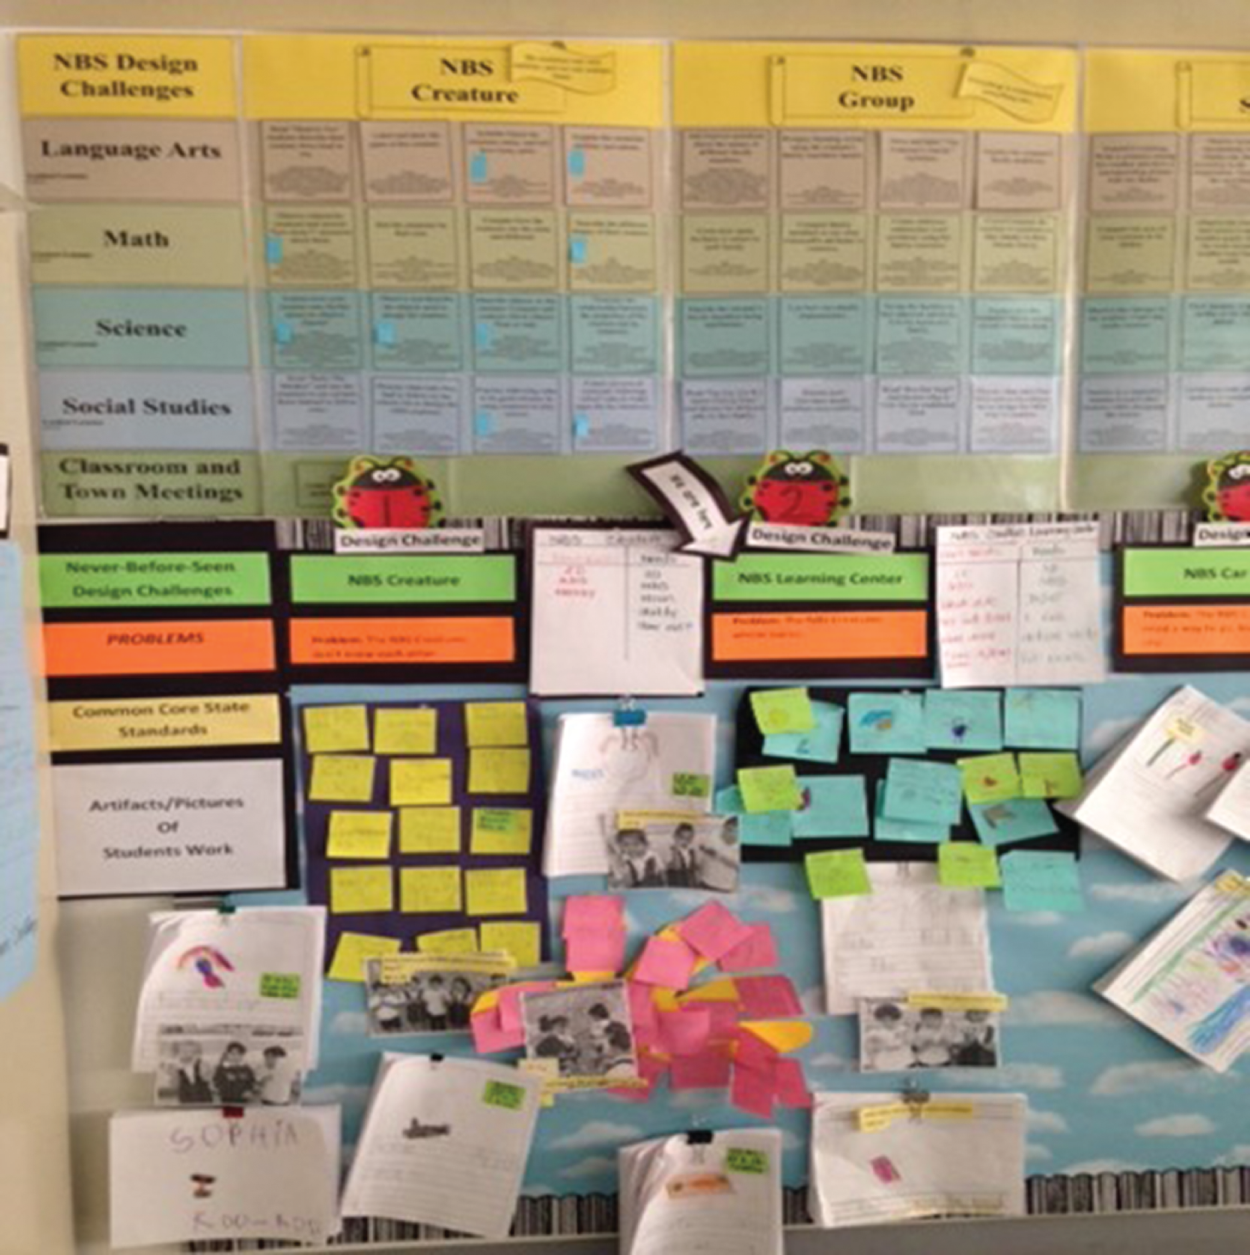
As an outline for her Long-Range Planning Boards, Leakana Nehm charted 10 Essential Questions, Design Problems, and corresponding Never-Before-Seen (NBS) Design Challenges that defined her Microdena Story for the school year:
| Essential Question | Design Problem | NBS Design Challenge |
| How do humans learn about each other? | We need to get to know one another and the Design-Based Learning process. | 1. NBS Introduction |
| How do symbolic representations portray and explain the self to others? | We need to get to know ourselves before we can empathize with and make friends with others. | 2. NBS Body Object |
| How does a growing population shelter itself and have its needs met? | We need places for everyone to live, work, and play. | 3. NBS Starter Community |
| How does the structure of living things affect human survival? | We need sources for food, water, and oxygen to survive. | 4. NBS Plant |
| How do the life cycle and changes in habitat contribute to survival? | We need a food chain and an oxygen-carbon exchange cycle so our Creatures can live. | 5. NBS Creature, Life Cycle |
| How do humans use available resources to protect themselves from dangers? | Our Creatures need protection in their community from the weather, natural disasters, and aggressors. | 6. NBS Structure |
| How do humans decide what and how to move? | Our Creatures need to get from one place to another to exchange goods, obtain services, and for work and play. | 7. NBS Way to Move |
| How does communication benefit humans? | Our Creatures do not have a means to communicate information and needs. Accidents happen because of this deficiency. | 8. NBS Way to Communicate |
| How do humans capture and conserve energy? | Movement and communication systems in our community need constant power. We need to find new energy sources and save energy to meet Microdena's demands. | 9. NBS Ways to Find and Conserve Energy |
| How do humans remember and preserve their past? | A review of the year: now that Microdena has progressed and advanced technologically, structurally, and socially, we need to preserve its story for future generations. | 10. NBS Way to Be Remembered Forever |