
In this chapter, I’m going to introduce you to the final three tabs in the Nikon D3400 menu system: the Setup, Retouch, and Recent Settings menus. In the section on the Setup menu, you’ll discover how to format a memory card, set the date/time and LCD monitor brightness, and do other maintenance and configuration tasks. You’ll learn how to use the Retouch menu to remove red-eye and fix photos right in your camera. The Recent Settings menu displays a list of the last 20 menu items used—a sort of “favorites” display for quick access.
Setup Menu Options
The orange-coded Setup menu (see Figure 5.1 for its first page) has a long list of entries. In this menu you can make additional adjustments on how your camera behaves before or during your shooting session, as differentiated from the Shooting menu, which adjusts how the pictures are actually taken.

Figure 5.1 The first page of the Setup menu.
Your choices include:
- Reset Setup Options
- Format Memory Card
- Date Stamp
- Time Zone and Date
- Language
- Monitor Brightness
- Info Display Format
- Auto Info Display
- Auto Off Timers
- Self-Timer
- Remote On Duration (ML-L3)
- Lock Mirror Up for Cleaning
- Image Dust Off Ref Photo
- Image Comment
- Copyright Information
- Beep
- Flicker Reduction
- Buttons
- Rangefinder
- Manual Focus Ring in AF Mode
- File Number Sequence
- Storage Folder
- File Naming
- HDMI
- Location Data
- Airplane Mode
- Connect to Smart Device
- Send to Smart Device (Auto)
- Bluetooth
- Eye-Fi Upload
- Conformity Marking
- Slot Empty Release Lock
- Reset All Settings
- Firmware Version
Reset Setup Options
Options: Yes, No
If you select Yes, the Setup menu settings shown in Table 5.1 will be set to their default values. It has no effect on the settings in other menus, or any of the other camera settings. Note that there is also a Reset option in the Shooting menu to return your shooting settings to their defaults.
You’d want to use this Reset option when you’ve made a bunch of changes (say, while playing around with them as you read this chapter), and now want to put them back to the factory defaults. Your choices are Yes and No. Only settings that are changed with this menu option are listed in the table below. Some don’t have settings you can change, such as Format Memory Card, Conformity Marking, and Firmware Version. Others retain the settings you make and ignore this reset, including Time Zone and Date, Language, and Storage Folder.
If you really want to change (almost) all Setup settings to their defaults, use Reset All Settings, described later in this chapter. It preserves only the Language, Time Zone and Date, and GUIDE mode options, and wipes out your Copyright Information, Image Comments, and other entries.

Format Memory Card
Options: Format card
I recommend using this menu entry to reformat your memory card after each shoot. While you can move files from the memory card to your computer, leaving behind a blank card, or delete files using the Playback menu’s Delete feature, both of those options can leave behind stray files (such as those that have been marked as Protected). Format removes those files completely and beyond retrieval (unless you use a special utility program) and establishes a spanking-new fresh file system on the card, with all the file allocation table (FAT or exFAT) pointers (which tell the camera and your computer’s operating system where all the images reside) efficiently pointing where they are supposed to on a blank card.
To format a memory card, choose this entry from the Setup menu, highlight Yes on the screen that appears, and press OK.
Date Stamp
Options: Off (default), Date, Date/Time, Date Counter
You can superimpose the date, time, or both on your photographs, or imprint a date counter that shows the number of days (or years and days, or months, years, and days) between when the picture was taken and a date (in the past or future) that you select. The good news is that this feature can be useful for certain types of photographs used for documentation. While the D3400’s time/date stamp may not be admissible in a court of law, it makes a convincing (or convenient) in-picture indication of when the shot was made. This feature works only with JPEG images; you cannot use Date Imprint with pictures taken using the RAW or RAW+Fine settings.
The bad news, especially if you use the feature accidentally, is that the imprint is a permanent part of the photograph. You’ll have to polish up your Photoshop skills if you want to remove it, or, at the very least, crop it out of the picture area. Date and time are set using the format you specify in the World Time setting of the Setup menu, described in the next section. Your options are as follows:
- Off. Deactivates the date/time imprint feature.
- Date. The date is overlaid on your image in the bottom-right corner of the frame, and appears in the shooting information display. If you’ve turned on Auto Image Rotation the date is overlaid at the bottom-right corner of vertically oriented frames.
- Date/Time. Both date and time are imprinted in the same positions.
- Date Counter. This option imprints the current date on the image, but also adds the number of days that have elapsed since a particular date in the past that you specify, or the days remaining until an upcoming date in the future.
Using the Date Counter
If you’re willing to have information indelibly embedded in your images, the Date Counter can be a versatile feature. You can specify several parameters in advance (or at the time you apply the Date Counter) and activate the overprinting only when you want it.
- Off. Select this from the main Date Imprint screen. Choosing Off disables the imprinting of date, date/time, and the Date Counter. When disabled, no date or counter information is shown, regardless of how you have set the other parameters.
- Choose date. When you enter the Date Counter screen, one option lets you enter up to three different dates for your countdown/countup. When you activate the Date Counter, you can choose from the three dates (or a new date you enter to replace one of the three) and use that for your date counting imprint.
- Display options. Also in the Date Counter screen, you can select Display Options, which allows you to specify Number of Days, Years and Days, or Years, Months, and Days for the Date Counter readout imprinted on your images.
- Done. When you’ve finished entering date and display options, choose Done to return to the Setup menu. (You must do this. If you press the MENU button or tap the shutter release button at this point, your changes will not be confirmed.)
Here are some applications for the Date Counter:
- Tracking a newborn. Enter the child’s birthday as one of your three dates. Select Number of Days as your display option for a newborn. Then, as often as you like, activate the Date Counter and take a picture or two. The number of days since the baby’s birth will be displayed right on the picture. (Remember to turn the feature off when shooting other pictures of the child, or of other subjects!)
- Document construction projects. Enter the start date of the project, activate the Date Counter, and take pictures of the construction progress. Each photo will show exactly how many days have elapsed since ground was broken (or the cornerstone laid, or that non-bearing wall demolished to begin remodeling).
- Long-term documentation. Perhaps you’d like to record the appearance of your favorite nature spot at different times of the year. Choose the first day of spring as your start date, then shoot pictures at intervals for an entire year, activating the Date Counter as needed. The results will be interesting—and maybe a revelation. With the Years, Months, and Days selected as a display option, you can continue your documentation for years!
- Countdown. Something big scheduled for a particular day? Choose that date in the future as your counter, and any photo you take with imprinting activated will show the days remaining until the big day.
Time Zone and Date
Options: Time Zone, Date and Time, Sync with Smart Device, Date Format, Daylight Saving Time
Use this menu entry to adjust the D3400’s internal clock. Your options include:
- Time zone. A small map will pop up on the setting screen and you can choose your local time zone. I sometimes forget to change the time zone when I travel (especially when going to Europe), so my pictures are all time-stamped incorrectly. I like to use the time stamp to recall exactly when a photo was taken, so keeping this setting correct is important.
- Date and Time. Use this setting to enter the exact year, month, day, hour, minute, and second, using a 24-hour clock.
- Sync with Smart Device. Allows the camera clock to be updated using information from your smart device when it is linked to the D3400.
- Date format. Choose from Year/month/day (Y/M/D), Month/day/year (M/D/Y), or Day/month/year (D/M/Y) formats.
- Daylight saving time. Use this to turn daylight saving time On or Off. Because the date on which DST takes effect has been changed from time to time, if you turn this feature on you may need to monitor your camera to make sure DST has been implemented correctly.
Language
Options: List of languages
Choose the language for menu display, from Arabic, Traditional Chinese, Simplified Chinese Czech, Danish, Dutch, English, Finnish, French German, Green, Hindi, Hungarian, Indonesian, Italian, Japanese, Korean, Norwegian, Polish, Portuguese, Romanian, Russian, Spanish, Swedish, Thai, Turkish, and Ukrainian
Monitor Brightness
Options: Values from +5 to −5
Choose this menu option to adjust the intensity of the display using the LCD Brightness option. A grayscale strip appears on the LCD monitor, as shown in Figure 5.2. Use the multi selector up/down keys to adjust the brightness to a comfortable viewing level over a range of +5 to −5. Under the lighting conditions that exist when you make this adjustment, you should be able to see all 10 swatches from black to white. If the two end swatches blend together, the brightness has been set too low. If the two whitest swatches on the right end of the strip blend together, the brightness is too high. Brighter settings use more battery power, but can allow you to view an image on the LCD outdoors in bright sunlight. When you have the brightness you want, press OK to lock it in and return to the menu.

Figure 5.2 Adjust the LCD brightness so that all the grayscale strips are visible.
Info Display Format
Options: Separate display formats for Auto/Scene/Effects modes and P/S/A/M modes
You can choose the format the Nikon D3400 uses for its shooting information screen. Two formats are available. You can choose one format for Auto, Scene, and Effects modes, and a different one for P/S/A/M modes, or have both the same.
- Classic. This is a mostly text-based format with a few icons. You’ll find this format the fastest to use once you’ve grown accustomed to the D3400 and its features, as all the information is clustered in a no-nonsense way that is easy to read.
- Graphic. This format mixes text and graphics, and includes a facsimile of the mode dial that appears briefly on the left side of the screen as you change from one exposure mode to the other. It’s prettier to look at and adds a little flair to the display, because you can choose black, white, or orange backgrounds, but I find it distracting.
You can change the shooting information display to the format of your choice using three easy-to-understand screens:
- Choose Info Display format from the Setup menu.
- Choose either Auto/Scene/Effects or P/S/A/M and press the multi selector right button.
- Navigate to the Classic or Graphic combination of your choice, in Black, White, or Blue background colors. Then press OK.
- You’ll be returned to the first screen you saw, where you can again choose Auto/Scene/Effects or P/S/A/M or press the MENU button (or tap the shutter release) to exit.
Auto Info Display
Options: On (default), Off
This setting controls when the shooting information display is shown on the LCD monitor. The display is a handy tool for checking your settings as you shoot. It does use up battery power, so you might want to turn off the automatic display if you don’t need to review your settings frequently, or if you especially want to conserve battery power. The shooting information display can be viewed any time by pressing the Info button at the lower-left side of the back of the D3400. You can choose whether to display Auto/Scene modes or P, S, A, and M modes individually. Here’s how this option works for both types of modes:
- On. The D3400 will display the shooting information screen if the shutter release button is pressed halfway and released. As always, the information display goes away when you press the shutter release halfway and hold it. If you’ve set Image Review to Off in the Playback menu, the shooting information screen also appears as soon as the photograph is taken. If Image Review is set to On, the shooting information screen appears only when the shutter release is pressed halfway and released, or if the Info button is pressed, but not immediately after the picture is taken. (Instead, the picture you just took is shown.)
- Off. The shooting information screen is not displayed when you press the shutter release button halfway and release it. You can activate the display by pressing the Info button.
SAVING POWER WITH THE NIKON D3400
There are several settings techniques you can use to stretch the longevity of your D3400’s battery. To get the most from each charge, consider these steps:
- Image Review. Turn off automatic image review after each shot. You can still review your images by pressing the Playback button. Or, leave image review on, but set the display for the minimum 4 seconds with this Auto Off Timers custom command.
- Auto meter-off-delay. Set to 4 seconds using Auto Off Timers if you can tolerate such a brief active time.
- Reduce LCD brightness. In the Setup menu’s LCD Brightness option, select the lowest of the seven brightness settings that work for you under most conditions. If you’re willing to shade the LCD with your hand, you can often get away with lower brightness settings outdoors, which will further increase the useful life of your battery.
- Turn off the shooting information display. You can always turn it on manually by pressing the Info button.
- Reduce internal flash use. No flash at all or fill flash use less power than a full blast.
- Cancel VR. Turn off vibration reduction if your lens (such as the 18-55mm VR kit lens) has that feature and you feel you don’t need it.
- Use a card reader. When transferring pictures from your D3400 to your computer, use a card reader instead of the USB cable. Linking your camera to your computer and transferring images using the cable takes longer and uses a lot more power.
Auto Off Timers
Options: Short, Normal (default), Long, Custom
This is the first entry on the second page of the Setup menu. (See Figure 5.3.) Use this setting to determine how long the D3400’s LCD monitor and viewfinder displays are shown, and how long exposure meters continue to function after the last operation, such as autofocusing, focus point selection, and so forth, was performed. You can choose a short timer to save power, or a longer value to keep the camera “alive” for a longer period of time. When the Nikon EH5a/EH-5b AC adapter is connected to the D3400, the exposure meters will remain on indefinitely, and when the D3400 is connected to a computer or PictBridge-compatible printer, the LCD and viewfinder displays do not turn off automatically.
Sports shooters and some others prefer longer delays, because they are able to keep their camera always “at the ready” with no delay to interfere with taking an action shot that unexpectedly presents itself. Extra battery consumption is just part of the price paid. For example, when I am shooting football, a meter-off delay of 16 seconds is plenty, because the players lining up for the snap is my signal to get ready to shoot. But for basketball or soccer, I typically set a longer limit, because action is virtually continuous.
Of course, if the meters have shut off, and if the power switch remains in the On position, you can bring the camera back to life by tapping the shutter button. You can select generic times such as Short, Norm, and Long as the auto-off delay, or specify custom times for playback/menus, image review, and exposure meters. Your delay options are as follows:
- Short. LCD Monitor Playback/Menus: 20 seconds; LCD Review: 4 seconds; Live View: 5 minutes; Standby Timer: 4 seconds.
- Norm. LCD Monitor Playback/Menus: 1 minute; LCD Review: 4 seconds; Live View: 10 minutes; Standby Timer: 8 seconds.

Figure 5.3 The second page of the Setup menu.
- Long. LCD Monitor Playback/Menus: 5 minutes; LCD Review: 20 seconds; Live View: 20 minutes; Standby Timer: 60 seconds.
- Custom: Playback/Menus. Choose 8, 12, 20, 60 seconds, or 10 minutes.
- Custom: Image Review. Choose 4, 8, 20, 60 seconds, or 10 minutes.
- Custom: Live View. Choose 30 seconds, 1, 3, or 5 minutes.
- Custom: Standby timer. Choose 4, 8, 20, 60 seconds, or 30 minutes.
Self-Timer
Options: Self-timer delay (default: 10 s), Number of shots (default: 1)
This setting lets you choose the length of the self-timer shutter release delay. The default value is 10 seconds. You can also choose 2, 5, or 20 seconds, as well as multiple shots (2 to 9) at the end of the elapsed time. If I have the camera mounted on a tripod or other support, I can set a two-second delay that is sufficient to let the camera stop vibrating after I’ve pressed the shutter release.
Remote On Duration (ML-L3)
Options: 1 min. (default), 5 min., 10 min., 15 min.
This setting allows you to specify how long the camera will actively wait for a signal from the ML-L3 infrared remote. The default value is 1 minute and provides maximum camera battery life. You can also choose 5, 10, or 15 minutes.
Lock Mirror Up for Cleaning
Options: None
Because the D3400 does not have automatic sensor cleaning, from time to time you’ll need to clean the sensor manually. Use this menu entry to raise the mirror and open the shutter so you’ll have access to the sensor for cleaning with a blower, brush, or swab. You don’t want power to fail while you’re poking around inside the camera, so this option is available only when sufficient battery power (at least 60 percent) is available. Using a fully charged battery or connecting the D3400 to an EP-5a/EH5b AC adapter is an even better idea.
Image Dust Off Ref Photo
Options: Start; Clean Sensor, Then Start
This menu choice lets you “take a picture” of any dust or other particles that may be adhering to your sensor. The D3400 will then append information about the location of this dust to your photos, so that the Image Dust Off option in Capture NX can be used to mask the dust in the NEF image.
To use this feature, select Dust Off Ref Photo, choose either Start or Clean Sensor, Then Start, and then press OK. If directed to do so, the camera will first perform a self-cleaning operation by applying ultrasonic vibration to the low-pass filter that resides on top of the sensor. Then, a screen will appear asking you to take a photo of a bright featureless white object 10 cm from the lens. Nikon recommends using a lens with a focal length of at least 50mm. Point the D3400 at a solid white card and press the shutter release. An image with the extension .ndf will be created, and can be used by Nikon Capture NX as a reference photo if the “dust off” picture is placed in the same folder as an image to be processed for dust removal. This setting is not available if battery power is low.
Image Comment
Options: Attach Comment, Input Comment
The Image Comment is your opportunity to add personal information about yourself (including contact info), or even a description of where the image was taken (e.g., Seville Photos 2012), although text entry with the Nikon D3400 is a bit too clumsy for doing a lot of individual annotation of your photos. (But you still might want to change the comment each time, say, you change cities during your travels.) The embedded comments can be read by many software programs, including Nikon ViewNX-i or Capture NX-D.
You can enter text using the same procedure described next for entering copyright information.
Copyright Information
Options: Attach Copyright Information, Artist, Copyright
This is an expansion of the Image Comment capability, allowing you to specify the name of the “artist” (photographer), and enter copyright information. Use the standard Nikon text entry screen described next. Highlight the Attach Copyright Information option and press the right multi selector button to mark/unmark it to control whether your copyright data is embedded in each photo as taken.
The standard text entry screen can be used to enter your comment, with up to 36 characters available. For the copyright symbol, most just embed a lowercase “c” within opening and closing parentheses: (c). (Technically, you must use Copr. instead, as I did for Figure 5.4.) You can enter text by choosing Input Comment, turning attachment of the comment On or Off using the Attach Comment entry, and selecting Done when you’re finished working with comments. If you find typing with a cursor too tedious, you can enter your comment in Nikon Capture NX-D and upload it to the camera though a USB cable.
Now is a good time to review text entry, because you can use it to enter comments, rename folders, and perform other functions.
- Press MENU and select the Setup menu.
- Scroll to Image Comment with the multi selector up/down buttons and press the multi selector right button.
- Scroll down to Input Comment and press the multi selector right button to confirm your choice.
- Use the multi selector navigational buttons to scroll around within the array of alphanumerics, as shown in Figure 5.4. There is a full array of uppercase, lowercase, and symbol characters. They can’t be viewed all at once, so you may need to scroll up or down to locate the one you want. Then, enter your text:
- Press the OK button to insert the highlighted character. The cursor will move one place to the right to accept the next character.
- Rotate the command dial button to move the cursor within the line of characters that have been input.
- To remove a character you’ve already input, move the cursor with the command dial to highlight that character, and then press the Trash button.
- When you’re finished entering text, press the Zoom In button to confirm your entry and return to the Image Comment screen.
- In the Image Comment screen, scroll down to Attach Comment and press the multi selector right button to activate the comment, or to disable it.
- When finished, press OK to confirm and exit.

Figure 5.4 Enter a comment on this screen.
Beep
Options: High, Low (default), Off
The Nikon D3400’s internal beeper provides a (usually) superfluous chirp to signify various functions, such as the countdown of your camera’s self-timer or autofocus confirmation in AF-S mode or AF-A mode with a static subject. You can (and probably should) switch it off if you want to avoid the beep because it’s annoying, impolite, or distracting (at a concert or museum), or undesired for any other reason. It’s one of the few ways to make the D3400 a bit quieter. (I’ve actually had new dSLR owners ask me how to turn off the “shutter sound” the camera makes; such an option was available in the point-and-shoot camera they’d used previously.) Your choices are High, Low, and Off. When the beeper is active, a musical note icon is shown in the shooting information display.
Flicker Reduction
Options: Auto (default), 50Hz, 60Hz
This option, the first entry on the third page of the Setup menu (see Figure 5.5), reduces flicker and banding, which can occur when shooting in Live View mode and Movie mode under fluorescent and mercury vapor illumination, because the cycling of these light sources interacts with the frame rate of the camera’s video system. In the United States, you’d choose the 60Hz frequency; in locations where 50Hz current is the norm, select that option instead.
Buttons
Options: Assign Fn Button, Assign AE-L/AF-L Button, Shutter Release Button AE-L, AF Activation
You can define the action that the Fn button, AE-L/AF-L, and shutter release button perform when pressed alone, and whether AF activation occurs when the shutter release button is pressed halfway. Each of the buttons has its own set of actions that you can define for use in PASM modes.

Figure 5.5 The third page of the Setup menu.
Fn Button
There are four different actions you can define for the Fn button, including the default ISO sensitivity behavior:
- Image Size/Qual. With this setting, when the Fn button is pressed, the information edit screen pops up, and you can rotate the command dial to view and select image quality (RAW, JPEG Fine, JPEG Norm, JPEG Basic, or RAW+Fine) and image size (for JPEG images). When specifying JPEG quality and size, the information edit display cycles among the three quality settings, then moves to the next lower size, allowing you to set both with one (extended) rotation of the command dial. For example, the Fine, Normal, and Basic Large settings are shown first, followed by Fine, Normal, and Basic Medium, and Fine, Normal, and Basic Small. I never use this function key definition; it’s easier just to use the information edit menu, and I rarely change image size, anyway.
- ISO Sensitivity (default). Use this option if you want to adjust ISO setting using the Fn key. The information edit screen appears, and you can rotate the command dial to choose an ISO sensitivity.
- White Balance. When the Fn button is pressed, you can rotate the command dial to select one of the white balance settings when using Program, Shutter-priority, Aperture-priority, or Manual exposure modes.
- Active D-Lighting. This allows you to choose the Active D-Lighting mode using the Fn button and rotating the command dial.
AE-L/AF-L Button
When the Nikon D3400 is set to its default values, a half-press of the shutter release locks in the current autofocus setting in AF-S mode, or in AF-A mode if your subject is not moving. (The camera will refocus if the subject moves and the D3400 is set for AF-C or AF-A mode.) That half-press also activates the exposure meter, but, ordinarily, the exposure changes as the lighting conditions in the frame change.
However, sometimes you want to lock in focus and/or exposure, and then reframe your photo. For that, and for other focus/exposure locking options, Nikon gives you the AE-L/AF-L button (located on the back of the camera to the right of the viewfinder window), and a variety of behavior combinations for it. This setting allows you to define whether the Nikon D3400 locks exposure, focus, or both when the button is pressed, so the AE-L/AF-L button can be used for these functions in addition to, or instead of, a half-press of the shutter release. It can also be set so that autofocus starts only when the button is pressed; in that case, a half-press of the shutter release initiates autoexposure, but the AE-L/AF-L button must be pressed to start the autofocusing process.
These options can be a little confusing, so I’ll offer some clarification:
- AE/AF lock. Lock both focus and exposure while the AE-L/AF-L button is pressed and held down, even if the shutter release button has not been pressed. This is the default value, and is useful when you want to activate and lock in exposure and focus independently of the shutter release button. Perhaps your main subject is off-center; place that subject in the middle of the frame, lock in exposure and focus, and then reframe the picture while holding the AE-L/AF-L button.
- AE lock only. Lock only the exposure while the AE-L/AF-L button is pressed. The exposure is fixed when you press and hold the button, but autofocus continues to operate (say, when you press the shutter release halfway) using the AF-A, AF-S, or AF-C mode you’ve chosen.
- AE lock (Hold). Exposure is locked when the AE-L/AF-L button is pressed, and remains locked until the button is pressed again, or the exposure meter-off delay expires. Use this option when you want to lock exposure at some point, but don’t want to keep your thumb on the AE-L/AF-L button.
- AF lock only. Focus is locked in while the AE-L/AF-L button is held down, but exposure will continue to vary as you compose the photo and press the shutter release button.
- AF-ON. The AE-L/AF-L button is used to initiate autofocus. This setting is useful when you want to frame your photo, press the shutter release halfway to lock in exposure, but don’t want the D3400 to autofocus until you tell it to. I use this for sports photography when I am waiting for some action to move into the frame before starting autofocus. For example, I might press the AE-L/AF-L button just before a racehorse crosses the finish line. This technique is called back button focus, and is described in Chapter 7.
Shutter Release Button AE-L
When you choose On, exposure will lock when the shutter release is pressed halfway. Select Off, and you must lock exposure using the AE-L/AF-L button (when it is defined to lock exposure, as described above).
AF Activation
Select Enable (On) and the D3400 will focus when the shutter release is pressed halfway. Choose Disable (Off) instead, and the shutter release button doesn’t activate autofocus. The Off option is required for the back button focus procedure mentioned above. While the technique is not excessively complex, it needs the full step-by-step description provided in Chapter 7.
Rangefinder
Options: Off (default), On
The rangefinder is a clever feature that supplements the green focus confirmation indicator at the left edge of the viewfinder by transforming the analog exposure indicator as an “in-focus/out-of-focus” scale to show that correct focus has been achieved when focusing manually.
Some lenses don’t offer autofocus features with the Nikon D3400, because they lack the internal autofocus motor the D3400 requires. (They are able to autofocus on other Nikon cameras, except for the D3xxx-series, D5xxx-series, D60, and D40/D40x, because those other cameras include an autofocus motor in the body.) Many manual focus lenses that never had autofocus features can also be used with the D3400 in manual focus mode. You’ll find more information about this limitation in Chapter 10, but all you need to know is that Nikon lenses with the AF-S or AF-P designation in the lens name will autofocus on the D3400, while those with the AF, AI, or AI-S designation will not. Specifications for lenses from other vendors will indicate whether the lens includes an autofocus motor or not.
When a non-autofocus lens is mounted on the Nikon D3400, and the camera has been set for any exposure mode except for Manual (M)—that is, any of the Scene or Effects modes, plus Program, Aperture-priority, or Shutter-priority, manual focus mode is automatically activated. You can manually focus by turning the focus ring on the lens (set the lens to manual focus if it is an AF-type lens) and watching the sharpness of the image on the focusing screen. The focus confirmation indicator at the lower-left corner of the viewfinder will illuminate when correct focus is achieved, if your lens has a maximum aperture of f/5.6 or larger (that is, a larger number, such as f/4.5, f/4, and so forth).

Tip
Note that this feature is not available when shooting in Manual exposure mode, nor when using live view, however. The D3400 shows whether exposure is under, over, or correct, instead. Use the focus confirmation lamp to monitor manual focus in this mode.
The readout in the viewfinder is not analog (that is, continuous). Only the six indicators shown in Figure 5.6 are displayed. Two centered rectangles indicate that correct focus has been achieved; when all 12 are shown, it means that correct focus cannot be indicated. Three and six rectangles show that slight or major focus corrections are needed, respectively.
Turn the Rangefinder On with this setting option if you want an additional manual focusing aid. With a manual focus lens and the Rangefinder operating, the analog exposure display at bottom right in the viewfinder will be replaced by a rangefinder focusing scale. Indicators on the scale like those in Figure 5.6 show when the image is in sharp focus, as well as when you have focused somewhat in front of, or behind the subject.

Figure 5.6 Upper left: Correct focus; upper right: focus is grossly incorrect; center left: focus slightly in front of the subject; center right: focus slightly behind the subject; bottom left: focus significantly in front of the subject; bottom right: focus significantly behind the subject.
Follow these steps to use the Rangefinder:
- Press the multi selector buttons to choose a focus point that coincides with the subject you’d like to be in focus.
- Rotate the focusing ring, watching the rangefinder scale at the bottom of the viewfinder. If the current sharp focus plane is in front of the point of desired focus, the rangefinder scale will point toward the left side of the viewfinder. The greater the difference, the more bars (either three or six bars) shown in the rangefinder.
- When the current focus plane is behind the desired point of focus, the rangefinder indicator will point to the right.
- When the subject you’ve selected with the focus zone bracket is in sharp focus, only two bars will appear, centered under the 0, and the focus confirmation indicator will stop blinking.
Manual Focus Ring in AF Mode
Options: Enable, Disable (default)
This entry, which appears only when a lens that supports the feature is mounted, allows you to fine-tune focus with compatible lenses when the D3400 is set to autofocus mode. With many lenses, the focus ring cannot be rotated when in an AF mode; you must switch to manual focus to gain control over focus. When this choice is enabled, you can autofocus by pressing the shutter release button halfway, and then, with the button still depressed, fine-tune the focus with the lens’s focus ring. Release the shutter button and press it down halfway to refocus/fine-tune again.
File Number Sequence
Options: Off (default), On, Reset
The Nikon D3400 will automatically apply a file number to each picture you take, using consecutive numbering for all your photos over a long period of time, spanning many different memory cards, starting over from scratch when you insert a new card, or when you manually reset the numbers. Numbers are applied from 0001 to 9999, at which time the D3400 “rolls over” to 0001 again.
HOW MANY SHOTS, REALLY?
The file numbers produced by the D3400 don’t provide information about the actual number of times the camera’s shutter has been tripped—called actuations. For that data, you’ll need a third-party software solution, such as the free Opanda iExif (www.opanda.com) for Windows or the non-free ($39.95) GraphicConverter for Macintosh (www.lemkesoft.com). These utilities can be used to extract the true number of actuations from the Exif information embedded in a JPEG file.
The camera keeps track of the last number used in its internal memory and, if File Number Sequence is turned On, will apply a number that’s one higher, or a number that’s one higher than the largest number in the current folder on the memory card inserted in the camera. You can also start over each time a new folder has been created on the memory card, or reset the current counter back to 0001 at any time. Here’s how it works:
- Off. At this default setting, if you’re using a blank/reformatted memory card, or a new folder is created, the next photo taken will be numbered 0001. File number sequences will be reset every time you use or format a card, or a new folder is created (which happens when an existing folder on the card contains 999 shots).
- On. The Nikon D3400 will apply a number one higher than the last picture taken, even if a new folder is created, a new memory card inserted, or an existing memory card formatted.
- Reset. The D3400 starts over with 0001, even if a folder containing images exists on the card. In that case, a new folder will be created. At this setting, new or reformatted memory cards will always have 0001 as the first file number.
Storage Folder
Options: Select Folder by Number, Select From List
This entry is useful if you want to store images in a folder other than the one created and selected by the Nikon D3400; you can switch among available folders on your memory card, or create your own folder. Remember that any folders you create will be deleted when you reformat your memory card.
The Nikon D3400 automatically creates a folder on a newly formatted memory card with a name like 100D3400, and when it fills with 999 images, it will automatically create a new folder with a number incremented by one (such as 101D3400). The “D3400” portion of the folder name is always created by the camera; you can override the camera-assigned folder number and specify your own number for the last three characters, from 100 to 999. When traveling, I often use “dates” such as 902 for September 2, and so forth for folder. From October to December, I just cycle back to 1, 2, and 3—the goal is to separate each day’s shots; the folder numbers are deleted on the memory card when I reformat after the images have been copied to my computer. To change the currently active folder:
- Choose Storage Folder in the Setup menu.
- Scroll down to Select Folder From List and press the multi selector right button.
- From among the available folders shown, scroll to the one that you want to become active for image storage and playback. (Handy when displaying slide shows.)
- Press the OK button to confirm your choice, or press the multi selector right button to return to the Setup menu.
Or you can create your own folders. Perhaps you’re traveling and have a high-capacity memory card and want to store the images for each day (or for each city that you visit) in a separate folder. Maybe you’d like to separate those wedding photos you snapped at the ceremony from those taken at the reception. To create your own folder, or to rename an existing folder:
- Choose Storage Folder in the Setup menu.
- Scroll down to Select Folder by Number and press the multi selector right button.
- Use the left/right buttons to choose which of the three digits to change, and the up/down buttons to increment/decrement the numbers.
- Press OK when finished to confirm your choice and exit.
File Naming
Option: Choose three-letter prefix. Default: DSC
The D3400, like other cameras in the Nikon product line, automatically applies a name like _ DSC0001.jpg or DSC_0001.nef to your image files as they are created. You can use this menu option to change the names applied to your photos, but only within certain strict limitations. In practice, you can change only three of the eight characters, the DSC portion of the file name. The other five are mandated either by the Design Rule for Camera File System (DCF) specification that all digital camera makers adhere to or to industry conventions.
DCF limits file names created by conforming digital cameras to a maximum of eight characters, plus a three-character extension (such as .jpg, .nef, or .wav in the case of audio files) that represents the format of the file. The eight-plus-three (usually called 8.3) length limitation dates back to an evil and frustrating computer operating system that we older photographers would like to forget (its initials are D.O.S.), but which, unhappily, lives on as the wraith of a file naming convention.
Of the eight available characters, four are used to represent, in a general sense, the type of camera used to create the image. By convention, one of those characters is an underline, placed in the first position (as in _DSCxxxx.xxx) when the image uses the Adobe RGB color space and in the fourth position (as in DSC_xxxx.xxx) for sRGB and RAW (NEF) files. That leaves just three characters for the manufacturer (and you) to use. Nikon, Sony, and some other vendors use DSC (which may or may not stand for Digital Still Camera, depending on who you ask), while Canon prefers IMG. The remaining four characters are used for numbers from 0000 to 9999, which is why your D3400 “rolls over” to DSC_0000 again when the 9999 number limitation is reached.
When you select File Naming, you’ll be shown the current settings for both sRGB (and RAW) and Adobe RGB. Press the right multi selector button, and you’ll be taken to the (mostly) standard Nikon text entry screen and allowed to change the DSC value to something else. In this version of the text entry screen, however, only the numbers from 0 to 9 and characters A to Z are available; the file name cannot contain other characters. As always, press the OK button to confirm your new setting.
Because the default DSC characters don’t tell you much, don’t hesitate to change them to something else. I use 340 for my D3400 and ND5 for my Nikon D5. If you don’t need to differentiate between different camera models, you can change the three characters to anything else that suits your purposes, including your initials (DDB_ or JFK_ for example), or even customize for particular shooting sessions (EUR_, GER_, FRA_, and IND_ when taking vacation trips). You can also use the file name flexibility to partially overcome the 9999 numbering limitation. You could, for example, use the template 501_ to represent the first 10,000 pictures you take with your D3400, and then 502_ for the next 10,000, and 503_ for the 10,000 after that.
That’s assuming that you don’t rename your image files in your computer. In a way, file naming verges on a moot consideration, because they apply only to the images as they exist in your camera. After (or during) transfer to your computer, you can change the names to anything you want, completely disregarding the 8.3 limitations (although it’s a good idea to retain the default extensions). If you shot an image file named DSC_4832.jpg in your camera, you could change it to Paris_EiffelTower_32.jpg later on. Indeed, virtually all photo transfer programs allow you to specify a template and rename your photos as they are moved or copied to your computer from your camera or memory card.
I usually don’t go to that bother (I generally don’t use transfer software; I just drag and drop images from my memory card to folders I have set up), but renaming can be useful for those willing to take the time to do it.
HDMI
Options: Output Resolution; Advanced: Output range, Output display size, Live view on-screen display, Dual monitor
This setting is used to control the HDMI format used to play back camera images and movies on a High Definition Television (HDTV) using a special cable not supplied by Nikon. Note that this setting controls only the output from your D3400 to the device. It has no effect on the resolution of your images or your movie clips. Your choices:
- Output resolution. You can choose Auto, in which case the camera selects the right format, or, to suit your particular HDTV, one of four progressive scan options: 480p—640 × 480 pixels; 576p—720 × 576 pixels; 720p—1280 × 720 pixels, and 1080p—1920 × 1080 pixels; plus one interlaced scan option, 1080i—1920 × 1080 pixels.
- Device control. You can select On or Off. This option applies when the D3400 is connected to a television that supports HDMI-CEC remote control operations. When you select On, if both the camera and HDTV are powered up, you will see a Play/Slideshow menu on the TV screen, and you can use the TV remote control as if it were the multi selector directional buttons and OK button during picture review and slide shows. An indicator reading CEC will appear in the camera viewfinder in place of the exposures remaining indicator. Select Off, and the television remote control is disabled.
Location Data
Options: Download From Smart Device, Position
This menu entry has options for using the Nikon D3400 when linked to a smart device that has GPS capabilities, and is available only when that device has not been set up for the camera.
- Download From Smart Device. Enables/disables embedding GPS information obtained from your device in the D3400’s image files. See Chapter 9 for information about using this option.
- Position. This is an information display, rather than a selectable option. You can view the location information added to your images from the smart device’s GPS data. Data in movie files is reported at the start of the recording.
Airplane Mode
Options: Enable, Disable
Like the Airplane mode on your smartphone or tablet, this option turns off the D3400’s Wi-Fi and Bluetooth capabilities. I enable the feature any time I am not planning to use Eye-Fi cards or SnapBridge, because it saves a lot of power. (See Figure 5.7.)
Connect to Smart Device
Options: Adjust the settings for connecting to smart devices
The D3400 has built-in Wi-Fi communications without the need of an add-on device. Use this entry to set up your SnapBridge connection to your smartphone or tablet. Your D3400’s other connectivity options will be covered in detail in Chapter 9, and the instructions for setting up your smart device won’t be repeated here.

Figure 5.7 The fourth page of the Setup menu.
Send to Smart Device (Auto)
Options: On, Off
You can instruct your D3400 to automatically upload new still photos (but not movies) to your smart device when the camera and device are linked. If they are not connected, the D3400 will mark a maximum of 1,000 photos and upload them the next time a wireless connection is made. See Chapter 9 for detailed information on using this feature.
Bluetooth
Options: Network Connection: Enable/Disable; Paired Devices: View Paired Devices; Send While Off: On, Off
Use this entry to enable or disable Bluetooth connections with your smart device, or to see what devices you have paired. The option you’ll use most frequently, however, is Send While Off. When turned on, wireless communication will continue even if the camera is powered down or the standby timer expires. As you might guess, that can consume a lot of power, especially if you have a lot of images queued up for transmission. It’s safer to leave the automatic upload disabled.
Eye-Fi Upload
Options: Enable, Disable
This option is displayed in the menu only when a compatible Eye-Fi memory card is being used in the D3400. The Eye-Fi card looks like an ordinary SDHC memory card, but has built-in Wi-Fi capabilities, so it can be used to transmit your photos as they are taken directly to a computer over a Wi-Fi network, or, unlike the D3400’s built-in Wi-Fi feature, upload directly to Facebook and other online sites. When an Eye-Fi card is inserted, and you’ve enabled the card by choosing Enable in this menu entry, one of four informational icons representing current connection and upload status will appear in its shooting information screen. If you are using an Eye-Fi card, you must set both Airplane Mode and Bluetooth > Network Connection to Disable. Because Eye-Fi has recently discontinued support for its older (but still commonly used) cards, and the D3400 has its own Wi-Fi capabilities, I no longer recommend using these cards. Set this menu option to Disable, and you can continue to use your Eye-Fi cards as ordinary memory cards, but without drawing unnecessary power.
Conformity Marking
Options: Display only—no selections
This entry does nothing but display the various international standards with which the D3400 complies. It’s included here because Nikon can easily update the listing during a firmware upgrade. The alternative might be to print new labels (like the one on the base of the D3400) each time a change is made.
Slot Empty Release Lock
Options: Release Locked, Enable Release
This entry gives you the ability to snap off “pictures” without a memory card installed—or, alternatively, to lock the camera shutter release if no card is present. It is sometimes informally called Play mode, because you can experiment with your camera’s features or even hand your D3400 to a friend to let them fool around, without any danger of pictures actually being taken.
Back in our film days, we’d sometimes finish a roll, rewind the film back into its cassette surreptitiously, and then hand the camera to a child to take a few pictures—without actually wasting any film. It’s hard to waste digital film, but “shoot without card” mode is still appreciated by some, especially camera vendors who want to be able to demo a camera at a store or trade show, but don’t want to have to equip each and every demonstrator model with a memory card. Choose Enable Release to activate “play” mode or Release Locked to disable it. The pictures you actually “take” are displayed on the LCD with the legend “Demo” superimposed on the screen, and they are, of course, not saved.
Reset All Settings
Options: Reset, Do Not Reset
Resets all settings, including Copyright Information, and other user-generated settings, except Language and Time Zone and Date
Firmware Version
Options: Reset, Do Not Reset
You can see the current firmware release in use in this menu listing. You can learn how to update firmware in Chapter 12.
Retouch Menu Options
The Retouch menu has eight entries on its first screen (see Figure 5.8). This menu allows you to create a new copy of an existing image with trimmed or retouched characteristics. You can apply D-Lighting, remove red-eye, create a monochrome image, apply filter effects, rebalance color, overlay one image on another, and compare two images side-by-side. Just select a picture during playback mode, as described below, or you can also go directly to this Retouch menu, select a retouching feature, and then choose a picture from the standard D3400 picture selection screen shown earlier.

Figure 5.8 The Retouch menu allows simple in-camera editing.
The Retouch menu is most useful when you want to create a modified copy of an image on the spot, for immediate printing or e-mailing without first importing into your computer for more extensive editing. You can also use it to create a JPEG version of an image in the camera when you are shooting RAW-only photos.
While you can retouch images that have already been processed by the Retouch menu, you can apply up to 10 different effects, in total, but only once per effect (except for Image Overlay). You may notice some quality loss with repeated applications. For the Retouch menu entries, I’m going to list the options in the description only.
To create a retouched copy of an image:
- While browsing among images in playback mode, press the i button when an image you want to retouch is displayed on the screen. A menu will pop up allowing you to choose from Rating, Retouch, or Select to Send to Smart Device. Choose Retouch.
- From the Retouch menu, select the option you want and press the multi selector right button. The Nikon D3400’s standard image selection screen appears. Scroll among the images as usual with the left/right multi selector buttons, press the Zoom In button to examine a highlighted image more closely, and press OK to choose that image.
- Work with the options available from that particular Retouch menu feature and press OK to create the modified copy, or Playback to cancel your changes.
- The retouched image will bear a file name that reveals its origin. For example, if you make a Small Picture version of an image named DSC_0112.jpg, the reduced-size copy will be named SSC_0113.jpg. Copies incorporating other retouching features would be named CSC_0113.jpg instead.
Here are the Retouch menu options:
- NEF (RAW) Processing
- Trim
- Resize
- D-Lighting
- Quick Retouch
- Red-Eye Correction
- Straighten
- Distortion Control
- Perspective Control
- Fisheye
- Filter Effects
- Monochrome
- Image Overlay
- Color Outline
- Photo Illustration
- Color Sketch
- Miniature Effect
- Selective Color
- Painting
- Edit Movie
- Side-by-Side Comparison
NEF (RAW) Processing
Use this tool to create a JPEG version of any image saved in either straight RAW (with no JPEG version) or RAW+Fine (with a Fine JPEG version). You can select from among several parameters to “process” your new JPEG copy right in the camera.
- Choose a RAW image. Select NEF (RAW) Processing from the Retouch menu. You’ll be shown the standard Nikon D3400 image selection screen. Use the left/right buttons to navigate among the RAW images displayed. Press OK to select the highlighted image.
- In the NEF (RAW) processing screen, shown in Figure 5.9, you can use the multi selector up/down keys to select from five different attributes of the RAW image information to apply to your JPEG copy. Choose Image Quality (Fine, Normal, or Basic), Image Size (Large, Medium, or Small), White Balance, Exposure Compensation, Set Picture Control, High ISO Noise Reduction, Color Space, Vignette Control, and D-Lighting parameters.
- Press the Zoom In button to magnify the image temporarily while the button is held down.
- Press the Playback button if you change your mind, to exit from the processing screen.
- When all parameters are set, highlight EXE (for Execute) and press OK. The D3400 will create a JPEG file with the settings you’ve specified, and show an Image Saved message on the LCD when finished.

Figure 5.9 Adjust parameters and then save your JPEG copy from a RAW original file.
Tip
The White Balance and Vignette parameters cannot be selected for images created with the Image Overlay tool. Exposure compensation cannot be adjusted for images taken using Active D-Lighting, and both white balance and optimize image settings cannot be applied to pictures taken using any of the Scene modes.
Trim
This option creates copies in specific sizes based on the final size you select, chosen from among 3:2, 4:3, and 5:4 aspect ratios (proportions). You can use this feature to create smaller versions of a picture for e-mailing without the need to first transfer the image to your own computer. If you’re traveling, create your smaller copy here, insert the memory card in a card reader at an Internet café, your library’s public computers, or some other computer, and e-mail the reduced-size version. Just follow these steps:
- Select your photo. Choose Trim from the Retouch menu. You’ll be shown the standard Nikon D3400 image selection screen. Scroll among the photos using the multi selector left/right buttons, and press OK when the image you want to trim is highlighted. While selecting, you can temporarily enlarge the highlighted image by pressing the Zoom In button.
- Choose your aspect ratio. Rotate the command dial to change from 3:2, 4:3, 5:4, 1:1, and 16:9 aspect ratios. These proportions happen to correspond to the proportions of common print sizes, plus HDTV, including the two most popular sizes: 4 × 6 inches (3:2) and 8 × 10 inches (5:4). (See Table 5.2.)
- Crop in on your photo. Press the Zoom In button to crop your picture. The pixel dimensions of the cropped image at the selected proportions will be displayed in the upper-left corner (see Figure 5.10) as you zoom. The current framed size is outlined in yellow within an inset image in the lower-right corner.
- Move cropped area within the image. Use the multi selector left/right and up/down buttons to relocate the yellow cropping border within the frame.
- Save the cropped image. Press OK to save a copy of the image using the current crop and size, or press the Playback button to exit without creating a copy. Copies created from JPEG Fine, Normal, or Standard have the same Image Quality setting as the original; copies made from RAW files or any RAW+JPEG setting will use JPEG Fine compression.
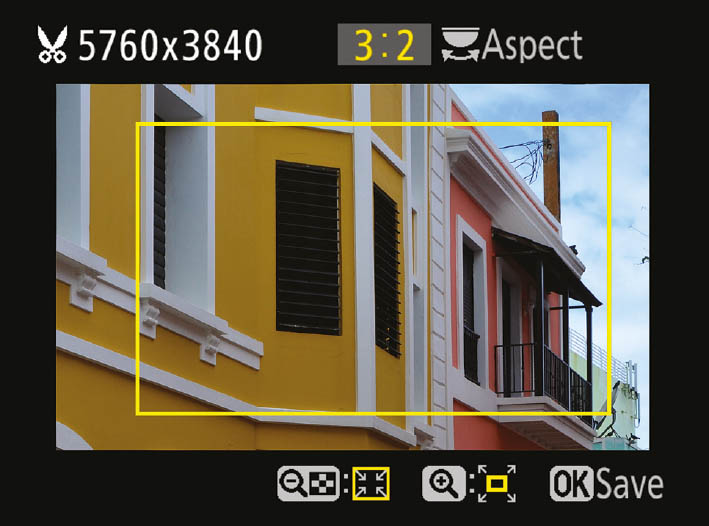
Figure 5.10 The Trim feature of the Retouch menu allows in-camera cropping.

Resize
This option creates smaller copies of the selected images. It can be applied while viewing a single image in full-frame mode (just press the i button as described above), or accessed from the Retouch menu (especially useful if you’d like to select and resize multiple images).
- Select images. If accessing from the Retouch menu, you can choose to select multiple images, or jump directly to the following two steps.
- Choose Size. Next, select the size for the finished copy, from 2.5M (1920 × 1280 pixels), 1.1M (1280 × 856 pixels), 0.6M (960 × 640 pixels), 0.3M (640 × 424 pixels), or 0.1M (320 × 216 pixels).
- Confirm. Press OK to create your copy.
D-Lighting
This option brightens the shadows of pictures that have already been taken, similarly to the Active D-Lighting feature described in Chapter 4. It is a useful tool for backlit photographs or any image with deep shadows with important detail. Once you’ve selected your photo for modification, you’ll be shown side-by-side images with the unaltered version on the left, and your adjusted version on the right. Press the multi selector’s up/down buttons to choose from High, Normal, or Low corrections. Press the Zoom In button to magnify the image. When you’re happy with the corrected image on the right, compared to the original on the left, press OK to save the copy to your memory card.
Quick Retouch
This option brightens the shadows of pictures that have already been taken. Once you’ve selected your photo for processing, use the multi selector up/down keys in the screen that pops up (see Figure 5.11). The amount of correction that you select (High, Normal, or Low) will be applied to the version of the image shown at right. The left-hand version of the image shows the uncorrected version. While working on your image, you can press the Zoom In button to temporarily magnify the original photo.
Quick Retouch brightens shadows, enhances contrast, and adds color richness (saturation) to the image. Press OK to create a copy on your memory card with the retouching applied.
Red-Eye Correction
This Retouch menu tool can be used to remove the residual red-eye look that remains after applying the Nikon D3400’s other remedies, such as the red-eye reduction lamp. (You can use the red-eye tools found in most image editors, as well.)

Figure 5.11 Quick Retouch applies D-Lighting, enhanced contrast, and added saturation to an image.
Your Nikon D3400 has a moderately useful red-eye reduction flash mode. Unfortunately, your camera is unable, on its own, to totally eliminate the red-eye effects that occur when an electronic flash (or, rarely, illumination from other sources) bounces off the retinas of the eye and into the camera lens. Animals seem to suffer from yellow or green glowing pupils, instead; the effect is equally undesirable. The effect is worst under low-light conditions (exactly when you might be using a flash) as the pupils expand to allow more light to reach the retinas. The best you can hope for is to reduce or minimize the red-eye effect.
The best way to truly eliminate red-eye is to raise the flash up off the camera so its illumination approaches the eye from an angle that won’t reflect directly back to the retina and into the lens. The extra height of the built-in flash may not be sufficient, however. That alone is a good reason for using an external flash. If you’re working with your D3400’s built-in flash, your only recourse may be to switch on the red-eye reduction flash mode. That causes a lamp on the front of the camera to illuminate with a half-press of the shutter release button, which may result in your subjects’ pupils contracting, decreasing the amount of the red-eye effect. (You may have to ask your subject to look at the lamp to gain maximum effect.)
If your image still displays red-eye effects, you can use the Retouch menu to make a copy with redeye reduced further. First, select a picture that was taken with flash (non-flash pictures won’t be available for selection). After you’ve selected the picture to process, press OK. The image will be displayed on the LCD monitor. You can magnify the image with the Zoom In button, scroll around the zoomed image with the multi selector buttons, and zoom out with the Zoom Out button. While zoomed, you can cancel the zoom by pressing the OK button. When you are finished examining the image, press OK again. The D3400 will look for red-eye, and, if detected, create a copy that has been processed to reduce the effect. If no red-eye is found, a copy is not created.
Straighten
Use this to create a corrected copy of a crooked image, rotated by up to five degrees, in increments of one-quarter of a degree. Use the right directional button to rotate clockwise, and the left directional button to rotate counterclockwise. Press OK to make a corrected copy, or the Playback button to exit without saving a copy.
Distortion Control
This option produces a copy with reduced barrel distortion (a bowing out effect) or pincushion distortion (an inward-bending effect), both most noticeable at the edges of a photo. You can select Auto to let the D3400 make this correction, or use Manual to make the fix yourself visually. Use the right directional button to reduce barrel distortion and the left directional button to reduce pincushion distortion. In both cases, some of the edges of the photo will be cropped out of your image. Press OK to make a corrected copy, or the Playback button to exit without saving a copy. Note that Auto cannot be used with images exposed using the Auto Distortion Control feature described earlier in this chapter. Auto works only with type G and type D lenses (see Chapter 10 for a description of what these lenses are), and does not work well with certain lenses, such as fisheye lenses and perspective control lenses.
Perspective Control
This option is the first on the second page of the Retouch menu (see Figure 5.12). It lets you adjust the perspective of an image, reducing the falling back effect produced when the camera is tilted to take in the top of a tall subject, such as a building. Use the multi selector buttons to “tilt” the image in various directions and visually correct the distortion. (See Figure 5.13.)

Figure 5.12 Perspective Control is the first entry on the second page of the Retouch menu.

Figure 5.13 Perspective Control lets you fix “falling back” distortion when photographing tall subjects.
Fisheye
This feature emulates the extreme curving effect of a fisheye lens. Use the right directional button to increase the effect, and the left directional button to decrease it. Press OK to make a corrected copy, or the Playback button to exit without saving a copy. Figure 5.14 shows an example image.
Filter Effects
Add effects somewhat similar to photographic filters with this tool. You can choose from among five different choices:
- Skylight. This option makes the image slightly less blue.
- Warm. Use this filter to add a rich warm cast to the duplicate.
- Red, Green, or Blue intensifiers. These three options make the red, green, and blue hues brighter, respectively. Use them to brighten a rose, intensify the greens of foliage, or deepen the blue of the sky.
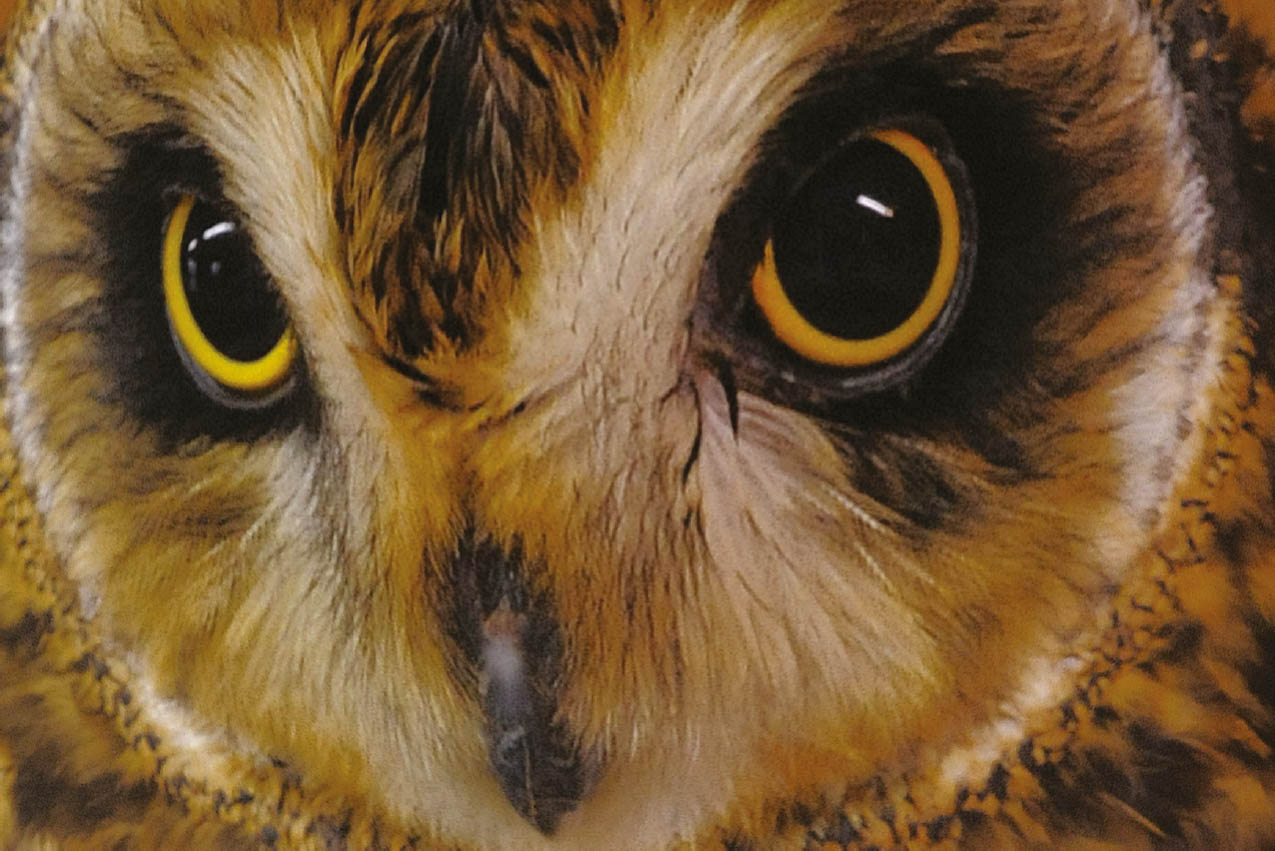
Figure 5.14 You can apply a fisheye effect to an image.
- Cross screen. This option adds radiating star points to bright objects—such as the reflection of light sources on shiny surfaces. You can choose four different attributes of your stars:
- Number of points. You can select from four, six, or eight points for each star added to your image.
- Filter amount. Select from three different intensities, represented by two, three, and four stars in the menu (this doesn’t reflect the actual number of stars in your image, which is determined by the number of bright areas in the photo).
- Filter angle. Select from three different angles: steep, approximately 45 degrees, and a shallower angle.
- Length of points. Three different lengths for the points can be chosen: short, medium, and long.
- Soft. Creates a dreamy, soft-focus version of your image. You can compare the “before” and “after” versions using a screen much like the one used for D-Lighting.
Monochrome
This Retouch choice allows you to produce a copy of the selected photo as a black-and-white image, sepia-toned image, or cyanotype (blue-and-white) image. You can fine-tune the color saturation of the previewed Sepia or Cyanotype version by pressing the multi selector up button to increase color richness, and the down button to decrease saturation. When satisfied, press OK to create the monochrome duplicate. See Figure 5.15.
Image Overlay
This feature allows you to combine two RAW photos (only NEF files can be used) in a composite image that Nikon claims is better than a “double exposure” created in an image-editing application, because the overlays are made using RAW data. To produce this composite image, follow these steps:
- Choose Image Overlay. A screen will be displayed, with the Image 1 box highlighted.
- Press OK and the Nikon D3400’s image selection screen appears. Choose the first image for the overlay and press OK.
- Press the right multi selector button to highlight the Image 2 box, and press OK to produce the image selection screen. Choose the second image for the overlay.
- By highlighting either the Image 1 or Image 2 boxes and pressing the multi selector up/down buttons, you can adjust the “gain,” or how much of the final image will be “exposed” from the selected picture. You can choose from X0.5 (half-exposure) to X2.0 (twice the exposure) for each image. The default value is 1.0 for each, so that each image will contribute equally to the final exposure.
- Use the multi selector right button to highlight the Preview box and view the combined picture. Press the Zoom In button to enlarge the view.
- When you’re ready to store your composite copy, press the multi selector down button when the Preview box is highlighted to select Save, and press OK. The combined image is stored on the memory card.

Figure 5.15 Create a black-and-white, sepia, or cyanotype version of a full-color image.
Color Outline
This option creates a copy of your image in outline form (see Figure 5.16), which Nikon says you can use for “painting.” You might like the effect on its own. It’s a little like the Find Edges command in Photoshop and Photoshop Elements, but you can perform this magic in your camera!
Photo Illustration
Applies the same look to an image that the Photo Illustration EFFECTS mode does, as explained in Chapter 6.
Color Sketch
This option creates a copy of your image in outline form, too, but retains some of the colors of the original image.

Figure 5.16 The Color Outline retouching feature creates an outline image (right), but it’s not in color (like the original, left).
Miniature Effect
This is a clever effect, and it’s hampered by a misleading name and the fact that its properties are hard to visualize (which is not a great attribute for a visual effect). This tool doesn’t create a “miniature” picture, as you might expect. What it does is mimic tilt/shift lens effects that angle the lens off the axis of the sensor plane to drastically change the plane of focus, producing the sort of look you get when viewing some photographs of a diorama, or miniature scene. Confused yet? It’s the first entry on the last screen of the Retouch menu. (See Figure 5.17.)
Perhaps the best way to understand this capability is to actually modify a picture using it. Just follow these steps:
- Take your best shot. Capture an image of a distant landscape or other scene, preferably from a slightly elevated viewpoint.
- Access Miniature Effect. When viewing the image during playback, press the multi selector center button to access the Retouch menu, and select Miniature Effect. A screen like the one shown at left in Figure 5.18 appears.
- Adjust selected area. A wide yellow box (or a tall yellow box if the image is rotated to vertical perspective on playback) highlights a small section of the image. (No, we’re not going to create a panorama from that slice; this Nikon super-tricky feature has fooled you yet again.) Use the up/down buttons (or left/right buttons if the image is displayed vertically) to move the yellow box, which represents the area of your image that will be rendered in (fairly) sharp focus. The rest of the image will be blurred.
- Preview area to be in sharp focus. Press the Zoom In button to preview the area that will be rendered in sharp focus. Nikon labels this control Confirm, but that’s just to mislead you. It’s actually just a preview that lets you “confirm” that this is the area you want to emphasize.
- Apply the effect. Press the OK button to apply the effect (or the Playback button to cancel). Your finished image will be rendered in a weird altered-focus way, as shown at right in Figure 5.18.

Figure 5.17 The last screen in the Retouch menu.

Figure 5.18 Left: Choose the area for sharp focus by moving the yellow box within the frame. Right: The photo with the diorama/miniature effect applied.
Selective Color
Use the multi selector to move the cursor over an object and press the AE-L/AF-L button to select that color, which will remain in the final retouched copy of the image, while the other colors are converted to black-and-white. You can press the Zoom In/Zoom Out buttons to choose a specific color more precisely. Rotate the command dial to expand/contract the color range of hues to match the selected color. (See Figure 5.19.)

Figure 5.19 Left: Choose a color to preserve. Right: All non-selected colors will be rendered in black-and-white.
Painting
Creates a copy with a weird, almost HDR effect, which, fortunately, the D3400 will preview for you before you decide to discard it. Or, maybe you’ll like it.
Edit Movie
You can trim your movies to exclude extraneous “footage.” You’ll find instructions for using this feature in Chapter 8.
Side-by-Side Comparison
Use this option to compare a retouched photo side-by-side with the original from which it was derived. This option is shown on the pop-up menu that appears when you are viewing an image (or copy) full screen and press the i button.
- Press the Playback button and review images in full-frame mode until you encounter a source image or retouched copy you want to compare. The retouched copy will have the retouching icon displayed in the upper-left corner. Press OK.
- The Retouch menu appears, with Side-by-Side Comparison added at the bottom. Scroll down to that entry and press OK.
- The original and retouched image will appear next to each other, with the retouching options you’ve used shown as a label above the images.
- Highlight the original or the copy with the multi selector left/right buttons, and press the Zoom In button to magnify the image to examine it more closely.
- If you have created more than one copy of an original image, select the retouched version shown, and press the multi selector up/down buttons to view the other retouched copies. The up/down buttons will also let you view the other image used to create an Image Overlay copy.
- When done comparing, press the Playback button to exit.
Using Recent Settings
The last menu in the D3400’s main menu screen is Recent Settings (see Figure 5.20), which simply shows an ever-changing roster of the 20 menu items you used most recently. Press the up/down buttons to highlight an entry, and the right button to select it. To remove an entry from the Recent Settings listing, highlight it and press the Trash button.
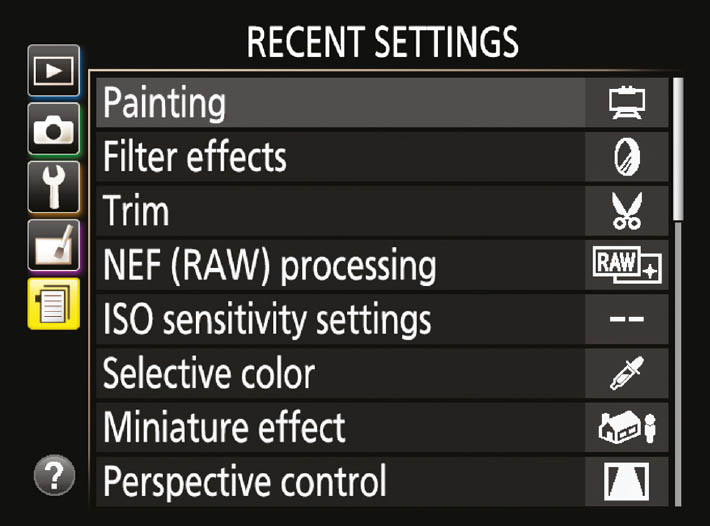
Figure 5.20 The most recent menu items you’ve accessed appear in the Recent Settings menu.