
This chapter will explain the essential skills you will need to master to use a Chromebook effectively as a teacher or an administrator. Most of these skills are ones that you will want your school’s students to learn as well.
This is a long chapter. We will start by covering the actions you will need to take with a new Chromebook—performing basic setup, connecting the Chromebook to a Wi-Fi network, accepting the Chrome OS licensing terms, and signing in to the Chromebook. We will then move along to looking at how to control startup, sleep and wake, shutdown, and restart on a Chromebook; how to navigate the Chrome OS interface; and how to use and configure the keyboard, including in-depth coverage of the many keyboard shortcuts that Chrome OS offers.
From there, we will explore how to connect external devices—from a mouse to a monitor, from Bluetooth devices to external drives—to a Chromebook and use them with it. After that, you will learn how to work with apps and windows, how to make the most of the Chrome browser, and how to manage your files using the Files app. Finally, we will cover how to sign in to multiple user accounts on a Chromebook and switch quickly among them, and how to capture screenshots on Chromebooks for documentation or other purposes.
Note
In this chapter, we will look at some configuration changes you may need to make immediately, such as choosing essential accessibility settings and connecting the Chromebook to a Wi-Fi network. For in-depth coverage of other settings, turn to Chapter 4, which will cover configuring a Chromebook manually.
Setting Up a Chromebook
This section will show you how to get started with a new Chromebook—performing the initial startup steps, connecting the Chromebook to a Wi-Fi network, accepting the Chrome OS licensing terms, and signing in to the Chromebook.
Note
You can also use this procedure to set up a Chromebook that has been restored to its original settings using the Powerwash feature. See the section “Resolving Problems by Resetting and Powerwashing Chromebooks” in Chapter 9 for details on Powerwash.
First, start the Chromebook by pressing its power button. Most Chromebooks have a dedicated power button—you will need to find where the manufacturer has located it—but some use a key on the keyboard for power.
Navigating the Welcome! Dialog Box: Choosing Language and Accessibility Settings

From the Welcome! dialog box, you can configure the language, keyboard layout, and essential accessibility settings
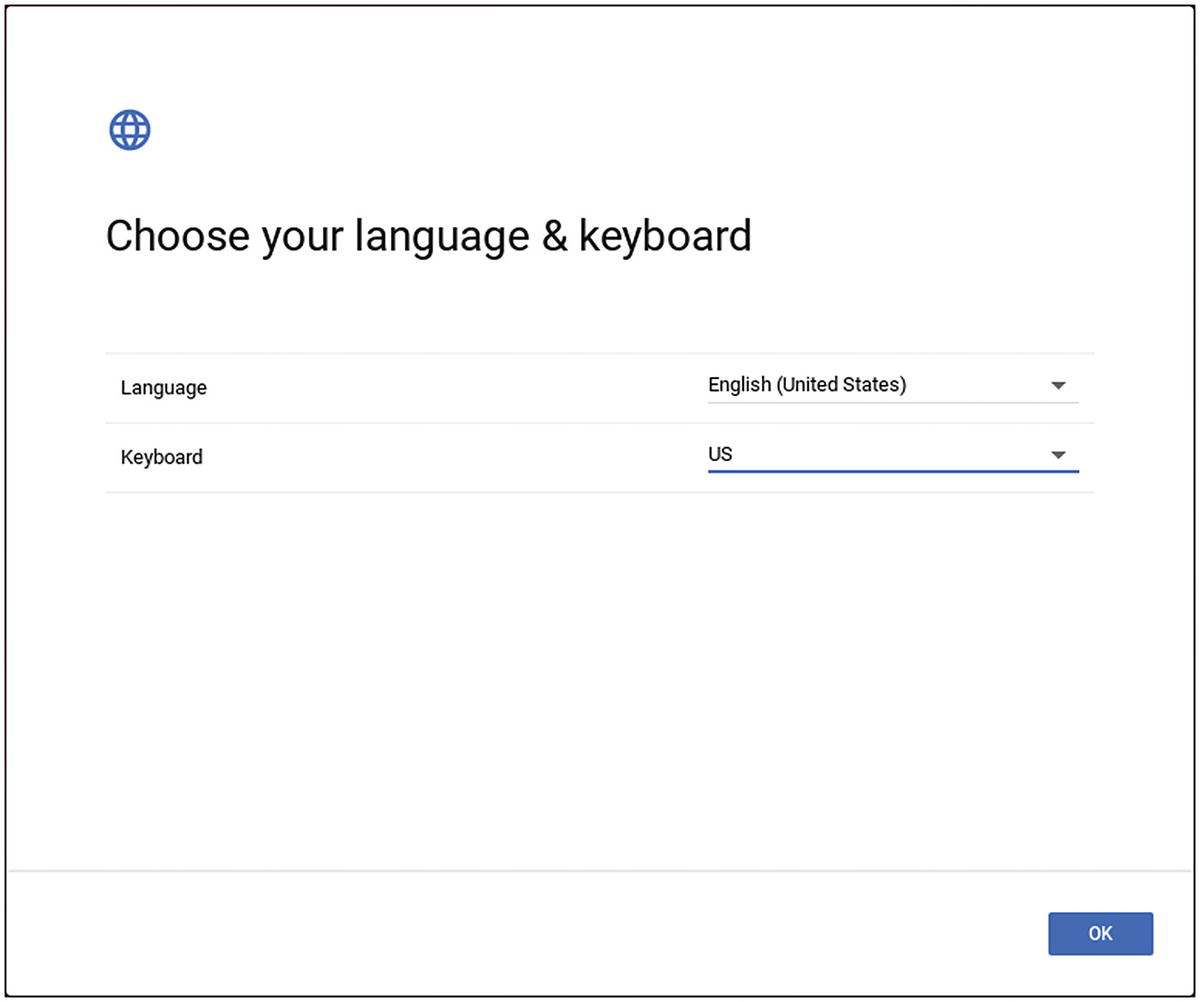
In the Choose your language and keyboard dialog box, select the display language you want to use and then select the keyboard layout
ChromeVox: Set this switch to On to enable ChromeVox spoken feedback during setup.

In the Accessibility settings dialog box, you can enable five essential accessibility settings: ChromeVox spoken feedback, the large mouse cursor, high-contrast mode, the screen magnifier, and the on-screen keyboard
Large mouse cursor: Set this switch to On to pump up the pointer (the mouse cursor) to a huge size for easy visibility.
High-contrast mode: Set this switch to On to apply a high-contrast mode that’s similar to reverse video.
Screen magnifier: Set this switch to On to magnify the screen. With the screen magnifier on, you will need to pan around the screen to see all of it.
On-screen keyboard: Set this switch to On to display the on-screen keyboard, which enables you to type characters by clicking.
After making your choices in the Accessibility settings dialog box, click the OK button to return to the Welcome! dialog box.

In the Connect to network dialog box, select the Wi-Fi network you want the Chromebook to use
Working in the Connect to Network Dialog Box
The Connect to network dialog box shows a list of the available Wi-Fi networks that Chrome OS has detected. At the bottom of the dialog box is the Add other Wi-Fi network button, which enables you to connect the Chromebook to a network that does not appear in the list.
UNDERSTANDING SSIDS AND OPEN AND CLOSED WI-FI NETWORKS
Each Wi-Fi network has a name that identifies it. The name is formally known as a service set identifier, which is abbreviated as SSID . The name can be up to 32 characters or 32 bytes long. The characters can include upper- and lowercase letters (including spaces), numbers, and symbols (such as underscores or periods). An SSID is case sensitive, so School_AP1 is different from SCHOOL_AP1.
Most wireless access points come with default names that identify the device’s manufacturer or the company that supplies it. If you are setting up the Wi-Fi network , you should give each wireless access point a name that makes sense for your school or institution so that staff and students can instantly tell whether a particular Wi-Fi network is part of the school or not. Unless your school’s buildings are surrounded by open space, it is likely that some Wi-Fi networks from neighboring buildings will reach into your school’s buildings. (Similarly, neighboring buildings will be able to see any of your school’s wireless networks that reach beyond its grounds.)
A Wi-Fi network can be either open or closed. An open Wi-Fi network is one that broadcasts its SSID for all to see; any Wi-Fi–capable device within range will detect the network and can attempt to connect to it. By contrast, a closed Wi-Fi network does not broadcast its SSID, and anyone trying to connect a device to it must type in the correct SSID on the device.
At first glance, preventing a network from broadcasting its SSID appears to be a reasonable security measure. But because Wi-Fi scanning apps and devices can detect the SSID of even a closed network, closing a network works only to deter casual access. Anyone with a scanning app (which you can get for free) or a dedicated scanning device can learn the SSID in seconds and can then try to connect to the network. In most cases, it is better to create open Wi-Fi networks and implement effective security than to create closed networks.
Readability and clarity: Normally, you will want to make the names readable (rather than gobbledygook) and their meanings clear. This way, you will be able to tell your colleagues and students clearly which networks they’re supposed to be using.
Uniqueness in their context: Each SSID should be unique so that users and devices can tell which network they’re trying to connect to. Some devices assume that an SSID uniquely identifies a network. This assumption enables a malefactor to set up a malicious Wi-Fi hotspot that uses the same name and password as a genuine hotspot nearby, causing devices to connect to the malicious hotspot instead of the genuine one. (The malicious hotspot can capture information from the devices that connect to it.)
Security: The Wi-Fi router uses the SSID, together with the security method you choose, to encrypt the information it transmits. So, technically it is better to choose a longer and more complex name than a short name.
- 1.
Click the button for the Wi-Fi network to which you want to connect the Chromebook. The Join Wi-Fi network dialog box for an open network opens (see Figure 3-5).
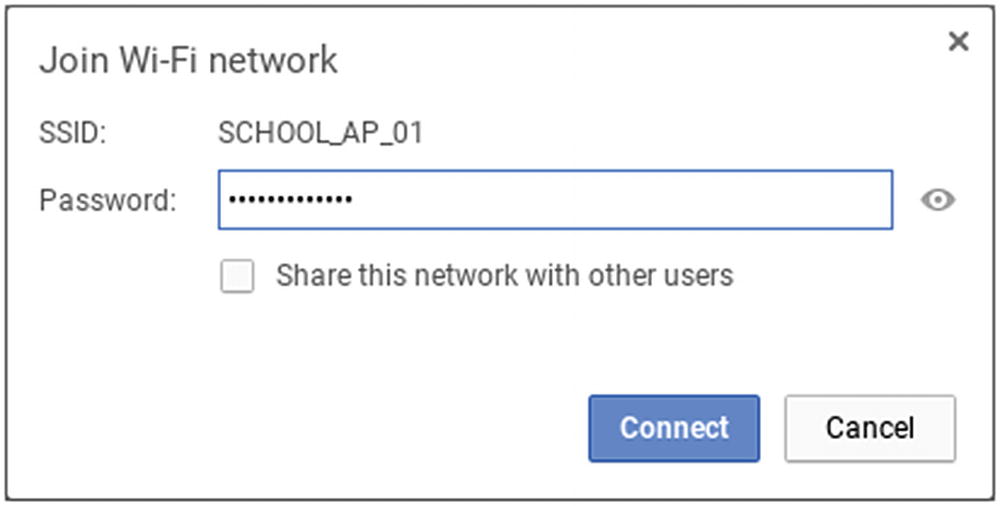
In the Join Wi-Fi network dialog box for an open network, enter the password or other security information for the network. Check the “Share this network with other users” check box if you want other users of this Chromebook to be able to use the network.
- 2.
Click the Password box and type the password for the network. You can click the Show password icon (the eye icon) on the right of the Password box to reveal the characters you typed; this is especially handy for complex passwords.
- 3.
Check the “Share this network with other users” check box if you want the network to be available to other users of this Chromebook. In a school situation, you will normally want to do this.
- 4.
Click the Connect button. Chrome OS connects to the Wi-Fi network. Once the connection is established, the Wi-Fi icon on the shelf displays white bars to show the signal strength. The Join Wi-Fi network dialog box closes, and the Google Chrome OS terms dialog box opens .
- 1.
Click the Add other Wi-Fi network button at the bottom of the list. If there are many networks, you may need to scroll down to reach this button. The Join Wi-Fi network dialog box for connecting to a closed network appears (see Figure 3-6).
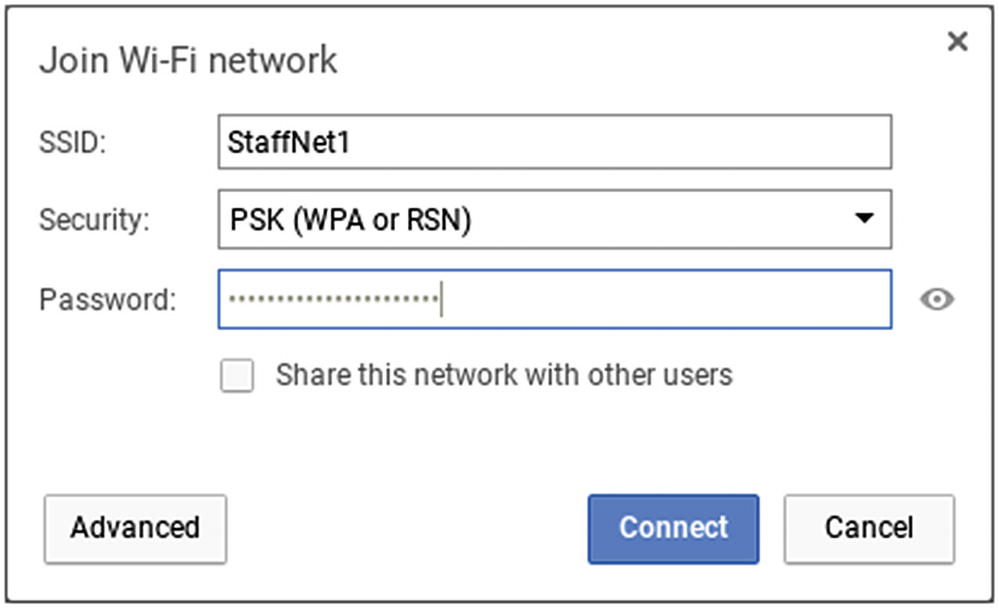
In the Join Wi-Fi network dialog box for other networks, type the network’s SSID, choose the security type, and enter the password
Note
If you need to set up a Wi-Fi network connection that uses other types of authentication than a password, click the Advanced button at this point to expand the Join Wi-Fi network dialog box so that it shows extra fields. Then, skip to the section “Connecting to a Wi-Fi Network with Complex Authentication” later in this chapter for instructions.
- 2.
Type the Wi-Fi network’s name in the SSID box.
- 3.
If the Wi-Fi network uses security (as most networks do), click the Security pop-up menu and then click the PSK (WPA or RSN) item or the WEP item. See the nearby sidebar titled “Wi-Fi Security: WEP, PSK, WPA, and RSN” for details on the acronyms. If the Wi-Fi network does not use security, leave the default setting, None, selected in the Security pop-up menu box.
WI-FI SECURITY: WEP, PSK, WPA, AND RSN
WEP: WEP is the acronym for Wired Equivalent Privacy . WEP is an older form of Wi-Fi security that is easy to crack, so few networks use it these days unless they need to provide backward compatibility for very old wireless hardware. Avoid using WEP unless there is no alternative.
PSK: PSK is the acronym for Pre-Shared Key —in other words, a password or passphrase used for securing the network. PSK can use either RSN or WPA to negotiate the connection between the wireless access point and the wireless client.
RSN: RSN is the acronym for Robust Security Network . RSN is a group of protocols that wireless access points and wireless clients can use to negotiate which authentication and encryption algorithms to use to secure the network connection.
WPA: WPA is the acronym for Wi-Fi Protected Access , a security specification designed to be more secure than WEP.
- 4.
Assuming the network uses security, click the Password box and type the password. You can click the Show password icon to the right of the Password box if you need to check what you are typing.
- 5.
Check the “Share this network with other users” check box if you want the network to be available to other users of this Chromebook. In a school situation, you will normally want to do this.
- 6.
Click the Connect button. Chrome OS connects to the closed Wi-Fi network. Once the connection is established, the Wi-Fi icon on the shelf shows the signal strength by the number of white bars. The Join Wi-Fi network dialog box closes, and the Google Chrome OS terms dialog box opens.
Note
If you are using this method to connect to a Wi-Fi network that’s not within range of the Chromebook, Chrome OS attempts to connect to the network. When the attempt to connect times out, Chrome OS displays a Network Connection Error alert. Chrome OS also displays the Join Wi-Fi network dialog box for an open network so that you can re-enter the password, in case a wrong password caused the network connection error. Click the Cancel button to dismiss the Join Wi-Fi network dialog box. You can also click the Network Connection Error alert to display the Settings window for the Wi-Fi network; we’ll examine this window in the section “Configuring the Settings for a Wi-Fi Network Connection” later in this chapter.
Navigating the Google Chrome OS Terms Dialog Box

In the Google Chrome OS terms dialog box, you can read the terms for Chrome OS, choose whether to automatically send diagnostic and usage data to Google, and access the System security setting
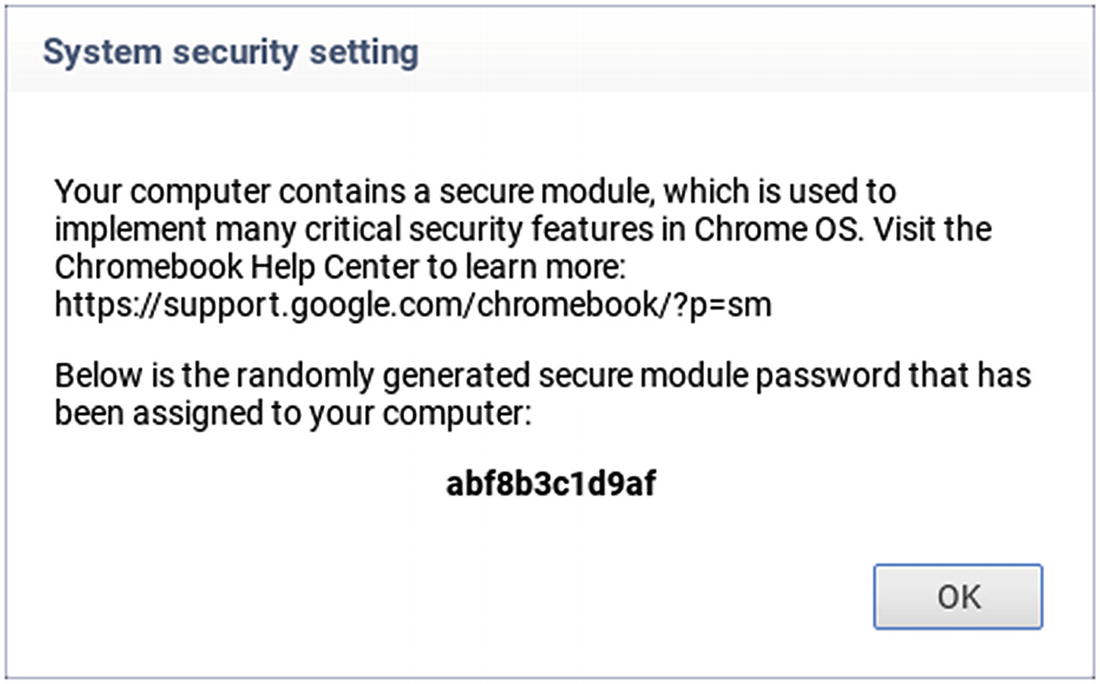
After opening the System security setting dialog box, note the randomly generated secure module password in your documentation
Uncheck the “Optional: Help make Chrome OS better by automatically sending diagnostic and usage data to Google” check box if you don’t want the Chromebook to report home about its usage and about errors that the operating system diagnoses. Then click the Accept and continue button to proceed with setup.
Next, the Checking for updates dialog box appears while Chrome OS checks for updates. If it finds updates, it installs them automatically and then restarts the Chromebook if necessary.
Once the updating (if any) is complete, the Sign in to your Chromebook dialog box opens.
Signing In to the Chromebook

From the Sign in to your Chromebook dialog box, you can sign in as an individual user, recover the details of your Google account, create a new Google account, launch Guest mode, or begin enterprise enrollment
Setting Up the Chromebook as an Individual User

In the Hi dialog box, type your password and click the Next button. You can click the Forgot password? link to start the process of recovering a forgotten password.
Note
If you have forgotten the password for your Google account, click the Forgot password? link to display the Find your email dialog box, type your phone number or recovery email address, click the Next button, and then follow the prompts to recover the details.

In the 2-Step Verification dialog box, type the six-digit verification code that Google sends to your mobile phone

When the Howdy dialog box opens, either click the Take a tour button to learn about Chrome OS or click the Close (X) button in the upper-right corner to close the dialog box
Using Guest Mode to Browse the Web
If you want to use the Chromebook in Guest mode, click the More options link in the Sign in to your Chromebook dialog box, then click the Guest mode item on the menu that opens. Chrome OS opens a browser window showing the message You are browsing as a guest, and you can start browsing.
Note
Chrome OS deletes files created during the Guest session when the guest logs out, so the Guest account takes up only a minimal amount of storage space between sessions. If you create any files you want to keep while using a Chromebook in Guest mode, you need to copy them to online storage—or perhaps email them to yourself—before you end the Guest session.
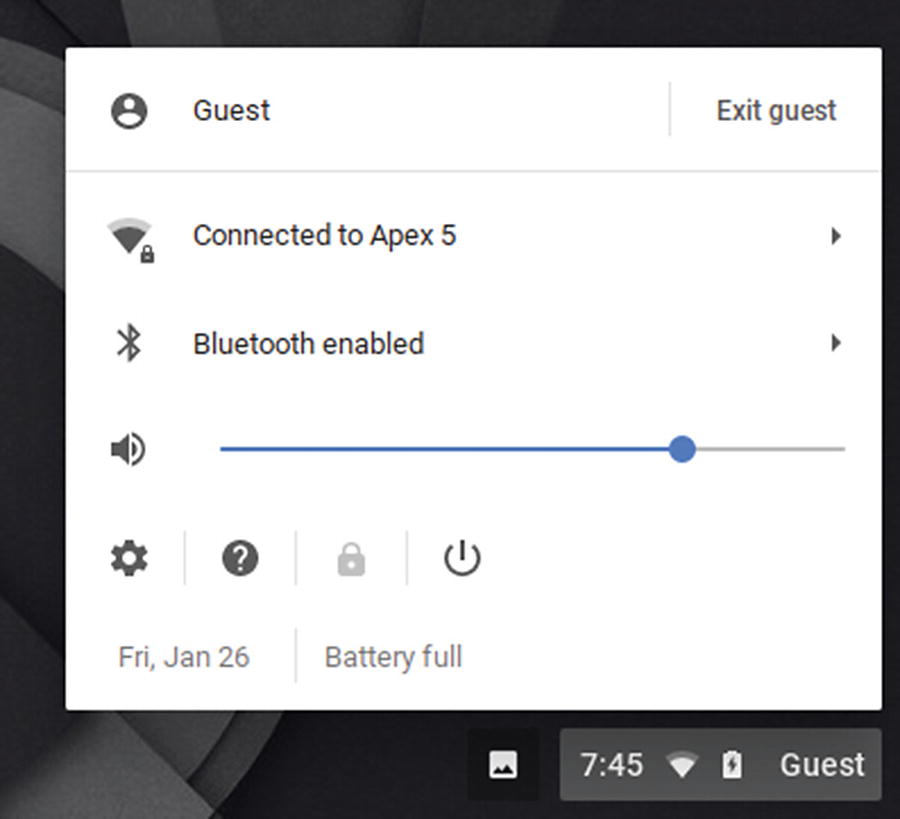
When you are ready to exit the Guest session, click the Guest button in the lower-right corner of the screen and then click the Exit guest button on the status menu
Setting Up the Chromebook to Use Enterprise Enrollment
If you are going to enroll the Chromebook in enterprise management, click the More options link on the Sign in to your Chromebook dialog box and then click the Enterprise enrollment item on the menu that opens. You can then follow the prompts to enroll the Chromebook.
Controlling Startup, Sleep and Wake, Shutdown, and Restart
This section will show you how to start the Chromebook; how to put it to sleep and how to wake it from sleep; how to shut down the Chromebook when you finish using it; and how to restart it.
Starting Up a Chromebook and Signing In
To start up a Chromebook, press the Power key on the keyboard or the Power button, depending on which power control the Chromebook has.
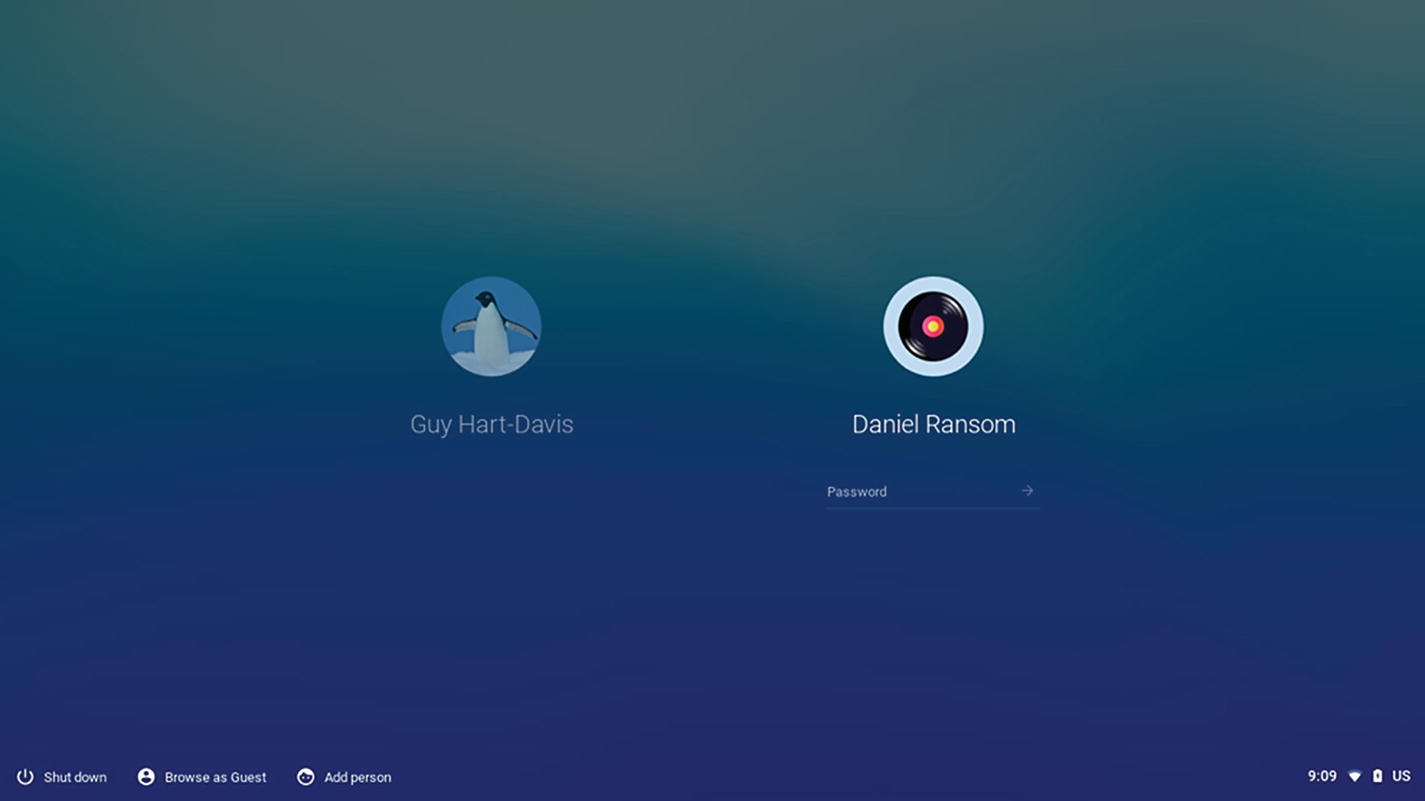
If the sign-in screen displays an icon and user name for each user, click your icon or user name, type your password, and press the Enter key or click the right-arrow button to the right of the “Password ” field
Locking a Chromebook
Keyboard: Press Search+L.
Trackpad: Click the status area to display the status menu and then click the Lock button.
Display the status menu: Click the status area as usual. Only some of the commands on the status menu are enabled. For example, you can change the keyboard layout and accessibility options, but you cannot connect to a different Wi-Fi network.
Sign out of the Chromebook: Click the Sign out button in the lower-left corner of the lock screen. You can also sign out from the status menu.
Shut down the Chromebook: Click the Shut down button in the lower-left corner of the lock screen . You can also click the Shut down button on the status menu, as usual.

From the lock screen, you can unlock the Chromebook by typing your password and pressing the Enter key. You can also display the status menu, sign out of the Chromebook, or shut down the Chromebook.
Note
If you will lock the Chromebook frequently, you may want to set up a PIN for unlocking it so that you do not have to type your password each time. See the section “Setting Up a Screen Lock” in Chapter 4 for instructions on setting up a PIN .
Putting a Chromebook to Sleep and Waking It Again
When you finish using a Chromebook for the time being but intend to return to it and resume work, you can put the Chromebook to sleep. When asleep, the Chromebook uses only a minimal amount of battery power.
Usually, the easiest way to put the Chromebook to sleep is to close its lid. By default, Chrome OS is configured to put a Chromebook to sleep when the lid closes.
Note
If closing the lid does not put the Chromebook to sleep, you need to set the “Sleep when lid is closed” switch on the Power screen in the Settings app to On. See the section “Configuring Power Settings” in Chapter 4 for more information about power settings.
To wake the Chromebook, open its lid (if the lid is closed) or press a key on the keyboard.
Signing Out of a Chromebook
Status menu: Click the status area to display the status menu and then click the Sign out button to the right of your user name.
Lock screen: Click the Sign out button near the lower-left corner of the lock screen.
After you sign out, the sign-in screen appears. From here, another user can sign in, or you can sign in again.
Shutting Down a Chromebook
When you finish using a Chromebook and do not intend to use it for a while, you can shut it down. Normally, you do not need to shut down a Chromebook unless you want to make it reload the operating system (for example, to try to clear an intermittent error) or unless it has reached the end of its battery power.
Status menu: Click the status area to display the status menu and then click the Shut down icon (see Figure 3-16).
Sign-in screen: Click the Shut down icon in the lower-left corner.
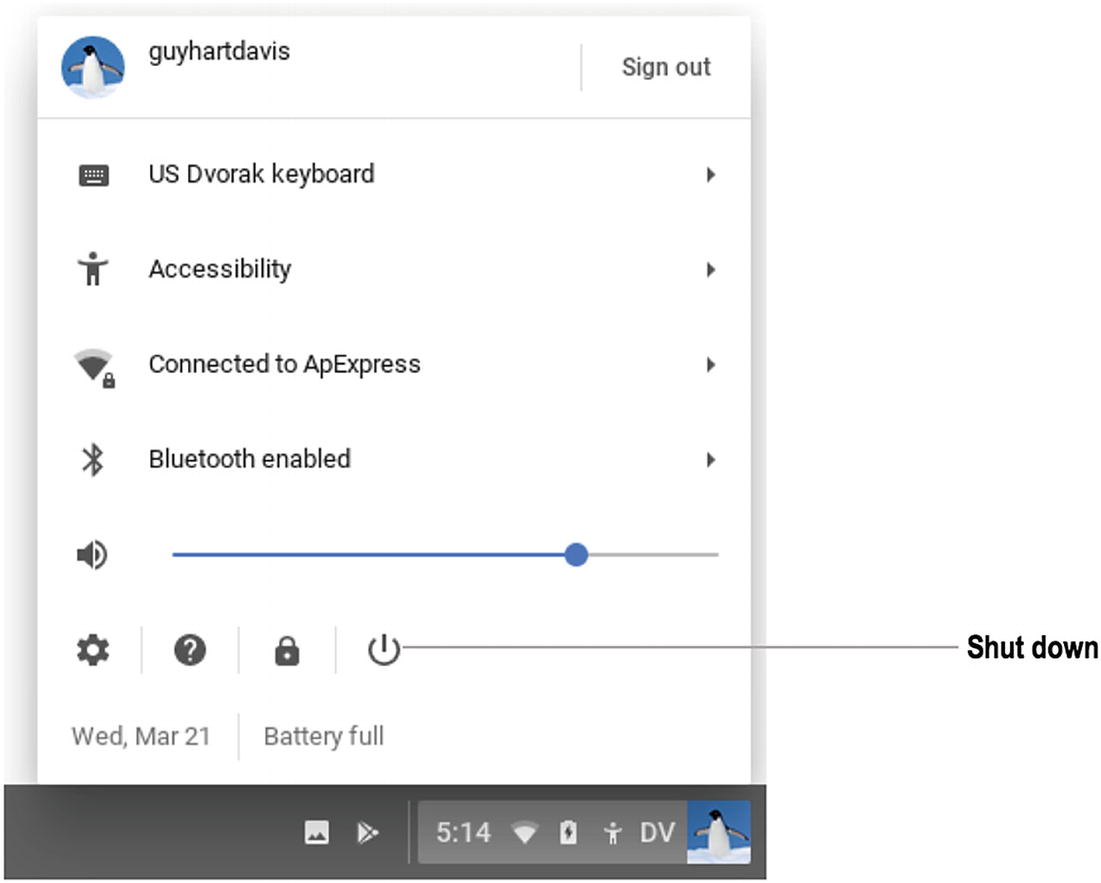
Click the Shut down icon on the status menu when you need to shut down the Chromebook
Either way, the Chromebook shuts down and stops using power.
When you are ready to start using the Chromebook again, press the Power key or Power button. Chrome OS starts, the sign-in screen appears, and you can sign in.
Restarting a Chromebook
Unlike most other operating systems , Chrome OS does not provide a Restart command in the user interface. Instead of restarting, you normally shut down Chrome OS by using the Shut down command either from the status menu when you are signed in or from the sign-in screen when you are not signed in.
However, Chrome OS does have a keyboard shortcut for restarting. Press the Refresh key and the Power key or Power button together. If you are signed in, it is best to sign out before invoking this keyboard shortcut because Chrome OS restarts without giving you the chance to save any unsaved work.
Navigating the Chrome OS Interface
Desktop: The desktop is the background area on which your apps appear. You can control the desktop’s appearance by changing the wallpaper applied to it.
Shelf: The shelf is a strip that appears at the bottom, the left side, or the right side of the Chrome OS desktop. The left shelf contains the Launcher icon and a row of app icons that are pinned in place. You can use these icons to launch apps that are not running and to switch to the apps when they are running. When you launch other apps, their icons appear on the shelf too, and you can use the icons to switch to the apps. You can either display the shelf all the time or make it hide itself automatically when you are not using it.
Launcher button: The Launcher button appears at the left end of the shelf when the shelf is at the bottom of the desktop or at the top of the shelf when the shelf is on the left side or right side of the desktop.
Notifications: The Notifications area displays icons for notifications that are awaiting your attention. See the section “Working with Notifications and Configuring Them” later in this chapter for details.
Status area: The status area, which appears at the right end of the shelf, contains icons such as the time, the Wi-Fi network strength, the battery status, and the current keyboard layout (if the Chromebook is configured with multiple keyboard layouts). You can click any of the icons in the status area to display the status menu, which contains frequently used settings and also gives you access to the Settings app (which contains the full range of settings).
Account picture: The account picture shows a thumbnail of the image associated with the Google account under which you are currently logged in. If you use only a single Google account, this reminder is largely superfluous, but if you log in using multiple accounts, you may find it helpful, especially as Chrome OS enables you to switch quickly among accounts. You can click your account picture to open the status menu.
Using the Touchpad
Move the pointer: Place a finger on the touchpad and move it in the direction you want the pointer to go.
Click: Press with one finger on the side of the touchpad nearest to you (farthest from the keyboard).
Note
If the tap-to-click feature is enabled, you can click by tapping one finger anywhere on the touchpad. Similarly, you can right-click by tapping with two fingers anywhere on the touchpad and close a tab by pointing to the tab and tapping anywhere on the touchpad with three fingers. If the tap-dragging feature is enabled, you should be able to position the pointer over an object, such as a window title bar , tap and keep your finger on the screen to grab the object, and then slide your finger to drag the object; however, this feature seems to work only intermittently.
Right-click (secondary click): Hold down the Option key while you click. Alternatively, press with two fingers on the side of the touchpad nearest to you.
Drag and drop: Point to the item you want to drag and drop. Click with one finger on the side of the touchpad nearer to you and keep holding the click while you drag the item to where you want it. Release the touchpad to drop the item.
Scroll up, down, left, or right: Place two fingers on the touchpad and move them up, down, left, or right.
Go back and forward between pages: Swipe left with two fingers on the touchpad to go back to the previous page you were on. After going back, you can swipe right with two fingers on the touchpad to go forward again to the page from which you went back.
Display all open windows: Swipe down with three fingers on the touchpad.
Note
Chrome OS includes a feature called Australian scrolling—scrolling in which up is down. With Australian scrolling on, you swipe up with three fingers on the touchpad to display all open windows.
Close a tab: Move the pointer over the tab and then click with three fingers on the side of the touchpad nearest to you.
Switch between browser tabs: Swipe left or right with three fingers on the touchpad.
Using the Touchscreen
Click: Tap the item you want to click.
Drag: Tap and hold for a moment, then drag. For example, to move a window, tap and hold its title bar and then drag the window to where you want it.
Right-click: With two fingers, tap the item you want to right-click.
Display the shelf when it is hidden: Swipe or drag up a short way from the bottom of the screen. You can swipe the shelf back down when you no longer need it displayed.
Display the Launcher screen: Swipe up from the bottom of the screen. The Launcher screen disappears when you tap an icon on it, but you can also hide the Launcher screen by swiping down from the top of the screen.
Go forward or back in a Chrome tab’s history: Swipe right to go back to the previous page displayed in this tab. After going back, you can swipe left to go forward to the page from which you went back.
Zoom in or out on a web page: Place two fingers (or a finger and a thumb) together on the screen and spread them apart to zoom in, or place them apart on the screen and move them together to zoom out. Zooming works only on web pages designed to use zoom.
Launching Apps with the Launcher
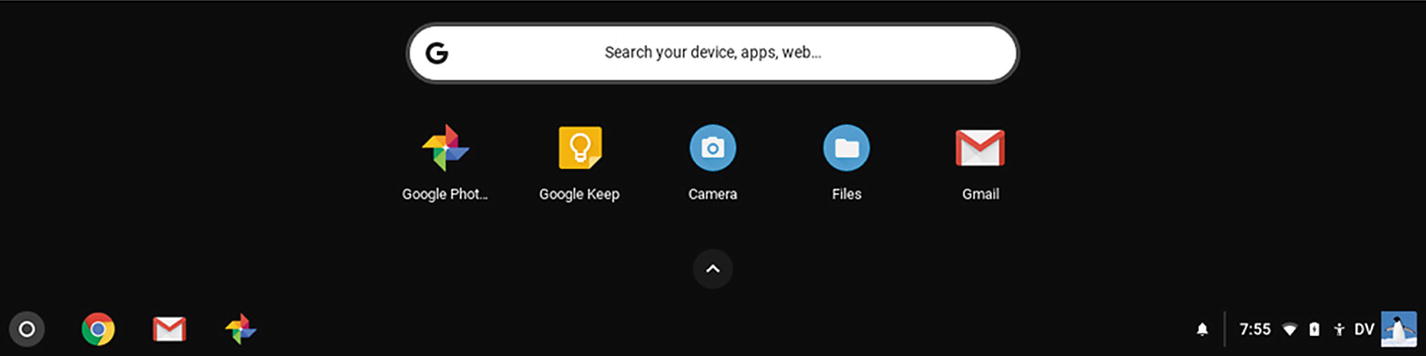
The Launcher first appears as a bar in the lower part of the screen. Click the app’s icon if it appears. Otherwise, click the up-arrow button to expand the Launcher to full screen.

When displayed full screen, the Launcher shows the full list of apps. If the apps stretch to multiple screens, white and gray dots appear on the right, with the white dot indicating the current screen. Click a gray dot to display that screen of apps.
Locate the icon for the app . If there are more apps than will fit on the single screen, dots appear on the right side of the list. The white dot indicates the current screen of apps; the gray dots indicate other screens of apps. Click a gray dot to display another screen of apps.
After searching for an app, click the appropriate icon to launch the app
When you find the app’s icon, click it to launch the app. The Launcher screen disappears again, and the app opens.
Configuring the Shelf
The shelf is the strip that appears at the bottom of the screen by default. You can move the shelf to the left side or right side of the screen if you prefer; you can make the shelf hide itself automatically when you are not using it; and you can customize the icons that appear on the shelf.
Note
The shelf provides some of the features of the taskbar and the notification area in Windows and the Dock and menu bar in MacOS.
Controlling the Shelf Position and Autohiding
By default, the shelf appears across the bottom of the screen, and you may well want to leave it there. If you want to move the shelf, right-click the Launcher icon, the shelf, or the desktop; click or highlight the Shelf position submenu; and then click the Left option button, the Bottom option button, or the Right option button, as needed.
By default, the shelf appears all the time unless you expand an app to full screen. But you can also set the shelf to hide itself automatically, which makes the shelf appear only when you move the pointer to the side of the screen on which the shelf is hiding. To turn autohiding on, right-click the Launcher icon, the shelf, or the desktop; then, click the “Autohide shelf” command, placing a check mark next to it. When you need to turn off autohiding, right-click the Launcher icon (or the shelf or the desktop) and click the “Autohide shelf” command again, removing the check mark.
Note
When you connect an external monitor to a Chromebook, you can choose a different “Autohide shelf” setting for each monitor if you want. This enables you to have the shelf appear on only one monitor consistently if you want.
Adding and Removing Shelf Items
By default, the Chrome icon and the Gmail icon are pinned to the shelf to make it easy for you to use these key Google features. You can customize the icons on the shelf by adding, removing, and rearranging them as needed.
Launcher: Click the Launcher button to open the Launcher, and then click the up-arrow button to switch the Launcher to full screen. Right-click the icon for the app you want to add, then click the Pin to shelf item on the shortcut menu.
Running app: If the app is already running, right-click its icon on the shelf and then click the Pin item on the shortcut menu.
- 1.
In Chrome, navigate to the web page.
- 2.
Click the More Actions button (the three vertical dots) to open the menu.
- 3.
Click or highlight the More tools item to display the More tools menu.
- 4.
Click the Add to shelf item. The Add to shelf dialog box opens (see Figure 3-20).

In the Add to shelf dialog box, adjust the display name as needed. Uncheck the “Open as window” check box if you want the web page to open in a tab rather than in a new window. Then, click the Add button.
- 5.
Edit the default name in the text box as needed.
- 6.
Uncheck the “Open as window” check box if you want Chrome to open the web page in a tab in the current window rather than in a new window.
- 7.
Click the Add button . The icon for the website appears on the shelf.
Tip
After adding the icon for the web page to the shelf, you can change whether the web page opens in a tab or in a new page by right-clicking the icon and then clicking the Open as window item on the shortcut menu.
To remove an icon from the shelf, right-click the icon on the shelf and then click the Unpin item on the shortcut menu. Alternatively, open the Launcher to full screen, right-click the icon, and then click the Unpin from shelf item on the shortcut menu.
To rearrange the icons on the shelf, click an icon and drag it to where you want it to appear.
Working with and Configuring Notifications
Chrome OS can display notifications for a wide range of events, such as a new email or a reminder you previously set up. To avoid being distracted unnecessarily, you will likely want to configure your Chromebook to make it display only the notifications you will find useful.
Chrome OS also includes a Do not disturb feature that you can enable when you want to suppress all interruptions.
Viewing Your Current Notifications
When an event occurs for which Chrome OS is configured to notify you, the notification pop-up panel appears briefly above the status area (see Figure 3-21). The pop-up panel shows the details of the notification and may offer actions, depending on the type of notification; for example, for the notification about a screenshot having been taken, you can click the notification to display the screenshot in its folder, or you can click the Copy to Clipboard button to copy the screenshot’s image to the Clipboard.
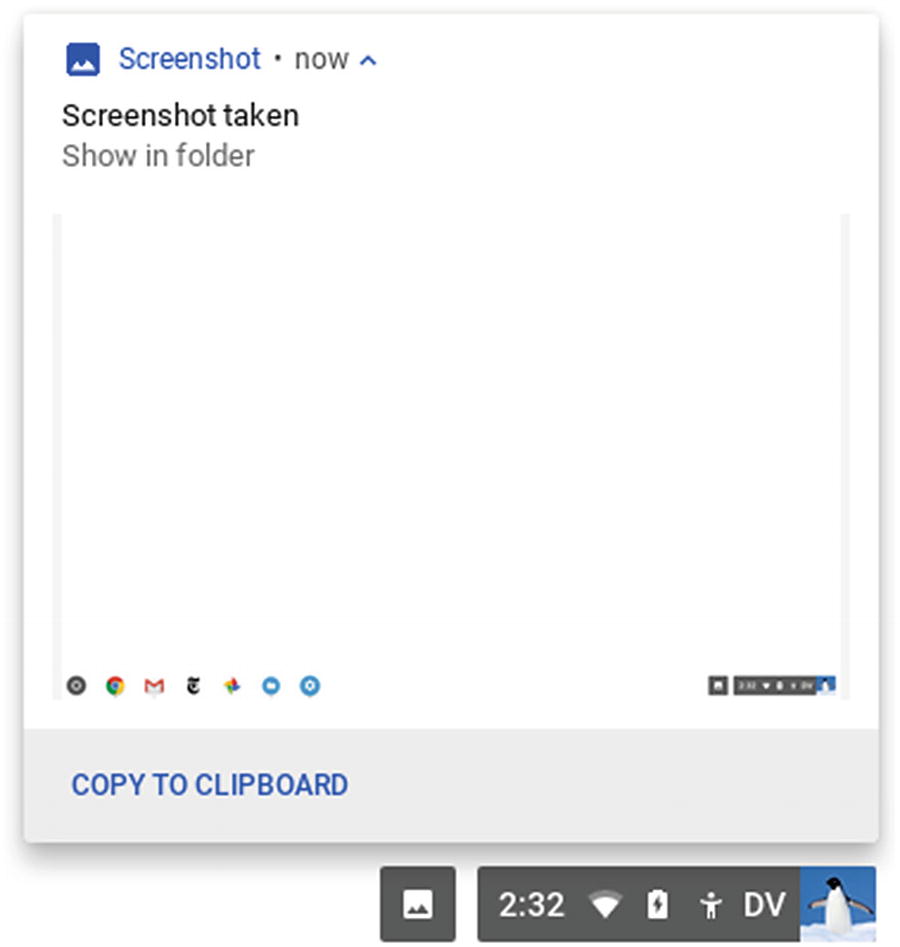
A notification appears as a pop-up panel above the status area and may contain buttons you can click to take actions. The notification disappears after a few seconds if you leave it alone.
Expand a notification: Click the down-arrow button to the right of the notification’s time.
Take action on a notification: Click one of the buttons in the notification, either when it is collapsed or after you expand it.
Clear the notification: Move the pointer over the notification and then click the Close (X) button in its upper-right corner .
Clear all notifications: Click the Clear all button.
Enable or disable Do not disturb mode: Click the Do not disturb button.
Open the Settings panel: Click the Settings icon.
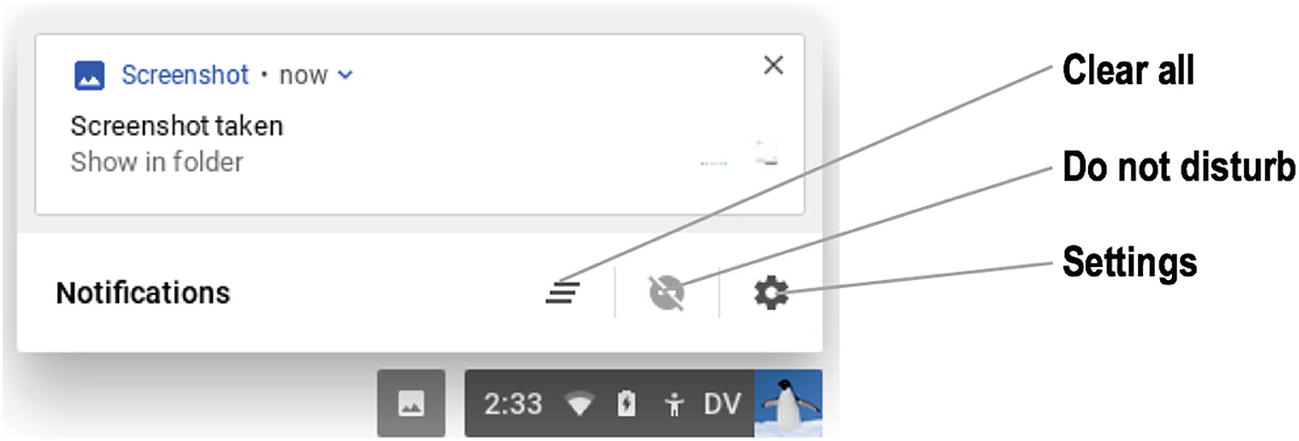
Open the Notifications pop-up panel when you need to review your notifications, enable the Do not disturb feature, or change your settings for notifications
Choosing Which Apps and Features Can Raise Notifications
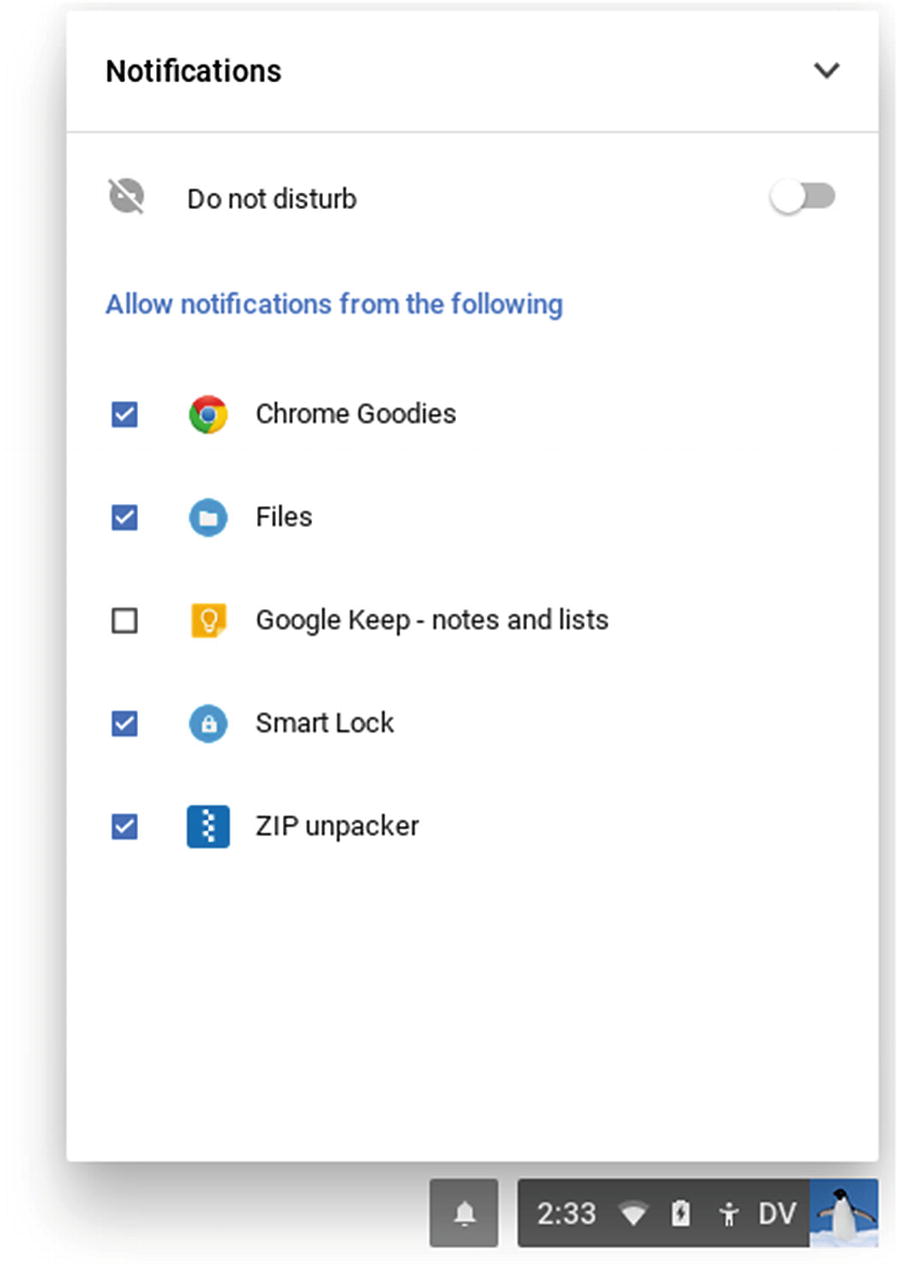
In the Notifications panel, uncheck the check boxes in the Allow notifications from the following list to specify which apps and features can raise notifications. You can set the Do not disturb switch to On to suppress all notifications.
When you have finished choosing settings, you can click the down-arrow button to the right of the Notifications heading to return to the Notifications pop-up panel . Alternatively, simply click outside the Notifications panel to close the panel altogether.
Controlling Which Websites Can Send You Notifications
Chrome OS also enables you to control which websites can send you notifications. You can either block all websites from sending notifications or adopt a more nuanced approach, building a list of sites that are allowed to send you notifications and list of sites that are blocked from doing so. See the section “Choosing Content Settings” in Chapter 4 for details.
Setting Wallpaper
Like most operating systems, Chrome OS enables you to customize the wallpaper on the desktop. Chrome OS includes a selection of wallpaper pictures, but you can also use your own pictures. For example, you might want to apply a school-themed wallpaper picture.
Note
Chrome OS treats wallpaper as one of your account’s settings. So, when you change the wallpaper on one Chromebook, the change carries across to any other Chromebook on which you sign in.
- 1.
Right-click the Launcher icon, the shelf, or the desktop and then click the Set wallpaper item on the shortcut menu. The Set Wallpaper dialog box opens (shown in Figure 3-24 with a picture being chosen).
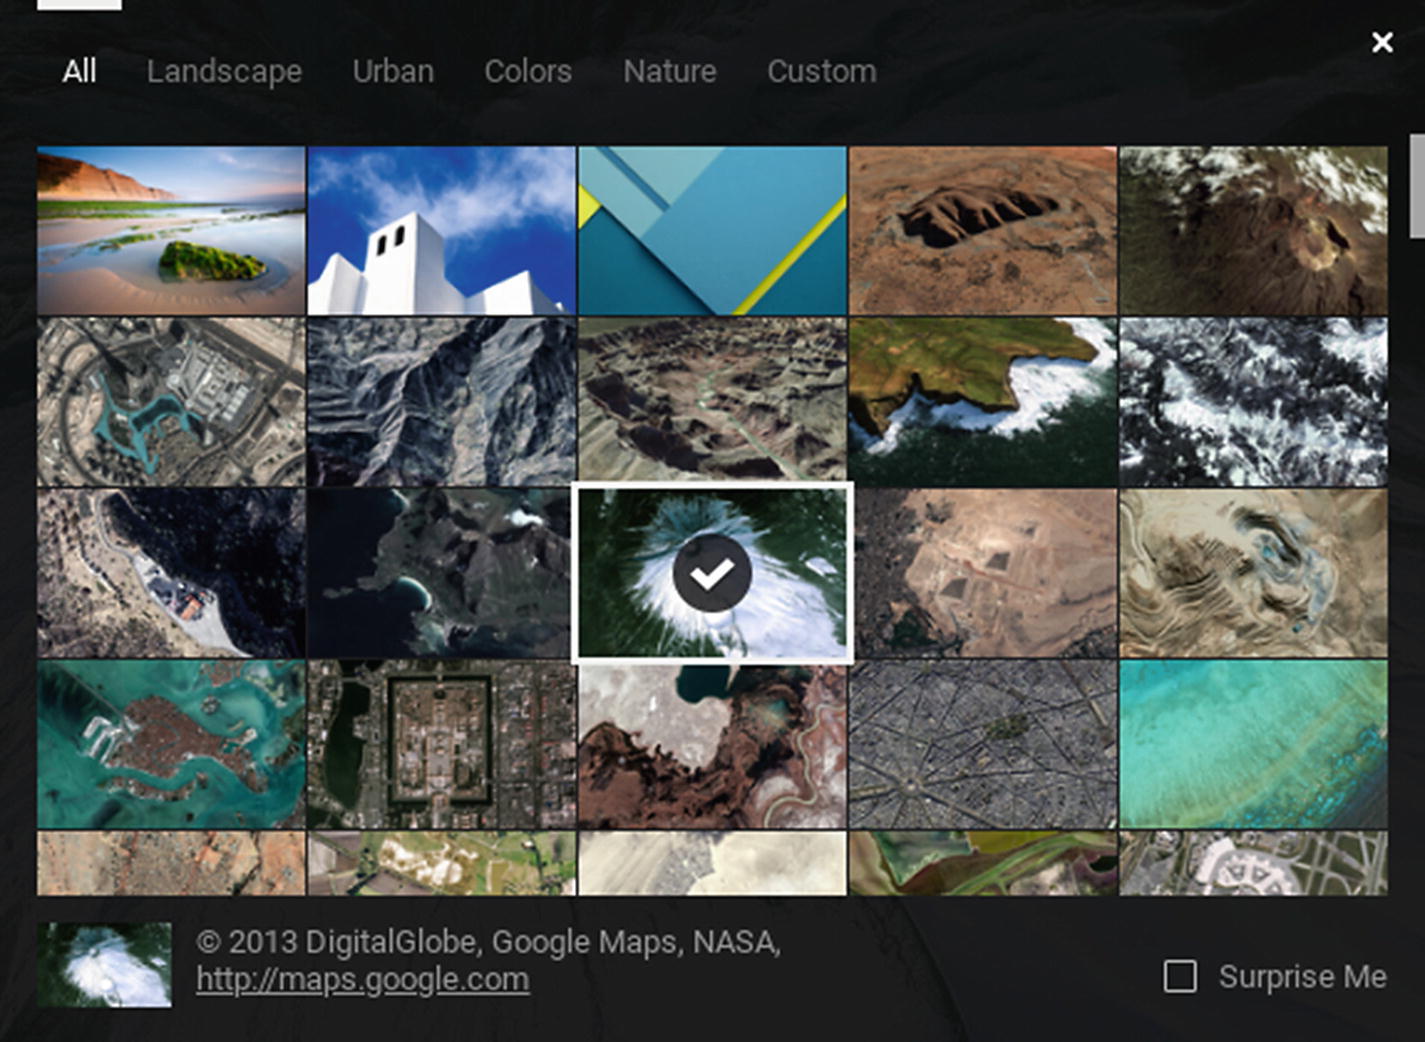
In the Set Wallpaper dialog box, click the tab for the collection you want to view and then click the picture you want to apply
- 2.
At the top of the Set Wallpaper dialog box, click the tab for the picture collection you want to view: All (which lets you see all pictures, but with plenty of scrolling), Landscape, Urban, Colors, Nature, or Custom (which lets you use your own pictures).
- 3.
Click the picture you want to use. Chrome OS downloads the picture (unless you have downloaded it already) and applies it to the desktop so you can see how it looks.
Note
You can check the “Surprise Me” check box to have Chrome OS automatically pick a picture, download it, and apply it as wallpaper.
- 4.If you want to use one of your own pictures as wallpaper, click the Custom tab and then follow these substeps:
- a.Click the Add (+) button to display the dialog box shown in Figure 3-25.
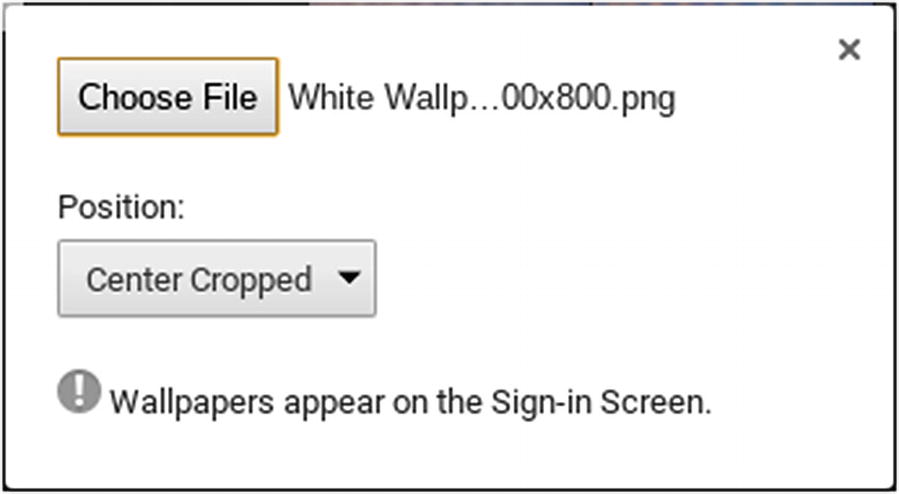 Figure 3-25
To use your own picture as wallpaper, click the Custom tab, click the Add (+) button, and then use this dialog box to select the file and specify how to position it on the screen.
- b.
Click the Choose File button to display the Select a File to Open dialog box.
- c.
Navigate to the folder that contains the file you want to use and then click the file.
- d.
Click the Open button. The file’s name appears in the first dialog box.
- e.
Click the Position pop-up menu and then click the position you want to use: Center, Center Cropped, or Stretch. The Center Cropped setting is usually the best choice for realistic photos, but if you find the cropping removes vital parts from a photo, try using the Center setting instead. The Stretch setting distorts the photo as needed to fit the screen without cropping, so it is best used only for non-realistic photos.
- a.
- 5.
When you have picked a wallpaper you like, click the Close (X) button in the upper-right corner of the Set Wallpaper dialog box.
Using and Configuring the Keyboard
A Chromebook has a keyboard that looks largely conventional at a quick glance but in fact contains plenty of built-in improvements and shortcuts. This section explains what you need to know to use the keyboard quickly and efficiently.
Understanding the Keys on a Chrome OS Keyboard
No Windows keys: This should be no surprise, but it means there is more room for the Ctrl key, Alt key, and space bar.
Search key: Where standard PC keyboards have a Caps Lock key, the Chromebook keyboard has a Search key. Pressing the Search key brings up a search window into which you can type search terms or a web address that you want to visit. The Search key also works as an extra modifier key for keyboard shortcuts.
- Dedicated function keys : Where standard PC keyboards have 12 (or sometimes more) function keys numbered F1 through F12 on the top row of the keyboard, above the number keys, the Chromebook keyboard has a row of dedicated function keys. Figure 3-26 shows the key names, and the following sublist explains what they do:
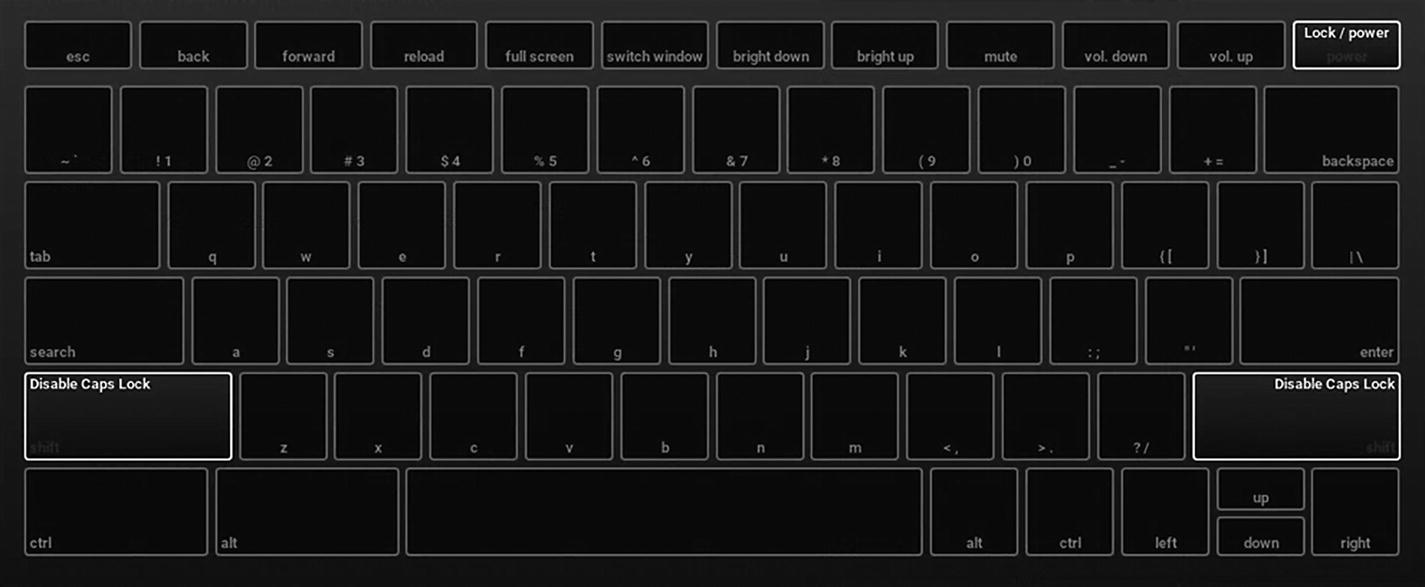 Figure 3-26
The top row of the Chromebook keyboard contains dedicated function keys
Escape key: Press this key to cancel the current action—for example, to dismiss a dialog box.
Back key: Press this key to go back to the previous page in a browser window.
Forward key: Press this key to go forward again in a browser tab. You can only go forward after going back—otherwise, there is no page to go forward to.
Reload key: Press this key to reload the current page.
Full Screen key: Press this key to switch the current app to full screen. Press again to switch back from full screen to a window.
Switch Window key: Press this key to display Overview Mode, which shows all your open windows . You can then close any unneeded windows or switch to another window.
Bright Down key: Press this key to decrease the screen’s brightness by one notch.
Bright Up key: Press this key to increase the screen’s brightness by one notch.
Mute key: Press this key to mute the sound. Press again to unmute the sound.
Volume Down key: Press this key to decrease the volume by one notch.
Volume Up key: Press this key to increase the volume by one notch.
Lock/Power key: Press this key to power on the Chromebook when it is off, to lock the Chromebook when it is unlocked, and to wake the Chromebook when it is sleeping. On some Chromebooks, this key is the Lock key only, and there is a separate Power button.
Note
You can use the dedicated function keys together with the modifier keys (the Ctrl, Alt, and Shift keys) to take other actions. We will get to these keyboard shortcuts soon.
Making the Most of Keyboard Shortcuts
Chrome OS supports many keyboard shortcuts that you can use to speed up your work by giving more commands from the keyboard. Chrome OS also gives you an easy way to view the available keyboard shortcuts. We will start with this feature.
Viewing the Available Keyboard Shortcuts
To view the available keyboard shortcuts, press Ctrl+Alt+? (you may need to press Shift as well in order to type the question mark). The screen displays a keyboard diagram with the key names, as shown in Figure 3-26.

Press one or modifier keys—this example uses the Ctrl key—to see the available keyboard shortcuts
Keyboard Shortcuts for the Ctrl Key
Keyboard Shortcut | What It Does |
|---|---|
Ctrl+Back | Displays the previous pane |
Ctrl+Forward | Displays the next pane |
Ctrl+Full Screen | Toggles an external monitor between mirroring the Chromebook’s screen (for example, when you are giving a presentation) and extending the desktop (giving more space to work in) |
Ctrl+Switch Window | Takes a screenshot |
Ctrl+1–Ctrl+8 | Displays Tabs 1 through 8 of the current window |
Ctrl+9 | Displays the last tab of the current window |
Ctrl+0 | Resets the zoom to 100 percent |
Ctrl+Backspace | Deletes the previous word |
Ctrl+Tab | Displays the next tab in the current window |
Ctrl+P | Displays the Google Print dialog |
Ctrl+F | Gives the Search command or Find command. Depending on the app or window, this command displays the “Search” field or the Find panel. |
Ctrl+G | Gives the Find again command , finding the next instance of the item for which you previously searched |
Ctrl+C | Copies the currently selected item to the Clipboard |
Ctrl+X | Cuts the current selected item to the Clipboard |
Ctrl+V | Pastes the Clipboard’s contents at the current location |
Ctrl+R | Reloads the current page. (This is an alternative to the Reload button on the top row of keys.) |
Ctrl+L | Selects the contents of the Address box so you can type another address |
Ctrl+? or Ctrl+/ | Opens the Chromebook Help window |
Ctrl++ or Ctrl+= | Zooms in by one increment |
Ctrl+- | Zooms out by one increment |
Ctrl+A | Selects all the content of the current object or window |
Ctrl+O | Gives the Open command, displaying a dialog box such as the Select a File to Open dialog box |
Ctrl+E or Ctrl+K | Places the focus in the Address bar and activates the Search functionality |
Ctrl+U | Displays the source code of the current web page |
Ctrl+D | Adds a bookmark for the current web page |
Ctrl+H | Displays the History screen, which shows a list of the web pages you have visited recently |
Ctrl+T | Opens a new tab in the current window |
Ctrl+N | Opens a new window |
Ctrl+S | Saves the current document |
Ctrl+Enter | Adds www. before and .com after the address you have typed and then opens the address |
Ctrl+J | Opens the Downloads window in a new tab |
Ctrl+W | Closes the current tab |
Ctrl+left arrow | Moves the insertion point to the beginning of the current word (if the insertion point is in a word) or to the beginning of the previous word (if the insertion point is not in a word) |
Ctrl+right arrow | Moves the insertion point to the beginning of the next word |
Keyboard Shortcuts for the Ctrl+Alt Key Combination
Keyboard Shortcut | What It Does |
|---|---|
Ctrl+Alt+Switch Window | Takes a screenshot of the window that you click after pressing this shortcut |
Ctrl+Alt+Bright Down | Reduces the magnification |
Ctrl+Alt+Bright Up | Increases the magnification |
Ctrl+Alt+, | Switches to the previous user when you have signed in multiple users |
Ctrl+Alt+. | Switches to the next user when you have signed in multiple users |
Ctrl+Alt+P | Toggles the display of touch points, circles that indicate where the touchscreen is detecting input |
Ctrl+Alt+I | Toggles the Projection Touch HUD (heads-up display) |
Ctrl+Alt+T | Opens a new crosh Terminal window |
Ctrl+Alt+Z | Toggles ChromeVox spoken feedback on or off |
Ctrl+Alt+up arrow | Gives the Home command |
Ctrl+Alt+down arrow | Gives the End command |
Keyboard Shortcuts for the Alt+Shift Key Combination
Keyboard Shortcut | What It Does |
|---|---|
Alt+Shift+= | Centers the active window on the desktop |
Alt+Shift+Tab | Displays the previous window |
Alt+Shift+T | Puts the focus on the toolbar |
Alt+Shift+I | Displays the Tell Us What’s Happening dialog box for reporting an issue with Chrome OS |
Alt+Shift+S | Displays the Status Menu pop-up panel |
Alt+Shift+P | Displays the Stylus Tools pop-up panel |
Alt+Shift+L | Puts the focus on the shelf, displaying it if it is hidden |
Alt+Shift+B | Puts the focus on the Bookmarks bar |
Alt+Shift+N | Displays the Message Center pop-up panel |
Alt+Shift+M | Opens a Files window or activates an existing Files window |
Keyboard Shortcuts for the Ctrl+Shift Key Combination
Keyboard Shortcut | What It Does |
|---|---|
Ctrl+Shift+Reload | Rotates the display 90° clockwise |
Ctrl+Shift+Switch Window | Takes a screenshot of the area over which you drag the crosshair pointer after pressing this shortcut |
Ctrl+Shift+0 (zero) | Resets the screen zoom to 100 percent |
Ctrl+Shift+– (hyphen) | Zooms the screen out by one increment |
Ctrl+Shift++ | Zooms the screen in by one increment |
Ctrl+Shift+Backspace | Activates the Settings app and displays the Clear browsing data dialog box |
Ctrl+Shift+Tab | Displays the previous tab in Chrome |
Ctrl+Shift+Q | Signs you out |
Ctrl+Shift+W | Closes the active window |
Ctrl+Shift+R | Reloads the current page, bypassing the Chromebook’s cache (to make sure the page is up to date) |
Ctrl+Shift+T | Reopens the last tab you closed |
Ctrl+Shift+U | Starts inputting a Unicode character. When you press this shortcut, an underlined u appears. Type the code for the Unicode character and then press Enter to make the Chromebook substitute the character. |
Ctrl+Shift+I | Displays the Developer tools |
Ctrl+Shift+O | Displays the Bookmark Manager when Chrome is the active app |
Ctrl+Shift+D | Bookmarks all the tabs in the current window in Chrome |
Ctrl+Shift+G | Gives the Find Previous command, finding the previous instance of the item for which you previously searched |
Ctrl+Shift+J | Opens a JavaScript console window |
Ctrl+Shift+C | Displays the DOM Inspector window for the current element |
Ctrl+Shift+V | Pastes the contents of the Clipboard as plain text |
Ctrl+Shift+B | Toggles the display of the Bookmark in Chrome |
Ctrl+Shift+N | Opens a new Incognito window in Chrome |
Ctrl+Shift+? | Opens a Help window |
Ctrl+Shift+spacebar | Switches the keyboard to the next input method |
Ctrl+Shift+left arrow | Selects one word at a time to the left |
Ctrl+Shift+right arrow | Selects one word at a time to the right |
Keyboard Shortcuts for the Ctrl+Alt+Shift Key Combination
Keyboard Shortcut | What It Does |
|---|---|
Ctrl+Alt+Shift+? | Displays the keyboard overlay—the onscreen keyboard reference diagram |
Ctrl+Alt+Shift+Reload | Rotates the active window 360°. This action is mostly for amusement. |
Keyboard Shortcuts for the Search Key
Keyboard Shortcut | What It Does |
|---|---|
Search+Esc | Opens Task Manager |
Search+Backspace | Deletes the character to the right of the cursor |
Search+L | Locks the screen |
Search+. (period) | Inserts the contents of the Clipboard |
Search+Alt | Toggles Caps Lock on and off |
Search+Left arrow | Issues the Home command |
Search+Right arrow | Issues the End command |
Search+Up arrow | Issues the Page Up command |
Search+Down arrow | Issues the Page Down command |
Connecting and Using External Devices
In this section, we will look at how to connect external devices to a Chromebook. We will start by covering how to connect and use Bluetooth devices, and then we will explore how to connect an external monitor, external drive, external pointing device, and external keyboard.
Connecting and Using Bluetooth Devices
Mouse or other pointing device: You may want to add a mouse or other external pointing device for students who find the built-in trackpad difficult to use. Or, if you use a Chromebook extensively yourself, you may prefer to use an external mouse for intensive work.
Keyboard: Although each Chromebook has a built-in keyboard, you may sometimes want to connect an external keyboard for heavy-duty text input—especially on a Chromebook that has a smaller keyboard.
Headphones or headsets: Bluetooth headphones and headsets are widely popular and can be helpful for study.
Speakers: Bluetooth speakers can be a good way to supplement a Chromebook’s built-in speakers, which tend to be small and not capable of loud output. In the classroom , you might use Bluetooth speakers to make a presentation audible to the whole class.
Note
Most Chromebooks have built-in Bluetooth, but some do not. To check whether a particular Chromebook has Bluetooth, click the status area to display the status menu and then see if a Bluetooth button appears on it. If so, you are in business. If not, you may be able to add Bluetooth capability by using a USB dongle.
Even in Chromebooks that have Bluetooth, as of this writing you cannot use Bluetooth for tethering a Chromebook to a phone or tablet’s Internet connection. Use the Wi-Fi hotspot feature on the phone or tablet instead and connect the Chromebook to the device’s hotspot as you would to any other hotspot.
Enabling and Disabling Bluetooth
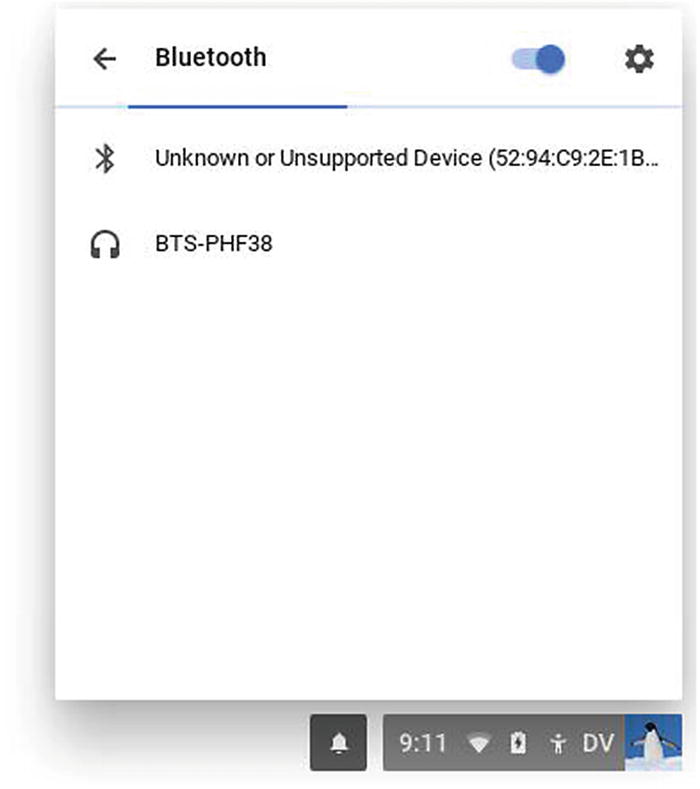
Enable or disable Bluetooth from the status menu: Click an icon in the status area to display the status menu. Click the Bluetooth button to open the Bluetooth status menu (see Figure 3-28). Then, set the switch at the top to On or Off as needed.

You can quickly enable or disable Bluetooth by setting the switch at the top of the Bluetooth status menu to On or Off
Enable or disable Bluetooth from the main Settings screen: Set the Bluetooth switch in the Bluetooth section of the main Settings screen (see Figure 3-29) to On or Off as needed. You can also set the switch at the top of the Settings screen for Bluetooth to On or Off.

You can enable or disable Bluetooth by setting the Bluetooth switch in the Bluetooth section of the main Settings window
Pairing a Bluetooth Device with a Chromebook
As with most Bluetooth equipment , you need to pair a Bluetooth device with a Chromebook to make the two work together. Pairing works as a sort of formal introduction between the devices. After you have paired the device with the Chromebook, you can quickly connect and disconnect the device as needed.
- 1.
Turn on the Bluetooth device and put it into pairing mode. How you do this depends on the device, so you will need to consult the instructions if you don’t already know the details.
- 2.
Click the status area to open the status menu.
- 3.
Click the Bluetooth button to display the Bluetooth status menu.
- 4.
If the switch at the top is set to Off, set it to On. The list of available Bluetooth devices will appear (see Figure 3-30).
In the Bluetooth status menu, select the device you want to pair with the Chromebook
- 5.
Select the device you want to pair with the Chromebook . The Add Bluetooth device dialog box opens (see Figure 3-31).
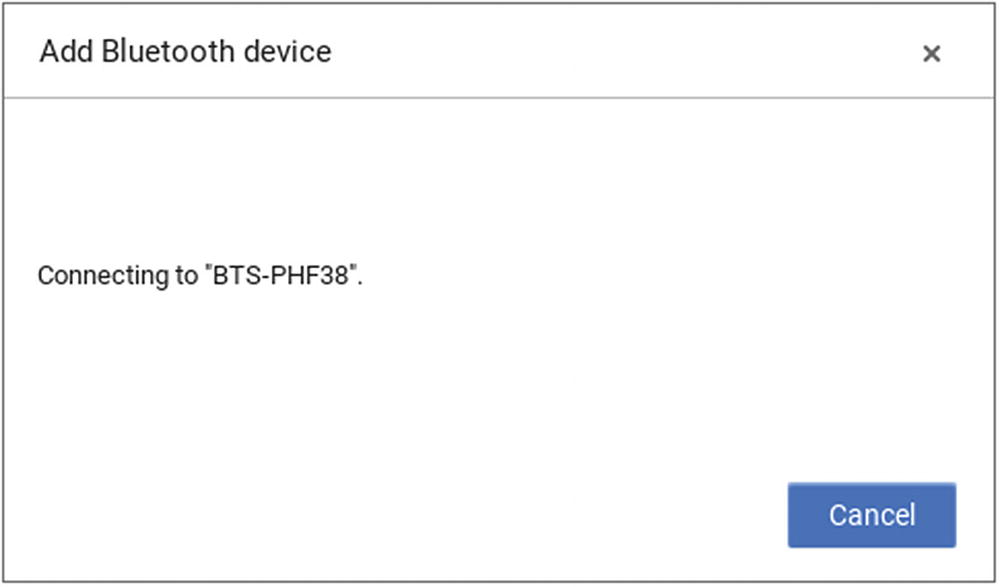
The Add Bluetooth device dialog box appears while Chrome OS connects to the Bluetooth device
- 6.
Once Chrome OS has paired the device, an alert message will appear in the lower-right corner of the screen (see Figure 3-32). To dismiss the alert, move the pointer over the alert and then click the Close (X) button that appears.
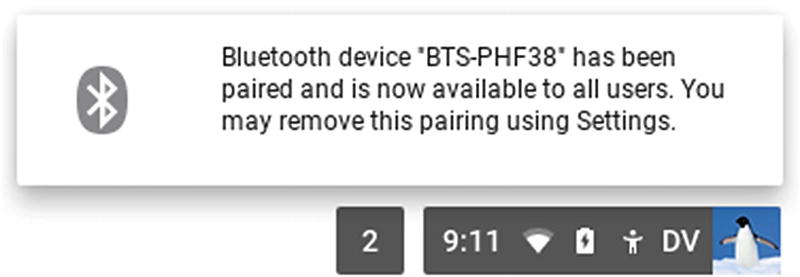
Chrome OS displaying an alert telling you that the Bluetooth device has been paired
Connecting and Disconnecting Paired Bluetooth Devices
Once you have paired a Bluetooth device with a Chromebook, you can connect the device to and disconnect it from the Chromebook as needed.
Connect a paired device from the Bluetooth status menu: Click an icon in the status area to display the status menu. Click the Bluetooth button to display the Bluetooth status menu (see Figure 3-33). Then, click the device’s button in the Paired devices list. The Connected readout appears under the device’s name once Chrome OS has established the connection.

To connect a paired Bluetooth device, click the device’s button in the Paired devices section of the Bluetooth status menu
Connect a paired device from the Bluetooth screen: Click an icon in the status area to display the status menu and then click the Settings icon to open the Settings window. Click the Bluetooth button to display the Bluetooth screen (see Figure 3-34). Click the device’s button to connect the device.
Note
You can also connect a paired device by clicking the More Actions button (the three vertical dots) on the right of the device’s button and then clicking the Connect item on the menu that appears. But usually simply clicking the device’s button itself is faster and easier.
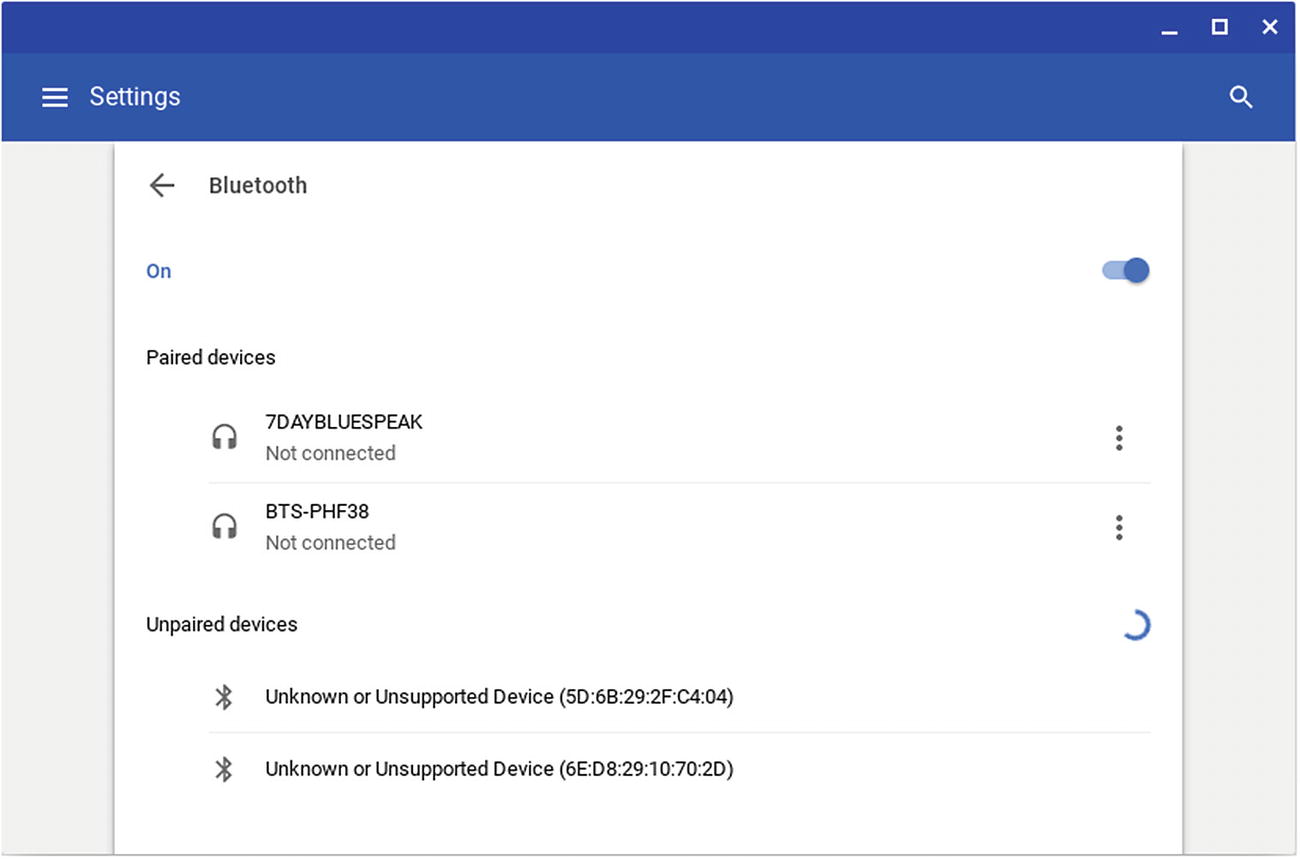
You can also connect a paired Bluetooth device by clicking the device’s button on the Bluetooth screen in the Settings window.
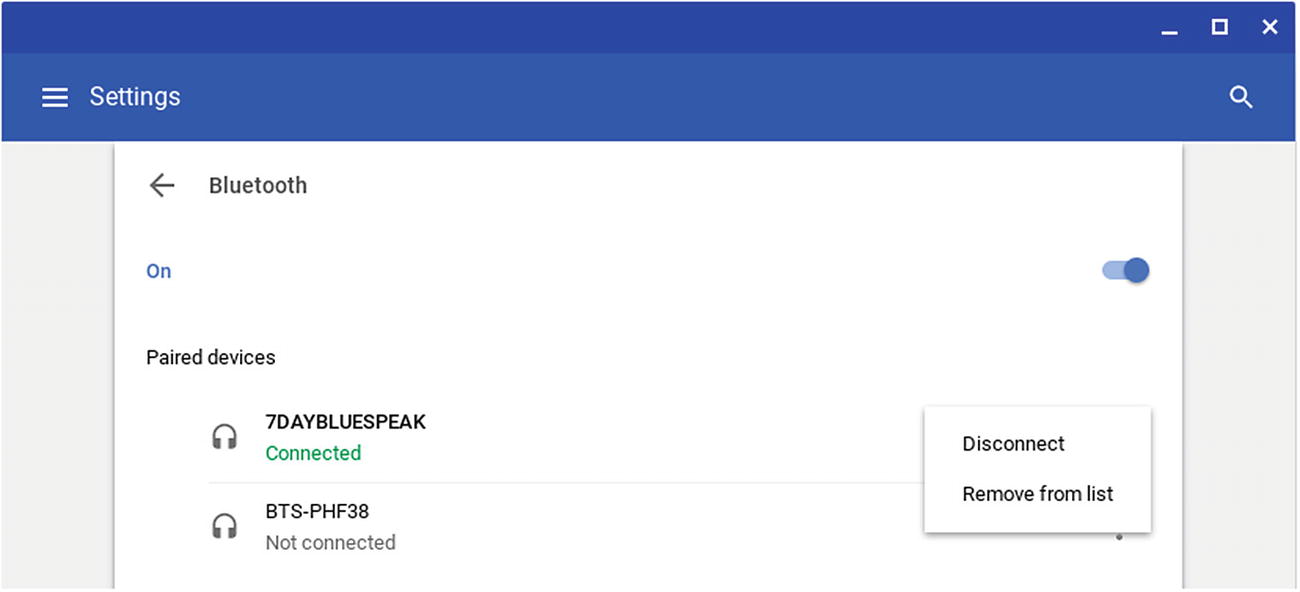
To disconnect a paired device, click the More Actions button (the three vertical dots) to open the menu, and then click the Disconnect item on it
Removing a Paired Bluetooth Device
When you no longer want a Chromebook to use a paired Bluetooth device, you can remove the pairing. On the Bluetooth screen in the Settings window, click the More Actions button (the three vertical dots) on the right of the button for the device, and then click the Remove from list item on the menu that opens.
Connecting an External Monitor
You can connect an external monitor to a Chromebook by using the HDMI port. Some Chromebook models have a standard, full-size HDMI port, but others use either a mini HDMI port or a micro HDMI port to save space. Each port type works fine, provided you have the right sort of cable—for example, a micro HDMI–to-HDMI cable.

Chrome OS displays a notification when you connect an external monitor to a Chromebook. You can click this notification to show the Displays screen in the Settings app.
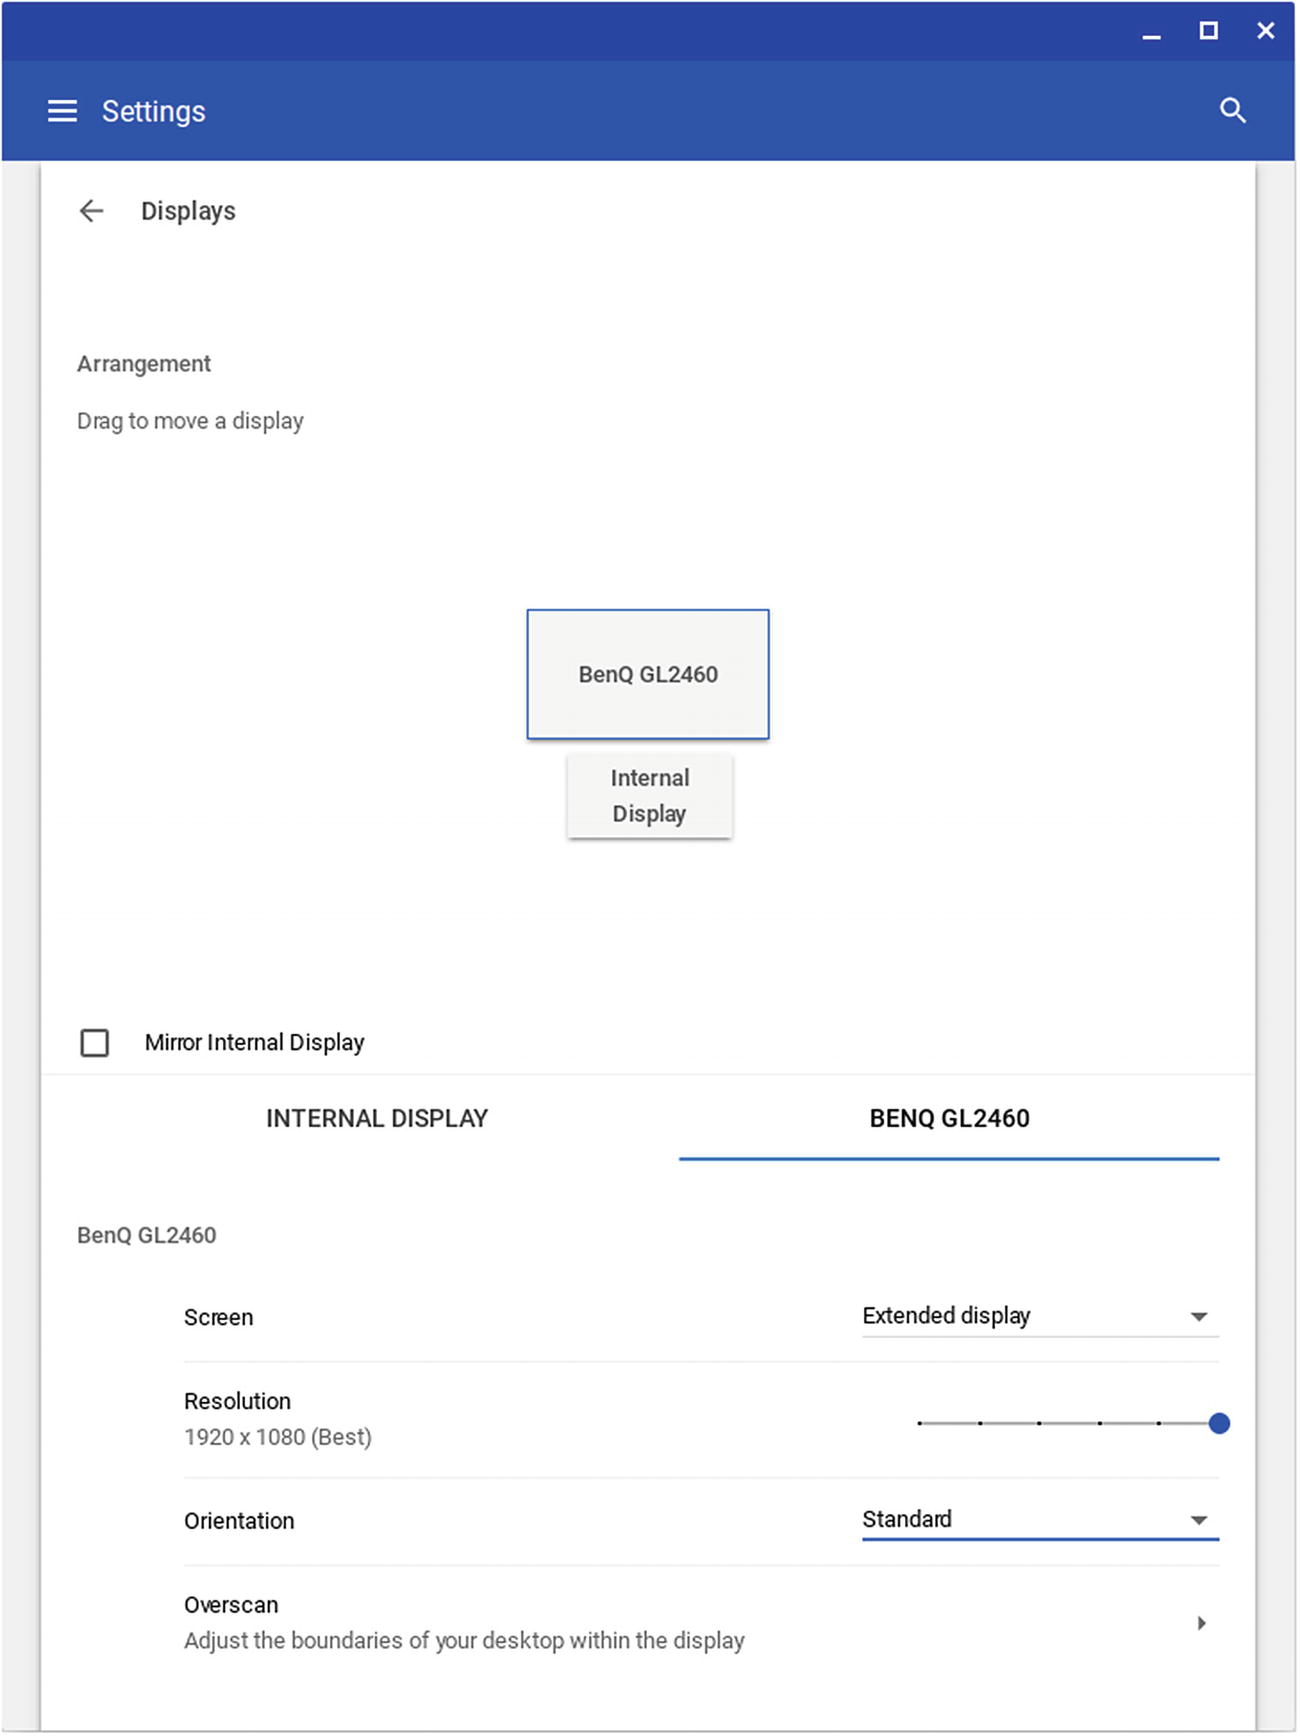
On the Displays screen in the Settings app, you can specify where the external display is positioned relative to the Chromebook and choose whether to mirror the internal display. After selecting the tab for the external display, you can set its resolution, specify its orientation, and choose whether to use the display as the primary display or as an extended display.
The Arrangement area shows how Chrome OS thinks the external display is positioned relative to the internal display. If the positioning is wrong, drag the icon for the external display to where it needs to be. Verify the positioning by moving the pointer from one display to the other and checking that the pointer appears at the correct point on each.
Next, if you want the external display to mirror the internal display, showing the same content at the same resolution, check the “Mirror Internal Display” check box. When you check this box, Chrome OS will remove the tab for the external display from the lower part of the Displays screen, leaving only the Internal Display tab.
Screen: In this pop-up menu, choose the Extended display item if you want to use the external display as an extension of the Chromebook’s internal display. The internal display remains the primary display. Choose the Primary display item if you want the Chromebook to treat the external display as the primary display.
Tip
Keyboard shortcuts can be especially handy for configuring displays quickly. You can press Ctrl+Full Screen to toggle the “Mirror Internal Display” feature on and off. You can press Alt+Full Screen to switch primary displays. You can press Ctrl+Shift+Reload to rotate the active screen 90° clockwise.
Resolution: Drag this slider to set the resolution for the external display. Chrome OS displays “(Best)” next to the native resolution for an LCD screen.
Orientation: If necessary, open this pop-up menu and click the orientation you need: Standard, 90, 180, or 270.
CONNECTING TWO EXTERNAL MONITORS TO A CHROMEBOOK
USB-C hub or docking station with dual HDMI outputs: If the Chromebook has a USB-C port, you can connect to that port a hub or docking station that has dual HDMI outputs. You can then connect a monitor to each of these HDMI outputs.
USB DisplayLink adapter: Chrome OS supports the DisplayLink standard for connecting monitors, so you can connect a USB DisplayLink adapter to a USB port on the Chromebook and to a monitor. Various types of USB DisplayLink adapters are available; most use a standard USB port rather than a USB-C port.
For either of these multi-monitor solutions, read the hardware’s specifications and user reviews to make sure that the item you plan to buy will work with Chrome OS.
If you need two external monitors on a Chrome OS device, consider getting a Chromebox (a Chrome desktop) instead of a Chromebook. Some Chromeboxes have two video outputs, enabling you to connect two external monitors with minimal effort.
Using an External Drive
USB: Connect the drive to one of the Chromebook’s USB sockets. A USB flash drive tends to be the best solution for quick use, but you can also connect external hard drives—either drives with spinning platters or SSDs. An external hard drive may require its own power supply. If the external drive has a power button, power on the drive.
SD card or micro SD card: If the Chromebook has an SD slot or micro SD slot, insert the card in the slot.
Note
You can also connect an SD card or micro SD card to a Chromebook by using a card reader that plugs into a USB socket.
WHICH FILE SYSTEMS CAN EXTERNAL DRIVES USE?
FAT16, FAT32, exFAT: These file systems are widely used for removable drives. FAT16 has a recommended maximum file size of 2 GB and an absolute maximum file size of 4 GB. FAT32 has a maximum file size of 4 GB. exFAT has a maximum file size of 2 TB.
NTFS: NTFS is the file system that Windows PCs use.
Chrome OS can also read from the HFS+ file system used by Macs, but it cannot write to it.
Most current USB flash drives, SD cards, and micro SD cards come formatted with FAT32 or exFAT, so you can normally use them with a Chromebook without having to reformat them.
Connecting an External Drive and Working with Files
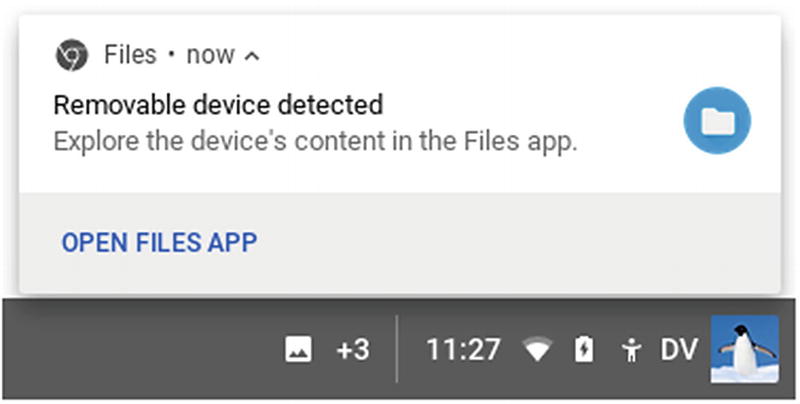
If the “Removable device detected” notification appears when you connect an external drive, you can click the notification to display the drive’s contents in the Files app
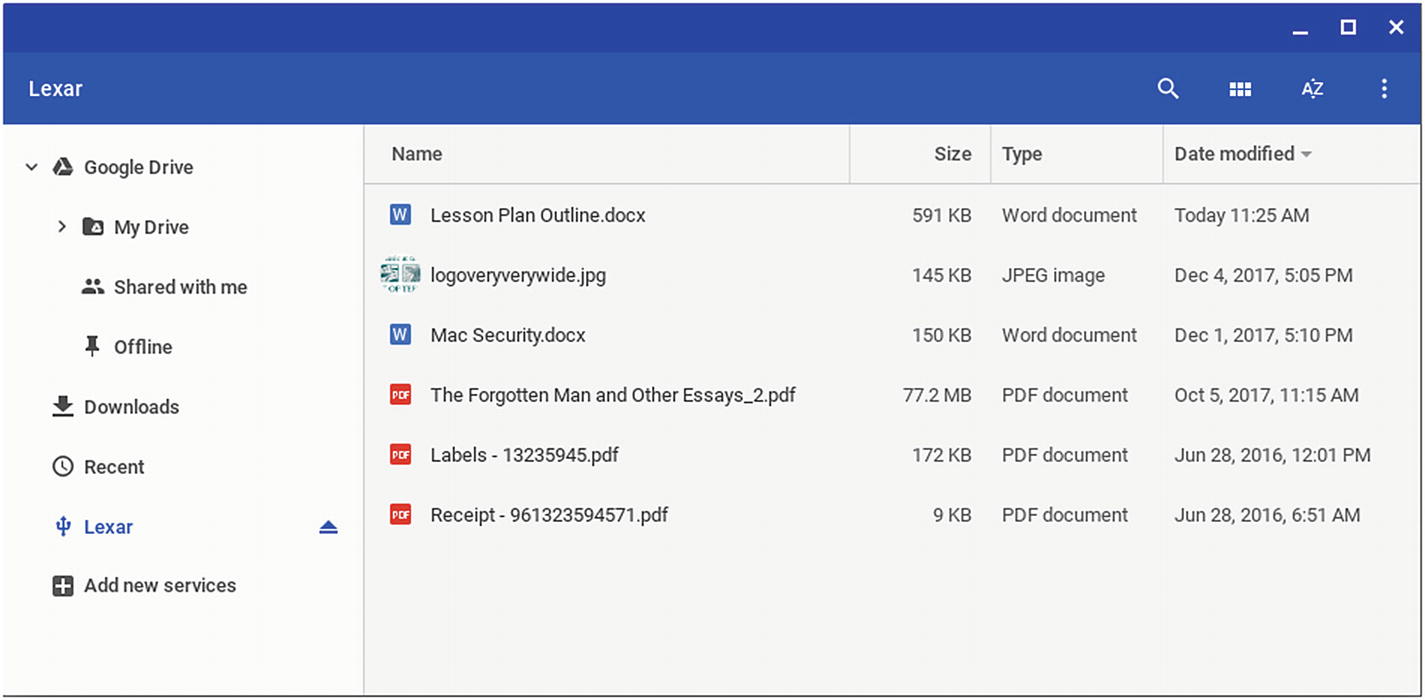
The external drive appears as an entry in the Navigation pane in the Files app, with an Eject button for ejecting the drive from the file system
Once you have displayed the files, you can perform regular file operations with them. For example, you can drag files to another folder to copy them there, or you can double-click a file to open it in the associated app (assuming the Chromebook has a suitable app).
Reformatting an External Drive
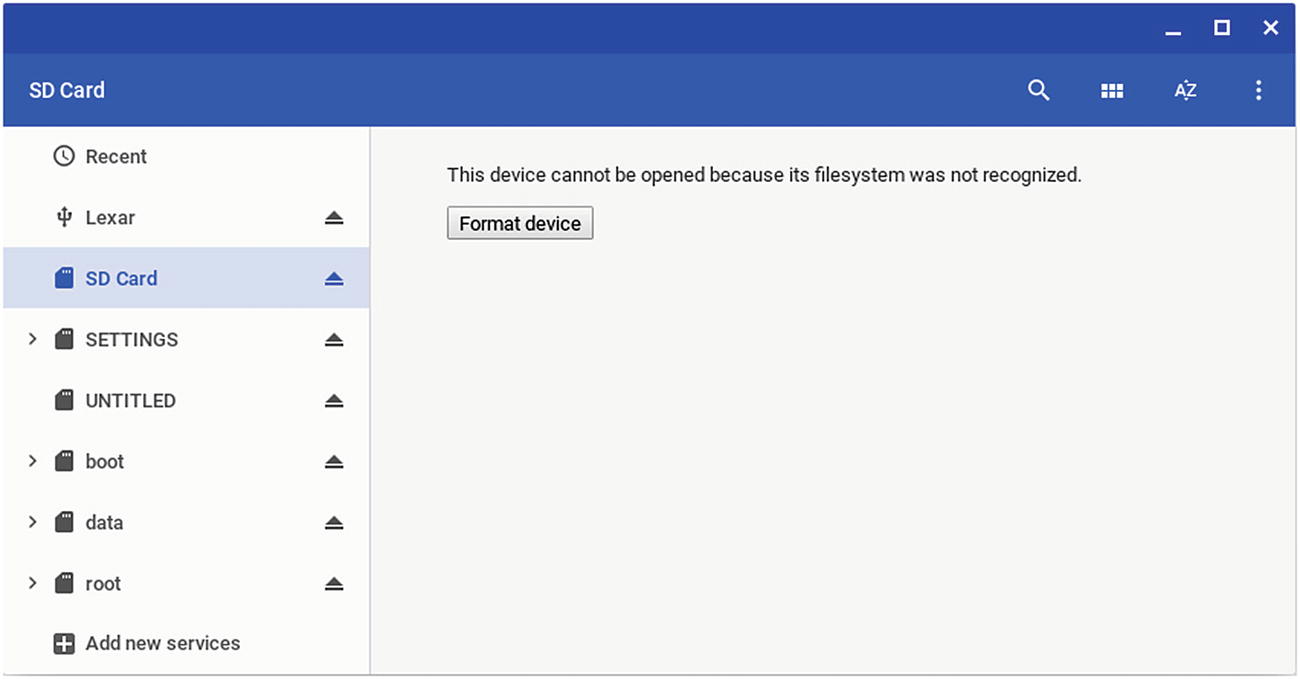
If Chrome OS cannot recognize the file system on a device, click the Format device button to start formatting it
You can also start formatting a device by right-clicking its entry in the Navigation pane and then clicking the Format device item on the shortcut menu.
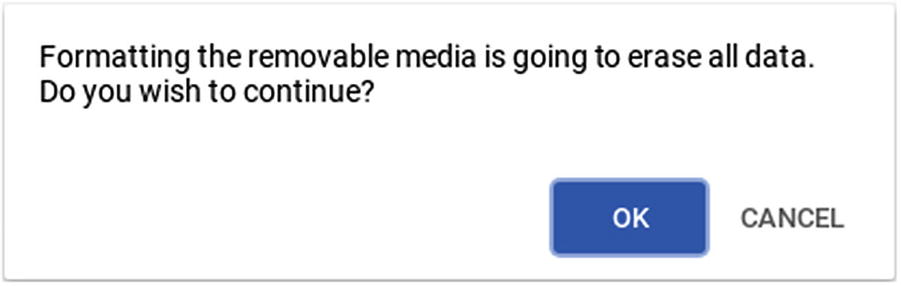
When this dialog box opens, verify that you have selected the right device to format and then click the OK button

The Files app displays the “Formatting” notification (left) while it formats the device and then displays the “Formatting finished” notification (right) when the formatting is complete.
Ejecting and Disconnecting an External Drive
When you finish using an external drive, eject it from the Chromebook’s file system before disconnecting it. Ejecting the device makes Chrome OS close any files that it has opened on the device.
To eject the device, either click the Eject icon to the right of its name in the Navigation pane, right-click the device’s name and then click the Eject device item on the shortcut menu, or press Ctrl+Shift+E when the device is selected.
Note
Even if your school’s Chromebooks normally live on desks in a classroom rather than get carried around the school, it is wise to avoid leaving an external drive connected to a Chromebook, because an external device increases the risk of damaging the Chromebook. USB sticks and SD cards also are at risk of being lost or pilfered.

Chrome OS displays the “Whoa, there. Be careful” message if you disconnect an external drive without ejecting it from the Chromebook’s file system
Connecting an External Mouse or Other Pointing Device
You can connect an external mouse or other pointing device to a Chromebook via either USB or Bluetooth. An external pointing device can be helpful for a student who finds the touchpad difficult to use, but you will likely want to minimize the number of additional devices in the classroom in order to keep the Chromebooks easy to handle and manage.
After connecting an external mouse , you can configure it in the Settings app. Click the Mouse and touchpad button in the Device section of the Settings window to display the Mouse and touchpad screen, and then choose the settings you need in the Mouse section.
REASONS TO PREFER USB OVER BLUETOOTH
You can see instantly which USB device is connected to which Chromebook. By contrast, a student playfully swapping several identical Bluetooth keyboards or pointing devices can disrupt a lesson.
You do not have to pair a USB device.
You do not have to keep a USB device charged.
Connecting an External Keyboard
As with an external pointing device, you can connect an external keyboard to a Chromebook via either USB or Bluetooth. USB is usually the better choice, especially for heavy-duty input, because USB keyboards typically respond faster than Bluetooth keyboards.
Once you have connected an external keyboard, you can use it instead of the built-in keyboard, or switch from one keyboard to the other, as needed.
Working with Apps and Windows
To get work done on a Chromebook, you run apps, much as on most other computers. The main difference is that, on Chrome OS, many of the apps are shortcuts that work in the Chrome browser rather than being full-fledged apps installed locally.
Launching Apps from the Shelf and the Launcher
Shelf: If the app’s icon is pinned to the shelf, click the icon to launch the app .
Launcher: Click the Launcher icon to display the Launcher bar. If the app’s icon appears on the Launcher bar, click it. Otherwise, click the up-arrow button to display the Launcher full screen and then click the app’s icon.
Once the app is running, the app’s icon appears on the shelf (assuming it was not already pinned there).
Organizing, Switching, and Managing Windows
Like most modern operating systems , Chrome OS includes features to make organizing, switching, and managing windows easy. This section will show you how to display two windows side by side and how to switch quickly among windows.
Displaying Two Windows Side by Side
- 1.
Activate the window you want to place on the left half of the screen.
- 2.
Click and hold the Maximize button in the upper-right corner of the window. A Left (<) button will appear to the left of the Maximize button, and a right (>) button will appear to the right of the Maximize button (see Figure 3-44).

To position a window on the left half or right half of the screen, click and hold the Maximize button until the Left (<) button and Right (>) button appear, then drag the Maximize button to the appropriate button and release it.
- 3.
Drag the Maximize button to the Left (<) button and release it. The window will appear on the left half of the Chromebook’s screen.
- 4.
Activate the window you want to place on the right half of the screen.
- 5.
Click and hold the Maximize button in the upper-right corner of this window. Again, the Left (<) and Right (>) buttons will appear.
- 6.
Drag the Maximize button to the Right (>) button. The window will appear on the right half of the Chromebook’s screen.
Switching Windows Using Alt+Tab

Hold down the Alt key and press the Tab key to display the window-switcher bar. Press the Tab key to move the selection to the window you want to display, and then release the Alt key.
Tip
While holding down the Alt key, you can press Shift+Tab to move the selection backward through the window thumbnails.
Displaying All Your Windows with the Window Switcher and Overview Mode
Trackpad: Swipe down from the top of the touchpad with three fingers.
Touchscreen: Swipe down from the top of the touchscreen with three fingers.
Keyboard: Press the Switch Window button—the top-row button above the 6 key.
Display a window: Click the thumbnail for the window you want to display.
Close a window: Click the X button in the upper-right corner of the window’s thumbnail.
Search: Press the spacebar to display a search field at the top of the Overview Mode screen and then start typing your search term. Chrome OS will highlight matching items, and you can click the window you want to display.
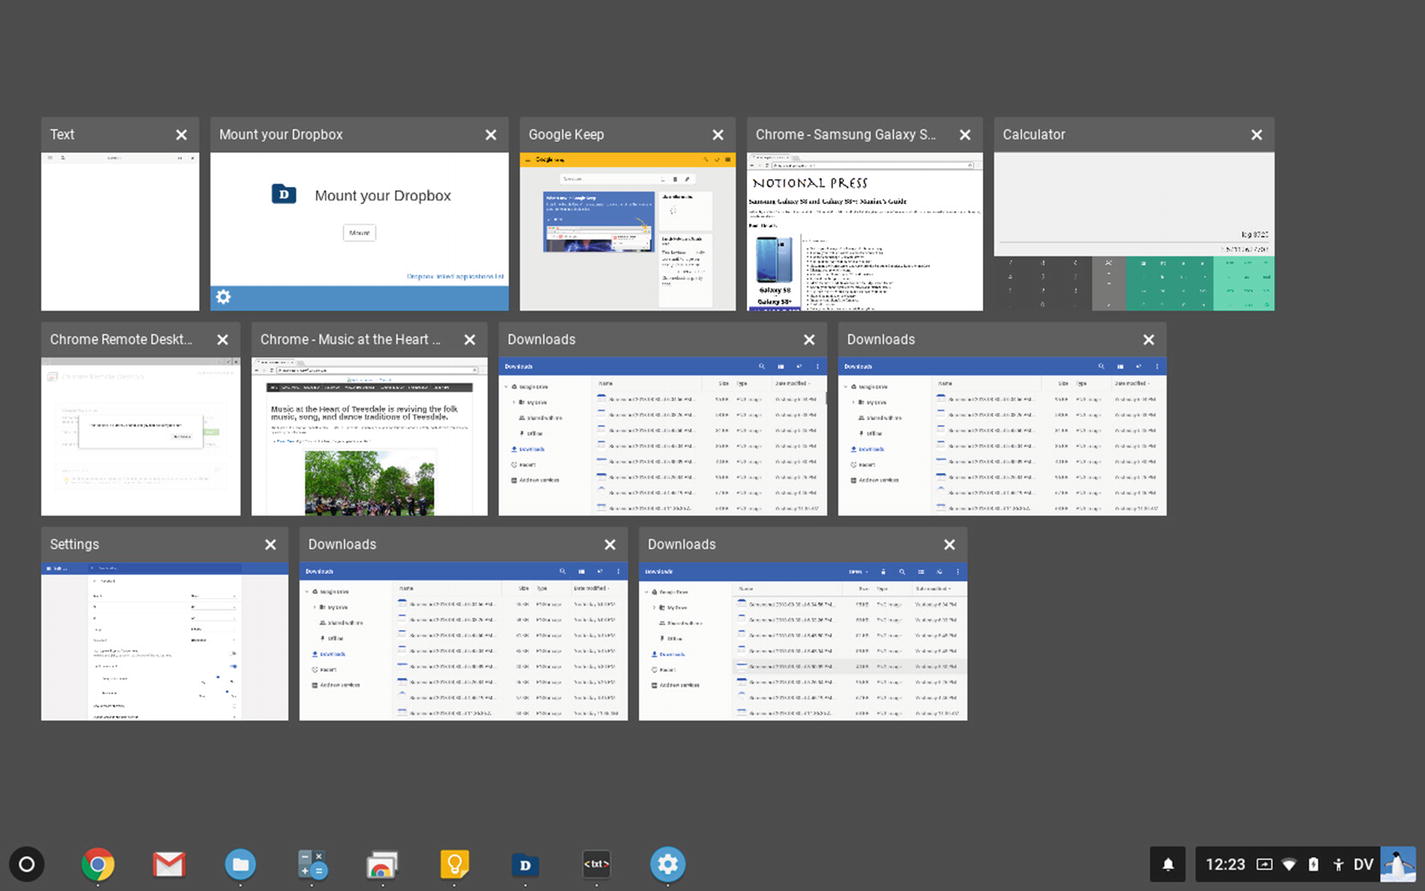
Overview Mode lets you see all your open windows and select the window you want to display
Note
With the keyboard , you can press the Tab key, the right-arrow key, or the down-arrow key to move the focus from one thumbnail to the next. Press Shift+Tab, the up-arrow key, or the left-arrow key to move the focus back to the previous thumbnail. Press the Enter key to display the window for the selected thumbnail. Press the Esc key to return to your previous window.
Return to your previous window: Click open space anywhere.
Switching Windows Using the Shelf
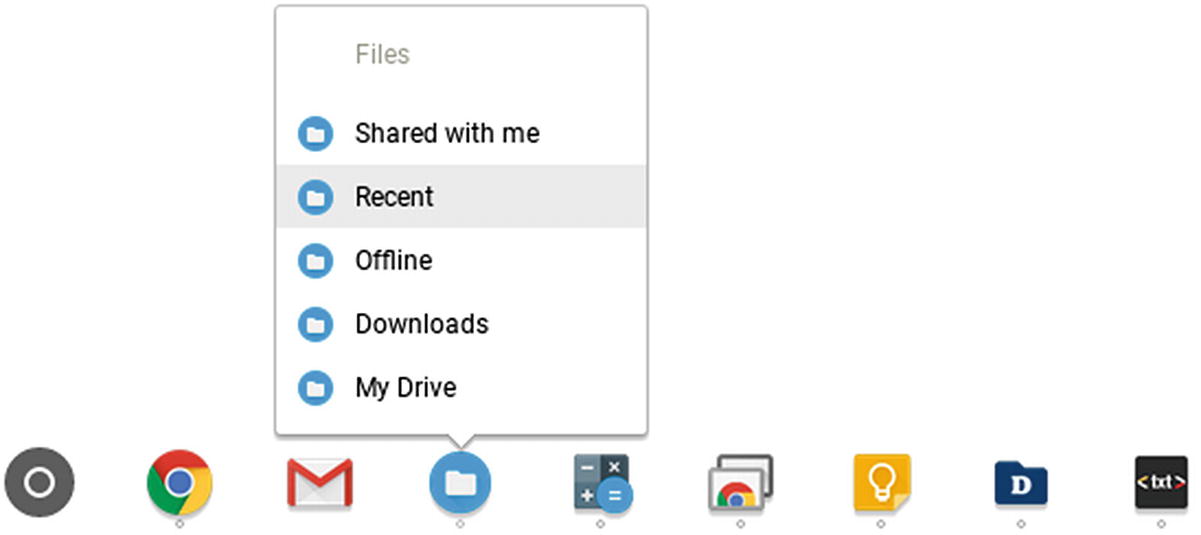
Click the shelf icon for the app you want to display. If the pop-up menu opens, click the entry for the window you want.
Closing a Crashed App with Task Manager
Keyboard: Press Search+Esc
More Actions menu: In Chrome, click the More Actions button (the three vertical dots), click or highlight the More tools item to open the More tools submenu, and then click the Task Manager item.
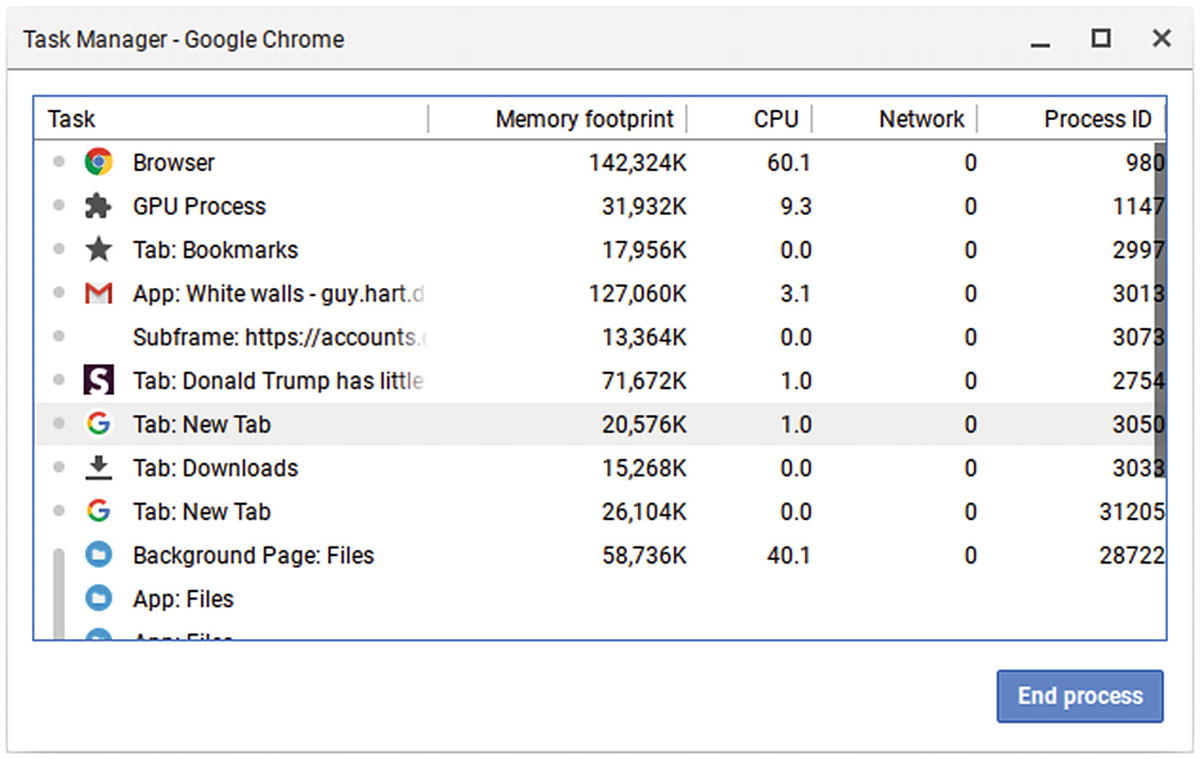
You can close a crashed app by clicking its process in Task Manager and then clicking the End process button
You can sort the tasks by clicking the heading of the column by which you want to sort. An arrow will appear on the column heading, pointing down to indicate a descending sort or pointing up to indicate an ascending sort; click the column heading again if you need to reverse the sort order.
Tip
Task Manager displays a handful of columns by default: Task, Memory footprint, CPU, Network, and Process ID. You can display various other columns by right-clicking in the Task Manager window and then clicking an item in the shortcut menu, placing a checkmark next to it. If you want to remove one of the displayed columns, click it on the shortcut menu to remove its checkmark.
When you identify the task you want to end, click its entry in Task Manager and then click the End process button. Task Manager will end the task without confirmation.
Making the Most of Chrome
The Chrome browser is the central app on a Chromebook, with many of the icons on the Launcher screen simply opening a Chrome tab to the appropriate website. For example, the Gmail icon opens a tab to your inbox on the Gmail site, and the YouTube icon opens a tab to the YouTube website. So, to get full use out of a Chromebook, you should become an expert in using Chrome and teach your students and your colleagues to become experts too.
This section will show you how to launch Chrome; how to navigate in it; how to work with windows and tabs and how to perform other essential browsing moves; and how to work with bookmarks and with your history.
Launching Chrome and Meeting Its Interface
You can launch Chrome either directly, by clicking the Chrome icon that appears on the shelf by default or on the Launcher screen, or indirectly, by clicking another icon for an “app” that relies on Chrome, such as Gmail or YouTube.
Tab: Chrome enables you to open multiple tabs within the same window, with each tab containing a different page. You can then switch among the pages by clicking the tabs.
Close tab button: Click this button to close the tab.
New tab button: Click this button to open a new tab after the last current tab in the window.
Omnibox : This box acts as a combined address box and search box. You can type a web address (a URL) to go to that address, or type the search terms for the search you want to perform.
Bookmark star : This star appears in gray if the current web page is not bookmarked and in blue if the page is bookmarked. Click the gray star to create and start editing a bookmark for the current page. Click the blue star to remove the existing bookmark for the page.
More Actions button: Click this button to display the menu, which contains further commands and submenus.
Reload button: Click this button to reload the current page. You may find it easier to press the Reload key on the keyboard.
Back button: Click this button to return to the previous page that was displayed in this tab. Click and hold this button to display a list of the previous pages.
Forward button: Click this button to go forward again to a page from which you have gone back in this tab. Click and hold this button to display a list of the pages to which you can go forward.
Bookmarks bar: This bar contains bookmarks you have added for quick access, plus the Other bookmarks button, which you can click to access other bookmarks. You can toggle the display of the Bookmarks bar by pressing Ctrl+Shift+B.
Bookmarks: Click a bookmark on the Bookmarks bar to display the bookmarked web page.
Thumbnails: Click a page thumbnail to display the associated web page . You can remove a thumbnail by moving the pointer over it and then clicking the Remove (X) button in the upper-right corner.

Chrome displays the New Tab page when you open a new window or tab
Going to a Web Page
Type or paste the web page’s URL in the omnibox and press the Enter key: Typing works well for short or simple addresses, whereas pasting is usually a better choice for long or complex addresses. However, if you have the address in another app on the Chromebook, you can usually open it in Chrome simply by clicking it; you do not need to copy the address in the other app and then paste it into Chrome.
Click a thumbnail on the New Tab page: If the web page you want to open has a thumbnail on the New Tab page, click that thumbnail to open the page.
Note
As in most web browsers, the pointer in Chrome changes to a right-hand outline with a finger pointing up when it is over a link.
Follow a link: Click a link on a web page. Doing so usually opens the linked page in the same tab, although some links are set up to open the linked page in a new tab, leaving the previous page still open. You can also choose to open a linked page in a new tab: instead of clicking the link, right-click it, and then click the Open link in new tab item on the shortcut menu.
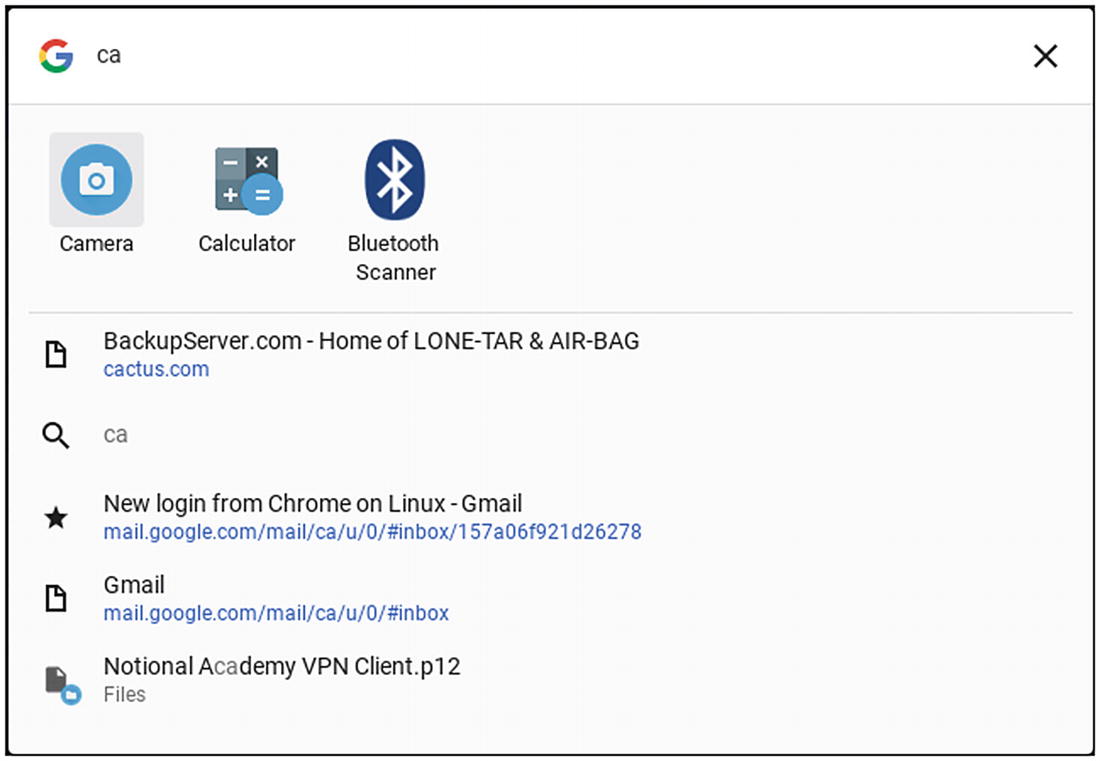
Search for a web page: Click the omnibox and start typing your search terms . As you type, Chrome will display a list of search suggestions and search results (see Figure 3-50). If a specific search result is what you want, click it. Otherwise, click the search suggestion that seems most suitable, such as one of the Google Search suggestions in the figure. Chrome will display the list of results that Google Search returns (see Figure 3-51), and you can click the result whose page you want to view.
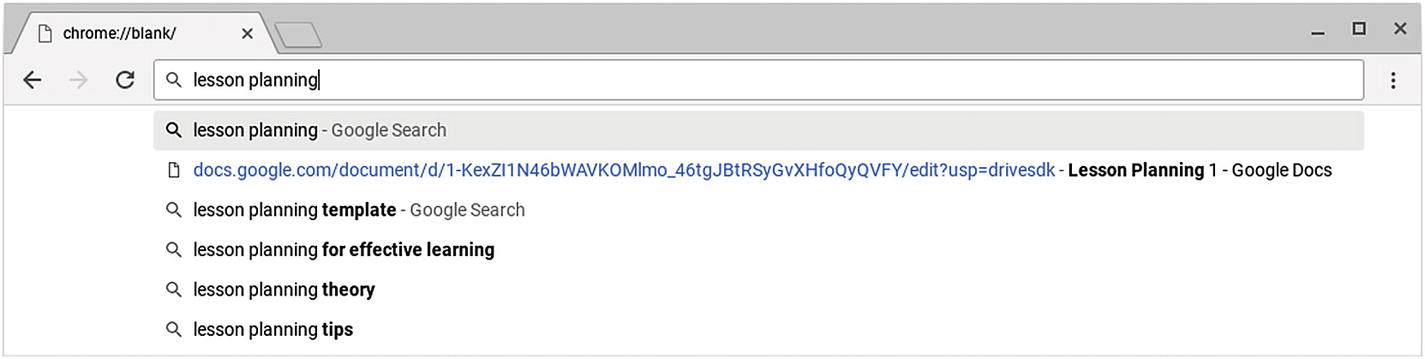
Chrome displays a list of search suggestions as you type your search terms
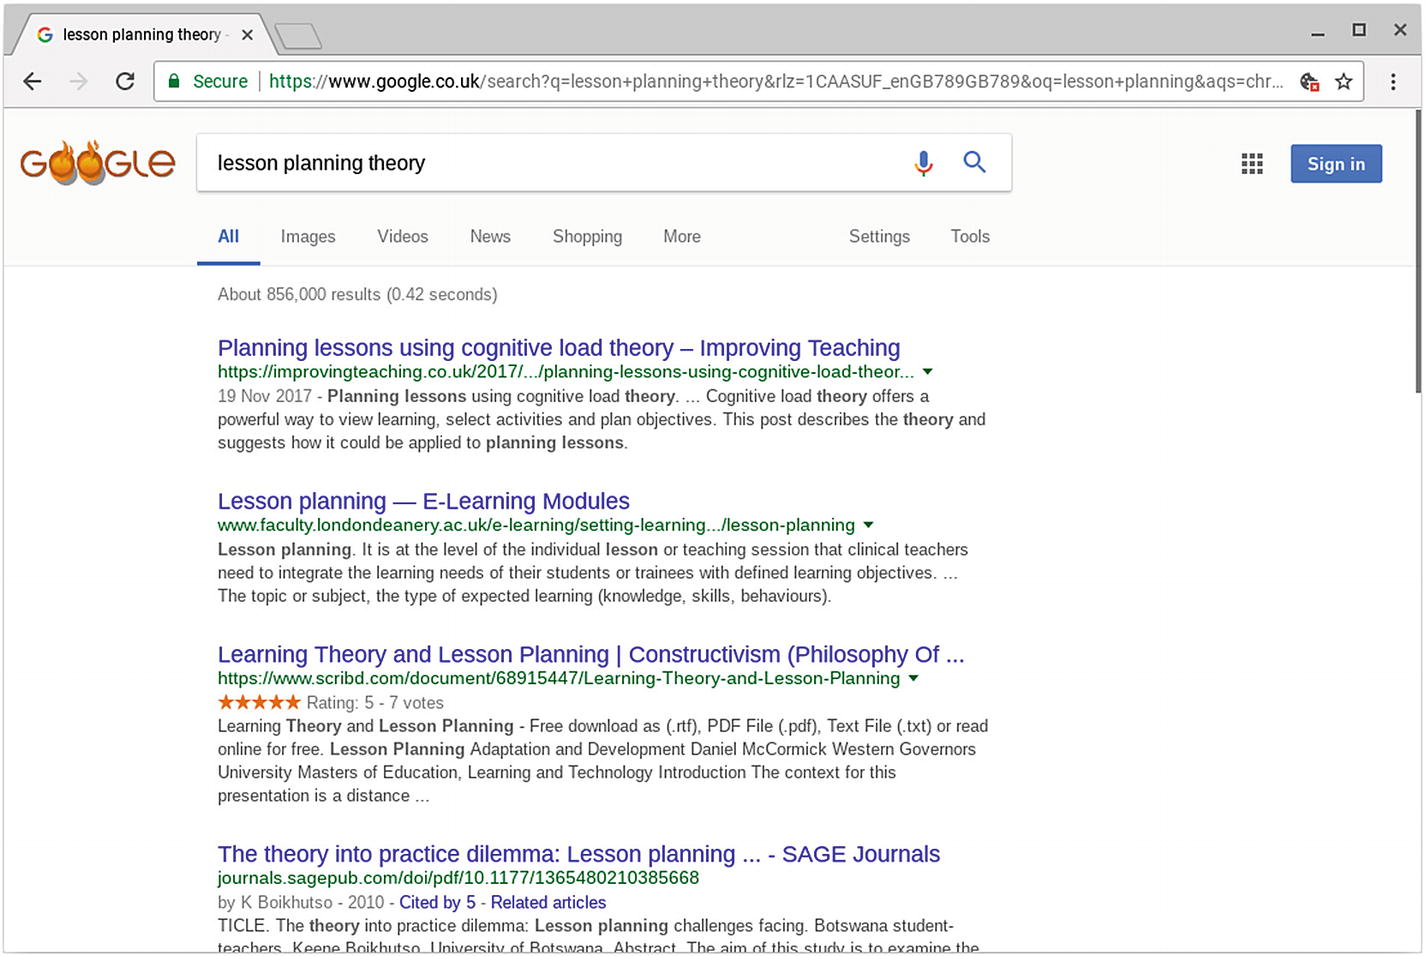
Click the search result whose page you want to view
Working with Windows and Tabs
Like most other browsers, Chrome enables you to open multiple windows, each of which can contain multiple tabs. Opening multiple windows is helpful both when you want to browse different topics, keeping each in its own window, and when you want to position two windows side by side to compare their contents.
Open a new window: Press Ctrl+N. Alternatively, click the More Actions button (the three vertical dots) and then click the New Window item on the menu. The new window will contain one tab.
Open a new incognito window: Press Ctrl+Shift+N. Alternatively, click the More Actions button and then click the New incognito window item on the menu.
Open the Downloads window: Press Ctrl+J. Alternatively, click the More Actions button and then click the Downloads item on the menu.
Close a window: Click the Close (X) button in the upper-right corner of the window .
Open a new tab: Click the New tab button to the right of the rightmost tab or press Ctrl+T. Alternatively, click the More Actions button (the three vertical dots) and then click the New Tab item on the shortcut menu.
Open a new tab showing the same page as a current tab: Right-click the tab showing the page and then click the Duplicate item on the shortcut menu.
Close a tab: Click the Close (X) button at the right side of the tab or press Ctrl+W. Alternatively, right-click the tab and then click the Close tab item on the shortcut menu.
Close all other tabs: Right-click the tab and then click the Close other tabs item on the shortcut menu.
Close all other tabs to the right of this tab: Right-click the tab and then click the Close tabs to the right item on the shortcut menu.
Pin the tab in place: Right-click the tab and then click the Pin tab item on the shortcut menu. Chrome shrinks the tab’s button and moves it to the left end of the tab bar, placing it to the right of any tabs you have already pinned there.
Unpin a pinned tab: Right-click the pinned tab and then click the Unpin tab item on the shortcut menu.
Move the tab: Drag the tab left or right along the tab bar to where you want it.
Mute a site: Right-click the tab and then click the Mute site item on the shortcut menu .
Reload a tab’s content: Press the Reload button on the keyboard or press Ctrl+R. Alternatively, right-click the tab and then click the Reload tab item on the shortcut menu.
Reopen the last tab you closed in the active window: Press Ctrl+Shift+T. Alternatively, right-click another tab in the window and then click the Reopen closed tab item on the shortcut menu.
Bookmark all the tabs in the current window: Press Ctrl+Shift+D. Alternatively, right-click a tab in the window and then click the Bookmark all tabs item on the shortcut menu.
Activate another tab: Click the tab. Alternatively, swipe left with three fingers on the touchpad to move to a previous tab, or swipe right to move to a subsequent tab. The further you swipe, the more tabs you move at once.
Performing Essential Browsing Moves
Zoom in or out: Press Ctrl+Shift++ or Ctrl+Shift+= to zoom in by one increment; press Ctrl+Shift+– to zoom out by one increment. Alternatively, click the More Actions button to open the menu and then click the – button to zoom out or the + button to zoom in.
Note
On a touchscreen Chromebook, you can place two fingers together on the screen and spread them apart to zoom in or place two fingers apart on the screen and move them together to zoom out.
Go back one page in the current tab: Click the Back button to the left of the omnibox or press Alt+Left arrow.
Tip
To go back or forward multiple pages, click and hold the Back button or the Forward button and then click the appropriate entry on the pop-up menu. The last item on each pop-up menu is the Show Full History item, which you can click to display your History screen.
Go forward one page in the current tab: Click the Forward button to the left of the omnibox or press Alt+Right arrow.
Open a linked page: Click the link.
Open a linked page in a new tab: Right-click the link and then click the Open link in New Tab item on the shortcut menu.
Open a linked page in a new window: Right-click the link and then click the Open link in new window item on the shortcut menu.
Open a linked page in a new incognito window: Right-click the link and then click the Open link in incognito window item on the shortcut menu.
Save the linked page to your Downloads folder: Right-click the link, click the Save link as item on the shortcut menu, enter the name in the Downloads dialog box that opens, and then click the Save button.
Copy the address of the linked page to the Clipboard: Right-click the link and then click the Copy link address item on the shortcut menu .
Working with Bookmarks
Like most browsers, Chrome enables you to create bookmarks to mark web pages to which you want to be able to return easily. You can access your bookmarks from the Bookmarks bar below the toolbar in the Chrome window, from the More Actions ➤ Bookmarks submenu, or from the Bookmarks Manager screen.
Creating a Bookmark
Once you have displayed a web page you want to bookmark, follow these steps to create the bookmark :
- 1.Take one of the following actions to display the Bookmark added dialog box (see Figure 3-52):
Click the Bookmark icon (the star at the right side of the omnibox).
Press Ctrl+D.
Choose More Actions ➤ Bookmarks ➤ Bookmark this page .
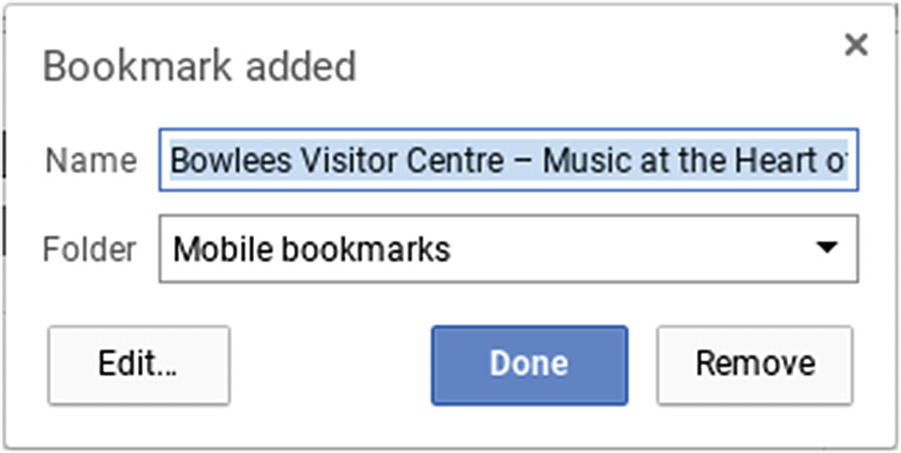
In the Bookmark added dialog box, edit the bookmark’s name as needed, choose the folder in which to store it, and then click the Done button
- 2.
Edit the suggested name in the Name box as needed, or simply type a new name over it.
- 3.
Open the Folder pop-up menu and click the folder in which to store the bookmark.
Note
Tip If you will access the bookmark frequently, select the Bookmarks bar folder in the Folder pop-up menu to put the bookmark on the Bookmarks bar.
- 4.
Click the Done button. Chrome will update the bookmark with the new information.
Edit the bookmark’s name: Make the changes needed in the Name box.
Edit the URL: Type or paste the new URL in the URL box.
Move the bookmark to a different folder: Click the destination folder in the list.
Add a new folder: Click the existing folder in which you want to place the new folder. Click the New folder button , type the name for the new folder, and then press the Enter key.
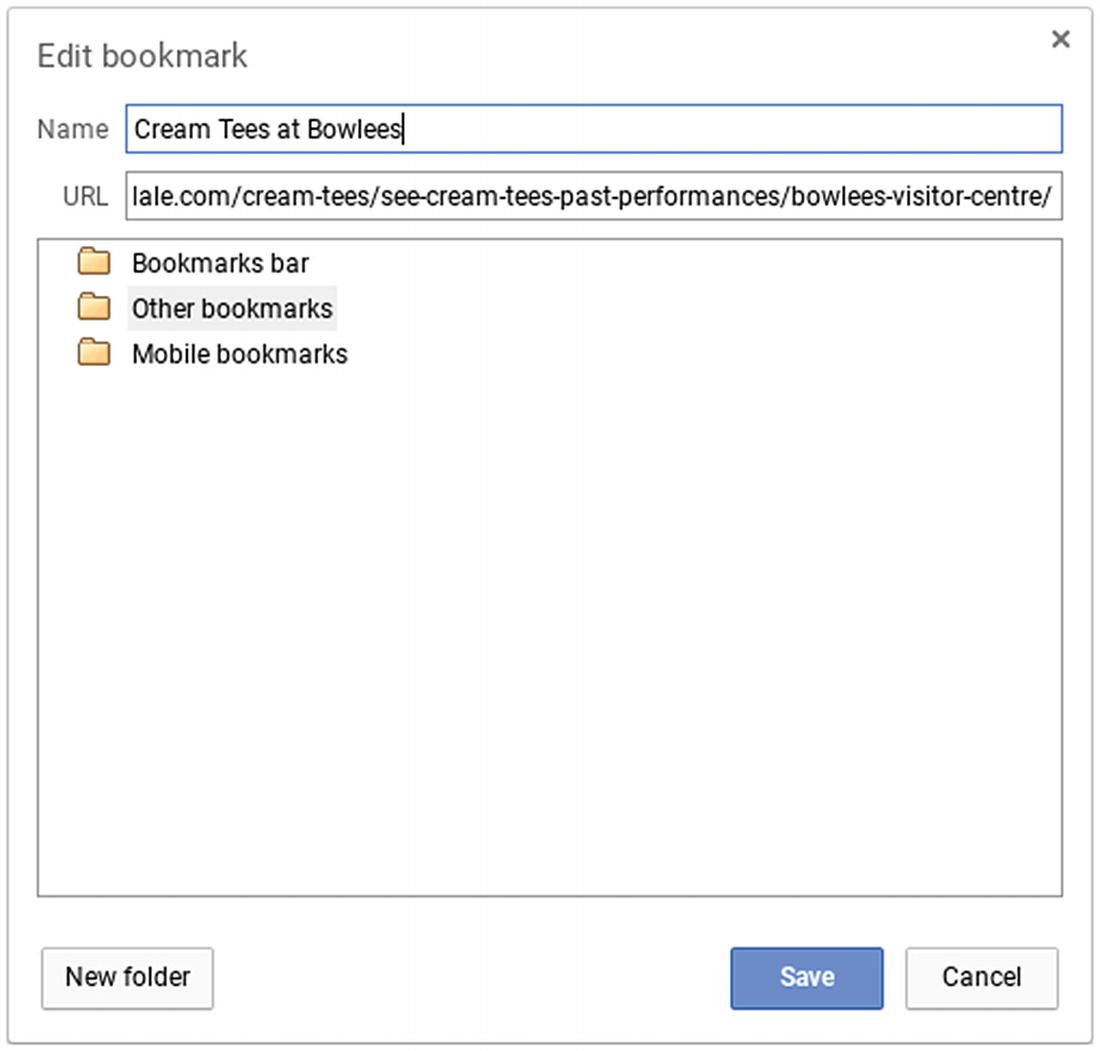
In the Edit bookmark dialog box, you can edit the bookmark’s name or URL, or move the bookmark to a different folder. Click the New folder button to start creating a new folder within the selected folder.
Going to a Bookmark

You can go to a bookmark by clicking its button on the Bookmarks bar or by clicking the Other bookmarks button, navigating to the bookmark, and clicking it.
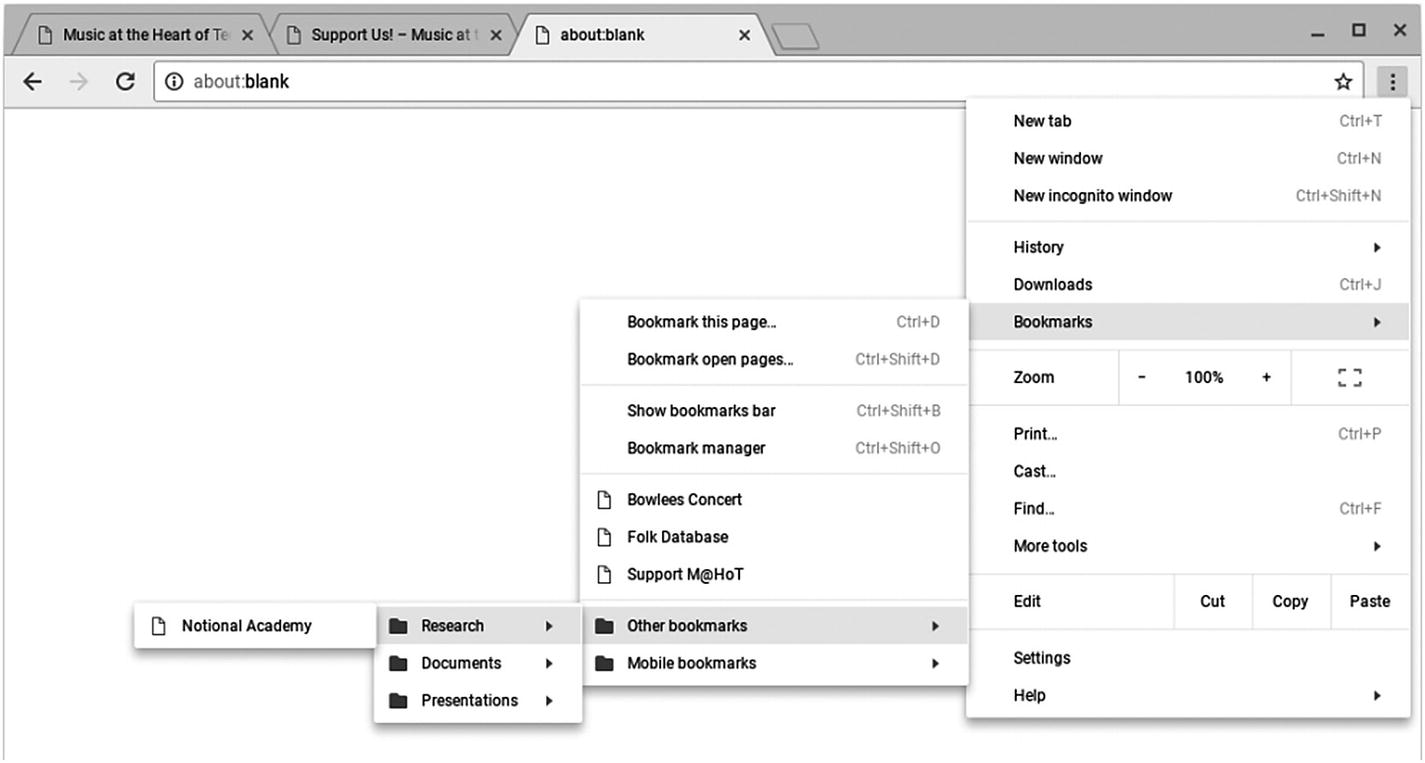
You can also use the More Actions ➤ Bookmarks submenu and its submenus to navigate to a bookmark
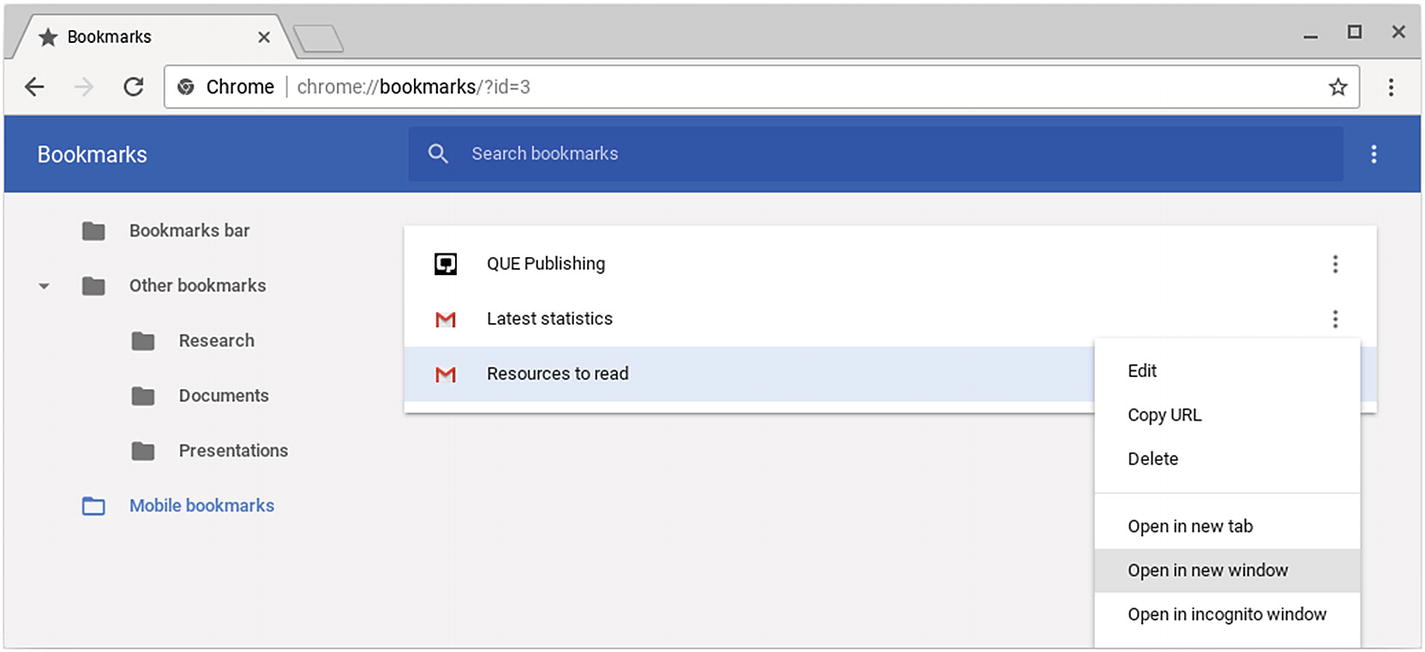
From the Bookmark manager, you can manage your bookmarks or open a bookmark in a new tab, in a new window, or in an incognito window.
Managing Your Bookmarks
As you saw in the previous section, you can use the Bookmark Manager screen to navigate to the bookmark for the web page you want to display. But, as its name suggests, the primary purpose of the Bookmark Manager screen is to enable you to manage your bookmarks.
Display the bookmarks on the Bookmarks bar or in a folder: Click the Bookmarks bar item or the folder in the Navigation pane.
Search for a bookmark: Click the “Search bookmarks” field on the toolbar and then start typing your search term. A list of results will appear. You can then double-click a search result to open it in a new tab, or click the More Actions button and then choose a different action from the menu.
Rename a folder: Right-click the folder, click the Rename item to display the Rename folder dialog box, type the new name, and then click the Save button.
Edit a bookmark: Click the More Actions button on the right of the bookmark and then click the Edit item on the menu.
Note
You can also access the Edit command, the Copy URL command, the Delete command, the Open in new tab command, the Open in new window command, and the Open in incognito window command by right-clicking the bookmark to display its shortcut menu.
Copy a bookmark’s URL: Click the More Actions button on the right of the bookmark and then click the Copy URL item on the menu.
Move a bookmark to a different folder: Drag the bookmark from its current folder to the destination folder.
Delete a bookmark: Click the More Actions button on the right of the bookmark and then click the Delete item on the menu.
Open a bookmark: Click the More Actions button on the right of the bookmark and then click the appropriate item on the menu: Open in new tab, Open in new window, or Open in incognito window .
Open all the bookmarks in a folder: Right-click the folder in the Navigation pane and then click the appropriate item: Open all bookmarks, Open all in new window, or Open all in incognito window.
Import bookmarks from a file: If you have a file containing bookmarks that you have exported from another browser, you can import them into Chrome. Click the More Actions button and then click the Import Bookmarks item on the menu. The Select a file to open dialog box appears. Navigate to the appropriate folder, click the file, and then click the Open button. Chrome OS will import the bookmarks, and you can then use them in Chrome.
Export your bookmarks: Click the More Actions button and then click the Export Bookmarks item on the menu. The Save file as dialog box opens. In the Navigation pane, click the folder in which you want to save the file containing the exported bookmarks; if necessary, click the New Folder button and follow the prompts to create a new folder.
Navigating and Working with Your History
As you browse the Web, Chrome adds the URL of each web page you visit to a list called your History, which enables you to navigate backward and forward along the path of web pages you have browsed in each open tab in Chrome. History also lets you view, browse, and search the full list of web pages you have browsed. You can delete individual records from your History—for example, to remove potentially embarrassing sites you visited by accident—or clear your History entirely if you want to make a fresh start.

The Back pop-up menu and Forward pop-up menu enable you to access the list of pages you have browsed in this tab. Click the Show Full History item to display the History screen.

The History submenu on the More Actions menu breaks down your History into categories such as Recently closed.
View your Chrome history: Make sure the Chrome history item is selected in the Navigation pane.
View your tabs from other devices: Click the Tabs from other devices item in the Navigation pane.
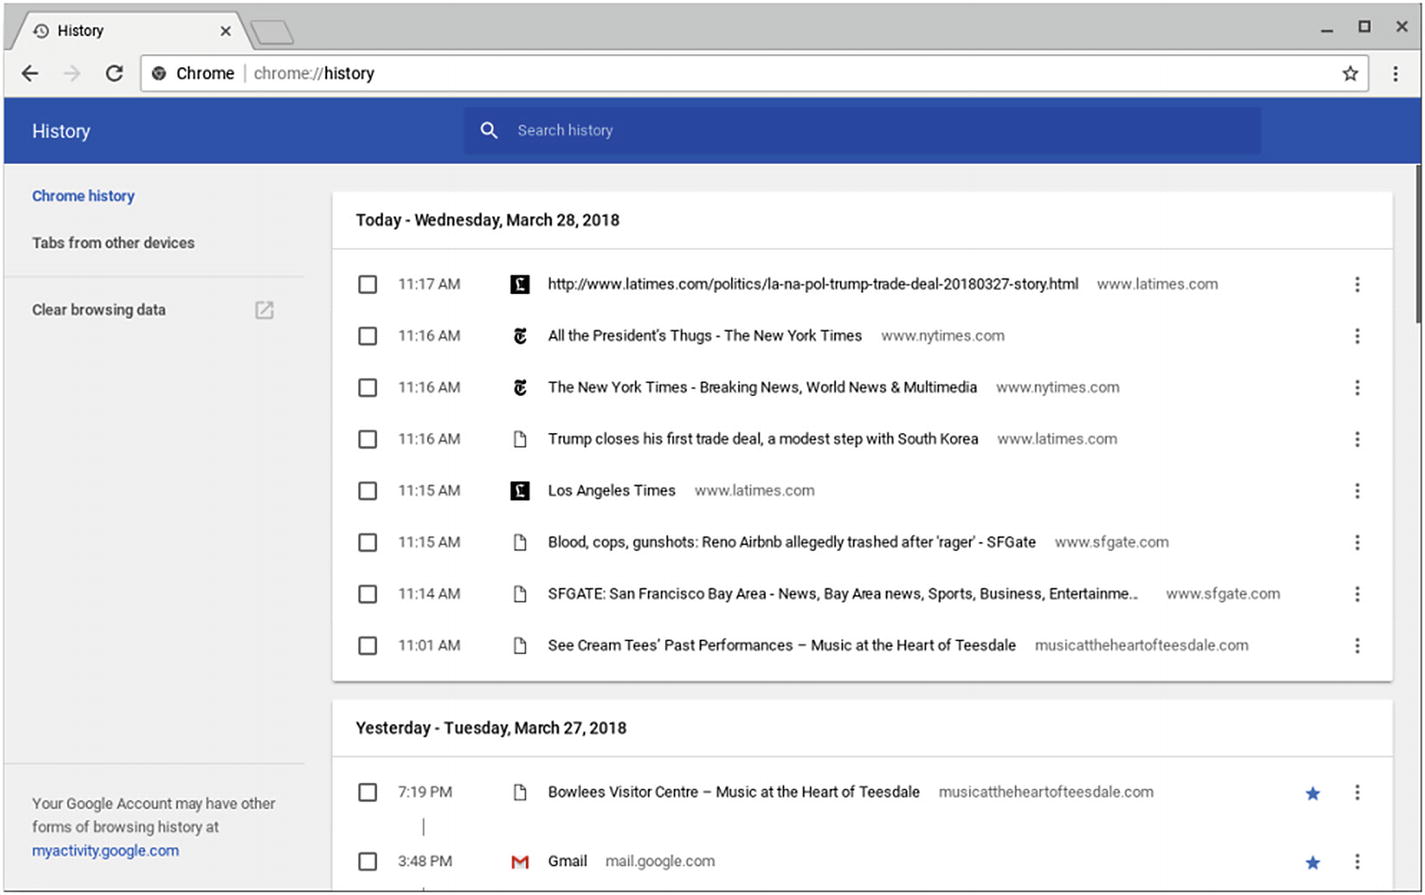
On the History screen, you can view your Chrome history, view your tabs from other devices, delete history items you no longer need, or clear some or all of your browsing data.
Search your history: Click the Search history box and then type your search terms. A list of results will appear.
Find more web pages from a site in your history: Click the More Actions button to the right of the history item and then click the More from this site item on the menu. Chrome will search your history for the website identified by the history item and then display a list of results.
Go to a web page: Click the history item for the page.
Remove an item from your history: Click the More Actions button to the right of the history item and then click the Remove from history item on the menu.
Remove multiple items from your history: Check the check box for each item, click the Delete button on the toolbar, and then click the Remove button in the Remove selected items dialog box.
Clear your browsing data: Click the Clear browsing data item in the Navigation pane. The Settings app will become active, and then the Clear browsing data dialog box will open. You can then clear all or some of your browsing data . See the section “Clearing Browsing Data” in Chapter 4 for details.
Managing Files with the Files App
In this section, we will explore how to manage files on a Chromebook using the Files app. File management on a Chromebook is usually relatively simple because most files are stored online, so you can quickly get up to speed with the moves you need to know.
The Files app enables you to access not only files stored on the Chromebook itself but also files stored in Google Drive in your Google account and in other compatible online file services, such as a Box account. Your Google Drive files become available automatically when you sign in to the Chromebook. For other online file services, you must install the service’s extension from the Chrome Web Store.
Caution
If your Chromebook’s storage is running out of space, Chrome OS may automatically delete some of your older downloaded files to recover enough space to avoid problems.
Launching the Files App and Meeting Its Interface
- 1.
Click the Launcher button to display the Launcher bar.
- 2.
If the Files icon does not appear on the Launcher bar, click the up-arrow button to expand the Launcher to full screen.
- 3.
Click the Files icon.
Navigation pane: This pane, on the left side of the Files window, enables you to navigate among your different storage locations, such as Google Drive and the Downloads folder on the Chromebook. The Navigation pane also contains the Add new services item for adding other online file services.
Columns and column headings: The Files app can display items either in list view (as in the figure) or in thumbnail view. List view shows four columns: Name, Size, Type, and Date modified. To control how the Files app sorts the items, click the heading of the column by which you want to sort. To reverse the sort order, click the column heading again.
Note
You can also change the sort order by clicking the Sort options button on the toolbar and then clicking the Name item, the Size item, the Type item, or the Date modified item on the pop-up menu. This is the only way to change the sort order in thumbnail view. In list view, it is usually easier to use the column headings.
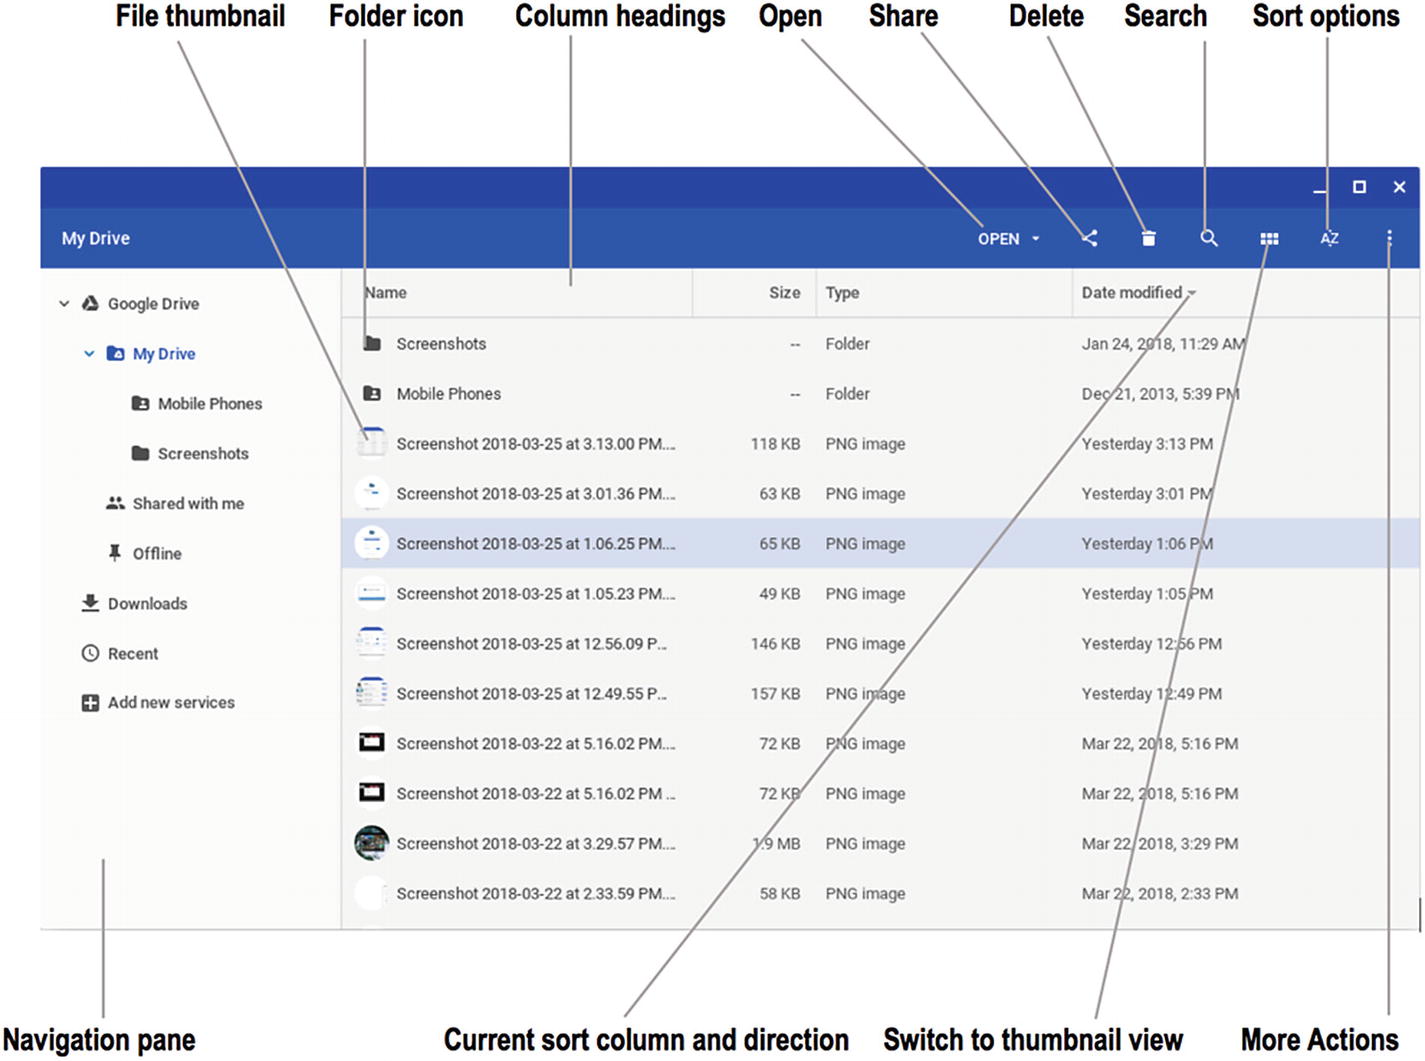
The Files app gives you access to files on the Chromebook and to files stored on Google Drive and other online file services
Current sort column and direction: An upward or downward triangle to the right of a column heading indicates the current sort column . An upward triangle indicates an ascending sort (A to Z, low numbers to high, earlier dates to later); a downward triangle indicates a descending sort (Z to A, high numbers to low, later dates to earlier).
Switch to thumbnail view: Click this button to switch the view to thumbnail view, which displays a thumbnail picture for each folder and file. Thumbnail view is especially useful for working with images that you can identify by sight. In thumbnail view, the Switch to thumbnail view button is replaced by the Switch to list view button, which you can click to switch the window back to list view .
Open: Click this button to display the Open pop-up menu, which shows the apps you can use to open the current item. This pop-up menu also contains the Change default item, which lets you choose which app to use as the default for this file type.
Share: For items stored online, click this item to display the Share pop-up menu, and then click the Share with others item to open the Share with others dialog box (see Figure 3-61). In the “People” field, type the email address of the person with whom to share the file. Type any information needed in the “Add a note” field (for example, why you are sharing the file with this person), then click the Send button.

In the Share with others dialog box, add the email address of the person with whom you want to share the file, add a note if necessary, and then click the Send button
Delete: To delete the selected file or files, click this button and then click the Delete button in the confirmation dialog box that opens .
Search: Click this button to display the “Search” field and then type your search terms.
More Actions: As usual, click this button to display a menu containing further actions you can take, either on the Files app as a whole or on the selected item or items.
Google Drive: This item represents your Google Drive in its entirety. If a right-arrow (>) appears to the left of this item, click the right-arrow or the Google Drive label to expand the item so that its contents appear: the My Drive, Shared with me, and Offline items. The right-arrow changes to a down-arrow, which you can click when you want to collapse the item again.
My Drive: This item represents the files you have stored on Google Drive. You can expand or collapse the listing using the techniques explained in the previous bulleted paragraph.
Shared with me: This item displays the files and folders that others have shared with you on Google Drive.
Offline: This item displays the files and folders you have marked for offline usage. To mark a file for offline usage, right-click it and then click the Available offline item on the shortcut menu , placing a check mark next to this item. Repeat this move, removing the check mark, when you no longer want to have the file available offline.
Note
The Show hidden files item on the More Actions menu in the Files app enables you to toggle the display of files marked as hidden. Normally, you do not need to see these files, which is why Chrome OS hides them, but sometimes it is helpful to see which hidden files are there.
Performing Operations with Files and Folders
Select a file or folder: Click the file or use the arrow keys to move the highlight until the file or folder you want is selected.
Select a contiguous range of files or folders: Using the touchpad, click the first file or folder, then hold down the Shift key and click the last file or folder in the range to select all the files or folders in between. Using the keyboard , press the arrow keys to move the highlight to the first file or folder, then hold down Shift while you press the arrow keys to extend the selection to the last file or folder. A blue circle containing a white check mark will appear to the left of each selected item.
Select a noncontiguous range of files or folders: Click the first file or folder, then hold down the Ctrl key while you click each other file or folder you want to add to the selection. A blue circle containing a white check mark will appear to the left of each selected item (see Figure 3-62).
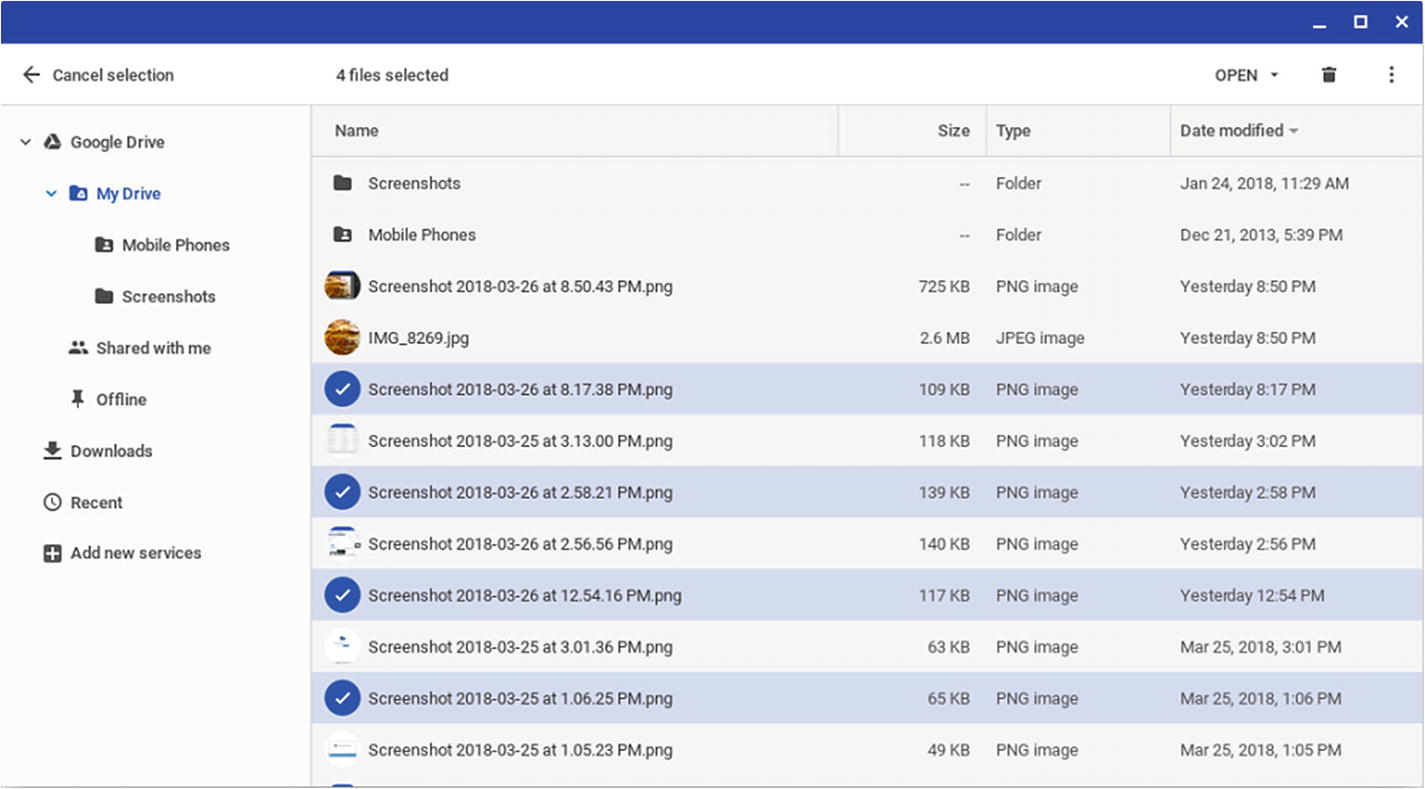
You can select a noncontiguous range of files or folders by clicking the first file or folder and then holding down Ctrl while you click each other one. A blue circle containing a white check mark will appear to the left of each selected item.
View information on the selected file: Press the spacebar. Alternatively, right-click the file and then click the Get info item on the shortcut menu. The Information window will appear (see Figure 3-63), showing a preview of the file (if one is available) and the Info pane. You can click the File info button to toggle the display of the Info pane on and off, the Open button to open the file in its default app, or the Back button to return to the Files window. You can also press the spacebar or the Esc key to return to the Files window .

Press the spacebar or invoke the Get info command on the shortcut menu to display the Info window for a file. You can click the File info button to toggle the display of the Info pane.
Tip
After opening the Information window, you can press the Left arrow to display information about the previous file or the Right arrow to display information about the next file.
Delete one or more selected files or folders: Press Alt+Backspace and then click the Delete button in the confirmation dialog box that opens.
Copy one or more selected files or folders: Press Ctrl+C or right-click the selection and then click the Copy item on the shortcut menu. You can then right-click the destination folder and click the Paste into folder item on the shortcut menu . Alternatively, display the contents of the destination folder and either press Ctrl+V or right-click and then click the Paste item on the shortcut menu.
Move one or more selected files or folders: Press Ctrl+X or right-click the selection and then click the Cut item on the shortcut menu. You can then right-click the destination folder and click the Paste into folder item on the shortcut menu. Alternatively, display the contents of the destination folder and either press Ctrl+V or right-click and then click the Paste item on the shortcut menu.
COPYING AND MOVING ITEMS USING DRAG AND DROP
You can use drag and drop to copy and move items in the Files app. If the destination folder is on the same device or service as the source folder, drag and drop moves the items. If the destination folder is on a different device or service, drag and drop copies the items.
Hold down Ctrl while you drag and drop if you want to copy items rather than move them.
Rename a file or folder: Select the file or folder and then press Ctrl+Enter . The Files app will display an edit box around the file name and extension and select the file name (but not the extension). Type the new name and then press the Enter key.
Create a new folder: Open the folder in which you want to create the new folder. Next, either press Ctrl+E or right-click and then click the New folder item on the shortcut menu. The Files app will display a folder icon with the default name New Folder, which will appear selected in an edit box. Type the name for the folder and then press the Enter key.
Compress the selection into a Zip file: Right-click the selection and then click the Zip selection item on the shortcut menu. The Files app will create a Zip file containing the selection. If the selection is a single file, the Zip file will have the same file name as the item but with the .zip file extension. If the selection is multiple items, the Zip file will have the name Archive.zip or (if Archive.zip already exists in this folder) the next available name, such as Archive (1).zip. If you need to rename the Zip file, press Ctrl+Enter, type the new name, and then press the Enter key.
Note
As of this writing, you cannot create Zip files on Google Drive in the Files app.
Decompress a Zip file: Double-click the Zip file. The Files app will mount the Zip file in the file system, add it to the Navigation pane with an Eject icon to the right of its name, and display its contents in the main part of the window. You can then drag the contents of the Zip file to the folder in which you want to store them. When you finish working with the contents, click the Eject icon to remove the Zip file from the Navigation pane.
Changing the Default App for Opening a File
- 1.
Open a Files window.
- 2.
Navigate to a file of the appropriate type.
- 3.
Click the Open pop-up button on the toolbar. The Open pop-up menu will open.
Note
If the Open button appears on the toolbar without the Open pop-up menu button, the selected file type is one for which you cannot change the default app.
- 4.
Click the Change default item to display the Change default… pop-up panel (see Figure 3-64).
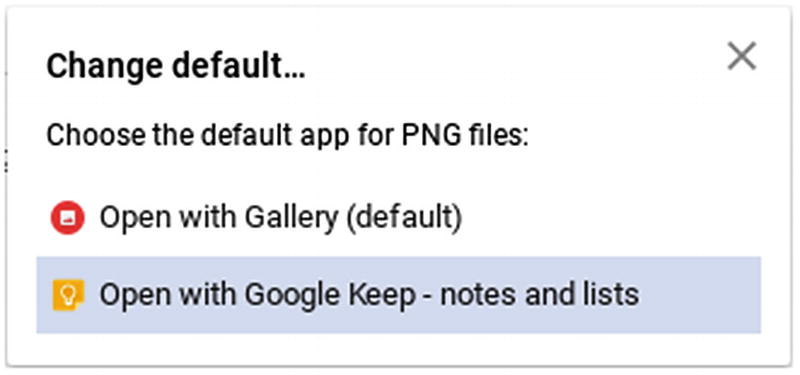
In the Change default… pop-up panel, click the app you want to make the default app for the file type
- 5.
Click the Open with item for the app you want to make the default app for the file type. The pop-up panel will close, and Chrome OS will register your preference.
After making this change, try double-clicking a file of the same type and verify that it opens in the app you chose.
Connecting to Another Cloud File Service
If you store files on another cloud file service as well as on Google Drive, you may be able to connect your Chromebook to that file service. As of this writing, Chrome OS supports various cloud file services, including Box, Dropbox, and OneDrive.
- 1.
Launch the Files app if it is not already running. If the Files app is running, make one of its windows active.
- 2.
In the left pane, click the Add new services item and then click the Install new from the webstore item on the pop-up menu. The Available services dialog box will open (see Figure 3-65).

In the Available services dialog box, click the Install button for the cloud file service to which you want to connect the Chromebook
- 3.
Click the Install button for the appropriate cloud file service . This example uses File System for Dropbox. The Add dialog box then opens (see Figure 3-66).

In the Add dialog box for the service, verify what the service will be able to do and then click the Add app button if you want to proceed
- 4.
Look at the “It can:” list to see what the service will be able to do on the Chromebook. Make sure that the service will not have any capabilities you do not want to allow.
- 5.
Click the Add app button. The Download manager window appears while Chrome OS downloads and installs the service. A window for setting up the service then opens, such as the Mount your Dropbox window shown in Figure 3-67.

To set up the Dropbox service, click the Mount button in the Mount your Dropbox dialog box
- 6.
Use the controls in the window and follow the subsequent prompts to set up the service. For example, for Dropbox, click the Mount button to open the Dropbox dialog box shown in Figure 3-68.

For Dropbox, you can sign in using either your Google account or another account
- 7.
After you sign in, the service may prompt you to grant permission for File System for ChromeOS to access your files and folders stored on the service (see Figure 3-69, which is for Dropbox). Click the Allow button to grant permission, as the service will not be able to work without it.
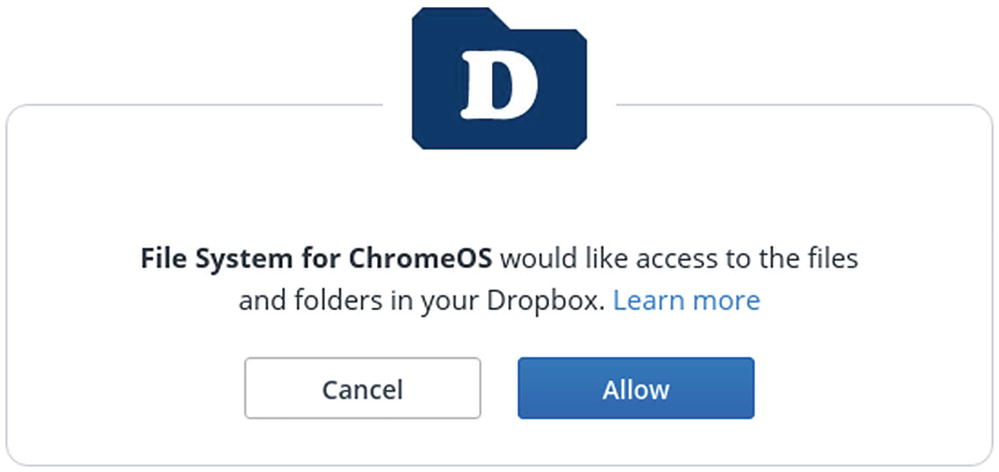
Click the Allow button to allow File System for ChromeOS to access your files and folders stored on the service
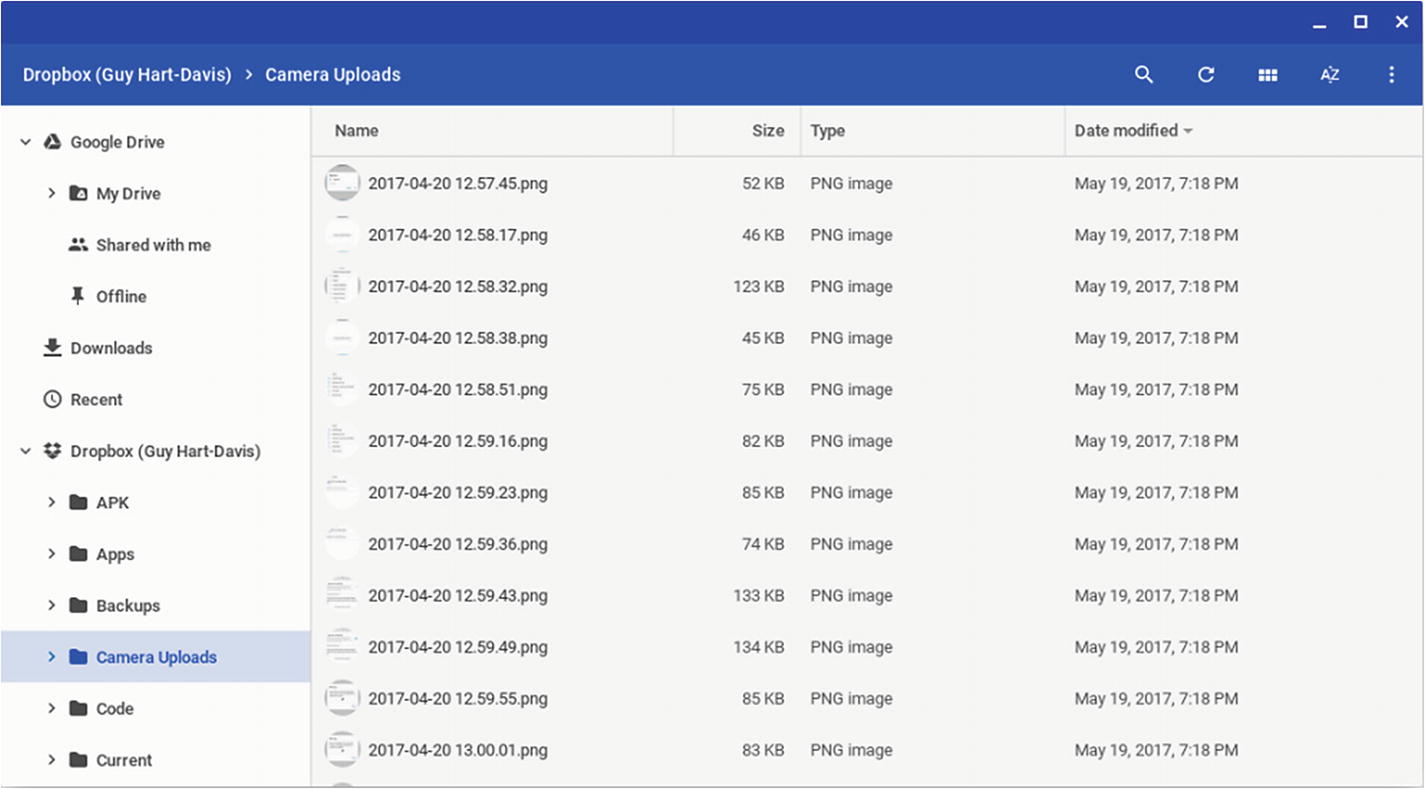
The online file service will appear in the left pane in the Files app, and you can work with your files and folders on it
Note
When you want to disconnect your Chromebook from an online file service, right-click the service’s entry in the left pane in the Files app and then click the Close item on the shortcut menu. To reconnect, open the Launcher, click the service’s icon, and then follow through the steps to mount the service again.
Signing In Multiple Users and Switching Among Them
Chrome OS includes a Multiple sign-in feature that enables you to sign in multiple users at once and switch quickly among them. This capability can be useful when you need to work with two different accounts at once.
- 1.
Click the status area to display the status menu.
- 2.
Click your picture or user name at the top of the status menu. A pop-up menu will appear, showing only the Sign in another user item.
- 3.
Click the Sign in another user item. The Multiple sign-in dialog box will open (see Figure 3-71), explaining that this feature enables you to access any signed-in user without having to enter a password, and also warning you to use the feature only with accounts you trust.
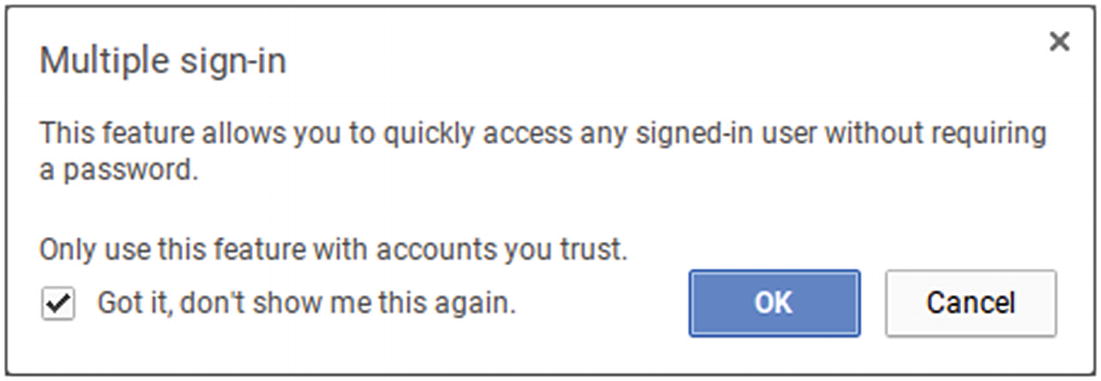
In the Multiple sign-in dialog box, uncheck the “Got it, don’t show me this again.” check box if you want to continue to receive the warning. Click the OK button to proceed.
- 4.
Uncheck the “Got it, don’t show me this again.” check box if you want to continue to receive this warning each time you use the Multiple sign-in feature.
- 5.
Click the OK button. The sign-in screen will appear, prompting you to sign in another user.
- 6.
Click the user you want to sign in.
- 7.
Type the user’s password and press the Enter key or click the right-arrow button. Chrome OS signs the user in, and the user’s desktop appears.
Keyboard: Press Ctrl+Alt+, (comma) to switch to the previous user, or Ctrl+Alt+. (period) to switch to the next user. (If you have only two users signed in, you can press either of these keyboard shortcuts to switch to the other account.)
Touchpad: Click the status area to display the status menu, click your picture or user name, and then click the appropriate user account on the pop-up menu.
- 1.
Click the status area to display the status menu.
- 2.
Click your picture or user name at the top of the status menu. A pop-up menu will appear, showing the available user accounts. (If no other user accounts are available, the message “All available users have already been added to this session” will appear.)
- 3.
Click the user account you want to add to the session.
Taking Screenshots on a Chromebook
Capture the full screen: Press Ctrl+Switch Window.
Capture a window: Press Ctrl+Alt+Switch Window. The pointer will change to crosshairs. Click the window you want to capture.
Capture a part of the screen that you select: Press Ctrl+Shift+Switch Window. The pointer will change to crosshairs. With the crosshairs, drag to select the area of the screen that you want to capture. When you release the drag, Chrome OS takes the screenshot.
Whichever method you use to take the screenshot, Chrome OS saves the screenshot automatically under a default name consisting of the word Screenshot and the date and time, such as Screenshot 2018-09-30 at 8:36.05 PM, in your Downloads folder.
A notification showing a thumbnail of the screenshot will appear briefly above the status area. You can click the notification to display the screenshot in the Files app—for example, if you want to check it immediately. To review the screenshots later, open the Files app from the Launcher and then click the Downloads item in the left column.
CAPTURING SIGN-IN SCREENS
You cannot get to the /tmp folder using the Files app; instead, you must use a command shell.
To use a command shell, you must enable Developer mode.
Enabling Developer mode erases the Chromebook’s contents—so you need to enable Developer mode before taking your screenshots of the sign-in or setup screens.
- 1.
Shut down the Chromebook as usual by clicking the Shut down button on the status menu or on the sign-in screen.
- 2.
Hold down the Esc key and the Refresh key and then press the Power key or Power button. The Chromebook will boot to the Recovery screen, which warns you that Chrome OS is missing or damaged.
- 3.
Press Ctrl+D. Chrome OS will prompt you to press the Enter key to enable or disable Developer mode.
- 4.
Press the Enter key to enable Developer mode.
- 5.
Wait while the Chromebook restarts and erases itself.
- 6.
When the Chromebook restarts, it boots to a Developer mode screen that tells you that OS verification is off and invites you to press the spacebar to reenable it. Wait for the Chromebook to launch Chrome OS. The Welcome dialog box then opens, and you can set up the Chromebook as explained in the section “Setting Up a Chromebook” at the start of this chapter.
- 1.Press Ctrl+Alt+T to open a crosh (Chrome Shell) window or tab in the Chrome browser. The crosh prompt appears:crosh>
- 2.At the command prompt, type shell and press the Enter key to switch to a Linux shell. The Linux prompt appears:chronos@localhost / xs$
- 3.
Type cd /tmp and press the Enter key to change directory to the /tmp folder.
- 4.
Type in *.png and press the Enter key to display a list of all the PNG files in the folder.
- 5.
Use the cp command to copy the appropriate screenshots to the Downloads folder in your account. For example, you could type cp *.png ~/Downloads and press the Enter key to copy all the PNG files to your Downloads folder. (The tilde, ~, represents your home folder.)
- 6.
When you finish using the Linux shell, type exit and press the Enter key to exit to crosh.
- 7.
Type exit and press the Enter key again to exit the crosh tab.
You can now open the Files app to the Downloads folder and view or use your screenshots.
After you have finished taking screenshots, you can disable Developer mode again. Doing so erases the Chromebook’s contents, so make sure you have copied or moved any files you want to keep to your Google account or a removable drive.
To disable Developer mode, shut down the Chromebook and then restart it. When the Developer mode screen appears, telling you that OS verification is off, press the spacebar to reenable OS verification. Wait while the Chromebook erases its contents and restarts. The Welcome! dialog box then opens, and you can once more set up the Chromebook as explained in the section “Setting Up a Chromebook” at the start of this chapter.
Summary
In this chapter, you have learned a wide range of essential Chromebook skills that will serve you well as either a teacher or an administrator—most of which skills you will likely want to teach to your students. You know how to set up a new Chromebook, connect it to a Wi-Fi network, and sign in to it. You have learned how to control startup, sleep and wake, shutdown, and restart on a Chromebook; how to navigate the Chrome OS interface; and how to use and configure the keyboard. You have met Chrome OS’s wide range of keyboard shortcuts and have (perhaps) learned those that will be most useful to you.
You are able to connect external devices, such as a keyboard and a monitor, to a Chromebook. You know how to work with apps and windows, how to work quickly and efficiently in the Chrome browser, and how to use the Files app to manage your files. You have also learned how to put a Chromebook into Developer mode, use the hidden Linux command shell to access areas of the file system that you cannot reach via the Files app, and disable Developer mode when you no longer need it.