
In this chapter, we will first look at how to connect your school’s Chromebooks to the school’s network shares so they can access files locally. Next, we will examine how printing from Chromebooks works and how you can set up your Chromebooks to print to the school’s printers. Finally, we will explore the ways in which you can display content from a Chromebook on a TV or monitor connected to a Chromecast device—for example, to share a document or a video with a class via a large screen.
Using Network Shares
As you well know by now, Chromebooks are designed to spend most of their lives working across Internet connections, storing data online and accessing it from there. But you can also connect your Chromebooks to your school’s network shares so that they can access files on the shares. Accessing files locally can reduce the impact that the Chromebooks have on the school’s Internet connection, so you will probably want to at least experiment with this method of sharing files.
Connecting a Chromebook to a Network Share
To enable a Chromebook to connect to a network share, you need to install the File System for Windows service. Although the service’s name includes “for Windows,” the service also works for any computer sharing files via the Server Message Block protocol (SMB), so you can use it on MacOS by turning on SMB sharing or on Linux by running the Samba suite.
- 1.
Launch the Files app if it is not already running. If the Files app is running, make one of its windows active.
- 2.
In the left pane, click the Add new services item, and then click the Install new from the webstore item on the pop-up menu. The Available services dialog box will open (see Figure 7-1).

In the Available services dialog box, click the Install button for the cloud file service to which you want to connect the Chromebook
- 3.
Click the Install button for the File System for Windows service. The Add “File System for Windows” dialog box will open (see Figure 7-2).

In the Add “File System for Windows” dialog box, verify the actions the app will be able to take and then click the Add app button
- 4.
Read through the “It can:” list to make sure all the actions are ones you want the service to be able to take, such as “Exchange data with any device on the local network or internet.”
- 5.
Click the Add app button. A Download manager notification will appear while Chrome OS downloads the service and installs it. The Mount a new Windows file server screen will then appear (shown in Figure 7-3 with settings chosen).

In the Mount a new Windows file server dialog box, specify the details of the network share and then click the Mount button
- 6.
Enter the hostname (such as winserver07) or IP address (such as 10.0.0.101) for the server in the Server Host Name/IP Address box.
- 7.
Enter the port number in the Server Port Number box. For Windows, you can usually accept the default setting, port 445, which is the port that Windows uses for SMB sharing over TCP/IP.
- 8.
Enter the username in the User Name box.
- 9.
Enter the password in the Password box.
- 10.
If the server is part of a Windows domain, enter the domain name in the Domain Name box. If the share is hosted on a machine that is part of a workgroup rather than a Windows domain, enter the workgroup name in the Domain Name box.
- 11.
Optionally, enter the name of the shared folder in the Shared Resource Name box. You can also leave this box blank and then choose the shared folder from a dialog box .
- 12.
Optionally, enter the root directory to use for the share in the Root Directory box. This is the directory (the folder) within the share that you want the user to see as the root directory. For example, if the share is named Spreads, and you want to use the folder Spreads/Development as the root directory, you would enter Development in the Root Directory box.
- 13.
Click the Mount button if you want to mount the shared folder on the Chromebook now. If the shared folder is not available now and you are setting up the details so that the user can connect later, click the Keep button instead.
- 14.
If you left the Shared Resource Name box blank, an unnamed dialog box will open showing the name of shared folders (see Figure 7-4). Click the option button for the folder to which you want to connect the Chromebook and then click the Connect button.
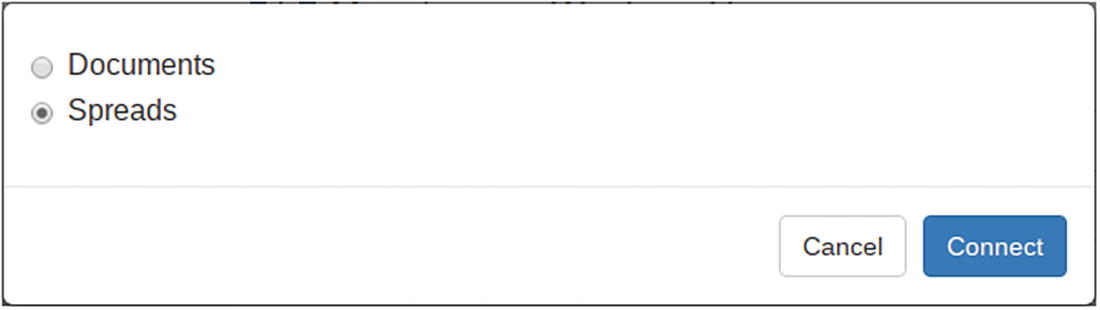
In this dialog box, click the option button for the shared folder to which you want to connect the Chromebook
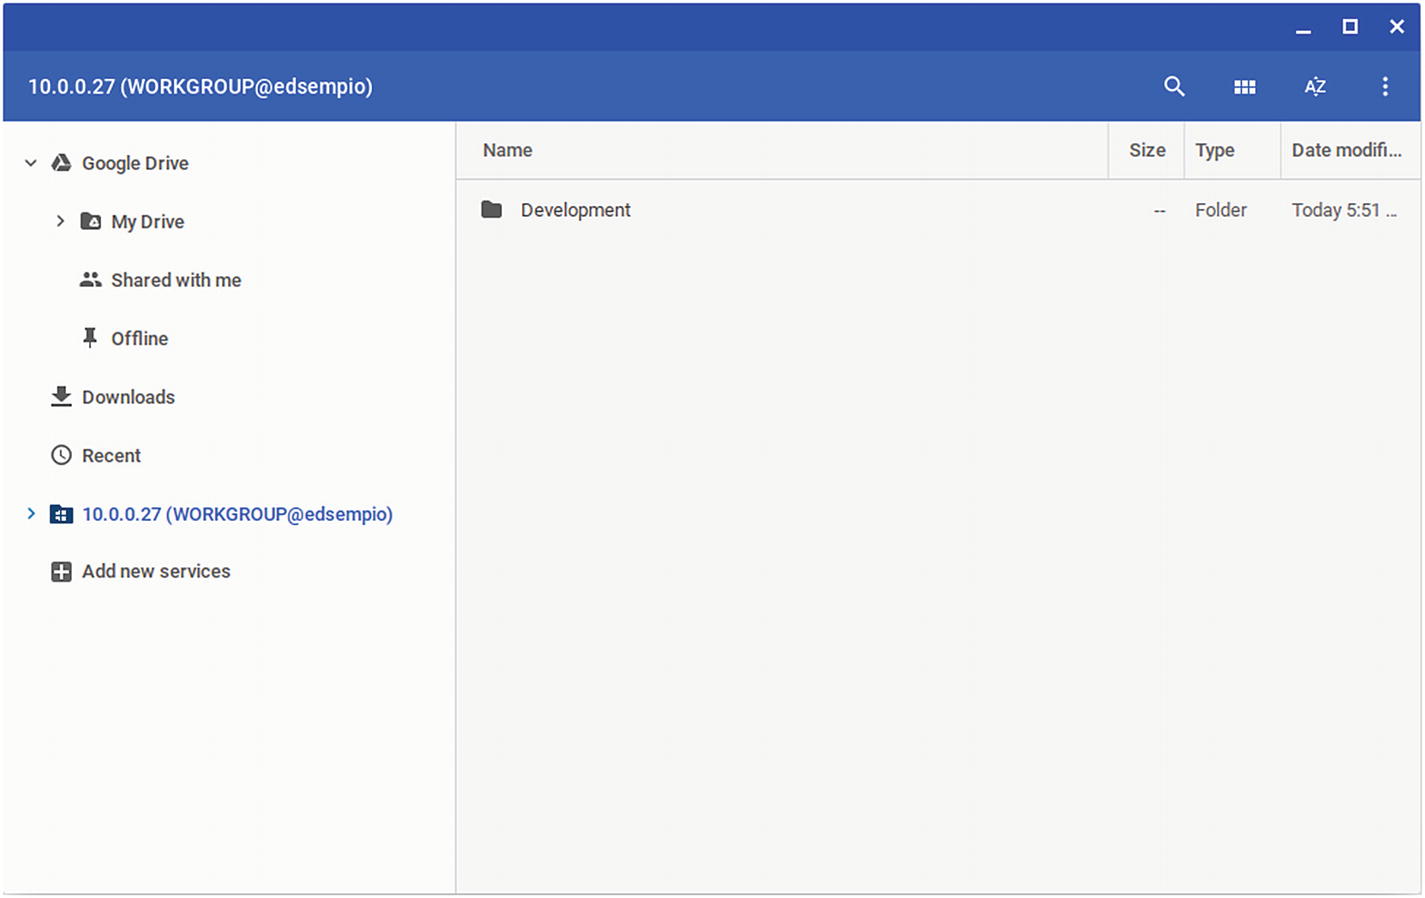
The network share appears in the left pane of the Files app, and you can access its contents
Disconnecting from a Network Share
When you have finished using the share, you can eject it from the Chromebook’s file system by pressing Ctrl+Shift+E with the share active in the Files app. Alternatively, right-click the share in the Navigation pane in the Files app and then click the Close item on the shortcut menu.
Printing from Chromebooks
In this section, we will explore how to print from Chromebooks to your school’s printers. We will start with an overview of how printing works on Chromebooks and Chrome OS, move on to making printers available on Google Cloud Print and managing them there, and then look at how to set up printers on Chromebooks and how to actually print on them.
Understanding How Printing from Chromebooks Works
If you are used to printing from Windows PCs, Macs, or even Linux boxes, you will find substantial differences in Chrome OS’s approach to printing. This section will outline how printing from Chrome OS devices works. The following sections will walk you through the specifics.
There are different ways to print from Chrome OS, but the standard way has been—and remains, as of this writing—to use the Google Cloud Print service. As its name suggests, Google Cloud Print uses the “cloud”—the Internet—to handle printing. Instead of the client computer sending the print job to the printer across the network, the client sends the print job across the Internet connection to Google Cloud Print, which then sends the print job to the printer, again across the Internet connection.
Printer registration: You need to set up your printers with Google Cloud Print so that it knows what the printers are and where to find them.
Remote printing: You can print from anywhere the client computer has an Internet connection; it does not need to be connected to the same network as the printer.
Increased Internet traffic: Sending the print jobs to the Google Cloud Print servers and receiving the print jobs back from them increases the amount of data being transmitted across the Internet connection or connections.
Data-protection issues: Sending the print jobs via Google Cloud Print may raise data-protection issues. You may need to make sure that your school’s privacy policies and computer-usage policies cover sharing data with Google Cloud Print in this way.
UNDERSTANDING ALTERNATIVES TO GOOGLE CLOUD PRINT
Google Cloud Print is the main way of printing from Chromebooks, but there are alternatives you may want to explore.
First, Google is gradually adding the capability to print to local printers via the CUPS printing system and the Internet Printing Protocol (IPP). This capability is currently patchy; it works for only some printers and works better with some Chromebooks than with others. Later in the chapter, we will examine how to connect to CUPS printers. In case you are wondering about the name, CUPS is a modular printing system for UNIX and similar operating systems; the name used to be an acronym for Common UNIX Printing System, but is now a name in its own right.
Second, some printer manufacturers provide apps or extensions for printing from Chrome OS to printers either connected directly via USB to a Chrome OS device or connected to the same local network. For example, HP provides the HP Print for Chrome app. Try searching the Chrome Web Store for an app or extension your printer manufacturer provides.
Third, some third-party developers provide apps or extensions for printing from Chrome to printers on the local network without going across the Internet. Try searching the Chrome Web Store for terms such as print local and see what you find.
Printing from a Chromebook via USB can be useful in some situations—for example, if you need to print from a Chromebook to your home printer. However, in a school situation, you will normally want to have the printers connected to the network so that more clients can print to them.
Making a Printer Available on Google Cloud Print
To make a printer available on Google Cloud Print, you go through a routine to add the printer to the service. How you do this varies depending on whether the printer is Google Cloud Print Ready or not. The first of the following sections will explain how to add a printer that is Google Cloud Print Ready; the second section will explain how to add a printer that is not Google Cloud Print Ready.
Note
To find out if a printer supports Google Cloud Print, look for the Google Cloud Print Ready logo on the box, on the printer itself, or on the manufacturer’s web pages for the printer.
Setting Up a Google Cloud Print Ready Printer
- 1.
Connect the printer to your network.
- 2.
Power the printer on.
- 3.
Open the Chrome browser.
- 4.
Type www.google.com/cloudprint in the omnibox and press the Enter key. The Cloud Print page will appear, showing any print jobs you have (see Figure 7-6).

On the Cloud Print screen, click the Add a Cloud-Ready Printer link to start adding a Cloud Print Ready printer
- 5.
Click the Add a Cloud-Ready Printer link on the left. The Cloud-ready printers screen will appear (see Figure 7-7).

On the Cloud-ready printers screen, identify your printer by searching or by browsing
- 6.
Identify your printer in one of these ways:
Search by model: Click the Search by model box and then type enough of the name to distinguish the printer.
Browse: Click one of the headings (such as Canon or Dell) to display the list of printers from that manufacturer, and then browse to locate the printer.
- 7.
Click the link in the section for your printer’s manufacturer to display instructions for adding the printer to Google Cloud Print. Follow these instructions to add the printer.
- 8.
After adding the printer, return to the Cloud Print page, either by using the Back button (or Back pop-up menu) in Chrome or by clicking the omnibox, typing the address ( www.google.com/cloudprint ), and pressing the Enter key . The printer will now appear in the left column.
Setting Up a Classic Printer on Google Cloud Print
- 1.
Connect the printer to a PC or a Mac.
- 2.
Power the printer on.
- 3.
On the PC or Mac, open the Chrome browser.
- 4.
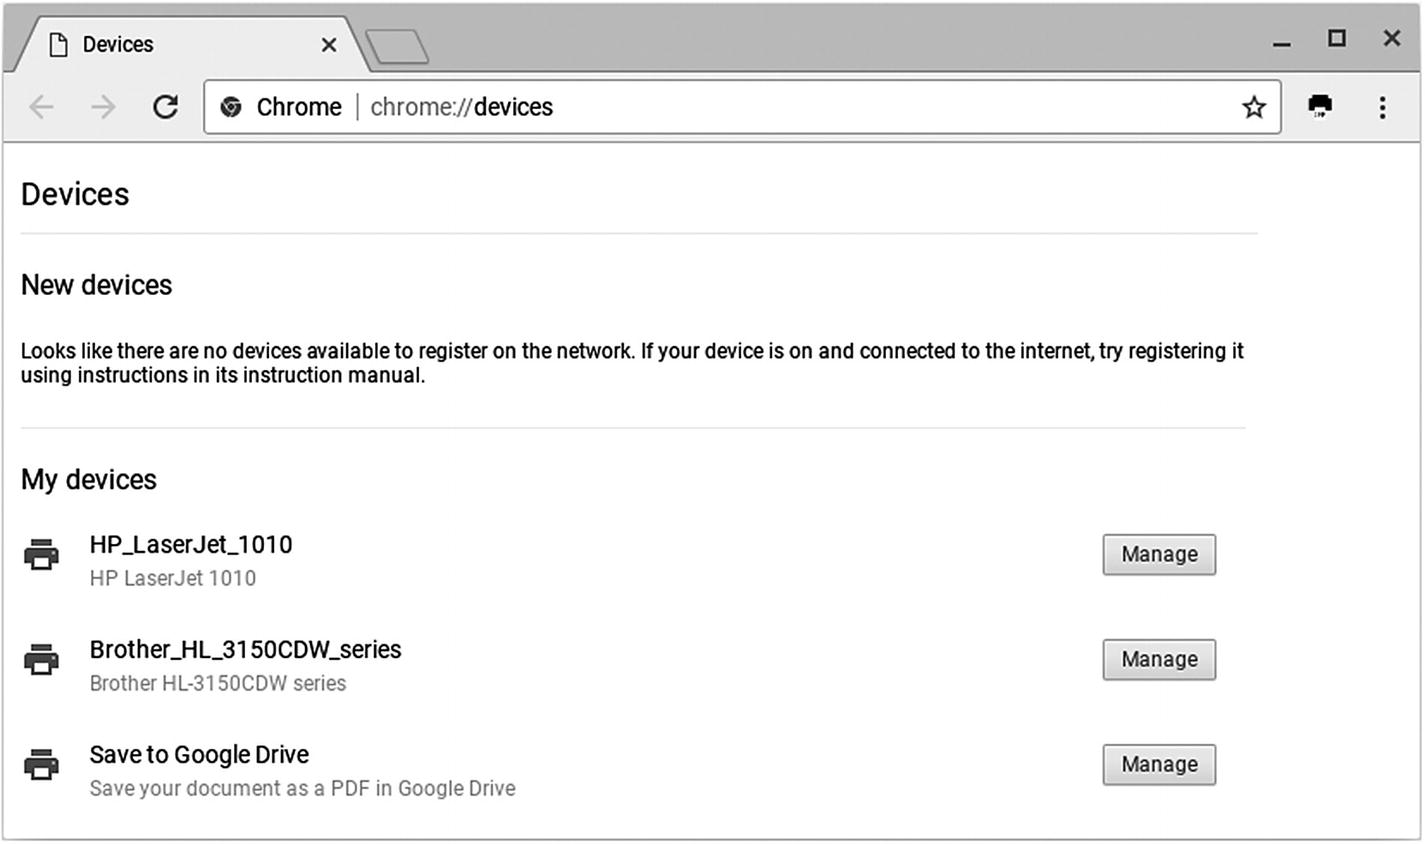
Type chrome://devices in the omnibox and press the Enter key. The Devices screen will appear (see Figure 7-8).
Note
You can also display the Devices screen by choosing More Actions ➤ Settings, clicking the Advanced button on the Settings screen, clicking the Google Cloud Print button in the Printing section, and then clicking the Manage Cloud Print devices button.
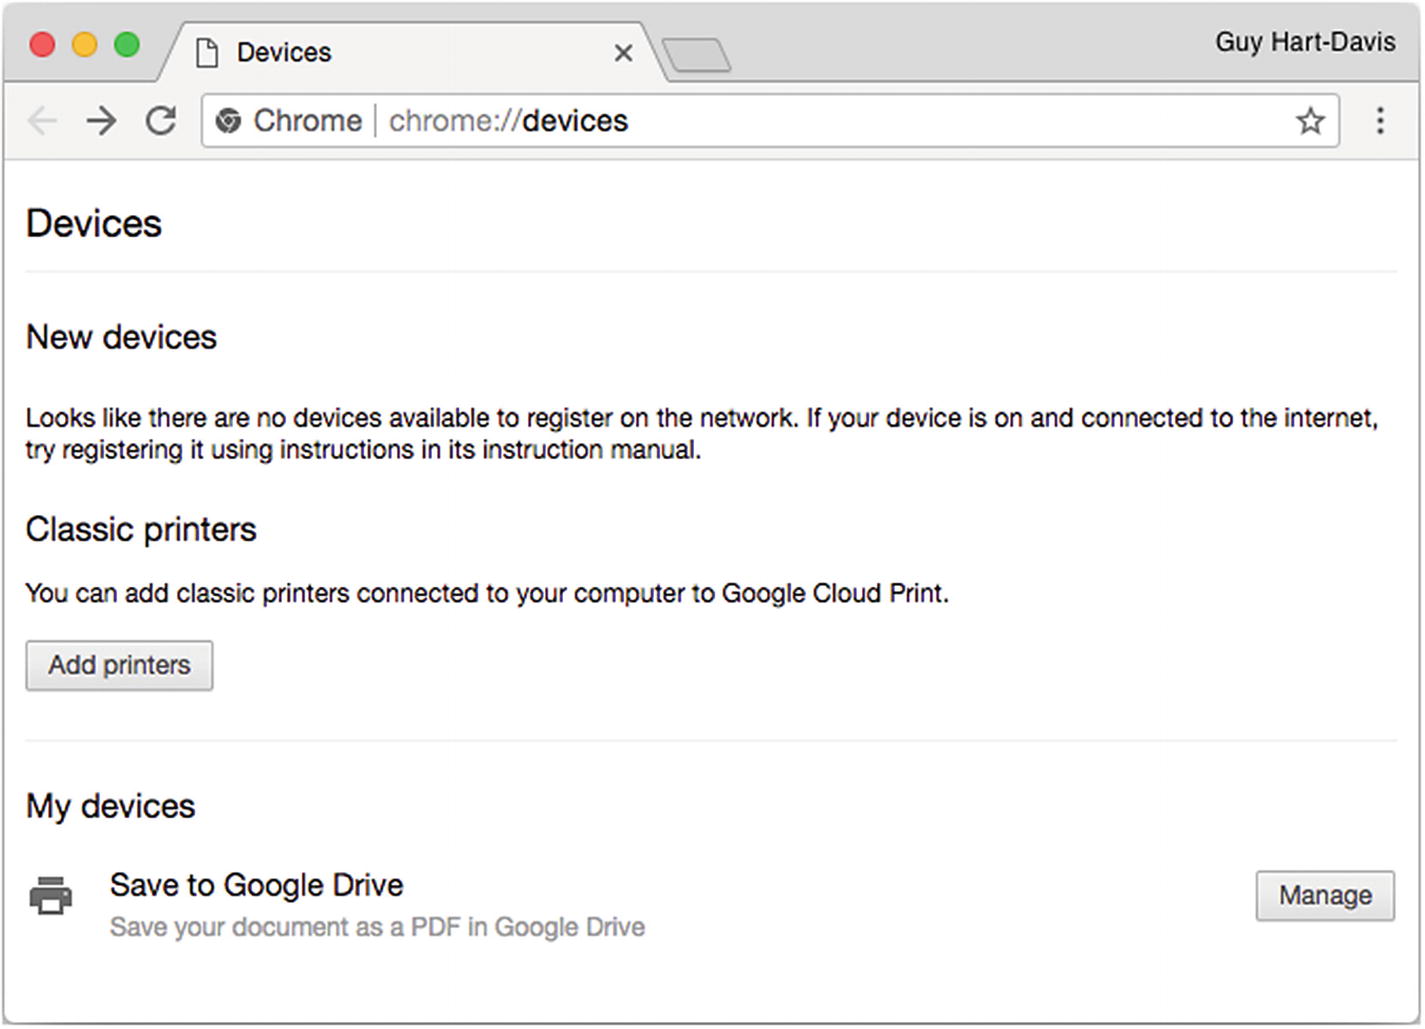
On the Devices screen, click the Add printers button under the Classic printers heading to start adding a non–Cloud Print Ready printer to Google Cloud Print.
- 5.
Under the Classic printers heading, click the Add printers button. A Google Cloud Print screen will appear, showing the list of printers detected on the PC or Mac you are using (see Figure 7-9).
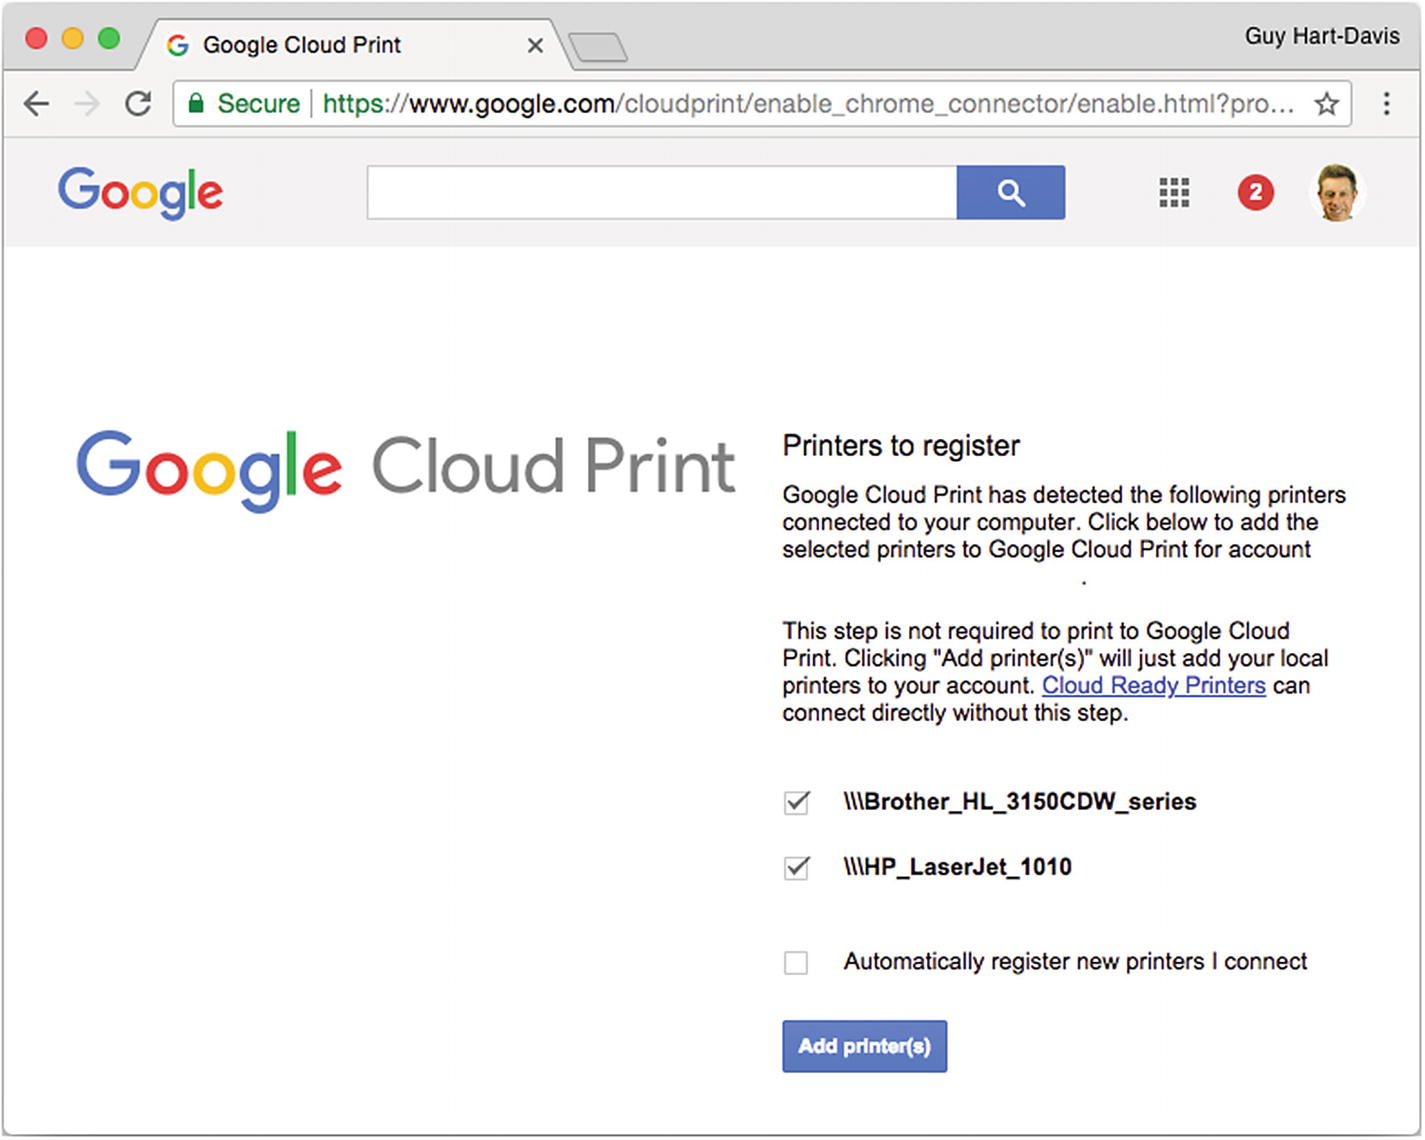
In the Google Cloud Print window, uncheck the check box for any printer you do not want to register; uncheck the “Automatically register new printers I connect” check box, as needed; and then click the Add printer(s) button.
- 6.
In the list of printers, uncheck the check box for any printer you do not want to register on Google Cloud Print.
- 7.
Uncheck the “Automatically register new printers I connect” check box if you prefer to add printers manually rather than have them added automatically.
- 8.
Click the Add printer(s) button. Google Cloud Print will register the printers and then display the message “Thanks, you’re ready to go!” (see Figure 7-10).
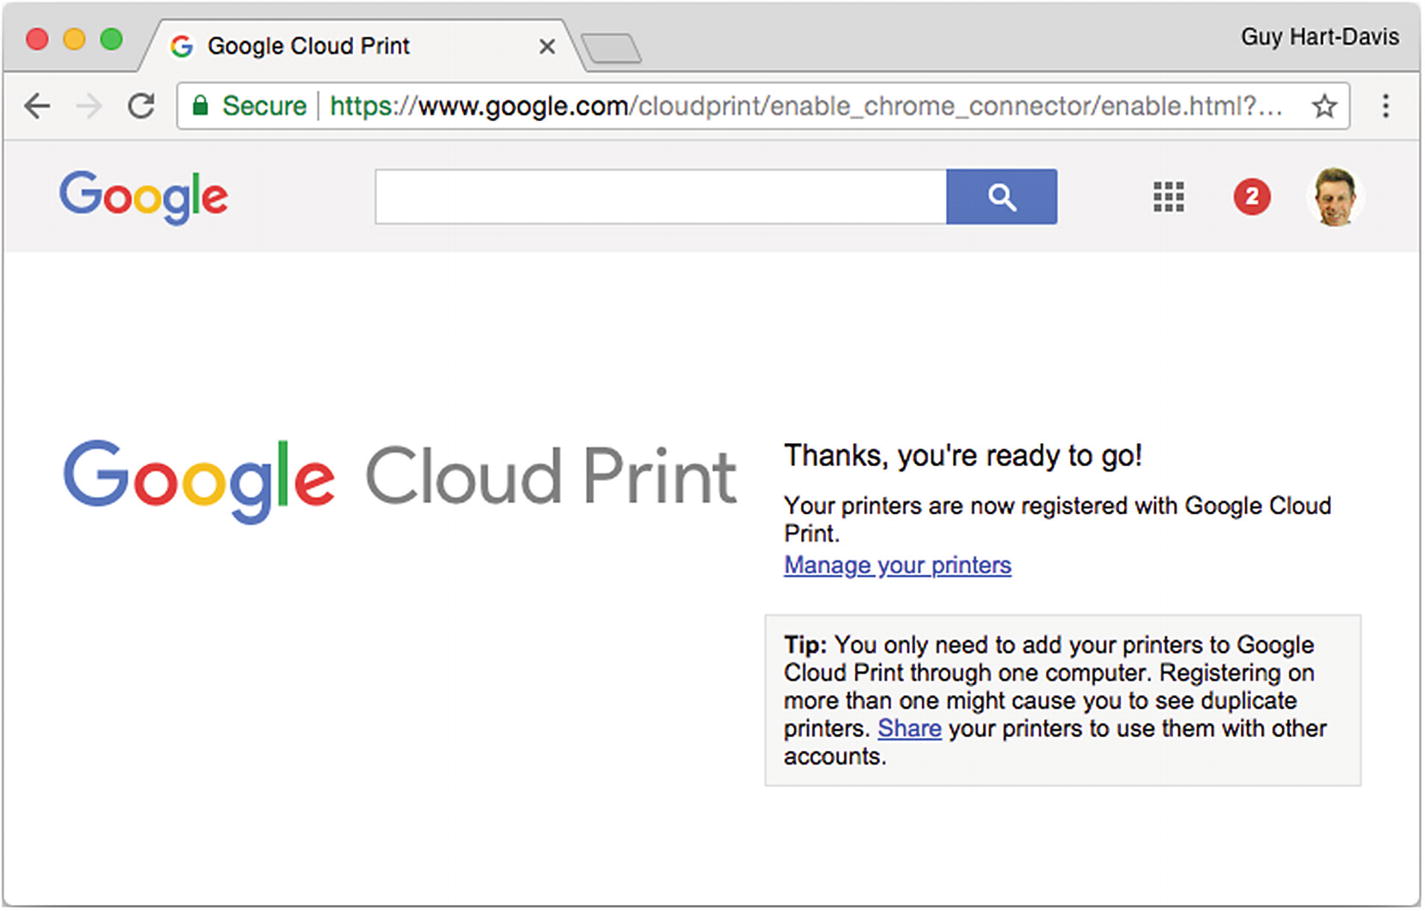
Google Cloud Print displays the “Thanks, you’re ready to go!” message once your printers have been registered. You can click the Manage your printers link to display the screen for managing your printers.
You can click the Manage your printers link if you want to go to the screen for managing your printers. Otherwise, close the Chrome tab or window, or quit Chrome .
Managing Your School’s Printers on Google Cloud Print
After you have added your printers to Google Cloud Print, you can manage them from the Printers page in Google Cloud Print for the Google account to which you have added them. To display the Printers page, open a browser tab to Google Cloud Print ( www.google.com/cloudprint ) and then click the Printers item in the navigation panel on the left.
Select a printer: Click the printer in the list.
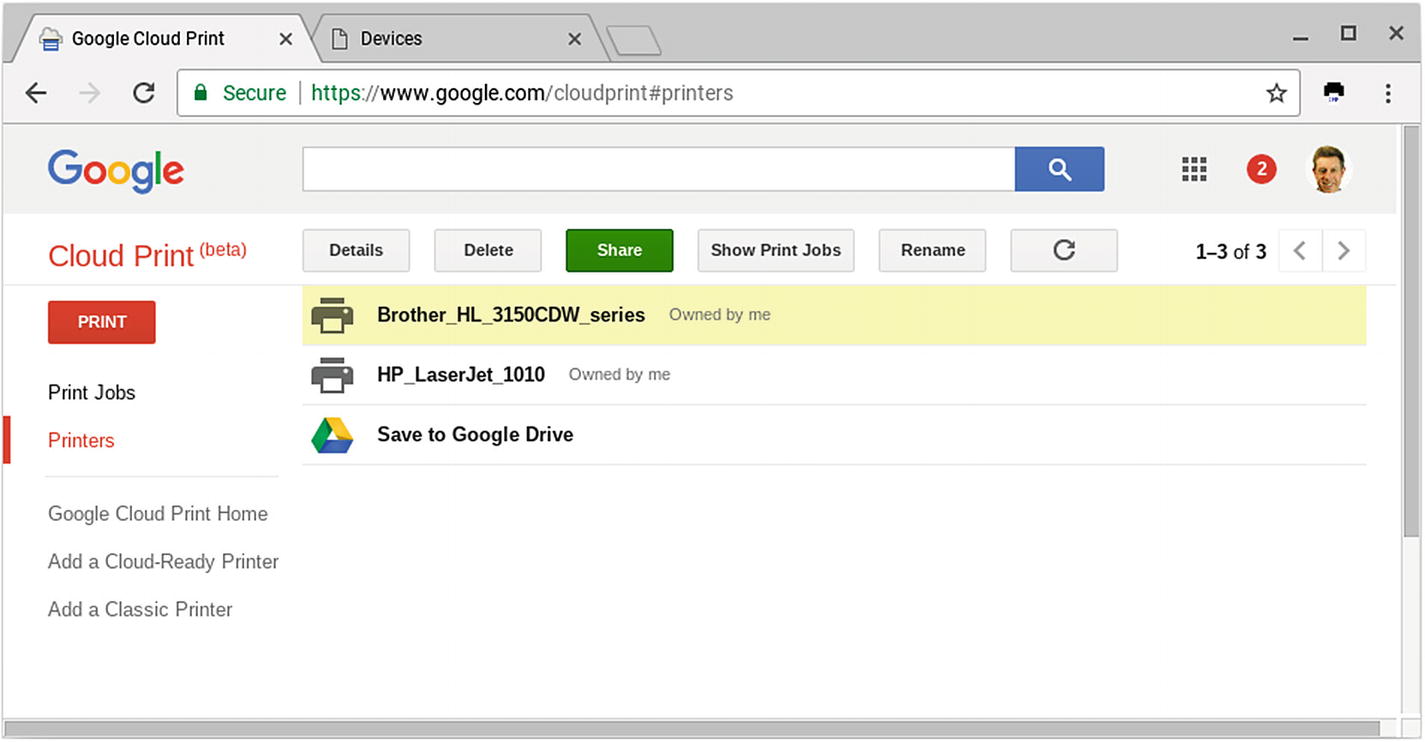
Click the Printers item in the navigation panel to display the list of printers. You can then click the printer you want to manage
View details for the selected printer: Click the Details button to display the Details page (see Figure 7-12). At first, this page displays only brief details: the printer’s ownership, when it was added, its location (if that information is available), and whether the printer is online and ready to print. You can click the Advanced Details button to display a wealth—or perhaps a surfeit—of further details. These details include whether the printer is a Google Cloud Print Ready model or a classic model, when it was last updated, and what its printer ID is. Click the Back button (an arrow pointing up and left) that replaces the Details button when you want to return to the Printers page.
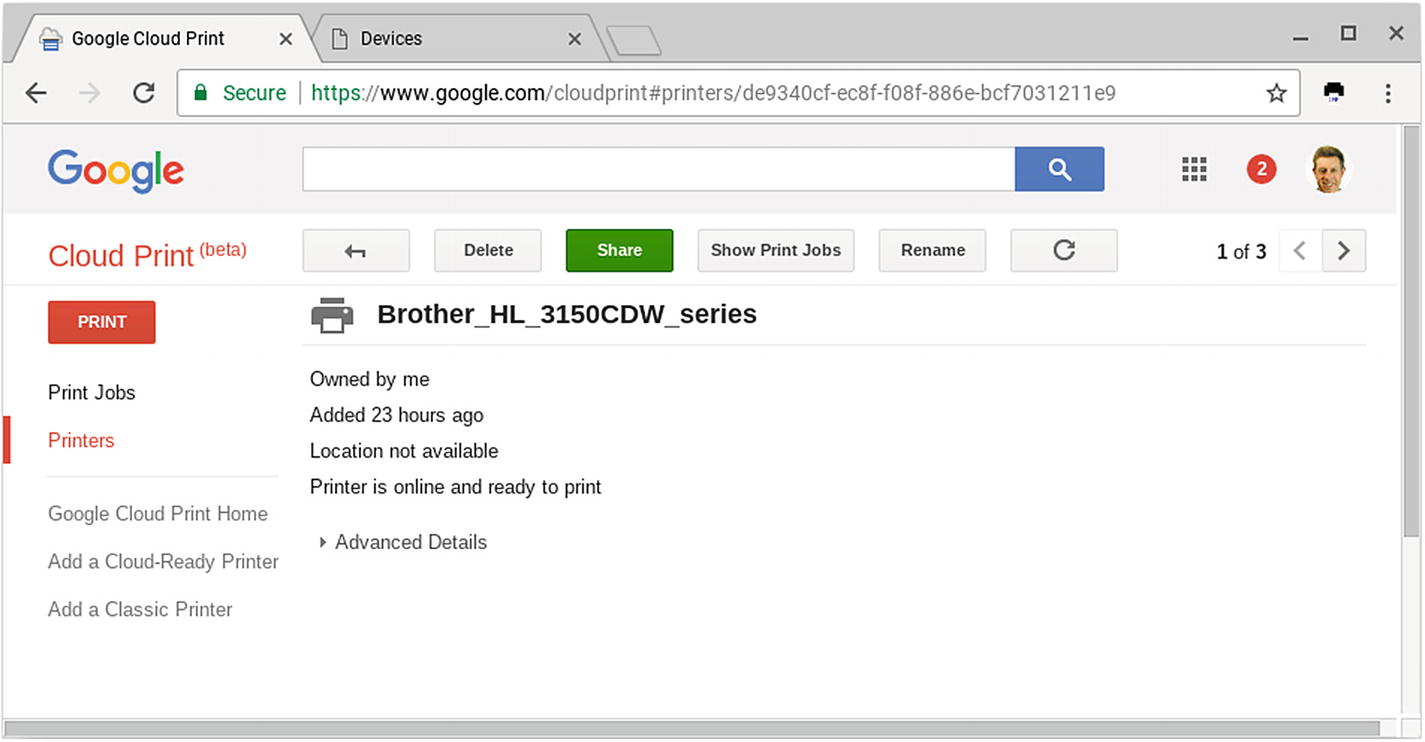
At first, the Details screen displays brief details about the printer, including its current status. You can click the Advanced Details button to display further information, including whether the printer is Google Cloud Print Ready or classic.
Delete the selected printer: Click the Delete button and then click the OK button in the Delete dialog box that opens.
Note
When you delete a classic printer, the Delete dialog box will prompt you to disable the Google Cloud Print connector on the computer to which your printer is connected so as to avoid Google Cloud Print registering the printer again. You need do this only if you checked the “Automatically register new printers I connect” check box when setting up Google Cloud Print on the computer.
Configure sharing for the selected printer: Click the Share button to display the main sharing settings dialog box for the printer (see Figure 7-13). You can then either allow access to the printer to anyone who has the link for it or invite specific people to share the printer. To allow access to anyone with the link, click the Change button on the Private line, click the “Anyone with the link has access to the printer” option in the smaller sharing settings dialog box that opens (see Figure 7-14), and then click the Save button. To invite one or more people to use the printer, type their names or email addresses in the Invite people box; alternatively, type a group name to add a group. Next, choose the Can print item in the pop-up menu and then click the Share button. The names will appear in the Who has access list (see Figure 7-15); if you need to remove a person, click the Delete (X) button on the right of that person’s row. Click the Close button to close the main sharing settings dialog box.
Note
If you want a person to be able to manage the printer, select the Can manage item in the pop-up menu in the main sharing settings dialog box and then click the Share button.
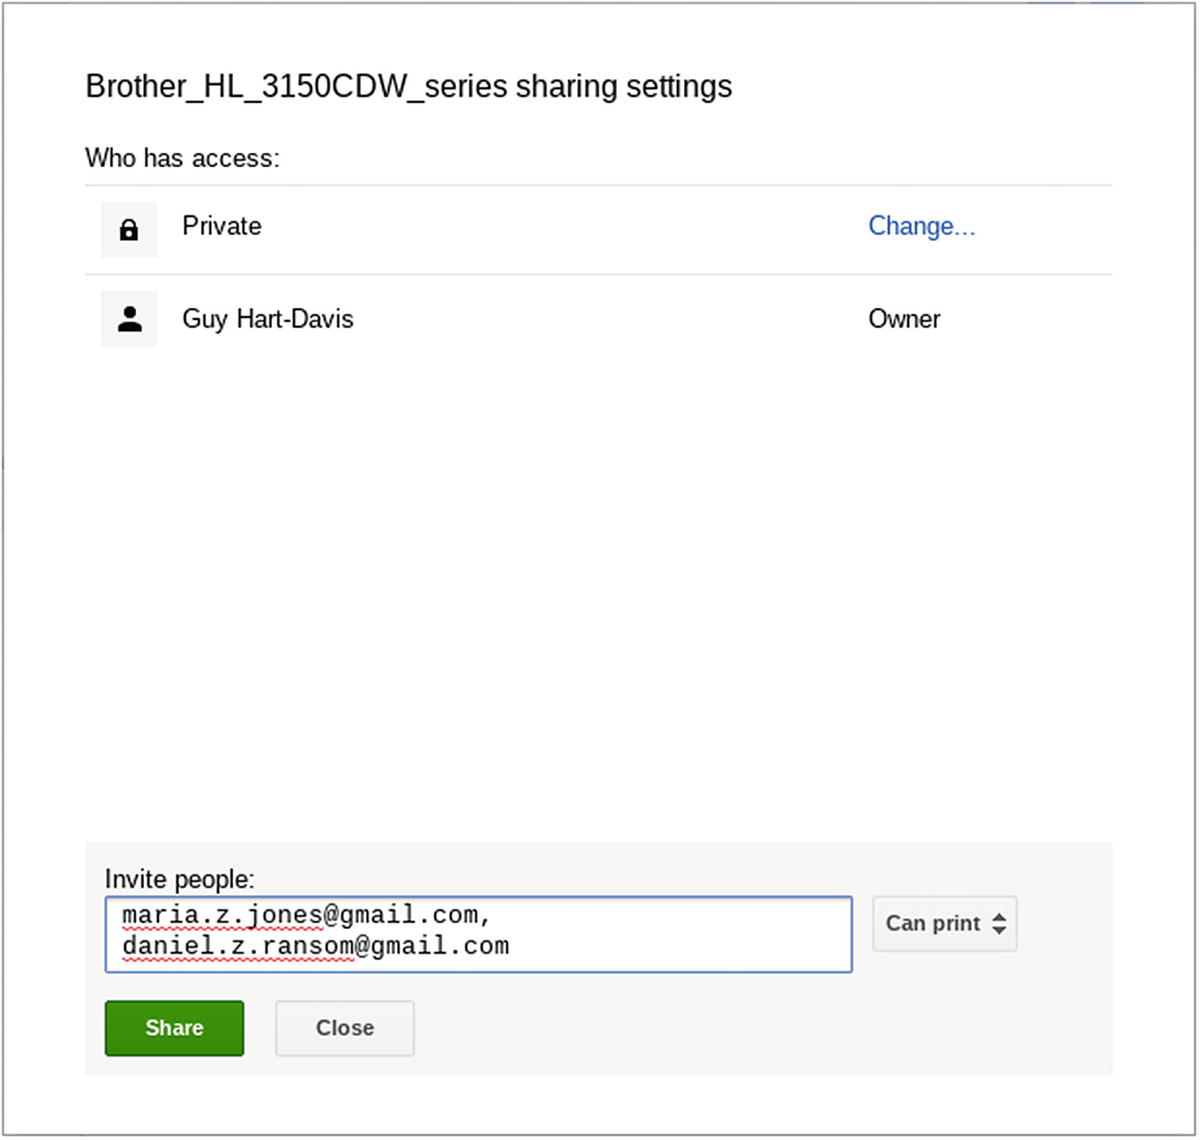
In the main sharing settings dialog box for a printer, you can click the Change button to open the smaller sharing settings dialog box . You can also invite specific people to share the printer.
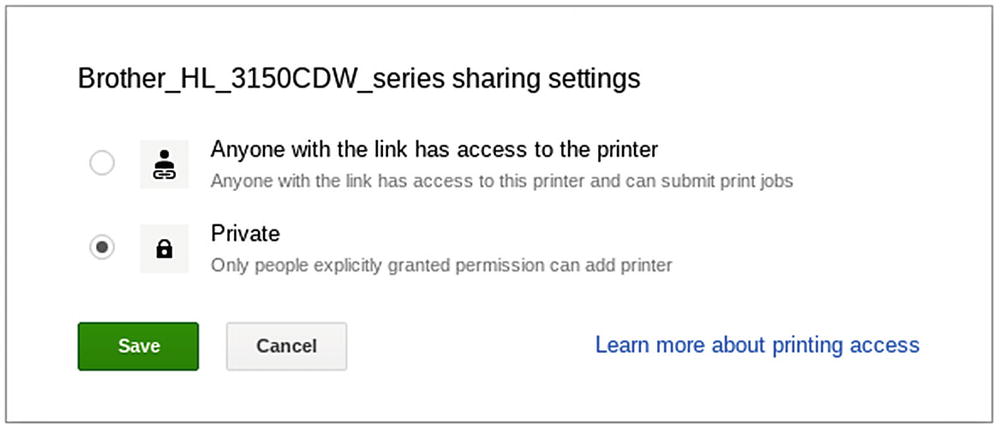
In this smaller sharing settings dialog box for a printer, you can select the “Anyone with the link has access to the printer” option to make the printer more widely available

The people you added appear in the Who has access list in the main sharing settings dialog box. You can remove a person by clicking the Delete (X) button on the right of that person’s row.
Manage the print jobs for the selected printer: Click the Show Print Jobs button to display a list of the print jobs (see Figure 7-16). You can then click a print job and click the Details button to view its details, or click the Delete button to delete the print job.
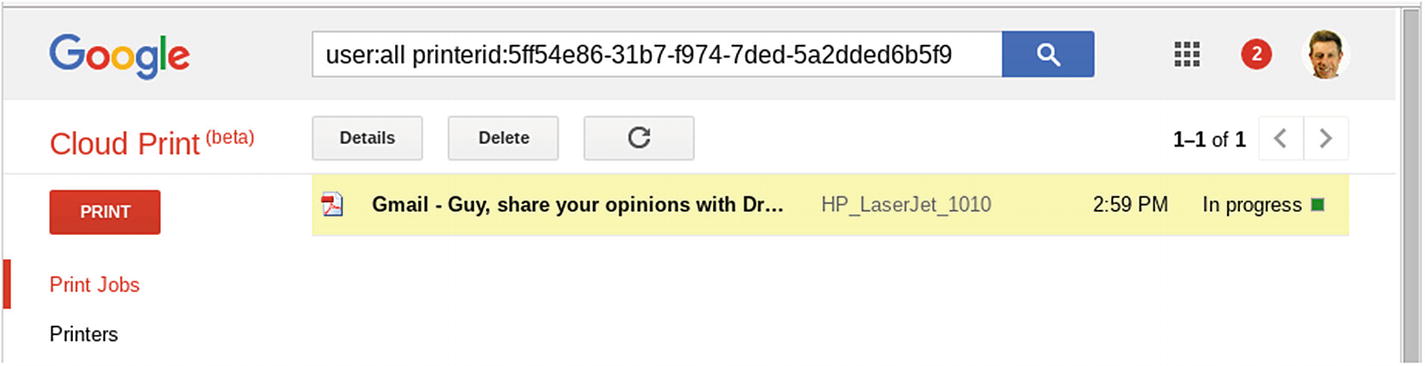
After displaying the list of print jobs for a printer, you can view the details of the selected print job or simply delete the print job
Rename the selected printer: Click the Rename button, type the new name in the edit box that appears around the current name, and then click the Rename button to the right of the edit box .
Note
Click the Refresh button (the circular arrow to the right of the Rename button) to refresh the list of printers.
Setting Up Printers on a Chromebook
After adding your school’s printers to Google Cloud Print, you can set up the printers on the Chromebooks. You may also be able to set up printers on your school’s local network, depending on whether they are models that Chrome supports.
Whichever way you will add a printer, you begin by opening a Settings window and displaying the Printing section of it.
Displaying the Printing Section of the Settings Window
- 1.
Click the status area to display the status menu.
- 2.
Click the Settings icon to open the Settings window.
- 3.
Click the Navigation button to display the Settings pane on the left.
- 4.
If the Advanced category is collapsed, click it to display its contents.
- 5.
Click the Printing item to display the Printing section of the Settings window (see Figure 7-17).
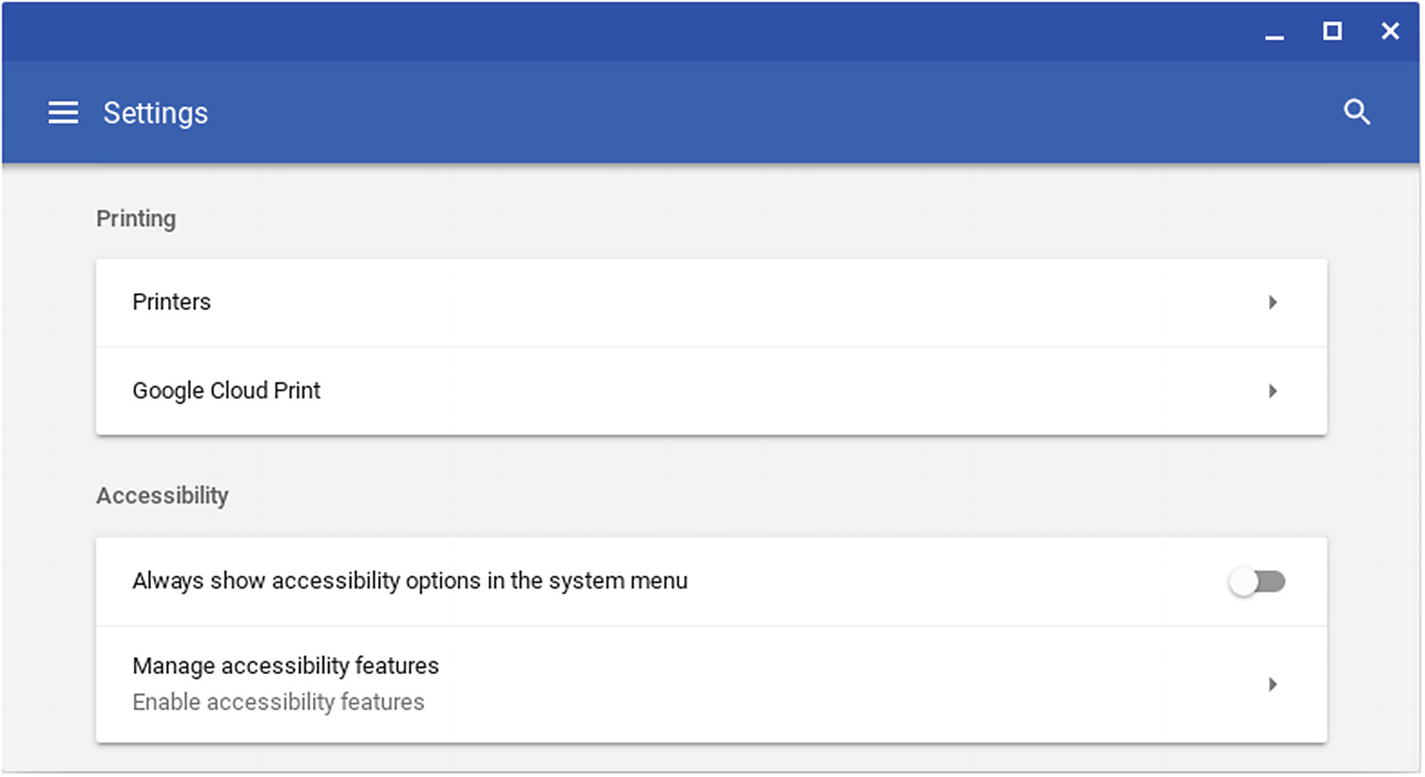
From the Printing section of the Settings window, you can start to configure printers or configure Google Cloud Print
Adding a Printer on the Network
Chrome OS enables you to add printers that it can detect on the same network as the Chromebook. As of this writing, this feature works with only some printers that comply with the CUPS standard.
- 1.
Click the Printers button to display the Printers screen (see Figure 7-18).

On the Printers screen in the Settings window, click the Add Printer button to start adding a printer
- 2.
Click the Add Printer button to open the Add a nearby printer dialog box (see Figure 7-19) or the Add a printer manually dialog box (shown in Figure 7-22, later in this chapter). These two dialog boxes work as a pair, and you can switch from one to the other by clicking the Add Manually button in the Add a nearby printer dialog box or the Add Nearby Printers button in the Add a printer manually dialog box.
- 3.
If the Add a printer manually dialog box opens, click the Add Nearby Printers button to switch to the Add a nearby printer dialog box. The main part of this dialog box shows any printers that Chrome OS has detected on the network.
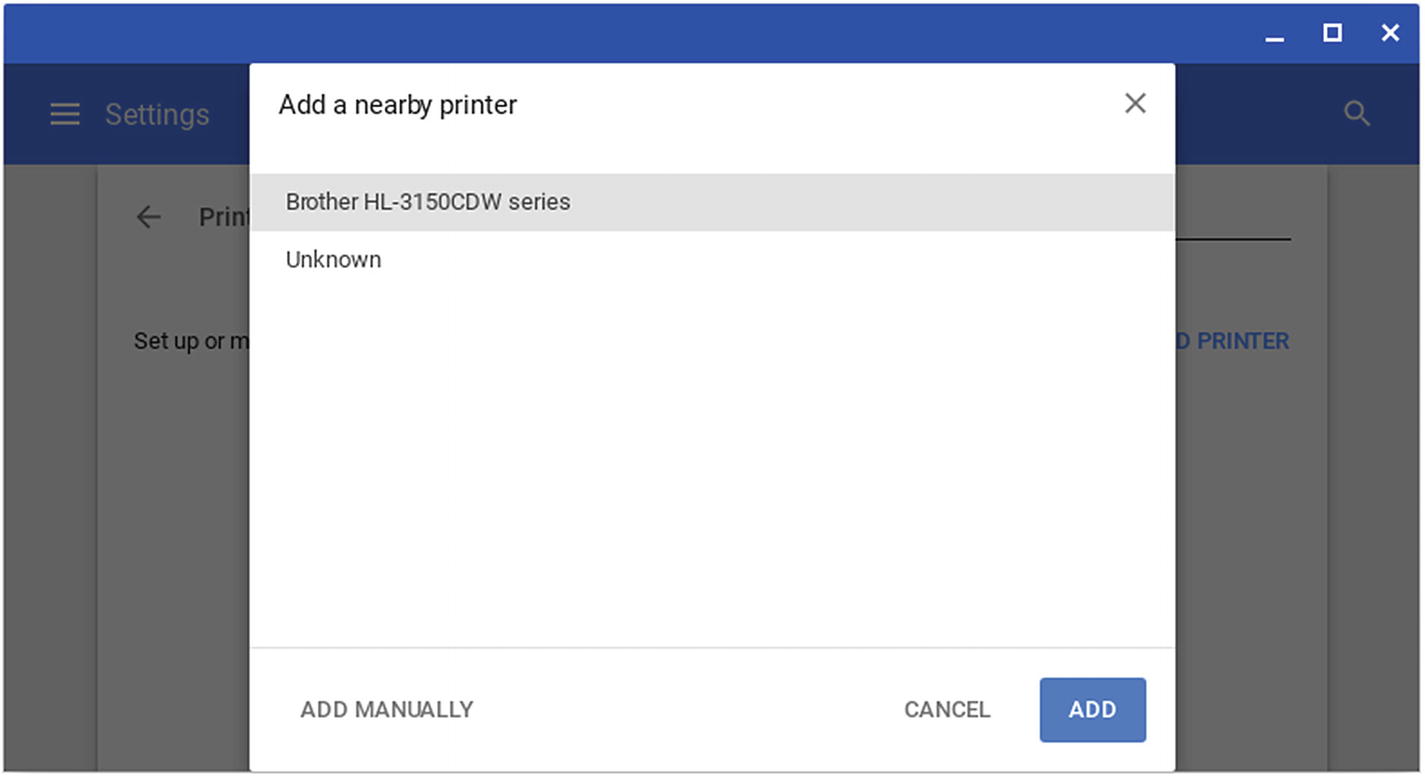
In the Add a nearby printer dialog box, click the printer you want to add and then click the Add button
- 4.
Click the printer you want to add.
- 5.
Click the Add button . The Select a printer manufacturer and model screen appears (see Figure 7-20).
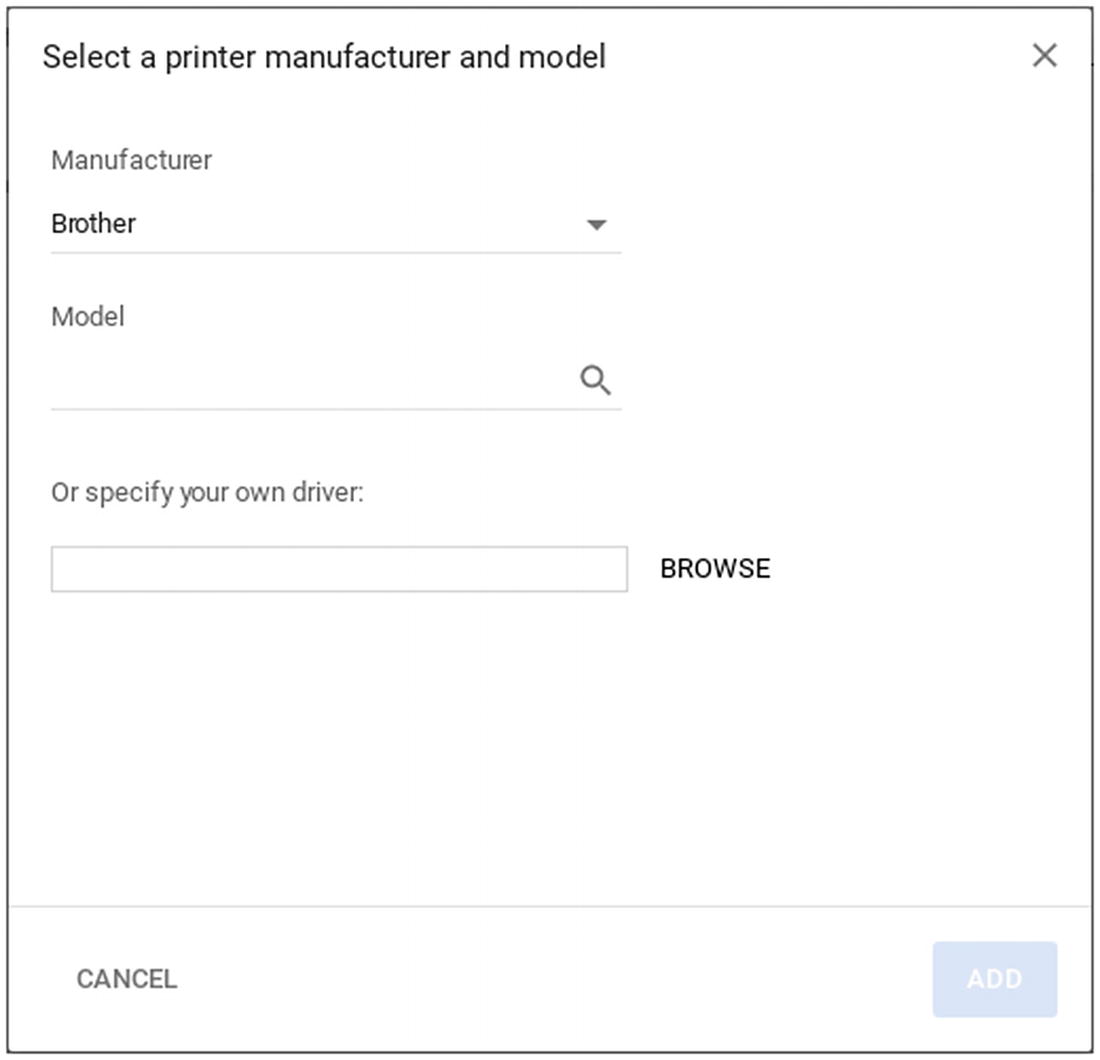
In the Select a printer manufacturer and model dialog box, identify the printer you want to add. You can either choose which of Chrome OS’s built-in drivers to use or provide a driver you have obtained elsewhere.
- 6.
Click the Manufacturer pop-up menu and then click the printer’s manufacturer .
- 7.
Use the controls in the Model area to specify the model in one of these ways:
Search: You can click in the search box, type a distinguishing part of the printer’s name or number, and then press the Enter key. In the list of matches that Chrome OS returns, click the best match.
Scroll: You can open the pop-up menu and simply scroll to locate the most suitable printer. However, depending on the printer manufacturer you selected, the list may be long.
Note
If you have downloaded a driver file for this printer, enter its name and location in the Or specify your own driver box by clicking the Browse button, clicking the location and file in the Select a file to open dialog box, and then clicking the Open button.
- 8.
Click the Add button. The dialog box will close, and the Printer will appear on the Printers screen (see Figure 7-21). A pop-up message will appear for a few seconds, announcing that the printer has been added.
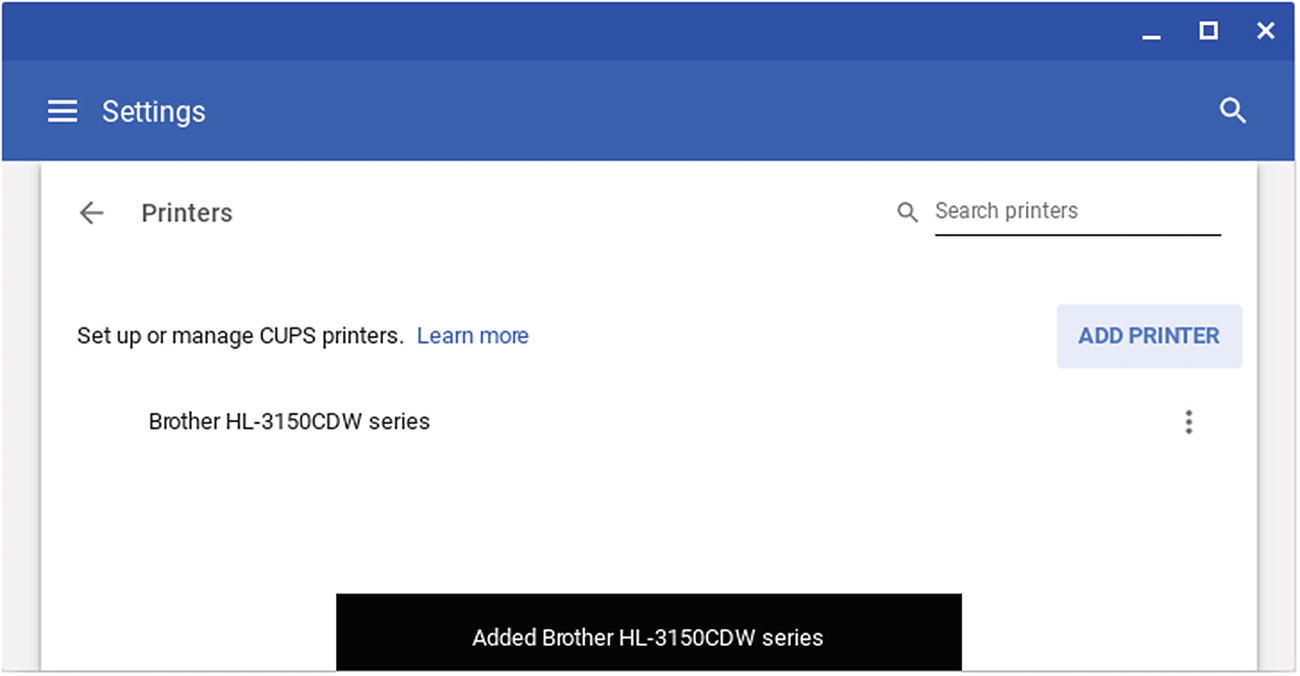
The printer appears on the Printers screen. A pop-up message appears for a few seconds, announcing that the printer has been added.
Adding a Printer Manually
You can also add a printer to a Chromebook manually—for example, when the network (or the printer) is not available or when Chrome OS cannot detect the printer on the network.
Caution
As of this writing, this method of adding a printer is not always successful—the Chromebook does gain an entry for the printer, but it may not be able to print to the printer even when the printer is there.
Printer name: This is the descriptive name you will assign to the printer.
Printer address: This is the network address, such as BRN30055C504EFA.local:631.
Printing protocol: This is the protocol used for printing to the printer, such as Internet Printing Protocol (IPP).
Print queue: This is the queue type for the printer, such as ipp/printer.
- 1.
Click the Printers button to display the Printers screen.
- 2.
Click the Add Printer button to open the Add a nearby printer dialog box (shown in Figure 7-19, earlier in this chapter) or the Add a printer manually dialog box (see Figure 7-22). As mentioned earlier, these two dialog boxes work as a pair, and you can switch from one to the other by clicking the Add Manually button in the Add a nearby printer dialog box or the Add Nearby Printers button in the Add a printer manually dialog box.

In the Add a printer manually dialog box, enter the details for the printer and then click the Add button
- 3.
If the Add a nearby printer dialog box opens, click the Add Manually button to switch to the Add a printer manually dialog box .
- 4.
Type the display name for the printer in the Name box. This is the name you want the user to see; it does not have to be what the printer is actually called. For example, you might give the printer a name such as Color Printer in Room 142.
- 5.
In the Address box, type or paste the address for the printer.
- 6.
Click the Protocol pop-up menu and then click the appropriate printing protocol. The choices are Internet Printing Protocol (IPP), Internet Printing Protocol (IPPS), Internet Printing Protocol (HTTP), Internet Printing Protocol (HTTPS), AppSocket (TCP/IP), and Line Printer Daemon (LPD).
- 7.
In the Queue box, enter the print queue, such as ipp/print for Internet Printing Protocol (IPP).
- 8.
Click the Add button. The Select a printer manufacturer and model dialog box opens (see Figure 7-20, earlier in this chapter).
- 9.
Click the Manufacturer pop-up menu and then click the printer’s manufacturer.
- 10.
Use the controls in the Model area to specify the model in one of these ways:
Search: You can click in the search box, type a distinguishing part of the printer’s name or number, and then press the Enter key. In the list of matches that Chrome OS returns, click the best match.
Scroll: You can open the pop-up menu and simply scroll to locate the most suitable printer. However, depending on the printer manufacturer you selected, the list may be long.
Note
If you have downloaded a driver file for this printer, enter its name and location in the Or specify your own driver box by clicking the Browse button, clicking the location and file in the Select a file to open dialog box, and then clicking the Open button.
- 11.
Click the Add button. The dialog box will close, and the Printer will appear on the Printers screen. A pop-up message will appear for a few seconds, announcing that the printer has been added.
Editing and Removing Network Printers
After adding a network printer, you may need to edit its details—for example, to change the printer’s name. You may also need to remove the printer if you are no longer using it.
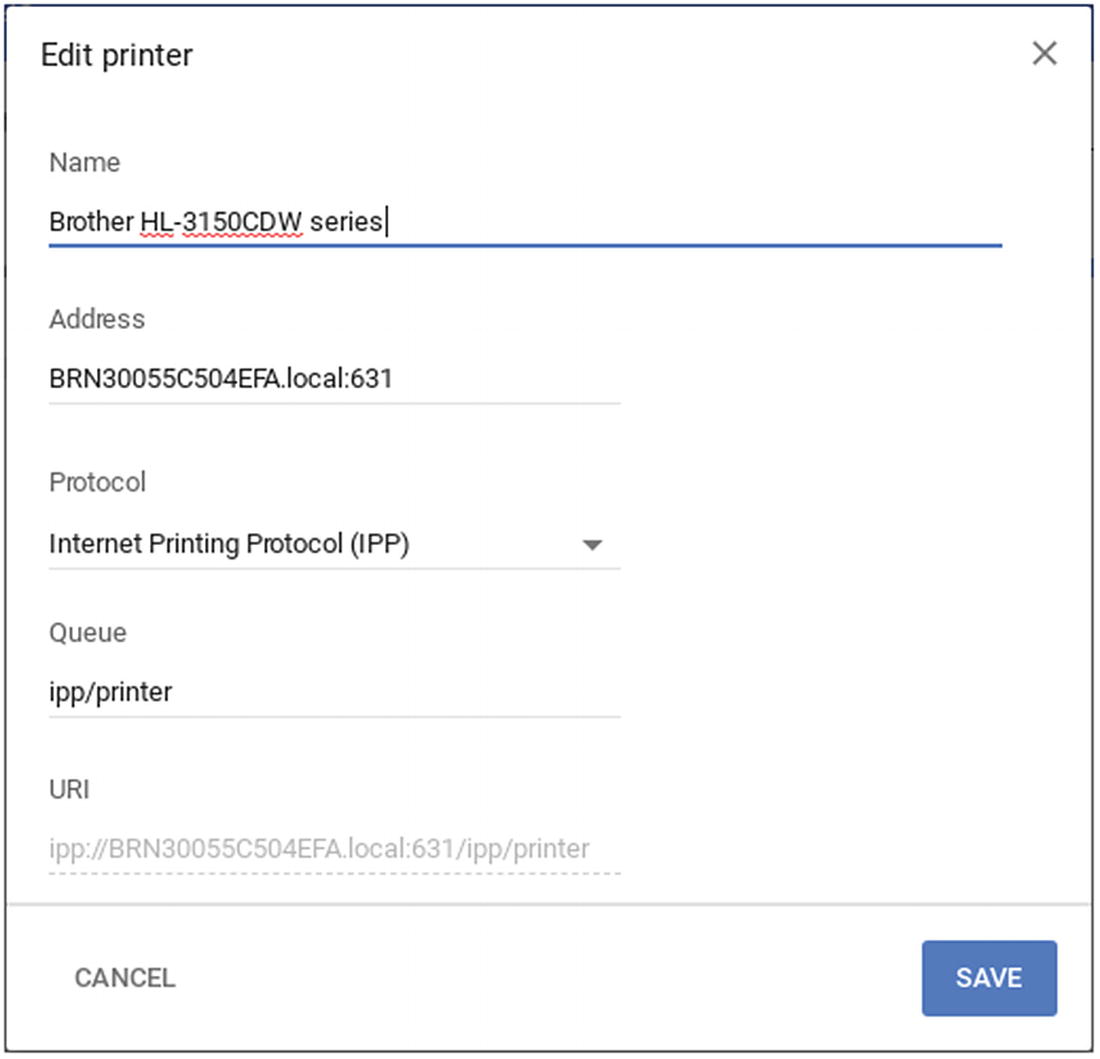
The Edit Printer dialog box enables you to change a printer’s name or configuration
To remove a printer, click the More Actions button and then click the Remove button. Chrome OS will remove the printer from the list without confirmation.
Configuring Google Cloud Print and Your Devices
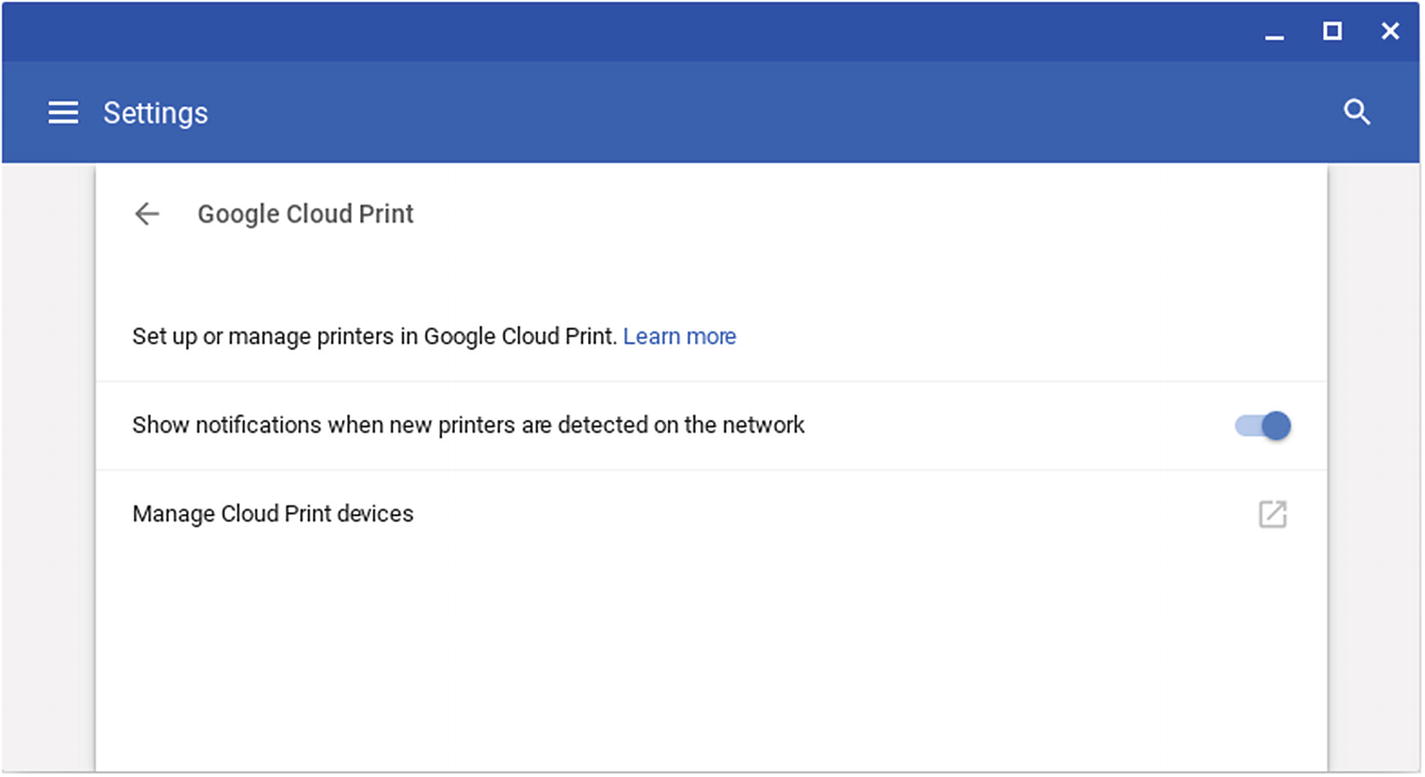
From the Google Cloud Print screen in the Settings window, you can learn about setting up and managing printers in Google Cloud Print, choose whether to display notifications when new printers are detected, and open a Chrome tab for managing Cloud Print devices
Set up or manage printers in Google Cloud Print: Click the Learn more link next to this item to open a Chrome tab to the “Print from Chrome” topic in Google Chrome Help.
Show notifications when new printers are detected on the network: Set this switch to On if you want the Chromebook to display notifications about new printers that Chrome OS detects on the network; set this switch to Off if you do not want the notifications. In a school deployment, you would normally want to set this switch to Off.
Manage Cloud Print devices: Click this button to open a tab to the Devices page for Chrome. You can also go directly to the Devices page by typing chrome://devices in the omnibox and pressing the Enter key.
Managing Devices on the Devices Page
When you need to manage your Google Cloud Print devices, display the Devices page by either clicking the Manage Cloud Print devices button on the Google Cloud Print screen or by typing chrome://devices in the omnibox and pressing the Enter key.
The Devices page includes the My devices list, which shows the printing devices set up on the Chromebook. You can click the Manage button on a device’s row to open a new tab showing the Cloud Print page for managing that device.
Printing from a Chromebook
Once you have set up a Chromebook’s printers, printing from the Chromebook is straightforward. This section will explain what you need to know, starting with giving the Print command, going through choosing settings for printing, and ending with coverage of managing your print jobs.
Giving the Print Command
Keyboard shortcut: In most apps that support printing, press Ctrl+P to give the Print command. (Some apps, such as Camera and Calculator, do not support printing.)
Print icon: If a Print icon appears, click it.
Menu: If the More Actions button (the three vertical dots) appears, click it to open the menu, and then click the Print item.
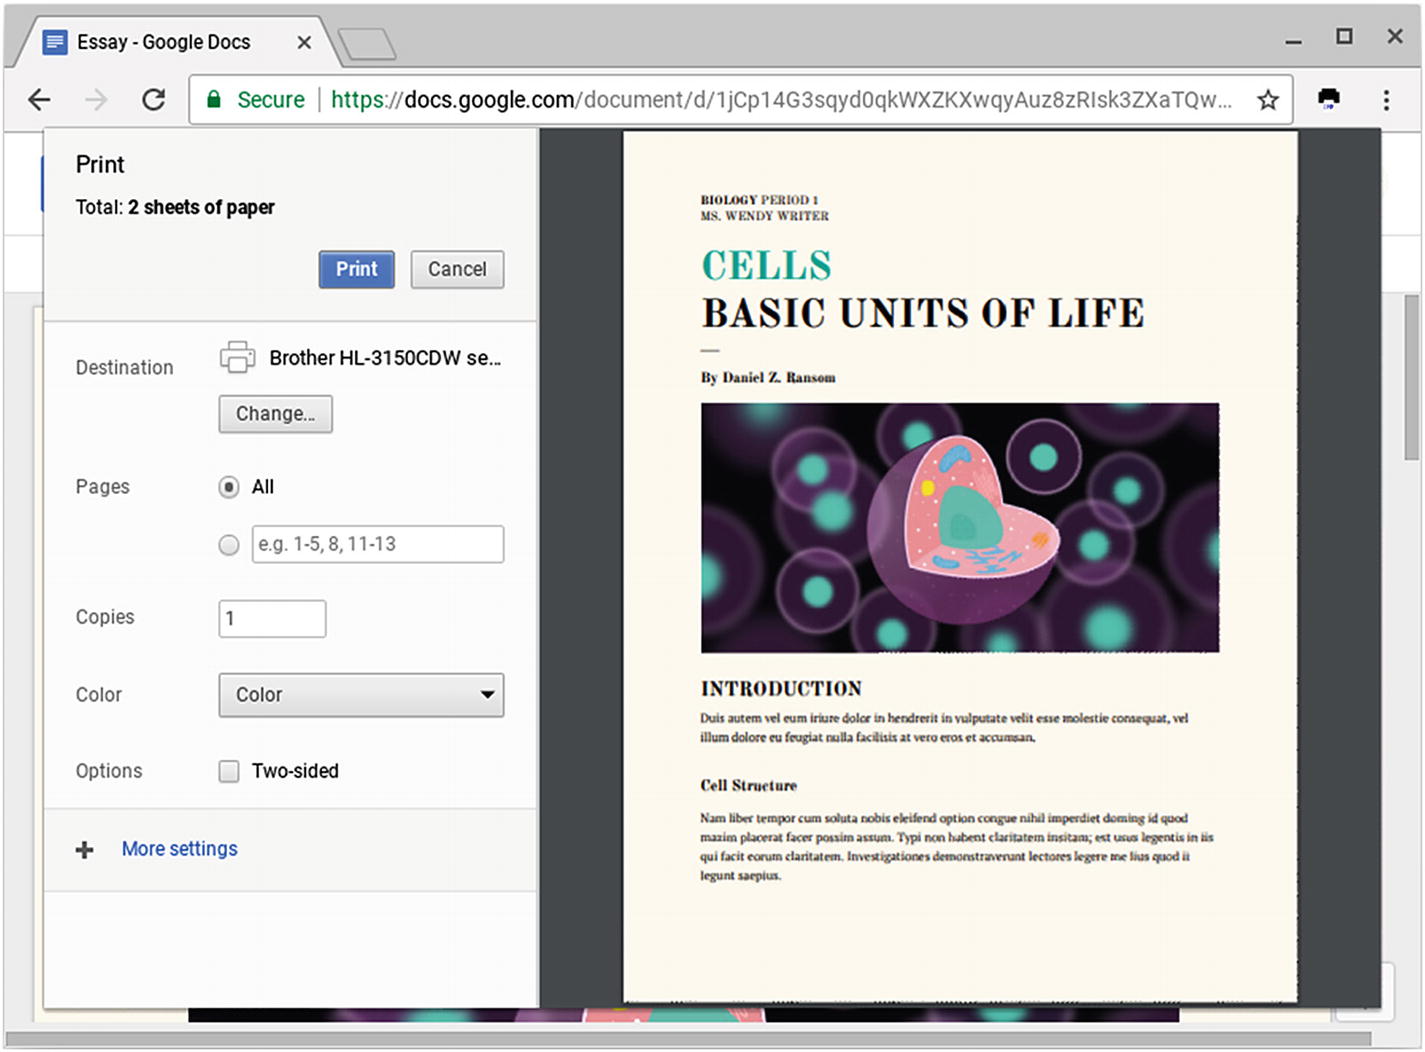
The Print panel at first displays essentials, such as controls for setting the print destination, choosing which pages to print, and specifying the number of copies. Click the More Settings button to display further settings .
Choosing Settings and Printing a Document
Destination: The Destination readout shows the current printing device—a printer or the Save as PDF service. To change the printing device, click the Change button and then click the printing device in the Select a destination dialog box (see Figure 7-27). If the Showing destinations for pop-up menu shows the wrong account, click the pop-up button and then click the right account. If you have too many print devices set up to browse easily, you can start typing a printer’s name or model in the Search destinations box.
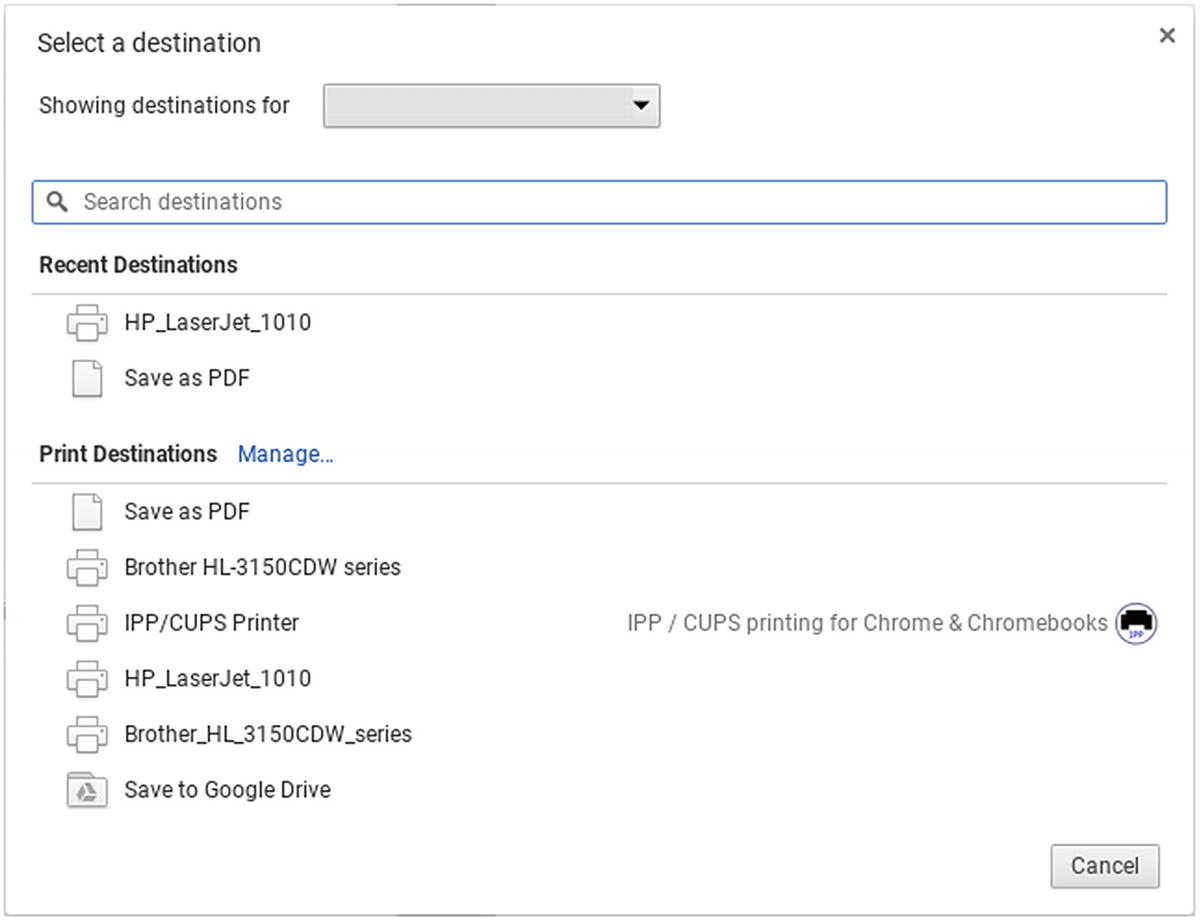
In the Select a destination dialog box, click the printing device you want to use
Pages: Make sure the “All” option is selected if you want to print the whole document. Otherwise, click in the lower box (which selects the lower option button) and enter the details of what you want to print. You can enter individual page numbers, separated by commas, such as 1, 3, 5; a range, such as 1–5; or both, such as 1, 3, 5–8, 11.
Copies: If you want to print more than one copy (the default), enter the number of copies in this box.
Color: For a color printer, you can open this pop-up menu and choose the Color item (usually the default) or the Black and white item.
Two-sided: Check this check box if you want to print on both sides of the paper rather than on one side.
Paper size: In this pop-up menu, choose the paper size, such as US Letter.
Margins: In this pop-up menu, choose what type of margins to use on the page. Your choices typically include Default, None, Minimum, and Custom; if you choose Custom, you can drag the margins on the document preview to where you need them.
Quality: In this pop-up menu, choose the print quality, such as 600 dpi.
Scale: If you need to print the document at a larger or smaller size, increase or decrease the scale from 100%. For example, you may need to scale a document down to make it fit on a specific number of pages.
Once you have chosen suitable settings, click the Print button. Chrome OS will process the print job and send it to the print device.
“PRINTING” TO A PDF
As well as the printers you have set up, Chrome OS offers the Save as PDF print destination. This feature enables the user to create a PDF of the page and save it either to the Chromebook or to the user’s Google Drive.
Saving a PDF can be a handy standby for capturing items when no printer is available, but you will still need to configure a printer on which to print those items later. If the user has a dedicated Chromebook, saving the PDF to the Chromebook is reasonable; if not, saving it to Google Drive is usually the better choice because the user will be able to print the PDF from any Chromebook (or other computer).
Canceling or Deleting a Print Job
Sometimes you may need to cancel or delete a print job you have sent to a printer.
- 1.
Click any icon in the notifications area (to the left of the status area) to display the current notifications.
- 2.
Click the down-arrow button (which you can see on the second notification in Figure 7-28) to expand the notification. The top notification here is expanded.
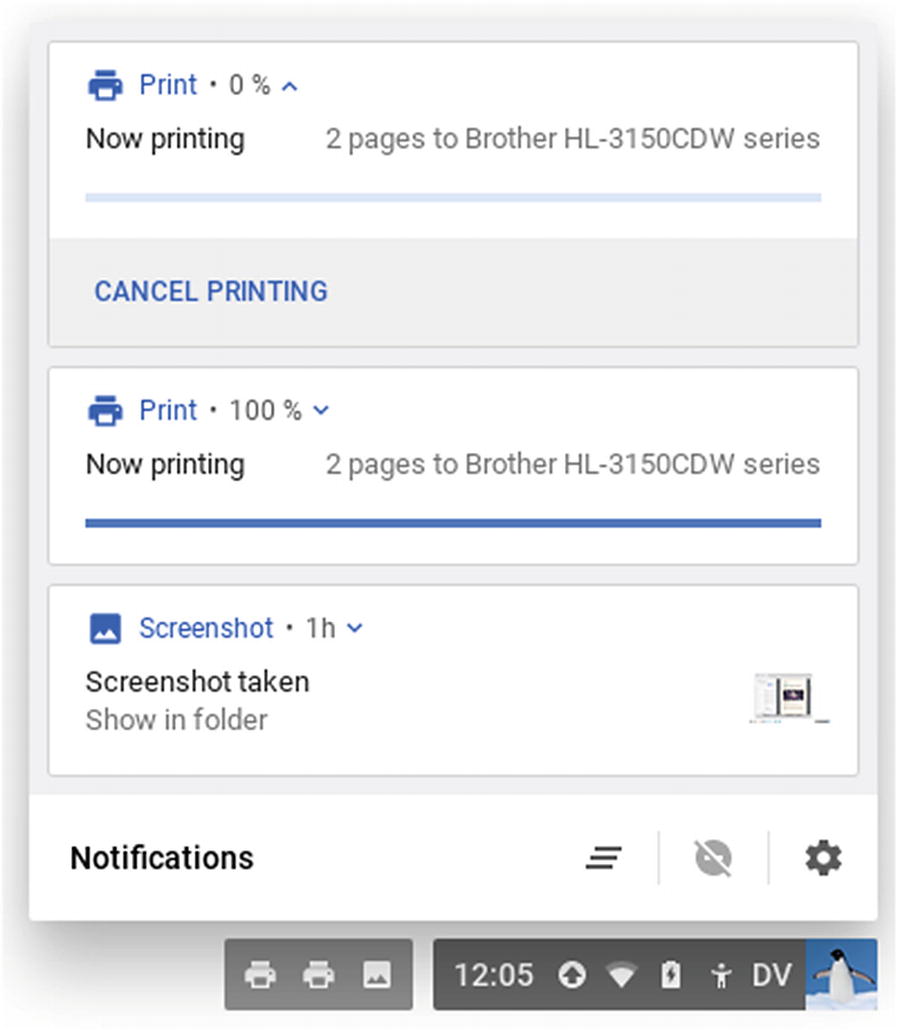
You may be able to cancel a print job by clicking the down-arrow button on its notification and then clicking the Cancel Printing button
- 3.
Click the Cancel Printing button.
- 1.
Launch or activate Chrome.
- 2.
Type chrome://devices in the omnibox and press the Enter key to display the Devices screen.
- 3.
Click the Manage button for the printer to which you sent the job . The Google Cloud Print page for managing that printer appears.
- 4.
Click the Show Print Jobs button. The list of print jobs appears.
- 5.
Click the entry for the print job you want to delete.
- 6.
Click the Delete button.
Casting Content to a Chromecast Device
As well as Chrome OS, the Chrome browser, Chromebooks, and Chromeboxes, Google also created the Chromecast family of devices. A Chromecast is a device that you plug in to the HDMI port on a TV or monitor and that enables you to play content from a computer or other device (such as an Android phone) on that TV or monitor. The Chromecast Audio, as its name suggests, is an audio-only device that you connect to regular (or “dumb”—not smart) speakers so that you can play audio on the speakers from a remote device.
Chrome browser: You can cast either a tab or the entire desktop.
Chrome OS desktop: You can cast your Chromebook’s entire desktop.
Video Player app: You can cast videos stored on Google Drive.
The following sections will show you how to use these three ways of casting.
UNDERSTANDING HOW CHROMECAST WORKS
From the user perspective, casting to a Chromecast device appears to be straightforward streaming from the Chromebook. You cue the content you want to cast and then specify the destination Chromecast device—and the content will appear on the TV or monitor connected to the Chromecast.
Behind the scenes, however, the implementation is more nuanced. When you cast a Chrome tab or the Chromebook's desktop, the Chromebook does stream that content to the Chromecast. But when you use the Video Player app to cast videos stored on Google Drive, the casting actually happens via remote control. The Video Player app causes the Chromecast device to connect to Google Drive and start streaming the video directly from there, so the stream is not being passed through the Chromebook.
Casting from the Chrome Browser
- 1.
Open a tab to the page you want to cast.
- 2.
Click the More Actions button and then click the Cast item on the menu. The Cast to dialog box opens, showing a list of available Chromecast devices (see Figure 7-29).
Note
The Cast to dialog box casts the tab by default rather than the desktop. However, instead of the Cast to dialog box, you may see the Cast tab dialog box or the Cast desktop dialog box. As their names imply, the Cast tab dialog box indicates that Chrome OS will cast the tab, and the Cast desktop dialog box indicates that Chrome OS will cast the desktop. You can change the item to be cast by clicking the down-arrow button and using the Select source dialog box.
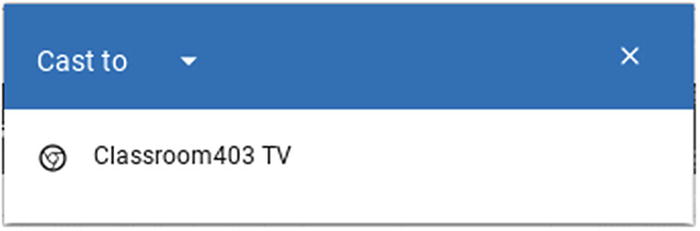
The Cast to dialog box shows the available Chromecast devices
- 3.
To change the item that Chrome OS will cast, click the down-arrow button. The Select source dialog box will open (see Figure 7-30).
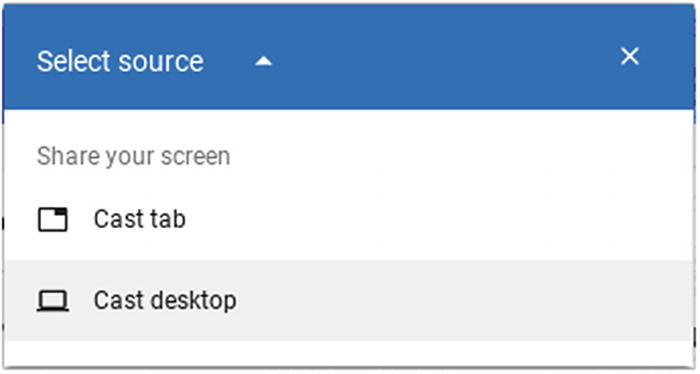
In the Select source dialog box, click the Cast tab button or the Cast desktop button, as needed
- 4.
Click the Cast tab button or the Cast desktop button to specify what you want to cast. The Cast tab dialog box (see Figure 7-31) or the Cast desktop dialog box then opens, again showing the list of available Chromecast devices.
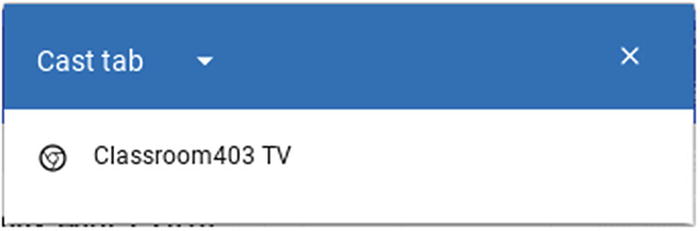
In the Cast tab dialog box (shown here) or the Cast desktop dialog box, click the Chromecast device you want to use
- 5.
Click the Chromecast device you want to use. If you choose to cast your desktop, the Share your screen dialog box will open (see Figure 7-32). Check or uncheck the “Share audio” check box, as needed, and then click the Share button. A dialog box whose title is the Chromecast device’s name will open, showing the Chrome Mirroring message and providing a volume slider and a Stop button (see Figure 7-33). The item you’re casting then appears on the TV or monitor.
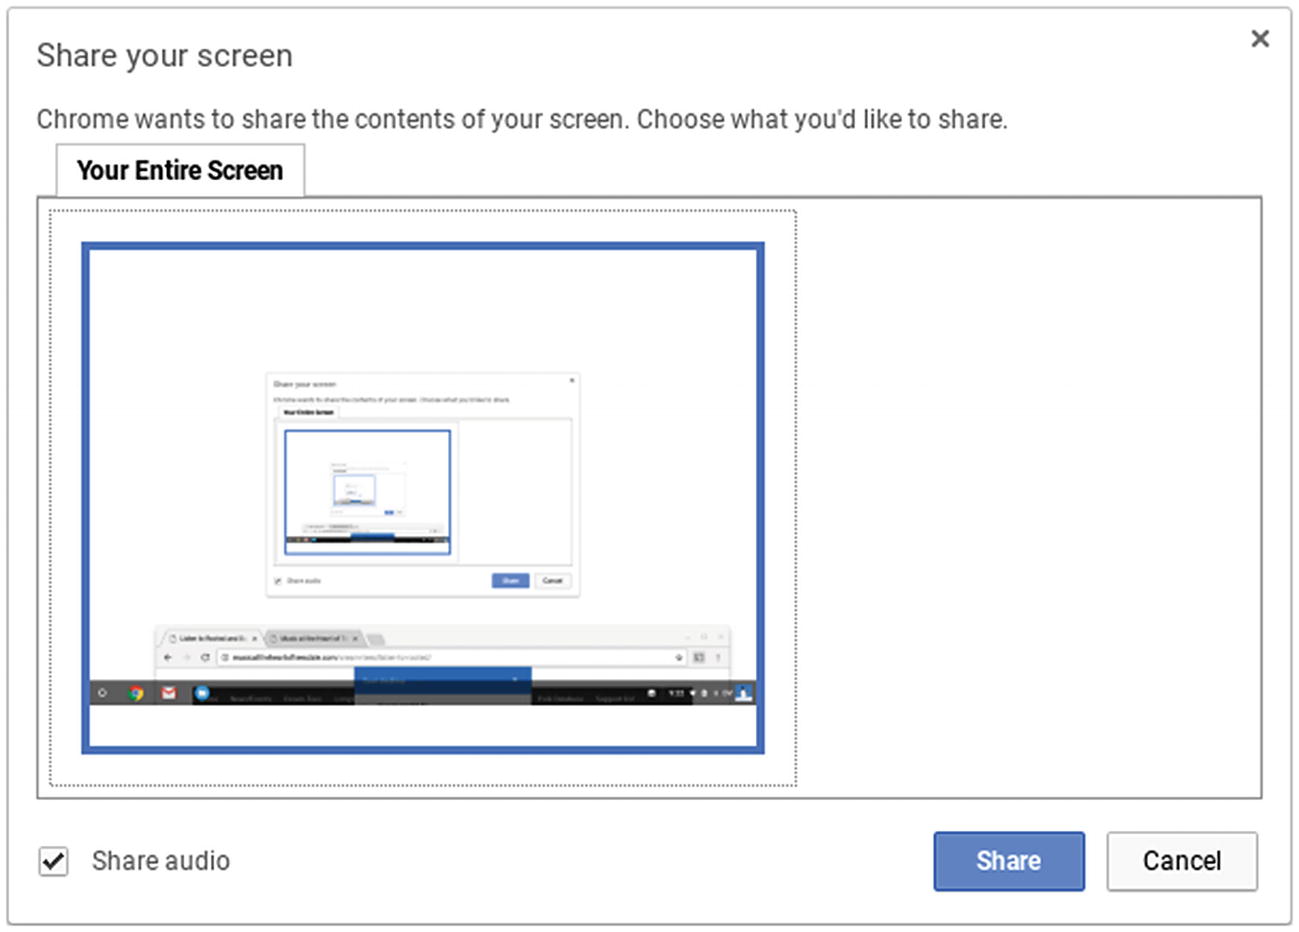
In the Share your screen dialog box, check or uncheck the “Share audio” check box, as needed, and then click the Share button
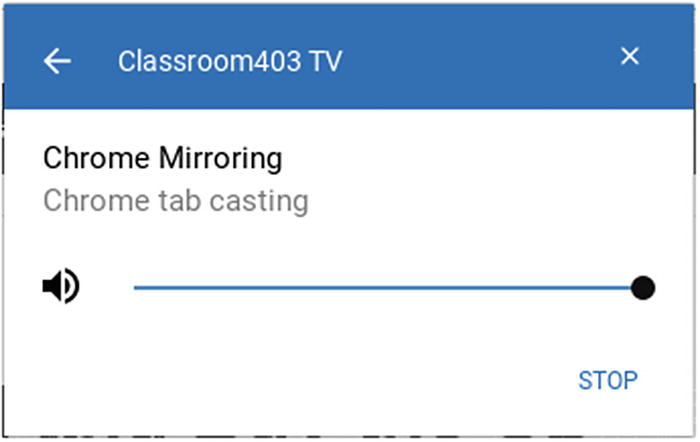
This dialog box shows the name of the Chromecast device. Use the volume slider to control the volume and the Stop button to end the cast.
- 6.
Drag the volume slider as needed to adjust the output volume. You should also be able to adjust the volume on the TV, monitor, or speakers.

The Display on another screen button appears to the right of the omnibox while the Chrome app is casting.
When you are ready to end the cast, click the Stop button in the dialog box for controlling the cast .
Casting the Chrome OS Desktop
- 1.
Open the app or apps you want to cast.
- 2.
Click the status area to display the status menu (shown on the left in Figure 7-35).
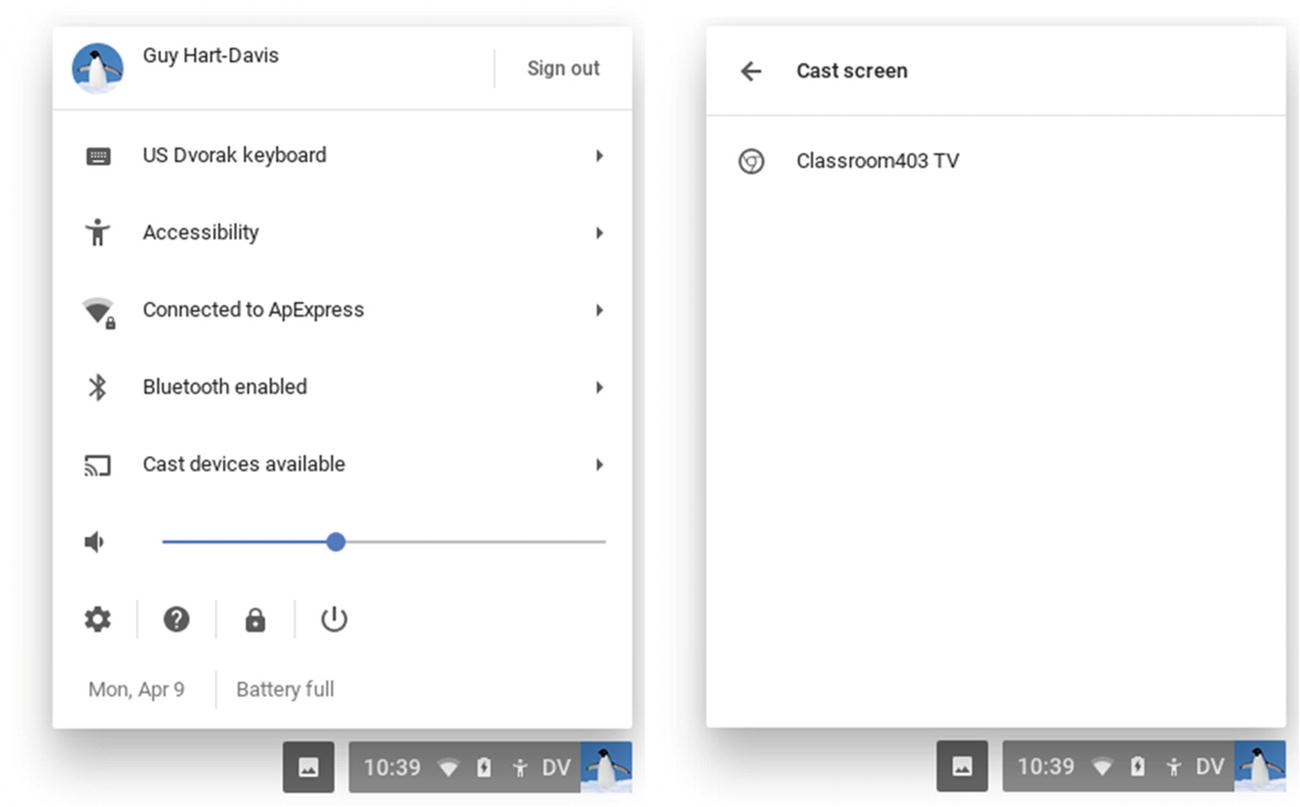
On the status menu (left), click the Cast devices available button to display the Cast screen menu (right), and then click the Chromecast device to which you want to cast the desktop.
- 3.
Click the Cast devices available button to display the Cast screen menu (shown on the right in Figure 7-35).
- 4.
Click the Chromecast device to which you want to cast the desktop. The Share your screen dialog box opens (see Figure 7-32, earlier in this chapter).
- 5.
Check or uncheck the “Share audio” check box, as needed.
- 6.
Click the Share button. The Chromebook's desktop will appear on the TV or monitor.
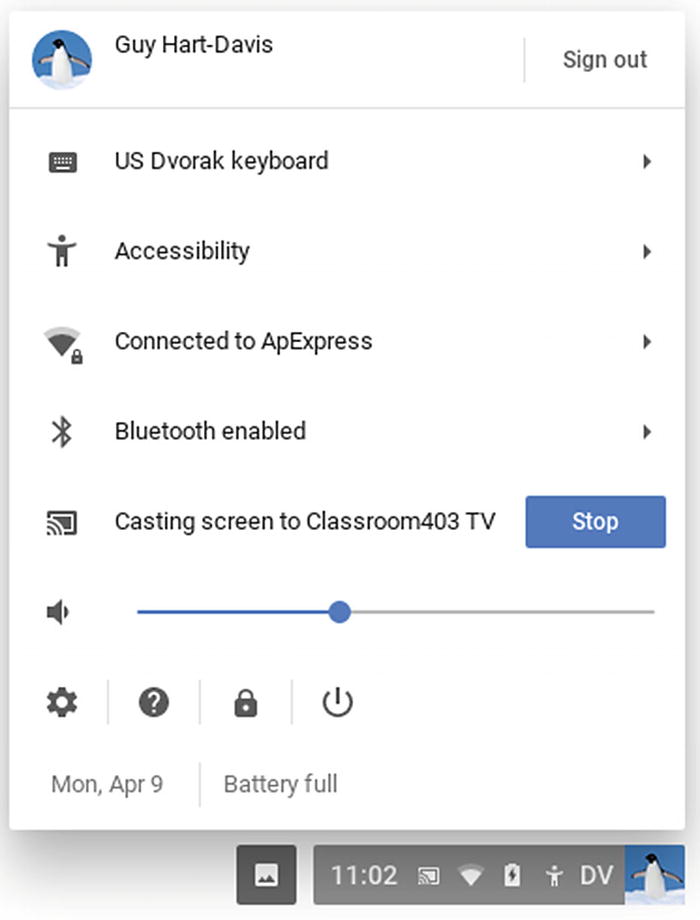
To stop casting the Chromebook’s desktop, open the status menu and click the Stop button to the right of the Casting screen item
Casting from the Video Player App
You can also start casting files from the Video Player app , which you launch from the Files app. This works only for video files stored on Google Drive, not for files on the Chromebook itself or on external drives connected to the Chromebook.
- 1.
Open the Files app. For example, click the Launcher button, click the up-arrow button, and then click the Files icon.
- 2.
In the navigation pane on the left, display the folder on Google Drive that contains the video file you want to cast.
- 3.
Double-click the video file to open it in the Video Player app (see Figure 7-37).
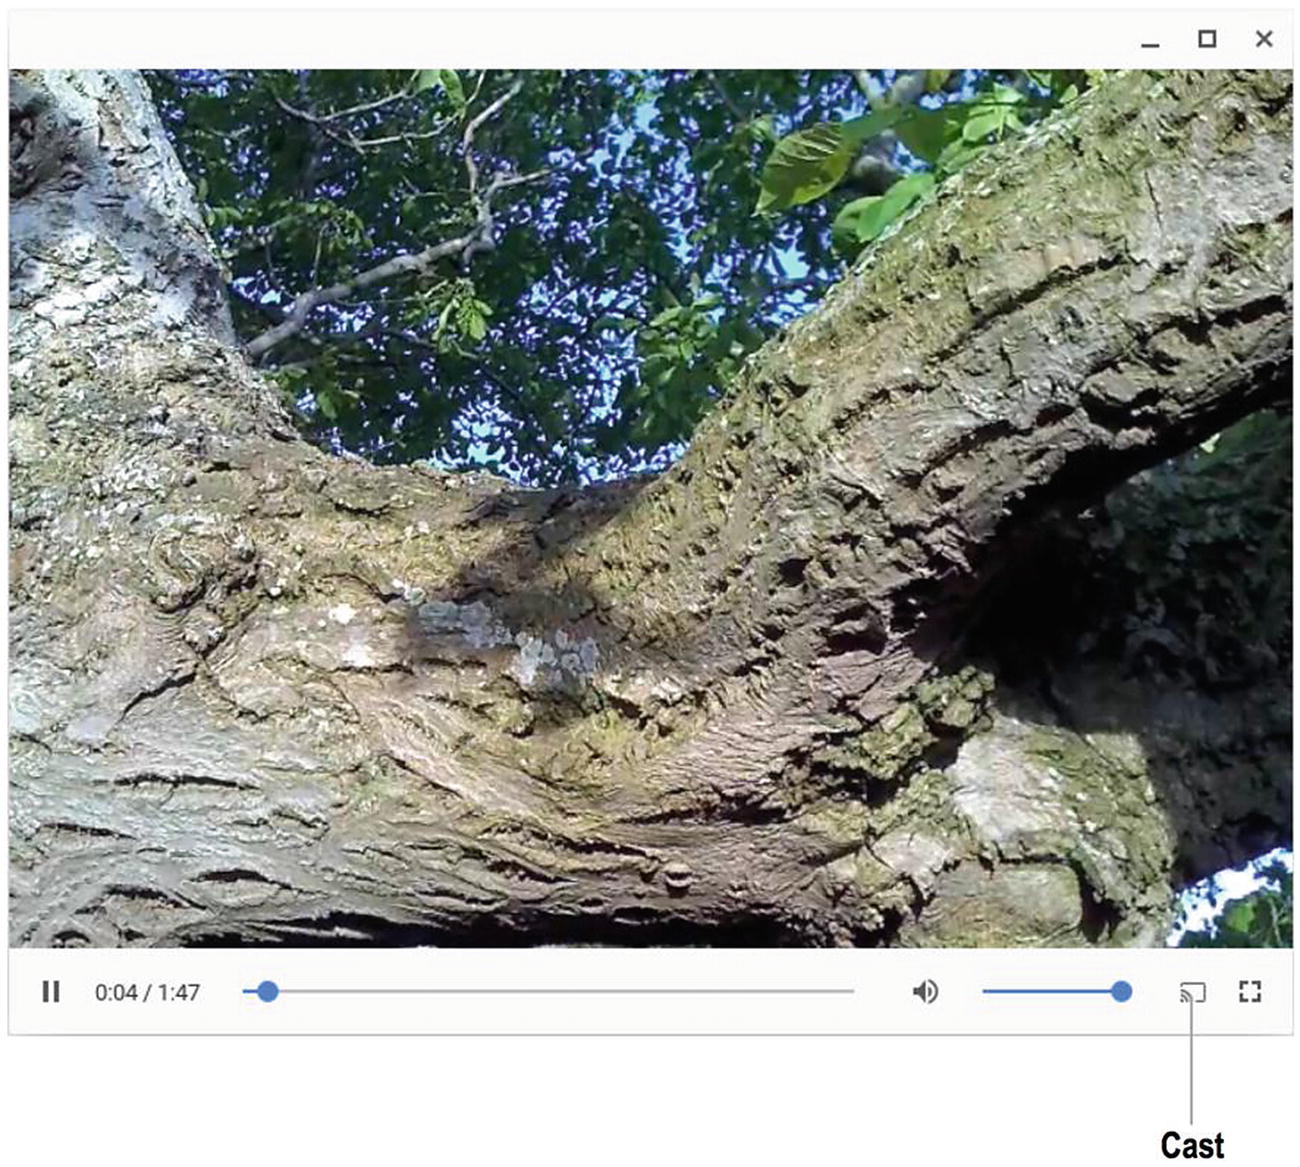
Click the Cast button in the Video Player window to start casting the video to a Chromecast device
- 4.
Click the Cast button . The Cast Video Player dialog box opens (see Figure 7-38).

In the Cast Video Player dialog box, click the Chromecast device you want to use
- 5.
Click the Chromecast device to which you want to cast the video. The video starts playing on the TV or monitor connected to that Chromecast device. On the Chromebook’s screen, the video stops and displays a message giving the name of the Chromecast device on which the video is playing.
When you are ready to stop casting the video, click the Stop button on the Chromebook’s screen.
Summary
In this chapter, you have learned how to connect Chromebooks to your school’s network shares so they can access files locally as well as across the Internet. You also now know how printing with Google Cloud Print works, how to get your school’s printers and Chromebooks to work together, and how to print and manage print jobs on Chromebooks. And you can display content from a Chromebook on a TV or monitor connected to a Chromecast device to share it with a class.
In the next chapter, we will examine how to organize your lessons with Google’s Classroom app.