You don’t need many supplies to get started in colored pencil, so you won’t need to invest a lot of money. All you need to start out are a few basic colors, an eraser, a sharpener, and some paper. (See page 3 for the colors used in this book.) Below are a few recommended tools that are good for beginners. You’ll also find information on using colored pencils—remember that the way you sharpen your pencil, the way you hold the pencil, and the amount of pressure you apply all affect the strokes you create. You can create everything from soft blends to brilliant highlights to realistic animal textures with colored pencil. Once you become familiar with the basics, you’ll be able to decide which tools and techniques will capture your subject’s unique qualities.
PENCILS
The price of a pencil indicates its quality; better pencils have truer color. Many brands offer sets of pencils that provide a basic array of colors. Some art stores also sell colored pencils individually—this way you can choose which hues you like best among several different brands. Once you’ve chosen your palette, make sure to store your pencils safely in a container—and try not to drop them. The lead in a colored pencil is very brittle, and it’s likely to break in the shaft if the pencil is dropped. This may not be immediately apparent, but it will eventually render the pencil useless.
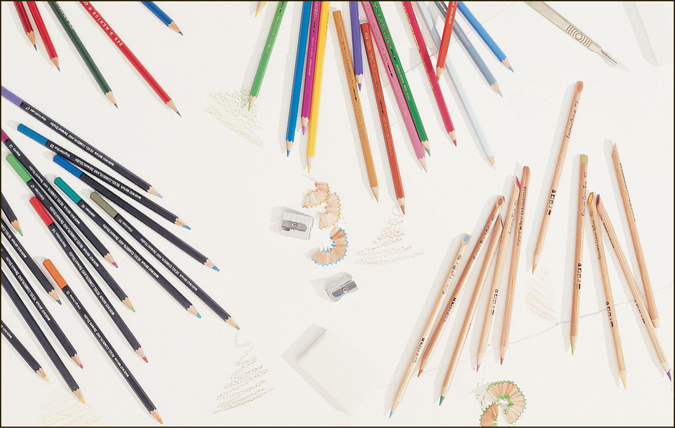
Choosing Pencils There are many different types of colored pencils available—harder, thinner leads are ideal for rendering fine lines and detail, whereas softer, thicker leads are great for filling in large areas. Experiment to find which you prefer.
ERASERS
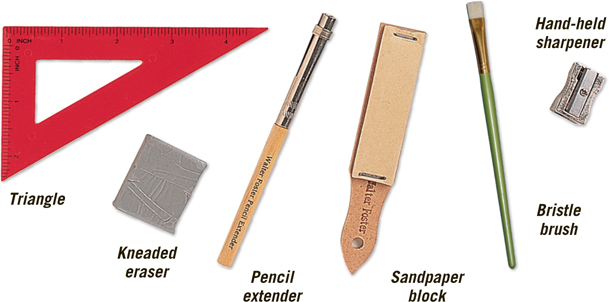
Ordinary erasers can’t be used to remove colored pencil; the friction between a rubber or vinyl eraser and the paper will actually melt the wax pigment and flatten the tooth (or grain) of the paper. Instead, many artists use a small battery-powered eraser to remove the pigment without crushing the paper underneath. A kneaded eraser is also useful for removing small amounts of color; twist or pinch it into any shape you like and then press it lightly on the paper to pick up the pigment. When it gets “dirty” and is not as effective, you can knead it (like dough) thoroughly to reveal a clean surface. To remove unwanted pigment, you can press clear tape over an area. You can also use an craft knife to carefully remove colored pencil from small areas.
PAPER
Slightly textured, thicker paper is best for colored pencil work because the rough grain “catches” the color so it accepts more pigment than a very smooth paper would. Art and craft stores carry a variety of textured water-color papers and illustration boards that offer a good tooth for colored-pencil art; look for a paper with a medium grain to start. For practice or doing quick studies on site, you’ll want to have a sketch pad or sketchbook.
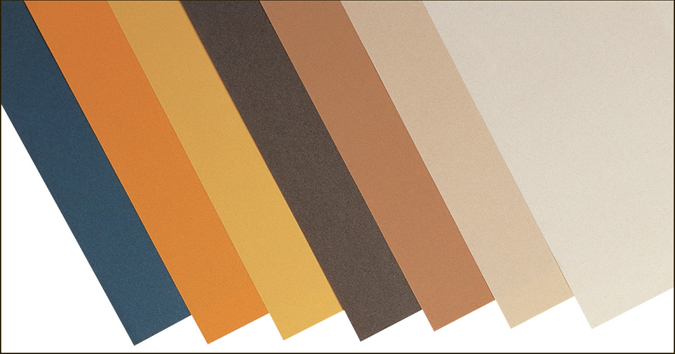
Experimenting with Paper You might also consider experimenting with different colored papers. Be sure to use the less-textured side of the paper. If you choose a colored paper that shares a dominant hue in your drawing, you can create color harmony in your drawing. Using black paper with light colors creates a sense of drama and contrast.
SHARPENERS
You can achieve various effects depending on how sharp or dull your pencil is, but generally you’ll want to make sure your pencils are sharp at all times; a sharp point will ultimately provide a smoother layer of color. Although a small hand-held sharpener will do, an electric or battery-powered sharpener is better suited for fine art purposes. You can also use a sandpaper block to sharpen your pencils; the sandpaper will quickly hone the lead into any shape you wish. It will also sand down some of the wood. The finer the grit of the paper, the more controllable the resulting point. Roll the pencil in your fingers when sharpening to keep the shape even.
EXTRAS
You’ll need a brush to gently remove the pencil residue from your paper (a camera lens brush will work well), a spray fixative to preserve your finished drawing, and a blending stump to create soft blends. A pencil extender is handy when the pencil gets too short to hold onto comfortably, and you may want a triangle for making straight lines and some artist’s tape for masking off edges. It’s also nice to have white gouache (similar to watercolor paint but more opaque) and a small brush on hand for adding tiny highlights.
Below are the main colors used for the projects in this book. Keep in mind that the names of the colors may vary among brands; also, sometimes two pencils that have the same name are different hues.

Black

Black cherry

Burnt ochre

Burnt sienna

Burnt yellow ochre

Canary yellow

Cedar green

Cerulean blue

Chartreuse

Cloud blue

Cool gray 30%

Cool gray 50%

Cool gray 70%

Cool gray 90%

Crimson

Dark brown

Dark indigo

Dark purple

Dark umber

French gray

French gray 30%

French gray 70%

Geranium lake

Apple green

Henna

Indigo blue

Jasmine

Kelp green

Light cerulean blue

Peach beige

Peacock blue

Poppy red

Prussian green

Pumpkin orange

Raw sienna

Sap green

Sepia

Sienna brown

Slate gray

Sunburst yellow

Thio violet

True blue

Tuscan red

Ultramarine

Venetian red

Warm gray 50%

White

Yellow ochre
STROKES
Each line you make in a colored pencil drawing is important—and the direction, width, and texture of the line you draw will all contribute to the effects you create. Practice making different strokes, as shown in the examples below. Apply light, medium, and heavy pressure; use the side and then the point of your pencil; and experiment with long, sweeping strokes as well as short, precise ones.

Pressure With light pressure, the color is almost transparent. Medium pressure creates a good foundation for layering, and heavy pressure flattens the paper texture, making the color appear almost solid.
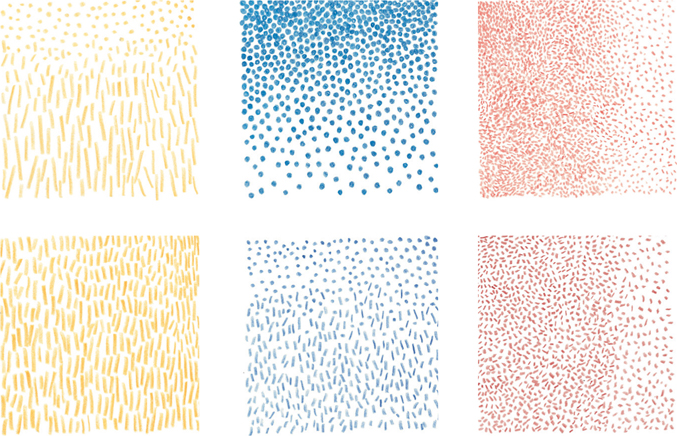
Strokes and Texture You can indicate a number of different textures by creating patterns of dots and dashes on the paper. To create even, dense dots, try twisting the point of your pencil on the paper.
LAYERING AND BLENDING
Because colored pencils are translucent, artists use a transparent layering process to either build up color or create new hues. This layering process is wonderful because it creates a much richer hue than you could ever achieve if you were using just one pure color. To deepen a color, layer more of the same over it. If you want to blend your strokes together, you can use a stiff bristle brush (see page 21).
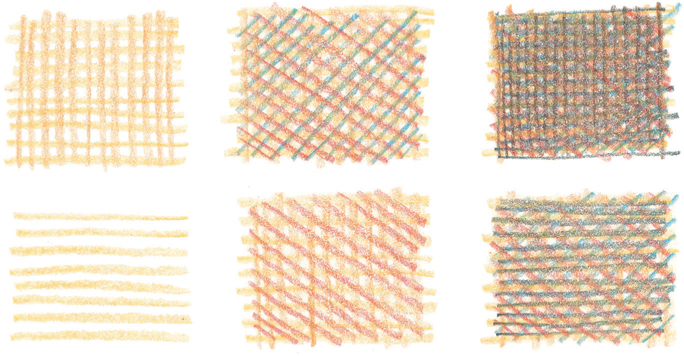
Layering with Hatch Strokes Here yellow, orange, red, and blue were layered on top of one another with crosshatching (laying one set of hatched lines over another but stroking in a different direction) to demonstrate one way of creating a new color. When crosshatching, work from light to dark to avoid getting a muddy mix.
