
With FileMaker’s Instant Web Publishing component any computer with a Web browser can view and (if you allow it) even edit FileMaker data (Figure 18.1).
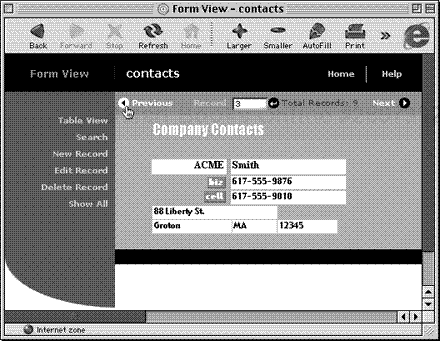
Figure 18.1. The Instant Web Publishing feature makes it easy to generate Web pages that let Web users take advantage of virtually all FileMaker’s database powers.
Thanks to buttons in the Instant Web Publishing layouts, which run behind-the-scenes scripts, Web users can perform many of the same actions once limited to machines running FileMaker itself. They can search records, update information, sort tables—the list goes on. A company’s sales force, for example, can place orders from the road, outside vendors can check delivery dates, and you can check the latest product deadlines from home. Don’t worry—Web Companion includes security options to let you precisely control who sees your data and what they can do with it. Timeliness is one of the best things about Web database publishing. Too much of the Web still uses static pages, which look the same every time you visit them. With the Web Companion feature, if a shared FileMaker database changes, Instant Web Publishing makes those changes immediately visible over the Web.
FileMaker’s Web Companion acts like a Web server by handling the file requests placed by Web browsers visiting your database. It does this by interpreting the HTTP (HyperText Transfer Protocol) commands from the browser, along with operating as a de facto CGI (Common Gateway Interface) application between FileMaker and visiting Web browsers. Web Companion handles all this in the background so you don’t have to deal with it. Instead, FileMaker’s Web Companion uses its Instant Web Portal and a built-in home page to automatically generate and display links to your Web databases (Figure 18.2). The Web Companion also offers you a variety of page styles for presenting your databases (Figure 18.3).
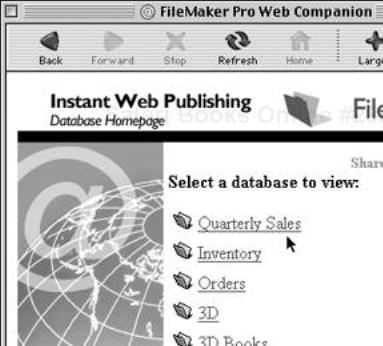
Figure 18.2. The Web Companion’s Instant Web Portal automatically generates and displays links to your Web databases.
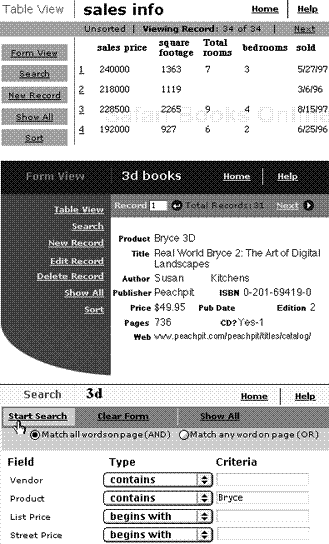
Figure 18.3. The Web Companion now includes a variety of styles and colors, including (top to bottom): a table view in fern green, a form view in lavender, and a search-only view.
If you elected not to include the Web Companion in your initial FileMaker installation, go back and add it by running the Custom installation. (See page 314 for Windows, page 319 for the Mac.) Besides FileMaker and Web Companion, if you’re running the Web Companion on a company intranet, that is all you need. If you’re going to publish to the Web, however, you’ll also need a full-time Internet connection (DSL, ISDN, T1, T2, or T3). In theory, you could publish a Web database via a part-time dial-up connection, but no one could use the database unless you were online at the very same time. The IP address for most part-time connections also changes from session to session, which would make it all but impossible for users to keep track of your database’s latest location.
What if you’re just running a small business and don’t have the dough to install a Web server, a T1 line, and a closet of cables? Not to worry—many of the same Internet Service Providers who offer dial-up connections can host your FileMaker database on one of their Internet-linked computers for a small monthly fee. FileMaker offers a partial list of such ISPs at: www.filemaker.com/support/isp.html
Aside from setting up and configuring the Web Companion, which controls FileMaker’s general Web publishing features, you’ll need to decide which individual files to share over the Web. As part of preparing those individual files for the Web, you’ll probably want to create layouts tailored for your Web users. Not only will that make it easier for your Web viewers, it also prevents the Web Companion from displaying database fields you may not want the world to see. For details, see Sharing and Viewing Web Files on page 297.
Generally, you’ll only need to set up Web Companion once. Selecting which FileMaker files will be published on the Web, however, must be done file by file using the File Sharing dialog box.
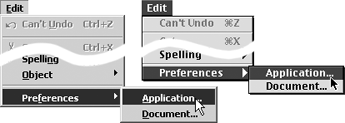
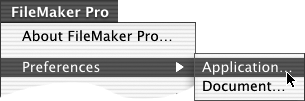
If you are using a Windows machine or a pre-OS X Mac, choose Edit > Preferences > Application (Figure 18.4). If you are running OS X, choose FileMaker Pro > Preferences > Application (Figure 18.5).
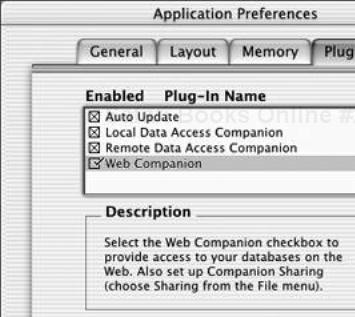
When the Application Preferences dialog box appears, click the Plug-Ins tab and check Web Companion (Figure 18.6). Most of the Web Companion’s default settings are fine for most users, so click OK to close the Application Preferences dialog box. If you want to customize the settings, see To configure the Web Companion on the next page.
 Tips
Tips
The Web Companion works independently of the two Data Access Companions, so whether they’re checked or not doesn’t affect the Web Companion.
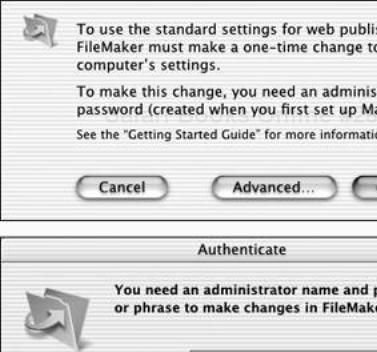
In step 2, if you are running OS X on a Mac, an alert dialog box will appear the first time you check Web Companion (top, Figure 18.7). Click Continue and, when the Authenticate dialog box appears, enter an administrator name and password, click OK, and you’ll be returned to the Application Preferences dialog box. Unless you want to reconfigure the Web Companion’s default settings, click OK and you’re done.
To customize the Web Companion’s settings on a Windows machine or a pre-OS X Mac, choose Edit > Preferences > Application (Figure 18.4). If you are running OS X, choose FileMaker Pro > Preferences > Application (Figure 18.5).
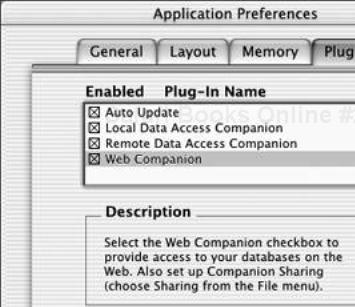
When the Application Preferences dialog box appears, click the Plug-Ins tab. Then select Web Companion in the Enabled Plug-In Name panel and—assuming the Web Companion is already activated—click Configure (Figure 18.8). (If you haven’t turned on the Web Companion, see To set up the Web Companion on the previous page.)
When the Web Companion Configuration dialog box appears (Figure 18.9), make your configuration choices. For details on each choice, see Web Companion options on page 294.
When you’re done, click OK to close the Web Companion Configuration dialog box. When the Application Preferences dialog box reappears, click OK again (Figure 18.10) and you’re done.
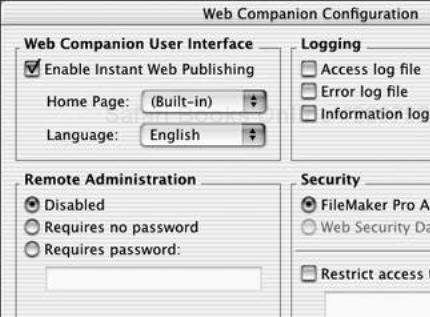

The Web Companion Configuration dialog box (Figure 18.11) controls the user interface, remote administration, the TCP/IP port number, logging activities, and security. Here’s a quick rundown of each:
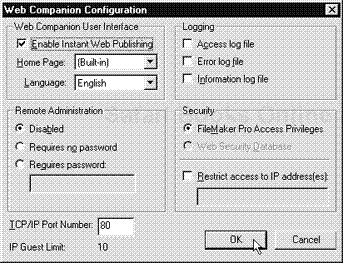
Figure 18.11. The Web Companion Configuration dialog box lets you control the user interface, logging activities, remote administration, and security.
Enable Instant Web Publishing: By default, this is checked. Even if you plan on using the FileMaker Developer edition to create custom pages, you’ll find the Instant Web Publishing option will be fine for certain pages.
Home Page: By default, the Web Companion uses its own Built-in home page. You can, however, use your own custom page (Figure 18.12) as a home page—if you place it in FileMaker’s Web folder (FileMaker Pro 6Web in Windows; FileMaker Pro 6 FolderWeb on the Mac). Once you put your custom HTML file in the Web folder, it will be visible in the Home Page pop-up menu (Figure 18.13).
Figure 18.12. You can use a custom home page with links to your data if you place the page inside FileMaker’s Web folder.
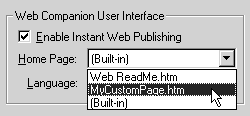
Figure 18.13. Use the Home Page pop-up menu to choose FileMaker’s Built-in page or your own custom page.
Language: This only affects the Instant Web Publishing interface and its built-in Help feature—not your data or layouts. Use the pop-up menu to select one of seven languages.
Remote Administration: The three radio buttons in this panel allow you to upload and download Web Companion files if they reside on an offsite server, a handy feature if you depend on an Internet Service Provider for hosting your FileMaker database. You can leave this option off or enable it. If you choose to use remote administration, always select Requires password and enter a password in the text box. For more details, see Security on page 296.
TCP/IP Port Number: Unless you’ve already got a Web server connected to your computer, the default setting of 80 is fine. Otherwise, you’ll have to set it to 591 and users visiting your Web site will have to add “:591’ to the end of your normal IP address (e.g., 146.98.21:591).
IP Guest Limit: Unless you’re using the FileMaker Unlimited edition, this number will be set at 10. That means only the first 10 users in a rolling 12-hour period will be able to use the Web database. More precisely, the limit is 10 computers since FileMaker tracks the use by the IP address. Any Web browser logging into the database after the first 10 users will get an error message. If one of your first 10 computers has not used the Web database in 12 hours, then FileMaker will let a new computer log into the database. If three of your first 10 computers don’t use it in 12 hours, three additional computers will be able to log in, and so on.
The problem with this approach, obviously, is FileMaker makes no distinction between 10 computers regularly logging into the Web database and a situation where several computers only tap into the database for one request or just spend five minutes using it. You’re limited to 10 IP addresses per 12 hours, no exceptions. If you’re a small firm, the workaround is musical chairs: designate 10 machines for tapping the Web database and have people sit at those machines to make their requests. If you’re trying to use FileMaker’s Web publishing features to serve a Web database to the wider world, you should get FileMaker Unlimited a $499 upgrade.
Logging: By default, Web Companion does not store a log of Web activity. Check Access log file if you want to record which IP addresses log into the site and which pages are viewed. Check Error log file if you want a record kept of errors generated by the Web Companion. Check Information log file only if you’re creating custom Web publishing files using the FileMaker Developer edition. The log files are stored in the FileMaker Pro 6 folder.
Security: The Web Companion’s security default is FileMaker Pro Access Privileges, which are set file by file using passwords and groups as explained in Networking on page 253. With this option activated, Web browsers enter the same passwords, and have the same privileges, as they would if they opened those files directly within FileMaker. You should choose Web Security Database only if you’ll be creating custom Web pages with FileMaker’s Developer edition. You can, however, add another level of security by checking Restrict access to IP address(es) and then entering specific IP numbers into the text window. Separate multiple IP addresses with a comma. You also can use a wildcard character (e.g. 192.168.0.*) to specify a range of addresses, a common setup for inhouse intranets.
Once you’ve configured the Web Companion, you need to designate which files will be shared over the Web. This must be done separately for every file you want to share. FileMaker also requires that you specify how you want each shared file to be viewed. Before you start using the Web Companion to configure each file’s Web views, however, be sure to create a Web-only layout for those same files. That will speed up the display of your files over the Web—and ensure that visitors don’t have to wade through irrelevant fields.
Open the FileMaker file you want to share:
 in Windows,
 on the Mac.
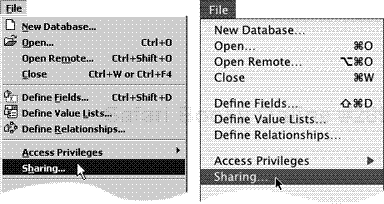
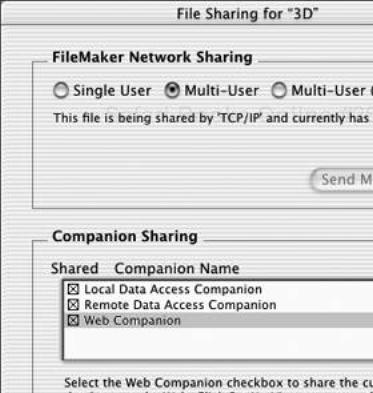
Choose File > Sharing (Figure 18.14).
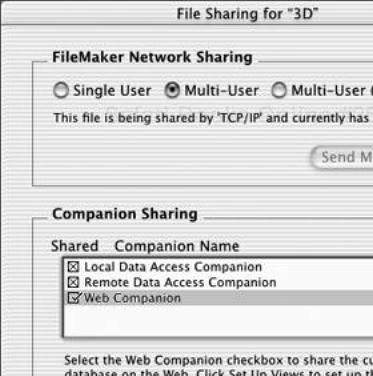
When the File Sharing dialog box appears, ignore the FileMaker Networking Sharing panel. Instead, look within the lower Companion Sharing panel and check Web Companion (Figure 18.15).
If you want to go ahead and set how the file will look over the Web, see step 2 in To set up the browser views on page 298. Otherwise, click OK. Once you also configure Web Companion, the file will be shared over the Web. Repeat the steps for every file you want to share.
Tips
If you ever want to stop sharing a file, open the File Sharing dialog box, uncheck Web Companion, and click OK.
You won’t be able to activate file sharing unless your password allows you to export records, which is effectively what you’re doing by sharing files over the Web. If your password doesn’t include that privilege, see the person who assigns FileMaker passwords to get export rights.
The Web Companion View Setup dialog box lets you control what visitors see when they call up your Web database. Depending on your needs, you may not need to set all the views.
Open the FileMaker file whose views you want to set, then choose File > Sharing (Figure 18.14).
Make sure that Web Companion is not only checked but selected (highlighted), then click Set Up Views (Figure 18.16).
When the Web Companion View Setup dialog box appears, the Web Style tab will be selected (Figure 18.17). Use the Styles pop-up menu to select a look for your Web pages (Figure 18.18). Not every style will work with every Web browser, so see Table 18.1 for help in making your choice. If you don’t need to set any of the other tabs, skip to step 8.
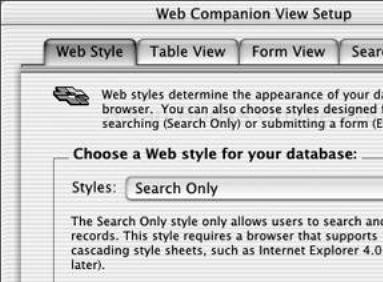
Figure 18.17. To set a style for your Web database, click the Web Style tab in the Web Companion View Setup dialog box.
Table 18.1. Choosing a Web Style
WEB STYLE
WORKS WITH BROWSERS
DETAILS
Soft Gray
version 4 or later; must support Cascading Style Sheets (CSS)
Opens in Form View
Lavender
version 4 or later; must support CSS
Opens in Form View
Wheat
version 4 or later; must support CSS
Opens in Form View
Blue and Gold 1
version 3 or later; must support CSS
Opens in Form View
Blue and Gold 2
version 3 or later
Opens in Table View
Fern Green
version 3 or later
Opens in Table View
Search Only
version 4 or later; must support CSS
Users can only find and view records
Entry Only
version 4 or later; must support CSS
Users can only add records
(works like a guestbook)
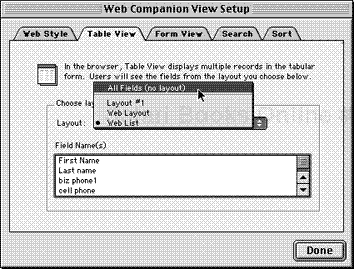
After you make your style choice, click the Table View tab (Figure 18.19) to set how the Web Companion will display multiple records. Use the Layout pop-up menu to choose which layout you want Web visitors to see. The Field Name(s) window will list all the fields in the chosen layout. This is where the advantage of creating special Web layouts for the file with a limited number of fields becomes obvious. If, however, you want to include every single field, select the Layout pop-up menu’s first choice: All Fields (no layout). If you don’t need to set any of the other tabs, skip to step 8.
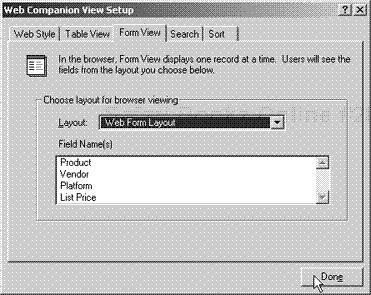
Click the Form View tab (Figure 18.20) to set how the Web Companion will display single records. Again, use the Layout pop-up menu to choose which layout you want Web visitors to see. If you don’t need to set any of the other tabs, skip to step 8.
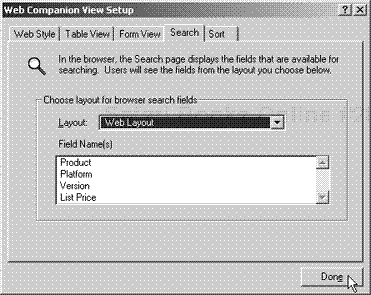
Click the Search tab (Figure 18.21) to see which fields will be visible to your Web visitors based on the Layout chosen. If you need to narrow which fields can be searched, you’ll need to exit the Web Companion View Setup dialog box and create a new layout for the file. If you don’t need to set any of the other tabs, skip to step 8.
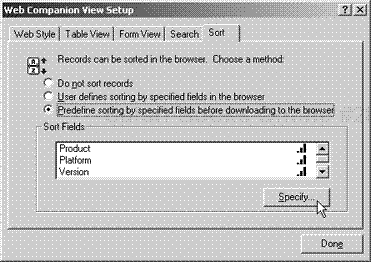
Click the Sort tab (Figure 18.22) to set how the Web Companion will handle sorting. By default, the Do not sort records radio button will be selected. If you don’t want users to be able to sort the records, skip to step 8.

Figure 18.22. By default, sorting is turned off in the Web Companion. Select the second or third radio button to enable sorting.
To let users sort the file, select the second radio button (User defines sorting...) and click Specify (Figure 18.23). When the Specify Sort dialog box appears (Figure 18.24), all the file’s fields—even those not visible in the chosen layout—will be listed on the left. Select any field in the left-hand list that you want to sort by, click Move, and it will be added to the Sort Order list. Continue adding fields, reordering them if needed by dragging the double arrows, and click OK when you’re done.
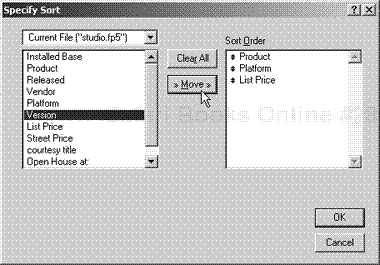
Figure 18.24. Select a field in the left-hand list, click Move, and it will be added to the Sort Order list. See the Tips on the next page for a workaround.
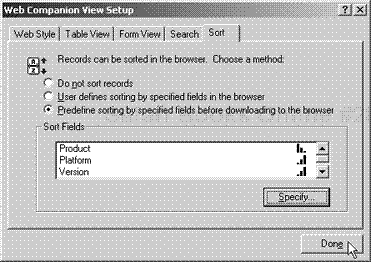
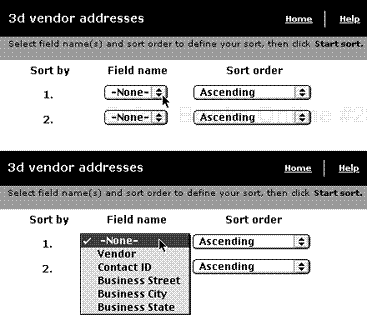
If you want to control the sort, choose the third radio button (Predefine sorting...) and click Specify. When the Specify Sort dialog box appears (Figure 18.25), select fields on the left and click Move to add them to the Sort Order list. To set how each field is sorted, select it in the Sort Order list, then choose Ascending order..., Descending order..., or Custom order.... Click OK when you’re done and your sort orders will appear in the Sort tab (Figure 18.26).
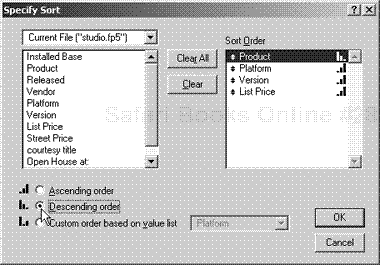
Figure 18.25. To control the sort yourself, choose the third radio button in Figure 18.22 and use the buttons in the Specify Sort dialog box.
When you are finished with the Web Companion View Setup dialog box, click Done and the current Web database will be configured based on your choices.

Tips
If you forget to set up sorting in step 7, the Web user won’t be able to set any fields for sorting (top, Figure 18.27). If you select the User defines sorting... radio button in step 7, users will be able to choose fields for sorting (bottom, Figure 18.27).
As noted in step 7, all of a file’s fields will be visible in the Specify Sort dialog box (Figure 18.24). If you don’t want Web visitors to see those fields, duplicate your original file, delete all the extraneous fields, and publish that file on the Web instead.
You can see how your Web databases look and test how they operate before publishing them to the Web or your inhouse intranet by setting up a local connection on your own computer. In Windows, it couldn’t be easier. On the Mac, it’s a wee bit more involved.
Make sure you’ve opened the FileMaker databases you want to share and that you’ve activated Web sharing for each.
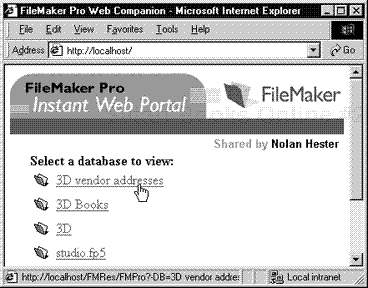
Launch your Web browser and in the Address or Location text window type
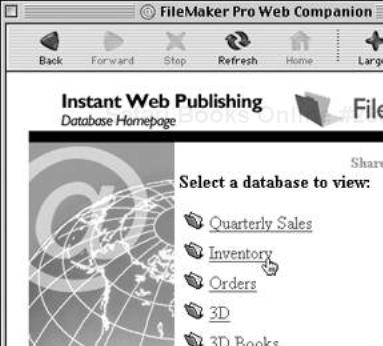
http://localhost/and press . FileMaker’s Instant Web Portal will appear within the browser, displaying all the open databases for which you have activated Web sharing (Figure 18.28). Click any of the listed databases to test their various views.
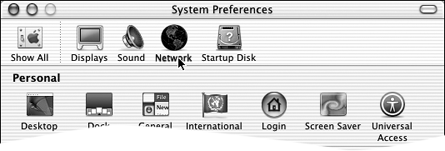
Choose Apple > System Preferences and click the Network icon when the System Preferences dialog box appears (Figure 18.29).
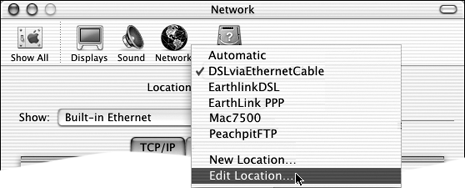
When the dialog box’s Network pane opens, click the Location pop-up menu and choose Edit Location (Figure 18.30).
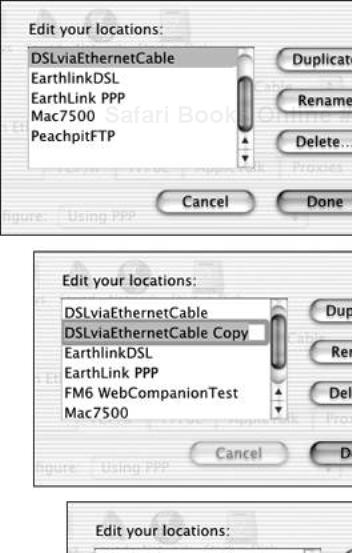
When the Edit your locations dialog box appears, your current location will be highlighted. Click Duplicate (top, Figure 18.31) and then rename the location copy when it appears (middle, Figure 18.31). Give it an easy to recognize name, such as
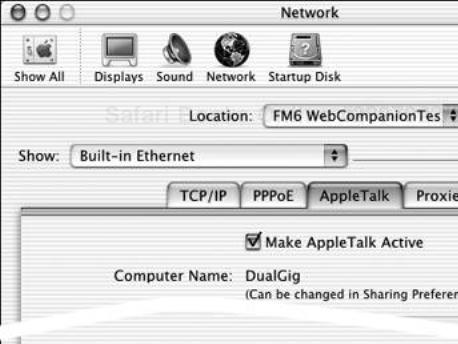
FM6 WebCompanionTestand click Done (bottom, Figure 18.31).When the Network pane of the System Preferences dialog box reappears, make sure the Location pop-up menu bar is displaying your new test name, and choose the Make AppleTalk Active checkbox (Figure 18.32). Click Apply Now and wait until the button changes from gray back to its default Aqua color, which indicates AppleTalk is now active.
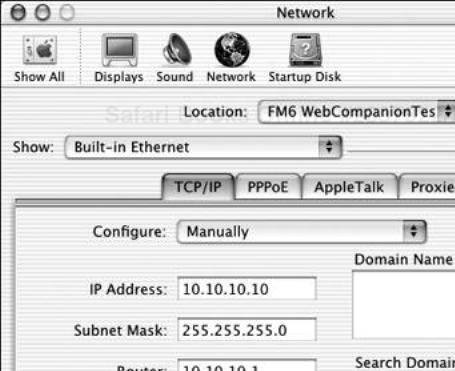
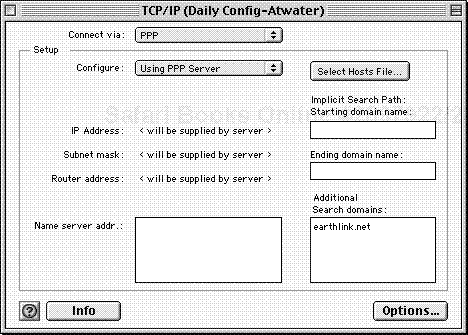
Now click the Network pane’s TCP/IP tab, set the Configure pop-up menu to Manually, and type
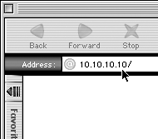
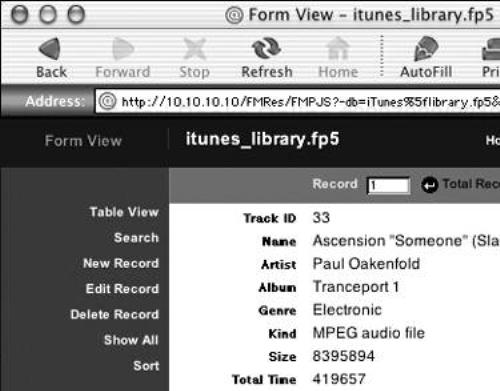
10.10.10.10into the IP Address text window and10.10.10.1into the Router text window (Figure 18.33). Leave the Subnet Mask text window as is and click Apply Now.Launch your Web browser and type into the Address or Location text box:
10.10.10.10/and press (Figure 18.34). (The
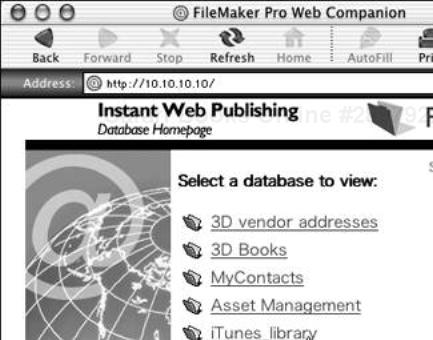
 http://part of the address will be added automatically.)The Instant Web Publishing Database Homepage will appear in the browser window and display the names of any FileMaker databases with Web sharing activated (Figure 18.35). Click any of the listed databases to test their various views (Figure 18.36).
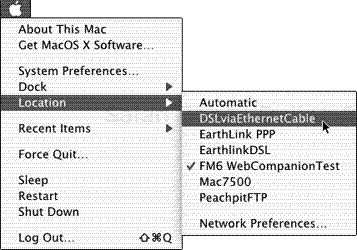
Once you’re done testing, you can easily switch back to your original network settings by choosing Apple > Location and making a choice from the sub-menu (Figure 18.37). And because you gave the Web Companion test setting a clear name, it’s easy to use the sub-menu to switch to it any time.
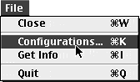
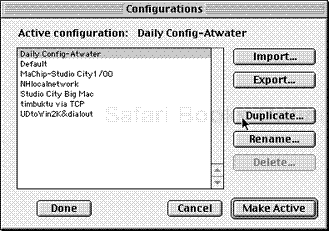
Open your TCP/IP control panel (Figure 18.38), then choose File > Configurations (Figure 18.39).
When the Configurations dialog box appears, select your current configuration and choose Duplicate (Figure 18.40).
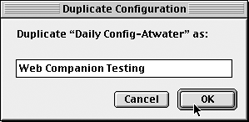
When the Duplicate Configuration dialog box appears, type in
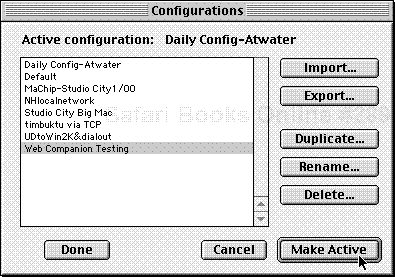
Web Companion Testingand click OK (Figure 18.41).When the Configurations dialog box reappears, select the Web Companion Testing configuration and click Make Active (Figure 18.42).
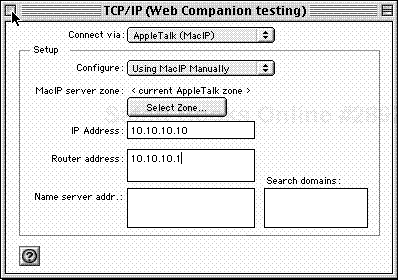
When the TCP/IP control panel for Web Companion testing appears, use the Connect via pop-up menu to select AppleTalk (MacIP) and choose Using MacIP Manually in the Configure pop-up menu. Type
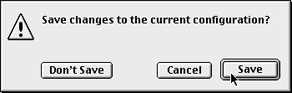
10.10.10.10into the IP Address text window and10.10.10.1into the Router address text window. When you’re done (Figure 18.43), close the window.Click Save when asked if you want to save the new configuration (Figure 18.44).
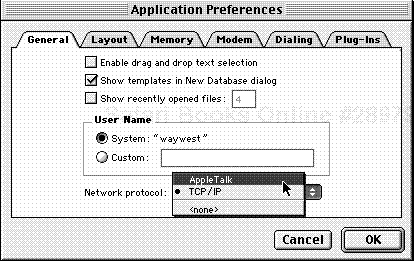
Switch to FileMaker and choose Edit > Preferences > Application. When the Application Preferences dialog box appears, switch the Network protocol to AppleTalk using the pop-up menu (Figure 18.45). Click OK to close the dialog box.
Restart FileMaker to switch the networking protocol, then open the FileMaker databases you want shared.
Now, launch your Web browser and type into the Address or Location text box:
10.10.10.10/and press (Figure 18.46). (The http://part of the address will be added automatically.)The Instant Web Publishing Database Homepage will appear in the browser window and display the names of any FileMaker databases with Web sharing activated (Figure 18.47). Click any of the listed databases to test their various views.
Once you’re done testing, be sure to switch your TCP/IP control panel back to its original setting and switch FileMaker back to its original network protocol.

Once you publish your database to the Web or company intranet, you’ll need to let users know how to reach it so they can put it to work. Typically these first users will be customers or co-workers. There are a couple of ways to point them your way.
You can simply tell them the IP address for the computer hosting the Web database, which they can type directly into their Web browser’s location window. Tell visitors to bookmark your database’s page in their browsers once they reach the page, and they’ll never have to key in that pesky number again.
If you already have a Web site, you can avoid the whole “What’s an IP address?” issue by putting a Web link on the site that points to the Instant Web Publishing home page.