Lesson Files | FCP4 Book Files > Lessons > Lesson 16 Project |
Media | Sahara folder, Titanic folder |
Time | This lesson takes approximately 60 minutes to complete. |
Goals | Blend clips to create a comp Apply a composite mode Apply a Luma Key filter Apply a Chroma Keyer filter Work with generated items Display filter keyframes in the Timeline Add keyframes in the Timeline Add filter keyframes in the Viewer Render and export a comp |
Up until now, you have been placing clips side by side in the Timeline, building horizontally or sequentially in time. In this lesson, you will learn how to lay clips on top of each other to build vertically, or at the same moment in time. By layering clips over one another and allowing them to blend together, you create a composite image that shows a portion of all the original clips displayed at the same time. You see many examples of this on TV. The weather person is shot against a blue or green screen as the foreground image, and a weather map is composited behind the person as the background image. There are several ways you can composite clips together. In this lesson, you will build vertically in the Timeline to create visual composite images using different filters, modes, and generated items.
In this lesson, you will launch Final Cut Pro by opening the lesson project file.
Navigate to the Lessons folder and double-click the Lesson 16 project file.
Play the Finished Comps sequence to see what you will create in this lesson.
In the Browser, double-click the sequence named Building Comps.
This sequence has just the clips on the V1 track from the Finished Comps sequence. During this lesson, you will add clips on top of these clips to create composite effects.
When you place one clip on top of another in the Timeline without altering the clips in any way, only the upper clip is visible. By changing opacity or applying filters or composite modes, you can combine or composite these clips together to create one image. Sometimes you composite clips out of necessity to cover up something you don't want to see in an image. Other times it is to create a visual effect by combining the foreground from one clip with a background image from another.
In the following exercises, you will place four new clips over four existing clips in the Timeline. Then you will change the clips in different ways to create four composite effects.
One way to build a composite image is to blend two images together. To do this, you can simply change the opacity of the clip above to allow the clip below to show through. Depending on the amount of opacity change in the upper clip, either more or less of the lower clip will be revealed.
In the Timeline, play the first clip, distinctive life vid. Park the playhead at the head of the sequence.
From the Browser, open the golden valley clip into the Viewer and play it. Edit the first eight seconds of the clip to the V2 track of the Timeline at the head of the sequence.
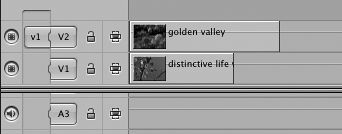
Click the Clip Overlay control in the lower left of the Timeline to turn on the overlay line, or press Option-W.
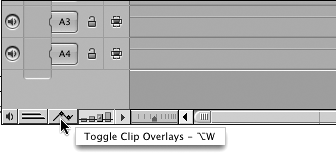
A thin, black line appears in the upper area of each clip in the Timeline.
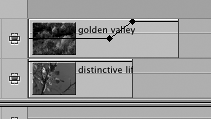
Drag the black opacity line down to about 50% in the upper clip, golden valley, and play the clip from the beginning.
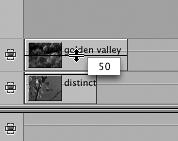
With the opacity at 50%, the distinctive life vid clip below is revealed in the Canvas.
Adding keyframes to an opacity line can make the clip opacity fade in and out. You add keyframes to the opacity line just as you did to the audio sound level line, by using the Pen tool.
Hold down Option and move the pointer over the opacity line in the middle of the golden valley clip. When you see the Pen tool appear, click the opacity line.
Using Option-click, set another keyframe in this clip close to where the clip below it stops.
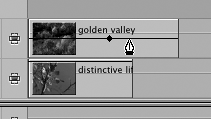
Drag the second keyframe up to 100% and play the clips.
Turn off the Clip Overlay line by clicking the Timeline control, or pressing Option-W.
In addition to changing opacity, you can also blend clips together by applying a composite mode to the upper clip. A composite mode combines two or more images together by using a mathematical equation. The resulting image often produces a composite that is at times more compelling than the two original clips on their own. The Final Cut Pro composite modes function similarly to Adobe Photoshop's composite modes and Adobe After Effects transfer modes. Composite modes appear under the Modify menu and on the clip's contextual menu, but they are not real-time effects.
Select the golden valley clip in the Timeline.
Choose Modify > Composite Mode > Add.
The Add composite mode combines the color values of the pixels of the clips.
Since Composite Modes are not real-time effects, press Option-P to preview this comp.
This time Ctrl-click the golden valley clip and choose Composite Modes > Lighten from the contextual menu.
The Lighten composite mode compares the color values of the pixels in the upper clip with the pixels in the lower clip and selects the lighter of the two.
Another way to composite two clips is to make a clip's background transparent. This isolates just the foreground of the clip, perhaps a person or object. When composited with another clip that has an appropriate background, the two images together can create a totally different sense of time and place than do the single clips alone. This is called a key effect and is created by applying a Key filter.
There are two primary types of keys. One is used to key out the luminance of an image area, based on its darkness or brightness. The other is used to key out a particular color, or chrominance, of the image. In the following exercise, you will key out the black background of an image taken from within the underwater MIR sub. Then key the foreground of that image over a clip of the divers.
In the Timeline, play the second clip, diver two subs.
This clip will be the background clip when you key another clip over it.
In the Browser, open the red display cu clip and play it.
This is a digital readout from inside the MIR sub instrument panel. When you key out the black area of the image, the digital numbers can be keyed on top of the diver two subs clip to indicate how deep they are diving.
To edit just the video of this clip, make sure the a1 and a2 Source controls are disconnected from the A1 and A2 Destination controls.
Park the playhead at the beginning of the diver two subs clip and edit the red display cu clip on V2 at this location.

Select the red display cu clip in the Timeline and choose Effects > Video Filters > Key > Luma Key.
Double-click this clip to open it from the Timeline into the Viewer, and park the playhead over the clip so you can see it in the Canvas. Click the Filters tab in the Viewer
Click the Key Mode pop-up and select Key Out Darker to key out the black portion of this image.
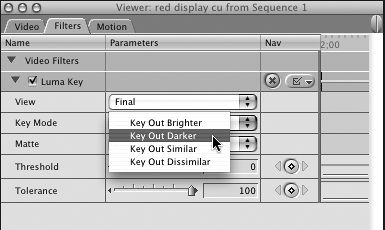
With the black keyed out, the numbers now appear over the diver two subs clip in the Canvas.
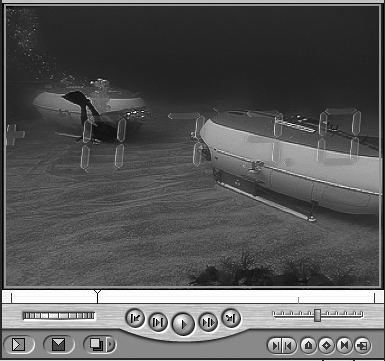
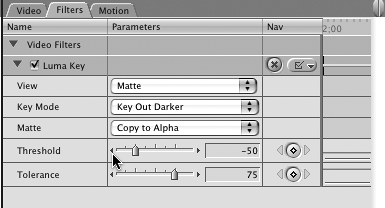
To fine tune the key, set the Threshold to –50, and the Tolerance to 75, and preview the comp.
Now click the View pop-up menu and choose Matte.
With Matte selected, you see only the alpha channel of the image. As you can see, some of the numbers are not pure white.
All video clips are made up of three channels of information: red, blue, and green—or RGB. Images are formed by the combination of these three colors. When you add certain filters onto clips, such as keys and mattes, a fourth channel is created: the alpha channel. Alpha channels are displayed in black and white. The white area is opaque and protects or maintains a portion of the foreground image. The black area is transparent and allows the background image to show through.
Click the left Threshold adjustment arrow until the letters appear with no black in them, around –65. Then click the View pop-up menu and select Final to see the red letters against the background. Preview the comp.
NOTE
In Lesson 18, you will resize and reposition the red digital numbers to be smaller and in the lower portion of the frame.
You can also key out a specific color from an image to allow a background image to show through. There are different filter options when keying out color in an image. If a special blue or green screen was used behind a person or object, you can apply the Blue and Green Screen filter. But you can also remove a different color from an image that was not shot against a blue or green screen. To do this, you use the Chroma Keyer filter. In this exercise, you will remove the sky from behind a tree and then key the tree over a new background.
Play the shadow on cliff clip in the Timeline.
From the Browser, open the distinctive life vid clip in the Viewer and play it.
This clip has a fairly solid sky color. An Out point is already marked.
Edit this clip to the V2 track over the shadow on cliff clip, then double-click to open the clip in the Viewer. Park the playhead over the image in the Timeline.
Select Effects > Video Filters > Key > Chroma Keyer and click the Filters tab. Then click the Chroma Keyer Visual button, or click the Chroma Keyer tab.
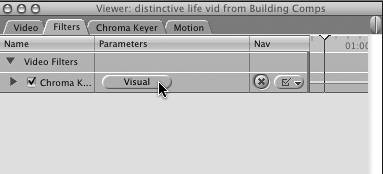 The keying options appear in a graphical layout, as they did with the Color Corrector filter.
Click the Select Color tool and in the Canvas click the sky in the upper-right corner.
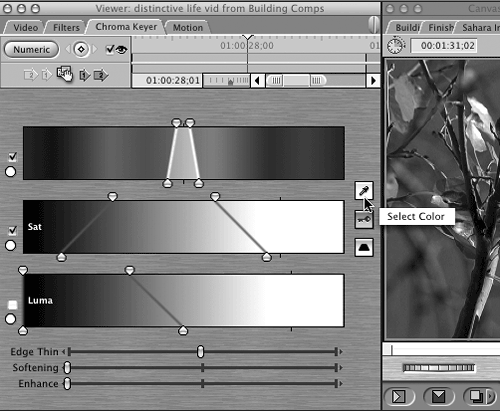
By sampling the sky, the visual indicators change to reflect the sky's color hue, saturation, and luminance in the image.
TIP
To add to the current color range of the sky, click the Select Color tool and hold down Shift while you click again in an area of sky that has not been removed.
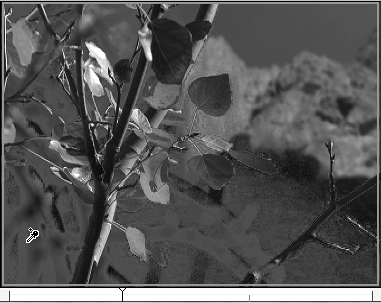
To finesse this key further, drag one of the lower Saturation nodes to the right to soften the saturation range. Look at the Canvas to see how much to drag.
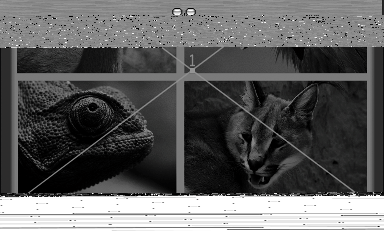
If necessary, drag the lower Luma nodes outward to soften the luma range. Continue making adjustments to the filter until you have a good color key for this image. Then preview the comp.
When you composite a foreground clip over a background, if the background clip is in sharp focus, the comp may not appear realistic. You can try adding a blur filter to the background clip, which will create a sense of distance.
In the Timeline, double-click the shadow on cliff clip to open it in the Viewer. Choose Effects > Video Filters > Blur > Gaussian Blur and then play the comp.
In the Filters tab, adjust the Radius of the blur to 4 and preview the comp again.
Sometimes you have a clip where the background can't be keyed out because there isn't a consistent color or luminance level, or perhaps there is an object in the background of the image. This may require separating the unwanted portion of an image from the usable foreground a different way. In Final Cut Pro, this is done with a matte. Mattes cover or suppress the portion of an image you do not want to see. In fact, some mattes are referred to as garbage mattes because they keep the garbage or unwanted portion of an image out of view.
In the Timeline, play the titanic bow clip.
This clip will be the background for a different foreground clip from the MIR sub instrument panel.
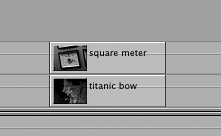
From the Browser, open the square meter clip and play it. Edit it to the Timeline directly above the titanic bow clip.
You will create a matte around the System 1 meter to separate it from the rest of the image. Since the meter is square, you need only four points to create the matte.
Select the square meter clip and choose Effects > Video Filters > Matte > Four-Point Garbage matte. Then park the playhead over the image and double-click it to open it in the Viewer.
Click the Filters tab to reveal the Four-Point Garbage matte parameters.
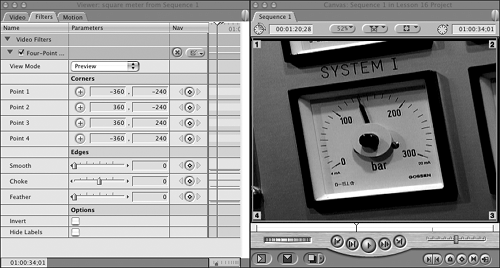
In the parameters area, there are four points that can be selected and set. In the Canvas window, the default points are set in each of the corners and are numbered clockwise from the upper-left corner.
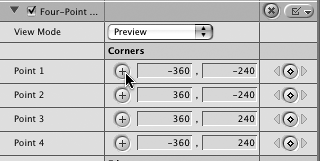
To set the first point of the matte, click the crosshair in the Point 1 parameter line in the Viewer and then click in the upper-left corner of the meter in the Canvas window.
In the Canvas, with the first point set, you can see the background image begin to appear through the upper-left corner, which is being masked out by the garbage matte.
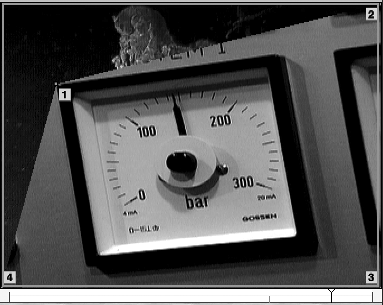
Set Point 2 in the upper-right corner the same way. Then set Point 3 in the lower-right corner, and Point 4 in the lower-left corner.
In the Feather slider, click the right arrow twice or enter a setting of 2.
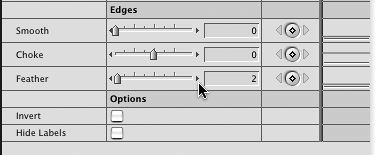
NOTE
In Lesson 18, you will also resize and reposition this meter.
In the Filters tab, click the Invert check box under Options in this matte filter and look at the image in the Canvas.
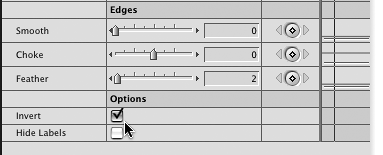
When you invert a matte, the portion you identified becomes the area that is masked out. In this situation, the titanic bow clip appears where the meter was.
The clips you have been using so far have been captured from source material or imported from other files. But Final Cut Pro can create certain clips internally. Some of these generated items include text, color bars and tone, slugs, colored mattes, gradients, and shapes. Some generated items stand alone, such as color bars at the head of a sequence or a slug clip used to hold the place of a missing graphic file. Other items can be used in conjunction with video clips as part of a composite.
Like filters and transitions, generated items can be selected from two different locations. One is in the Effects tab in the Browser. The other is from a pop-up menu in the Viewer. Generated items follow the same protocol that freeze frame and still images do. When selected, they appear in the Viewer with a marked 10-second default duration, but they originate with a length of 2 minutes. All generated items are video-only except for color bars and tone.
Since generated items are often used in conjunction with other clips already in the Timeline, you can use a specific type of edit that will automatically place the generated item on top of an existing clip and match that clip's length. Placing one clip on top of another is called superimposing.
In this exercise, you will superimpose an oval Shape clip on top of a titanic ocean clip to re-create the view from within one of the sub windows. This effect can also be used to create a telescope or binocular view, or simply to zero in on one part of an image. But first you will select the shape from the generated items list.
In the Viewer, click the Video tab and then the Generated Items pop-up menu in the lower-right corner.
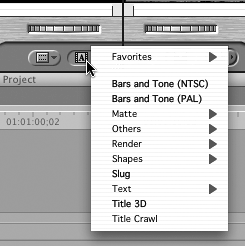
From the Generated Items pop-up menu, select Shapes > Oval.
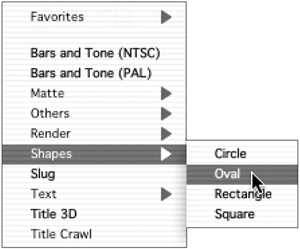
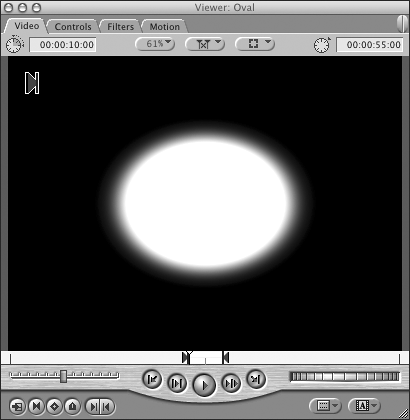
In the Viewer, an Oval clip appears with a white oval image against a black background. There is a 10-second marked duration.
In the Timeline, place the playhead over the fifth clip, sea bottom cu, and patch the v1 Source control to the V1 destination track.
This clip is less than 10 seconds long, and you need only enough of the Oval clip to cover its length. Superimposing the Oval clip over the V1 clip will automatically match the length of this clip. In addition, Superimpose always places a clip one track above the one that has been targeted. In this case, with V1 targeted, the clip will appear on the V2 track.
Drag the Oval clip from the Viewer to the Canvas Edit Overlay and drop it on the Superimpose section.
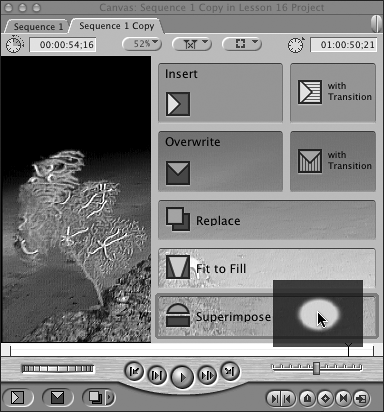
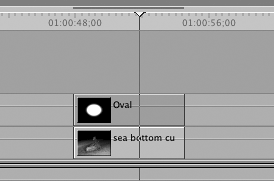
In the Timeline, the Oval clip is placed over the sea bottom cu clip and is the same length as the lower clip.
NOTE
You will work with other generated items in Lessons 18 and 19.
In order to see the sea bottom cu clip through the oval shape, you have to apply a Luma Key filter to the shape to key out the white area. Once you do this, you can make adjustments to the oval's size.
Select the Oval clip in the Timeline and choose Effects > Video Filters > Key > Luma Key.
The sea bottom cu clip appears through the keyed-out white oval area.
Double-click the Oval clip in the Timeline to open it in the Viewer and click the Controls tab.
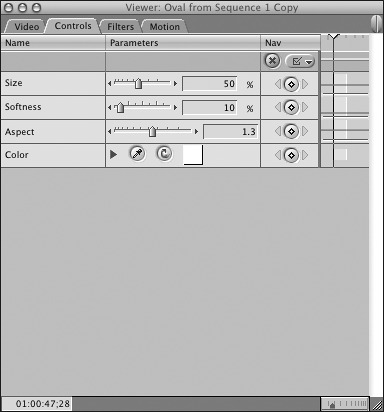
In the Controls tab, change the size to 85%.
Click the Filters tab and change the Threshold to –75. Press Return and preview the comp.
Now it appears as though someone is looking out through a porthole to the ocean scene.
You have been making changes to a clip's filter parameters in the Viewer Filter tab. But you can also change certain filter parameters in the Timeline. Similar to the Clip Overlay lines that appear over clips, there are Clip Keyframe lines that appear under clips in the Timeline to indicate when a filter has been added.
The Clip Keyframe lines can be toggled off or on in the Timeline. A contextual menu attached to the Clip Keyframes control allows you to select the specific information you want to see displayed.
In the lower left of the Timeline, click the Clip Keyframes control, next to the Clip Overlays control. The shortcut to toggle Clip Keyframes off and on is Option-T.
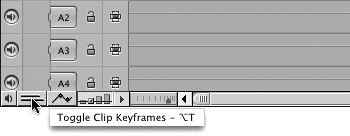
With the Clip Keyframes active, the Timeline tracks expand vertically, and blue or green bars may appear under the clip.
Different information can be displayed in the Clip Keyframes control, as shown in the following steps.
Ctrl-click the Clip Keyframes control.
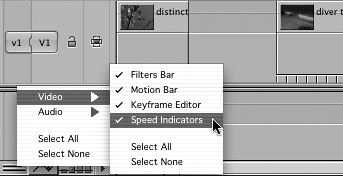
From the contextual menu, select Video > Speed Indicators to toggle this display off if it is checked. Ctrl-click the Clip Keyframes control again and toggle off the Keyframe Editor display. Make sure Filters Bar and Motion Bar are both checked.
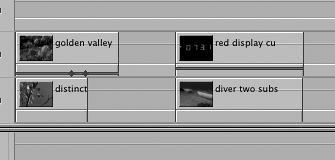
The blue motion bar under the golden valley clip indicates that a motion effect has been applied, in this case opacity. A green filter bar appears under the red display cu clip, indicating that a filter has been added.
NOTE
Other motion effects will be covered in Lesson 18.
Click the Clip Overlays control, or press Option-W, to turn on the black overlay lines in the clip.
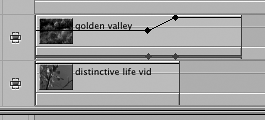
The keyframes in the motion bar align with the keyframes in the overlay line.
Toggle off the Clip Overlay lines by clicking the Clip Overlays control, or pressing Option-W.
Look at the green bar under the second comp.
A green bar indicates that a filter has been added to one of these clips. It is positioned higher in the track than the motion bar.
Ctrl-click the Clip Keyframes control and from the contextual menu select Video > Keyframe Editor.
When the Keyframe Editor is on, a space appears beneath the clip where you can adjust filter parameters or add filter keyframes, just as you did on the opacity overlay.
Ctrl-click the gray area under the red display cu clip and select Luma Key > Threshold.
NOTE
Depending on the filter, different parameters will appear here. The options below Luma Key are all motion effects.
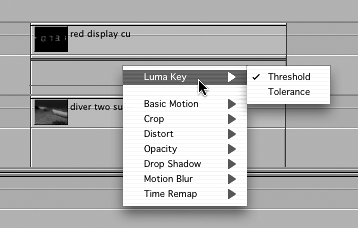
Move the playhead into the second comp. Move the pointer over the keyframe line under the red display cu clip. When it turns into the resize arrow, drag the line down to –100. Look at the image in the Canvas.
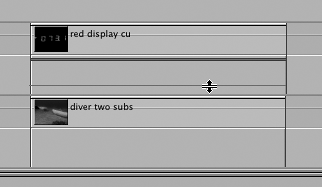
With the threshold at –100, there is no active luma key.
Drag the line up and down to see how it affects the key, then return it to –60 or an optimum setting.
You can apply keyframes to filters either in the Timeline or in the Viewer. In this exercise, you will apply two keyframes at the beginning of the comp to change the threshold of the key over time. You will add these keyframes to the Keyframe Editor in the Timeline.
Hold down the Option key and move the pointer over the filter keyframe line beneath the red display cu clip in the Timeline.
When the pointer changes into a Pen tool, click once toward the beginning of the clip to set a starting keyframe, and again after that to determine the destination keyframe.
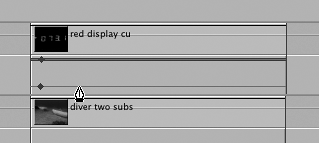
Drag the first keyframe down to –100, where the threshold is at the lowest and no black will be keyed out.
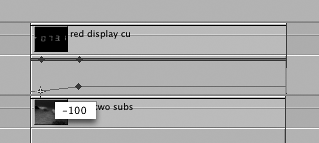
Press Option-P to preview the comp.
As the threshold changes, more of the background image appears.
To raise the threshold at the end of the clip, so the numbers themselves are keyed out, Option-click two more keyframes toward the end of the clip.
Drag the last keyframe up to 100 and press Option-P to preview the end of the comp.
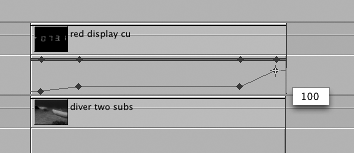
As you set keyframes in the Timeline, they are also being placed in the Viewer keyframe area as well. You can place keyframes in either location.
To make the Viewer wider, drag the left Viewer edge into the Browser window area as far as possible. Then drag the right edge of the Viewer into the Canvas area as far as possible.
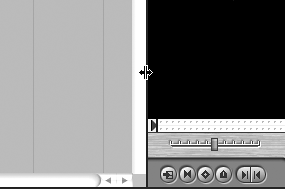
Double-click the red display cu clip to open it in the Viewer, then click the Filters tab.
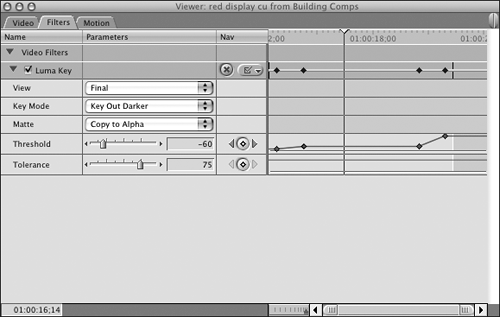
To the right of the Filter parameters is a small representation of the Timeline. Since you have added keyframes in the Timeline already, those same keyframes appear in the Viewer timeline along with a playhead.
To place a keyframe in the Viewer timeline, move the playhead to the center of the clip area and click the Keyframe button on the Threshold parameter.

Drag the keyframe up in the Viewer timeline to 100 and press Option-P to preview the clip.
To delete one of these keyframes, hold down Option and move the pointer over the keyframe. When the pointer changes to a Pen tool with a minus sign, click the keyframe.
Depending on their complexity, composite images may not always play back smoothly in real time. If you want to see every frame of the comp play in real time, you have some options. You can preview the comp, render it load it into RAM, or export the comp and import it back into the project as its own master clip.
Press Option-P to preview the square meter comp.
To load this clip into RAM, move the playhead over the clip and choose Tools > QuickView, or press Option-8.
Click the Play button in the QuickView window.
The clip will play slowly as it is loaded into RAM. When it has finished loading, the clip will play in real time. Close the QuickView window when you are finished.
To render this comp, choose Safe RT from the RT pop-up menu, select it, and press Cmd-R. Play the clip.
After rendering, the comp plays smoothly in real time.
You can also export the distinctive life vid chroma key comp so you can use it as a separate clip in this and other projects.
Mark an In point at the beginning of the distinctive life vid comp in the Timeline, then mark an Out point at the end of the clip.
TIP
Make sure you see the end-of-clip indicator in the lower-right corner of the Canvas. If necessary, move the playhead back one frame.
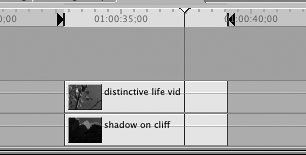
Choose File > Export > QuickTime Movie to export it using the current Final Cut Pro settings.
Enter leaves comp as the name, select Media > Exports as the destination, click the Make Movie Self-Contained box, and click Save.
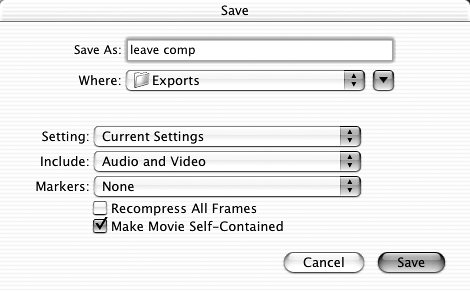
To import this clip into this project, choose File > Import > Files, or press Cmd-I.
Navigate to the Media > Exports folder and select leaves comp. Click Choose.
In the Browser, double-click to open the leaves comp clip into the Viewer.
The comp is a single clip and can be edited or handled as one clip.
Always save your project before you close it or quit Final Cut Pro.
How to blend clips to create a comp
How to apply a composite mode
How to apply a Luma Key filter
How to apply a Chroma Keyer filter
How to work with generated items
How to display filter keyframes in the Timeline
How to add keyframes in the Timeline
How to add filter keyframes in the Viewer
How to render and export a comp
