Lesson Files | FCP4 Book Files > Lessons > Lesson 19 project |
Media | Sahara folder, Music folder, Graphics folder |
Time | This lesson takes approximately 1 hour to complete. |
Goals | Create text edits Work with the text options Superimpose a title Create a lower third Create animated text edits Work with multilayered graphic files //Nest sequence layers Create 3D effects Add motion effects to text |
Text can be added to your project for a number of different purposes and in a number of different ways. You can create stand-alone text edits for something as mundane as a slate or production title card before your sequence even begins. You can add text on top of existing sequence clips to identify a person, place, or thing. You can add text as an effect, such as a typewriter revealing character by character, or an emergency warning across the bottom of the screen. And most projects require either an opening or a closing title and a credit roll of some type. In this lesson, you will create, manipulate, and edit text to the sequence.
To get started in Lesson 19, you will launch Final Cut Pro and open the project for this lesson.
Text is one of the generated items that Final Cut Pro can create. Within that category are different types of text options, each with a different set of parameters that can be controlled and adjusted. Although you may choose a graphic artist or use the bundled LiveType software to create special titles for your project, the generated text options within Final Cut Pro offer many options to create and control text edits.
The most basic of the text generators is Text. You can use this text option to create a number of text edits, including slates, simple titles, and a production title card that identifies the title of the sequence, film, or project. In this exercise, you will use this text item to place a title card in front of the sequence.
Open the Adding Text - Starting sequence in the Timeline, and position the playhead at the head of the sequence.
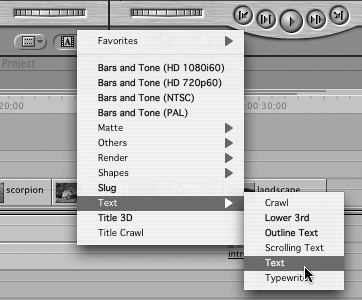
In the Viewer, click the Generator pop-up menu and select Text > Text.
In the Viewer, the words SAMPLE TEXT appear over the image area. This is a default text line. The In and Out points create a 10-second default duration, which can be changed in the Editing tab of the User Preferences.
For the purposes of this exercise, make sure that View > Background > Checkboard 1 is selected.
All text edits contain an alpha channel. This allows you to use the text as a stand-alone item or superimposed over another clip. When you see a checkerboard background behind the text, you are seeing the portion of the text image that is being dropped or keyed out.
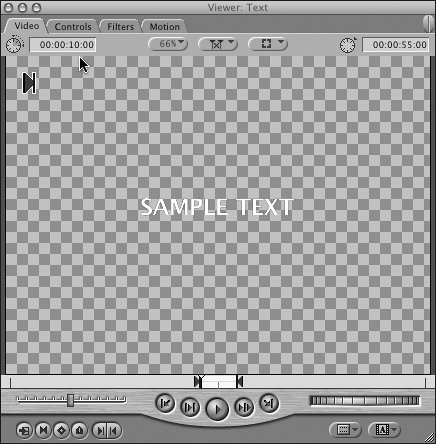
Change the duration to 5 seconds.
Edit the text into the Timeline by dragging it to the Canvas overlay as an Insert edit at the head of the sequence.

Move the playhead to the center of the Text clip in the Timeline to see it in the Canvas.
Once you edit a generated Text item into the sequence, you make changes to it the same way you would if you were adding a filter to a sequence clip. You open it back up in the Viewer. As with other generated items, Text provides a Controls tab in the Viewer where you can modify its attributes.
To make changes to the Text clip, double-click it to open it in the Viewer.
Click the Controls tab in the Viewer.
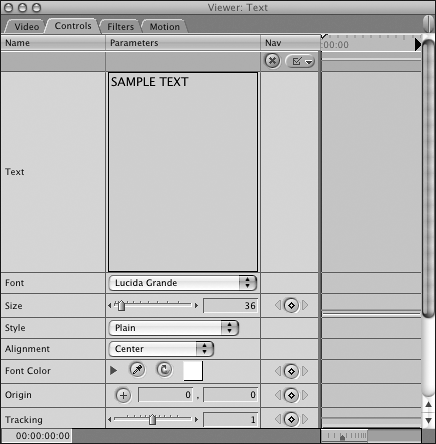
Note the attributes you can modify, such as Font, Size, Style, and Alignment. Scroll down to see the other attributes.
Click the SAMPLE TEXT, and when it's highlighted, type Sahara Documentary.

Press the Tab key to apply this information.
In the Canvas, you see what you have just typed.
Make the following text selections by selecting from the pop-up menus, adjusting the sliders, or typing the information.
Font: Arial Black
Size: 40
Alignment: Center
Click the Font Color tile box.

Select a bright yellow color and click OK.
Adjust the Tracking, Leading, and Aspect sliders to see how they affect the text in the Canvas. If you don't like a change, return to your previous settings by pressing Cmd-Z.
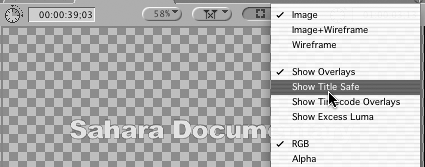
To double-check that the text is within the Title Safe area, select Show Title Safe in the Canvas View pop-up menu. Turn Title Safe off when you're finished viewing the text.
In this exercise, you will utilize the alpha channel of a text item by placing a title over a background clip. You will use the Superimpose edit option so the title that's edited is the same length as the background clip.
Park the playhead over the camels in distance clip and make sure the v1 source is patched to the V1 track.
Click the Viewer Video tab. From the Generator pop-up menu in the Viewer, choose Text > Text.
Drag the Text clip from the Viewer into the Canvas and drop it on the Superimpose section of the Edit Overlay.
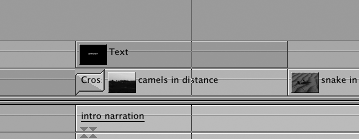
With the playhead parked over the clips, you see SAMPLE TEXT over the camels in distance background clip.
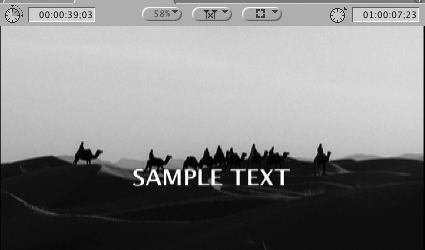
Double-click the new text clip in the Timeline to open it in the Viewer.
Click the Controls tab, and in the Text box, type Produced By.
Press Return, and type Mandalay Media Arts.
Lower thirds are lines of text used to identify a person, place, or thing in a clip. Final Cut Pro's Lower 3rd text clip is preformatted to automatically create two lines of text information in the lower left of the image area. You can choose to use only one line of text in a lower 3rd, but you cannot use more than two. The name Lower 3rd is derived from the placement of the text in the lower third of the image area.
In the Timeline, target the V1 track and move the playhead into the little fox clip.
Click the Video tab in the Viewer, then click the Generator pop-up menu and choose Text > Lower 3rd.
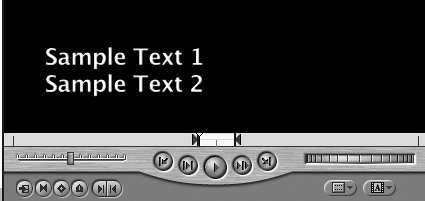
In the Viewer, a new text edit appears with two default lines of sample text. (The background of the screen shot above has been changed to black for easier viewing.)
Drag the clip into the Canvas and drop it on the Superimpose section of the Edit Overlay.

In the Timeline, double-click the Lower 3rd clip to open it in the Viewer.
Click the Controls tab.
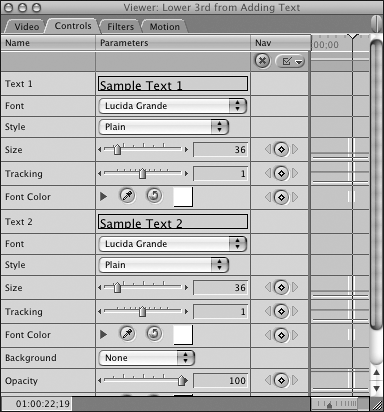
There are Sample Text 1 and Sample Text 2 entry areas, along with a separate set of attribute controls for each line of text.
Enter Ferrec Fox in the Text 1 box, and make it Arial Black, Italic, and 40 point.
Enter Nocturnal Omnivore in the Text 2 box, and make it Arial Rounded MT Bold and 30 point.
Scroll down to see the Background attribute. Click the Background pop-up menu and select Solid.

This places a solid bar behind the text. This bar can be used for style purposes or to help text be read more clearly.
Click the color tile, and select a light peach for the Lower 3rd background solid. Change the background Opacity to 20.
Play this clip.
Add a fade in and fade out to this Lower 3rd text edit.
Press Option-W to turn on clip overlays in the Timeline.
Move the pointer over the overlay line and press Option. When the Pen tool appears on your pointer, click to create two keyframes. Drag the first keyframe down and position it left toward the head of the clip. Position the second keyframe about 1 second in from the first one.
Option-click to add two keyframes toward the end of the clip.
Drag the last keyframe down to 0.

The Outline Text generator allows you to create an outline around the letters of your text, add a background image to your text, or even fill the text, outline, or background with different images from other clips. This exercise will guide you through some of Outline Text's possibilities, but there are numerous ways to adjust this type of text clip.
Park the playhead over the landscape clip.
In the Viewer, click the Video tab, and from the Generator pop-up menu choose Text > Outline Text.
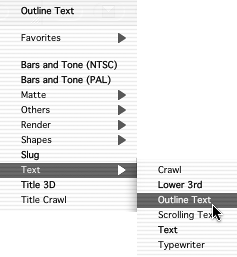
Drag the image from the Viewer to the Canvas and drop it into the Superimpose section of the Canvas Edit Overlay.
In the Timeline, double-click the Outline Text clip to open it in the Viewer. Click the Controls tab.
Type the word Sahara in the text box, and select Impact for the font and 150 for the font size. Press Tab or Return to see the results.
Change Line Width to 20 and Line Softness to 15.
Scroll down to the Text Graphic attribute.

To fill the text letters with a frame from a different clip, go to the Browser and drag the orange lizard clip back to the Text Graphic image well in the Viewer.

When you release the mouse button, the Text Graphic box displays the frame that will fill the text.
TIP
To fill the text with a different frame, open the clip in the Viewer and park the playhead on that frame. Then repeat the process of placing the clip in the Text Graphic box. You can also fill the outline of the text with a clip frame or graphic file as you did with the text. The Outline Text can be superimposed over another clip, as above, or stand alone as a main title within a sequence.
You can create credits as single edits with one name on the screen at a time. Or you can use the Final Cut Pro animated Scrolling text option to roll the credits over the screen, which is a standard for television shows and films.
Position the playhead at the end of the sequence. In the Viewer, click the Video tab.
Click the Generator pop-up menu and choose Text > Scrolling Text.
Edit the text clip into the Timeline as an Overwrite edit at the end of the sequence.
Double-click the Scrolling text clip to open it in the Viewer, and click the Controls tab.
Move the playhead to the middle of the Scrolling Text clip in the Timeline.
In the text entry area, enter the following information, including the asterisks between the credit and prerson's name, and press Return after each line.
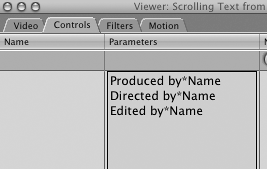
Produced by*Name
Directed by*Name
Edited by*Name
When you press Tab, Final Cut Pro will create two symmetrical columns separated by a gap where the asterisks were entered in the text. When no asterisk is entered, all the text is centered together.
Drag the scroll bar down to the lower Controls parameters, and adjust the Gap Width to 10% to increase the distance between the two columns.
To fade your credits in and out as they appear on and off the screen, enter a Fade Size value of 20%.
Change Leading to 100%.
To preview the clip, press Option-P.
There are two other animated text edits you can experiment with on your own: Crawl and Typewriter text. Crawl reveals text horizontally across the screen from the left or right. You may have seen a weather warning being broadcast this way. The Typewriter text reveals one letter at a time until the full text is revealed, as though a typewriter is typing the text.
Final Cut Pro can import and work with different types of graphic files. Working with a single-layered graphic file is no different from importing a video clip and editing it. The imported image always defaults to the duration given in the Freeze Frame/Still Duration in the User Preferences. You can also import multilayered Adobe Photoshop files and edit each layer separately within Final Cut Pro.
Before editing graphic files into your sequence, keep in mind that video's pixel aspect ratio is different than graphic files'. This is because computers and graphic programs display square pixels, whereas digital video uses non-square pixels. If you create a graphic of a circle and import it into Final Cut Pro, the output of that file will not look perfectly round. To be absolutely accurate, there are certain steps you can take when preparing your graphic files to accommodate this pixel difference. Use these numbers when working with DV video.
Begin with a file image size that is 720x534 pixels for NTSC and 768x576 for PAL. These are the square-pixel dimensions you should use in any still-image graphic application.
When you have completed the graphic, save a copy of it and change the image size to 720x480 for NTSC and 720x576 for PAL.
Without making changes to the 720x480 (720x576 for PAL) file, import it into Final Cut Pro.
When you import a graphic file that has layers, Final Cut Pro detects this and creates a new sequence to display those layers. In this exercise, you will import a multilayered Photoshop file of the Sahara desert and apply motion effects to it.
Make the Browser window active, and choose File > Import > Files or press Cmd-I.
Navigate to the Media > Graphics folder, and select the image named Sahara_Map(480).psd. Click Choose.
TIP
Sometimes it's helpful to include the pixel aspect ratio in the filename to be clear about which one to import.
In the Browser, a new sequence icon appears with the name of the graphic file.
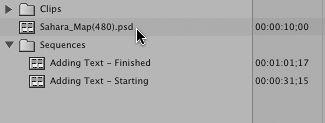
In the Browser, double-click the Sahara_Map(480).psd sequence to open it in the Timeline.
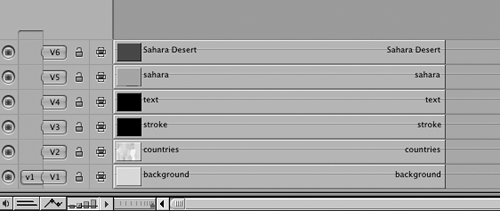
Each Photoshop image layer is placed on a separate track in an independent sequence. Here you can make changes to the individual layers.
Click the Visibility control for the text layer, since the names of the countries are too difficult to read at this size.
Press Option-W to toggle on the clip overlay lines. Drag the opacity line down to 56 for the background layer. Then adjust the opacity for the countries layer to 52.
Set opacity keyframes to fade the opacity of the Sahara Desert and sahara layers in and out.
Since this graphic file was imported as a sequence to accommodate for the layers, you can nest the entire graphics sequence into the Adding Text – Starting sequence. This will maintain the original layered files, but allow you to work with the graphic layers as a single layered clip.
Select the Adding Text – Starting sequence tab in the Timeline.
To edit the graphic layers sequence into the Adding Text – Starting sequence, drag it from the Browser to the Timeline, and drop it after the landscape clip as an Insert edit.

In the Timeline, a single nested clip is edited at this location.
Once a nested sequence has been edited into another sequence, you can still make changes to the individual layers.
To turn off the graphic background layer, double-click the Sahara_Map(480).psd clip and click the Vrisible button for the V1 track. Click the Adding Text – Starting sequence tab and play the clip.
Final Cut Pro includes external editors for four types of files: still image files, video files, audio files, and LiveType movie files. When you access an external editor, you can open other programs to make changes to files even as you edit. External editors have to be set before you can use them, and of course, you must have the specific software on your computer.
NOTE
LiveType is a 32-bit title-animating program that comes bundled with Final Cut Pro 4. It is covered in Lesson 20.
Click the Sahara_Map(480).psd sequence tab where all the original layers exist.
Choose Final Cut Pro > System Settings, and click the External Editors tab.
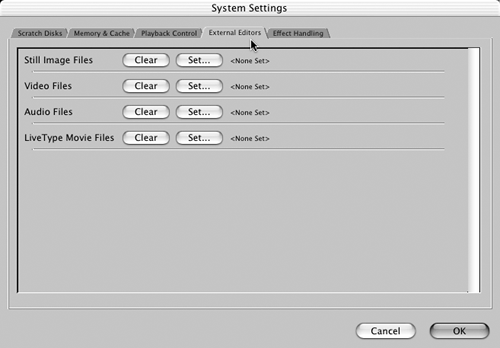
Click the Still Image Files Set button, and navigate to your applications folder to set the Still Image Files to Adobe Photoshop or another graphic program. Click Choose.
With the External Editor set, move the playhead over the clips and choose View > Clip in Editor.
The original file you imported is opened automatically in the application you set in the External Editors tab—in this case, Photoshop. At this point you can make certain changes, save them, and return to Final Cut Pro. Those changes will appear on the existing layers.
One of the most frequently used effects you can add to text is a drop shadow. In Final Cut Pro, this function is located in the Motion tab of the Viewer. You may want to use other motion effects to resize or reposition a graphic or text clip. You can also add motion keyframes to a text or graphic clip to create a motion path, just as you did in the previous lesson.
TIP
Always resize a text clip in the Controls tab using the Size slider, not on the Motion tab using the Scale slider. Using Scale will make the text look pixilated.
You will add drop shadow to the Text clip above camels in distance and reposition the text clip higher in the image.
In the AddingText – Starting sequence, move the playhead over the camels in distance clip, and double-click the Text clip above it to open it in the Viewer.
Click the Motion tab and enter 80 in the second Center field to reposition the text on the vertical axis.
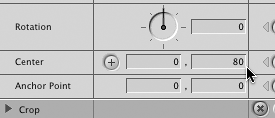
To add a drop shadow, click the Drop Shadow box to make it active.

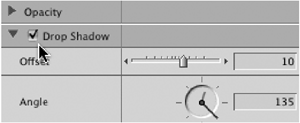
Click the Drop Shadow triangle to display the parameters, enter the following information, and press Tab.
Offset: 2.5
Angle: 140
Color: Tan
Softness: 16
Opacity: 60
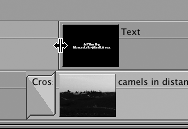
Make the text start at the end of the camels in distance fade-up by dragging the Text clip In point to the right to align with the end of the transition.
Press Option-P to preview the clip.
As with filters and motion effects, you can also animate certain text parameters, such as scale and tracking. Animating the tracking on a text clip allows you to stretch the letters horizontally over time. You can also animate motion effects when they're applied to a text clip. For example, when a drop shadow is applied, you can animate the offset over time so it appears as though the sun or light source is changing behind the text.
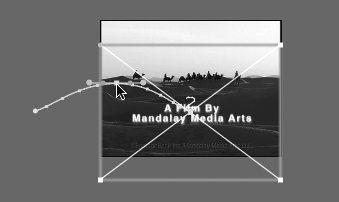
However, some of the more basic uses of motion effects as applied to text are to simply change the position of the text in the image area, or to move the text onscreen or off. Of course, you can make it zoom in and swoop past the viewer as well. Here you will move the text clip onscreen and then off.
In the Timeline, move the playhead to the beginning of the Text clip over the camels in distance clip.
To see outside the image area, click the Canvas Zoom pop-up menu and select 25%.
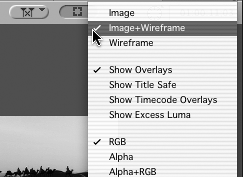
Click the Canvas View pop-up menu and choose Image+Wireframe, or just press W.
Hold down the Shift key as you drag the text offscreen to the left until you no longer see the s in Arts.
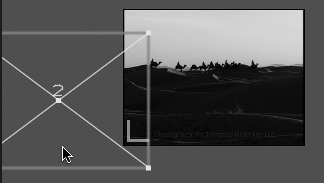
Press Ctrl-K to set a keyframe for this starting position.
In the Timeline, press Shift-right arrow to move the playhead 1 second to the right.
Hold down Shift as you drag the text into the center of the screen.
A keyframe is automatically created for this new position.
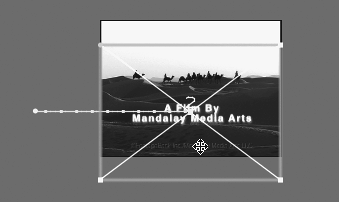
In the Timeline, go to the tail of the clip and back up 2 seconds by pressing Shift-left arrow twice. Press Ctrl-K to set a keyframe.
This keyframe will hold the current text position from the previous keyframe to this point in the clip.
Now move your playhead forward 1 second by pressing Shift-right arrow. Then hold down Shift as you drag the title offscreen to the right.
In the Canvas View pop-up, restore to Fit to Window, preview or render the clip, and play.
In addition to using the generators under the Text submenu of the Generator pop-up menu, there is also a Title 3D option. In this option, a separate text window opens in which you can make a number of style choices and save them as part of a style palette that you can then apply to other clips in other projects.
Move the playhead to the end of the sequence, and target the V1 track.
Select Title 3D from the Generated Items pop-up menu.
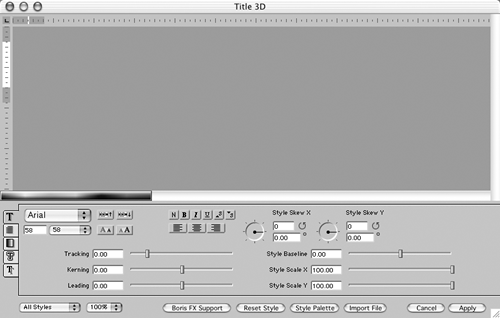
A large title window opens with several text opens.
Title 3D options are organized via small tabs running vertically down the left side of the window. The different tabs are Text Style, Text Wrap, Text Fill, Edge Style, and Shadow Type. Next to some of the tabs are tiny check boxes for toggling the options on and off.
With the first tab selected, type The End in the large gray text area, and drag over the letters to select the text.
Choose Arial Black; click in the font-size box and enter 58.
Click the third tab, and in the Text Fill box select Gradient.
Click the box next to Click to Edit Gradient.
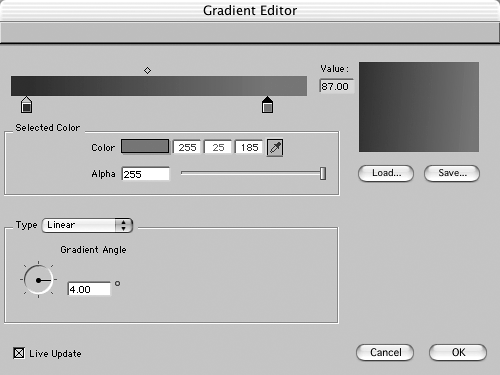
A Gradient Editor window opens with at least two paint buckets attached to the horizontal bar. These represent the colors of the gradient.
Make these changes in the Gradient Editor:
Click the first bucket to select it, and click the Color box to choose a color.
Select a hue from the Colors window and click OK.
Click the second paint bucket, and choose a second color. Click OK.
Click the fourth tab and make the following changes:
Check the T1 box to toggle on the effect.
Choose an edge color by clicking in the Color box to bring up the Colors window.
Change the Edge width to .98 and opacity to 80%.
With the text selected, click the fifth tab, Shadow Type, and check the T1 box.
From the Shadow Type pop-up menu, select Cast Shadow, add a light color, and select both a distance and opacity.
Click Apply.
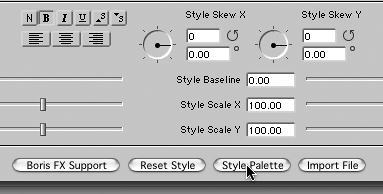
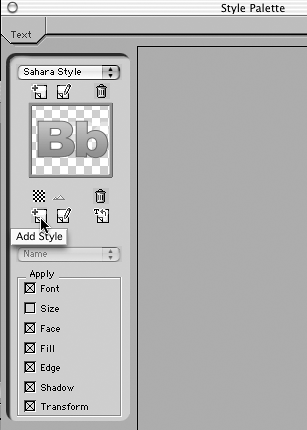
To save these settings as a specific style you can apply to other Title 3D text, click the Style Palette button in the lower window area.
In the upper left of the Style Palette window, click the Add Category button, and enter Sahara Style as the Category name.
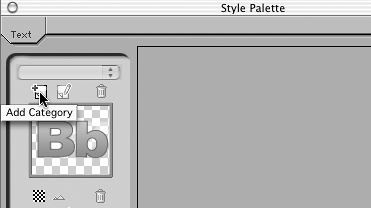
Then click the Add Style button, and check the boxes for any of the attributes you want to include in this style. Click Apply.
Now that you have made the Title 3D choices, you still need to bring the clip into the Timeline.
Witrh the playhead at the end of the sequence and the Video tab selected in the Viewer, drag the clip to the Canvas overlay and edit this as an Overwrite edit.
Plary the finished sequence.
Always save your project before you close it or quit Final Cut Pro.
How to create text edits
How to work with the text options
How to superimpose a title
How to create a lower third
How to create animated text edits
How to work with multilayered graphic files
How to nest sequence layers
How to create 3D effects
How to add motion effects to text

