
Lesson Files | FCP4 Book Files > Lessons > Lesson 20 Project |
Media | Sahara folder, Music folder, Graphics folder |
Time | This lesson takes approximately 90 minutes to complete. |
Goals | Understand the LiveType interface |
Build an animated title | |
Export a Final Cut Pro clip to LiveType | |
Open a clip in LiveType | |
Create an animated title for a clip | |
Render a LiveType file for Final Cut Pro | |
Import an animated title into Final Cut Pro |
LiveType is a special-effects titling application that comes bundled with Final Cut Pro 4. It allows editors with minimal motion graphic experience to create high quality, animated titles and graphics for importing into their Final Cut Pro sequences. In the past, if editors wanted to include animated titles and graphics in their sequences, they would hire a motion graphic artist or spend hours building complex animations. Typically, each element in the animation would require a number of keyframes relating to a number of different parameters, and each keyframe would then have to be adjusted individually to create the desired effect. This would normally take hours in other applications, but LiveType simplifies the process by providing you with pre-keyframed content that can be customized quickly and easily.
To get started in Lesson 20, you will launch Final Cut Pro by clicking the program icon in the Dock and then opening the project for this lesson. You will find the sequence you will be working with and identify the clip that will be used for the background of your title.
TIP
For the purposes of this exercise, drag the LiveType application icon from your Applications folder to your Dock so it will be easily accessible during the lesson.
Launch Final Cut Pro and choose File > Open, or press Cmd-O, and choose the Lesson 20 Project file from the Lessons folder on your hard drive.
Close any other projects that may be open from a previous session.
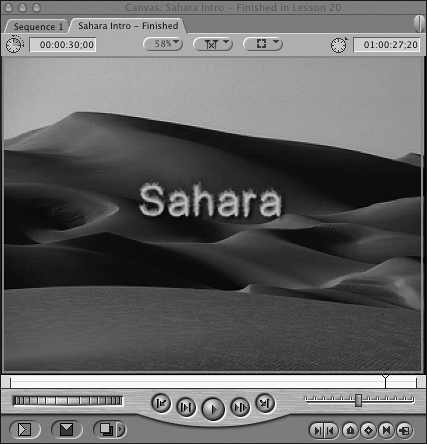
In the Timeline, play the Sahara Intro – Finished sequence.
This is similar to the sequence you worked on in Lesson 2. Notice when the narrator says, “Sahara,” and you see the landscape clip. To end this sequence dramatically, you will create an animated “Sahara” title in the LiveType program and superimpose it on the last clip in the sequence.
LiveType is a title animating program that works in conjunction with a variety of animated media, including animated graphics, textures, and character sets called LiveFonts. Each of these elements has built-in motion effects, so they move even before you add motion paths and additional animation. The beauty of LiveType is that you can be as involved or as removed from the creative process as you like. With over 8 gigabytes (GB) of animated media and dozens of premade project templates available, you can click a few buttons to create professional, quality animations instantly. You can also customize existing animations or create your own from scratch for a more unique look.
Launch LiveType by clicking once on the LiveType program icon in the Dock. Or double-click the LiveType program icon in the Applications folder.
The LiveType interface consists of four primary windows: the Canvas, the Inspector, the Media Browser, and the Timeline. The four windows float freely and can be moved and resized to suit your needs, just as in Final Cut Pro.

The Canvas is a visual representation of your title sequence. Here you adjust the position of your graphics and titles and create motion paths.
The Inspector is where you select and customize parameters for your titles, graphics, and animations.
The Media Browser provides access to preset Livefonts, regular fonts, textures, objects, and effects.
The Timeline, just as in Final Cut Pro, is a graphical representation of your sequence. This is where you add keyframes as well as change the duration and position of your tracks.
In the Media Browser, click the LiveFonts tab.
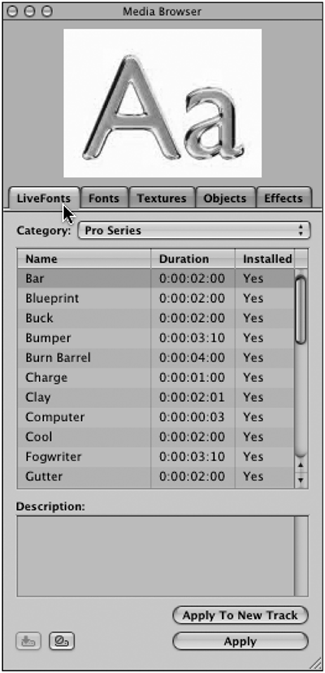
A list of preset font animations appears. These animated fonts can be applied to any title you create. The Name column gives you the LiveFont name, the Duration column shows the default duration of the effect, and the Installed column tells you whether the LiveFont is currently installed on your computer.
Select the Burn Barrel LiveFont and watch the preview at the top of the Media Browser change to reflect the current selection.

Click on a few other items to preview their animations. You can also use the up and down arrows to move through the list.
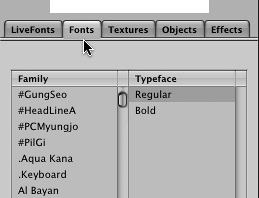
Now click the Fonts tab to see a list of available fonts installed on your computer.
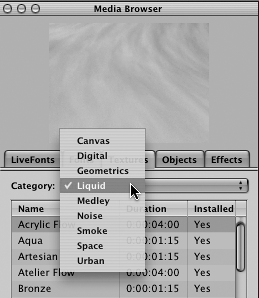
Click the Textures tab.
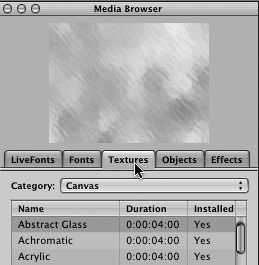
This tab has a list of textures you can use to fill backgrounds, titles, or graphics. The Textures are grouped by category. Select Liquid from the Category pop-up menu.
Click on the Objects tab.
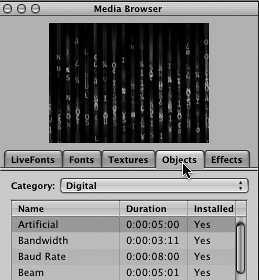
This tab has a list of animated graphics that you can use to enhance and spice up your compositions. Each graphic has a built-in alpha channel. This means that the background black or white areas of the graphic will be transparent when you composite them over titles or add them to a Final Cut Pro sequence. Select Particles from the Category pop-up menu and click a few objects in the Name column to preview them.
Click the Effects tab.

Effects in LiveType are separate packages of prebuilt motions, such as zooms, pans, and rotations, that can be applied to any element in LiveType. Once an effect is added to an element, you can customize it to fit your project.
Select Zooms from the Category pop-up menu and click on a few zoom effects to preview them.
Now that you are familiar with the different preset titles and graphics in LiveType, it is time to build your own title. You begin building a title in the Inspector window. But before you begin, you will save your project to the Final Cut Pro Lessons folder.
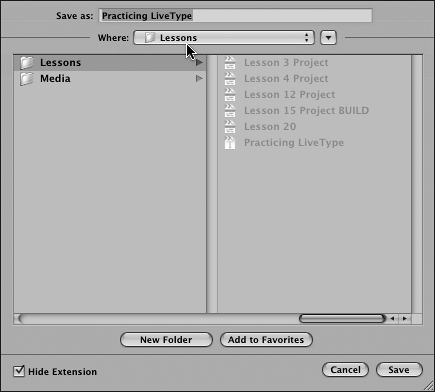
Choose File > Save As and name this project Practicing LiveType. Choose the Lessons folder as the destination, and click Save.
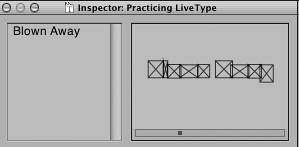
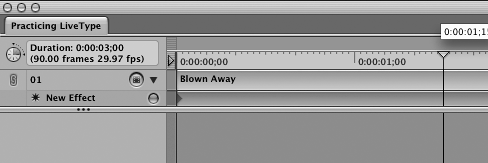
The project name appears at the top of the Canvas, Inspector, and Timeline windows. It is also displayed on the tab in the Timeline, similar to a sequence tab in Final Cut Pro.
The Inspector window is made up of a text-entry box, a live wireframe preview area, Inspector tabs for choosing different categories of parameters, and the parameter area itself where you adjust values and settings for the elements in the Timeline.
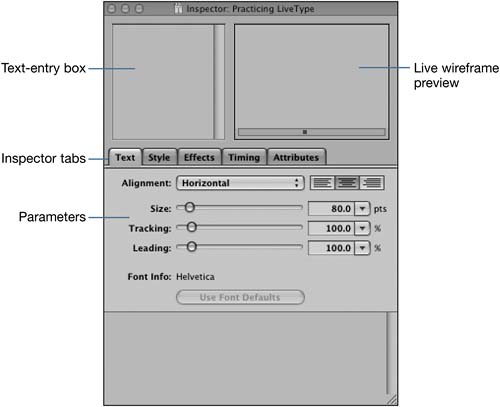
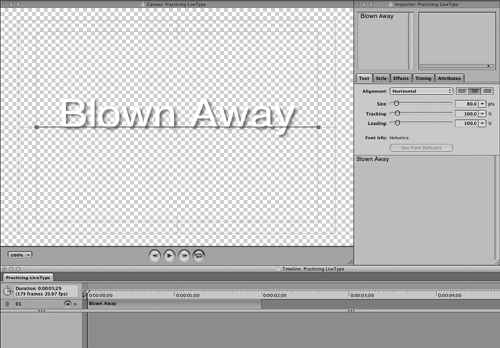
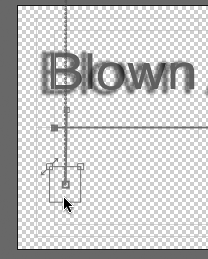
Click the text-entry box in the upper left of the Inspector and type Blown Away.
A new title element is automatically added to track 1 of the Timeline. In the Canvas, the title has a dark blue line under it to show the title's position in the frame. There is a light green title/action safe overlay for reference.
NOTE
Make sure the playhead is parked over the new clip in the Timeline to see the text in the Canvas.
Title safe line
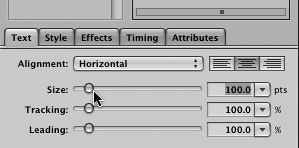
Click the Text tab and drag the Size slider to change the size to 95 points, or enter 95 in the numerical field.
NOTE
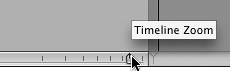
If you can't see the name on the track in the Timeline, click on the right of the Timeline Zoom to bring the whole title bar into view.
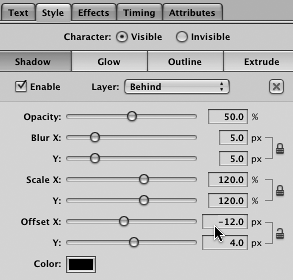
Click the Style tab in the Inspector.
A drop shadow is added by default to your text object, as indicated by the Enable check box.
Change the Scale X slider to 120 and press Tab. Make sure the Y scale is also set to 120, and change the X offset to –12.
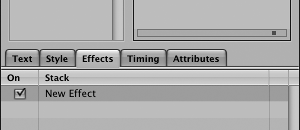
Click the Effects tab. Since you haven't added any effects to your title, this window is empty. You will come back to this tab later.
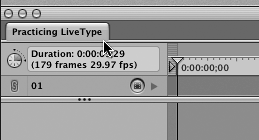
Click the Timing tab. Notice that the duration says 2 seconds. In the Timeline, move your pointer over the right edge of the clip. Notice that the arrow turns into a resize tool.

Click the edge of the clip and drag to resize your clip. When you release the mouse, notice the duration change in the Inspector. Drag the edge of the clip to the right until the new duration is 3 seconds.
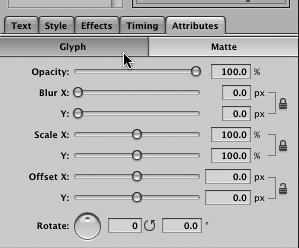
Click the Attributes tab and make sure the Glyph button is selected. Click the rotate wheel and drag in a circle a few times to sample different rotations. Enter 0 in the rotation and degree boxes to set them back to normal.
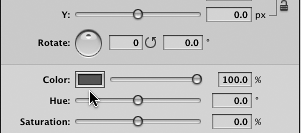
Sample a deep red color from the color wheel in the Colors window.
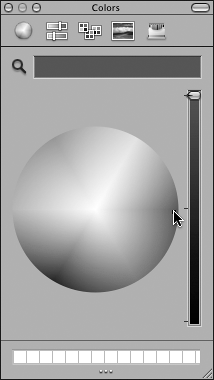
Observe the color on your title. Now sample a cool blue color and close the color window by clicking the Close button in the upper-left corner.
Press Cmd-S to save your project often throughout this creative process.
Now that you have created your title, you can also animate it. You will first apply a prebuilt animation and then you will build your own from scratch. Remember, effects in LiveType are animation packages with built-in, complex, animation parameters that can be applied to any element in LiveType. You can also add multiple effects to the same element for further depth in your animations. When creating your own animation from scratch you can also save it to use in other projects.
Click the Effects tab in the Media Browser. Under Category, select Fantasy. In the Names column, select Horde.
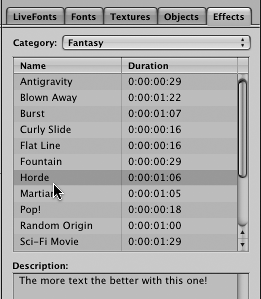
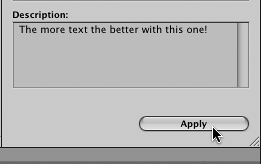
Click the Apply button at the bottom of the Media Browser. (Or, just double-click the effect name to apply it).
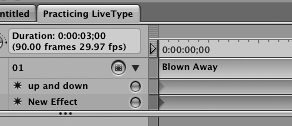
Notice that the new effect appears as a purple bar below the 01 title track. It is shorter in length because the default duration of the effect is 1:06, and the Blown Away title is currently 3 seconds in the Timeline.
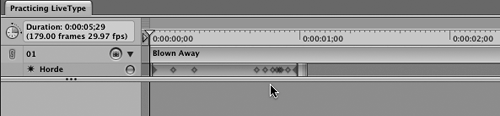
Watch the wireframe preview window to view the new animation. You will notice that the wireframe holds steady for a few seconds at the end of the animation. This is because you are previewing the entire Timeline, but the animation stops short of the end.
Play the title/animation clip in the Canvas by clicking the Play button.
For the first second (the animation is actually 1.06), the title is animated. For the next two seconds, the title plays without animation. The playhead then continues to the end of the Timeline.
In the ruler area of the Timeline, there is an In point at the head and an Out point at the end of the visible Timeline. These are Render Selection In and Out points. You use them to define which areas of the Timeline you will be previewing or rendering.
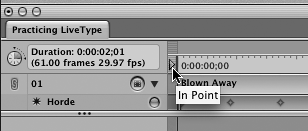
To render just the animated portion of the title clip, move the playhead to the end of the effect bar and press O on the keyboard. This moves the Render Selection Out point to the end of the effect.
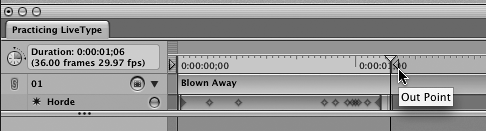
Press Home to send the playhead to the beginning of the Timeline (just as in Final Cut Pro) and press the spacebar to play the animation in the Canvas.
The animation plays as a loop between the Render Selection In and Out points.
If you drag the playhead anywhere in the Timeline, you will see a still frame of the title at that moment.
To slow down the animation and make it last longer, click the edge of the Horde bar in the Timeline and drag to the right until it is about three quarters the length of the title track.

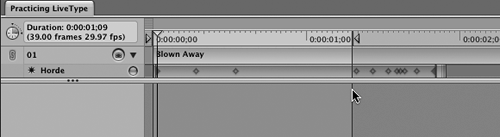
Drag the playhead to the end of the Horde effect and again press O to extend the Out point.
Now both the playhead and the Render Selection Out point are at the end of the Horde bar.
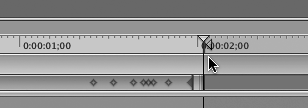
Extend the Out point to the end of the Blown Away title bar to play the title in full.
To play the full animation, press the spacebar or click the Play button in the Canvas.
LiveType plays the sequence slowly as it loads the animation into RAM. After the first pass, the animation will play out of RAM in real time.
Make sure the effect bar is still selected, then click the Timing tab in the Inspector and drag the Sequence slider to about 6, or just enter 6 in the Sequence field.
In the Timeline, the first part of the effect bar is now a lighter purple than the rest of the bar, and there are hash marks in the light purple area. These marks represent the sequencing of the effect. As you can now see from the wireframe preview, the individual letters appear at different times. One of the powerful features of LiveType is its capability to affect individual letters of a title separately.
Click the edge of the Horde effect bar and drag it to the right until it is the same length as the title track.
NOTE
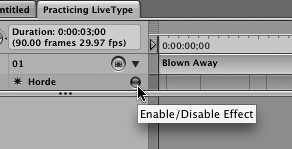
To see your title track without a particular effect applied, toggle the Enable/Disable button for the track you don't want to see. This is like the Visible control in Final Cut Pro.
Adding effects in LiveType is as easy as choosing from a list of prebuilt effects and clicking the Apply button. You can also create an effect from scratch by adding keyframes and changing motion parameters. One of the big differences between LiveType and other animating applications is that instead of every parameter having its own keyframe, in LiveType all the parameters are stored in one keyframe for that moment in time.
Click on the Horde effect in the Timeline and press the Delete key.
The effect is removed from the Timeline.
Choose Track > Add New Effect, or press Cmd-E.
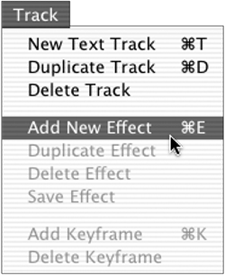
A new effect bar appears under the title track in the Timeline.
Click the right edge of the effect bar and drag it out so that it is the same length as the title track.

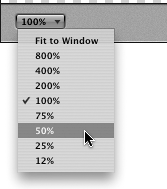
In the Canvas zoom pop-up menu, change the size to 50%.
Move the playhead to the beginning of the Timeline, to specify where the animation is to begin. Make sure the effect bar is selected in the Timeline by clicking on it.
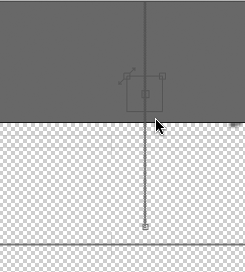
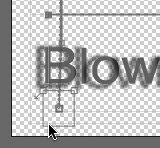
In the Canvas, click one of the letters and drag it above the viewable area.
All the letters follow. When you release the mouse, the text disappears, because it has moved above the frame.

Though the letters are gone, in their place is a bounding box for the letter you dragged and a motion path from the title's off-screen position to the original position.
The wireframe preview is now showing the animation that you created.
Click the Play button in the Canvas.
Click the Canvas Loop button to play the animation without looping.
You have now specified that the title will start off-frame and end in the center. LiveType has interpolated the in-between frames to create the animation.
Drag the playhead to the middle of the title. Stop dragging when the yellow playhead position box reads 1:15.
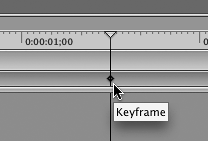
Choose Track > Add Keyframe, or press Cmd-K.
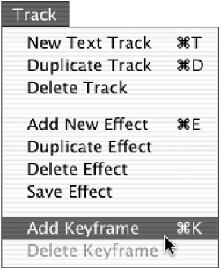
A diamond keyframe appears in the effect bar at the playhead position.
Click one of the letters in the Canvas and drag it below the blue track line.
NOTE
A selected track in the Canvas is identified by a thicker blue line with square endpoints on either end. In the Timeline, a selected track has a darker blue color.
All the other letters follow, and you have now defined a position parameter for the middle keyframe. Check your wireframe preview and you will see that the animation starts above the frame, moves down to the lower portion of the frame by the middle of the track, and then moves back up to the center of the frame by the end of the track.
Click the Play button in the Canvas or press the spacebar to view the animation.
Many effects can be applied to the same track to further customize your animation. These can be prebuilt effects, brand new effects, or a combination of both.
Click on the Effects tab in the Inspector. Notice that the new effect you created is listed there.
Double-click on the name and change it to Up and Down.
Choose Track > Add New Effect, or press Cmd-E.
A second effect bar appears under the title track, and there's a new effect bar in the Timeline.
Under the Effects tab of the Inspector, double-click on the new effect name and rename it Separate.
In the Timeline, click in the middle of the Separate effect bar and drag it to the right until it is centered around the keyframe in the Up and Down effect bar.

Move the playhead to the middle of the Separate effect bar.
Select the letter L in the Canvas and then uncheck the box next to the Separate effect in the Inspector. Repeat this step for the two Ws and the Y.
By doing this, you are turning off the effect for the selected letters. Now, changes will not be applied to these letters.
Choose Track > Add Keyframe.
A new keyframe appears in the Separate effect bar.
Click on the B in the Canvas and drag it lower until the top of the B lines up with the bottom of the L.
All the letters to which this effect applies move down. The L, the two Ws, and the Y stay where they were. Look at the wireframe preview to see the animation, and click in the Canvas.
Click on the Effects tab in the Media Browser and choose Zooms from the Category pop-up menu.
Select Zoom from the Name column and click Apply.
You now have a title animation composed of three separate animations—two that you created yourself and one that was prebuilt. Press the spacebar to watch the animation.
Textures can add depth to any project. Use them to fill existing titles and objects or place them in the background to give richness to your animation.
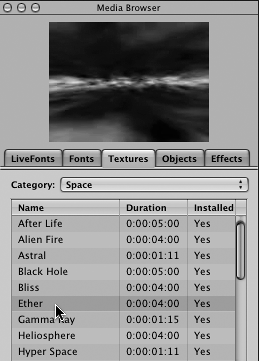
Click the Textures tab in the Media Browser and choose Space from the Category pop-up menu.
Select Ether from the Space category and double-click it to apply the texture to the Timeline.
Click the right edge of the new texture track and drag to adjust the length of the track to match the length of the title track.
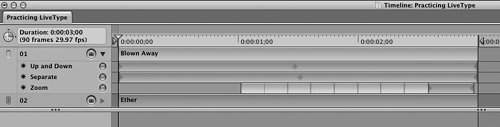
Move the playhead to the middle of the tracks and make sure the texture track is selected in the Timeline by clicking it.
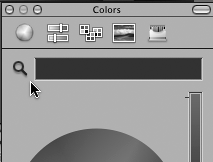
Click the Attributes tab in the Inspector and then click on the color swatch.
Sample a few different colors and watch the result in the Canvas window. Then click the color sampler tool (the magnifying glass) and click on the blue title in the Canvas to sample the previous blue you created earlier.
This changes the texture color to blend nicely with the title.
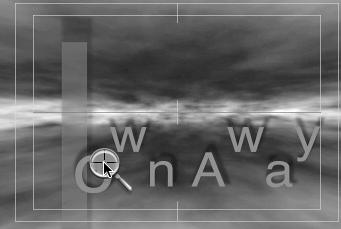
Close the Colors window, and press the spacebar to view the animation.
Now that you know your way around LiveType, you will move back into Final Cut Pro to select a video clip to use to create a title. This clip will be placed in LiveType as a background movie that you can use for reference as you select styles and animate your title. This will ensure that the whole video and title animation works well together.
To create a title for a specific sequence or clip, you first choose the area of the sequence that needs a title, and then export that portion from Final Cut Pro.
The first step is to match settings within LiveType with sequence settings in Final Cut Pro to make sure that frame size and pixel aspect ratio will match from one program to the other.
Return to Final Cut Pro by clicking on its icon in the Dock.
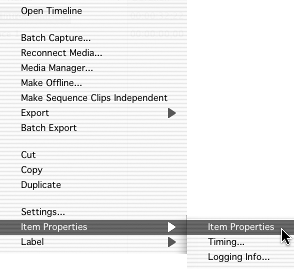
Ctrl-click the Sahara Intro – Finished sequence in the Browser and choose Item Properties > Item Properties from the contextual menu, or press Cmd-9.
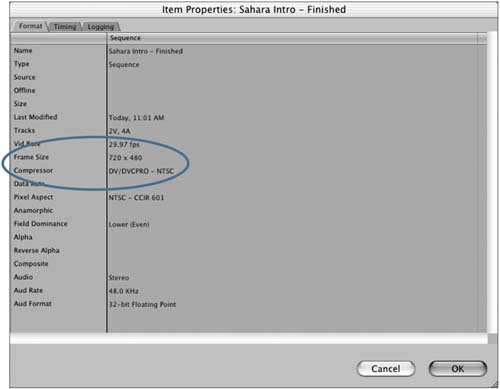
For this project it is sufficient to note that you are using DV/DVCPRO – NTSC settings. You will use this information when you set up your LiveType project. When working on your own projects, you will need to make a note of the settings in the Item Properties window.
Click Cancel or OK to close the window.
Once you have checked your settings, you need to mark the portion of your sequence that you wish to use as a reference in LiveType.
Play the open Sahara Intro – Starting sequence in the Timeline.
You will create a title for the landscape clip so that when the narrator says, “The world of the great Sahara,” a Sahara title will come up.
Park the playhead over the landscape clip in the Timeline and make sure Auto Select is turned on for V1.
An In and Out point appear in the Timeline at the beginning and end of the landscape clip.
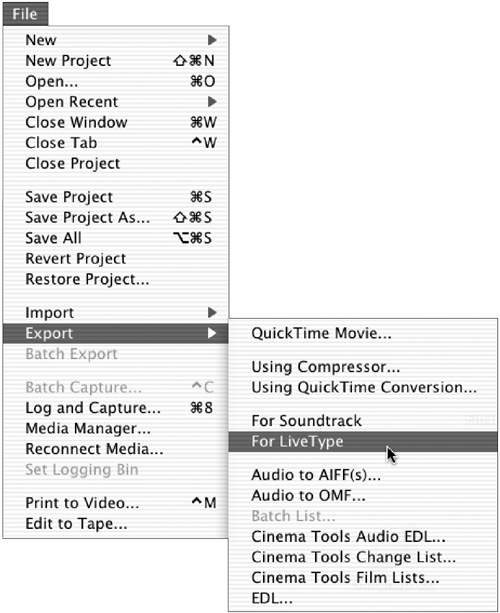
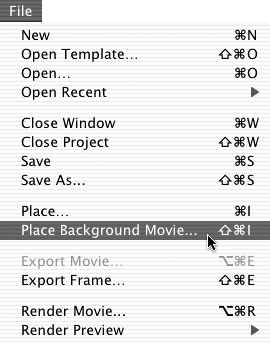
With the Timeline active, choose File > Export > For LiveType.
A LiveType Save window opens.
Navigate to the Media folder, and select the Export folder.
Name the file Sahara Landscape and click Save.
Now that you know the settings from your Final Cut Pro sequence, you will create a new project in LiveType and change the setting to match the Final Cut Pro sequence.
Click the LiveType icon in the Dock to return to the LiveType interface.
Choose File > Close Project. Click Save.
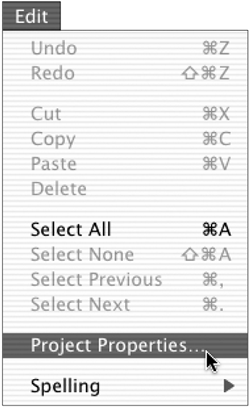
Choose Edit > Project Properties.
From the Presets pop-up menu, choose NTSC DV 3:2.
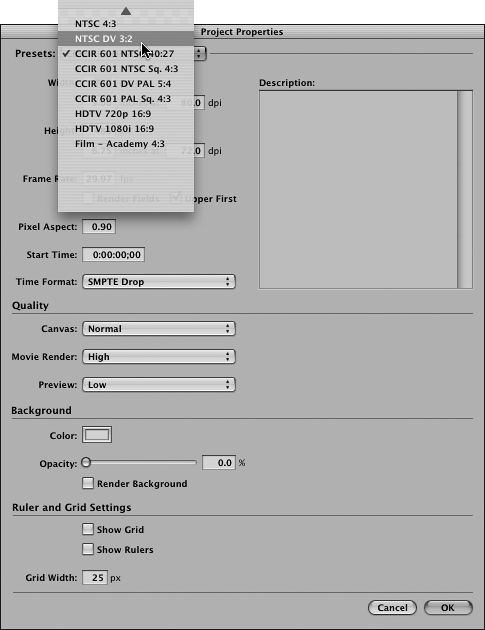
Since Sahara Intro – Starting is a DV sequence, the project properties in LiveType must be set for DV as well.
In the Frame Rate area of the Project Properties window, make sure that the Upper First check box is not selected, and that the Render Background check box is not selected in the Background area.

Click OK.
Choose File > Save As. Type Sahara Title Project in the Name field, navigate to the Lessons folder as the save destination, and click Save.
You will be using the video clip you exported from Final Cut Pro as a background reference for your title. It will be placed under the background bar in the Timeline and won't be included in the final output.
In the first part of this lesson you created a title from scratch and set its attributes. For the Sahara video you are going to start with a LiveFont for your title and then modify its attributes to fit your project.
In the Timeline, click in the empty title track above Sahara to make it active.
In the Inspector, click on the text-entry box and type Sahara.
Click on the LiveFonts tab in the Media Browser and select Burn Barrel from the list.
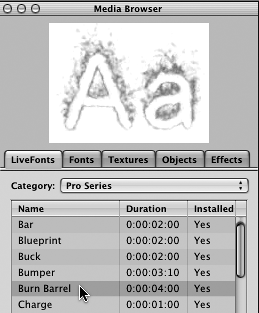
With the title track still selected in the Timeline, click Apply in the lower-right corner of the Media Browser.
Click on a few different places in the ruler area of the Timeline to move the playhead and view different frames.
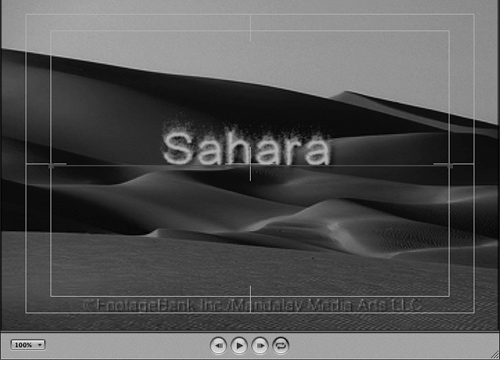
Click the Attributes tab of the Inspector and make sure the Glyph button is selected.
Click the color swatch and use the color sampler tool to sample a light sand color from the Sahara Landscape clip. Close the window.
Drag the Render Selection In point and Render Selection Out point closer together, so that the In point is in the middle of the title track and the Out point is at the end of the title track.
Press the spacebar to view the title animation.
Now that you have created a dynamic title animation, you can export it for use in your Final Cut Pro sequence. When you do this, your video background layer is ignored, and an alpha channel is automatically created so that you can easily superimpose the title over your video in Final Cut Pro.
Make sure the background bar in the Timeline is above the Sahara Landscape track and below the Sahara title track.
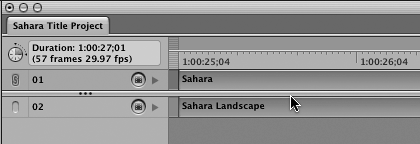
Drag the Render Selection In point to the beginning of the Timeline (or reposition the playhead and press I) and drag the Render Selection Out point to the end of the Sahara Title track.
Leave the name as Sahara Title movie, but make sure that the Render Background button is not checked, and that the Render Only Between In/Out Points is checked.
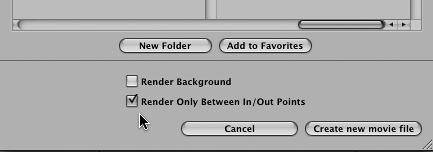
Navigate to the Media > Export folder as the destination and click Create New Movie File.
When the render is complete and the viewing window opens, play the movie to make sure the computer rendered out what you wanted. Close the window.
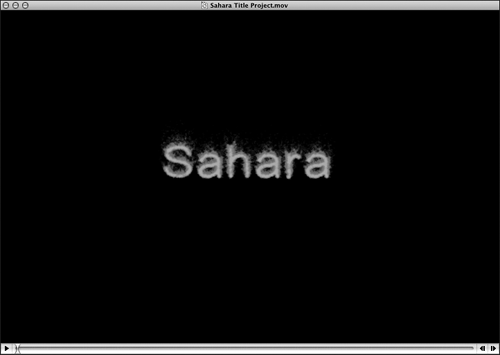
In Final Cut Pro, choose File > Import > File and navigate to the Sahara Title Project file you just saved in the Export folder. Click Choose.
Place this clip over the Landscape video in the Timeline.
Render the title and then play it.
Always save your project before you close it or quit Final Cut Pro.
How to launch LiveType
How to use the Media Browser
How to choose and preview effects
How to create a title and adjust its attributes
How to add prebuilt effects to tracks
How to build an effect from scratch
How to add multiple effects to a track
How to apply an effect to only certain letters in a title
How to export a clip to LiveType
How to place a background movie in LiveType
How to apply and customize LiveFonts
How to render final title animations
How to import titles animations and use them in Final Cut Pro