Chapter 10. Multimedia
Introduction
The recipes in this chapter provide routines for playing sound files and for displaying video clips and photos. One recipe even demonstrates the “new” functionality of Visual Basic 2005 that commands your computer’s internal speaker to emit a system-dependent beep. (That takes us back a few years!) More advanced recipes let you process the JPEG photos from your digital camera. No longer is C++ coding required to manipulate images with respectable speed. Visual Basic programmers now have access to a full set of powerful multimedia-processing features built right into .NET.
10.1. Playing an Audio File
Problem
You want to play a sound clip file, a system sound, or a music file such as an MP3.
Solution
Several different objects and system utilities are available to play sound clips or media files. In this recipe we’ll demonstrate the use of:
Discussion
The code required to play an audio sample is actually quite
short. In most cases, a single line of code is all it takes to play a
sound. Visual Basic 2005’s new My
namespace provides a lot of new easy-to-use functionality. The
My.Computer.Audio.Play() method is
a good example. Simply pass this method the name of an audio file and
the play mode that controls how the sound is played:
	My.Computer.Audio.Play("sample.wav", _
	   AudioPlayMode.WaitToComplete)
The AudioPlayMode.WaitToComplete option causes
the program to wait for the sound to complete before proceeding. The
two other members of this enumeration are Background (plays a sound once in the
background) and BackgroundLoop
(loops the sound repeatedly in the background). To stop a background
looping sound, issue this command:
My.Computer.Audio.Stop( )
Another way to play sounds is with a
SoundPlayer class instance. This works a lot
like the My.Computer.Audio features
because those features depend on the SoundPlayer class:
	Dim player As New SoundPlayer("sample.wav")
	player.
Play( )
The SoundPlayer object
provides quite a few properties and methods to control the playing of
sound files, and you should check these out if you need special
functionality in your application. For example, the Stop() and Play() methods allow you to pause and
restart the sound in the middle of the content.
Windows includes several user-configured sounds for various system-level events. For example, when validating user-entered data, you can play the system-assigned sound for Exclamation in coordination with a custom visual message to inform the user of some issue with the input data:
My.Computer.Audio.PlaySystemSound(SystemSounds.Exclamation)
Some sound formats are beyond the basic capabilities of the
My.Computer.Audio features. To play
these sounds, you can defer to the default applications designated to
play sound files with specific extensions. The following lines of code
start whatever program is currently assigned to play MP3 files,
passing it the name of the MP3 file to be played. Often this will
start the Windows Media Player, but the user may have some other
program configured to play such files. The
Process.Start() method tells the operating
system to play the file using its current settings:
	Dim soundProgram As Process = Process.Start("sample.mp3")
	soundProgram.WaitForExit( )
10.2. Displaying Image Files
Problem
You want to display pictures, possibly selected by the user, in your Visual Basic 2005 application.
Solution
Sample code folder: Chapter 10ShowJPG
The OpenFileDialog class provides a standard way
to let the user select any file, such as a picture to be displayed,
and the PictureBox control gives
you a great way to display pictures.
Discussion
It’s easy to use an OpenFileDialog control on a form to let the
user select a file from anywhere in the system. Create a new Windows
Forms application, add a PictureBox
control to Form1 named SelectedPicture, and add a Button control named ActLocate. Set the PictureBox's SizeMode property to StretchImage. Add the following code to the
button’s Click event
handler:
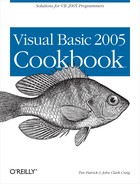
	Private Sub ActLocate_Load(ByVal sender As System.Object, _
	      ByVal e As System.EventArgs) Handles ActLocate.Click
	   ' ----- Let the user choose a picture.
	   Dim locateFile As New OpenFileDialog

	   locateFile.Filter = "JPG files (*.jpg)|*.jpg"
	   locateFile.Multiselect = False
	   If (locateFile.ShowDialog( ) = _
	         Windows.Forms.DialogResult.OK) Then
	      ' ----- Show the selected picture.
	      SelectedPicture.Load(locateFile.FileName)
	   End If
	End Sub
Figure 10-1 shows
the OpenFileDialog during a typical
session in which the user is about to select a JPEG picture
file.
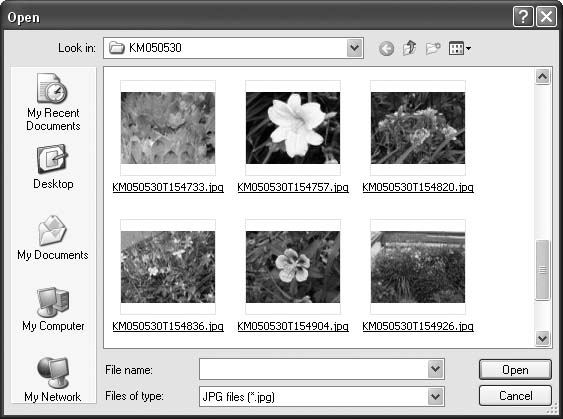
If a JPEG file is selected, it is loaded into the form’s
PictureBox for display. It takes
only one command to load the picture:
SelectedPicture.Load(locateFile.FileName)
Figure 10-2 shows
the picture as displayed in the PictureBox on the form.

10.3. Playing a Video File
Problem
You want to play video clips from your Visual Basic 2005 application.
Solution
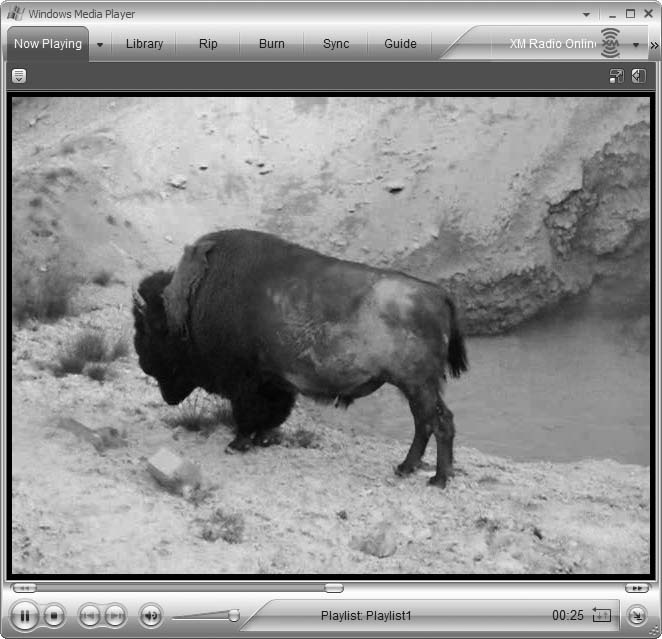
The Process.Start() method lets you automate the
playing of video clips in a very reliable and standardized way. Figure 10-3 shows a video run
in Windows Media Player using this method.
Discussion
The Process object lets you
run an external application explicitly or implicitly: you can run an
application and pass it a specific file to open and run, or you can
pass a file and let the operating system implicitly run the associated
application based on the filename’s extension. This is a good way to
play a video clip—the user’s media player of choice is automatically
launched to play the clip.
Another advantage of the Process object is its simplicity. The
following two lines of code create an instance of the Process class, run a shared method to load
and start an AVI file, and wait for the media player to exit:
	Dim videoProgram As Process = Process.Start("sample.avi")
	videoProgram.WaitForExit( )
10.4. Making Your Computer Beep
Problem
You want to play a simple sound or sequence of tones based on frequency and duration using the built-in speaker on your computer, rather than relying on the sound board or creating audio files specifically tailored for the purpose.
Solution
Sample code folder: Chapter 10PlayTones
Visual Basic 2005 now provides a
Console.Beep() method that plays a tone given
frequency and duration parameters.
Discussion
You can use this command to create notification sounds from console applications, but you can also call this method from any Windows application to create specialized effects.
The following PlayTones()
subroutine plays a sequence of tones passed to it in the form of a
Point array. This data structure is
ideal for the notes because each note is comprised of integer
frequency and duration parameters (similar to the X and Y
values of each point):
	Public Sub PlayTones(ByVal toneArray( ) As Point)
	   ' ----- Play a set of tones, one after another.
	   Dim frequency As Integer
	   Dim duration As Integer
	   For Each tone As Point In toneArray
	      frequency = tone.X
	      duration = tone.Y
	      Console.Beep(frequency, duration)
	   Next tone
	End Sub
The following code creates a Point array to play a simple melody:
	Dim soundsAlien As Point( ) = { _
	   New Point(932, 500), _
	   New Point(1047, 500), _
	   New Point(831, 500), _
	   New Point(415, 500), _
	   New Point(622, 900)}
	PlayTones(soundsAlien)
This may remind you of something each time you play it; something to do with mashed potatoes, perhaps…
10.5. Creating an Animation Using Multiple Images
Problem
You want to add a simple animation to your application without resorting to complicated video techniques.
Solution
Sample code folder: Chapter 10 ImageListAnim
There are several ways to create simple animations in your
Visual Basic 2005 applications, and the next three recipes will show
you three different ways to do so. One straightforward and effective
technique is to store bitmap images in an ImageList control, and then display them
sequentially in a PictureBox with
each tick of a timer.
Discussion
An ImageList control holds
multiple images in one spot in your application to use with other
controls that require multiple images. For example, the ListView, TreeView, Toolbar, and other
controls all work hand in hand with an ImageList to display customized images on
their surfaces. But you can use an ImageList for other purposes, too, as this
recipe shows.
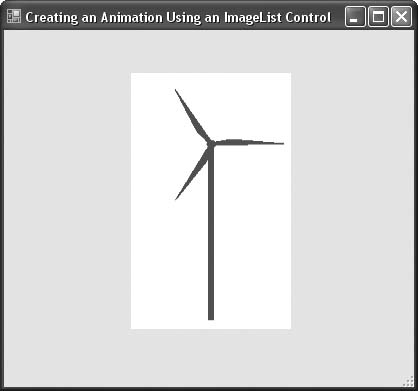
The first step in creating an animation is to create or collect a sequence of images to be displayed. Figure 10-4 displays a collection of wind-tower bitmaps with the turbine blades in rotated positions slightly shifted from one to the next.
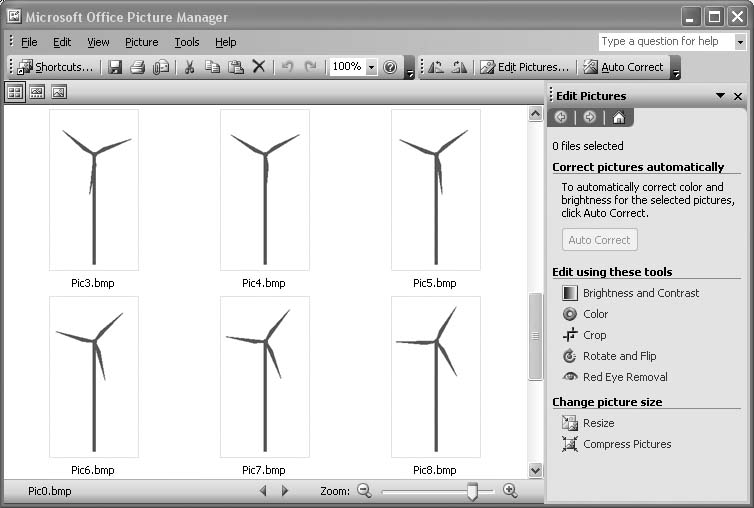
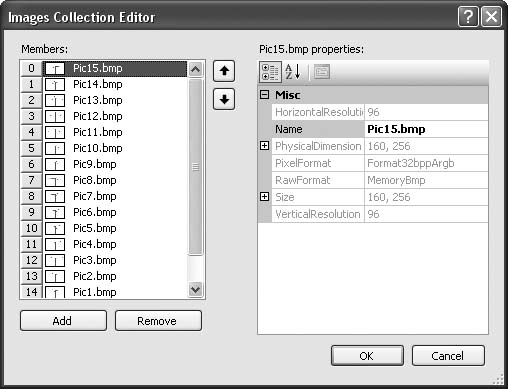
In the sample application for this recipe, an ImageList has been added to the main form,
and its Images collection has been
filled with the windmill images (in a specific order). Figure 10-5 shows the image
collection.
To display these images sequentially as an animation, add a
PictureBox and a Timer control to the form:
	Private Sub Timer1_Tick(ByVal sender As System.Object, _
	      ByVal e As System.EventArgs) Handles Timer1.Tick
	   ' ----- Draw the next image on each tick.
	   Static imageNumber As Integer
	   imageNumber = (imageNumber + 1) Mod ImageList1.Images.Count
	   PictureBox1.Image = ImageList1.Images(imageNumber)
	End Sub
The timer should be enabled, and its Interval property should be set to a number
of milliseconds appropriate for the animation. In this case, 40
milliseconds worked well.
As soon as the form loads, the action starts. With each tick of
the timer, the static variable imageNumber increments to point to the next
image in the ImageList control. The
image is loaded, and the program continues until the Timer’s next Tick event. Figure 10-6 shows one frame
of the animation.
10.6. Creating an Animation by Generating Multiple Bitmaps
Problem
You want to add a simple animation to your application based on code-drawn bitmaps, but without resorting to complicated video techniques.
Solution
Sample code folder: Chapter 10BitmapAnim
This recipe shows how to create an array of bitmaps in memory, fill them with graphic drawings that vary slightly from one to the next, and then display them in sequence to create an animation.
Discussion
This recipe is very similar to the previous one, except that in
this case, the images are stored in an array of bitmaps rather than in
an ImageList control. The results
are very similar.
Create a new Windows Forms application, and add a Timer control named Timer1. Set its Interval property to 50 and its Enabled property to True. Now add the following code to the
form’s code template:
	Private StarImages(23) As Bitmap

	Private Sub SpinningStar_Resize(ByVal sender As Object, _
	      ByVal e As System.EventArgs) Handles Me.Resize
	   ' ----- Rebuild the images needed for the animation.
	   Dim xCenter As Integer
	   Dim yCenter As Integer
	   Dim radius As Double
	   Dim canvas As Graphics
	   Dim counter As Integer
	   Dim angle As Double
	   Dim x1 As Single
	   Dim y1 As Single
	   Dim x2 As Single
	   Dim y2 As Single
	   Const RadPerDeg As Double = Math.PI / 180#

	   ' ----- Perform some basic calculations.
	   xCenter = Me.ClientSize.Width  2
	   yCenter = Me.ClientSize.Height  2
	   radius = IIf(Me.ClientSize.Width < Me.ClientSize.Height, _
	      Me.ClientSize.Width, Me.ClientSize.Height) * 0.4

	   ' ----- Remove the previous images.
	   Array.Clear(StarImages, 0, StarImages.Length)
	   For counter = 0 To StarImages.Length - 1
	      StarImages(counter) = New Bitmap( _
	         Me.ClientSize.Width, Me.ClientSize.Height)
	      canvas = Graphics.FromImage(StarImages(counter))
	      For angle = 0 To 360 Step 72
	         x1 = xCenter + radius * _
	            Math.Cos(RadPerDeg * (angle + counter * 3))
	         y1 = yCenter + radius * _
	            Math.Sin(RadPerDeg * (angle + counter * 3))
	         x2 = xCenter + radius * _
	            Math.Cos(RadPerDeg * (angle + counter * 3 + 144))
	         y2 = yCenter + radius * _
	            Math.Sin(RadPerDeg * (angle + counter * 3 + 144))
	         canvas.DrawLine(SystemPens.ControlText, _
	            x1, y1, x2, y2)
	      Next angle
	      canvas.Dispose( )
	   Next counter
	End Sub
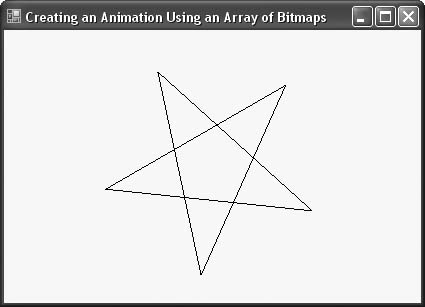
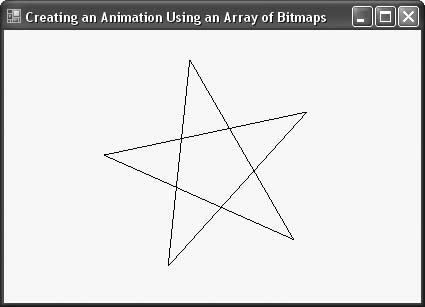
The code runs every time its form is resized, including once when the form first appears. The 24 bitmap images are recreated nearly instantly, keeping up with the changing form size. Each bitmap is of a five-pointed star, and each star image is rotated slightly from the previous one in the array.
A timer animates the star bitmaps using the 50-millisecond
interval set earlier. Add the following code in the timer’s Tick event handler to display the next
bitmap in the sequence, looping back to the start when the end of the
array is reached. The last star is drawn in a position almost rotated
to match the first, providing continuously smooth animation:
	Private Sub Timer1_Tick(ByVal sender As System.Object, _
	      ByVal e As System.EventArgs) Handles Timer1.Tick
	   ' ----- Draw one of the star array elements.
	   Dim canvas As Graphics
	   Static imageNumber As Integer

	   On Error Resume Next

	   imageNumber = (imageNumber + 1) Mod StarImages.Length
	   Try
	      canvas = Me.CreateGraphics( )
	      canvas.Clear(Me.BackColor)
	      canvas.DrawImage(StarImages(imageNumber), 0, 0)
	      canvas.Dispose( )
	   End Try
	End Sub
The DrawImage() method of the
form’s Graphics object copies each
bitmap onto the form’s surface. For maximum smoothness, check that the
form’s DoubleBuffered property is
set to True.
A couple of frames of the rotating star are shown in Figures 10-7 and 10-8. Try resizing the form while the animation is running; you’ll see that the star itself resizes as you resize the form.
10.7. Creating an Animation by Drawing at Runtime
Problem
You want to add a simple animation to your application without resorting to complicated video techniques.
Solution
Sample code folder: Chapter 10DrawAnim
A very direct but often effective technique is to simply draw updated images on a graphics surface with each tick of a timer, as shown in this recipe.
Discussion
The following code handles the Tick event for a timer on a form. It redraws
the face of the form at each tick. The current position and direction
of a block are maintained in form-level variables. The timer’s
Tick event handler updates those
variables so the block drifts around the form and bounces off the
walls; the form’s Paint event
handler is where the actual drawing of the block takes place. At the
end of the timer’s Tick event
handler is a Refresh() command that
causes the form to redraw itself. That fires the Paint event, which redraws the block.
Create a new Windows Forms application, and add a Timer control named Timer1. Set its Interval property to 10 and its Enabled property to True. Now add the following code to the
form’s code template:
	Private UseX As Integer
	Private UseY As Integer
	Private MoveX As Integer
	Private MoveY As Integer
	Private Const BlockSize As Integer = 50

	Private Sub Timer1_Tick(ByVal sender As System.Object, _
	      ByVal e As System.EventArgs) Handles Timer1.Tick
	   ' ----- Draw the next step in the animation.
	   UseX += MoveX
	   UseY += MoveY

	   ' ----- Make adjustments for edge detection.
	   If (UseX <= 0) Then MoveX = 1
	   If (UseX >= (Me.ClientSize.Width - BlockSize)) Then _
	      MoveX = -1
	   If (UseY <= 0) Then MoveY = 1
	   If (UseY >= (Me.ClientSize.Height - BlockSize)) Then _
	      MoveY = -1

	   ' ----- Redraw the image.
	   Me.Refresh( )
	End Sub


Private Sub Bounce_Paint(ByVal sender As Object, _
	      ByVal e As System.Windows.Forms.PaintEventArgs) _
	      Handles Me.Paint
	   ' ----- Draw the block.
	   e.Graphics.FillRectangle(Brushes.Red, UseX, UseY, _
	      BlockSize, BlockSize)
	   e.Graphics.DrawRectangle(New Pen(Color.Blue, 5), _
	      UseX, UseY, BlockSize, BlockSize)
	End Sub
Two rectangles are drawn, one to create a red square and the
other to draw a 5-pixel-wide border around the square. The current
values for form-level variables UseX and UseY are used for the position at which to
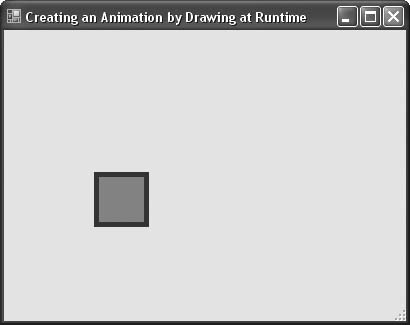
draw the squares. Be sure to set the form’s DoubleBuffered property to True for the smoothest effect. Figure 10-9 shows the square
block as it drifts towards the walls of the form.
10.8. Creating Animated Sprites
Problem
You want to create sprites, small graphics objects that display in front of a background and can detect collisions with other sprites.
Solution
Sample code folder: Chapter 10 Sprites
The Sprite class presented
here provides a very simple but useful starting point for creating
sprites as complicated as you desire.
Discussion
The Sprite class exposes
public properties for its bitmap, position, and velocity; a method for
drawing itself on a graphics surface; and a function that determines
if another sprite is currently in collision with this one. This
rudimentary sprite class provides a good start at understanding how
sprites work. You can add new functionality to enhance your sprites as
desired.
This class doesn’t define exactly what the sprite will look like
or even its size. It provides a public Bitmap property, which the calling program
can fill with any desired image. Likewise, the location and velocity
properties are very flexible and can take on any signed integer
values. The calling program is responsible for setting these
properties and for determining when they might change. The Draw() method uses the velocity values to
update the position values, which minimizes the overhead in the
calling program each time the sprite is redrawn.
Create a new Windows Forms application. Add a new class to the project named Sprite.vb, and use the following code for its definition:
	Public Class Sprite
	   Public SpriteImage As Bitmap
	   Public X As Integer
	   Public Y As Integer
	   Public VelocityX As Integer
	   Public VelocityY As Integer

	   Public Sub Draw(ByVal g As Graphics)
	      ' ----- Update the location.
	      X += VelocityX
	      Y += VelocityY

	      ' ----- Draw the sprite.
	      g.DrawImage(SpriteImage, X, Y)
	   End Sub

	   Public Function Collision(ByVal targetSprite As Sprite) _
	         As Boolean
	      ' ----- See if two sprites overlap each other.
	      On Error Resume Next

	      Dim s1Left As Integer = X
	      Dim s1Top As Integer = Y
	      Dim s1Right As Integer = s1Left + SpriteImage.Width
	      Dim s1Bottom As Integer = s1Top + SpriteImage.Height
	      Dim s2Left As Integer = targetSprite.X
	      Dim s2Top As Integer = targetSprite.Y
	      Dim s2Right As Integer = s2Left + _
	         targetSprite.SpriteImage.Width
	      Dim s2Bottom As Integer = s2Top + _
	         targetSprite.SpriteImage.Height

	      ' ----- Compare the positions.
	      If (s1Right < s2Left) Then Return False
	      If (s1Bottom < s2Top) Then Return False
	      If (s1Left > s2Right) Then Return False
	      If (s1Top > s2Bottom) Then Return False

	      ' ----- No collision.
	      Return True
	   End Function
	End Class
There are a lot of ways you can enhance this Sprite class. For example, you can add code
to the Draw() method to create and
maintain a bitmap image within the sprite object, perhaps creating a
unique Sprite class for each type
of sprite image. The collision-detection code shown here simply looks
for overlapping rectangular areas; that is, if any parts of the
bitmaps for the two sprites are touching, they are in collision. However,
you might want to make the collision detection more sophisticated. For
example, the code added next uses sprites with transparent corners, yet these transparent
corners still count as collision areas. An enhanced version of
collision detection might let the sprites overlap in the transparent
areas, “bouncing” only when the visible portions touch each
other.
To demonstrate the Sprite
class, the following code creates two instances, draws colored solid
circles with transparent backgrounds to define their bitmaps (that is,
everything between the circle and the rectangular border is
transparent), and sets them in motion against a background comprised
of stripes. This background lets you see clearly how the transparent
colors in the rectangular bitmaps make the sprites appear as solid
circles only. These sprites and their bitmaps are created just once,
as the form loads.
Return to Form1, and set its
DoubleBuffered property to True. Add a Timer named Timer1. Now add the following code to the
form’s code template:
	Private MySprites(1) As Sprite

	Private Sub SpriteDemo_Load(ByVal sender As System.Object, _
	      ByVal e As System.EventArgs) Handles MyBase.Load
	   ' ----- Prepare the sprites.
	   Dim canvas As Graphics

	   ' ----- Create the first sprite.
	   MySprites(0) = New Sprite
	   MySprites(0).X = 37
	   MySprites(0).Y = 37
	   MySprites(0).VelocityX = 2
	   MySprites(0).VelocityY = 1

MySprites(0).SpriteImage = New Bitmap(30, 30)
	   canvas = Graphics.FromImage(
MySprites(0).SpriteImage)
	   canvas.Clear(Color.FromArgb(0, 0, 0, 0))
	   canvas.FillEllipse(Brushes.Red, 0, 0, 30, 30)
	   canvas.Dispose( )

	   ' ----- Create the second sprite.
	   MySprites(1) = New Sprite
	   MySprites(1).X = 97
	   MySprites(1).Y = 57
	   MySprites(1).VelocityX = 1
	   MySprites(1).VelocityY = -2
	   MySprites(1).SpriteImage = New Bitmap(30, 30)
	   canvas = Graphics.FromImage(MySprites(1).SpriteImage)
	   canvas.Clear(Color.FromArgb(0, 0, 0, 0))
	   canvas.FillEllipse(Brushes.Green, 0, 0, 30, 30)
	   canvas.Dispose( )

	   ' ----- Start the action.
	   Timer1.Interval = 10
	   Timer1.Enabled = True
	End Sub
With each tick of the timer, the two sprites are each checked to see if they’ve come in contact with the walls of the form. If so, their appropriate velocity properties are reversed to cause them to bounce back into the display area of the form. A quick check is also made to see if the two sprites are in collision with each other. If they are, the velocity properties for both sprites are reversed, causing them to bounce away from each other. This simple action provides a starting point for creating more complex sprite interaction.
To see the animated sprites in action, add the following code to the form:
	Private Sub Timer1_Tick(ByVal sender As System.Object, _
	      ByVal e As System.EventArgs) Handles Timer1.Tick
	   ' ----- Trigger a redraw of the form.
	   Me.Refresh( )
	End Sub

	Private Sub SpriteDemo_Paint(ByVal sender As Object, _
	      ByVal e As System.Windows.Forms.PaintEventArgs) _
	      Handles Me.Paint
	   ' ----- Draw the sprites on a background.
	   Dim counter As Integer

	   ' ----- Redraw the striped background.
	   For counter = 0 To Me.ClientSize.Width * 2 Step 20
	      e.Graphics.DrawLine(New Pen(Color.LightBlue, 5), _
	         counter, -5, counter - Me.ClientSize.Height - 10, _
	         Me.ClientSize.Height + 5)
	   Next counter

	   ' ----- Draw the sprites.
	    MySprites(0).Draw(e.Graphics)
	    MySprites(1).Draw(e.Graphics)
	   ' ----- See if the
sprites have hit each other.
	   If
MySprites(0).Collision(MySprites(1)) Then
	      MySprites(0).VelocityX = -MySprites(0).VelocityX
	      MySprites(0).VelocityY = -MySprites(0).VelocityY
	      MySprites(1).VelocityX = -MySprites(1).VelocityX
	      MySprites(1).VelocityY = -MySprites(1).VelocityY
	   End If

	   ' ----- Move the sprites for the next update.
	   For counter = 0 To 1
	      If (MySprites(counter).X < 0) Then
	         MySprites(counter).VelocityX = _
	            Math.Abs(MySprites(counter).VelocityX)
	      End If
	      If (MySprites(counter).Y) < 0 Then
	         MySprites(counter).VelocityY = _
	            Math.Abs(MySprites(counter).VelocityY)
	      End If
	      If (MySprites(counter).X > _
	            (Me.ClientSize.Width - 30)) Then
	         MySprites(counter).VelocityX = _
	            -Math.Abs(MySprites(counter).VelocityX)
	      End If
	      If (MySprites(counter).Y > _
	            (Me.ClientSize.Height - 30)) Then
	         MySprites(counter).VelocityY = _
	            -Math.Abs(MySprites(counter).VelocityY)
	      End If
	   Next counter
	End Sub
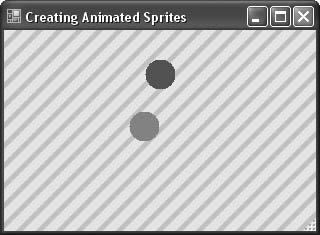
Figure 10-10 shows the two sprites in action, just after bouncing away from each other. Notice that the bitmaps are created outside each sprite object, so the colors are easily set to something unique. In fact, the bitmaps could easily be made much more unique, with the sprites appearing in different sizes and shapes if desired.
10.9. Resizing and Compressing JPEG Files
Problem
Your digital camera’s pictures are great, but they’re way too big to send attached to your family emails. You want to shrink them to a manageable size, but you also want to control the compression so there’s no compromise in the resulting quality of the images.
Solution
Sample code folder: Chapter 10CompressImages
The CompressJPEG class
presented in this recipe wraps all the code required to compress JPEG
pictures to any desired absolute or relative size. It lets you set the
compression factor so you get a good balance between file size and
quality in the resulting JPEG images.
Discussion
Before presenting the CompressJPEG class itself, let’s see how
it’s called. The following code shows how a large picture named
Family.jpg is compressed to 25 percent of its
starting size using a compression-factor setting of 70 percent. A
CompressJPEG object is created, and
its SizePercent and QualityPercent properties are set to
25 and 70, respectively. The Load() method loads the original JPEG image,
and the Save() method then saves
the compressed and resized image to a new JPEG file:
	Dim imageConverter As New CompressJPEG
	imageConverter.SizePercent = 25
	imageConverter.QualityPercent = 70
	imageConverter.Load("Family.jpg")
	imageConverter.Save("SmallerFamily.jpg")
Both the SizePercent and
QualityPercent properties affect
the final number of bytes in the output file, and it’s important to
understand the difference between these two settings. SizePercent refers to the physical
dimensions of the image; that is, how many pixels wide and high it
will be after compression. JPEG compression is not a lossless
compression technique, and the QualityPercent setting controls how much of
the original information content of the picture is retained. A low
setting results in graininess and blockiness in the image, whereas a
high value for this setting retains the detail and quality of the
original image. Typically, a setting of around 75 to 85
provides good compression with little or no noticeable loss of image
quality. If you don’t set the QualityPercent property, it defaults to a
very reasonable value of 85. If you
don’t set the SizePercent property,
the output image retains the same dimensions as the original.
The following code is for the CompressJPEG class itself. In addition to
the properties and methods described so far, there are two more
properties you might find handy: instead of setting SizePercent, which resizes the picture to a
percentage of its original size, you can set the Width or Height properties to define the compressed
file’s dimensions. If you set one of these properties,
the other is calculated to retain the proportions of the original
image. Here’s the code for the CompressJPEG class:
	Imports System.Drawing.Imaging

	Public Class CompressJPEG
	   Private SourceImage As Image
	   Private UseQualityPercent As Double
	   Private UseSizePercent As Double
	   Private UseWidth As Integer
	   Private UseHeight As Integer

	   Public Sub Load(ByVal filePath As String)
	      ' ----- Assign the user-specified file.
	      SourceImage = Image.FromFile(filePath)
	   End Sub

	   Public Sub Save(ByVal outputFile As String)
	      ' ----- Save the file, making adjustments as requested.
	      Dim wide As Integer
	      Dim tall As Integer
	      Dim newImage As Bitmap
	      Dim canvas As Graphics
	      Dim codecs( ) As ImageCodecInfo
	      Dim jpegCodec As ImageCodecInfo
	      Dim scanCodec As ImageCodecInfo
	      Dim qualityParam As EncoderParameters

	      ' ----- Don't bother if there is no image.
	      If IsNothing(SourceImage) = True Then Return

	      ' ----- Use default values if needed.
	      If UseQualityPercent = 0 Then UseQualityPercent = 85

	      ' ----- Calculate the new dimensions.
	      If (UseWidth <> 0) And (UseHeight = 0) Then
	         ' ----- Proportional to the width.
	         wide = UseWidth
	         tall = CInt(UseWidth * _
	            SourceImage.Height / SourceImage.Width)
	      ElseIf (UseWidth = 0) And (UseHeight <> 0) Then
	         ' ----- Proportional to the height.
	         wide = CInt(UseHeight * _
	            SourceImage.Width / SourceImage.Height)
	         tall = UseHeight
	      ElseIf (UseWidth <> 0) And (UseHeight <> 0) Then
	         ' ----- User-specified size.
	         wide = UseWidth
	         tall = UseHeight
	      ElseIf (UseSizePercent <> 0) Then
	         ' ----- Percent scale.
	         wide = CInt(SourceImage.Width * _
	            UseSizePercent / 100)
	         tall = CInt(SourceImage.Height * _
	            UseSizePercent / 100)
	      Else
	         ' ----- Retain the size.
	         wide = SourceImage.Width
	         tall = SourceImage.Height
	      End If

	      ' ----- Redraw the image to the new size.
	      newImage = New Bitmap(wide, tall)
	      canvas = Graphics.FromImage(newImage)
	      canvas.DrawImage(SourceImage, 0, 0, wide, tall)
	      canvas.Dispose( )

	      ' ----- Locate the processor for JPEG images.
	      codecs = ImageCodecInfo.GetImageEncoders
	      jpegCodec = codecs(0)
	      qualityParam = New EncoderParameters
	      For Each scanCodec In codecs
	         If (scanCodec.MimeType = "image/jpeg") Then
	            ' ----- Found the one we're looking for.
	            jpegCodec = scanCodec
	            Exit For
	         End If
	      Next scanCodec

	      ' ----- Prepare the quality reduction.
	      qualityParam.Param(0) = New EncoderParameter( _
	         Encoder.Quality, CInt(UseQualityPercent))

	      ' ----- Adjust
and save the new image in one command.
	      newImage.Save(
outputFile, jpegCodec, qualityParam)
	      SourceImage = Nothing
	   End Sub

	   Public Property QualityPercent( ) As Double
	      Get
	         Return UseQualityPercent
	      End Get
	      Set(ByVal Value As Double)
	         Select Case Value
	            Case Is < 1
	               UseQualityPercent = 1
	            Case Is > 100
	               UseQualityPercent = 100
	            Case Else
	               UseQualityPercent = Value
	         End Select
	      End Set
	   End Property

	   Public Property SizePercent( ) As Double
	      Get
	         Return UseSizePercent
	      End Get
	      Set(ByVal Value As Double)
	         Select Case Value
	            Case Is < 1
	               UseSizePercent = 1
	            Case Is > 400
	               UseSizePercent = 400
	            Case Else
	               UseSizePercent = Value
	         End Select
	      End Set
	   End Property

	   Public Property Width( ) As Integer
	      Get
	         If (UseWidth > 0) Then
	            Return UseWidth
	         Else
	            If (SourceImage.Width > 0) Then
	               Return CInt(SourceImage.Width * _
	                  UseSizePercent / 100)
	            End If
	         End If
	      End Get
	      Set(ByVal Value As Integer)
	         UseWidth = Value
	      End Set
	   End Property

	   Public Property Height( ) As Integer
	      Get
	         Return UseHeight
	      End Get
	      Set(ByVal Value As Integer)
	         UseHeight = Value
	      End Set
	   End Property
	End Class
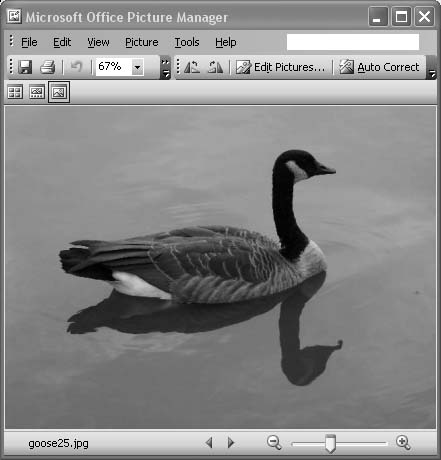
Figure 10-11 shows an image after compression from the original, much larger file. This compressed file is less than 19 KB in size, reduced from an original of over 1.25 MB!
10.10. Getting JPEG Extended Information
Problem
You want to extract information from within the JPEG pictures your camera creates. You might want to do this, for instance, to rename the pictures based on the date and time they were taken.
Solution
Sample code folder: Chapter 10JPEGInfo
Use the GetPropertyItem() method of the Bitmap class to extract header information
from a JPEG file.
Discussion
Each brand of camera seems to create and store different header information in the picture files it creates, so this solution may or may not work for you. This recipe’s code is generalized enough so that even though you might not have documentation listing the properties by their access numbers, you can check this program’s output to help determine what information is available.
The GetJpgInformation()
function listed here gets a list of all property IDs from the
picture’s bitmap, calls GetPropertyItem() for each of these, and
then formats the results into a string array as best it can, replacing
some characters and zero bytes as required to prevent string-handling
problems:
	Public Shared Function GetJpgInformation( _
	      ByVal whichFile As String) As String
	   ' ----- Retrieve the properties of a JPEG file.
	   Dim bytesPropertyID As Byte( )
	   Dim stringPropertyID As String
	   Dim loadedImage As System.Drawing.Bitmap
	   Dim propertyIDs( ) As Integer
	   Dim result As New System.Text.StringBuilder
	   Dim counter As Integer
	   Dim scanProperty As Integer

	   ' ----- Retrieve the image and its properties.
	   loadedImage = New System.Drawing.Bitmap(whichFile)
	   propertyIDs = loadedImage.PropertyIdList

	   ' ----- Examine each property.
	   For Each scanProperty In propertyIDs
	      ' ----- Convert the property to a string format.
	      bytesPropertyID = loadedImage.GetPropertyItem( _
	         scanProperty).Value
	      stringPropertyID = System.Text.Encoding.ASCII. _
	         GetString(bytesPropertyID)

	      ' ----- Only retain characters in the printable
	      '       ASCII range.
	      For counter = 0 To 255
	         If counter < 32 Or counter > 127 Then
	            If (stringPropertyID.IndexOf(Chr(counter)) _
	                 <> -1) Then
	               stringPropertyID = Replace(stringPropertyID, _
	                  Chr(counter), "")
	            End If
	         End If
	      Next counter

	      ' ----- Display the property if it's reasonable.
	      If (stringPropertyID.Length > 0) And _
	            (stringPropertyID.Length < 70) Then
	         result.Append(scanProperty.ToString)
	         result.Append(": ")
	         result.AppendLine(stringPropertyID)
	      End If
	   Next scanProperty

	   ' ----- Display the results.
	   Return result.ToString
	End Function

	Public Shared Function GetString( _
	      ByVal sourceBytes As Byte( )) As String
	   ' ----- Convert a byte array to a string, taking into
	   '       account the terminating null character.
	   Dim result As String

	   result = System.Text.Encoding.ASCII.GetString(sourceBytes)
	   If (result.EndsWith(vbNullChar) = True) Then _
	      result = result.Substring(0, result.Length - 1)
	   Return result
	End Function
Call the GetJpgInformation()
function directly with the path to a valid JPEG file to view the
properties of the file:
MsgBox(ProcessJPEG.GetJpgInformation("sample.jpg"))Figure 10-12 shows a sample of the output produced by this code.
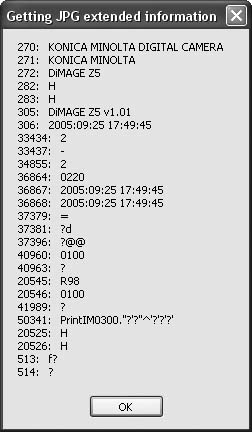
As you can see from the output, not all data items are usable, or even recognizable as readable ASCII text. Your output will probably vary depending on the camera or software used to create your image files. For your camera, you can use the date and time stamps as shown to help rename your picture files for easy chronological storage and access.
10.11. Creating Thumbnails
Problem
You want to create good-quality thumbnail JPEG images from larger images. These smaller versions of larger pictures are handy for web pages.
Solution
The CompressJPEG class
presented in Recipe
10.9 provides an ideal solution for creating smaller thumbnail
versions of large JPEG pictures.
Discussion
Instead of setting the CompressJPEG object’s SizePercent property to shrink the pictures
to some unknown smaller size, set the Height property to 100 to force the creation of compressed
files exactly 100 pixels high. The width of each output thumbnail
picture will be automatically adjusted to retain the proportions of
the original image. The default QualityPercent value of 85 works just fine for these thumbnails:
Dim imageThumb As New CompressJPEG
imageThumb.Height = 100
imageThumb.Load("sample.jpg")
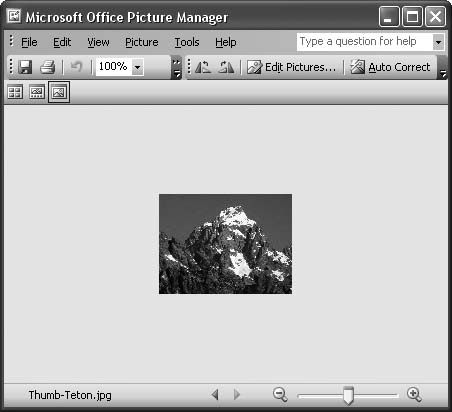
imageThumb.Save("sampleThumb.jpg")The picture shown in Figure 10-13 is a 100-pixel-high copy of an original, and much larger, JPEG picture of a mountain in the Grand Tetons.
10.12. Displaying Images While Controlling Stretching and Sizing
Problem
You want to display a picture in a PictureBox on a form, but you aren’t sure which size mode setting to use.
Solution
Sample code folder: Chapter 10StretchImage
The sample code in this recipe lets you interactively experiment with the display of a picture on a form to determine which size mode setting will work best for your needs.
Discussion
The PictureBox control is
ideal for displaying JPEG and other picture files. However, one
of the property settings of the PictureBox changes the way images are
displayed in a significant way, and having a clear means of
visualizing how it affects the displayed images can help you plan your
applications better. The code presented here provides an easy way to
see exactly how the SizeMode property works.
Create a new Windows Forms application. Add a PictureBox control to the form, and set its
Dock property to Fill. This causes the PictureBox to automatically stretch to fill
the client area of the form on which it resides. (The image displayed in the PictureBox won’t necessarily stretch to fill
the same area—that depends on the SizeMode setting of the PictureBox.) Next, add the following code to
the form’s code template. The code toggles through the SizeMode settings each time you click on the
PictureBox, letting you easily see
and experiment with the various settings:
	Private Sub PictureBox1_Click(ByVal sender As System.Object, _
	      ByVal e As System.EventArgs) Handles PictureBox1.Click
	   ' ----- Toggle to the next size mode.
	   Static displayState As PictureBoxSizeMode = 0

	   ' ----- Move to the next state.
	   If ([Enum].IsDefined(GetType(PictureBoxSizeMode), _
	         CInt(displayState) + 1) = True) Then
	      displayState += 1
	   Else
	      ' ----- Wrap to the first choice.
	      displayState = 0
	   End If

	   ' ----- Update the display.
	   PictureBox1.SizeMode = displayState
	   Me.Text = "PictureBoxSizeMode." & displayState.ToString( )
	End Sub
This code toggles through all available values of the PictureBoxSizeMode enumeration, the one used
to set the size of a PictureBox
control. To select an image when starting the application, add the following
code to the form’s class:
	Private Sub Form1_Load(ByVal sender As Object, _
	      ByVal e As System.EventArgs) Handles Me.Load
	   ' ----- Let the user choose a picture.
	   Dim locateFile As New OpenFileDialog

	   ' ----- Prompt for the initial file.
	   locateFile.Filter = "JPG files (*.jpg)|*.jpg"
	   locateFile.Multiselect = False
	   If (locateFile.ShowDialog( ) = _
	         Windows.Forms.DialogResult.OK) Then
	      ' ----- Show the selected picture.
	      PictureBox1.Load(locateFile.FileName)
	   Else
	      ' ----- Exit the program.
	      Me.Close( )
	   End If

	   ' ----- Show the initial state.
	   Me.Text = "PictureBoxSizeMode." & _
	      PictureBox1.SizeMode.ToString( )
	End Sub
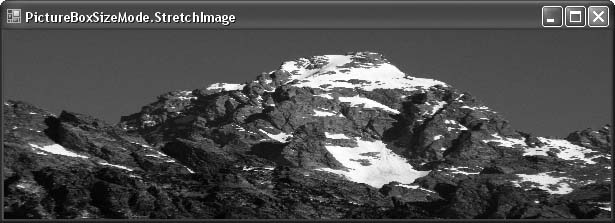
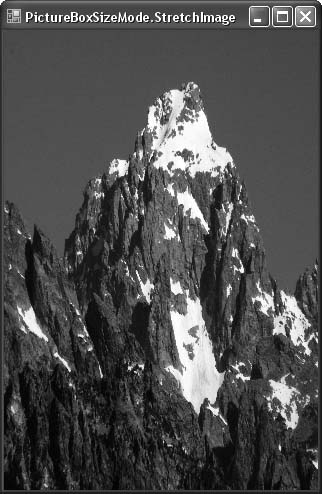
Figures 10-14
and 10-18 show the
display of a picture when SizeMode
is set to StretchImage. This
setting causes the image to distort horizontally and/or vertically to
fit the control, rather than retaining its original
proportions.
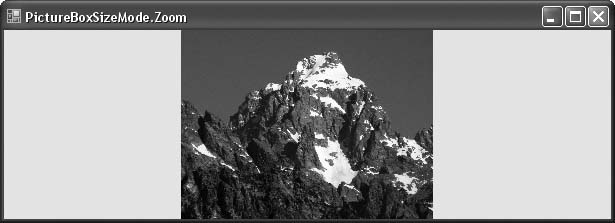
As you can see in Figure 10-15, with the
Zoom setting, the picture retains
its original proportionality. However, this can cause blank areas to
appear either on both sides of or above and below the image. The
picture appears smaller than when it’s stretched to fit the dimensions
of the PictureBox, but at least
it’s not distorted.
In Figure 10-16,
SizeMode is set to AutoSize, which means the PictureBox automatically resizes itself to
show the entire picture at its full resolution. Because the PictureBox is limited to the surface of the
form, though, only the upper-left corner of the picture is seen here,
and only by expanding the form to great lengths will you begin to see
the edge of the mountain in the bottom-right corner of the form. In
this figure we only see blue sky and a little bit of the mountain. You
may also detect a small blurry bird image in the very corner.
Figure 10-17
shows the picture when SizeMode is
set to CenterImage. The picture is
once again shown full-scale, as when the mode was set to AutoSize, but in this case you see the very
center of the large picture rather than its upper-left corner.
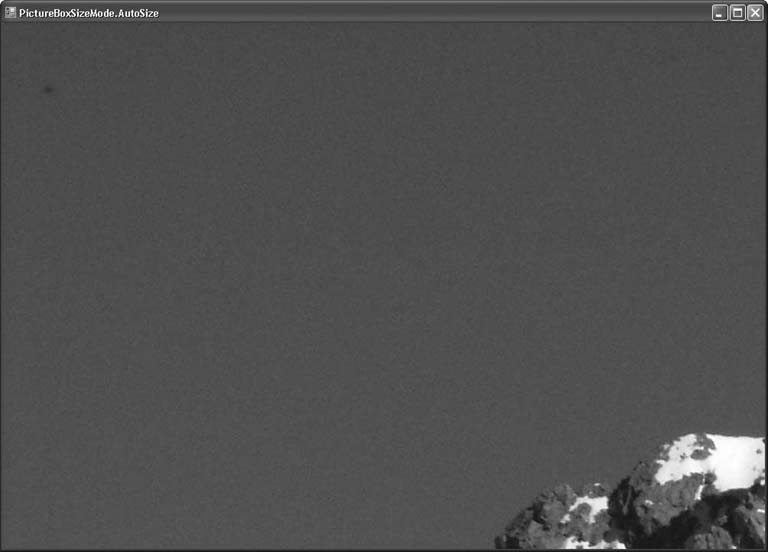
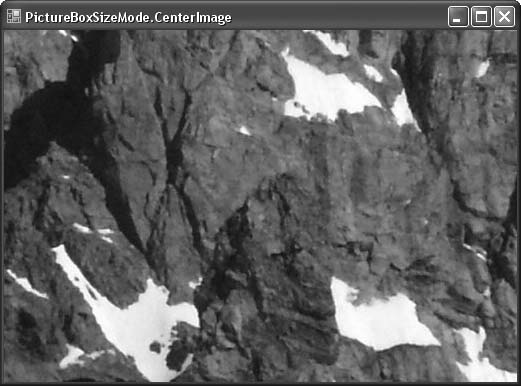
Figure 10-18 show what happens after the demonstration program cycles through the settings.
Each setting has its uses, and you should become familiar with the effects of each when displaying pictures or other graphics.
10.13. Scrolling Images
Problem
You want to display a picture with full resolution, but you want to let the user scroll around to see all parts of the picture.
Solution
Sample code folder: Chapter 10ScrollImage
Store the picture in a PictureBox with its SizeMode property set to AutoSize, and place it on a form with its
AutoScroll property set to True.
Discussion
To see this demonstration in action, add a PictureBox to a form, set its SizeMode property to AutoSize, and set its Location property to 0,0. Don’t worry about its size; the
AutoSize setting will take care of
that. Change the form’s AutoScroll
property to True. Now add the
following code to the form’s class, which loads a picture on
startup:
	Private Sub Form1_Load(ByVal sender As Object, _
	      ByVal e As System.EventArgs) Handles Me.Load
	   ' ----- Let the user choose a picture.
	   Dim locateFile As New OpenFileDialog

	   ' ----- Prompt for the initial file.
	   locateFile.Filter = "JPG files (*.jpg)|*.jpg"
	   locateFile.Multiselect = False
	   If (locateFile.ShowDialog( ) = _
	         Windows.Forms.DialogResult.OK) Then
	      ' ----- Show the selected picture.
	      PictureBox1.Load(locateFile.FileName)
	      Me.AutoScroll = True
	   Else
	      ' ----- Exit the program.
	      Me.Close( )
	   End If
	End Sub
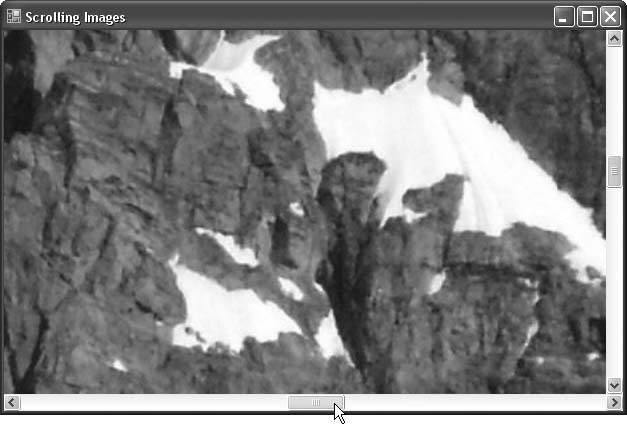
Run the program, and select a large picture. The scrollbars will automatically appear when needed, as shown in Figure 10-19.
10.14. Merging Two or More Images
Problem
You want to blend two images together, with a variable strength for each, to create a ghost-like effect.
Solution
Sample code folder: Chapter 10MergeImages
Use the GetPixel() method of the Bitmap class to process the pixels from
matching locations in each of the original images, and use the
SetPixel() method to assign the resulting
pixels to a third bitmap to create the merged image.
Discussion
This recipe processes the pixels from two identically sized
images and creates a third. The action is slow enough that
intermediate results are displayed after each row of pixels is
processed. To try it out, add the following code to the form’s class.
The code loads two image files (in Form1_Load()) and does the actual processing
(DoMergeImages()):
	Private SourceImages(1) As Bitmap

	Private Sub Form1_Load(ByVal sender As System.Object, _
	      ByVal e As System.EventArgs) Handles MyBase.Load
	   ' ----- Prepare the form.
	   Dim counter As Integer
	   Dim locateFile As New OpenFileDialog

	   ' ----- Display the form immediately.
	   Me.Show( )

	   ' ----- Prompt for each file.
	   locateFile.Filter = "JPG files (*.jpg)|*.jpg"
	   For counter = 0 To 1
	      ' ----- Prompt for the initial file.
	      If (locateFile.ShowDialog( ) <> _
	            Windows.Forms.DialogResult.OK) Then
	         ' ----- End the program.
	         Me.Close( )
	         Return
	      End If

	      ' ----- Load in the picture.
	      SourceImages(counter) = New Bitmap(locateFile.FileName)
	   Next counter

	   ' ----- Start the processing.
	   DoMergeImages( )
	End Sub

	Private Sub Form1_FormClosed(ByVal sender As Object, _
	      ByVal e As System.Windows.Forms.FormClosedEventArgs) _
	      Handles Me.FormClosed
	   ' ----- Exit the program. This is needed just in case the
	   '       user closed the form in the middle of the merge.
	   End
	End Sub

	Private Sub DoMergeImages( )
	   ' ----- Merge two images.
	   Dim workBitmap As Bitmap
	   Dim across As Integer
	   Dim down As Integer
	   Dim firstColor As Color
	   Dim secondColor As Color
	   Dim mixedColor As Color
	   Dim redPart As Integer
	   Dim greenPart As Integer
	   Dim bluePart As Integer
	   Dim canvas As Graphics

	   ' ----- Use one of the images as the base.
	   workBitmap = SourceImages(0)
	   canvas = Graphics.FromImage(workBitmap)

	   ' ----- Process each row of the image.
	   For down = 0 To SourceImages(0).Height - 1
	      ' ----- Process each column of the image.
	      For across = 0 To SourceImages(0).Width - 1
	         Try
	            ' ----- Get the colors of a specific pixel.
	            firstColor = _
	               SourceImages(0).GetPixel(across, down)
	            secondColor = _
	               SourceImages(1).GetPixel(across, down)
	         Catch
	            ' ----- If an error occurs, the images must have
	            '       been mismatched in size.
	            Continue For
	         End Try

	         ' ----- Build a blended color from the parts.
	         redPart = (CInt(firstColor.R) + secondColor.R)  2
	         greenPart = (CInt(firstColor.G) + secondColor.G)  2
	         bluePart = (CInt(firstColor.B) + secondColor.B)  2
	         mixedColor = Color.FromArgb(redPart, greenPart, _
	            bluePart)
	         ' ----- Update the image.
	         workBitmap.SetPixel(across, down, mixedColor)
	      Next across

	      ' ----- Refresh the display so the user knows
	      '       something is happening.
	      MergedImage.Image = workBitmap
	      Application.DoEvents( )
	   Next down
	   canvas.Dispose( )
	End Sub
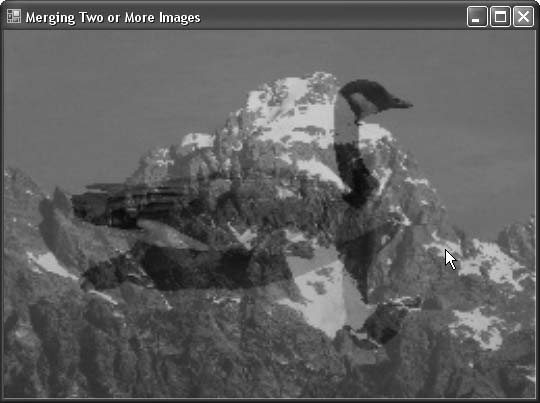
Figure 10-20 shows the results of blending together images of a goose and the Grand Teton mountains. The code blends the pixels equally by adding together the color values and dividing by two to find their averages. You could easily modify this averaging to place more weight on the pixels from one image or the other. Another creative experiment might be to average together only one or more of the color channels (red, green, or blue).
10.15. Using Resource Images
Problem
You want to manipulate images on your forms at runtime without having to load them from accompanying files shipped with your application.
Solution
Add the images to the application’s resources, then load them
into controls or process them as needed by accessing them directly
from the My.Resources
object.
Discussion
Adding pictures, icons, strings, or other items to your application’s resources is very straightforward and easy to do in Visual Basic 2005. This recipe shows the steps involved for adding images, but the process easily extends to other types of resources.
Resource items are maintained at design time by double-clicking My Project in the Solution Explorer list and selecting the Resources tab. Figure 10-21 shows an example set of image resources as they appear in the Resources maintenance dialog.

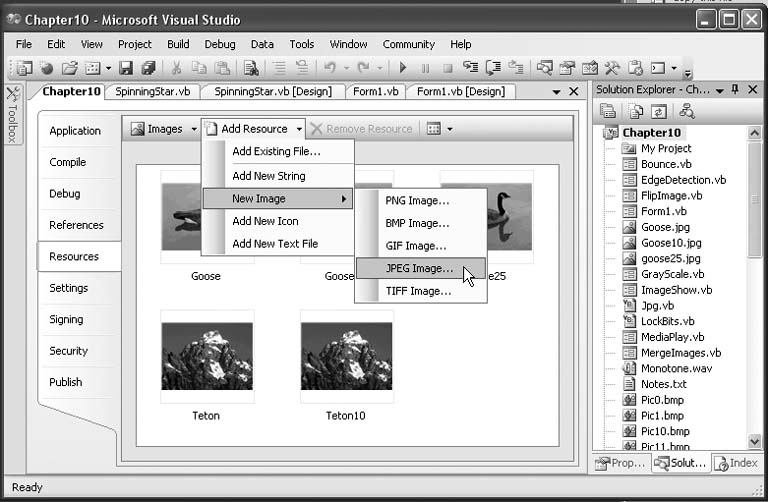
To add a new picture to the collection of images, click the Add Resources pull-down menu, open the New Image submenu, and select JPEG Image, as shown in Figure 10-22.
At runtime, the images stored in your application’s resources
are referenced by name. For example, the following code loads either
the Goose or the Teton image into PictureBox1, based on the current state of
the static Boolean variable
showTheGoose:
	Private Sub ShowImage(ByVal useTheGoose As Boolean)
	   ' ----- Goose or Teton: hard choice!
	   If (useTheGoose = True) Then
	      PictureBox1.Image = My.Resources.Goose
	   Else
	      PictureBox1.Image = My.Resources.Teton
	   End If
	End Sub
10.16. Capturing an Image of the Screen
Problem
You want to capture a copy of the screen for processing in your Visual Basic 2005 application as a bitmap image, without resorting to any external applications.
Solution
Sample code folder: Chapter 10 CaptureScreen
Use the GetScreen() function in the ScreenGrab module presented in this
recipe.
Discussion
There’s no straightforward way to grab the contents of the
screen using only functionality within the .NET Framework, but it is
easy to call the appropriate Windows API functions to get the job
done. The ScreenGrab module shown
here wraps all the required function declarations and calls in an
easy-to-use package.
Create a new Windows Forms application. Add a new module to the project named ScreenGrab.vb, and use the following code for its definition:
	Module ScreenGrab
	   Private Declare Function CreateDC _
	      Lib "GDI32" Alias "CreateDCA" ( _
	      ByVal lpDriverName As String, _
	      ByVal lpDeviceName As String, _
	      ByVal lpOutput As String, _
	      ByVal lpInitData As String _
	      ) As IntPtr

	   Private Declare Function CreateCompatibleDC _
	      Lib "GDI32" (ByVal hDC As IntPtr) As IntPtr

	   Private Declare Function CreateCompatibleBitmap _
	      Lib "GDI32" ( _
	      ByVal hDC As IntPtr, _
	      ByVal nWidth As Integer, _
	      ByVal nHeight As Integer _
	      ) As IntPtr

	   Private Declare Function SelectObject _
	      Lib "GDI32" ( _
	      ByVal hDC As IntPtr, _
	      ByVal hObject As IntPtr _
	      ) As IntPtr

	   Private Declare Function BitBlt _
	      Lib "GDI32" ( _
	      ByVal srchDC As IntPtr, _
	      ByVal srcX As Integer, _
	      ByVal srcY As Integer, _
	      ByVal srcW As Integer, _
	      ByVal srcH As Integer, _
	      ByVal desthDC As IntPtr, _
	      ByVal destX As Integer, _
	      ByVal destY As Integer, _
	      ByVal op As Integer _
	      ) As Integer

	   Private Declare Function DeleteDC _
	      Lib "GDI32" (ByVal hDC As IntPtr) As Integer

	   Private Declare Function DeleteObject _
	      Lib "GDI32" (ByVal hObj As IntPtr) As Integer

	   Const SRCCOPY As Integer = &HCC0020


Public Function GetScreen( ) As Bitmap
	      ' ----- Take a picture of the screen.
	      Dim screenHandle As IntPtr
	      Dim canvasHandle As IntPtr
	      Dim screenBitmap As IntPtr
	      Dim previousObject As IntPtr
	      Dim resultCode As Integer
	      Dim screenShot As Bitmap

	      ' ----- Get a reference to the display.
	      screenHandle = CreateDC("DISPLAY", "", "", "")

	      ' ----- Make a canvas that is just like the
	      '       display's canvas.
	      canvasHandle = CreateCompatibleDC(screenHandle)

	      ' ----- Create a bitmap that will hold the screen image.
	      screenBitmap = CreateCompatibleBitmap(screenHandle, _
	         Screen.PrimaryScreen.Bounds.Width, _
	         Screen.PrimaryScreen.Bounds.Height)

	      ' ----- Copy the screen image to the canvas/bitmap.
	      previousObject = SelectObject(canvasHandle, _
	         screenBitmap)
	      resultCode = BitBlt(canvasHandle, 0, 0, _
	         Screen.PrimaryScreen.Bounds.Width, _
	         Screen.PrimaryScreen.Bounds.Height, _
	         screenHandle, 0, 0, SRCCOPY)
	      screenBitmap = SelectObject(canvasHandle, _
	         previousObject)

	      ' ----- Finished with the canvases.
	      resultCode = DeleteDC(screenHandle)
	      resultCode = DeleteDC(canvasHandle)

	      ' ----- Copy image to a .NET bitmap.
	      screenShot = Image.FromHbitmap(screenBitmap)
	      DeleteObject(screenBitmap)

	      ' ----- Finished.
	      Return screenShot
	   End Function
	End Module
Now return to Form1, and add
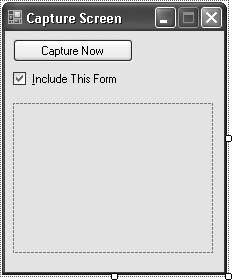
a Button control named ActCapture. Set its Text property to Capture Now. Next, add a CheckBox control named IncludeThisForm, set its Checked property to True, and set its Text property to Include This Form. Finally, add a PictureBox control named ScreenSummary, set its SizeMode property to StretchImage, and set its Size property to 200,150. Figure 10-23 shows the form
and its controls.
Add the following code to Form1’s class template:
	Private Sub ActCapture_Click(ByVal sender As System.Object, _
	      ByVal e As System.EventArgs) Handles ActCapture.Click
	   ' ----- Copy the screen.
	   ScreenSummary.Image = GetScreen( )
	End Sub

	Private Sub IncludeThisForm_CheckedChanged( _
	      ByVal sender As System.Object, _
	      ByVal e As System.EventArgs) _
	      Handles IncludeThisForm.CheckedChanged
	   ' ----- Adjust the opacity as needed.
	   If (IncludeThisForm.Checked = True) Then
	      Me.Opacity = 1.0
	   Else
	      Me.Opacity = 0.99
	   End If
	End Sub
It turns out that the standard method of copying the screen ignores semitransparent forms, so setting the form’s opacity to anything below 1.0 makes it invisible to the screen capture process.
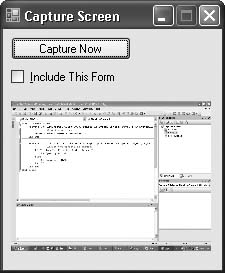
Run the program, and click the ActCapture button. Figure 10-24 shows the form
in use.
Details of the API functions included in the ScreenGrab module and their use are beyond
the scope of this book, but there are plenty of resources on the
Internet if you want to find out how they work.
10.17. Getting Display Dimensions
Problem
You want to determine the dimensions of the user’s screen at runtime, including both the entire screen and just the working area that doesn’t include the task bar. Also, you want to determine the number of monitors on the user’s system, the screen dimensions of each, and which screen is currently active.
Solution
Sample code folder: Chapter 10ScreenInfo
Access this information from the Screen object, which includes an array of
objects, one for each screen on the system.
Discussion
The following code extracts information from each Screen object returned by the Screen.AllScreens property, then formats the
various data items returned for easy review:
	Dim result As New System.Text.StringBuilder
	Dim scanScreen As Screen

	' ----- Include some summary data.
	result.Append("Number of screens: ")
	result.AppendLine(Screen.AllScreens.Length.ToString)
	result.AppendLine( )

	' ----- Process each installed screen.
	For Each scanScreen In Screen.AllScreens
	   result.AppendLine("Device Name: " & _
	      GetTerminatedString(scanScreen.DeviceName))

	   result.AppendLine("Bounds: " & _
	      scanScreen.Bounds.ToString)

	   result.AppendLine("Working Area: " & _
	      scanScreen.WorkingArea.ToString)

	   result.AppendLine("Is Primary: " & _
	      scanScreen.Primary.ToString)

	   result.AppendLine( )
	Next scanScreen

	MsgBox(result.ToString( ))
The device name returned by the scanScreen.DeviceName property may include
an old C-style terminating null character (ASCII 0), so you must to
add a custom function to extract just the part you need:
	Private Function GetTerminatedString( _
	      ByVal sourceString As String) As String
	   ' ----- Return all text of a string up to the first
	   '       null character.
	   Dim index As Integer

	   index = sourceString.IndexOf(vbNullChar)
	   If (index > -1) Then
	      Return sourceString.Substring(0, index)
	   Else
	      Return sourceString
	End If
	    End Function
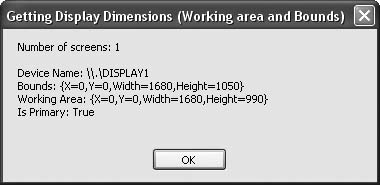
As shown in Figure 10-25, the system used for testing this code had only one monitor, with a screen resolution of 1680 x 1050 pixels and a working area of 1680 x 990 pixels (the working area is slightly smaller because the task bar was showing along the bottom edge of the screen).
10.18. Speeding Up Image Processing
Problem
You want to implement some image-processing algorithms, and you want the operations to be reasonably fast.
Solution
Sample code folder: Chapter 10LockImage
Use the InteropServices.Marshal.LockBits() method to
prevent the operating system from moving the bitmap data around in
memory. This greatly speeds up the program’s access to the pixel data.
This recipe presents a LockImage
class that wraps the LockBits()
functionality for easy use.
Discussion
The LockImage class presented
in this recipe and the remaining recipes in this chapter contains
several image-processing methods. (The full LockImage class is listed in Recipe 10.21.) The goal is
to provide enough examples to enable you to design your own
image-processing functionality.
The processing function demonstrated in this recipe is Mirror(), a method of the LockImage class that flips an image left and
right. To see how it works, create a form with a PictureBox on it that has its Dock property set to Fill and its SizeMode property set to StretchImage. Load a picture into its
Image property, and add the
following code to its Click
event:
	Private Sub PictureBox1_Click(ByVal sender As System.Object, _
	      ByVal e As System.EventArgs) Handles PictureBox1.Click
	   ' ----- Mirror-image the bitmap.
	   Dim mirrorIt As New LockImage
	   mirrorIt.Image = PictureBox1.Image
	   mirrorIt.Mirror( )
	   PictureBox1.Image = mirrorIt.Image
	End Sub
When you click on the picture, this procedure creates an
instance of the LockImage class,
copies the PictureBox’s image to
it, calls the Mirror() method to
process the image, and then copies the image back into the PictureBox. This is the pattern for using
any of the processing methods of the LockImage class.
Now let’s look at the portions of the LockImage class that relate to the mirroring
processs.
First, you must import the requisite namespaces. InteropServices.Marshal is required for its
LockBits() method. The class defines a few
class-level variables:
	Imports System.Drawing.Imaging
	Imports System.Runtime.InteropServices.Marshal

	Public Class LockImage
	   Private BaseImage As Bitmap
	   Private BaseImageWidth As Integer
	   Private BaseImageHeight As Integer
	   Private TotalPixels As Integer
	   Private ImageAddress As IntPtr
	   Private ImageContent As BitmapData
	   Private ImageBuffer( ) As Integer
The Image property stores or
retrieves the bitmap image to be locked and processed:
	Public Property Image( ) As Bitmap
	   ' ----- User access to the relevant image.
	   Get
	      Return BaseImage
	   End Get
	   Set(ByVal Value As Bitmap)
	      Dim canvas As Graphics
	      BaseImage = New Bitmap(Value.Width, _
	         Value.Height, Value.PixelFormat)
	      canvas = Graphics.FromImage(BaseImage)
	      canvas.DrawImage(Value, 0, 0, _
	         Value.Width, Value.Height)
	      canvas.Dispose( )
	   End Set
	End Property
The LockTheImage() method
provides the important core functionality of this class; with it, you
can lock down the bits of the bitmap and present the pixel data in an
integer array for efficient processing. All pixel processing in the
methods you create, such as the Mirror() method presented later, will
process in place the integer pixel data stored in ImageBuffer().
Each 32-bit integer in ImageBuffer() represents a single pixel. The
most significant byte is alpha, the opacity value. The next most
significant byte is for red, then green, and the least significant
byte is for blue. Each of these four values ranges from 0 to 255.
Two other variables of importance for your image-processing methods
are BaseImageWidth and BaseImageHeight. The ImageBuffer() array is one-dimensional, so
these two values are required to determine the rectangular layout of
the pixels:
	Private Sub LockTheImage( )
	   ' ----- Lock the image in memory. How much room
	   '       do we need?
	   BaseImageWidth = BaseImage.Width
	   BaseImageHeight = BaseImage.Height
	   TotalPixels = BaseImageWidth * BaseImageHeight

	   ' ----- Create a stable (locked) area in memory. It
	   '       will store 32-bit color images.
	   ReDim ImageBuffer(TotalPixels - 1)
	   ImageContent = BaseImage.LockBits( _
	      New Rectangle(0, 0, BaseImageWidth, _
	      BaseImageHeight), ImageLockMode.ReadWrite, _
	      PixelFormat.Format32bppRgb)
	   ImageAddress = ImageContent.Scan0

	   ' ----- Associate the buffer and the locked memory.
	   Copy(ImageAddress, ImageBuffer, 0, TotalPixels)
	End Sub
The Mirror() method works by
locating the first and last pixels of each row of the image, then
swapping the pixels at those locations. The next and previous pixels
in the row are swapped next, and this continues until all pixels in
the row have been swapped. Here is the code for the Mirror() method:
	Public Sub Mirror( )
	   ' ----- Make a left-to-right mirror image.
	   Dim pixelIndex1 As Integer
	   Dim pixelIndex2 As Integer
	   Dim holdPixel As Integer
	   Dim down As Integer

	   ' ----- Lock the image for speed.
	   LockTheImage( )

	   ' ----- Process each row of the image.
	   For down = 0 To BaseImageHeight - 1
	      ' ----- Process each column,
up to halfway across.
	      pixelIndex1 = down * BaseImageWidth
	      pixelIndex2 = pixelIndex1 + BaseImageWidth - 1
	      Do While pixelIndex1 < pixelIndex2
	         ' ----- Swap two pixels.
	         holdPixel = ImageBuffer(pixelIndex1)
	         ImageBuffer(pixelIndex1) = _
	            ImageBuffer(pixelIndex2)
	         ImageBuffer(pixelIndex2) = holdPixel
	         pixelIndex1 += 1
	         pixelIndex2 -= 1
	      Loop
	   Next down

	   ' ----- Finished. Unlock the image.
	   UnlockTheImage( )
	End Sub
The UnlockTheImage( ) method
restores the processed pixel data in ImageBuffer( ) to the bitmap, ready to be
retrieved by the code that uses the class:
	Private Sub UnlockTheImage( )
	   ' ----- Unlock the memory area.
	   Copy(ImageBuffer, 0, ImageAddress, TotalPixels)
	   Image.UnlockBits(ImageContent)
	   ImageContent = Nothing
	   ReDim ImageBuffer(0)
	End Sub
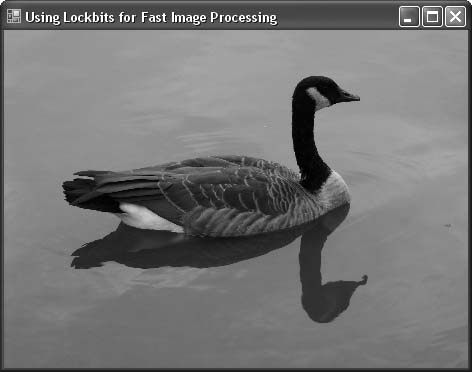
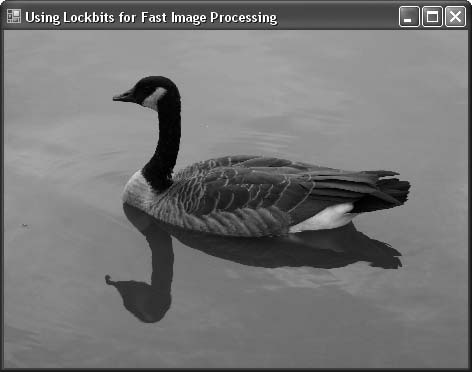
Figure 10-26 shows a sample picture just before being flipped; Figure 10-27 shows the picture immediately afterwards.
See Also
Recipe 10.21
includes the full source code for the LockImage class.
10.19. Converting an Image to Grayscale
Problem
You’d like to convert a picture from color to grayscale from within a Visual Basic 2005 application.
Solution
Sample code folder: Chapter 10LockImage
Use the MakeGray() method of
the LockImage class, described in
Recipe 10.18.
Discussion
The MakeGray() method of the
LockImage class (whose full source
code is listed in Recipe
10.21) provides a working example that processes the individual
color bytes stored in the class’s ImageBuffer() integer array.
Here’s the code for the MakeGray() procedure:
	Public Sub MakeGray( )
	   ' ----- Make a grayscale version of the image.
	   Dim pixelIndex As Integer
	   Dim onePixel As Integer
	   Dim alphaPart As Integer
	   Dim redPart As Integer
	   Dim greenPart As Integer
	   Dim bluePart As Integer
	   Dim maxColor As Integer
	   Dim minColor As Integer
	   Dim down As Integer
	   Dim across As Integer

	   ' ----- Lock the image for speed.
	   LockTheImage( )
All processing methods added to the LockImage class should call the private
method LockTheImage() as the first
step and the corresponding UnlockTheImage() method as the last
step.
The following two nested loops process all pixels in all rows of
the image. pixelIndex walks the
pixels across each row and then down the image:
	   ' ----- Process each pixel in the grid.
	   For down = 0 To BaseImageHeight - 1
	      For across = 0 To BaseImageWidth - 1
	         ' ----- Locate the pixel's color.
	         pixelIndex = down * BaseImageWidth + across
Each pixel is split up into its parts if the processing requires
access to them. The Mirror( )
method processed the pixels as whole units, but to compute grayscale
values, you need to access the individual color components of each
pixel:
	   onePixel = ImageBuffer(pixelIndex)

	   ' ----- Extract the color values.
	   alphaPart = (onePixel >> 24) And &HFF
	   redPart = (onePixel >> 16) And &HFF
	   greenPart = (onePixel >> 8) And &HFF
	   bluePart = onePixel And &HFF
The next lines convert the color information to grayscale using an algorithm that averages using the two maximum and minimum values for red, green, and blue. There are other algorithms available for converting to grayscale, and you might want to experiment with others to best meet your requirements. All three colors are assigned the same byte value, which is what forces all pixels to become some shade of gray:
	         ' ----- Get the general color intensity.
	         maxColor = Math.Max(redPart, Math.Max(greenPart, _
	            bluePart))
	         minColor = Math.Min(redPart, Math.Min(greenPart, _
	            bluePart))
	         onePixel = (maxColor + minColor)  2

	         ' ----- Use a common intensity for all colors.
	         bluePart = onePixel
	         greenPart = onePixel
	         redPart = onePixel

	         ' ----- Set the pixel to the new color. Retain
	         '       the original alpha channel.
	         ImageBuffer(pixelIndex) = (alphaPart << 24) + _
	            (redPart << 16) + (greenPart << 8) + bluePart
	      Next across
	   Next down
As a last step, it’s important to call UnlockTheImage( ) when the processing of
ImageBuffer( ) is complete:
	   ' ----- Finished. Unlock the image.
	   UnlockTheImage( )
	End Sub
In this example, 256 shades of gray are created. If you want to
convert to 16 shades, or even just 2(black-and-white monochrome),
simply round off onePixel to the
nearest shade values desired. For example, for two-level
black-and-white images all values of onePixel less than 128 are rounded to zero,
and all other byte values are set to 255.
Figure 10-28
shows the results of converting the original color image to grayscale.
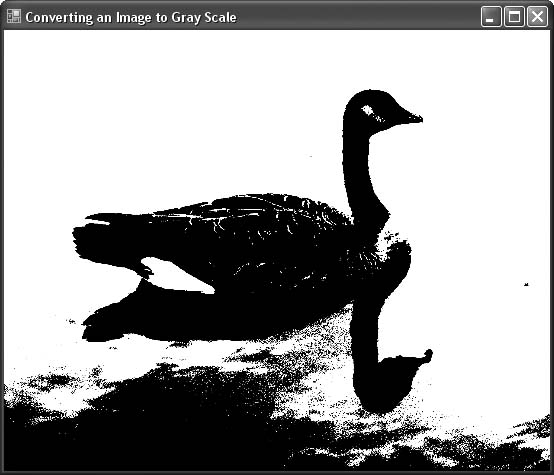
Although the difference can be hard to discern in the grayscale
figures used in this book, it can easily be seen in Figure 10-29, where a
two-level grayscale (or monochrome black-and-white) conversion was
used. This result was obtained by inserting the following lines to
adjust onePixel just before it is
assigned to the red, blue, and
green variables:
	If (onePixel < 128) Then
	   onePixel = 0
	Else
	   onePixel = 255
	End If

See Also
Recipe 10.18
describes the LockImage class used
in this recipe. Recipe
10.21 includes the full source code for the LockImage class.
10.20. Performing Edge Detection on an Image
Problem
You want to perform edge detection on a picture.
Solution
Sample code folder: Chapter 10LockImage
Use the EdgeDetect() method
of the LockImage class, described
in Recipe
10.18.
Discussion
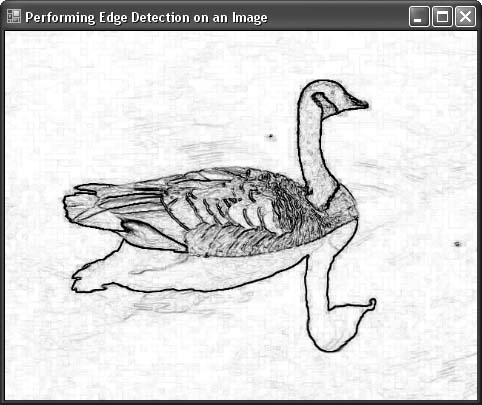
Edge detection is a good example of the complex
image-processing routines that can be created within the framework of
the LockImage class. The EdgeDetect() method processes the pixels in
an image by converting them to grayscale and then using a filter
matrix to process neighboring pixels. The matrix processing detects
rapid rates of change in the pixels and assigns a darker shade of gray
where pixels are changing the fastest. Figure 10-30 shows the edges
of the goose after this method has done its work.
The EdgeDetect() method is a
little more involved than the image-processing methods discussed in
the previous two recipes. Two 3 x 3 matrices, edgeX and edgeY, are created to process neighboring
pixels for X and Y changes. This processing requires that the pixels
be accessed multiple times. It is easier to set up the algorithm by
first converting all pixels to shades of gray and storing them in a
two-dimensional array. Even with these extra processing steps, the
algorithm runs very fast in the .NET Framework.
Here’s the code for the EdgeDetect(
) procedure:
	Public Sub EdgeDetect( )
	   ' ----- Enhance the edges within the image.
	   Dim onePixel As Integer
	   Dim redPart As Integer
	   Dim greenPart As Integer
	   Dim bluePart As Integer
	   Dim maxColor As Integer
	   Dim minColor As Integer
	   Dim down As Integer
	   Dim across As Integer
	   Dim pixArray(,) As Integer
	   Dim target(,) As Integer
	   Dim sumX As Integer
	   Dim sumY As Integer
	   Dim useSum As Integer
	   Dim squareX As Integer
	   Dim squareY As Integer

	   ' ----- Define the Sobel Edge Detector gradient
	   '       matrices.
	   Dim edgeX(,) = {{-1, 0, 1}, {-2, 0, 2}, {-1, 0, 1}}
	   Dim edgeY(,) = {{1, 2, 1}, {0, 0, 0}, {-1, -2, -1}}

	   ' ----- Lock the image for speed.
	   LockTheImage( )

	   ' ----- Convert the 1D pixel array to 2D for ease
	   '       of processing.
	   ReDim pixArray(BaseImageHeight - 1, BaseImageWidth - 1)
	   For down = 0 To BaseImageHeight - 1
	      For across = 0 To BaseImageWidth - 1
	         ' ----- Convert each pixel to a grayscale value.
	         onePixel = ImageBuffer(down * BaseImageWidth + _
	            across)
	         redPart = (onePixel >> 16) And &HFF
	         greenPart = (onePixel >> 8) And &HFF
	         bluePart = onePixel And &HFF
	         maxColor = Math.Max(redPart, Math.Max(greenPart, _
	            bluePart))
	         minColor = Math.Min(redPart, Math.Min(greenPart, _
	            bluePart))
	         pixArray(down, across) = (maxColor + minColor)  2
	      Next across
	   Next down

	   ' ----- Results will be placed in a second pixel array.
	   ReDim target(BaseImageHeight - 1, BaseImageWidth - 1)

	   ' ----- Process for
edge detection.
	   For down = 0 To BaseImageHeight - 1
	      For across = 0 To BaseImageWidth - 1
	         ' ----- Calculate the edge factor.
	         sumX = 0
	         sumY = 0
	         If (down = 0) Or _
	               (down = (BaseImageHeight - 1)) Then
	            ' ----- Ignore true
edges.
	            useSum = 0
	         ElseIf (across = 0) Or _
	               (across = (BaseImageWidth - 1)) Then
	            ' ---- Ignore true edges.
	            useSum = 0
	         Else
	            ' ----- Summarize a small square around
	            '       the point.
	            For squareX = -1 To 1
	               For squareY = -1 To 1
	                  sumX += pixArray(down + squareY, _
	                     across + squareX) * _
	                     edgeX(squareX + 1, squareY + 1)
	                  sumY += pixArray(down + squareY, _
	                     across + squareX) * _
	                     edgeY(squareX + 1, squareY + 1)
	               Next squareY
	            Next squareX

	            ' ----- Force the value into the 0 to 255 range.
	            useSum = Math.Abs(sumX) + Math.Abs(sumY)
	            If (useSum < 0) Then useSum = 0
	            If (useSum > 255) Then useSum = 255
	            useSum = 255 - useSum

	            ' ----- Save it as a grayscale value in
	            '       the pixel.
	            target(down, across) = useSum + _
	               (useSum << 8) + (useSum << 16)
	         End If
	      Next across
	   Next down

	   ' ----- Move results back into the locked pixels array.
	   For down = 0 To BaseImageHeight - 1
	      For across = 0 To BaseImageWidth - 1
	         ImageBuffer(down * BaseImageWidth + across) = _
	            target(down, across)
	      Next across
	   Next down

	   ' ----- Finished. Unlock the image.
	   UnlockTheImage( )
	End Sub
See Also
Recipe 10.18
describes the LockImage class used
in this recipe. Recipe
10.21 includes the full source code for the LockImage class.
10.21. Full Listing of the LockImage Class
Sample code folder: Chapter 10LockImage
This recipe contains the full code for the LockImage class described in Recipes 10.18, 10.19 through 10.20:
	Imports System.Drawing.Imaging
	Imports System.Runtime.InteropServices.Marshal

	Public Class LockImage
	   Private BaseImage As Bitmap
	   Private BaseImageWidth As Integer
	   Private BaseImageHeight As Integer
	   Private TotalPixels As Integer
	   Private ImageAddress As IntPtr
	   Private ImageContent As BitmapData
	   Private ImageBuffer( ) As Integer

	   Public Property Image( ) As Bitmap
	      ' ----- User access to the relevant image.
	      Get
	         Return BaseImage
	      End Get
	      Set(ByVal Value As Bitmap)
	         Dim canvas As Graphics
	         BaseImage = New Bitmap(Value.Width, _
	            Value.Height, Value.PixelFormat)
	         canvas = Graphics.FromImage(BaseImage)
	         canvas.DrawImage(Value, 0, 0, _
	            Value.Width, Value.Height)
	         canvas.Dispose( )
	      End Set
	   End Property

	   Private Sub LockTheImage( )
	      ' ----- Lock the image in memory. How much room
	      '       do we need?
	      BaseImageWidth = BaseImage.Width
	      BaseImageHeight = BaseImage.Height
	      TotalPixels = BaseImageWidth * BaseImageHeight

	      ' ----- Create a stable (locked) area in memory. It
	      '       will store 32-bit color images.
	      ReDim ImageBuffer(TotalPixels - 1)
	      ImageContent = BaseImage.LockBits( _
	         New Rectangle(0, 0, BaseImageWidth, _
	         BaseImageHeight), ImageLockMode.ReadWrite, _
	         PixelFormat.Format32bppRgb)
	      ImageAddress = ImageContent.Scan0

	      ' ----- Associate the buffer and the locked memory.
	      Copy(ImageAddress, ImageBuffer, 0, TotalPixels)
	   End Sub

	   Private Sub UnlockTheImage( )
	      ' ----- Unlock the memory area.
	      Copy(ImageBuffer, 0, ImageAddress, TotalPixels)
	      Image.UnlockBits(ImageContent)
	      ImageContent = Nothing
	      ReDim ImageBuffer(0)
	   End Sub

	   Public Sub MakeGray( )
	      ' ----- Make a grayscale version of the image.
	      Dim pixelIndex As Integer
	      Dim onePixel As Integer
	      Dim alphaPart As Integer
	      Dim redPart As Integer
	      Dim greenPart As Integer
	      Dim bluePart As Integer
	      Dim maxColor As Integer
	      Dim minColor As Integer
	      Dim down As Integer
	      Dim across As Integer

	      ' ----- Lock the image for speed.
	      LockTheImage( )

	      ' ----- Process each pixel in the grid.
	      For down = 0 To BaseImageHeight - 1
	         For across = 0 To BaseImageWidth - 1
	            ' ----- Locate the pixel's color.
	            pixelIndex = down * BaseImageWidth + across
	            onePixel = ImageBuffer(pixelIndex)

	            ' ----- Extract the color values.
	            alphaPart = (onePixel >> 24) And &HFF
	            redPart = (onePixel >> 16) And &HFF
	            greenPart = (onePixel >> 8) And &HFF
	            bluePart = onePixel And &HFF

	            ' ----- Get the general color intensity.
	            maxColor = Math.Max(redPart, Math.Max(greenPart, _
	               bluePart))
	            minColor = Math.Min(redPart, Math.Min(greenPart, _
	               bluePart))
	            onePixel = (maxColor + minColor)  2

	            ' ----- Use a common intensity for all colors.
	            bluePart = onePixel
	            greenPart = onePixel
	            redPart = onePixel

	            ' ----- Set the pixel to the new color. Retain
	            '       the original alpha channel.
	            ImageBuffer(pixelIndex) = (alphaPart << 24) + _
	               (redPart << 16) + (greenPart << 8) + bluePart
	         Next across
	      Next down

	      ' ----- Finished. Unlock the image.
	      UnlockTheImage( )
	   End Sub

	   Public Sub Mirror( )
	      ' ----- Make a left-to-right mirror image.
	      Dim pixelIndex1 As Integer
	      Dim pixelIndex2 As Integer
	      Dim holdPixel As Integer
	      Dim down As Integer

	      ' ----- Lock the image for speed.
	      LockTheImage( )

	      ' ----- Process each row of the image.
	      For down = 0 To BaseImageHeight - 1
	         ' ----- Process each column, up to halfway across.
	         pixelIndex1 = down * BaseImageWidth
	         pixelIndex2 = pixelIndex1 + BaseImageWidth - 1
	         Do While pixelIndex1 < pixelIndex2
	            ' ----- Swap two pixels.
	            holdPixel = ImageBuffer(pixelIndex1)
	            ImageBuffer(pixelIndex1) = _
	               ImageBuffer(pixelIndex2)
	            ImageBuffer(pixelIndex2) = holdPixel
	            pixelIndex1 += 1
	            pixelIndex2 -= 1
	         Loop
	      Next down

	      ' ----- Finished. Unlock the image.
	      UnlockTheImage( )
	   End Sub

	   Public Sub EdgeDetect( )
	      ' ----- Enhance the edges within the image.
	      Dim onePixel As Integer
	      Dim redPart As Integer
	      Dim greenPart As Integer
	      Dim bluePart As Integer
	      Dim maxColor As Integer
	      Dim minColor As Integer
	      Dim down As Integer
	      Dim across As Integer
	      Dim pixArray(,) As Integer
	      Dim target(,) As Integer
	      Dim sumX As Integer
	      Dim sumY As Integer
	      Dim useSum As Integer
	      Dim squareX As Integer
	      Dim squareY As Integer

	      ' ----- Define the Sobel Edge Detector gradient
	      '       matrices.
	      Dim edgeX(,) = {{-1, 0, 1}, {-2, 0, 2}, {-1, 0, 1}}
	      Dim edgeY(,) = {{1, 2, 1}, {0, 0, 0}, {-1, -2, -1}}

	      ' ----- Lock the image for speed.
	      LockTheImage( )

	      ' ----- Convert the 1D pixel array to 2D for ease
	      '       of processing.
	      ReDim pixArray(BaseImageHeight - 1, BaseImageWidth - 1)
	      For down = 0 To BaseImageHeight - 1
	         For across = 0 To BaseImageWidth - 1
	            ' ----- Convert each pixel to a grayscale value.
	            onePixel = ImageBuffer(down * BaseImageWidth + _
	               across)
	            redPart = (onePixel >> 16) And &HFF
	            greenPart = (onePixel >> 8) And &HFF
	            bluePart = onePixel And &HFF
	            maxColor = Math.Max(redPart, Math.Max(greenPart, _
	               bluePart))
	            minColor = Math.Min(redPart, Math.Min(greenPart, _
	               bluePart))
	            pixArray(down, across) = (maxColor + minColor)  2
	         Next across
	      Next down

	      ' ----- Results will be placed in a second pixel array.
	      ReDim target(BaseImageHeight - 1, BaseImageWidth - 1)

	      ' ----- Process for edge detection.
	      For down = 0 To BaseImageHeight - 1
	         For across = 0 To BaseImageWidth - 1
	            ' ----- Calculate the edge factor.
	            sumX = 0
	            sumY = 0
	            If (down = 0) Or _
	                  (down = (BaseImageHeight - 1)) Then
	               ' ----- Ignore true edges.
	               useSum = 0
	            ElseIf (across = 0) Or _
	                  (across = (BaseImageWidth - 1)) Then
	               ' ---- Ignore true edges.
	               useSum = 0
	            Else
	               ' ----- Summarize a small square around
	               '       the point.
	               For squareX = -1 To 1
	                  For squareY = -1 To 1
	                     sumX += pixArray(down + squareY, _
	                        across + squareX) * _
	                        edgeX(squareX + 1, squareY + 1)
	                     sumY += pixArray(down + squareY, _
	                        across + squareX) * _
	                        edgeY(squareX + 1, squareY + 1)
	                  Next squareY
	               Next squareX

	               ' ----- Force the value into the 0 to 255 range.
	               useSum = Math.Abs(sumX) + Math.Abs(sumY)
	               If (useSum < 0) Then useSum = 0
	               If (useSum > 255) Then useSum = 255
	               useSum = 255 - useSum

	               ' ----- Save it as a grayscale value in
	               '       the pixel.
	               target(down, across) = useSum + _
	                  (useSum << 8) + (useSum << 16)
	            End If
	         Next across
	      Next down

	      ' ----- Move results back into the locked pixels array.
	      For down = 0 To BaseImageHeight - 1
	         For across = 0 To BaseImageWidth - 1
	            ImageBuffer(down * BaseImageWidth + across) = _
	               target(down, across)
	         Next across
	      Next down

	      ' ----- Finished. Unlock the image.
	      UnlockTheImage( )
	   End Sub
	End Class