Chapter 17. Web Development
Introduction
Programming for the Web is a vast subject worthy of a whole series of books. While we obviously can’t cover everything here, this chapter presents a few web-related recipes for Visual Basic that let you add some useful features to your applications. They will give you some idea of the power of web functionality combined with desktop applications. For a comprehensive collection of Visual Basic web recipes, see ASP.NET 2.0 Cookbook by Michael A. Kittel and Geoff T. LeBlond (O’Reilly).
17.1. Displaying Web Pages on a Form
Problem
You want to display a web page on your form, possibly built from custom HTML content.
Solution
Sample code folder: Chapter 17CustomWebContent
Sample code folder: Chapter 17 WebBrowser
Use the WebBrowser control.
It encapsulates the core Microsoft Internet Explorer engine, and it
integrates easily into your Windows Forms applications.
Discussion
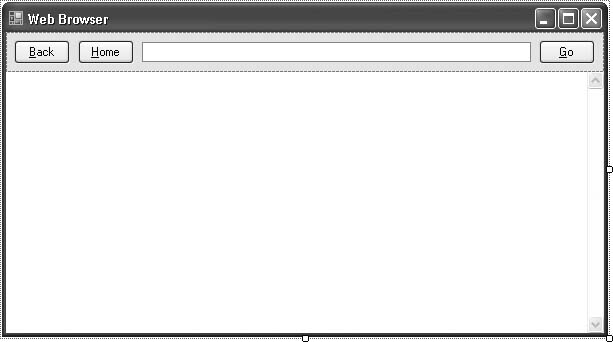
This recipe’s sample code implements a simple web browser.
Create a new Windows Forms application, and add the following controls
to Form1:
A
Panelcontrol namedWebToolbar. Set itsDockproperty toTopand itsSize.Heightproperty to about40.A
WebBrowsercontrol namedWebContent. Set itsDockproperty toFill. It should only fill below thePanelcontrol. If it doesn’t, right-click on thePanelcontrol and select “Send to Back” from the shortcut menu.A
Buttoncontrol namedActBack. This control should appear on the surface of thePanelcontrol. Set itsTextproperty to&Back.A
Buttoncontrol namedActHome. This control should appear on the surface of thePanelcontrol. Set itsTextproperty to&Home.A
TextBoxcontrol namedWebAddress. This control should appear on the surface of thePanelcontrol. Set itsAnchorproperty toTop, Left, Right.A
Buttoncontrol namedActGo. This control should appear on the surface of thePanelcontrol. Set itsTextproperty to&Goand itsAnchorproperty toTop, Right.
Arrange the controls as presented in Figure 17-1.
Now add the following source code to the form’s class template:
	Private Sub ActBack_Click(ByVal sender As System.Object, _
	      ByVal e As System.EventArgs) Handles ActBack.Click
	   ' ----- Move to the previous web page.
	   If (WebContent.CanGoBack() = True) Then _
	      WebContent.GoBack()
	End Sub

	Private Sub ActHome_Click(ByVal sender As Object, _
	      ByVal e As System.EventArgs) Handles ActHome.Click
	   ' ----- Move to the main web page.
	   WebContent.GoHome()
	End Sub

	Private Sub Form1_Load(ByVal sender As Object, _
	      ByVal e As System.EventArgs) Handles Me.Load
	   ' ----- Start from the home page.
	   ActHome.PerformClick()
	End Sub

	Private Sub ActGo_Click(ByVal sender As Object, _
	      ByVal e As System.EventArgs) Handles ActGo.Click
	   ' ----- Move to the requested page.
	   If (Trim(
WebAddress.Text) <> "") Then _

WebContent.Navigate(WebAddress.Text)
	End Sub
The previous dozen lines of code are all you need to provide your users with a full Internet browsing experience (albeit without all of the fancy features). Run the program, and use it like a typical web browser.
You are not limited to Internet-based HTML content in the
browser. You can supply your own generated-on-the-fly content as well,
by setting the control’s DocumentText property to a string containing
the HTML content. We added the following code to a new Form1 that contained only a WebBrowser control:
	WebBrowser1.DocumentText = "<html><body>" & _
	   "<h1>Important</h1><p>This is web content." & _
	   "</p></body></html>"
Figure 17-2 shows the output.

Interacting with web-browser links is somewhat indirect. There
is no LinkClicked event that occurs
when a user clicks on a link. However, there is a Navigating event that is pretty close. You
can monitor this event to provide support for your own internal link
events. Decorate your custom HTML with a fake URL address, such as
internal://EditCustomer?ID=25 to trigger the
editing of the customer with ID number 25. To test this, create a new
Windows Forms application, and add a WebBrowser control named WebBrowser1. Next, add the following source
code to the form’s code template:
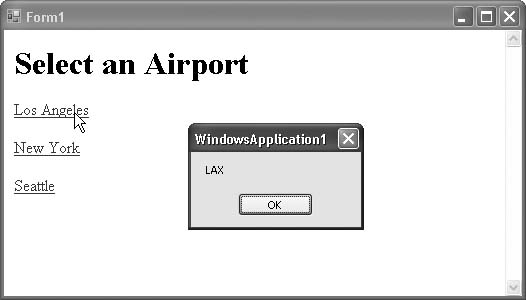
	Private Sub Form1_Load(ByVal sender As Object, _
	      ByVal e As System.EventArgs) Handles Me.Load
	   ' ----- Add some custom content.
	   WebBrowser1.DocumentText = "<html><body>" & _
	      "<h1>Select an Airport</h1>" & _
	      "<p><a href=""internal://Airport?Code=LAX"">" & _
	      "Los Angeles</a></p>" & _
	      "<p><a href=""internal://Airport?Code=JFK"">" & _
	      "New York</a></p>" & _
	      "<p><a href=""internal://Airport?Code=SEA"">" & _
	      "Seattle</a></p>" & _
	      "</body></html>"
	End Sub

	Private Sub
WebBrowser1_Navigating(ByVal sender As Object, _
	      ByVal e As System.Windows.Forms. _

WebBrowserNavigatingEventArgs) _
	      Handles WebBrowser1.Navigating
	   ' ----- Which link was clicked?
	   Dim queryEntries() As String
	   Dim oneEntry() As String
	   Dim airportCode As String = "Invalid Code"
	   Dim scanQuery As String

	   ' ----- Look for internal://airport?… links.
	   If (e.Url.Scheme = "internal") Then
	      If (e.Url.Host = "airport") Then
	         If (e.Url.Query.Length > 0) Then
	            ' ----- Found an airport link. Get the
	            '       airport code. The query starts with
	            '       "?". Skip it.
	            queryEntries = _
	               Split(e.Url.Query.Substring(1), "&")
	            For Each scanQuery In queryEntries
	               oneEntry = Split(scanQuery, "=")
	               If (UCase(oneEntry(0)) = "CODE") Then
	                  ' ----- Found the airport code.
	                  airportCode = UCase(oneEntry(1))
	                  Exit For
	               End If
	            Next scanQuery
	         End If

	         ' ----- Show the code.
	         MsgBox(airportCode)
	         e.Cancel = True
	      End If
	   End If
	End Sub
Clicking on one of the links gives results similar to Figure 17-3.
Several of the WebBrowser
control’s properties can be used to limit the allowed actions of the
user. For instance, setting the AllowNavigation, WebBrowserShortcutsEnabled,
and IsWebBrowserContextMenuEnabled
properties to False can effectively
shut down all user interaction with the Internet, providing a portal
for static web content display only.
See Also
Recipe 17.12 shows how to add a clickable hyperlink to a Windows form.
17.2. Accessing Content Within an HTML Document
Solution
Sample code folder: Chapter 17UseHTMLDOM
While you could use standard string-manipulation techniques to scan through a web page, it’s a lot of work. If the HTML content you need to parse has a consistent format with identifiable tags and elements, you can use Microsoft’s Managed HTML Document Object Model (DOM) to traverse the HTML content as a set of objects.
Discussion
This recipe builds on the code developed in Recipe 17.1. Create a new Windows Forms project following the instructions in that recipe. Now add the following additional code to the form’s code template:
	Private Sub WebContent_DocumentCompleted( _
	      ByVal sender As Object, ByVal e As _
	      System.Windows.Forms. _
	      WebBrowserDocumentCompletedEventArgs) _
	      Handles
WebContent.DocumentCompleted
	   ' ----- Extract the title and display it.
	   MsgBox(WebContent.Document.Title)
	End Sub
Run the program, and as you browse from page to page, the title of each page will appear in a message box.
The Managed HTML DOM, made available through the WebBrowser control’s Document property, provides object-based
access to all elements of an HTML page, including links (via the Links property), cookies associated with the
page (via the Cookies string-array
property), and the body content (via the Body property). You can search for specific
elements by ID using the GetElementByID() method.
Specific use of the Managed HTML DOM is beyond the scope of this
book. Use the MSDN documentation supplied with Visual Studio to obtain
information about the HtmlElement
class and other classes used within the DOM.
See Also
Recipe 17.1 includes most of the code used in this recipe. Recipe 17.3 uses the HTML DOM to access links within a web page.
17.3. Getting All Links from a Web Page
Problem
You want to build a list of the hyperlinks included in a specific web page.
Solution
Sample code folder: Chapter 17ListWebLinks
Use the Managed HTML DOM to traverse the list of web page links as objects.
Discussion
This recipe’s sample code builds a list of links from a web
page. Create a new Windows Forms application, and add the following
controls to Form1:
A
TextBoxcontrol namedWebAddress.A
Buttoncontrol namedActGo. Set itsTextproperty toGo.A
WebBrowsercontrol namedWebContent.A
ListBoxcontrol namedWebLinks.
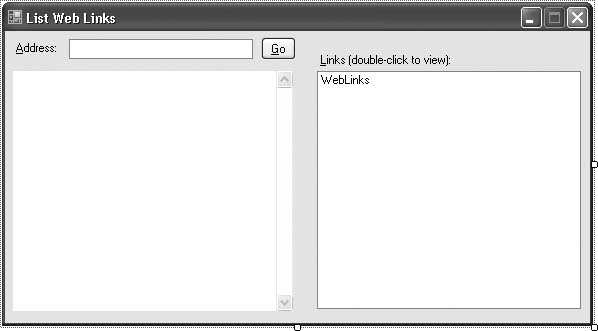
Add informational labels if desired, and arrange the controls to look like Figure 17-4.
Next add the following source code to the form’s class template:
Private Class LinkDetail
Public LinkURL As String
Public LinkText As String
Public Overrides Function ToString() As String
Return LinkText
End Function
End Class
Private Sub ActGo_Click(ByVal sender As System.Object, _
ByVal e As System.EventArgs) Handles ActGo.Click
' ----- Jump to a new web page.
If (Trim(WebAddress.Text) <> "") Then
WebLinks.Items.Clear()
WebContent.Navigate(WebAddress.Text)
End If
End Sub
Private Sub WebContent_DocumentCompleted( _
ByVal sender As Object, ByVal e As
System.Windows.Forms. _
WebBrowserDocumentCompletedEventArgs) _
Handles WebContent.DocumentCompleted
' ----- Build the list of links.
Dim oneLink As HtmlElement
Dim newLink As LinkDetail
' ----- Scan through all the links.
For Each oneLink In WebContent.Document.Links
' ----- Buld a new link entry.
newLink = New LinkDetail
If (oneLink.InnerText = "") Then
newLink.LinkText = "[Image or Unknown]"
Else
newLink.LinkText = oneLink.InnerText
End If
newLink.LinkURL = oneLink.GetAttribute("href")
' ----- Add the link to the list.
WebLinks.Items.Add(newLink)
Next oneLink
End Sub
Private Sub WebLinks_DoubleClick(ByVal sender As Object, _
ByVal e As System.EventArgs) Handles WebLinks.DoubleClick
' ----- Show the detail of a web link.
Dim linkContent As LinkDetail
If (WebLinks.SelectedIndex = -1) Then Return
linkContent = CType(WebLinks.SelectedItem, LinkDetail)
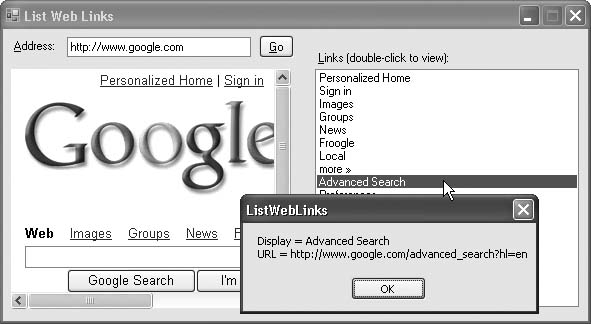
MsgBox("Display = " & linkContent.LinkText & vbCrLf & _
"URL = " & linkContent.LinkURL)
End SubRun the program, enter an address in the TextBox control, and click the Go button.
The web page appears, as does the list of its links. Double-click a
link to display its target URL, as shown in Figure 17-5.
See Also
Recipe 17.2 discusses the general use of the Managed HTML Document Object Model.
17.4. Get the Local Computer’s IP Address
Problem
You want to determine the IP address of the computer on which your program is running.
Solution
Sample code folder: Chapter 17LocalIPAddresses
Use the features in the System.Net. Dns namespace to obtain the IP address(es)
for the local host. A single workstation may have multiple IP
addresses; this generally occurs when multiple networking cards are
installed and active on that workstation.
Discussion
It may not be possible to determine the single IP address for your computer, because a computer may have multiple addresses. What .NET can give you is a list of all current IP addresses for the workstation, and its host name as well.
The following code displays the local host name and all related
IP addresses for that host. It uses the System.Net.Dns namespace, which includes
features for managing IP addresses and related hosts:
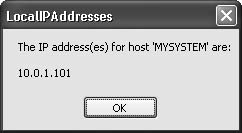
	Dim hostAddresses() As Net.IPAddress
	Dim ipList As String = ""
	Dim oneAddress As Net.IPAddress

	hostAddresses = Net.Dns.
GetHostAddresses( _
	   Net.Dns.GetHostName())
	For Each oneAddress In hostAddresses
	   ipList &= vbCrLf & oneAddress.ToString()
	Next oneAddress
	MsgBox("The IP address(es) for host '" & _
	   Net.Dns.GetHostName() & "' are:" & vbCrLf & ipList)
On our system, this code displayed the message box in Figure 17-6.
The GetHostAddresses() method
returns IP addresses as they are understood by the local host. These
addresses may differ from the IP address of that same workstation as
viewed from the Internet. A router that implements Network Address
Translation (NAT) can mask the actual (local) IP address of a
system.
See Also
Recipe 17.5 discusses determining IP addresses for systems other than the local workstation.
17.5. Resolving a Host Name or IP Address for Another Computer
Problem
You need to determine the host name for another computer from its IP address, or vice versa.
Solution
Sample code folder: Chapter 17ResolveHostOrIP
The System.Net. Dns namespace includes methods that let you
resolve an IP address to its matching host name or obtain an IP address for a host
name.
Discussion
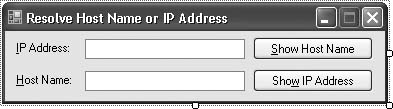
Create a new Windows Forms application, and add the following
controls to Form1:
A
TextBoxcontrol namedIPAddress.A
Buttoncontrol namedFromIpToHost. Set itsTextproperty toShow Host Name.A
TextBoxcontrol namedHostName.A
Buttoncontrol namedFromHostToIp. Set itsTextproperty toShow IP Address.
Add informational labels if desired. The form should look like the one in Figure 17-7.
Now add the following source code to the form’s code template:
	Private Sub FromIpToHost_Click( _
	      ByVal sender As System.Object, _
	      ByVal e As System.EventArgs) _
	      Handles FromIpToHost.Click
	   ' ----- Convert from IP address to host name.
	   If (Trim(IPAddress.Text) <> "") Then _
	      MsgBox("Host Name" & vbCrLf & vbCrLf & _
	      Net.Dns.
GetHostEntry(IPAddress.Text).HostName)
	End Sub

	Private Sub FromHostToIp_Click( _
	      ByVal sender As System.Object, _
	      ByVal e As System.EventArgs) _
	      Handles FromHostToIp.Click
	   ' ----- Convert from host name to IP address.
	   Dim hostEntry As Net.IPHostEntry
	   Dim scanAddress As Net.IPAddress
	   Dim hostAddresses As String = ""

	   If (Trim(HostName.Text) <> "") Then
	      hostEntry = Net.Dns.GetHostEntry(HostName.Text)
	      For Each scanAddress In hostEntry.AddressList
	         hostAddresses &= vbCrLf & scanAddress.ToString()
	      Next scanAddress
	      If (hostAddresses = "") Then _
	         hostAddresses = vbCrLf & "None."

	      MsgBox("
IP Addresses" & vbCrLf & hostAddresses)
	   End If
	End Sub
To use the program, enter an IP address in the IP Address field or a host name in the Host Name field, and click the applicable button to view the resolved name or address.
A bug in some versions of Windows XP prevents the GetHostEntry() method from working
correctly. Specifically, if you supply an IP address of a remote
system (out-side of your local network) to the method, the returned
IPHostEntry.HostName property returns the IP
address itself instead of the host name. This bug may be resolved in a
Windows XP service pack or hotfix; it is resolved in Windows
Vista.
See Also
Recipe 17.4 discusses finding the IP address(es) for the local workstation.
17.6. Pinging an IP Address
Problem
You want to perform a “ping” operation on a remote system.
Solution
Use the My.Computer.Network.Ping() method. The
general syntax is:
My.Computer.Network.Ping(targetSystem[, timeout])targetSystem is a string IP address,
a host name, or a System.Uri
instance. The optional timeout argument is
supplied in milliseconds and defaults to 500. This method returns True if the ping is successful, or False on failure or no response.
Discussion
If you receive a ping response from the remote system, it naturally means that the remote system is accessible. However, if you receive no response, this does not mean the remote system is inaccessible. It may have disabled responses to ping requests or a firewall or router between your system, and the remote system may have blocked the request or response.
17.7. Using FTP to Download Files
Problem
You want to add the ability to download a file from a File Transfer Protocol ( FTP) server at the click of a button (or at any other point in your application) with completely automatic action.
Solution
Sample code folder: Chapter 17FTPDownload
Use the System.Net. FtpWebRequest class to drive the FTP protocol
from within your application.
Discussion
The FtpWebRequest class
provides a straightforward way to programmatically download files from
FTP servers. This works fine either for anonymous FTP, as shown in
this recipe’s code, or when using a specific user ID and
password.
The following code demonstrates downloading a file from an
anonymous FTP server on the Internet. Create a new Windows Forms
application, and add a Button
control named Button1. Then add the
following code to the form’s class template:
	Private Sub Button1_Click(ByVal sender As System.Object, _
	      ByVal e As System.EventArgs) Handles Button1.Click
	   Dim sourceFile As String

	   ' ----- Prompt the user for an FTP path.
	   sourceFile = InputBox( _
	      "Specify a URL for an FTP file to download.")
	   If (sourceFile = "") Then Return

	   ' ----- Initiate the download.
	   DownloadViaFTP(sourceFile, "anonymous", "[email protected]")
	End Sub
The event handler calls the DownloadViaFTP() method. That method starts
by collecting the information it needs, calculating the target output
file. sourceFile is the full path
to the file to download, located in a folder on a server specifically
set up for FTP access. destinationFile is the full path (including
the filename) where you want the file to be downloaded, using the same
filename as the source file. userName and password are strings containing the
credential information to access the FTP server. For anonymous FTP,
use “anonymous” for the username. It’s customary to use your email
address as the password. Here’s the
method declaration:
	Private Sub DownloadViaFTP(ByVal sourceFile As String)
	      ByVal userName As String, ByVal password As String)
	   ' ----- Download the specified file via FTP and save
	   '       it in the application's directory.
	   Dim readBuffer(4095) As Byte
	   Dim count As Integer

Dim requestFile As System.Net.FtpWebRequest
	   Dim responseFTP As System.Net.FtpWebResponse
	   Dim responseStream As IO.Stream
	   Dim outFile As IO.FileStream
	   Dim destinationFile As String

	   ' ----- Get the output location.
	   destinationFile = My.Computer.FileSystem.CombinePath( _
	      My.Application.Info.DirectoryPath, _
	      My.Computer.FileSystem.GetName(sourceFile))
The variable requestFile is
the instance of the FtpWebRequest
that we’ll use to drive the FTP protocol. Various properties of
requestFile, such as Credentials and Method, provide the control required to
define the FTP action:
	   ' ----- Connect to the file on the FTP site.
	   requestFile = CType(System.Net.FtpWebRequest.Create( _
	      sourceFile), System.Net.FtpWebRequest)
	   requestFile.Credentials = New _
	      System.Net.NetworkCredential(userName, password)
	   requestFile.KeepAlive = False
	   requestFile.UseBinary = True
	   requestFile.Method = _
	      System.Net.WebRequestMethods.Ftp.DownloadFile
The actual flow of the byes comprising the file to be downloaded
is handled by the FtpWebResponse
object, which provides a Stream to
move the bytes:
	   ' ----- Open a transmission channel for the file content.
	   responseFTP = CType(requestFile.GetResponse, _
	      System.Net.FtpWebResponse)
	   responseStream = responseFTP.GetResponseStream
	   outFile = New IO.FileStream(destinationFile, _
	      IO.FileMode.Create)
The stream of bytes is read into a buffer in chunks of up to 4,096 bytes, and from there it’s written to the local file:
	   ' ----- Save the content to the output file block by block.
	   Do
	      count = responseStream.Read(readBuffer, 0, _
	         readBuffer.Length)
	      outFile.Write(readBuffer, 0, count)
	   Loop Until count = 0
Housekeeping wraps up the process:
	   ' ----- Clean up.
	   responseStream.Close()
	   outFile.Flush()
	   outFile.Close()
	   responseFTP.Close()

	   MsgBox("File downloaded!" & vbNewLine & sourceFile)
	End Sub
By this time, the file has been completely downloaded. To verify that the operation was a success, look in the application folder (wherever the executable file for this program resides) to confirm that the file has been created there.
17.8. Calling a Web Service
Solution
Sample code folder: Chapter 17WebReference
Add a Web Reference to your project, and use the My.WebServices object to access the
service.
Discussion
An XML Web Service is a function located on the Internet that your application can call. But unlike internal functions, calls to XML Web Services communicate via standard HTTP and plain text. They use defined standards, such as SOAP and WSDL, which are beyond the scope of this book.
There are a lot of XML Web Services available on the Internet, some free and some for a fee. For demonstration purposes, the following sample code calls Microsoft’s TerraServer engine (http://terraserver.microsoft.com) to get a place name for any latitude and longitude around the world.
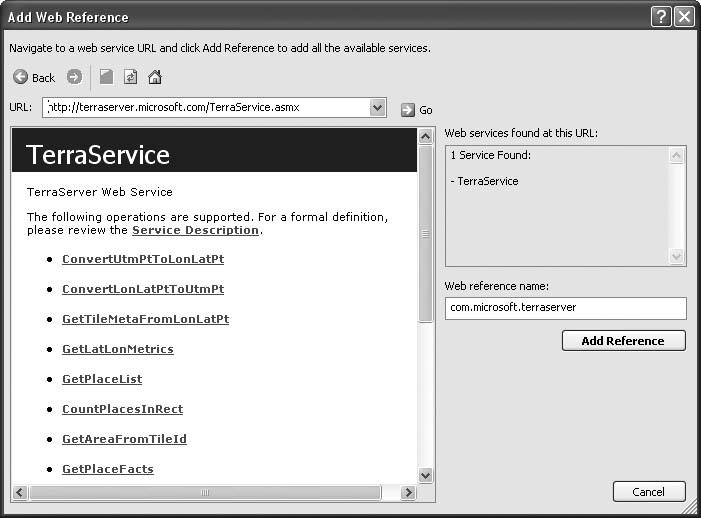
To call an XML Web Service, you must first add a Web Reference to your project. Create a new Windows Forms project, and select the Project → Add Web Reference menu command. When prompted for a service path URL in the Add Web Reference dialog, enter http://terraserver.microsoft.com/TerraService.asmx to access the Terra-Server Web Service. Then click the Add Reference button. Figure 17-8 shows how the Add Web Reference dialog helps you to explore the functionality provided by a service.
To demonstrate one of the functions provided by this service,
this recipe’s code calls the ConvertPlaceToLonLatPt() function to do just
what it says: convert a place name to a latitude and longitude
location. You can also convert in the other direction, using the
service’s ConvertLonLatPtToNearestPlace()
function.
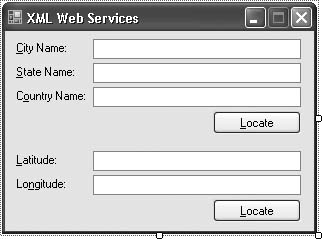
Add two Button controls to
your form named ActToPlace and
ActToLatLon, and set their Text properties to Locate. Also add five TextBox controls named CityName, StateName, CountryName, Latitude,
and Longitude. Add some
informational labels if desired. The form should look something like
Figure 17-9.
Now, add the following code to the form’s class template:
Private Sub ActToLatLon_Click(ByVal sender As System.Object, _
ByVal e As System.EventArgs) Handles ActToLatLon.Click
' ----- Locate the latitude and longitude for a place.
Dim usePlace As com.microsoft.terraserver.Place
Dim foundLocation As com.microsoft.terraserver.LonLatPt
' ----- Prepare the location details for use.
usePlace = New com.microsoft.terraserver.Place
usePlace.City = CityName.Text
usePlace.State = StateName.Text
usePlace.Country = CountryName.Text
' ----- Call the service with the user-supplied values.
Me.Cursor = Cursors.WaitCursor
foundLocation = _
My.WebServices.TerraService.ConvertPlaceToLonLatPt( _
usePlace)
Me.Cursor = Cursors.Default
' ----- Inform the user.
MsgBox("That place is located at:" & vbCrLf & vbCrLf & _
"Latitude: " & foundLocation.Lat.ToString & vbCrLf & _
"Longitude: " & foundLocation.Lon.ToString)
End Sub
Private Sub ActToPlace_Click(ByVal sender As System.Object, _
ByVal e As System.EventArgs) Handles ActToPlace.Click
' ----- Locate the place for a latitude and longitude.
Dim useLatLon As com.microsoft.terraserver.LonLatPt
Dim foundPlace As String
' ----- Prepare the location details for use.
useLatLon = New com.microsoft.terraserver.LonLatPt
useLatLon.Lat = CDbl(Latitude.Text)
useLatLon.Lon = CDbl(Longitude.Text)
' ----- Call the service with the user-supplied values.
Me.Cursor = Cursors.WaitCursor
foundPlace = My.
WebServices.TerraService. _
ConvertLonLatPtToNearestPlace(useLatLon)
Me.Cursor = Cursors.Default
' ----- Inform the user.
MsgBox("That location is at or near:" & vbCrLf & _
vbCrLf & vbTab & foundPlace)
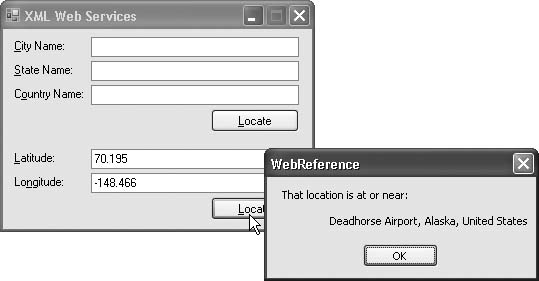
End SubFigure 17-10 shows the form in action. After entering the latitude and longitude for one of our favorite (and certainly one of the most memorably named) airports, a click of the button reveals the server’s place name for this location as the airport at Deadhorse, Alaska.
This example shows how easy it is to use an Internet-based XML Web Service as if it were a function local to your application’s source code. XML is used to make these services hardware-and software-independent, which means this same service can be called from a variety of programming languages using just about any computer and any operating system.
17.9. Sending Email Using SMTP
Problem
You want to send an email automatically from your application without using an external application such as Outlook.
Solution
Sample code folder: Chapter 17SendEmail
Use the System.Net. Mail.SmtpClient class in the .NET Framework,
supplying the server name and details specific to the email.
Discussion
The System.Net.Mail.SmtpClient class
encapsulates an email submission. All you need to do is fill in its
properties and call the Send() method, and your mail is delivered to
the target recipient.
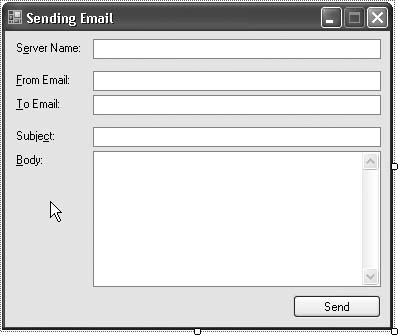
Create a new Windows Forms application, and add five TextBox controls named ServerHost, FromEmail, ToEmail, SubjectText,
and BodyText. Set the BodyText control’s Multiline property to True. Also add a Button control named ActSend, and set its Text property to Send. Add informational labels if desired.
Your form should look something like Figure 17-11.
Now add the following code to the form’s class template:
	Imports System.Net.Mail

	Public Class Form1
	   Private Sub ActSend_Click(ByVal sender As System.Object, _
	         ByVal e As System.EventArgs) Handles ActSend.Click
	      ' ----- Send the requested email.
	      Dim
emailSender As SmtpClient
	      Dim theMessage As MailMessage

	      ' ----- Connect to the server. A second optional
	      '       argument lets you alter the port number from
	      '       the default.
	      emailSender = New System.Net.Mail.SmtpClient( _
	         ServerHost.Text)

	      ' ----- Build the content details.
	      theMessage = New MailMessage
	      theMessage.From = New MailAddress(FromEmail.Text)
	      theMessage.To.Add(ToEmail.Text)
	      theMessage.Subject = SubjectText.Text
	      theMessage.Body = BodyText.Text

	      ' ----- Fill in the details and send.
	      emailSender.Send(theMessage)
	   End Sub
	End Class
The MailMessage object
includes properties that let you add attachments and specify the
properties of the email message. Its To property is a collection that lets you
add an unlimited number of email recipients. It also includes parallel
CC and Bcc collections.
17.10. Getting POP3 Emails
Problem
You want to access emails from an application, perhaps just to get a quick count of available emails or to get the complete contents.
Solution
Sample code folder: Chapter 17Pop3Email
Use the TcpClient class in the System.Net. Sockets namespace. The Pop3 class presented here wraps this class
with supporting code to make it easier to access your emails.
Discussion
The following class code creates
Pop3 objects to simplify accessing emails from a standard POP3 server. Note that some
servers require SSL or other authentication, in which case this code
will need modification. For standard POP3 servers, it works well as
presented.
Create a new Windows Forms application, add a new class named Pop3.vb, and use this code for its definition:
	Public Class Pop3
	   ' ----- The default TCP/IP port number for POP3 is 110.
	   Public Port As Integer = 110
	   Public Messages As Integer = 0

	   Private Const CommandFailure As String = "-ERR"

	   Private Pop3Server As TcpClient
	   Private CommandSender As NetworkStream
	   Private ContentReceiver As StreamReader

	   Public Sub Connect(ByVal serverName As String, _
	         ByVal userName As String, ByVal password As String)
	      ' ----- Initiate the connection to a POP3 server.
	      Dim commandData As String
	      Dim contentBuffer() As Byte
	      Dim responseString As String
	      Dim parts() As String

	      ' ----- Connect to the POP3 server.
	      Try
	         Pop3Server = New TcpClient(serverName, Port)
	         CommandSender = Pop3Server.GetStream()
	         ContentReceiver = New StreamReader(CommandSender)
	      Catch
	         Throw
	      End Try

	      If (userName <> "") Then
	         ' ----- Authenticate with the user ID.
	         commandData = "USER " & userName & vbCrLf
	         contentBuffer = _
	            System.Text.Encoding.ASCII.GetBytes( _
	            commandData.ToCharArray())
	         CommandSender.Write(contentBuffer, 0, _
	            contentBuffer.Length)
	         responseString = ContentReceiver.ReadLine()
	         If (Left(responseString, Len(CommandFailure)) = _
	               CommandFailure) Then
	            Throw New Exception("Invalid user name.")
	         End If

	         ' ----- Send the authenticating password.
	         commandData = "PASS " & password & vbCrLf
	         contentBuffer = _
	            System.Text.Encoding.ASCII.GetBytes( _
	            commandData.ToCharArray())
	         CommandSender.Write(contentBuffer, 0, _
	            contentBuffer.Length)
	         responseString = ContentReceiver.ReadLine()
	         If (Left(responseString, Len(CommandFailure)) = _
	               CommandFailure) Then
	            Throw New Exception("Invalid password.")
	         End If
	      End If

	      ' ----- Logged in. On some servers, the PASS command
	      '       is not enough to push the server into a
	      '       transaction state. Send a STAT command twice.
	      commandData = "STAT" + vbCrLf
	      contentBuffer = System.Text.Encoding.ASCII.GetBytes( _
	         commandData.ToCharArray())
	      CommandSender.Write(contentBuffer, 0, _
	         contentBuffer.Length)
	      responseString = ContentReceiver.ReadLine()

	      ' ----- Get a count of the messages.
	      commandData = "STAT" + vbCrLf
	      contentBuffer = System.Text.Encoding.ASCII.GetBytes( _
	         commandData.ToCharArray())
	      CommandSender.Write(contentBuffer, 0, _
	         contentBuffer.Length)
	      responseString = ContentReceiver.ReadLine()
	      If (Left(responseString, Len(CommandFailure)) = _
	            CommandFailure) Then
	         Throw New Exception( _
	            "Could not retrieve message count.")
	      End If

	      ' ----- The response includes two integers: a count
	      '       and a size, separated by a space. Skip over
	      '       the "+OK" part also.
	      parts = Split(responseString, " ")
	      Messages = Val(parts(1))
	   End Sub

	   Public Sub Disconnect()
	      ' ----- Disconnect from the
POP3 server.
	      Dim commandData As String
	      Dim contentBuffer() As Byte
	      Dim responseString As String

	      ' ----- Tell the server we're through.
	      commandData = "QUIT" & vbCrLf
	      contentBuffer = System.Text.Encoding.ASCII.GetBytes( _
	         commandData.ToCharArray())
	      CommandSender.Write(contentBuffer, 0, _
	         contentBuffer.Length)
	      responseString = ContentReceiver.ReadLine()

	      ' ----- End the connection.
	      ContentReceiver.Close()
	      CommandSender.Close()

Pop3Server.Close()
	   End Sub

	   Function GetMessage(ByVal whichMessage As Integer) _
	         As String
	      ' ----- Retrieve a single email message.
	      Dim commandData As String
	      Dim contentBuffer() As Byte
	      Dim responseString As String
	      Dim theMessage As New System.Text.StringBuilder
	      Dim oneLine As String

	      ' ----- Check for an invalid message.
	      If (whichMessage < 1) Or (whichMessage > Messages) Then
	         Throw New ArgumentOutOfRangeException(whichMessage, _
	            "Messages are numbered from 1 to the number " & _
	            "identified by the Messages property.")
	      End If

	      Try
	         ' ----- Request the message.
	         commandData = "RETR " & whichMessage & vbCrLf
	         contentBuffer = _
	            System.Text.Encoding.ASCII.GetBytes( _
	            commandData.ToCharArray())
	         CommandSender.Write(contentBuffer, 0, _
	            contentBuffer.Length)
	         responseString = ContentReceiver.ReadLine()
	         If (Left(responseString, Len(CommandFailure)) = _
	               CommandFailure) Then
	            Throw New Exception("Message retrieval failed.")
	         End If

	         ' ----- The message is all data until a line with
	         '       a single dot (.) appears.
	         Do While (ContentReceiver.EndOfStream = False)
	            oneLine = ContentReceiver.ReadLine()
	            If (oneLine = ".") Then Exit Do
	            theMessage.AppendLine(oneLine)
	         Loop
	      Catch ex As InvalidOperationException
	         MsgBox("Message retrieval failed: " & ex.Message)
	      End Try

	      ' ----- Return the constructed message.
	      Return theMessage.ToString()
	   End Function
	End Class
Return to Form1, and add
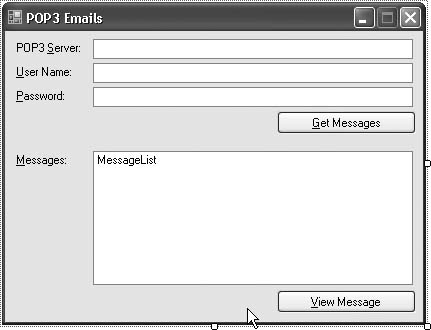
three TextBox controls named
ServerName, UserName, and UserPassword. Set the UserPassword control’s PasswordChar field to the asterisk character
(*). Add a ListBox control named
MessageList and two Button controls named ActGet and ActView. Set the Button controls’ Text properties to Get Messages and View Message, respectively. Add
informational labels if desired. The form should look like the one in
Figure 17-12.
Now add the following code to Form1’s class template:
	Private POP3Connection As Pop3 = Nothing

	Private Sub ActGet_Click(ByVal sender As System.Object, _
	      ByVal e As System.EventArgs) Handles ActGet.Click
	   ' ----- Initiate a POP3 connection.
	   Dim counter As Integer

	   ' ----- First, disconnect any previous connection.
	   If (POP3Connection IsNot Nothing) Then
	      Try
	         POP3Connection.Disconnect()
	      Catch ex As Exception
	         ' ----- Ignore.
	      End Try
	   End If
	   POP3Connection = Nothing

	   ' ----- Clear any previous messages.
	   MessageList.Items.Clear()

	   ' ----- Try the new connection.
	   Try

POP3Connection = New Pop3
	      POP3Connection.Connect(ServerName.Text, _
	         UserName.Text, UserPassword.Text)
	   Catch ex As Exception
	      MsgBox("Connection failure: " & ex.Message)
	      POP3Connection = Nothing
	      Return
	   End Try

	   ' ----- How many messages?
	   If (POP3Connection.Messages = 0) Then
	      MsgBox("No messages found.")
	      POP3Connection.Disconnect()
	      POP3Connection = Nothing
	      Return
	   End If

	   ' ----- Show each message.
	   For counter = 1 To POP3Connection.Messages
	      MessageList.Items.Add("Message Number " & counter)
	   Next counter
	End Sub

	Private Sub ActView_Click(ByVal sender As System.Object, _
	      ByVal e As System.EventArgs) Handles ActView.Click
	   ' ----- Show a message.
	   Dim whichMessage As Integer
	   Dim parts As String()
	   Dim content As String

	   ' ----- Which message? Each item has the format:
	   '          Message Number x
	   If (MessageList.SelectedIndex = -1) Then Return
	   parts = Split(CStr(MessageList.SelectedItem), " ")
	   whichMessage = CInt(Val(parts(2)))

	   ' ----- Get the content.
	   content = POP3Connection.GetMessage(whichMessage)

	   ' ----- Show the content.
	   MsgBox(content)
	End Sub

	Private Sub MessageList_DoubleClick(ByVal sender As Object, _
	      ByVal e As System.EventArgs) _
	      Handles MessageList.DoubleClick
	   ' ----- Same as the View button.
	   ActView.PerformClick()
	End Sub

	Private Sub Form1_FormClosing(ByVal sender As Object, _
	      ByVal e As System.Windows.Forms.FormClosingEventArgs) _
	      Handles Me.FormClosing
	   ' ----- Disconnect before leaving.
	   On Error Resume Next

	   If (
POP3Connection IsNot Nothing) Then
	      POP3Connection.Disconnect()
	      POP3Connection = Nothing
	   End If
	End Sub
When you successfully connect to a POP3 server through the
ActGet button, it displays a simple
list of each message stored on the server. It’s not as good as a real
email program such as Microsoft Outlook because it hasn’t yet read
even the sender name or subject text, but it does add one entry for
each available message. Clicking on the ActView button retrieves the content for one
email message from the server through the Pop3 class’s GetMessage() method. The connection to the
email server is closed when the form closes.
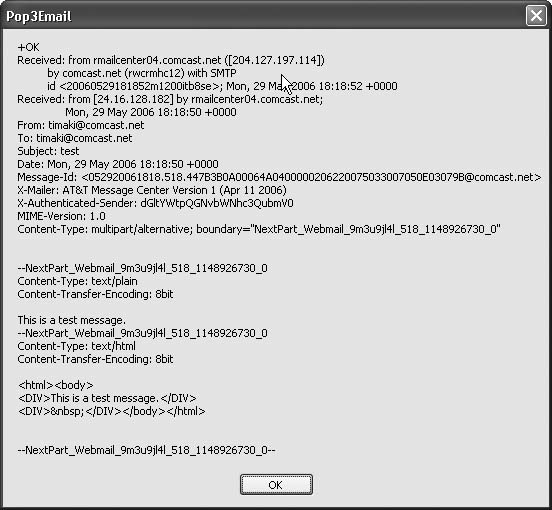
Figure 17-13 shows the content from a test email retrieved from a POP3 server. This rather short sample email arrives with considerable overhead in the header details. The message body is near the end, and it shows the email was sent using HTML content.
17.11. Sending a Message to Another Computer
Problem
You want to send a pop-up message to one or more users on your network, something they’ll see right away without requiring any special third-party applications to be running on their computers.
Solution
Sample code folder: Chapter 17SendMessage
Use Windows’s Net.exe program to send instant messages to named computers on your network.
Discussion
The general syntax of the Net.exe command, when used to send instant
messages, is of the form:
Net.exe Send ComputerName MessageYou’ll need to know the name of the computer to which you wish to send the message, or you may use "*" as the computer name to send a message to all computers on your network in one shot. If you specify a domain name as the target address, the message is delivered to all computers belonging to that domain.
You can use this command from a Command Prompt window, or you
can use a Visual Basic 2005 application as a wrapper for the command.
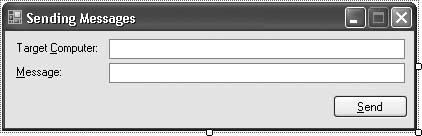
Create a new Windows Forms application, and add two TextBox controls named TargetComputer and MessageText. Also add a Button control named ActSend, and set its Text property to Send. Add informational labels if desired.
The form should look something like Figure 17-14.
Now add the following code to the form’s class template:
' ----- Send a message to another computer.
Process.Start("net.exe", _
"send " & TargetComputer.Text & _
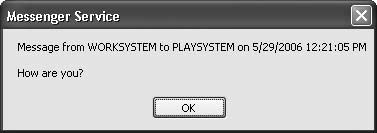
" """ & MessageText.Text & """")The message you send appears in a message box on the other computer, similar to Figure 17-15.
Both the sending and the receiving computer(s) must have the Messenger service running, or the message won’t be sent. To enable this service under Windows XP, try the following steps:
Click Start → Control Panel, and open the Administrative Tools panel.
Within the Administrative Tools panel, open Services.
Locate Messenger, and double-click its icon to open the Messenger Properties window.
Set the Startup Type to Automatic, and click the Start button.
Click the OK button, and close all open Control Panel windows.
This starts the Messenger service and causes it to restart each time Windows starts.
17.12. Adding Hyperlinks to a (Desktop) Form
Problem
You want to add a standard hypertext link to text on a Windows form, without resorting to HTML or other browser technology.
Discussion
The LinkLabel control is
similar to a standard Label
control, except that it has additional properties and events that
provide the behavior expected of a hypertext link as displayed in a
browser window. For example, the color of the link before being
clicked the first time is determined by the LinkLabel’s LinkColor property, and its color after it
has been clicked is determined by its VisitedLinkColor property. The defaults for
these colors work very well, and the results are much like what you
expect after using a browser for any length of time.
The LinkLabel holds text of
any reasonable length, and you can set all or just a part of the text
as the active, clickable part by setting its LinkArea property. The Start and Length numbers in the LinkArea determine exactly which group of
contiguous characters in the label are colored as an active link.
Clicks on the LinkLabel within the
LinkArea activate its LinkClicked event, whereas clicks anywhere
else on the LinkLabel activate the
usual Click event.
The code you put in the LinkClicked event is what really makes this
control behave like a link should. The following code, for example,
sets the LinkArea’s LinkVisited property to True, which causes its VisitedLinkColor to show. It also creates a
true link to an Internet URL, in this case opening a web site in the
default browser:
	Private Sub LinkLabel1_LinkClicked( _
	      ByVal sender As System.Object, _
	      ByVal e As System.Windows.Forms. _
	      LinkLabelLinkClickedEventArgs) _
	      Handles LinkLabel1.LinkClicked
	   ' ----- Open that important web site.
	   LinkLabel1.LinkVisited = True
	   System.Diagnostics.Process.Start( _
	      "http://www.oreilly.com/")
	End Sub
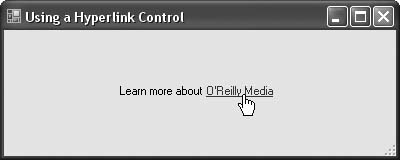
Figure 17-16
shows a small dialog window that displays a single LinkLabel control. The LinkArea is set to the last part of the
LinkLabel’s text, and the previous
code is activated when this area is clicked. Your default browser will
then display very interesting O’Reilly Media pages for your
enjoyment.