MSI/Project Installations
TIP
For any serious project or application, it is generally necessary to use professional installation software. This not only enables you to use someone else's resources to create and maintain the latest installation technology, but it also makes it possible for you to customize and perform tasks, such as adding shortcuts to the desktop, that you cannot do with an XCopy installation. Visual Studio .NET is just one provider of professional installation software. Other installation products include InstallShield and WISE InstallMaster. The next section will show you how to create a basic installation project using Visual Studio .NET.
Creating an Installation Project
The fist thing to do when creating a setup project is to invoke the Setup Project Wizard from the New Project dialog, as shown in Figure 20.3.
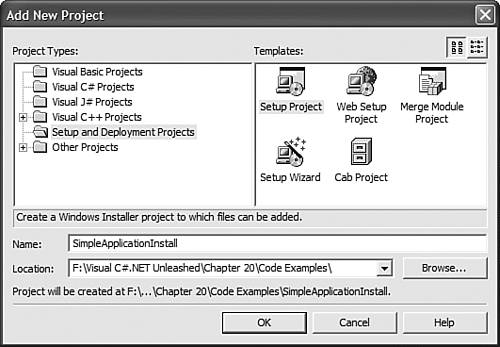
Just like any other project that you create, after you've invoked the Setup Project Wizard, Visual Studio .NET creates a setup project in your solution, as shown in Figure 20.4.
Figure 20.4. Visual Studio .NET creates a setup project in your active solution.

Now that the setup project has been created, you must now add the files that you want to distribute. To do this, invoke Add Project Output dialog (see Figure 20.5) by right-clicking the Application Folder item and selecting the Add, Project Output menu item.

Next, select Primary Output and press the Enter button. This will add the primary output (DLL or EXE) as well as other project dependencies to this folder, as shown in Figure 20.6.
Figure 20.6. The SimpleApplication.exe and SimpleApplicationLibrary.dll assemblies are added to the application folder.

Now that the distributable files have been added to the project, you need to create a shortcut on the desktop for the application. To do this, right-click the desired location for the shortcut and select the Create New Shortcut menu item, as shown in Figure 20.7. For the purposes of this example, you should select the User's Desktop for the location of this shortcut.

Next, select the folder in which the application is located (Application Folder) by double-clicking on the folder, as shown in Figure 20.8.
Figure 20.8. Select the location of the file in which to create the shortcut.
Now select the Primary Output from SimpleApplication item to create the shortcut, as shown in Figure 20.9.
Figure 20.9. Select the desired file in which to create the shortcut.

After you've selected the appropriate item, you are given the chance to rename the shortcut. Simply rename the shortcut to the desired name. Figure 20.10 shows the created shortcut.

Now that all the items are created and you are ready to compile the setup application, it might be helpful to look at the Solution Explorer, as shown in Figure 20.11. It shows all the assemblies that are included in the setup program.
Finally, compile the setup application. You should see a result similar to that in Figure 20.12.