Chapter 12
Customizing the Development Environment
![]() Implement Custom Templates
Implement Custom Templates
![]() Create Custom Snippets
Create Custom Snippets
![]() Write Macros
Write Macros
In addition to all the great features you’ve seen in preceding chapters, VS gives you the capabilities to customize your own environment. The customizations I’ll discuss are custom templates, custom snippets, and macros.
Throughout the book, you’ve started new projects and added items to those projects, using what is available with VS. On some occasions, you might desire to have a special type of project or customize an existing project for your own needs. The same need might apply to project items (such as a special type of class file), where you might change the contents of an item or create a new item.
Chapter 2 showed you how to use snippets, and Chapters 3 and 4 showed how to use several more snippets to quickly code common statements. In addition to using existing snippets, you can create your own. VS also has a management window that allows you to organize snippets, adding, deleting, and rearranging as you see fit.
Whenever you run into repetitive scenarios, it would be nice to capture the actions you perform so that you can quickly complete a task. For example, if you found yourself using the same set of keystrokes, it would be nice to collapse that action down into one command. Macros allow you to collapse repetitive tasks into a single task, saving you time.
Let’s start the journey of customizing VS by looking at customizing templates.
Implementing Custom Templates
As you’ve seen in previous chapters, VS helps you get started with new projects and project items by providing default project items and skeleton code. In most cases, this is a very quick way to get started with a project. As you become more proficient in VS, you might prefer to have projects with different items than those that ship with VS or item templates with different code. This section will show you how to create your own project and item templates.
Creating New Project Templates
If you’re working on a single project that lasts a long time, you might be satisfied with using a default template and doing a one-time modification. However, if you are starting new projects on a regular basis, customizing a project template can be very useful. There are various reasons you might want to create a custom project template, such as adding new items that aren’t included in the default project template, removing items from the default template that you don’t ever use, or changing an existing item for version upgrades. In addition to customizing existing templates, you might want to create a brand new template for a new project type that doesn’t yet exist.
The example in this section will show you how to customize the ASP.NET MVC project template. The specific changes made to the template will be to remove much of the default code provided by the template. The assumption is that once you’ve written a few ASP.NET MVC applications, you won’t need the default files as examples and would prefer to start with a more bare-bones template and build the application from the ground up yourself.
Modifying a Project
The easiest way to get started with creating a new project template is to start a new project that is most similar to the project type you want to create. If you wanted a blank project, you might start with a Console project because there aren’t many items and it’s quicker to delete them all. In the scenario for this section, we want to create a specialized ASP.NET MVC project, so it makes sense to create a new ASP.NET MVC project. The following steps show you how:
1. Press CTRL-SHIFT-N to create a new project and select ASP.NET MVC 2 Web Application. Name the project and solution Custom ASP.NET MVC Web Application and set the location for anywhere you like. Click OK to create the project. Next, the Create Unit Test Project window will appear and you should click “No, do not create a unit test project” and click OK. VS will create a new solution with a project. Chapter 9 explains what each of the projects and items are.
2. Open the Controllers folder and delete its contents.
3. Open the Models folder and delete its contents.
4. Open the Views folder but only delete the Account and Home folders.
5. Open the Shared folder, under the Views folder, and delete its contents.
6. Double-click Global.asax and comment out the call to routes.MapRoute in the editor.
7. To make sure your changes are okay, build and run the project. Select Build | Rebuild Solution and ensure you don’t receive compiler errors. Then press F5 to run and allow VS to modify the Web.config file. Since you’ve commented out the route in Global .asax and there aren’t any files to locate, you’ll receive the message “The resource can’t be found” in the browser. This is okay because it’s assumed that you want to build your own controllers, models, and views and apply custom routing too.
You now have customized ASP.NET MVC project that allows you to build your application without any preinstalled items. VS is likely to ship with an empty template, but for additional customization, you might replace the CSS file in the Content folder or add your own JavaScript libraries to the Scripts folder. Make any changes you feel are most helpful for starting a new ASP.NET MVC project. Next, you’ll learn how to transform this project into a reusable project template.
Exporting the Project Template
After you have a project configured the way you want, you can save it as a project template. The first step is to select File | Export Template, which will display the Choose Template Type window, shown in Figure 12-1. Choose Project Template and click Next.

Figure 12-1 The Choose Template Type window
The next window is Select Template Options, shown in Figure 12-2. The Template Name defaults to the name of the project, which you can change. You can see how the filled-in Template description tells what the template is used for. Additionally, if you want to associate an icon or preview, you can click the respective Browse button and select the image you want to be associated with the project. As you may recall, the New Project window has an icon for the project and will display a preview whenever you select the project. The “Automatically import the template into Visual Studio” option will make the project template available via the New Project window. “Display an explorer window on the output files folder” will allow you to access the new file, shown in the Output location. Click Finish to create the template.
After you click Finish, VS does two things: it saves to the output location and makes the template available in VS. The output location is just a place to store the project template, Custom ASP.NET Web Application.zip, which contains all of the information VS needs to display the template and create the project if you select it in the New Projects window.

Figure 12-2 The Select Template Options window
You can share the project template with other developers too. The next section shows what to do to get the project template to appear in VS.
Using the New Project Template
The instructions for exporting the project template in the preceding section chose “Automatically import the template into Visual Studio.” The use of the word “import” might make you think there is some magic process going on in the background, which there is to some extent. However, all the Export Template Wizard did was copy the Custom ASP.NET MVC Web Application.zip file from the Output location to <My Documents>Visual Studio 2010TemplatesProjectTemplates, which I’ll call local project templates. The <My Documents> folder location can differ, depending on the version of Windows you’re running. Once the file appears in the local project templates folder, you can verify that it’s been imported into VS by pressing CTRL-SHIFT-N and observing that Custom ASP.NET MVC Web Application appears in the list.
If you had not checked “Automatically import the template into Visual Studio” (Figure 12-2), then you could have copied the Custom ASP.NET MVC Web Application .zip file to the local project templates folder yourself and the project template would appear in VS. If you share the Custom ASP.NET MVC Web Application.zip file with another developer, she can copy to the local project templates folder also.
If you delete the file from the local project templates folder, it will no longer appear in the VS New Projects window.
Another option for adding project templates is to copy the project templates file to a folder under Program FilesMicrosoft Visual Studio 10.0Common7IDEProjectTemplates, which I’ll call global project templates. There are various folders under global project templates, including CSharp VisualBasic, Web, and more; each folder corresponding to folders in the VS New Project window. Under each folder is a locale code—for instance, English is 1033—and you would copy the file into the locale folder for the category you wanted the project template to appear in. For example, if you wanted the project template to appear in Visual C# | Web in the New Projects window, copy the project template *.zip file to Program FilesMicrosoft Visual Studio 10.0Common7IDEProjectTemplatesCSharpWeb.
Unlike templates in the local project templates folder, where all you need to do is copy the file, project templates in the global project templates folder don’t automatically show up. To test the global project templates scenario, you should remove the project template from your local project templates folder. You must close down VS and execute the following in a command window, which you should open by selecting Start | All Programs | Microsoft Visual Studio 2010 | Visual Studio Tools | right-click on Visual Studio Command Prompt (2010) and select Run As Administrator. This will take a few minutes to run, but afterward you’ll see the project appear in the VS New Project window. This command imports all of the project templates from the global project templates folder into VS:
devenv /installvstemplates
If later you decide you don’t want a given template to appear in the VS New Project window, remove the project template from the global project templates folder(s) and run the preceding command again.
Now you’re able to create and use custom project templates. While you might create projects occasionally, it’s a common task to create project items, covered next.
Creating New Item Templates
Sometimes, you use certain item templates frequently but often modify the contents of the item for your own purposes. In these cases, it’s useful to be able to create a custom item template instead. The example in this section will be to create something that isn’t currently an item in VS: a new item template for enums. To create a new item template, we’ll create the file for holding the item, save the new item, and then use the new item in a project.
Creating an Item Template
The easiest way to get started with creating a new item template is to start a new project that has an existing item template that is most similar to the one you want to create. For a new enum template, all we need is a class file, so any project that allows you to add a class file template will work. The example in this section will use a Console project, but the project type doesn’t matter because we’ll only be interested in extracting one file for the item template. The following steps show you how:
1. Press CTRL-SHIFT-N to create a new project and select Console Application. Name the project anything you want and set the location for anywhere you like; name and location don’t matter because we are only interested in the item template file and not the project. Click OK to create the project. VS will create a new solution with a project. By now, you’ve seen plenty of new Console applications in previous chapters, and this will be the same.
2. Right-click the project in Solution Explorer, select Add | New Item, select Code File, name the file Enum.cs (Enum.vb for VB), and click Add. This will add a new blank file to your project.
3. Add the following code to the file:
C#:
   /// <summary>
   /// Enum description
   /// </summary>
   public enum MyEnum
   {
       /// <summary>
       /// Item 1 description
       /// </summary>
       Item1,

       /// <summary>
       /// Item 2 description
       /// </summary>
       Item2
   }
VB:
   ''' <summary>
   ''' Enum description
   ''' </summary>
   Public Enum MyEnum
       ''' <summary>
       ''' Item 1 description
       ''' </summary>
       Item1

       ''' <summary>
       ''' Item 2 description
       ''' </summary>
       Item2

   End Enum
4. Save the file.
You now have a file that can be used as a skeleton for new enums. The next section shows you how to export this file so that it can be used as an item template.
Exporting the Item Template
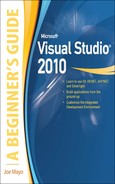
After you have a file written the way you want, you can save it as an item template. The first step is to select File | Export Template, which will display the Choose Template Type window, shown in Figure 12-3. Choose Item Template and click Next.
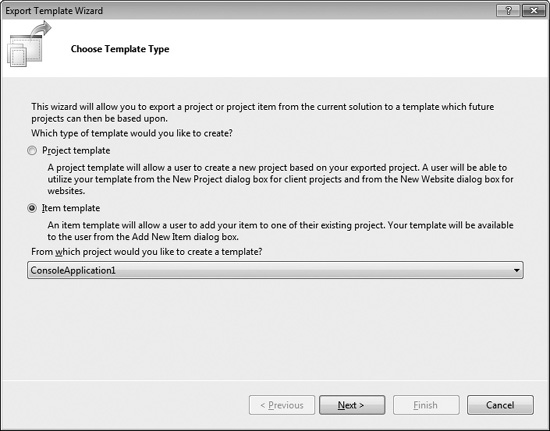
Figure 12-3 The Choose Template Type window
The next window is Select Item To Export, shown in Figure 12-4. The list shows all of the files eligible for creating an item. Check Enum.cs, which is the only file we’re interested in for this example. Click Next to continue.
Next, you’ll see the Select Item References window, shown in Figure 12-5. These are the assemblies that are part of the project that you’re extracting the item template from. Check the assemblies that this item will require. In this case, I want to ensure the System assembly is included. Ignore the warning message, as it is assumed that you will always have the .NET Framework installed and the System.dll assembly will always be available. Click Next to continue.

Figure 12-4 The Select Item To Export window
Figure 12-6 shows Select Template Options, where you specify how the item template will appear in the New Items window that appears when selecting Add | New Item on a project. The Template name defaults to the name of the project, which you should change to the item name, by changing the template name to Enum. The description lets the user know the purpose of the item template. If you want to associate an icon or preview, you can click the respective Browse button and select the image you want to be associated with the item. As you may recall, the New Item window has an icon for the item and will display a preview whenever you select the project. The “Automatically import the template into Visual Studio” option will make the item template available via the New Item window. “Display an explorer window on the output files folder” will allow you to access the new file, shown in the Output location. Click Finish to create the item template.

Figure 12-5 The Select Item References window
After you click Finish, VS does two things: it saves to the output location and makes the template available in VS. The output location is just a place to store the item template, Enum.zip, which contains all of the information VS needs to display the template and create the item if you select it in the New Item window. You can share the item template with other developers, too. The next section shows what to do to get the item template to appear in VS.
Using an Item Template
The instructions for exporting the item template in the preceding section chose “Automatically import the template into Visual Studio,” copying the Enum.zip file from the Output location to <My Documents>Visual Studio 2010TemplatesItemTemplates, which I’ll call local item templates. The <My Documents> folder location can differ, depending on the version of Windows you’re running. Once the file appears in the local

Figure 12-6 The Select Template Options window
item templates folder, you can verify that it’s been imported into VS by selecting an open project in Solution Explorer (open a new or existing project if one is not opened), pressing CTRL-SHIFT-A, and observing that Enum appears in the list in the New Item window.
If you had not checked “Automatically import the template into Visual Studio” (Figure 12-6), then you could have copied the Enum.zip file to the local project templates folder yourself and the project template would appear in VS. If you share Enum.zip file with another developer, he can copy to the local item templates folder also.
If you delete the file from the local item templates folder, it will no longer appear in the VS New Item window.
Another option for adding item templates is to copy the project templates file to a folder under Program FilesMicrosoft Visual Studio 10.0Common7IDEItemTemplates, which I’ll call global item templates. There are various folders under global item templates, including CSharp VisualBasic, Web, and more, each folder corresponding to folders in the VS New Item window. Under each folder is a locale code—for instance, English is 1033— and you would copy the file into the locale folder for the category you wanted the project template to appear in.
Unlike templates in the local item templates folder, where all you need to do is copy the file, item templates in the global item templates folder don’t automatically show up. To test the global item templates scenario, you should remove the item template from your local item templates folder. You must close down VS and execute the following in a command window, which you should open by selecting Start | All Programs | Microsoft Visual Studio 2010 | Visual Studio Tools | right-click Visual Studio Command Prompt (2010) and select Run As Administrator. This will take a few minutes to run, but afterward you’ll see the project appear in the VS New Item window. This command imports all of the item templates from the global item templates folder into VS:
devenv /installvstemplates
If later you decide you don’t want a given template to appear in the VS New Item window, remove the item template from the global item templates folder(s) and run the preceding command again.
This section showed you how to add new project and item templates to VS, but sometimes you just want to add a common bit of code while you’re programming. The next section shows you how to add your own custom code snippets to VS.
Creating Custom Snippets
If you’ve been using VS snippets, as described in Chapter 2, you’ll know how much time they can save when writing common blocks of code. In time, you’ll wonder why certain items aren’t already covered by snippets, especially if you’re a C# developer who has noticed that VB has many more snippets. Even if you’re a VB developer with the plethora of available snippets, you might find blocks of code that will make you more productive when written in the form of a snippet. This chapter takes you to the next level in working with snippets by showing you how to create and manage your own snippets.
Creating a New Snippet
VB already has a snippet for Sub and Function, but C# doesn’t. Since C# doesn’t have as many snippets as VB, I’ll show you how to create a snippet in C#, but the process is similar for a VB snippet. To create a new snippet, you can either work from an existing snippet file or start from scratch. I’ll show you how to find and open existing snippets first.
Examining Existing Snippets
Snippets that ship with VS are located at Program FilesMicrosoft Visual Studio 10.0 under a folder for the language (VC#, VB, XML, and more) you need to find a snippet for. There, you’ll either find one or more folders named with language codes (English is 1033) or a folder named Snippets. For some languages, the language code is at a higher level and the Snippets folder is under that or vice versa; regardless, you’ll be looking for the Snippets folder that contains items with a .snippet file extension. The file path for C# is Program FilesMicrosoft Visual Studio 10.0VC#Snippets1033. Beneath the Snippets folder, you’ll see additional folders that serve to categorize other snippets.
We’re going to open the for snippet because it contains several features that give you a good idea of how snippets work. It might help if you open a blank file by pressing CTRL-N, selecting Visual C# Class, and naming the file anything you want, and try the for snippet before going further; it will give you a good idea of what the snippet is supposed to be doing. Alternatively, you can review the description of the for snippet in Chapter 2.
The .snippet extension is registered with VS, so you can double-click the for.snippet file in the Snippets folder and it will open in VS. Listing 12-1 shows what this file looks like.
Listing 12-1 Inside the for snippet
<?xml version="1.0" encoding="utf-8"?>
<CodeSnippets xmlns=
"http://schemas.microsoft.com/VisualStudio/2005/CodeSnippet">
      <CodeSnippet Format="1.0.0">
            <Header>
                  <Title>for</Title>
                  <Shortcut>for</Shortcut>
                  <Description>Code snippet for 'for' loop</Description>
                  <Author>Microsoft Corporation</Author>
                  <SnippetTypes>
                       <SnippetType>Expansion</SnippetType>
                       <SnippetType>SurroundsWith</SnippetType>
                  </SnippetTypes>
            </Header>
            <Snippet>
                  <Declarations>
                       <Literal>
                             <ID>index</ID>
                             <Default>i</Default>
                             <ToolTip>Index</ToolTip>
                       </Literal>
                       <Literal>
                             <ID>max</ID>
                             <Default>length</Default>
                             <ToolTip>Max length</ToolTip>
                       </Literal>
                  </Declarations>
                  <Code Language="csharp"><![CDATA[for (int $index$ = 0;
$index$ < $max$; $index$++)
                  {
                  $selected$ $end$
                  }]]>
                  </Code>
            </Snippet>
      </CodeSnippet>
</CodeSnippets>
As shown in Listing 12-1, a snippet is an XML file where all data is defined by begin and end tags arranged in a hierarchy. Inside of the CodeSnippet tags are Header and Snippet elements.
Inside of the Header element is a Shortcut element that defines the prefix you must type in the VS editor to use the snippet. The Title and Description tags define what displays for Intellisense in VS when the shortcut is being typed. Author tells who wrote the snippet.
The SnippetTypes element defines the two ways to use a snippet: Expansion and SurroundsWith. Chapter 2 describes many snippets that work via Expansion. However, SurroundsWith snippets are also very useful. To use a SurroundsWith snippet, highlight the code that you want to surround, press CTRL-SPACE, and select the snippet. After selecting the snippet, the snippet template will appear in VS, with its blocks surrounding the highlighted text. Since the for loop has a block that can contain statements, it makes sense that the for snippet is both a SurroundsWith and Expansion snippet.
The Snippet element in Listing 12-1 contains a Declarations and Code element, where the declarations are used in the code. Thinking about how snippet templates work, remember that your cursor is positioned on blocks of code that you change and tab through to complete the snippet. The blocks of code to be filled in correspond to Literal elements in the declaration.
Each Literal element has an ID that is used in the Code to define where the Literal is located. Default describes the data shown in the template before you start typing. Whenever you’re filling in a snippet template, you can hover over the data field and a tooltip will describe what information should go into the data field. This tooltip is defined in the Tooltip element of the snippet definition. The ID of each literal is defined in the Code element.
Inside the Code element is the code for the snippet. The variables in the code with $ prefix and suffix help define how the snippet template works. Notice that $index$ and $max$ match Literal elements in the Declarations element; this is where you must fill in data items when filling in the snippet template in VS. The $end$ variable defines where the cursor ends up after the snippet is complete (after pressing ENTER in the snippet template). You’ll want to locate $end$ where a developer would normally continue typing. The $selected$ variable is used with SurroundsWith snippets, defining the relationship of selected text with where snippet code should be.
Now that you have a basic familiarity with snippets, the next section brings you to the next level as you actually create a new snippet.
Creating New Snippets
To create a new snippet, you can either work from an existing snippet file or start from scratch. If you work from an existing snippet, find and open the snippet closest to what you want to do, using the techniques described in the preceding section. Starting from scratch, there is a quick way to get started using a snippet snippet; that’s right, there is a snippet that helps you create new snippets.
As you learned in the preceding section, snippets are defined as XML files. Fortunately, VS has a nice XML editor that supports XML snippets. So, when I say that we’re going to create a snippet from scratch, that’s not quite true, because we’re going to leverage VS to get a quick start. In the following steps, I’ll show you how to create a snippet you can use to add a C# method to a class quickly:
1. With VS open, press CTRL-N and create a new XML file. If you were opening the file from an existing project, you would need to provide a name, which would be meth .snippet. The new XML file has a single line, which is called an XML prefix.
2. Move to the line below the XML prefix, press CTRL-K-X, type sn to select Snippet in the Intellisense list, and press ENTER. You’ll see an XML snippet template with the values for Title, Author, Shortcut, Description, ID, and Default.
3. Fill in data and tab through the snippet template as follows: Title as Method Snippet, Author as <your name>, Shortcut as meth, Description as Create a New Method, ID as access, and Default as public. Press ENTER when complete.
4. The resulting snippet still needs code and template item definitions, which is accomplished by filling in the Code element and adding needed Literal elements. First, modify the code element as follows:
    <Code Language="csharp">
      <![CDATA[$access$ $return$ $methodName$($paramList$)
      {
        $end$
      }
      ]]>
    </Code>
5. In addition to access, the code example in the preceding step includes variables for return, methodName, and paramList. Add Literal elements for each of these variables, where the ID is the variable name and the Default is set to return as void, methodName as MethodName, and paramList as int p1.
6. Save the file and name it meth.snippet. The next section will explain where to put the file, but for now put it in a location that you can remember so you can copy it later. BTW, the Save File dialog box has Snippet Files (*.snippet) for a Save A Type option, which you can use to ensure the snippet has the correct file extension.
You now have a workable snippet. Listing 12-2 shows the snippet in its entirety. Additionally, notice how each Literal has a Tooltip to help the user of the snippet fill in each data item. Also, notice that the Language attribute of the Code element is spelled csharp, rather than C#. These small nuances, such as the spelling for a language, could make the snippet file invalid. A good troubleshooting technique is to open a similar snippet predefined for VS, as described in the preceding section, and compare formats to see if you might have mistyped something. The next section will explain what to do with this snippet file so that you can begin using it.
Listing 12-2 A custom method snippet
<?xml version="1.0" encoding="utf-8"?>
<CodeSnippet Format="1.0.0"
xmlns="http://schemas.microsoft.com
/VisualStudio/2005/CodeSnippet">
   <Header>
      <Title>Method Snippet</Title>
      <Author>Joe Mayo</Author>
      <Shortcut>meth</Shortcut>
      <Description>Create a New Method</Description>
      <SnippetTypes>
        <SnippetType>SurroundsWith</SnippetType>
        <SnippetType>Expansion</SnippetType>
      </SnippetTypes>
    </Header>
    <Snippet>
      <Declarations>
        <Literal>
          <ID>access</ID>
          <Default>public</Default>
          <ToolTip>Access modifier</ToolTip>
        </Literal>
        <Literal>
          <ID>return</ID>
          <Default>void</Default>
          <ToolTip>Return value</ToolTip>
        </Literal>
        <Literal>
          <ID>methodName</ID>
          <Default>MethodName</Default>
          <ToolTip>Name of Method</ToolTip>
        </Literal>
        <Literal>
          <ID>paramList</ID>
          <Default>int p1</Default>
          <ToolTip>
Comma-separated list of parameters
          </ToolTip>
        </Literal>
      </Declarations>
      <Code Language="csharp">
        <![CDATA[
$access$ $return$ $methodName$($paramList$)
{
      $end$
}]]>
      </Code>
    </Snippet>
</CodeSnippet>
Managing the Snippet Library
To use a snippet, you can either copy the snippet into a VS folder or use a VS tool called the Snippet Manager. This section will explain how to make the method snippet, created in the preceding section, available to your code.
File Folders Holding Snippets
The local snippets folder is located at Users<your name>DocumentsVisual Studio 2010Code Snippets. You’ll see a set of folders for each language/technology, which each have subfolders for organizing snippets. Copy and paste the snippet file into one of these folders, such as Visual C#My Code Snippets, and the snippet will be immediately available to your code.
The local snippets folder makes a snippet available to your machine login. You can also make the snippet available to everyone who logs on to the machine by copying the snippet to a global snippet folder, located at Program FilesMicrosoft Visual Studio 10.0. You’ll see language technology folders, such as VC# for C# or VB for VB. Within those folders, you’ll either see folders for language codes (English is 1033) or a Snippets folder. Drilling down two levels, through the language code folders and Snippet folders (whichever shows first), you’ll see more snippets and subfolders that organize the snippets for that language/technology. Copy the snippet into the folder where you feel it belongs. The snippet will be immediately available to your code.
Working with system file folders can be cumbersome, so VS offers a tool to help organize snippets, the Snippets Manager.
Using the Snippets Manager
The Snippets Manager allows you to import new snippets and organize existing snippets. Either select Tools | Code Snippets Manager or press CTRL-K, CTRL-B. You’ll see the Snippets Manager window, shown in Figure 12-7.
The Language drop-down shows what type of snippets you can work with. The folders show how snippets are organized. Use the Add and Remove buttons to manage folders. Click the Import button to find and make new snippets available to the application.
As you’ve seen, snippets give you a well-specified way to quickly write code. However, there is a capability that is even more powerful, which is macros, discussed next.

Figure 12-7 The Snippets Manager window
Writing Macros
When the productivity features that ship with VS and custom snippets don’t give you enough power, the next step is to consider creating a macro, which is a repeatable set of actions that you can record and re-run multiple times. An example of when a macro is useful is whenever you find yourself continuously repeating the same set of actions in VS. This section will show you how to create and run a macro that uses VS features to create a customized block of code for validating strings.
Recording a Macro
When creating business objects, it’s common to validate input parameters to ensure they are valid. One such validation is enforcing that calling code pass a required parameter. The example in this section shows you how to write a macro for validating that a string-type parameter is not null, empty, or white space (such as a space or tab). To get started, create a new Console project and add a Class file with the following method to the project, which simulates adding a new customer:
C#:
using System;

class Customer
{
   public int AddNewCustomer(string firstName, string lastName)
   {
      int newCustID = 0;

      // Logic to add customer

      return newCustID;
   }
}
VB:
Public Class Customer

   Function AddNewCustomer(
     ByVal firstName As String,
     ByVal lastName As String) As Integer

     Dim newCustID As Integer = 0

     ' Logic to add customer
     Return newCustID

   End Function

End Class
The point of interest in the AddNewCustomer method is the firstName and lastName parameters. Whenever working with data, you’ll usually want to ensure that input data is legal. When user input is being processed, it’s common to get bad information, even if you have good input validation in your user interface code. For example, the following code calls the preceding AddNewCustomer method, passing in bad data as arguments:
C#:
class Program
{
   static void Main()
   {
      string firstName = "Joe";
      string lastName = null;

      Customer cust = new Customer();
      cust.AddNewCustomer(firstName, lastName);
   }
}
VB:
Module Module1

   Sub Main()
      Dim firstName As String = "Joe"
      Dim lastName As String = Nothing

      Dim cust As New Customer
      cust.AddNewCustomer(firstName, lastName)

   End Sub

End Module
In the preceding example, firstName is okay because it has a good name in it. However, notice that lastName is set to null (Nothing in VB). This would cause a NullReferenceException if AddNewCustomer tried to call a string operation on the parameter, the code that AddNewCustomer calls could potentially throw a NullReferenceException, or (assuming that null is considered invalid in this case) you could end up saving bad data. Since AddNewCustomer doesn’t have an implementation, this is all speculation, but this outlines a few of the many problems that can occur if you allow your business objects to accept data that is bad for your program.
The macro demonstrated in this section will show how to check a string parameter for null, empty, or white space and throw an ArgumentNullException. This will prevent callers from passing bad data and give them a meaningful message. To create a macro, you will need to locate the position in the code where the macro starts (if applicable), start recording, perform VS actions, and stop recording. It’s somewhat like using a video recorder where you have to find a TV show, start the recording, allow the show to play, and then stop recording. Perform the following steps to create the parameter validation macro:
1. Click the firstName parameter of the AddNewCustomer method so that the cursor is inside of the firstName parameter identifier. This is important because we need the parameter name in the code.
2. Start the macro recorder by selecting Tools | Macros | Record TemporaryMacro or press CTRL-SHIFT-R.
3. For C#, press CTRL-LEFT ARROW, CTRL-SHIFT-RIGHT ARROW, and CTRL-C. For VB, press CTRL-LEFT ARROW, CTRL-SHIFT-RIGHT ARROW, SHIFT-LEFT ARROW, and CTRL-C. This copies the parameter name.
4. For C#, press CTRL-F to bring up the Find And Replace window, type { into Find What, click Find Next, Close the Find And Replace window, press END, and press ENTER. For VB, press END and press ENTER. This positions the cursor to begin entering code.
5. Type if and press TAB twice (the if snippet), type string.IsNullOrWhiteSpace( into the condition, press CTRL-V to paste the parameter name as the argument, and type ). For C#, press ENTER. For VB, press DOWN ARROW. The cursor moves to the body of the if statement (as you would expect with the if snippet). This sets up the validation check for the parameter, seeing if it is null (Nothing in VB), an empty string, or some white space character such as space or tab.
6. Type throw new ArgumentNullException(“, press CTRL-V to paste the parameter name, type “, “, press CTRL-V to paste the parameter name, type a space, and type value is not valid.”). For C#, add a semicolon,;, to the end of the line. This is the action to perform when the value is not valid, throwing an exception to let the caller know that the value is not good.
7. Press DOWN ARROW and press ENTER. This positions the cursor after the code, which might be convenient if you want to continue typing from this point.
8. Select Tools | Macros | Stop Recording TemporaryMacro or press CTRL-SHIFT-R to stop recording.
You’ve now recorded a macro. To check the preceding steps against what you’ve produced, here’s a revised AddNewCustomer method, showing what the results should look like:
C#:
using System;

class Customer
{
   public int AddNewCustomer(string firstName, string lastName)
   {
      if (string.IsNullOrWhiteSpace(firstName))
      {
          throw new ArgumentNullException(
            "firstName",
            "firstName value is not valid.");
      }

      int newCustID = 0;

      // Logic to add customer

      return newCustID;
   }
}
VB:
Public Class Customer

   Function AddNewCustomer(
      ByVal firstName As String,
      ByVal lastName As String) As Integer

      If String.IsNullOrWhiteSpace(firstName) Then
         Throw New ArgumentNullException("
            "firstName",
            "firstName value is not valid.")
      End If

      Dim newCustID As Integer = 0

      ' Logic to add customer

      Return newCustID

   End Function

End Class
In the preceding code, I’ve moved the ArgumentNullException arguments to separate lines to fit the book’s line length, but this is what you should see. Next, you can test the macro by running it. Click the lastName parameter and select Tools | Macros | Run TemporaryMacro or press CTRL-SHIFT-P. That will produce the following code:
public int AddNewCustomer(string firstName, string lastName)
{
   if (string.IsNullOrWhiteSpace(lastName))
   {
       throw new ArgumentException("lastName", "lastName value is not
valid.");
   }

   if (string.IsNullOrWhiteSpace(firstName))
   {
       throw new ArgumentException("firstName", "firstName value is not valid.");
   }

   int newCustID = 0;

   // Logic to add customer

   return newCustID;

}
Now, you can run this macro on any of the string parameters of methods in your class and quickly add validation support. The only problem at the present time is that the macro is overwritten as soon as you begin recording a new macro and the macro is gone if you close VS. The next section addresses this problem by showing you how to save the macro.
Saving a Macro
You can save macros to be reused in later sessions. To save the macro, select Tools | Macros | Save TemporaryMacro. VS will save TemporaryMacro and open the Macro Explorer window, shown in Figure 12-8.
VS uses TemporaryMacro as the name of whatever macro it will record. Therefore, you must rename the macro if you want to keep it because the next recording will overwrite this macro. Rename the file macro to ValidateStringParameter by right-clicking TemporaryMacro in Macro Explorer, showing the context menu, and selecting Rename.

Figure 12-8 The Macro Explorer window
In the Macro Explorer, you can add new Macro Projects, which are containers for holding macro modules, by right-clicking Macros and selecting New Macro Project. If someone shares their Macro Project with you, right-click Macros and select Load Macro Project to find the project in the file system and load it. Macro modules hold macros, and you can right-click any macro project; such as MyMacros or Samples in Figure 12-8, and select New Module to add new macro modules. You can find all of these commands on the Tools | Macros menu too.
To run an existing macro, double-click the macro in Macro Explorer.
To change a macro, you can either re-record or edit an existing macro. The next section explains how to edit a macro.
Editing Macros
Macros are editable, allowing you to modify previously recorded macros or create a brand new macro. To edit a macro, right-click the macro in Macro Explorer and select Edit. You’ll see the Macro editor, shown in Figure 12-9, which contains the code for the ValidateStringParameter macro created in the preceding section.
In Figure 12-9, you can see that the editor opens the macro in a code editing window. The language is VB, so if the language you normally program with is C#, you might want to review the VB portions of Chapters 2 through 4 as a refresher. The features of Macro editor are very similar to the normal VS IDE, except that now you must work with Macro Projects and Modules. Listing 12-3 shows the macro code from Figure 12-9. In Listing 12-3, both the C# and VB macros are written in VB. However, the C# code is for a macro that works on C# code and the VB code is for a macro that works on VB code.

Figure 12-9 The Macro editor
Listing 12-3 Code for the ValidateStringParameter macro
C#:
Option Strict Off
Option Explicit Off
Imports System
Imports EnvDTE
Imports EnvDTE80
Imports EnvDTE90
Imports EnvDTE90a
Imports EnvDTE100
Imports System.Diagnostics

Public Module RecordingModule

   Sub ValidateStringParameter()
       DTE.ActiveDocument.Selection.WordLeft()
       DTE.ActiveDocument.Selection.WordRight(True)
       DTE.ActiveDocument.Selection.Copy()
       DTE.ExecuteCommand("Edit.Find")
       DTE.Windows.Item("Customer.cs").Activate()
       DTE.Windows.Item("{CF2DDC32-8CAD-11D2-9302-005345000000}")
.Activate() ' Find and Replace
       DTE.Windows.Item("Customer.cs").Activate()
       DTE.Find.FindWhat = "{"
       DTE.Find.Target =
vsFindTarget.vsFindTargetCurrentDocument
       DTE.Find.MatchCase = False
       DTE.Find.MatchWholeWord = False
       DTE.Find.Backwards = False
       DTE.Find.MatchInHiddenText = False
       DTE.Find.PatternSyntax = vsFindPatternSyntax
.vsFindPatternSyntaxLiteral
       DTE.Find.Action = vsFindAction.vsFindActionFind
       If (DTE.Find.Execute() =
vsFindResult.vsFindResultNotFound) Then
Throw New System.Exception("vsFindResultNotFound")
       End If
       DTE.Windows.Item(
"{CF2DDC32-8CAD-11D2-9302-005345000000}").Close()
       DTE.Windows.Item("Customer.cs").Activate()
       DTE.ActiveDocument.Selection.EndOfLine()
       DTE.ActiveDocument.Selection.NewLine()
       DTE.ActiveDocument.Selection.Text = "if"
       DTE.ExecuteCommand("Edit.InsertTab")
       DTE.ExecuteCommand("Edit.InsertTab")
       DTE.ActiveDocument.Selection.Text =
"string.IsNullOrWhiteSpace("
       DTE.ActiveDocument.Selection.Paste()
       DTE.ActiveDocument.Selection.Text = ")"
       DTE.ExecuteCommand("Edit.BreakLine")
       DTE.ActiveDocument.Selection.Text =
"throw new ArgumentNullException("""
       DTE.ActiveDocument.Selection.Paste()
       DTE.ActiveDocument.Selection.Text = """, """
       DTE.ActiveDocument.Selection.Paste()
       DTE.ActiveDocument.Selection.Text =
" value is not valid."");"
       DTE.ActiveDocument.Selection.LineDown()
       DTE.ActiveDocument.Selection.NewLine()
   End Sub
End Module
VB:
Option Strict Off
Option Explicit Off
Imports System
Imports EnvDTE

Imports EnvDTE80
Imports EnvDTE90
Imports EnvDTE90a
Imports EnvDTE100
Imports System.Diagnostics

Public Module RecordingModule

   Sub ValidateStringParameter()
       DTE.ActiveDocument.Selection.WordLeft()
       DTE.ActiveDocument.Selection.WordRight(True)
       DTE.ActiveDocument.Selection.CharLeft(True)
       DTE.ActiveDocument.Selection.Copy()
       DTE.ActiveDocument.Selection.EndOfLine()
       DTE.ActiveDocument.Selection.NewLine()
       DTE.ActiveDocument.Selection.Text = "if"
       DTE.ExecuteCommand("Edit.InsertTab")
       DTE.ExecuteCommand("Edit.InsertTab")
       DTE.ActiveDocument.Selection.Text = "string.IsNullOrEmpty("
       DTE.ActiveDocument.Selection.Paste()
       DTE.ActiveDocument.Selection.Text = ")"
       DTE.ActiveDocument.Selection.LineDown()
       DTE.ActiveDocument.Selection.Text =
"throw new ArgumentNullException("""
       DTE.ActiveDocument.Selection.Paste()
       DTE.ActiveDocument.Selection.Text = """, """
       DTE.ActiveDocument.Selection.Paste()
       DTE.ActiveDocument.Selection.Text =
" value is not valid."")"
       DTE.ActiveDocument.Selection.LineDown()
       DTE.ActiveDocument.Selection.NewLine()
   End Sub
End Module
In Listing 12-3, all of the namespaces that begin with EnvDTE have code that allows you to manipulate the VS environment. The macro itself is a Sub within a Module.
Each of the statements corresponds to the steps used to create the macro in the preceding section. For example, the Find And Replace window has several options, which this macro populates, regardless of whether they contribute toward the purpose of the macro.
Opening a macro in the editor can be very useful if you want to make a quick change, without needing to re-record the entire macro. For example, what if you missed a keystroke or misspelled something? You can just edit the code, save the file, close the Macro editor, and then re-run the macro. In fact, there is a problem with the macro for C#; it will only work on the file you ran it in. This problem doesn’t occur in the macro for VB. I’ll show you how to fix this problem, but let’s open the macro editor first.
You can open the Macro editor through VS by selecting Tools | Macros | Macros IDE, start a new project, add a module to the project, and add a Sub to the Module as a new macro. Then code the macro by typing DTE. and using Intellisense to find various parts of the IDE. The cryptic parameter to Windows.Item, {CF2DDC32-8CAD-11D2-9302-005345000000}, for the Find And Replace window is called a Globally Unique Identifier (GUID). A GUID is often used as a special identifier for software components and is the method used in VS to uniquely identify tools. So, DTE.Windows.Item(“{CF2DDC32-8CAD-11D2-9302-005345000000}”).Activate() is a way to reference and open the Find And Replace window.
There is a problem with the macro for C# in Listing 12-3, because it will only work in the Customer.cs file in VS. The VB code below is provided for your convenience, but this problem only occurs with the macro written for C# code; the VB macro works fine on the VB code below. If you created a new class named Product in a file named Product.cs and added an AddNewProduct method like the following, the macro will try to open and write into the Customer.cs file, which is not the result you want:
C#:
using System;

namespace ConsoleApplication1
{
   class Product
   {
      public int AddNewProduct(string productName)
      {
         int newProdID = 0;

         // Logic to add product

         return newProdID;
      }
   }
}
VB (doesn’t have problem that occurs in C# code):
Public Class Product

     Function AddNewProduct(ByVal productName As String) As Integer

        Dim newProdID As Integer = 0
        ' Logic to add product

        Return newProdID

     End Function

End Class
To fix the problem with the macro (for the C# code) opening the Customer.cs file, notice that the macro has three statements that activate the Customer.cs file. Comment out each of these statements as shown in the following excerpt:
…
‘DTE.Windows.Item(“Customer.cs”).Activate()
…
‘DTE.Windows.Item(“Customer.cs”).Activate()
DTE.Find.FindWhat = “{“
…
‘DTE.Windows.Item(“Customer.cs”).Activate()
…
If you were to write your own macro via code, a quick way to figure out what code you have to write is to start the macro recorder in VS (CTRL-SHIFT-R), use the VS feature you want to code, stop recording (CTRL-SHIFT-R), and save the macro. Then inspect the code in the Macro editor and copy the parts you need. This technique is especially valuable to figure out how to open windows, such as the Find And Replace window discussed in the preceding paragraph. For even more help, there are several example macros under the Samples folder, shown in Figure 12-9, showing you different ways to write VS macros.
Summary
Now you know about various techniques for customizing VS. You learned how to customize projects and save your work as a custom project template. In a related task, you saw how you can create a new file and then save that file as a custom item template. This gives you the ability to use projects and project items in a way that you want. In addition to using snippets that ship with VS, you learned how to find the definition of existing snippets and either modify a snippet or create a brand new snippet from scratch. You also saw how to organize snippets with the Snippets Manager. Finally, you learned how to record and save repeatable actions with VS macros. You can also use the Macro editor to customize existing macros or create new ones on your own.
Macros are very powerful, but VS has even more capabilities for allowing you to extend the IDE. You’ll learn how to extend VS by writing Add-Ins in the next chapter.